I have put together a hit list of things that always make you say to yourself: "I should have known that." I'd like to show you these using a small project in which we shape a cup.
First, I create a cylinder using objects and increase the radius a little. Now I reduce the segment circumference and dissolve it a little more coarsely, as it will later be rendered using a HyperNURBS object..webp?tutkfid=49302)
Now I'm going to build the cup first. So I'll convert it into a polygon object.
.webp?tutkfid=49303)
Now we can get started and shape the interior. To do this, I have to go into the surface editing mode and select the top using the Select tool (with the live selection)..webp?tutkfid=49304)
Continue with the shortcut M+W to extrude the inside and another shortcut M+T to extrude. We'll see how far it really goes in a moment. I don't need to start a second time in the editor now, because that would create another section. It's much smarter to change the offset here so that it fits - like this - and then you can continue..webp?tutkfid=49305)
Now I take a HyperNURBS object, drag the cylinder into it and check whether it is rounded..webp?tutkfid=49306)
Tip 1:
Since this is not or only partially the case, I still have to optimize it. For the next step to work right away, I first have to deselect everything. Because if you forget that there is still an open selection in here (this happens very quickly), nothing happens. This open selection prevents everything! Then you can't cut, round or do anything else properly.
To do this, I go to Select>Deselect all. Now I could go directly to Mesh>Commands>Optimize.
It is not always absolutely necessary, but sometimes quite clever, not to click directly on the word, but to select the small menu item. This will take you to the dialog where you can set the optimization. In my case, I don't need to change anything, because everything with a tolerance of 0.01 cm should be deleted..webp?tutkfid=49307)
Now we have a nice round cup..webp?tutkfid=49308)
Tip 2:
But it's too round for me. That's because of those triangles, and triangles should be avoided at all costs. Because triangles create these ugly shades that you definitely don't want..webp?tutkfid=49309)
In this case, however, it's a small thing. I simply take the knife (I can find it under Mesh>Create>Knife) and get it in loop mode, ....webp?tutkfid=49310)
... so that I can cut once down here and preferably also inside..webp?tutkfid=49311)
If you look at the HyperNURBS now, you'll see: Oh, no more triangles! So remember: avoid triangles if at all possible..webp?tutkfid=49312)
Now I duplicate the object; it's easy with Ctrl+C and Ctrl+V.
Tip 3:
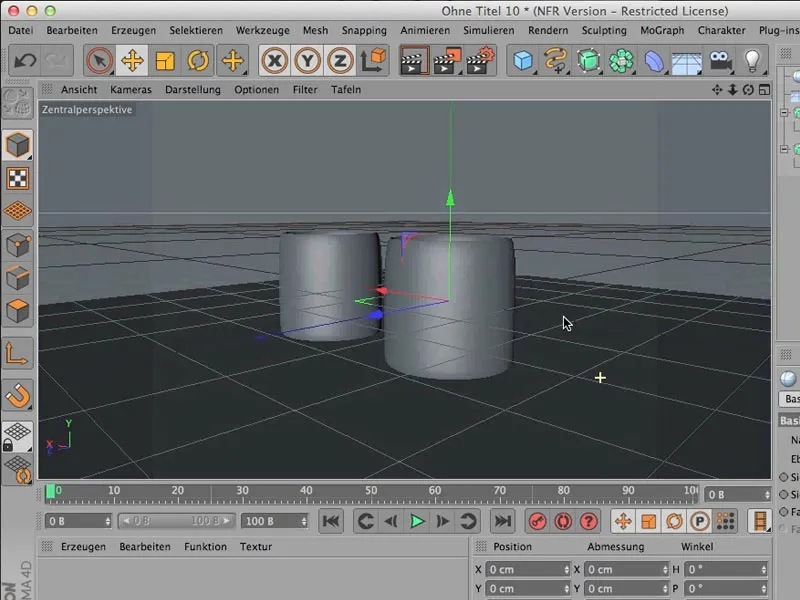
Now I'd like to move it to the side, but I can't, even though I'm in the right mode and have selected the right tool, and yet the tool isn't there. It may be that the object cannot be moved in the 3D axis. You have probably used Alt+D to hide the 3D axis, and you can use the same command to show it again. This command also makes sense, as it can sometimes get in the way during a live selection..webp?tutkfid=49313)
Now I can move the cup to the side as desired..webp?tutkfid=49314)
Apart from the selection and the hidden 3D axis, what else drives you crazy? One thing is still relatively common, I've noticed. Let's create a floor and use the green arrow on the 3D axis to move it down to where it belongs. You don't have to hit it exactly.
Now let's illuminate our scene. I like to use a physical sky object for this.
Watch out: It often happens that you select the sky because it simply appears first in the list and the physical sky on the right is not noticed at all.
And then, as you can see in the picture, you have a gray nothing as a background.
The normal sky is great for lighting by assigning an HDRI to it, but if I want to light with real clouds, with a real sky, I need the other one.
If I select the physical sky, ....webp?tutkfid=49316)
... I can also rotate it until the sun is where I want it to be..webp?tutkfid=49317)
Now I should look at the whole thing from a different perspective. I switch on the camera and set the focal length to 70mm and ... nothing happens. The only thing you can see is that the square on the camera has changed. It seems to focus a little more..webp?tutkfid=49318)
Tip 4:
The camera must be switched on so that I can also see through the camera. As long as the camera is visible in the picture (indicated here by the green arrow), it is switched off..webp?tutkfid=49319)
That leaves the 5th and final tip:
I'm also very happy to pass on this tip because I've seen it happen a lot and it still happens to me from time to time, especially when the scenes look a bit more complex.
So I would like to see if I can make the highlight a little smaller here. So I create a material. I know that if I change something in the material editor, it will be displayed immediately. I change the width and height of the light, but nothing changes. I can see in the preview that something should happen, but not on the scene..webp?tutkfid=49320)
Why is that? Here, too, it's the classic: it hasn't been assigned yet (especially if you have a lot of similar objects, experiment a lot with materials, have very similar materials, this actually happens again and again). The changes can only be implemented once it has been assigned. So always make sure that the material is assigned. If nothing happens, always check first whether you have assigned the material..webp?tutkfid=49321)
Summarized once again:
- Is the 3D axis shown or hidden?
- Do you have the sky object or the physical sky?
- Do we perhaps still have hidden selections somewhere?
- Is the camera switched on or possibly off?
- Is the material assigned correctly?
If you go through these things very briefly, you can save yourself a lot of nerves. Because then you will be reminded of them again and again.

