In this tutorial, you will learn how to effectively retouch portraits in Lightroom Classic CC. Retouching is an essential tool in photography that allows you to highlight the best features of a photo. In this guide, we will show you step by step how to achieve a professional result using Lightroom's built-in tools without the need for complex additional programs like Photoshop. You will also learn what to consider when retouching to maintain the natural appearance of a person.
Key Findings
- The correct use of retouching tools in Lightroom is crucial for appealing results.
- Be sure to preserve personal features and only remove blemishes.
- Use soft edges and the appropriate size for the retouching tool to achieve a harmonious result.
- Avoid excessive clarity adjustments to avoid compromising the natural appearance.
Step-by-Step Guide
1. Introduction to Image Analysis
Before you start retouching, take a moment to analyze the photo. Pay attention to features you may want to correct, such as blemishes or distracting spots. It's important to develop an eye for what can be improved in the image.
2. Selecting the Retouching Tool
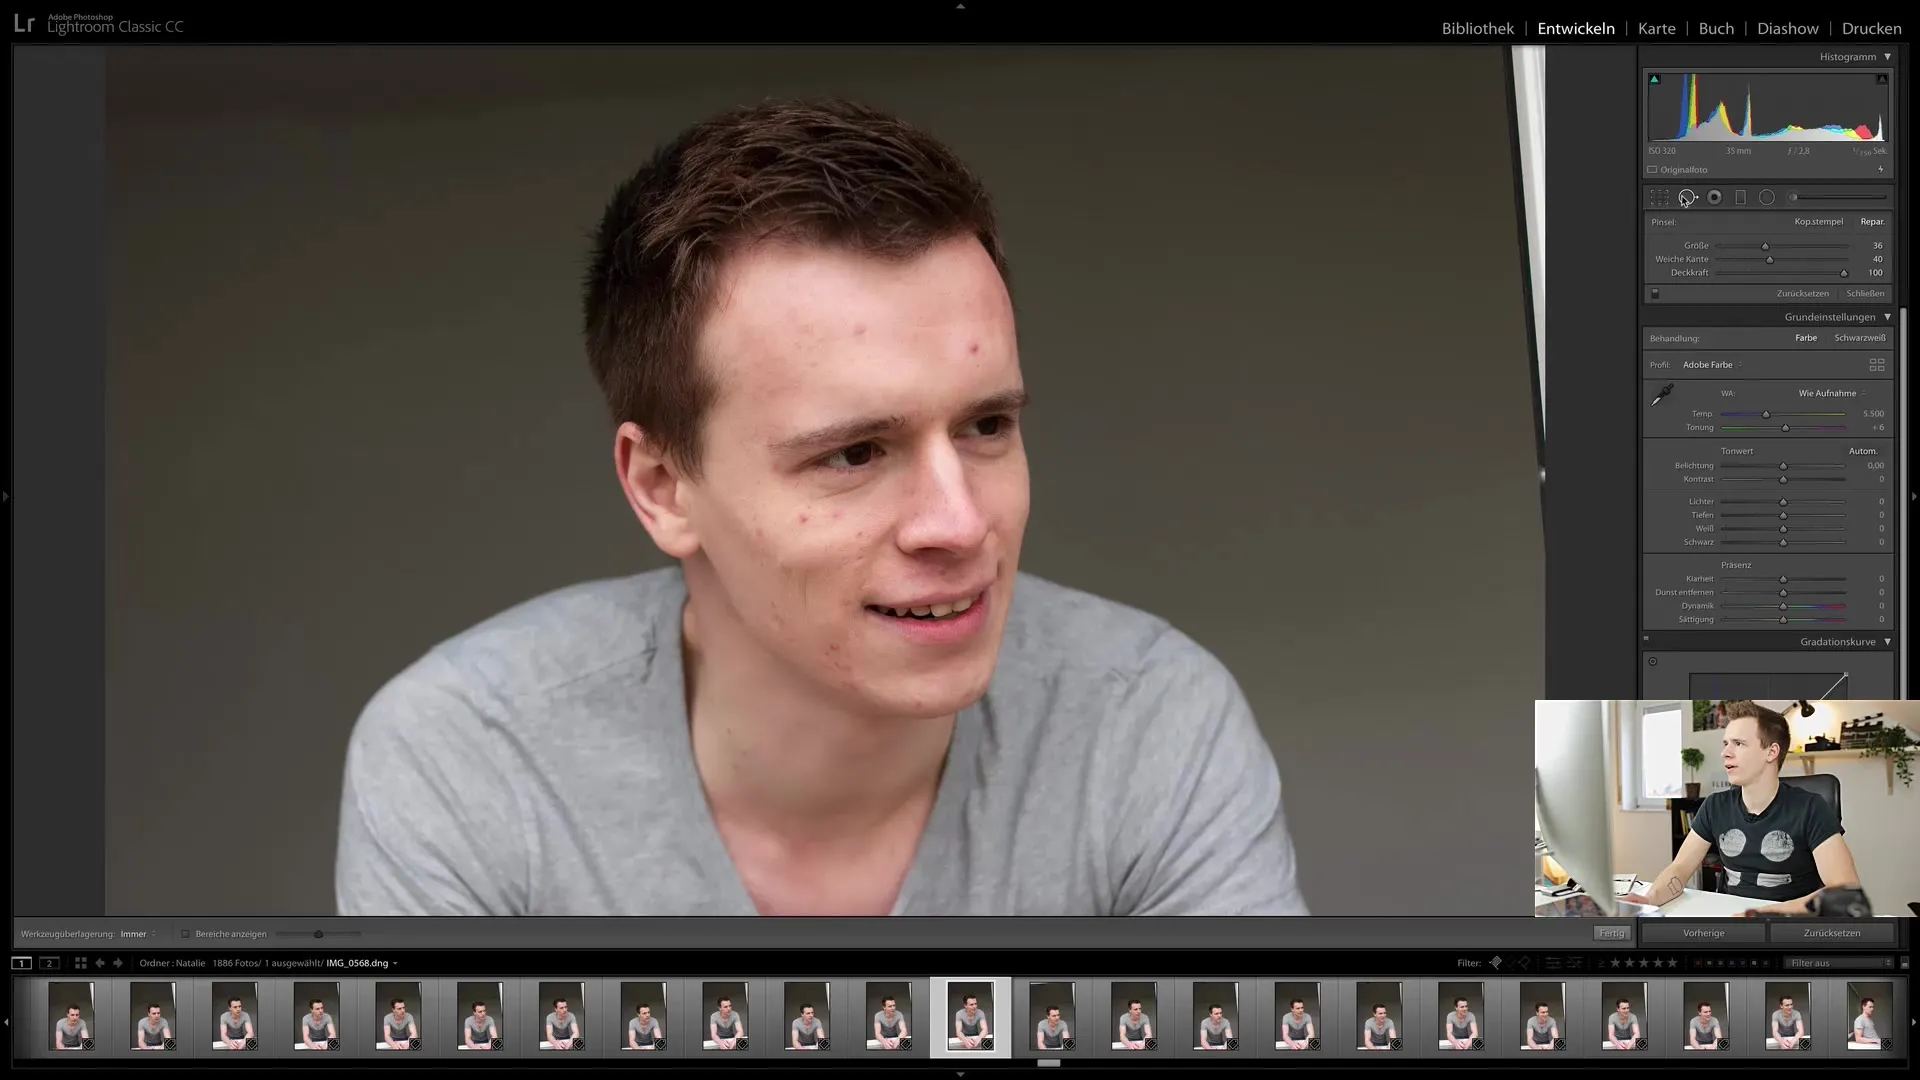
The first thing you need to do is select the retouching tool in Lightroom. You can find it in the toolbar on the left side of the screen. With this tool, you can remove blemishes and make minor adjustments to your portrait.
3. Adjusting Tool Parameters
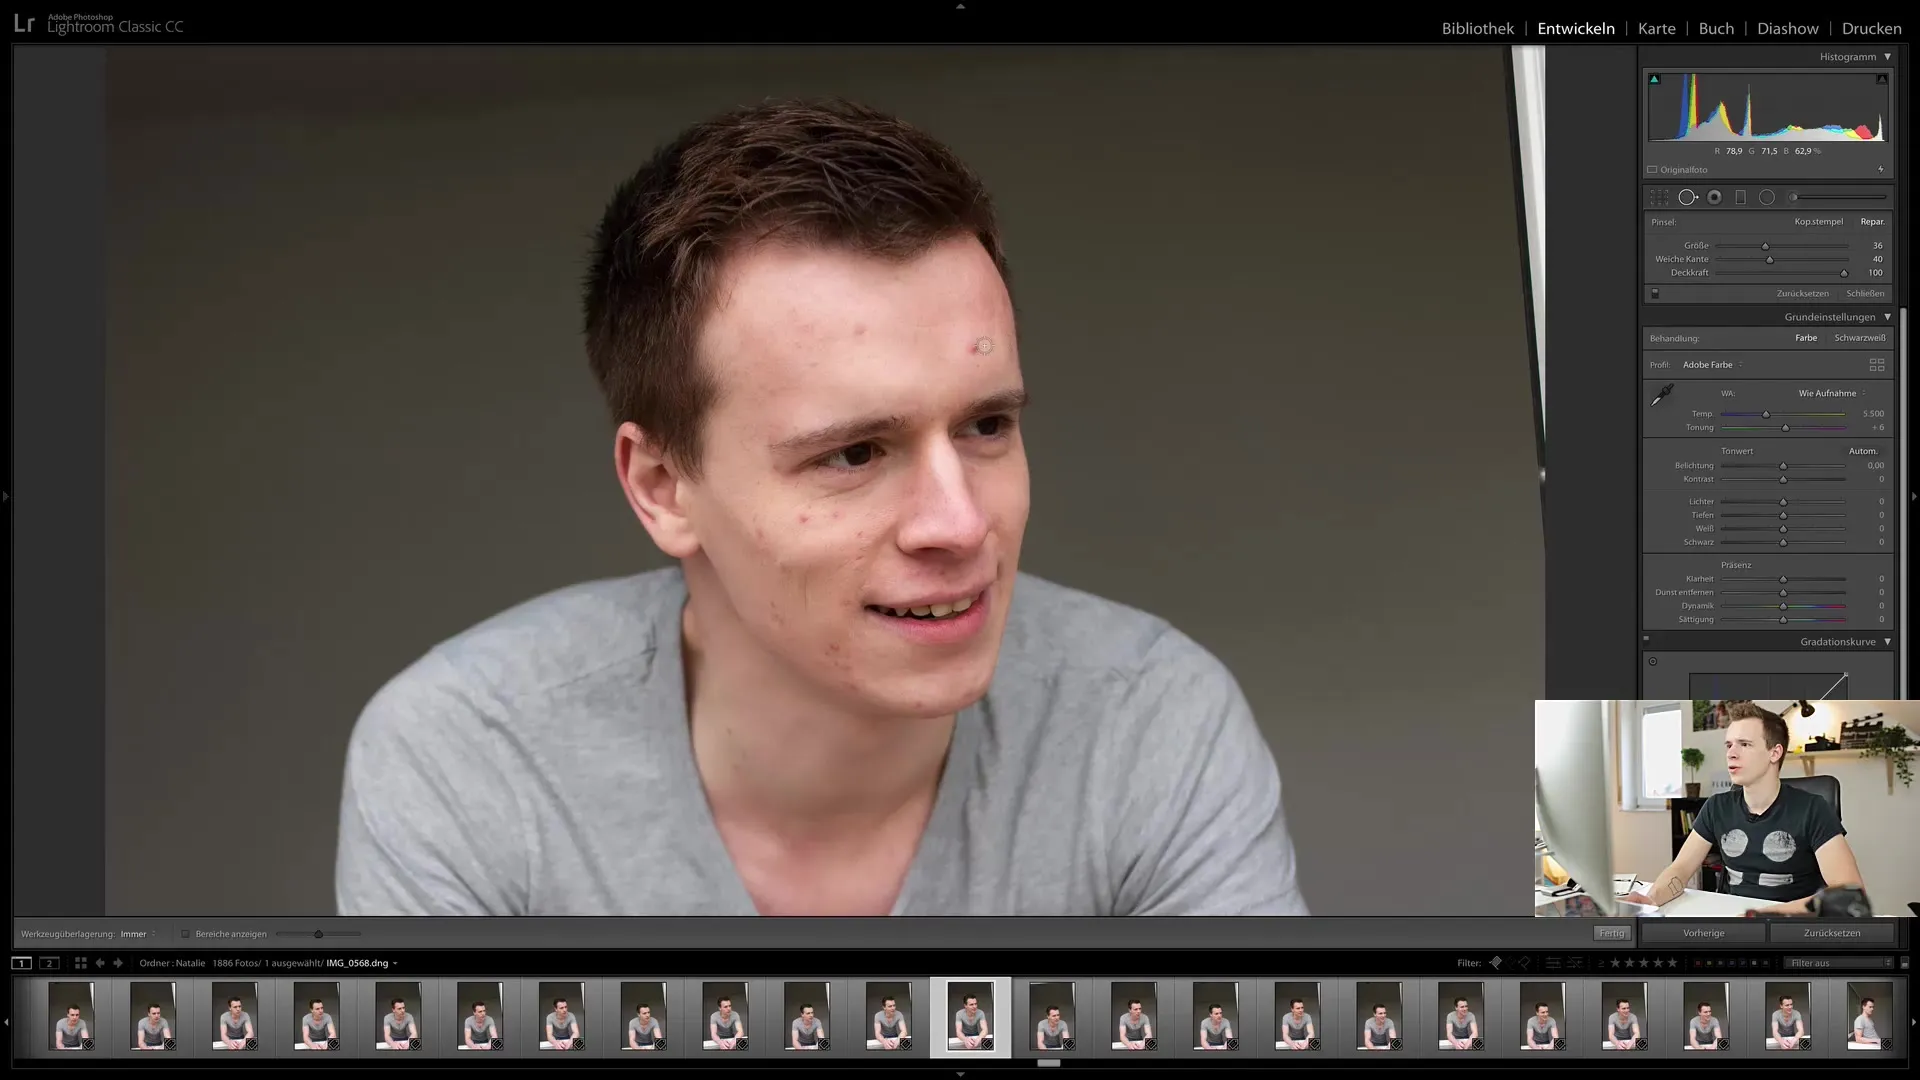
Once you have selected the retouching tool, you can adjust the size and softness of the edge. It is advisable to choose a smaller size for precise work. A softer edge helps to avoid harsh transitions and ensures a more natural result.
4. Selecting Areas to Retouch
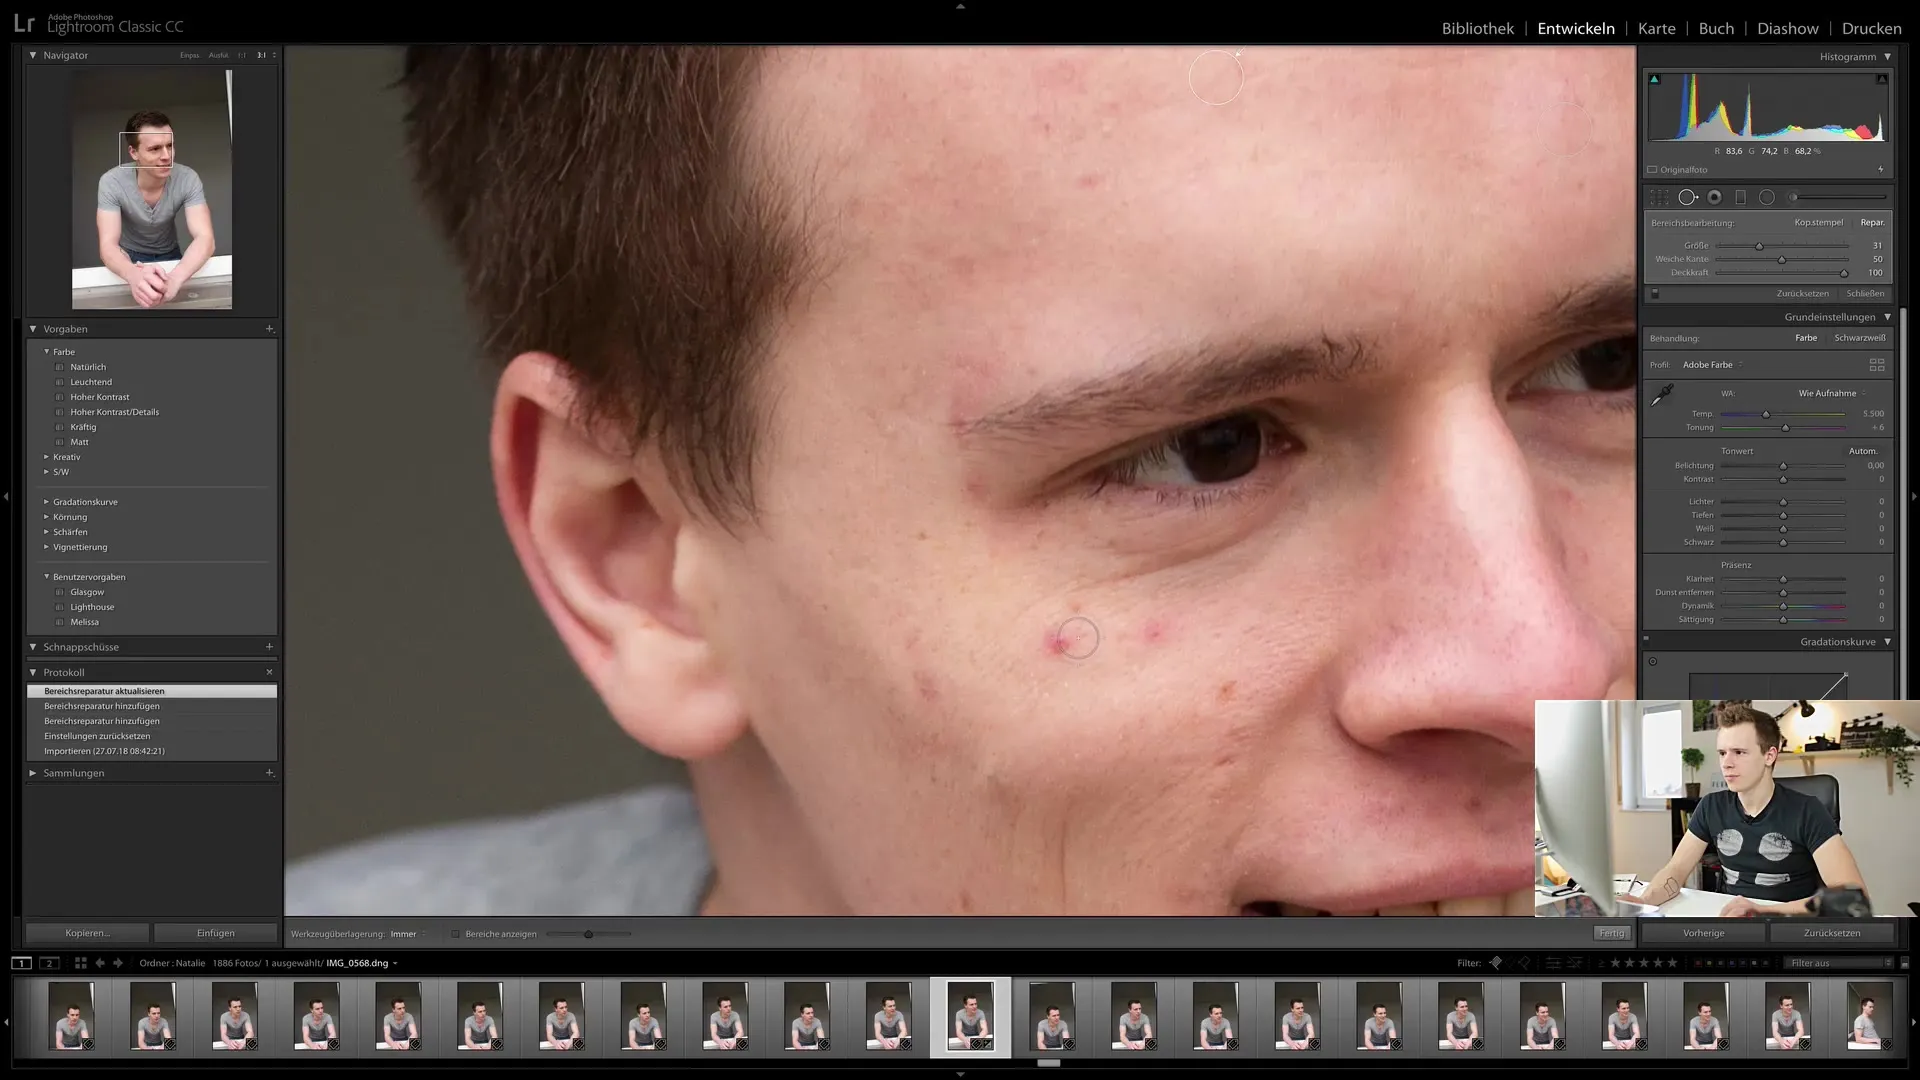
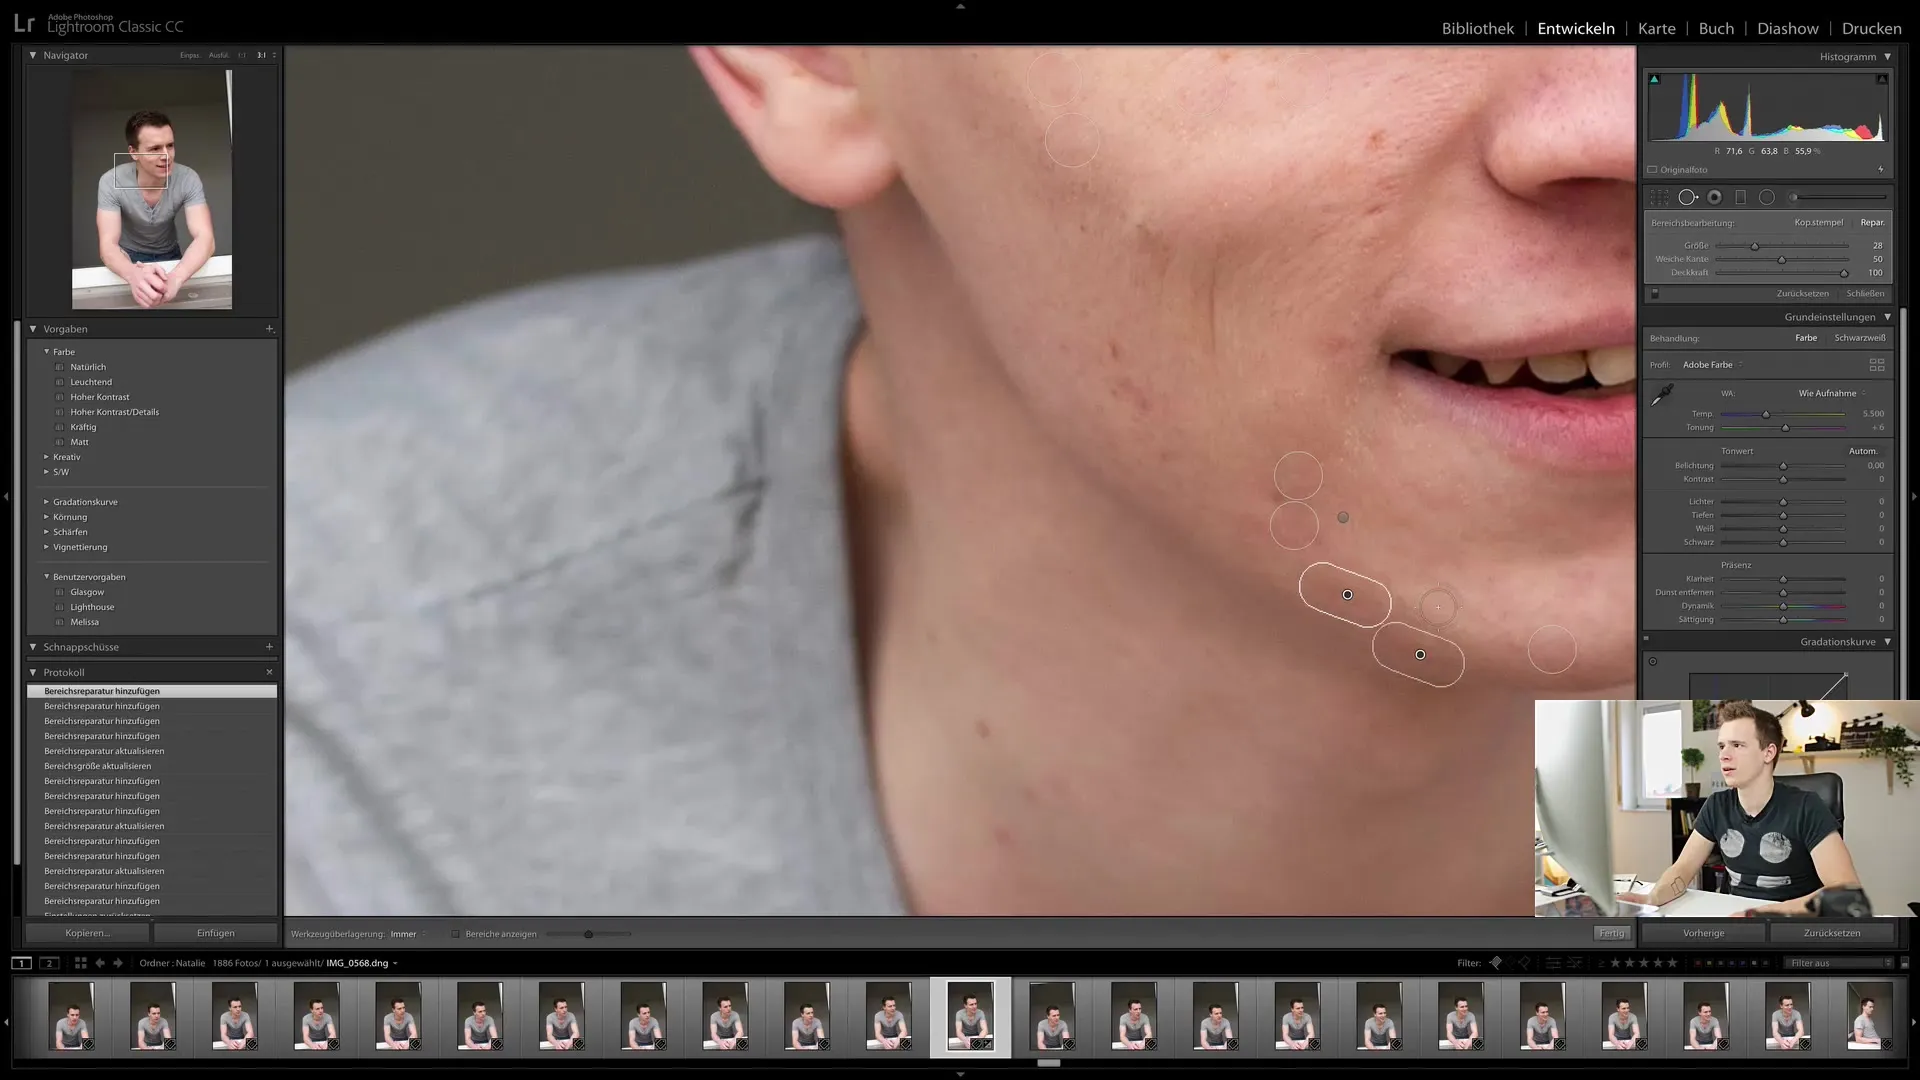
Start by clicking on the areas you want to retouch. It sounds simple, and it is simple, but you should make sure to preserve the skin texture. Click carefully on the affected areas and observe how Lightroom automatically adjusts the areas.
5. Painting Over with the Retouching Tool
In some cases, simply clicking on an area is not enough. If the area is large or if there are multiple problem spots, you should paint over the areas. This gives you more control and can deliver a better result.
6. Reviewing the Retouching
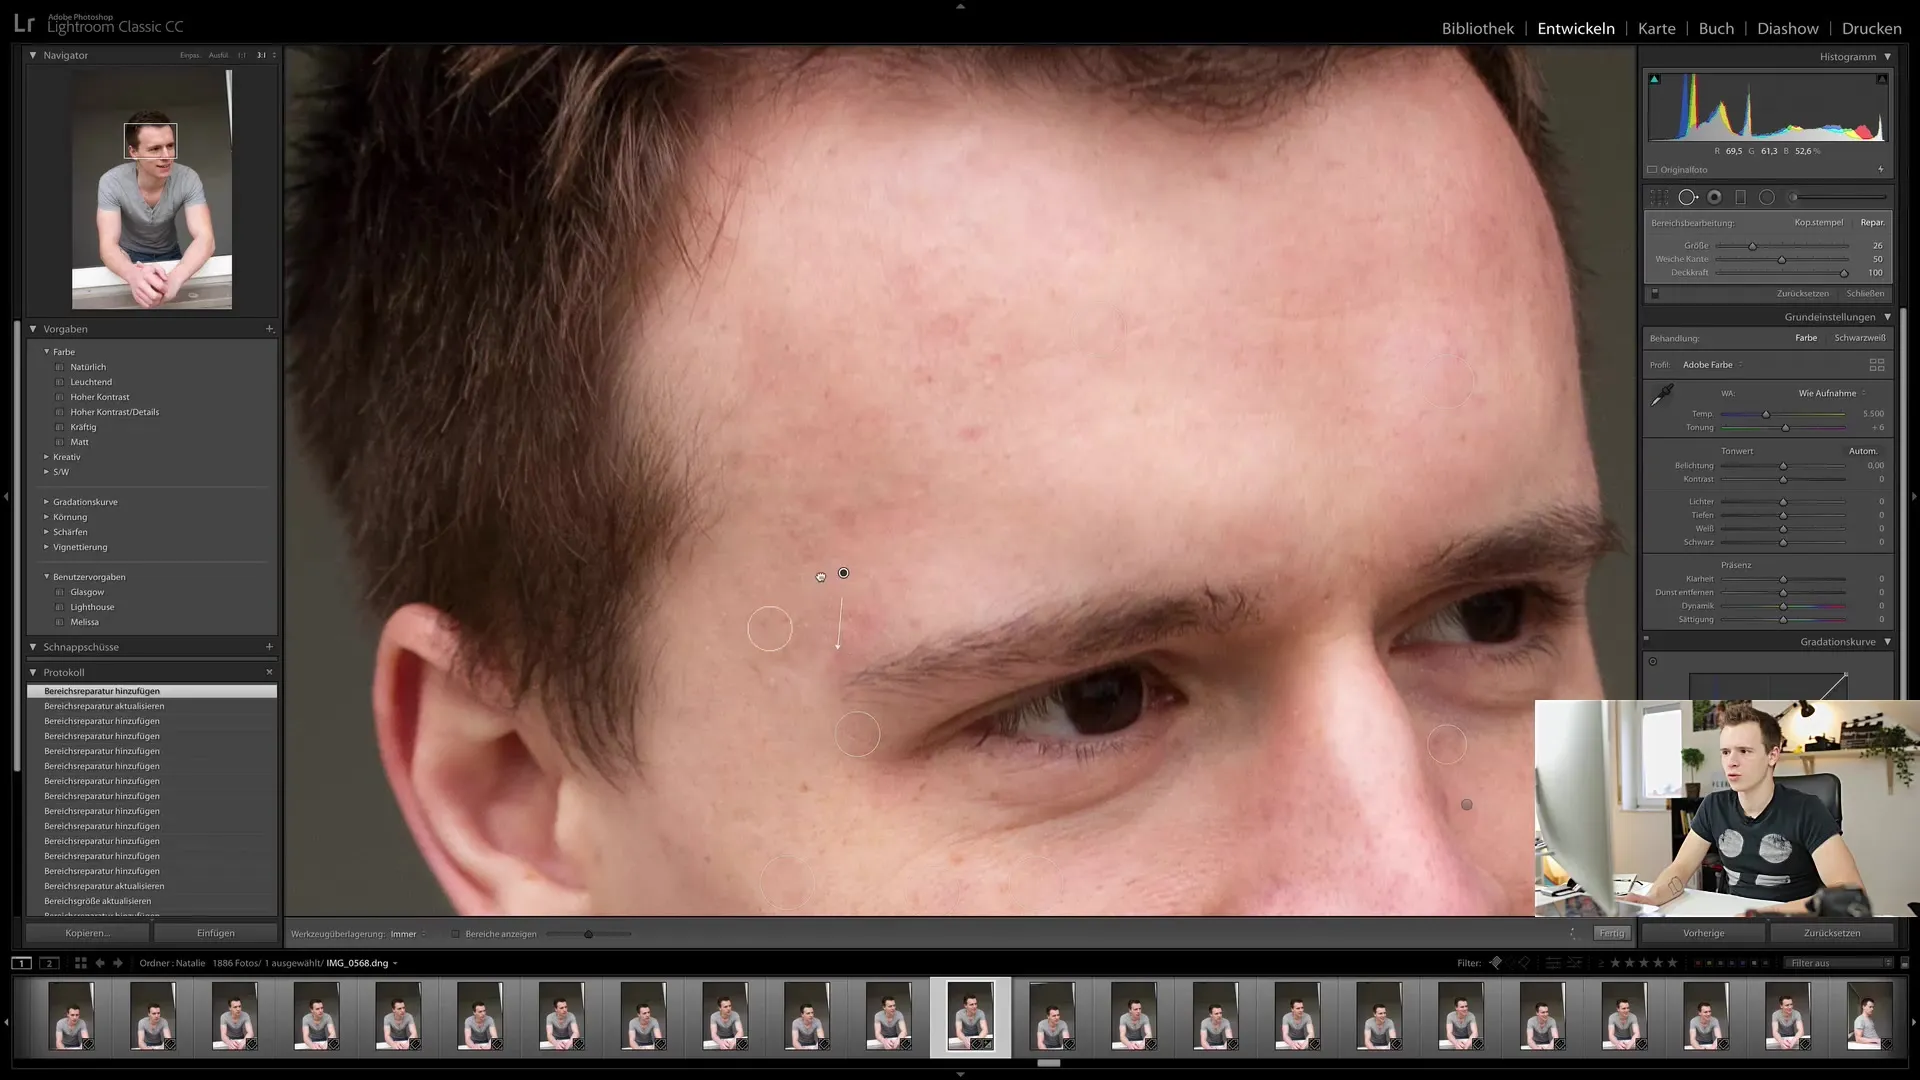
After making a few clicks, you should review the changes. Be careful not to overdo it and keep an eye on the healthy skin texture. Only retouch the most obvious imperfections to keep the image natural.
7. Straightening and Cropping the Image
In Lightroom, you can also straighten images. However, be careful not to crop out important elements like hands. You can crop the images to remove unwanted parts at the edges without losing the main subject.

8. Color Corrections for a Harmonious Look
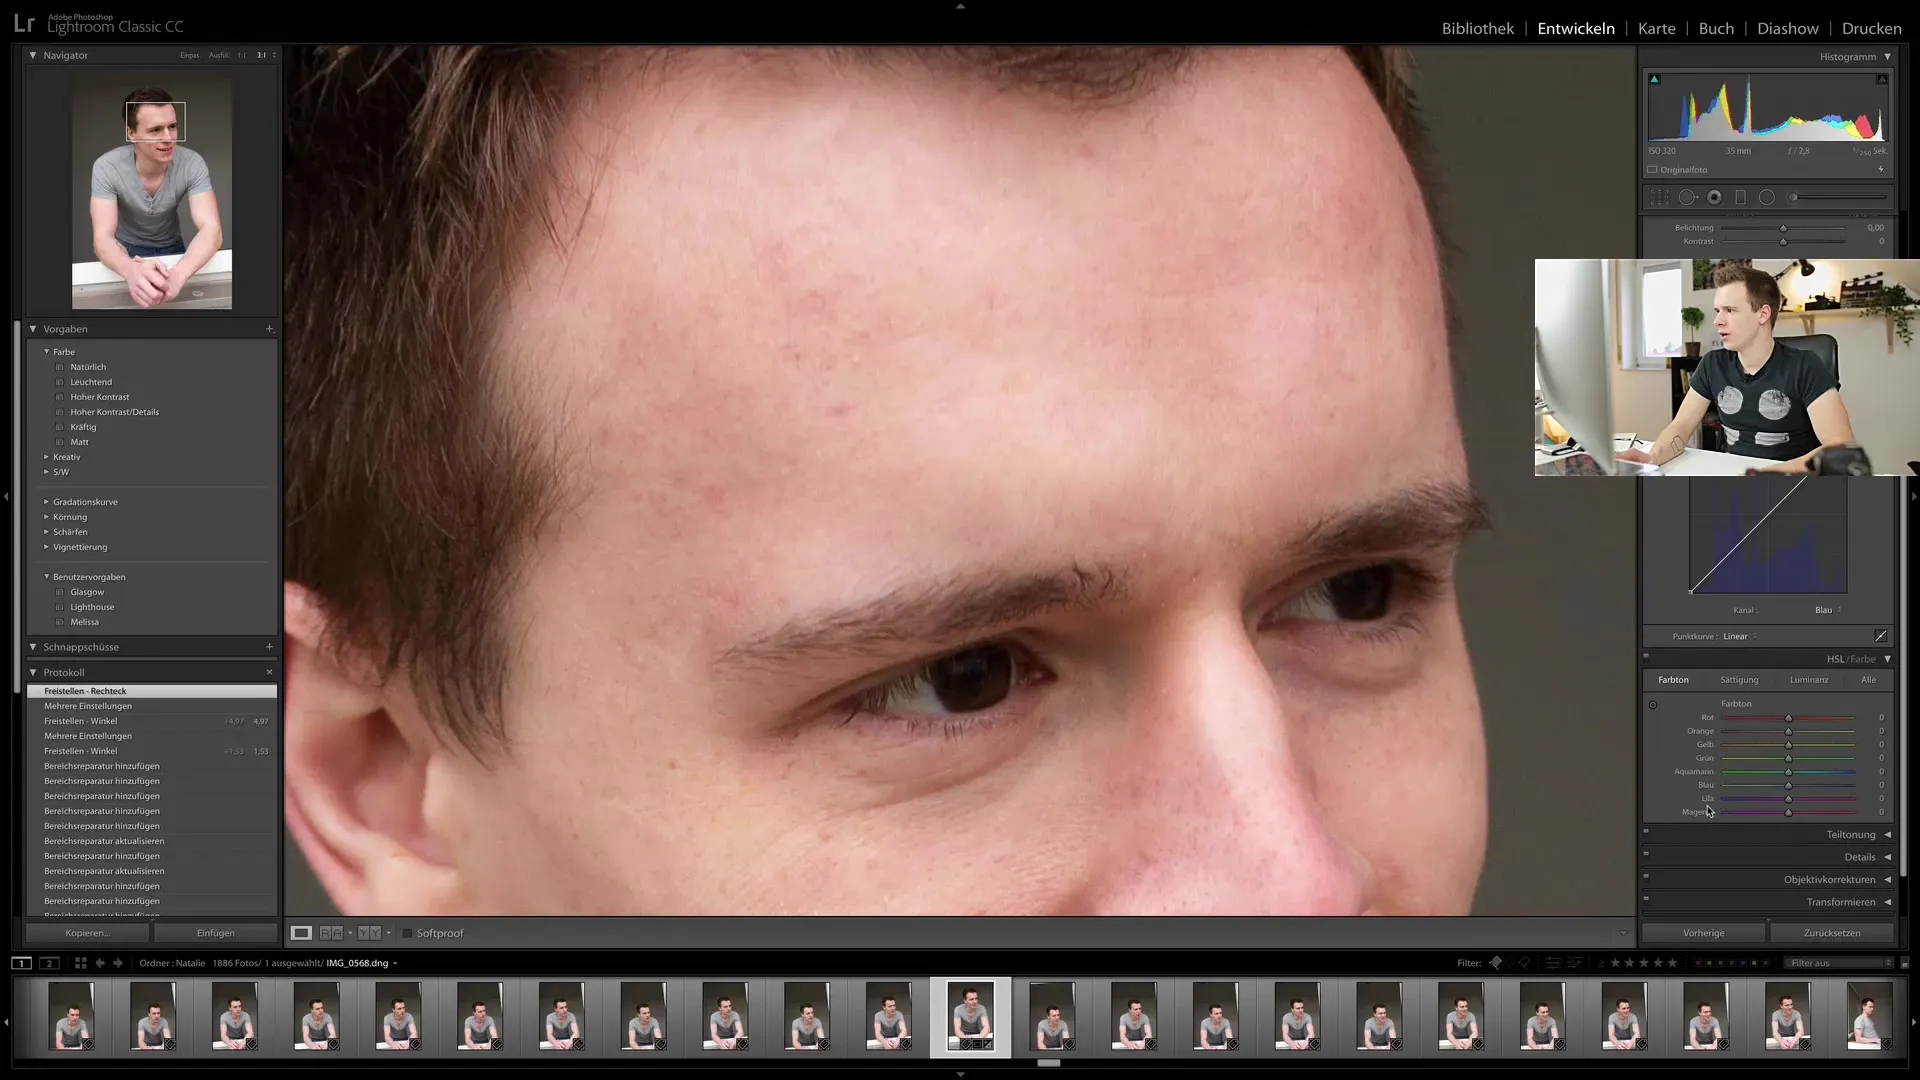
To remove any potentially disruptive color nuances, you can go to the HSL section. Select the hue to be reduced and adjust it slightly to minimize the blemishes.
9. Adjusting Saturation and Contrast
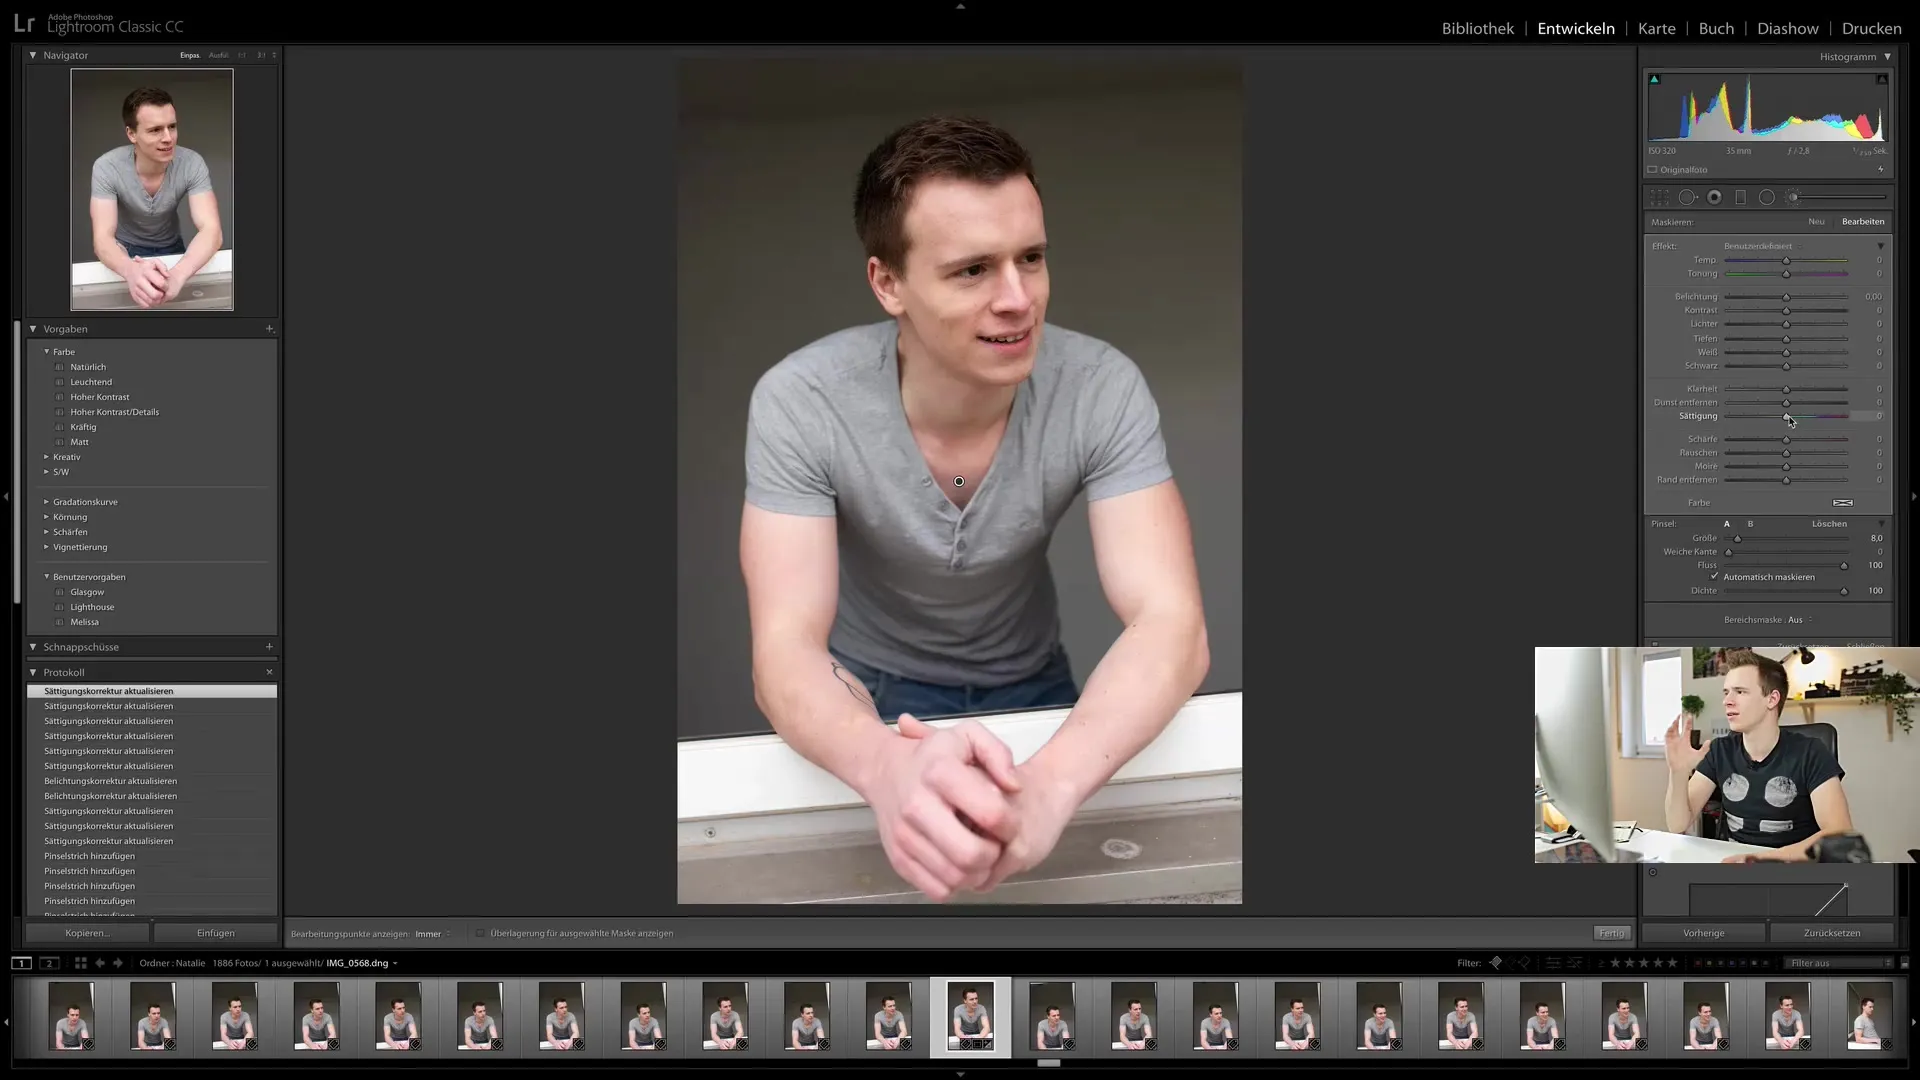
You can also adjust the saturation and contrast of the face to make it appear more lively. Increased saturation can give freshness to an image, but do not overdo it as it can look artificial.
10. Conclusion of Retouching
After the adjustments, you should check your image for errors. Make sure everything looks harmonious and the image does not appear over-edited. If you are satisfied with the result, save your image and prepare it for publication.
Summary
In this tutorial, you have learned the basics of retouching in Lightroom Classic CC. You now know how to effectively use the retouching tool to achieve natural results without losing the characteristics of a person. You can now professionally edit your photos while always keeping an eye on the details. Have fun trying out the techniques!
Frequently Asked Questions
How long does retouching a portrait in Lightroom take?It can take a few minutes to half an hour depending on experience and specific adjustments.
Can I retouch in Photoshop as well?Yes, Photoshop offers significantly more features and options for retouching than Lightroom.
How can I ensure that the skin texture is preserved?Make sure to use the retouching tool with soft edges and avoid making too many adjustments.
Should I retouch everything?No, keep personal features and natural imperfections to keep the image authentic.
When should I use the adjustment brush?The adjustment brush is useful when you want to adjust or eliminate specific areas that the retouching tool does not handle well.


