Denoiser
Strictly speaking, this is the Intel Open Image Denoiser, which Maxon has built into Cinema 4D Release 21 as a post effect. This means that the Denoiser works with all render engines.
Let's take a look at a simple example scene to see how successfully the Denoiser combats image noise.
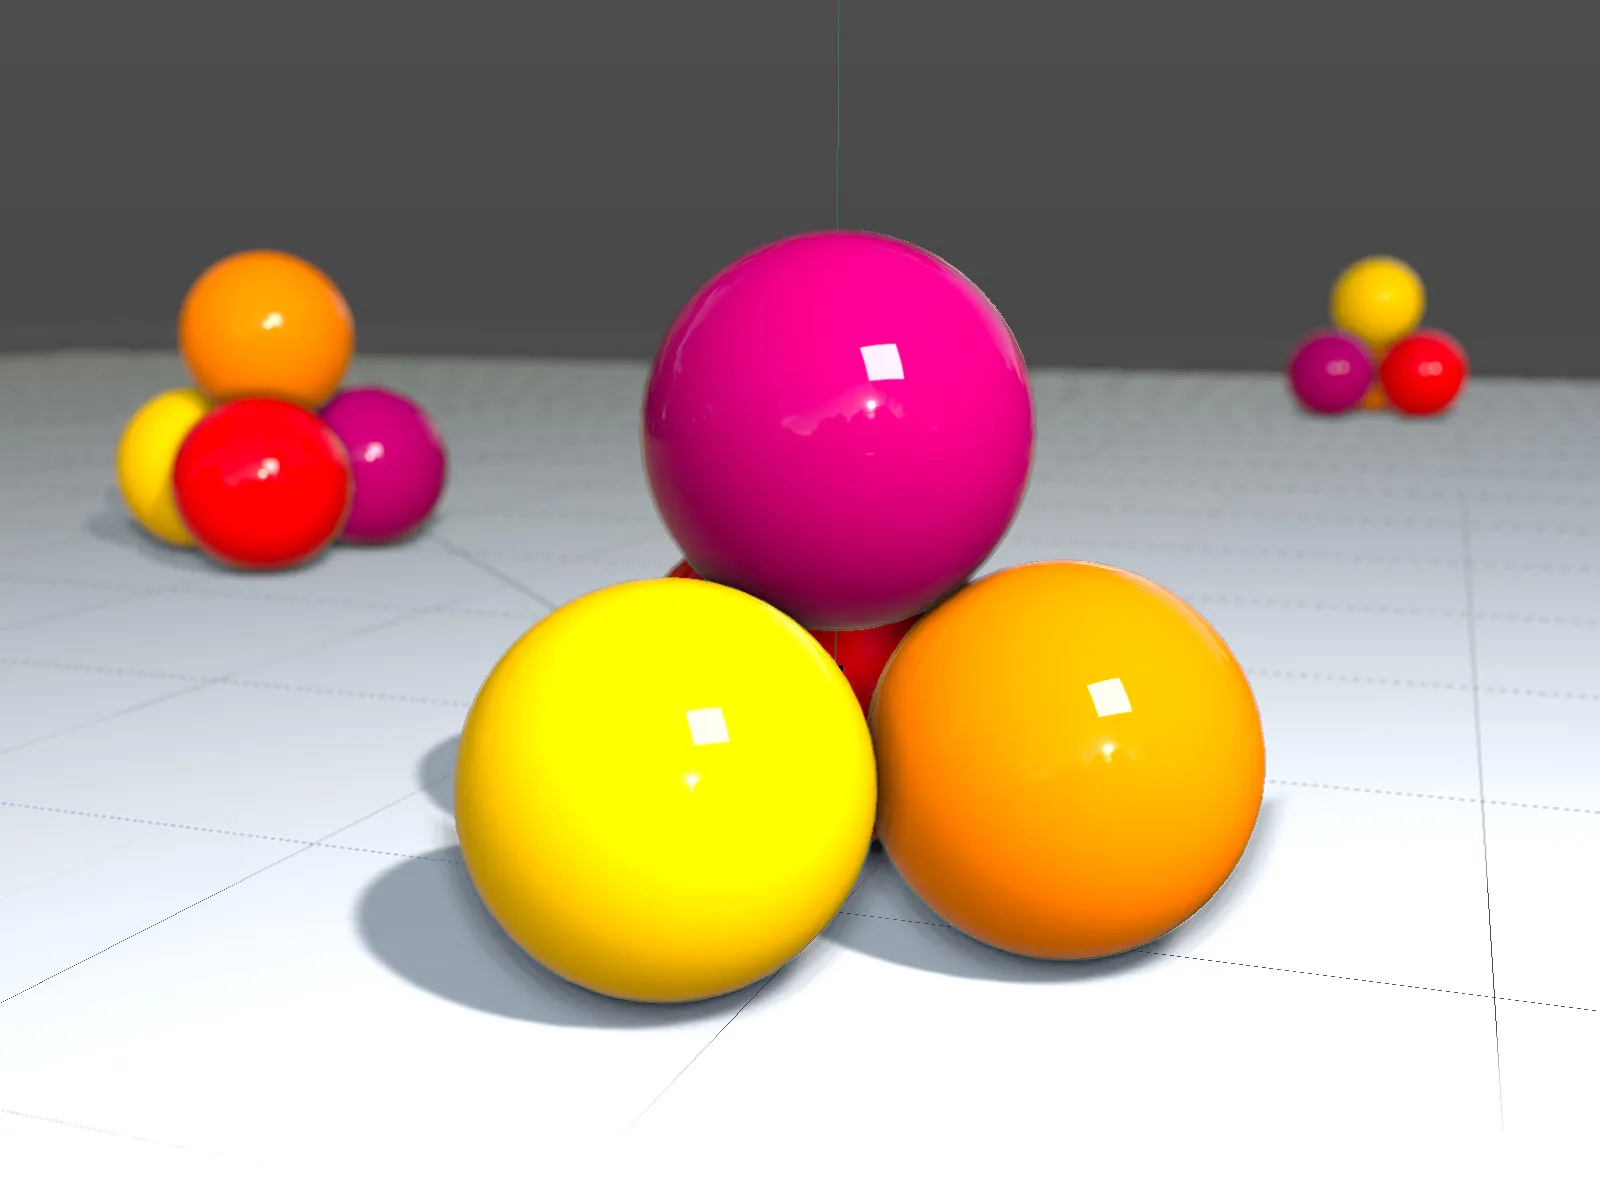
In the example scene, I use the physical renderer with depth of field activated. However, I leave the sample quality on the Low setting in order to produce decent image noise for the denoiser.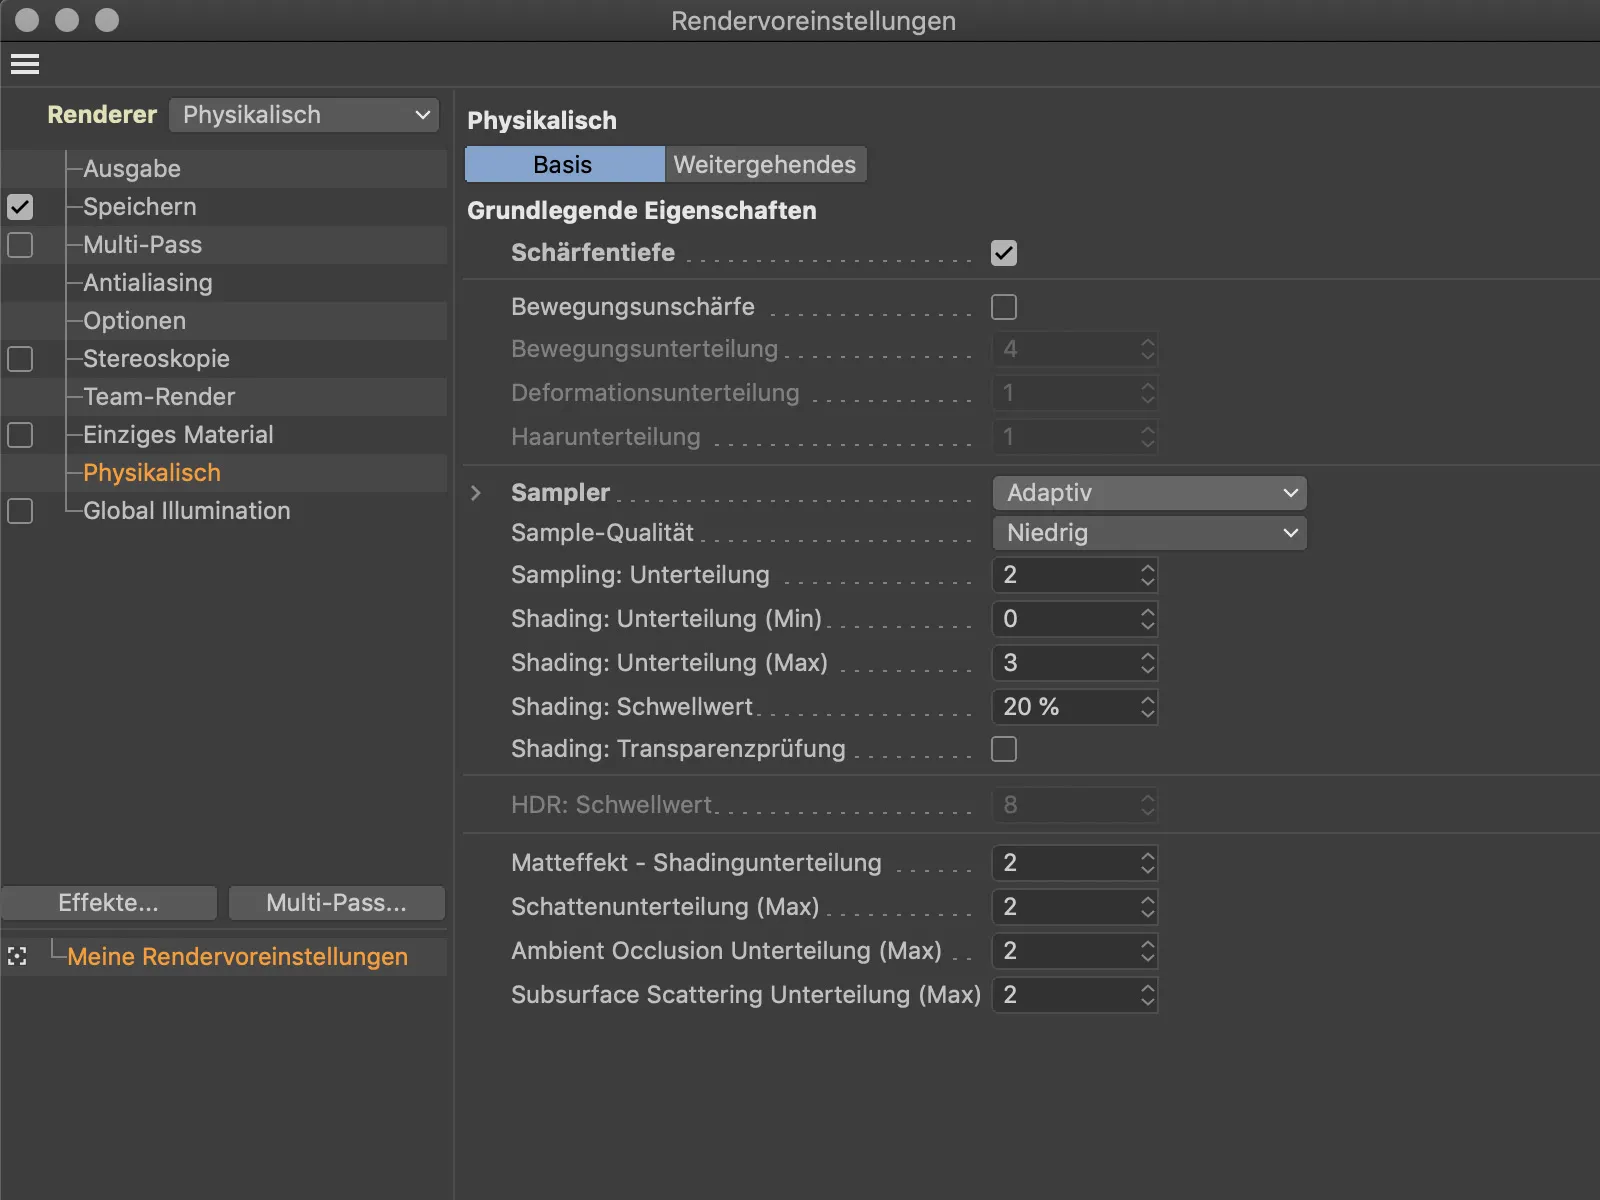
Especially in the shadow areas, but also in the objects themselves, the image noise occurred as expected due to the low sample number.
However, instead of turning up the sample rate and buying better image quality with significantly longer render times, we get the Denoiser post effect from the Effects... menu in the render presets.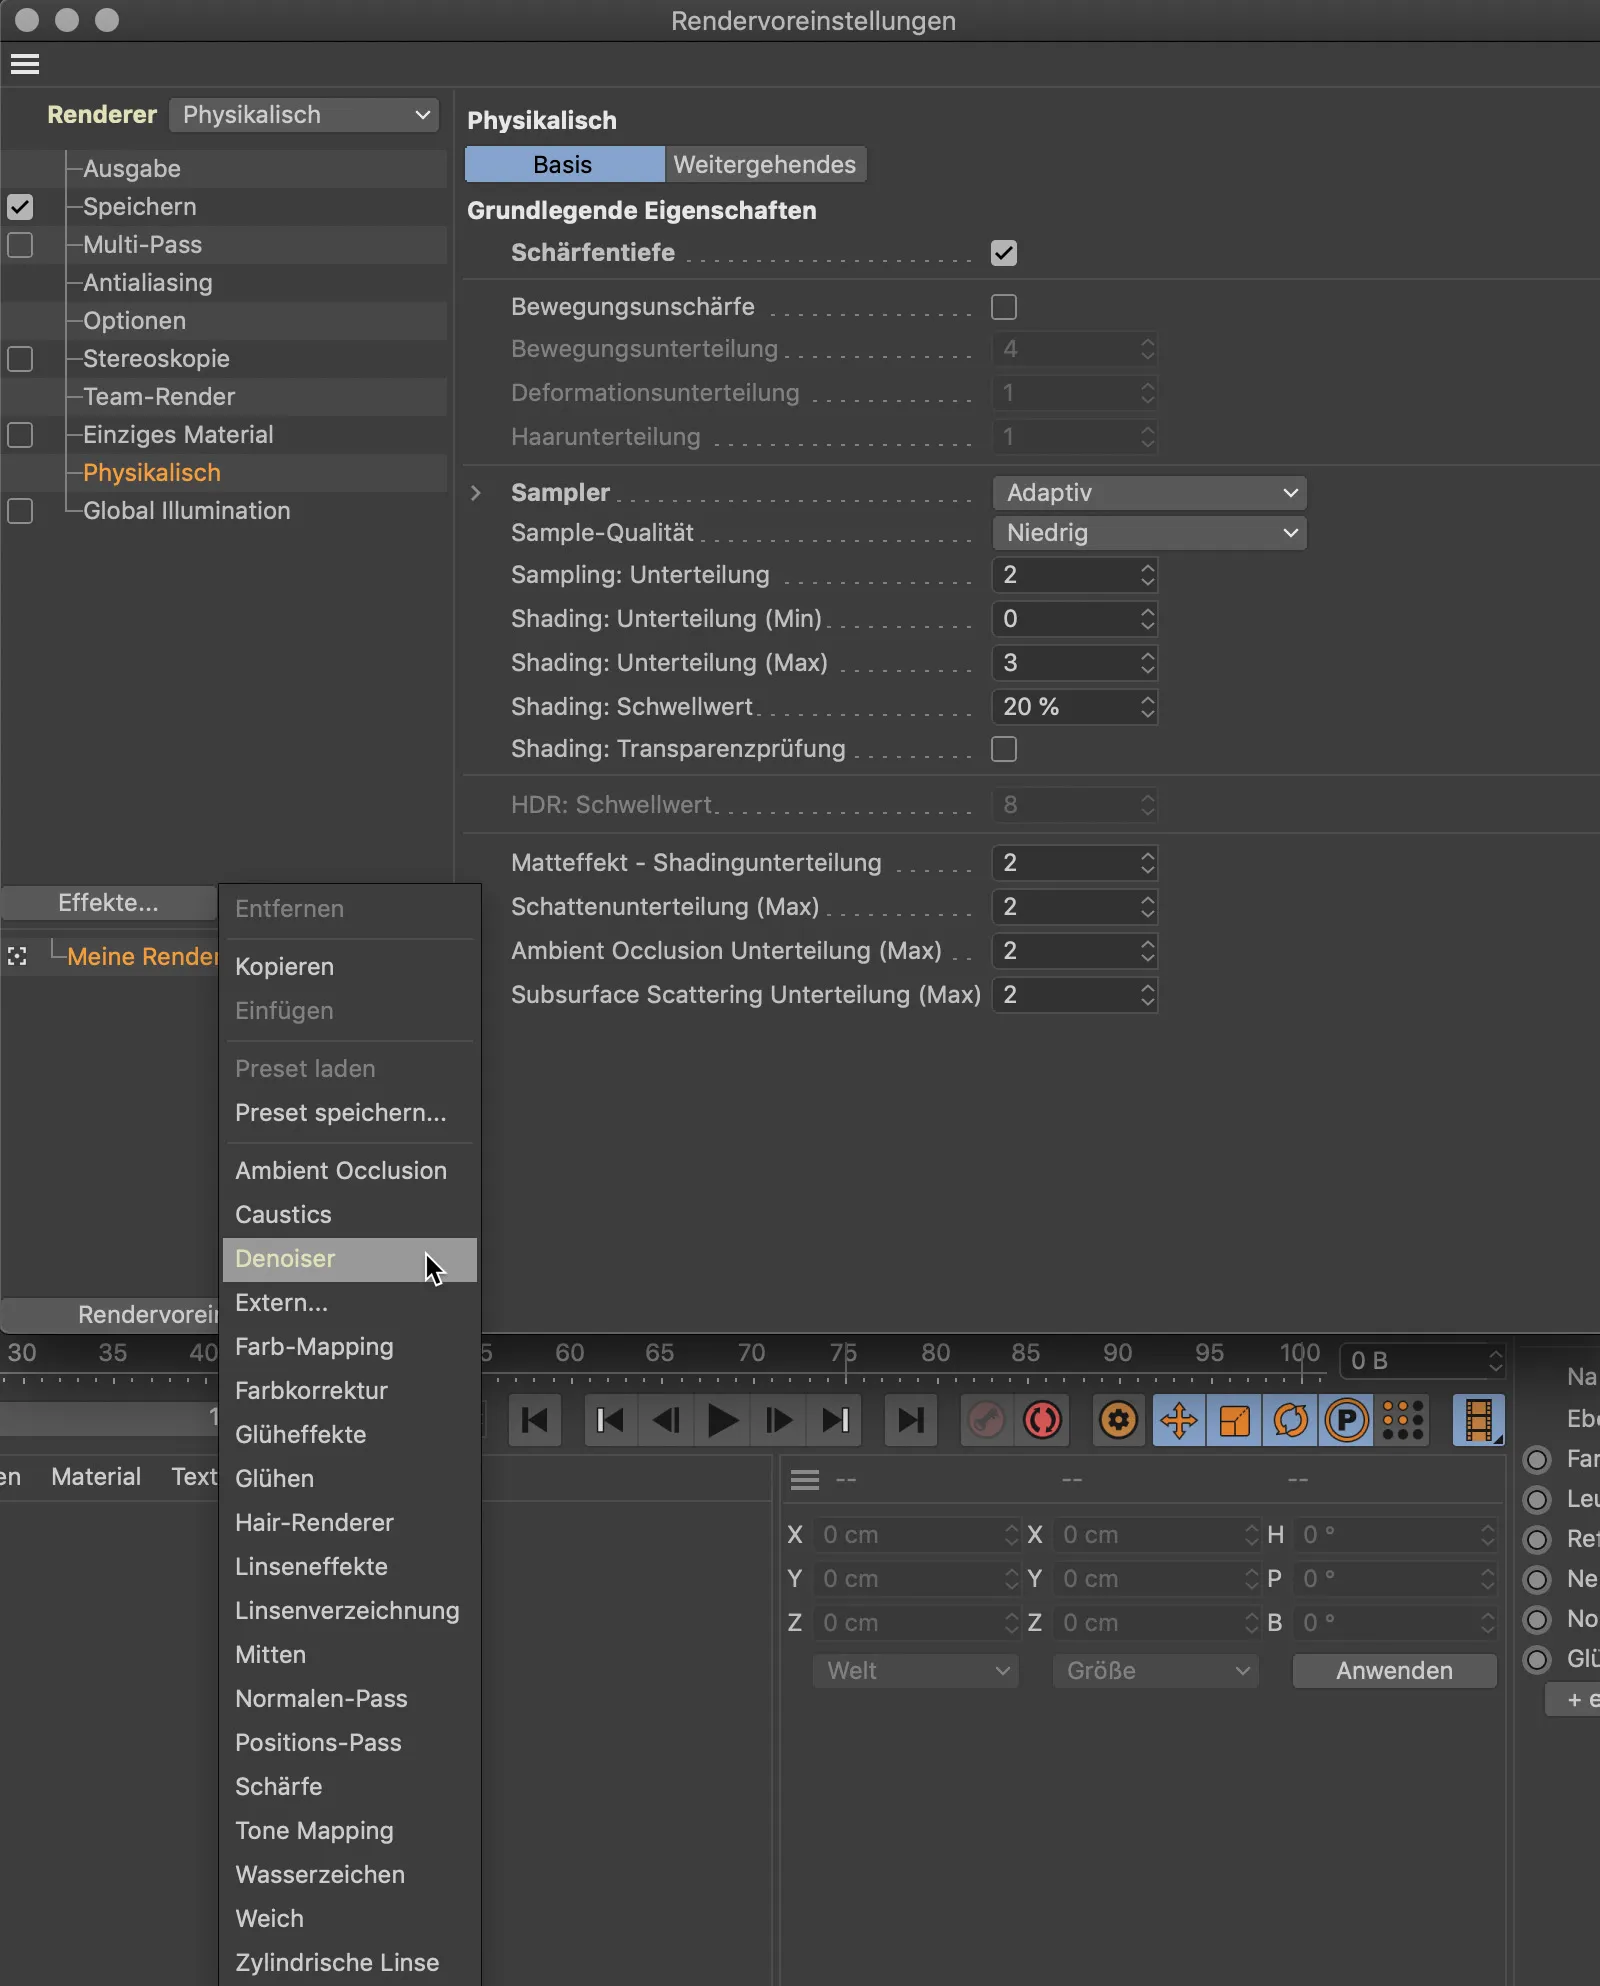
The settings dialog for the Denoiser post effect is straightforward and only refers to settings for any multi-pass rendering.
The result of the new rendering including the denoiser speaks for itself. Although it is not yet perfect, it is a significant improvement on the original image.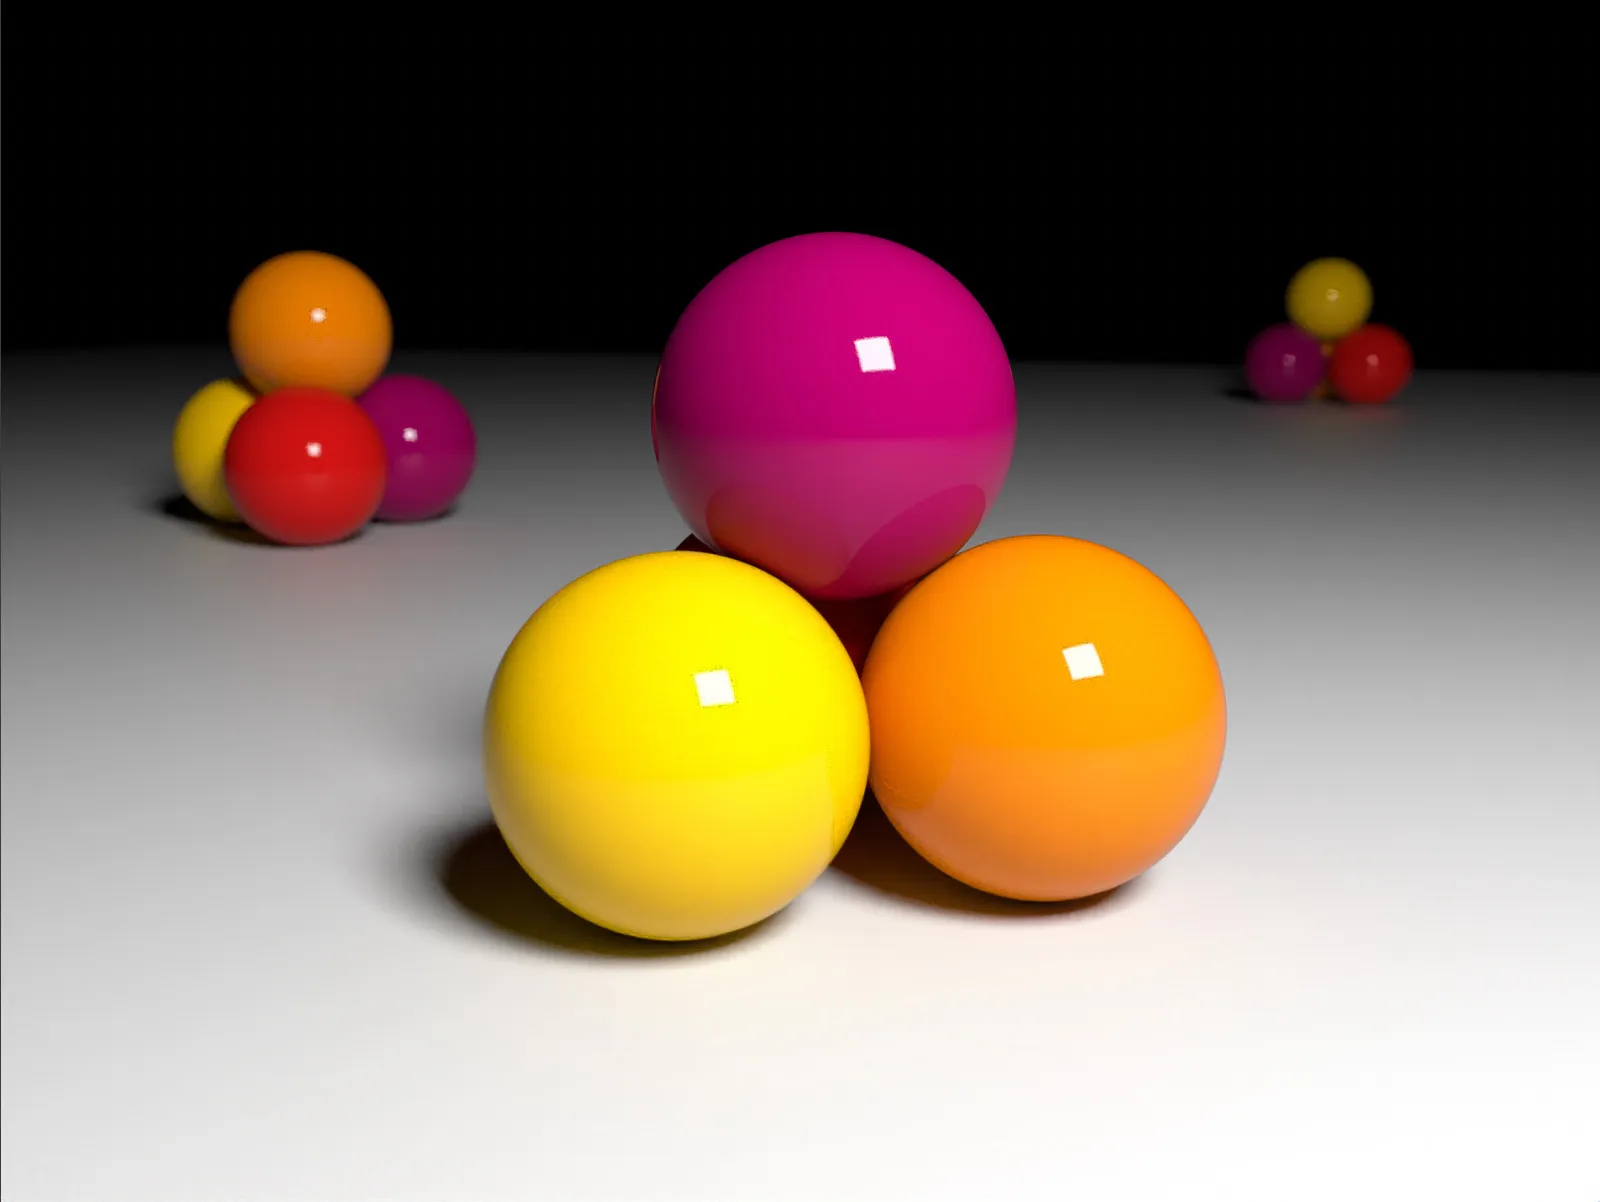
A comparison of the render times should dispel any remaining doubts. The significantly better render result thanks to the denoiser required just two seconds more rendering time.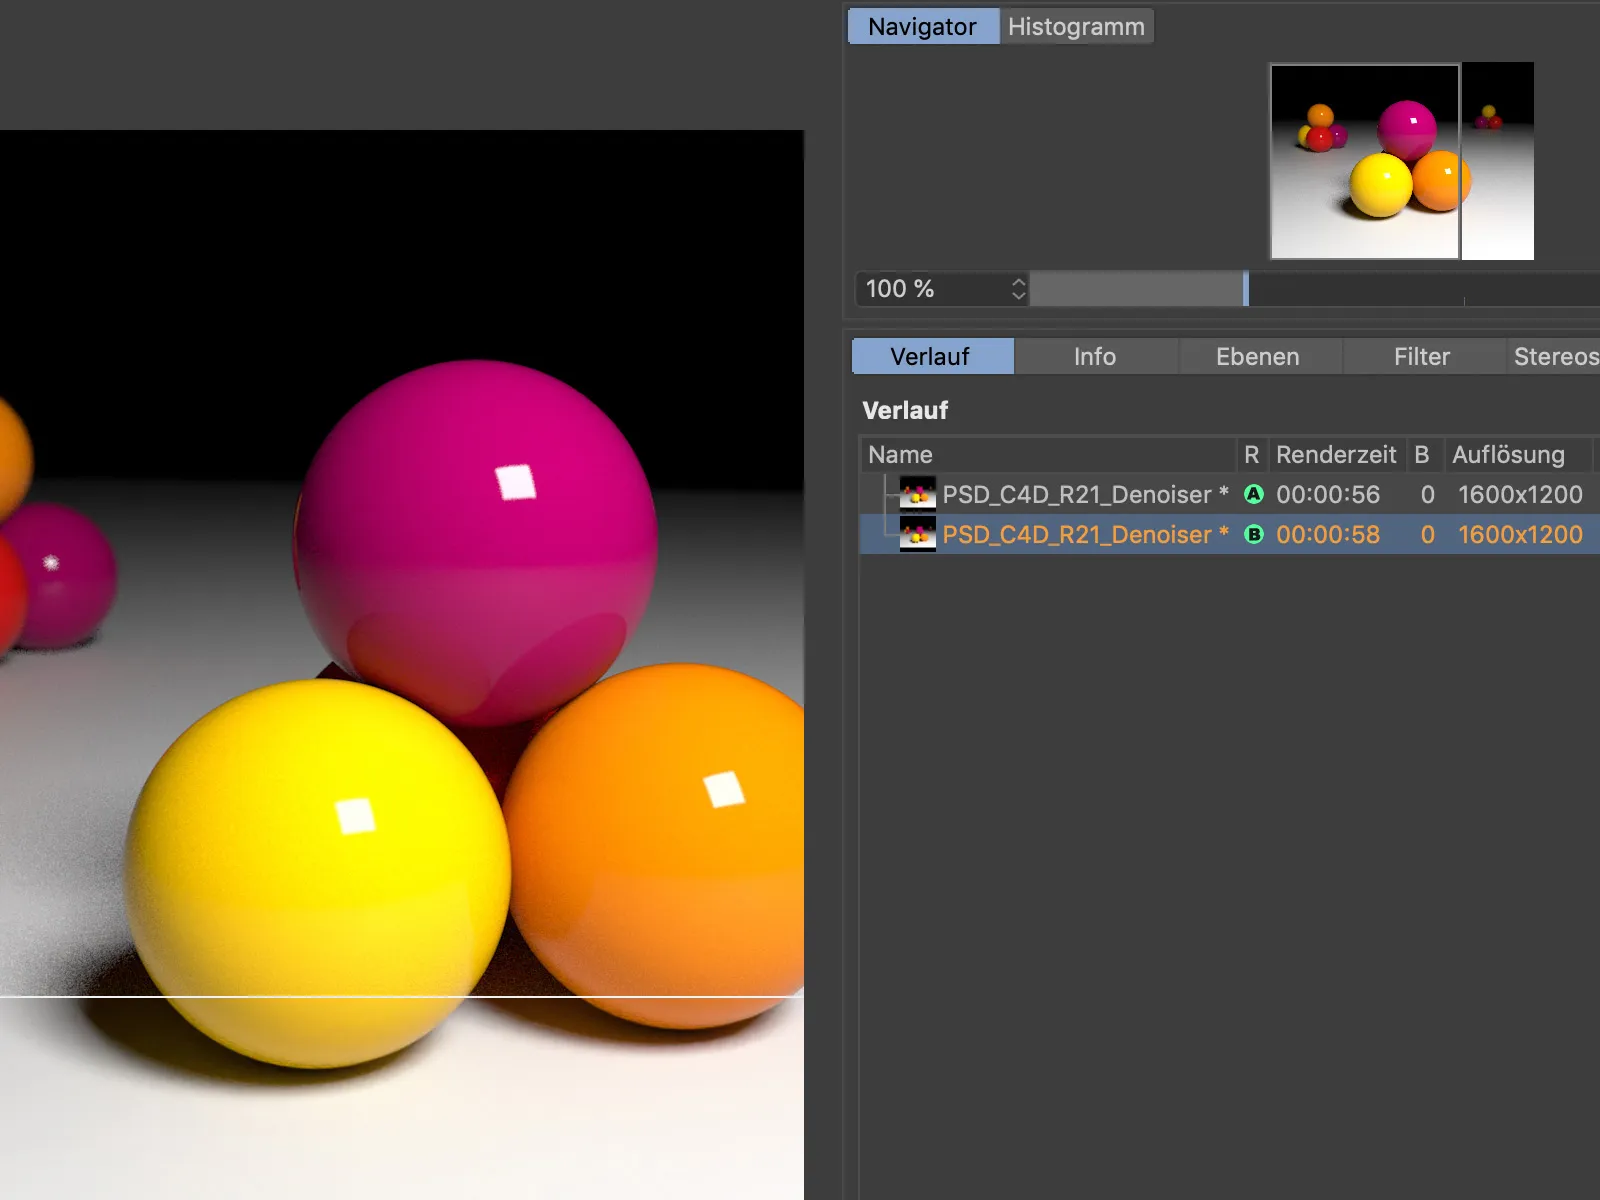
Subfields and masks
In order to make working with fields in Cinema 4D clearer and more logical, the field lists built into the force field objector in the removal functions are increasingly reminiscent of relevant image editing programs in terms of their layer functionality.
Let's take another look at a simple example in the form of a matrix objectthat is modified using a Simpel effector.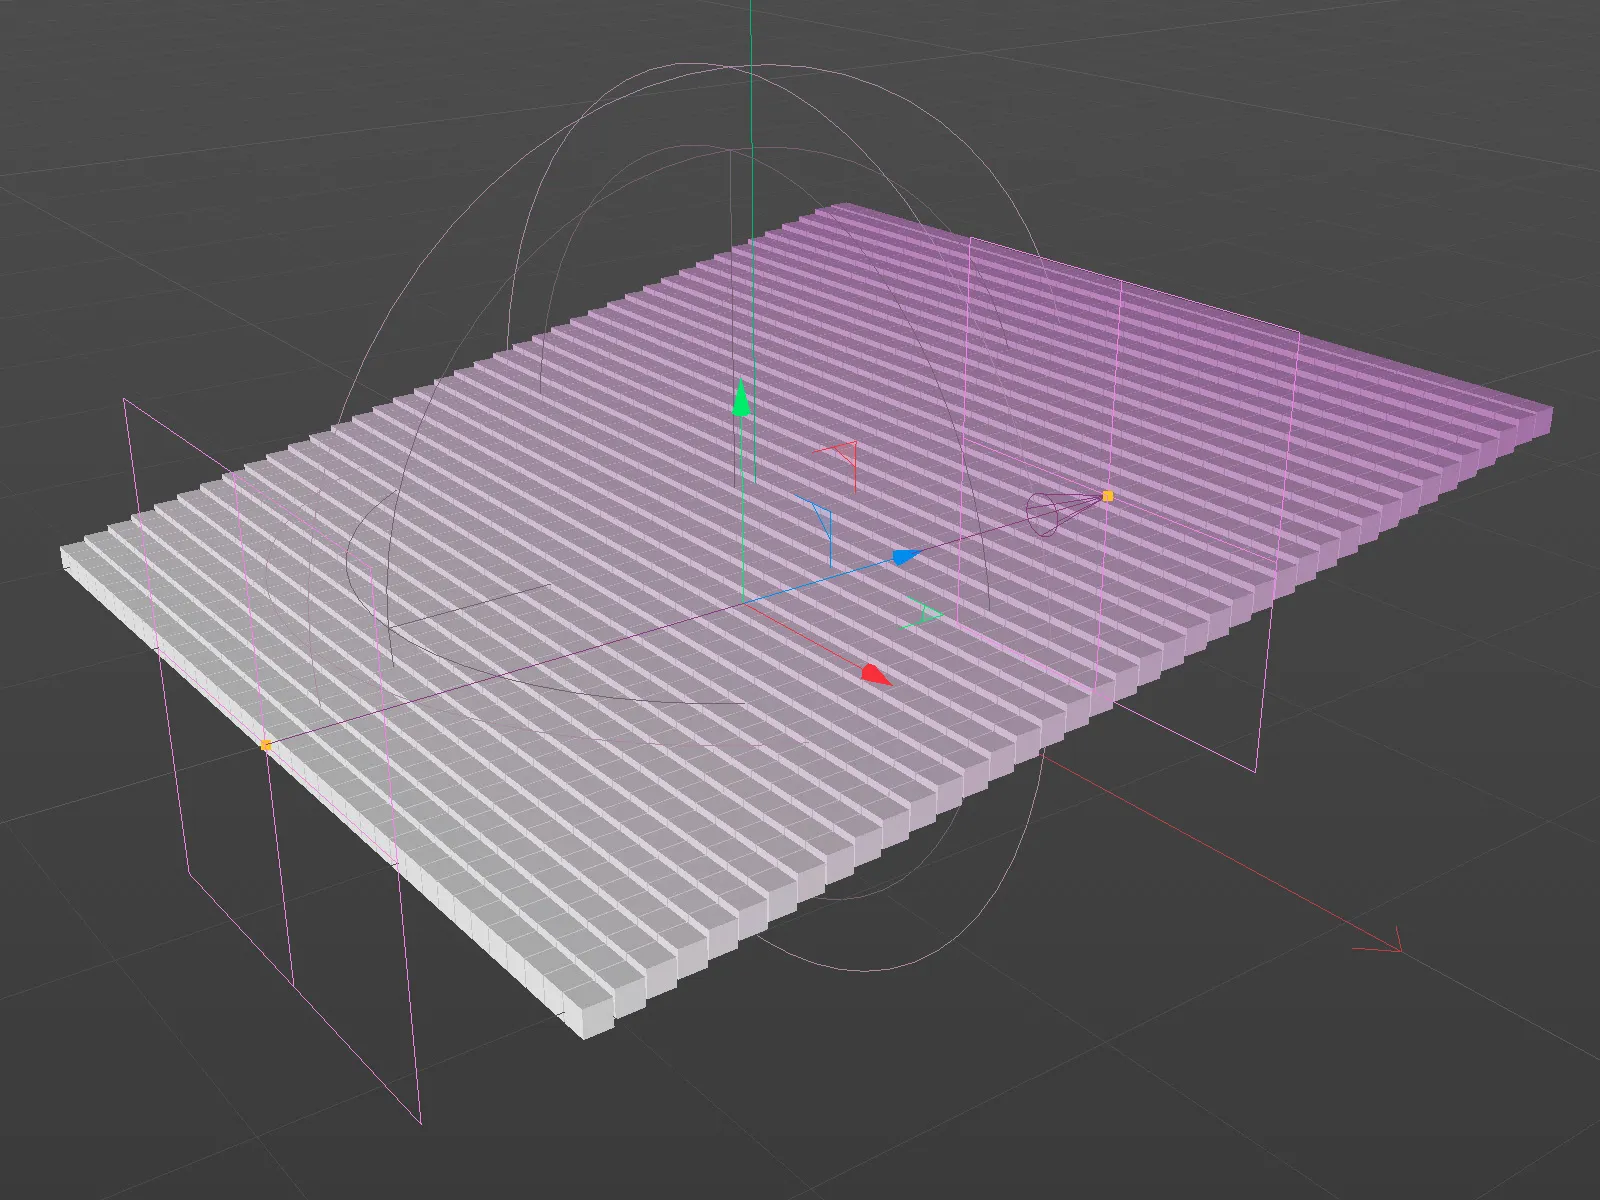
A total of three field levels are entered in the list on the decrease pageof the Simpel effector. The currently active linear field is responsible for the staircase-like movement of the clones.
To use a field layer as a mask for another field layer, right-click to open the context menu where you will find the Add mask command.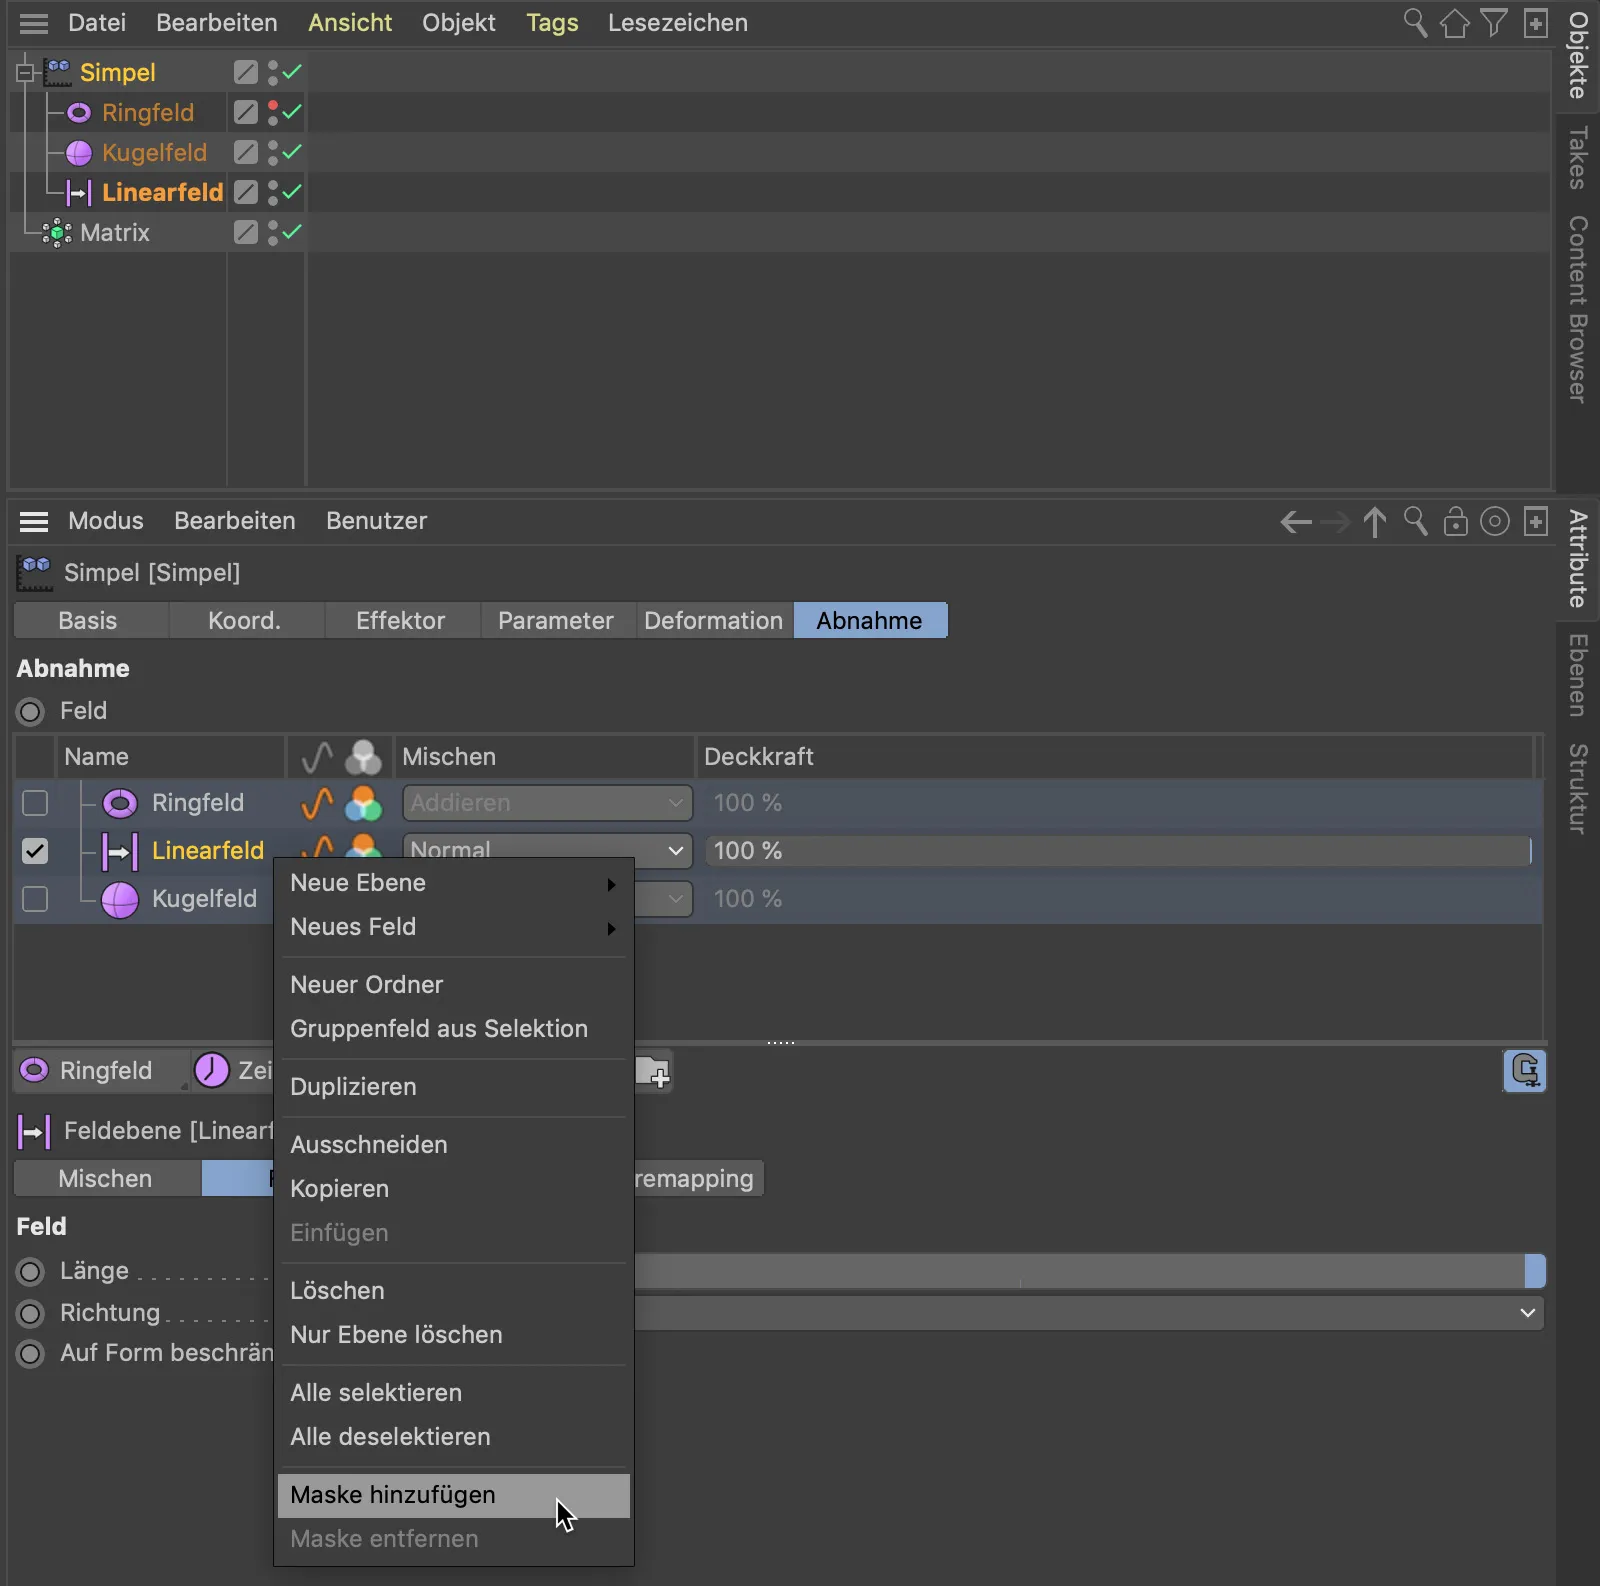
Alternatively, we can also use the corresponding button below the field layer listto create a mask for a field layer. The mask created is a sub-object of the field level it affects. If we now assign a field level such as the sphere field to the mask using drag-and-drop, the sphere field acts as a mask for the linear field.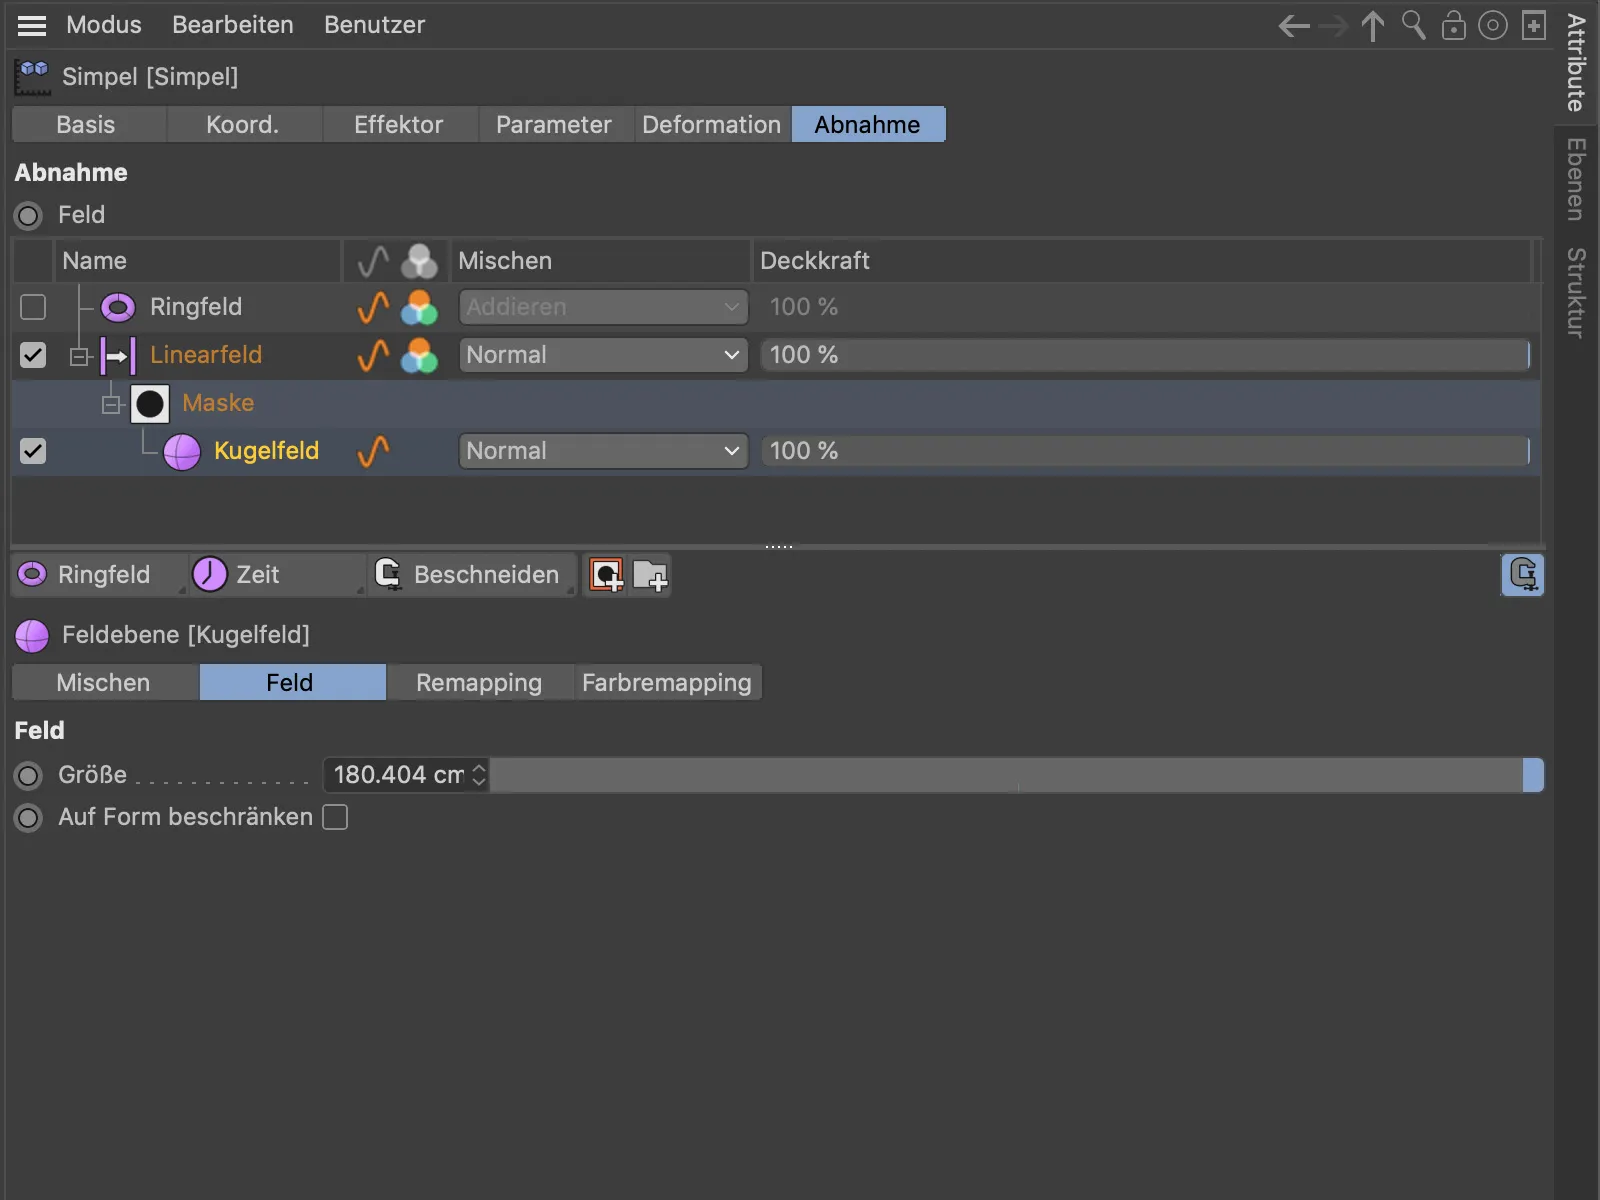
As in an image editing program, we can control the influence of the field layers individually using opacity and offset them against each other using the blend mode stored in the Blend column. The superordinate ring field layer has a corresponding effect on all subordinate layers.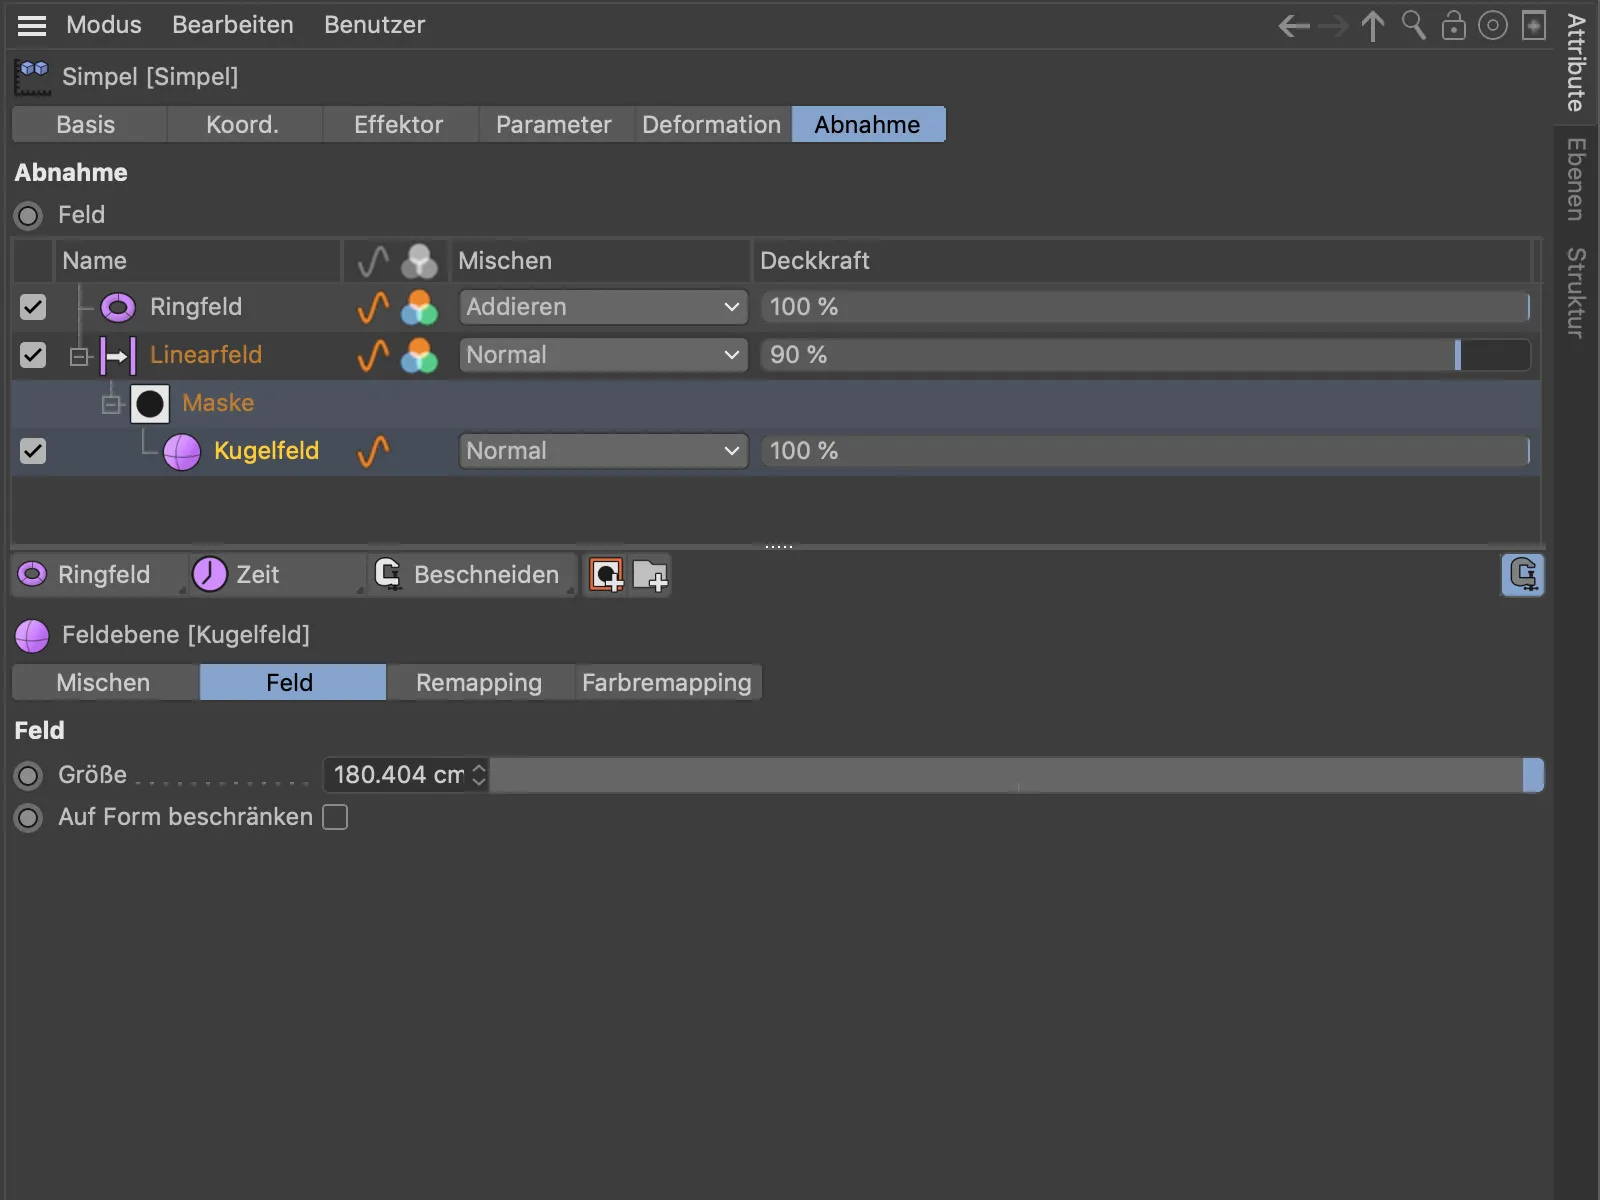
The result of our field layer layering. The spherical field layer masks the effect of the linear field layer, while the superordinate ring field layer affects all elements in its circle of influence.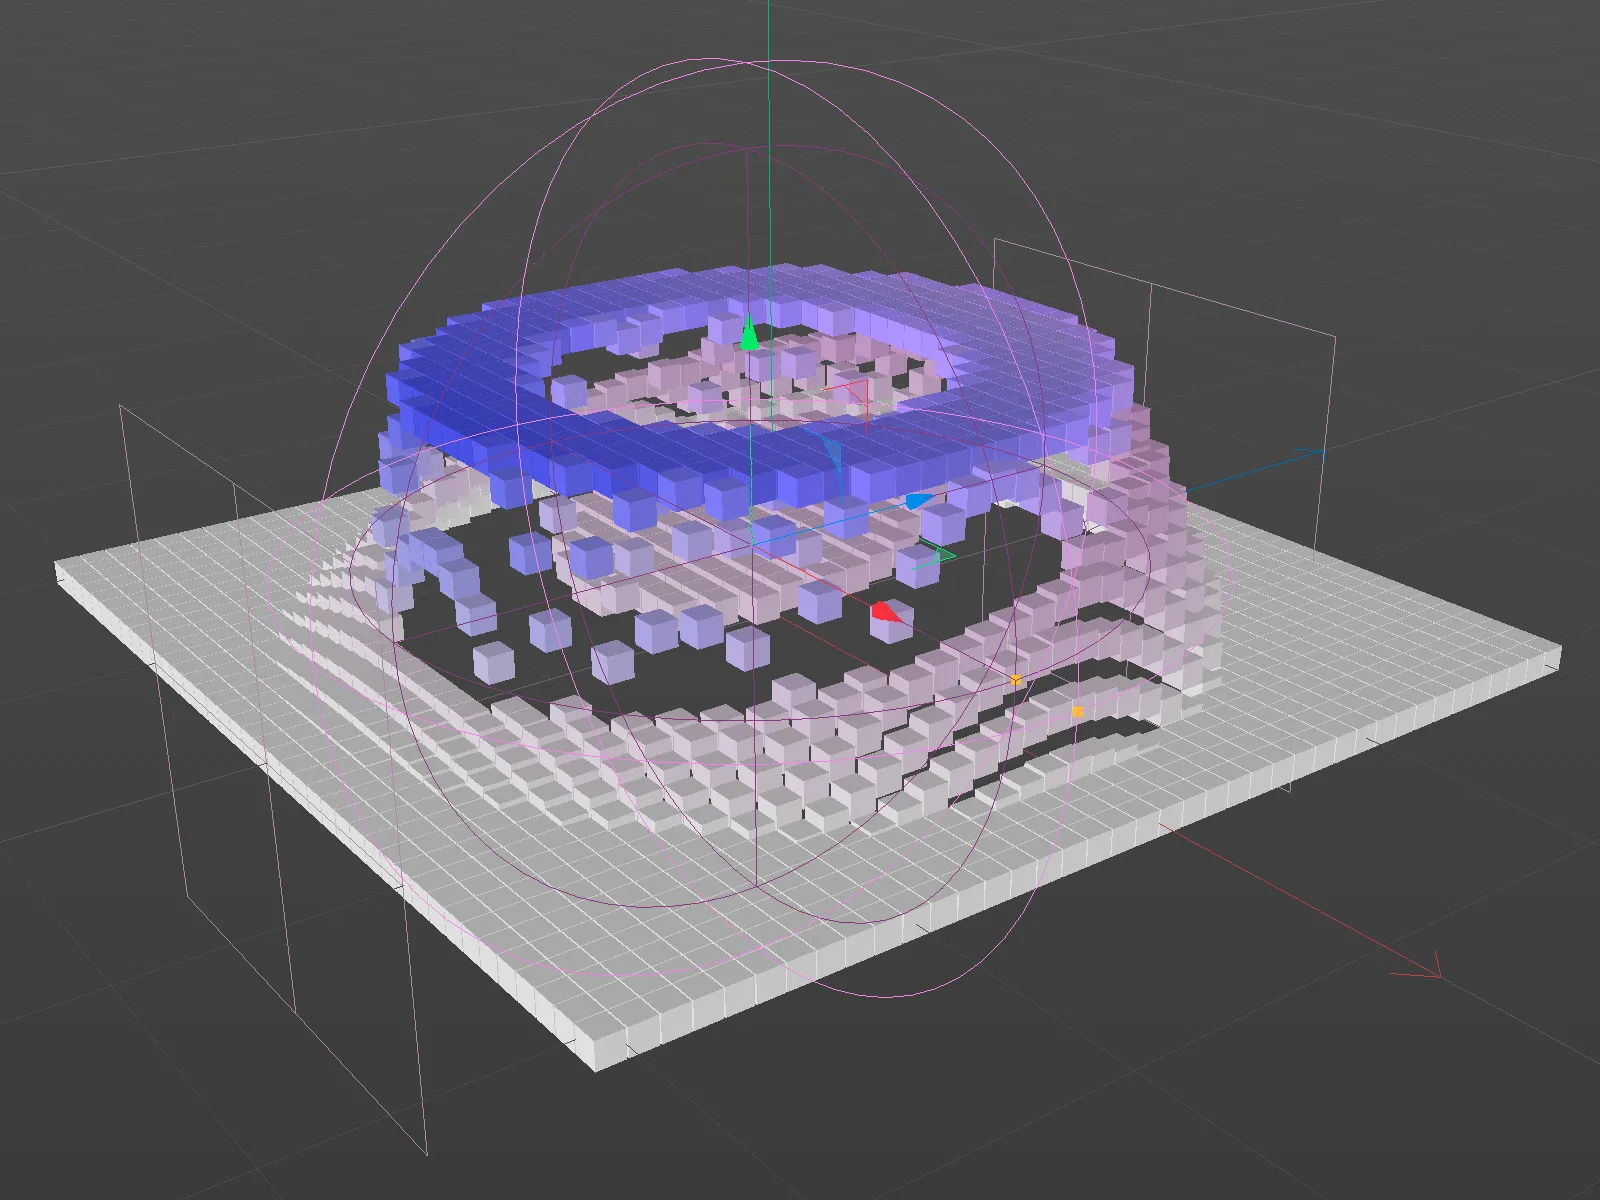
Copying and pasting points and polygons from object to object
The title says it all - even if it may come as a surprise to some that such a supposedly basic function was only implemented with Release 21. We can now simply copy point and polygon selections using the copy command (Ctrl + C) and paste them to another object using the paste command (Ctrl + V). The coordinate system of the selected object is used as the reference system.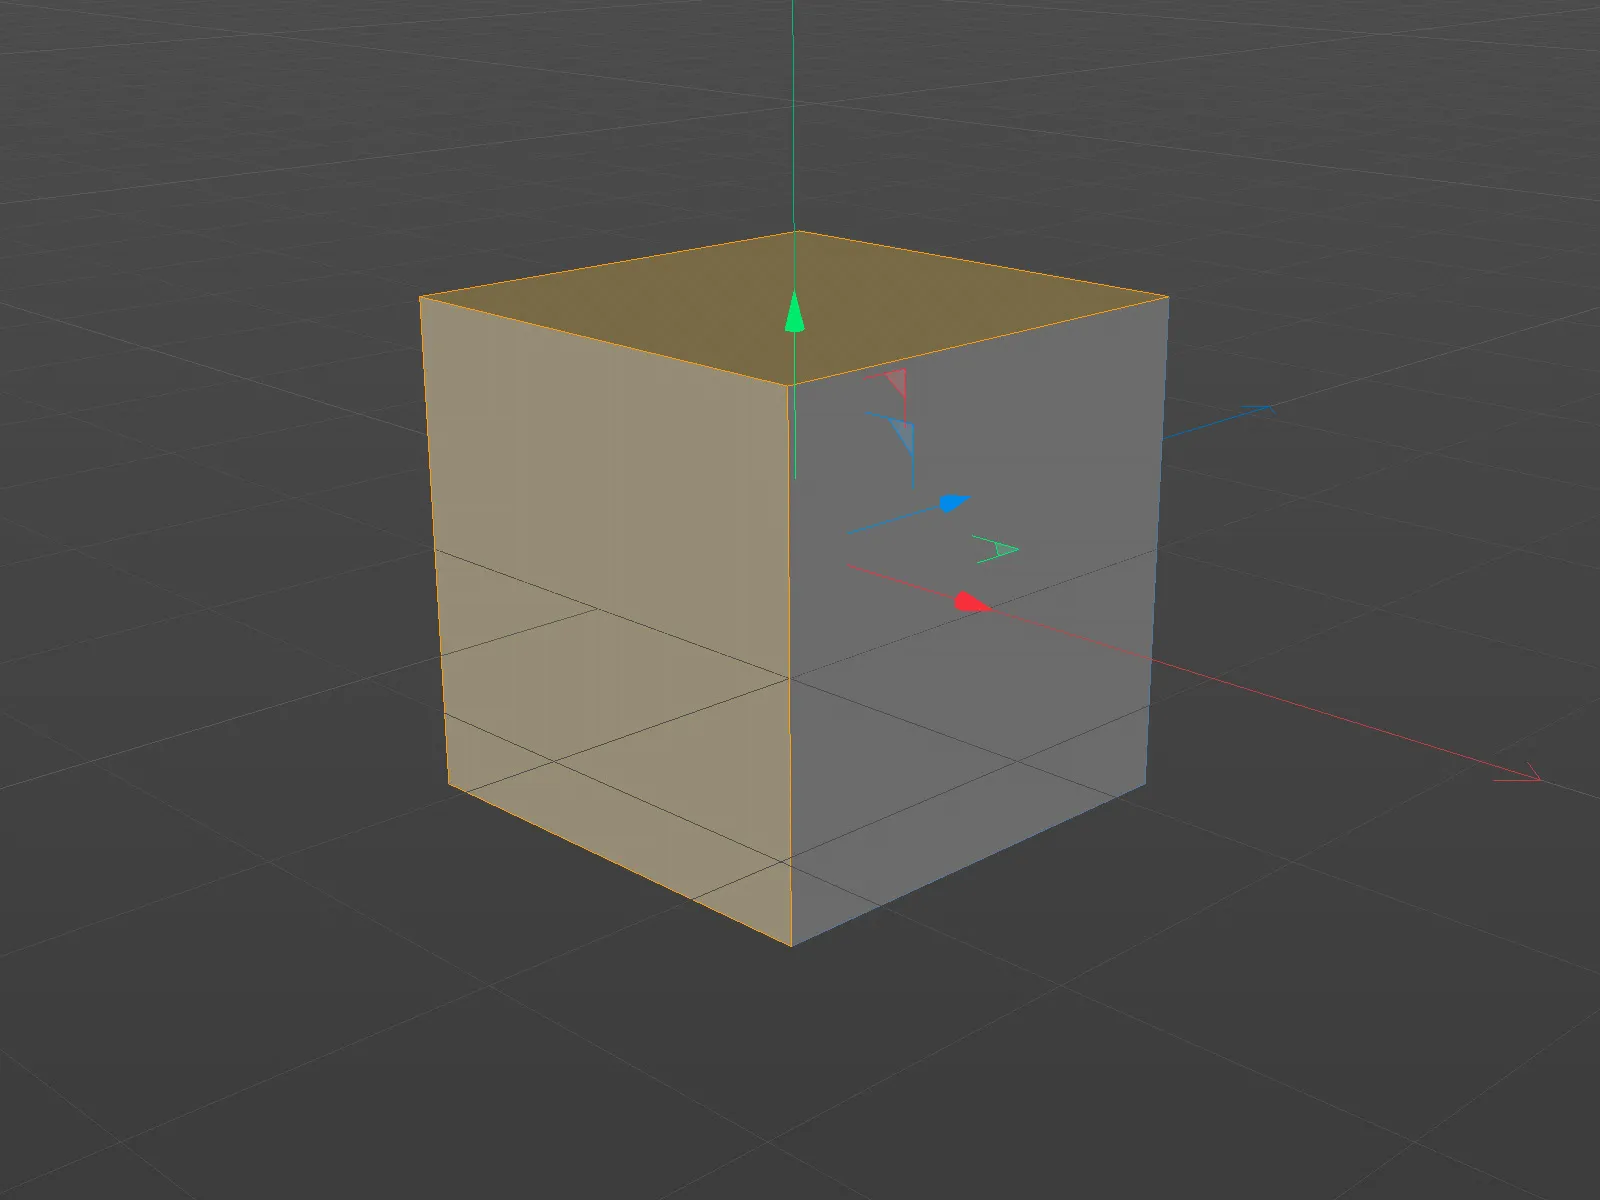
Incidentally, copying and pasting also works without using another object as the recipient. For example, to copy geometry within an object and reuse it.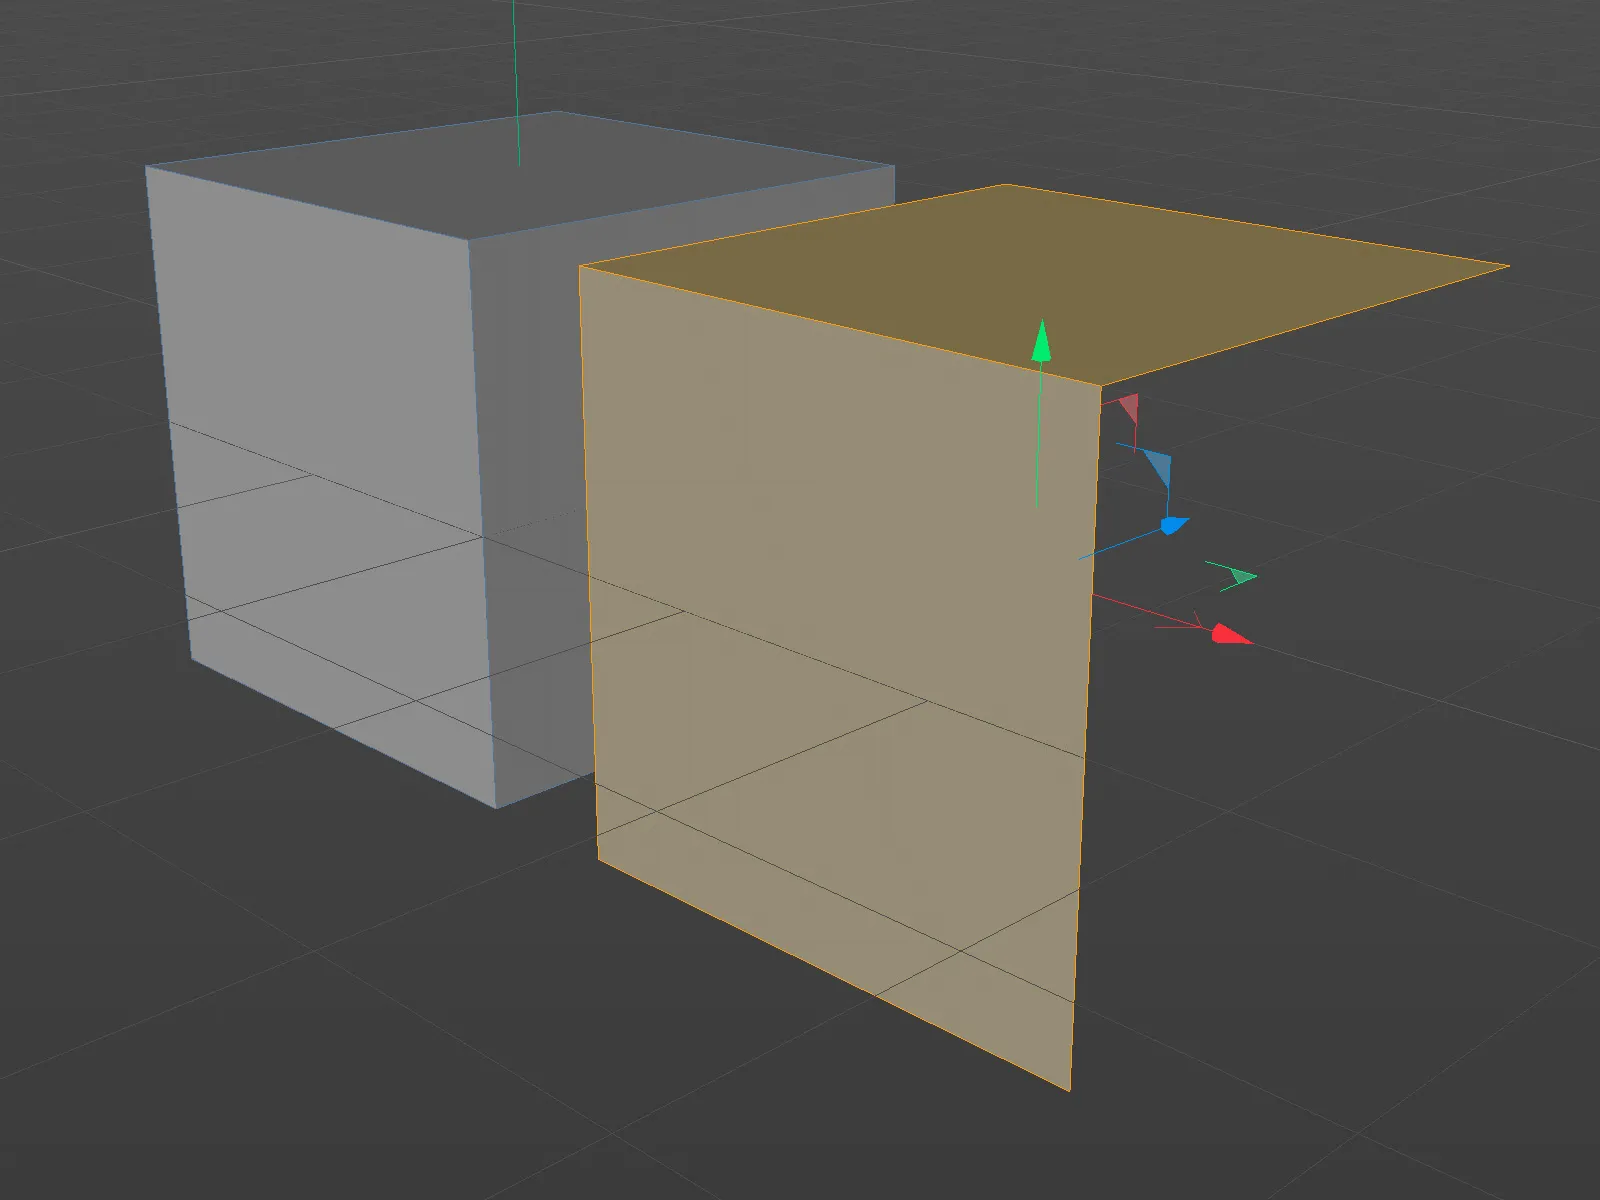
If no object is selected when pasting, Cinema 4D automatically creates a new object so that the copied geometry can be pasted there.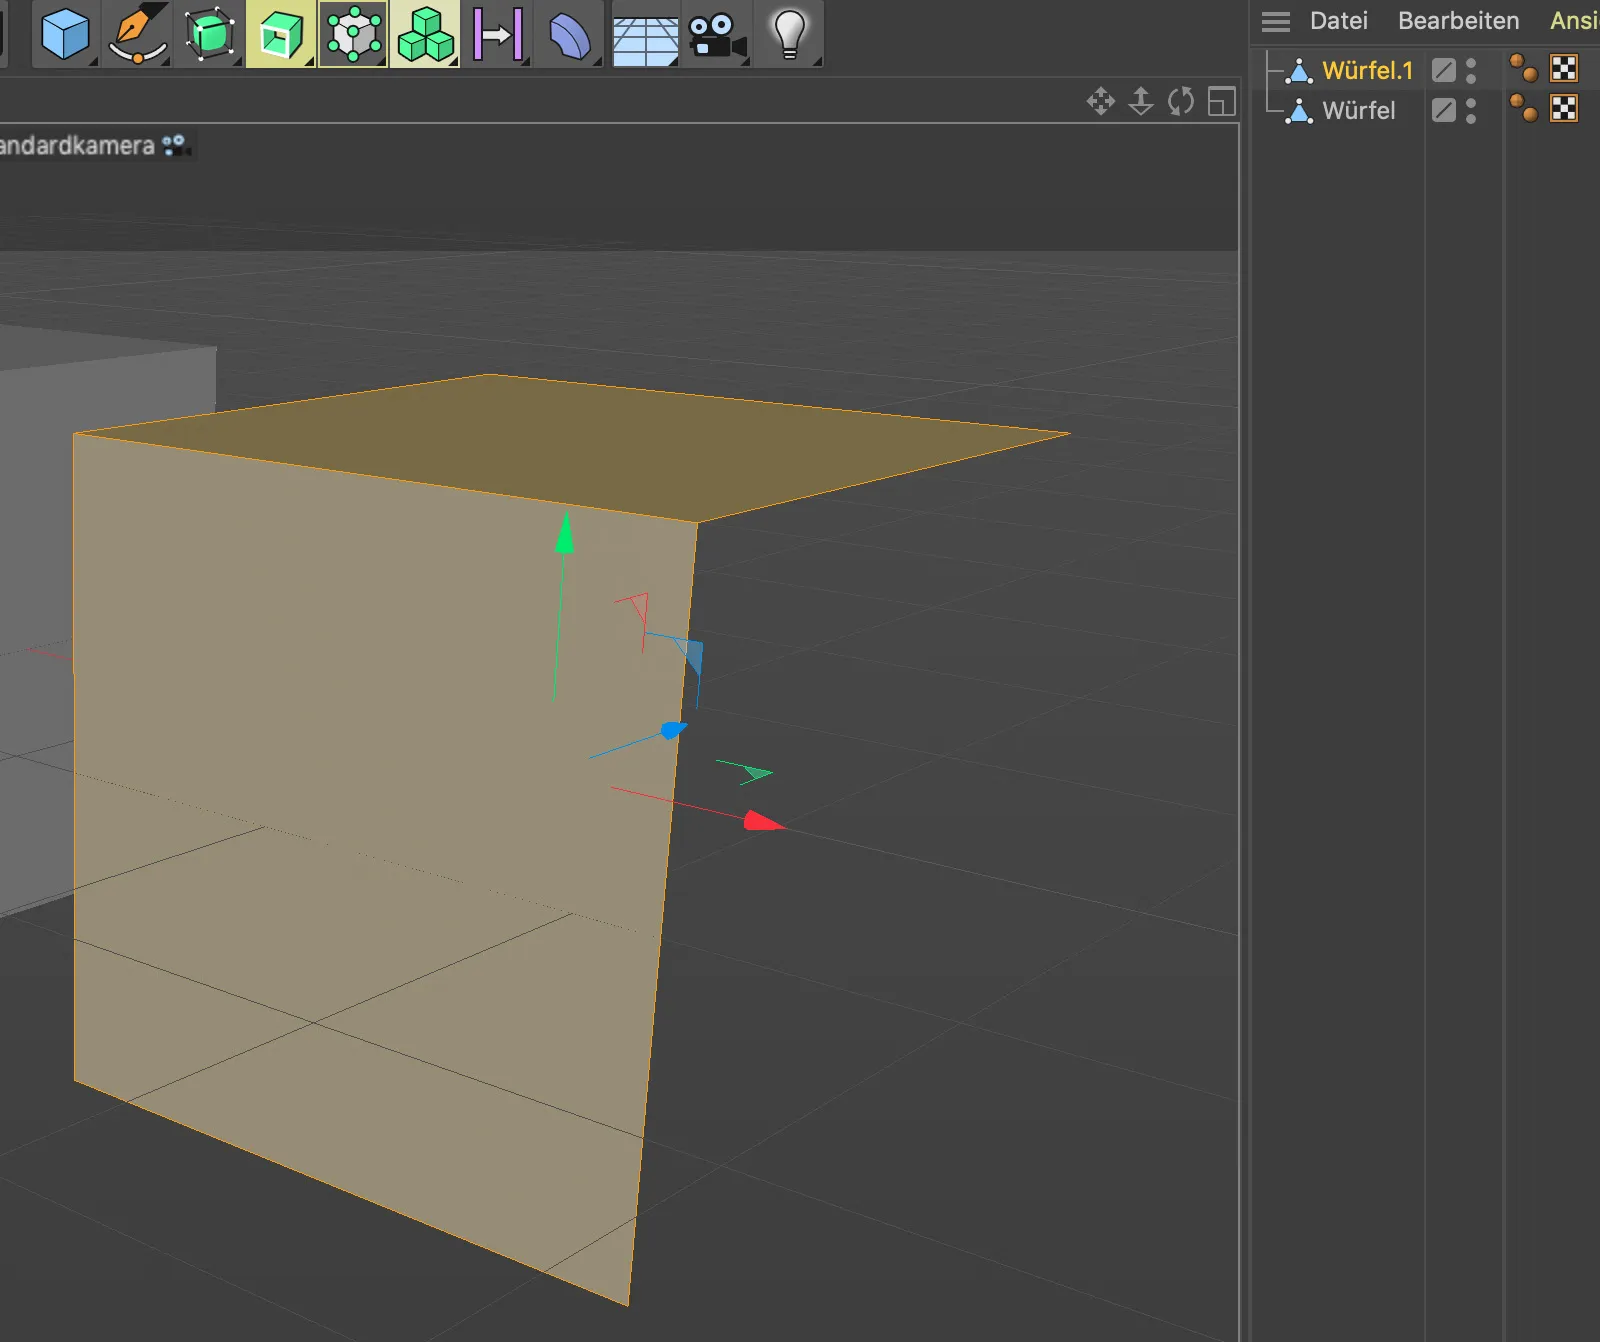
UV transformation
For working on UV selections, Cinema 4D Release 21 now has the practical new UV Transformation tool. In principle, it combines the previously separate Move, Scale, Rotate and Horizontal or Vertical Distort tools into a single tool.
As soon as we have created a UV selection, the UV transformation tool can be activated.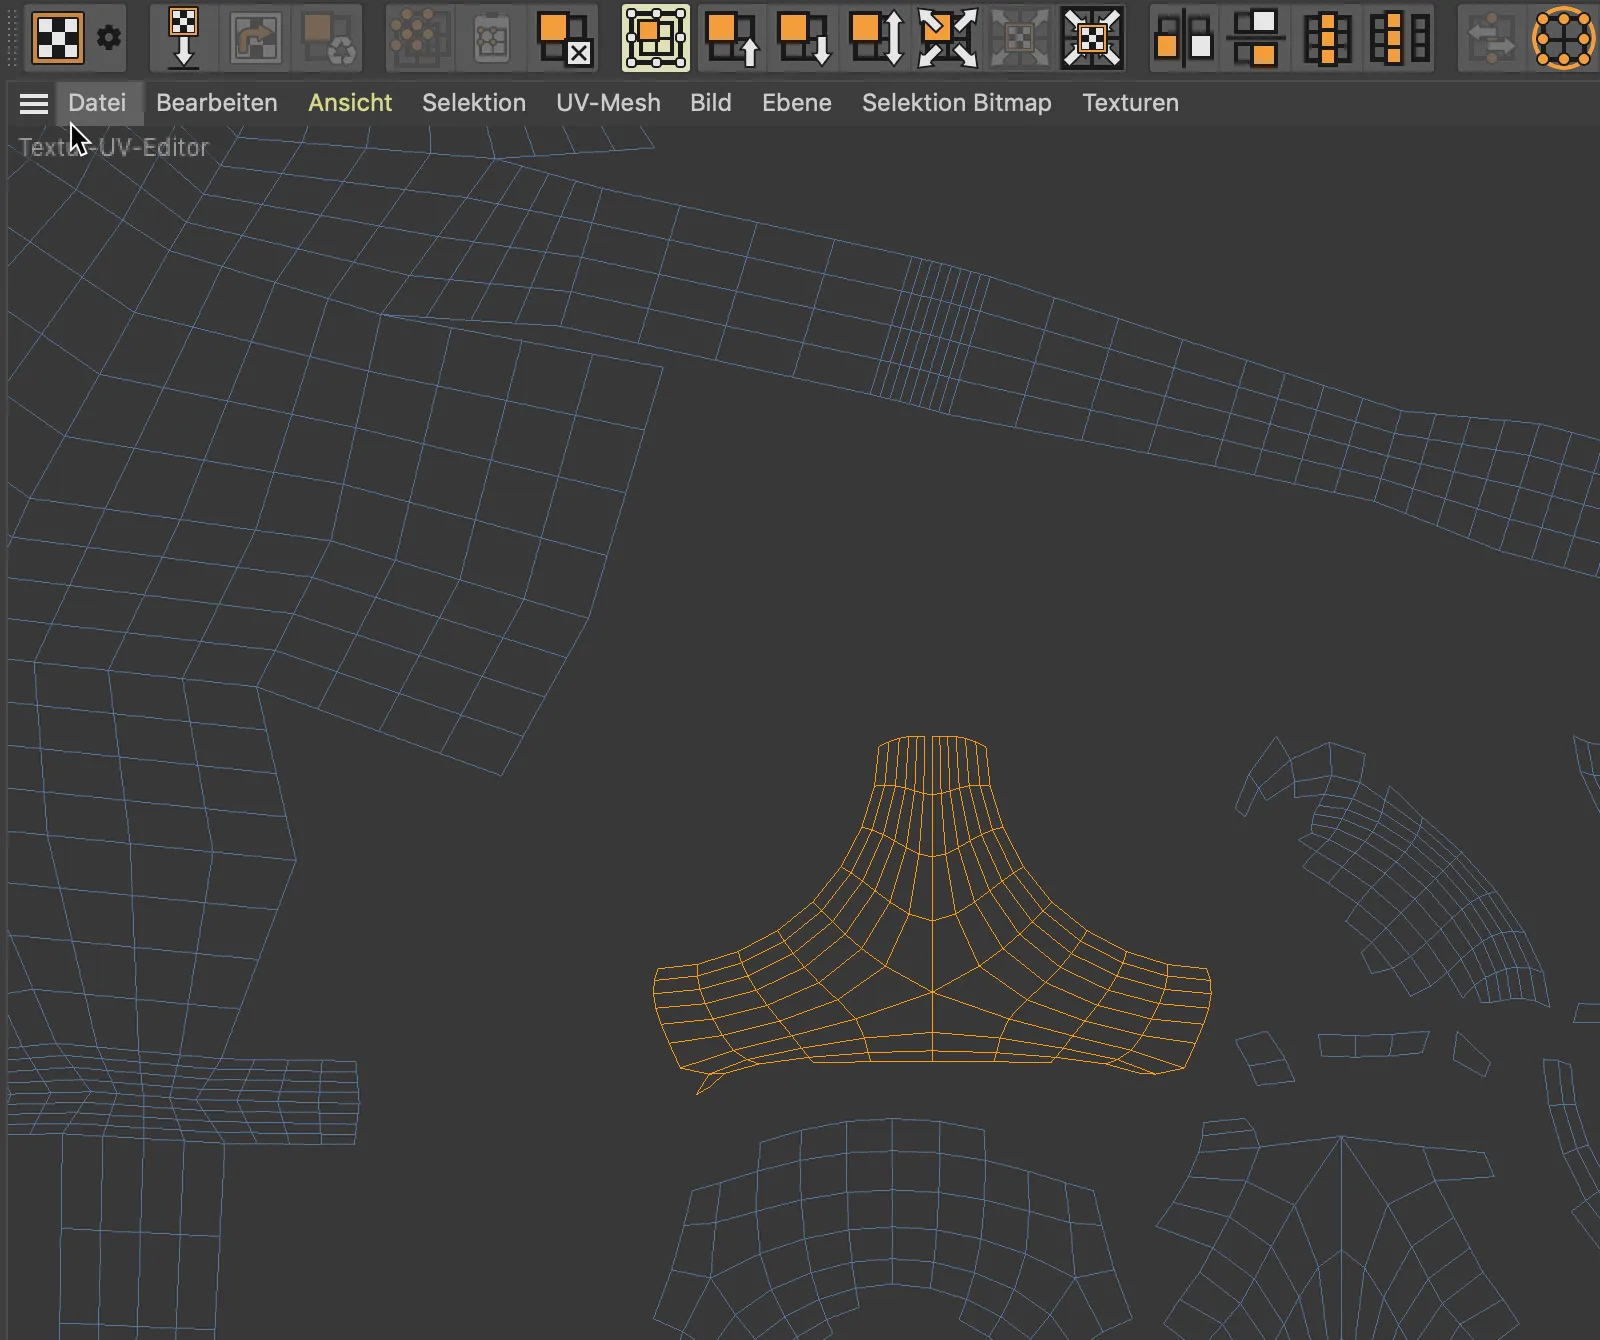
Using the familiar handles on the sides and corners of the selection frame, we can now move, scale and rotate the UV selection...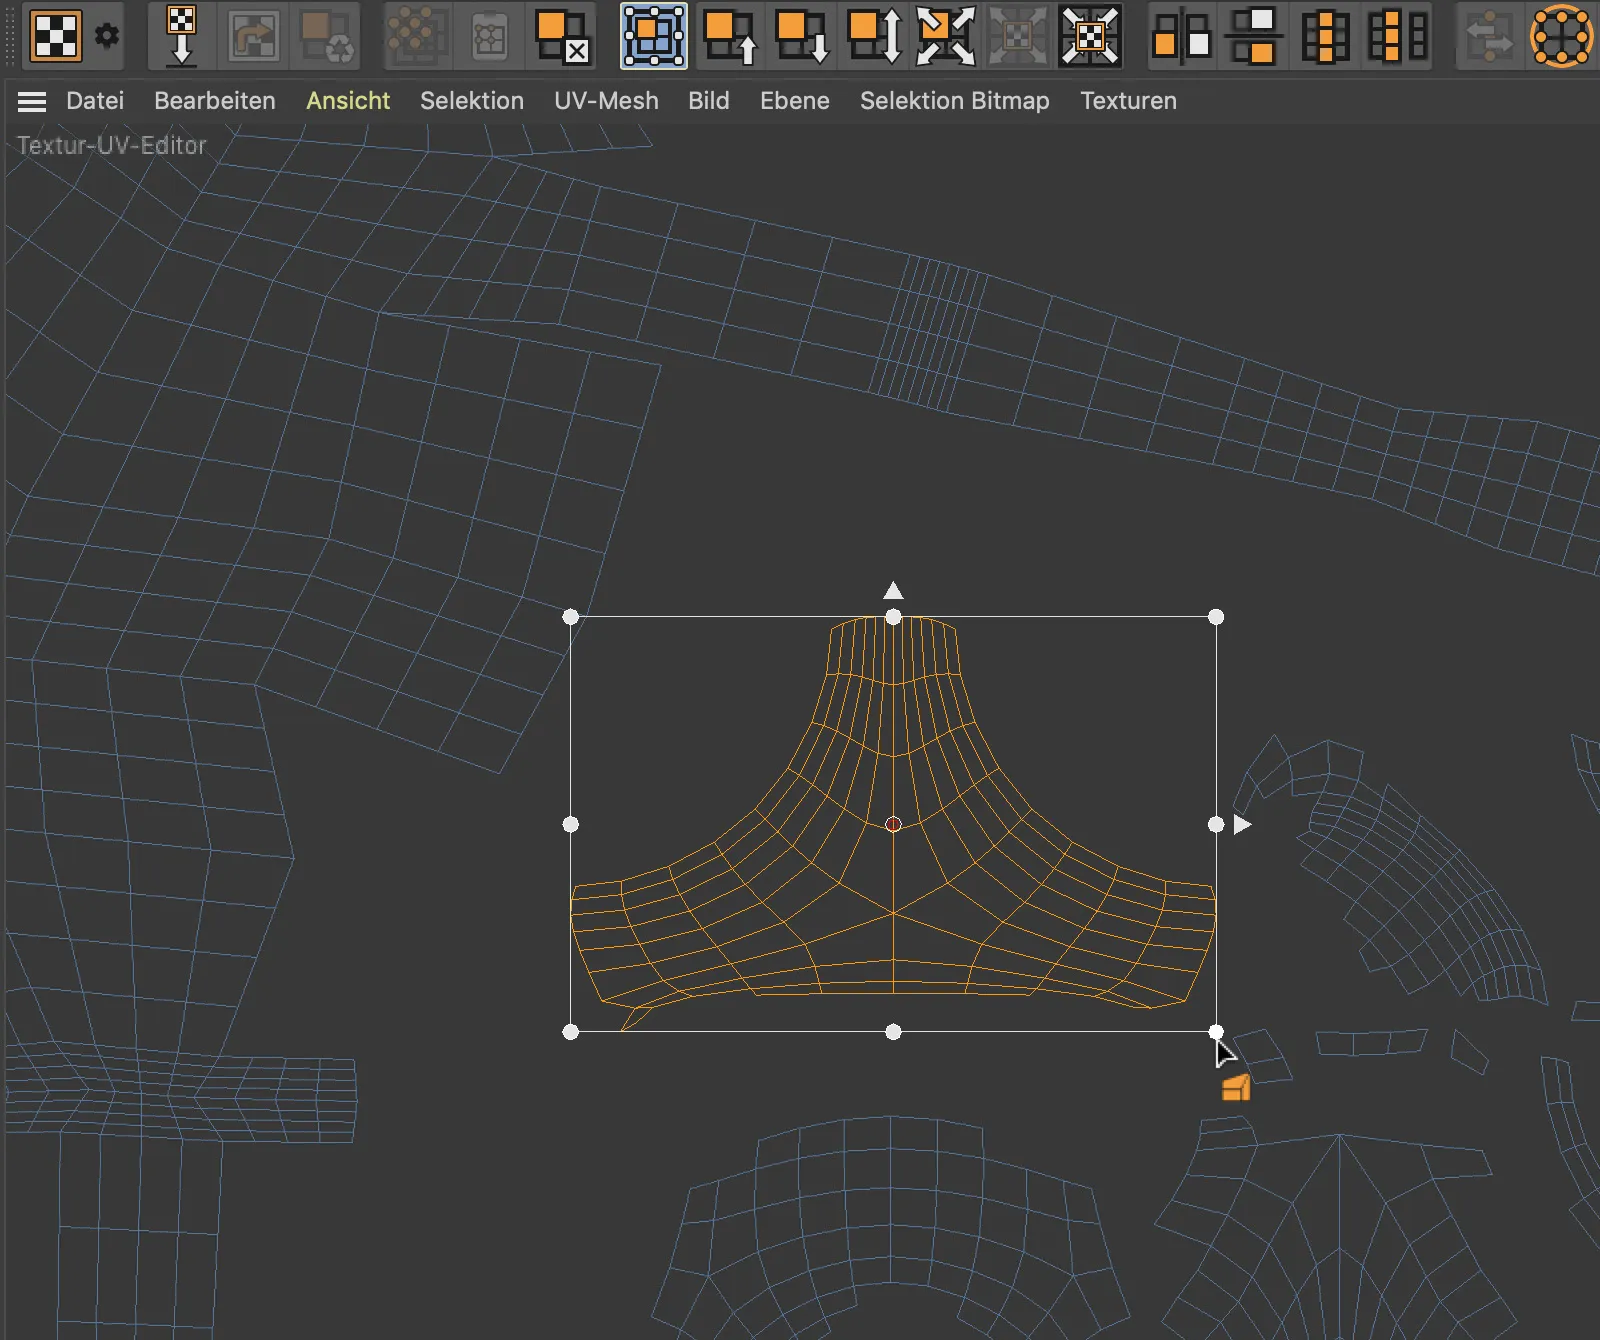
... and distort it horizontally or vertically using the Ctrl key.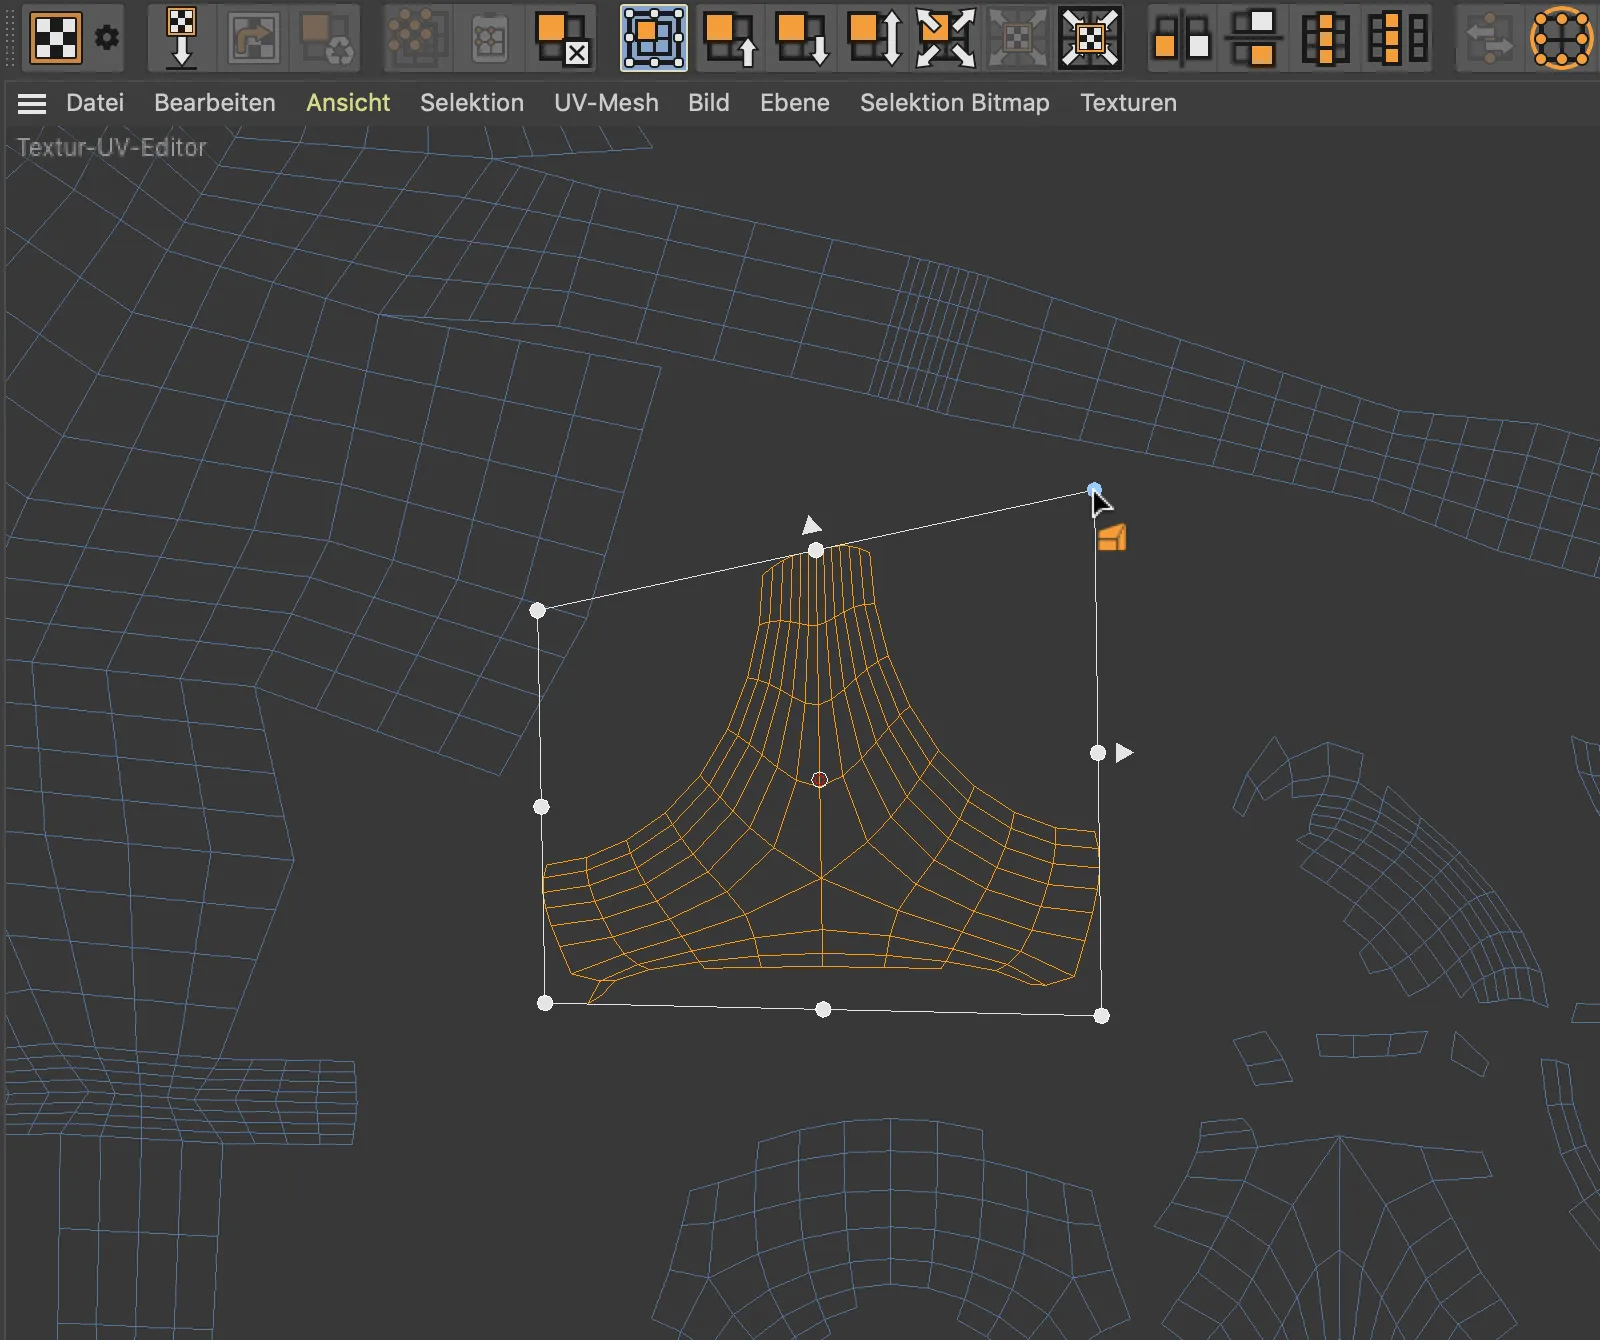
Project asset inspector
The new Project Asset Inspector replaces the Texture Manager, which was exclusively responsible for textures, and now takes care of all assets that are stored externally and are required for rendering. These can be bitmap textures, sound files, XRefs, IES light sources, substance files, etc.
The project asset inspector not only shows the status, name and path of the respective asset, but also its affiliations within the scene, for example the scene element, the layer or the take.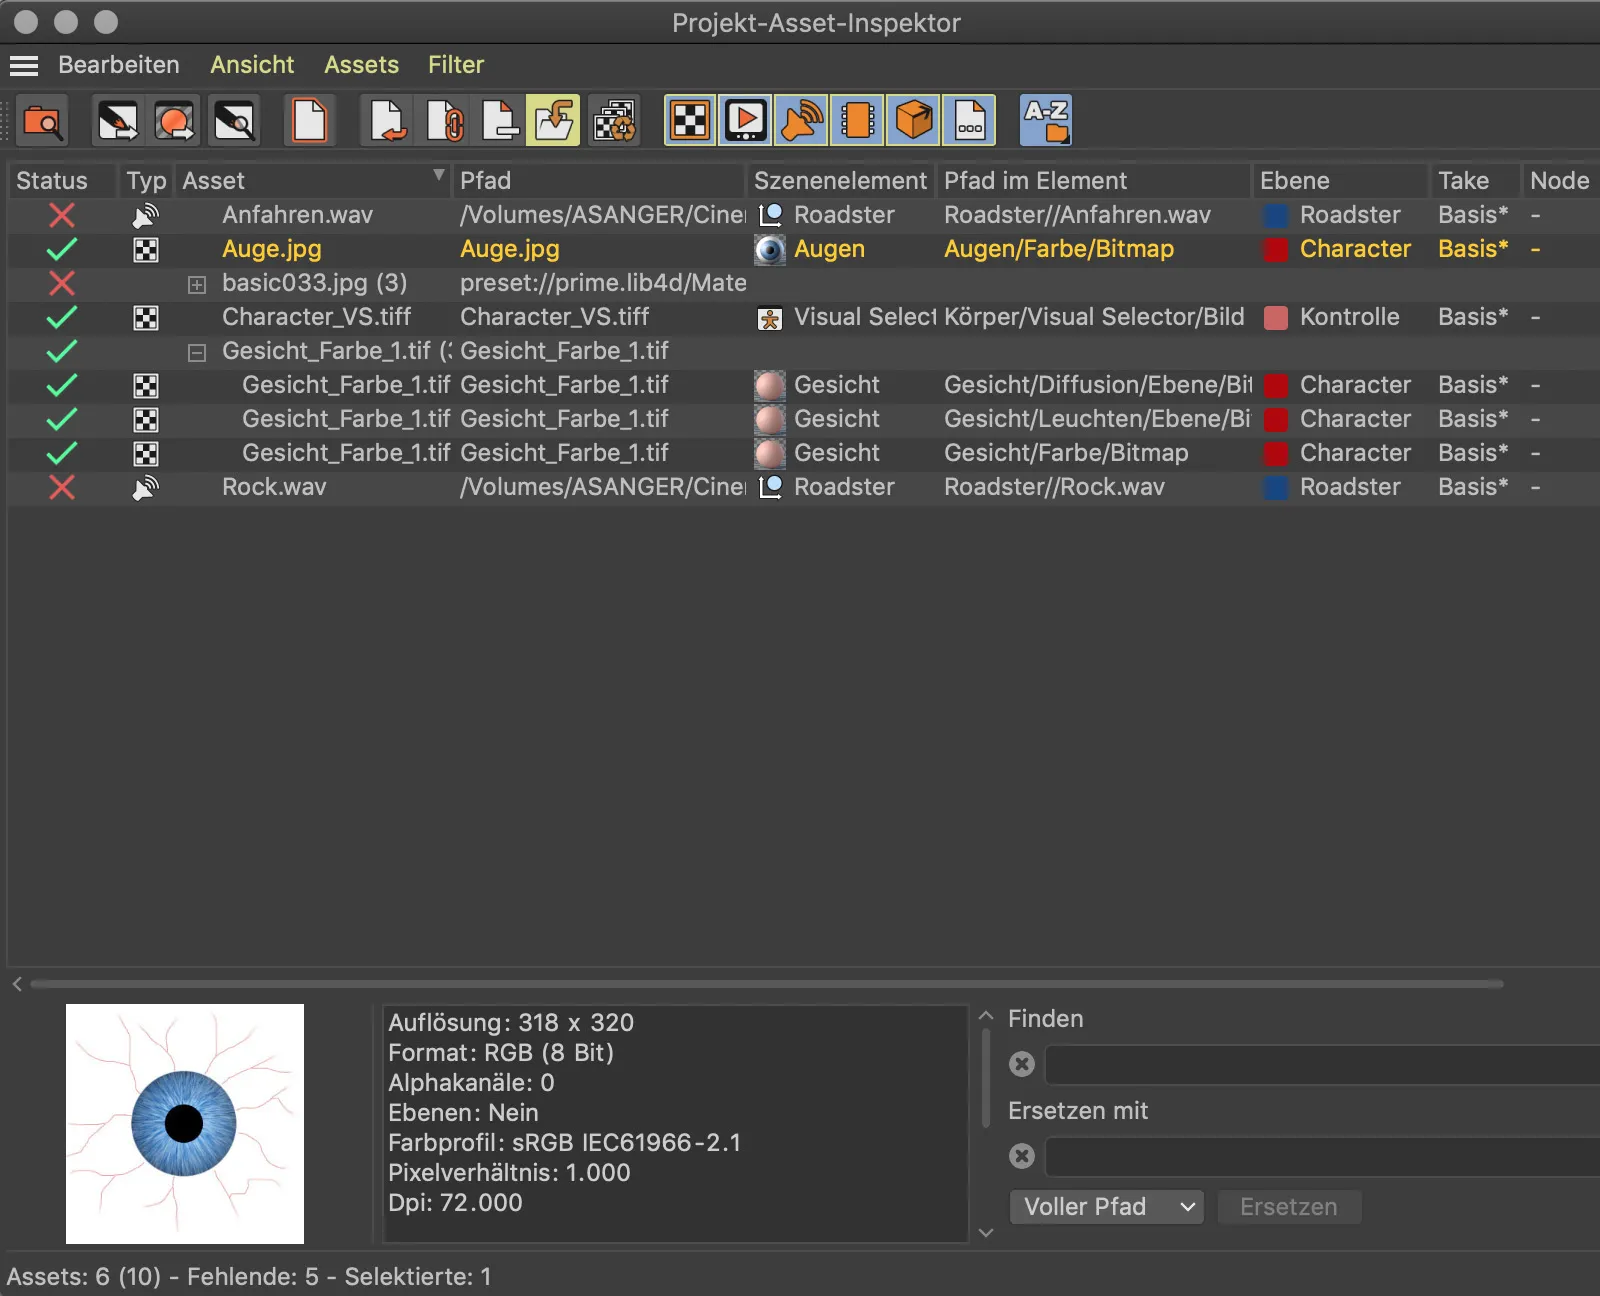
The new Merge Assets command could prove to be particularly practical. It collects all assets belonging to the respective project and saves them in the project directory. The contained file paths are created as new or relative files.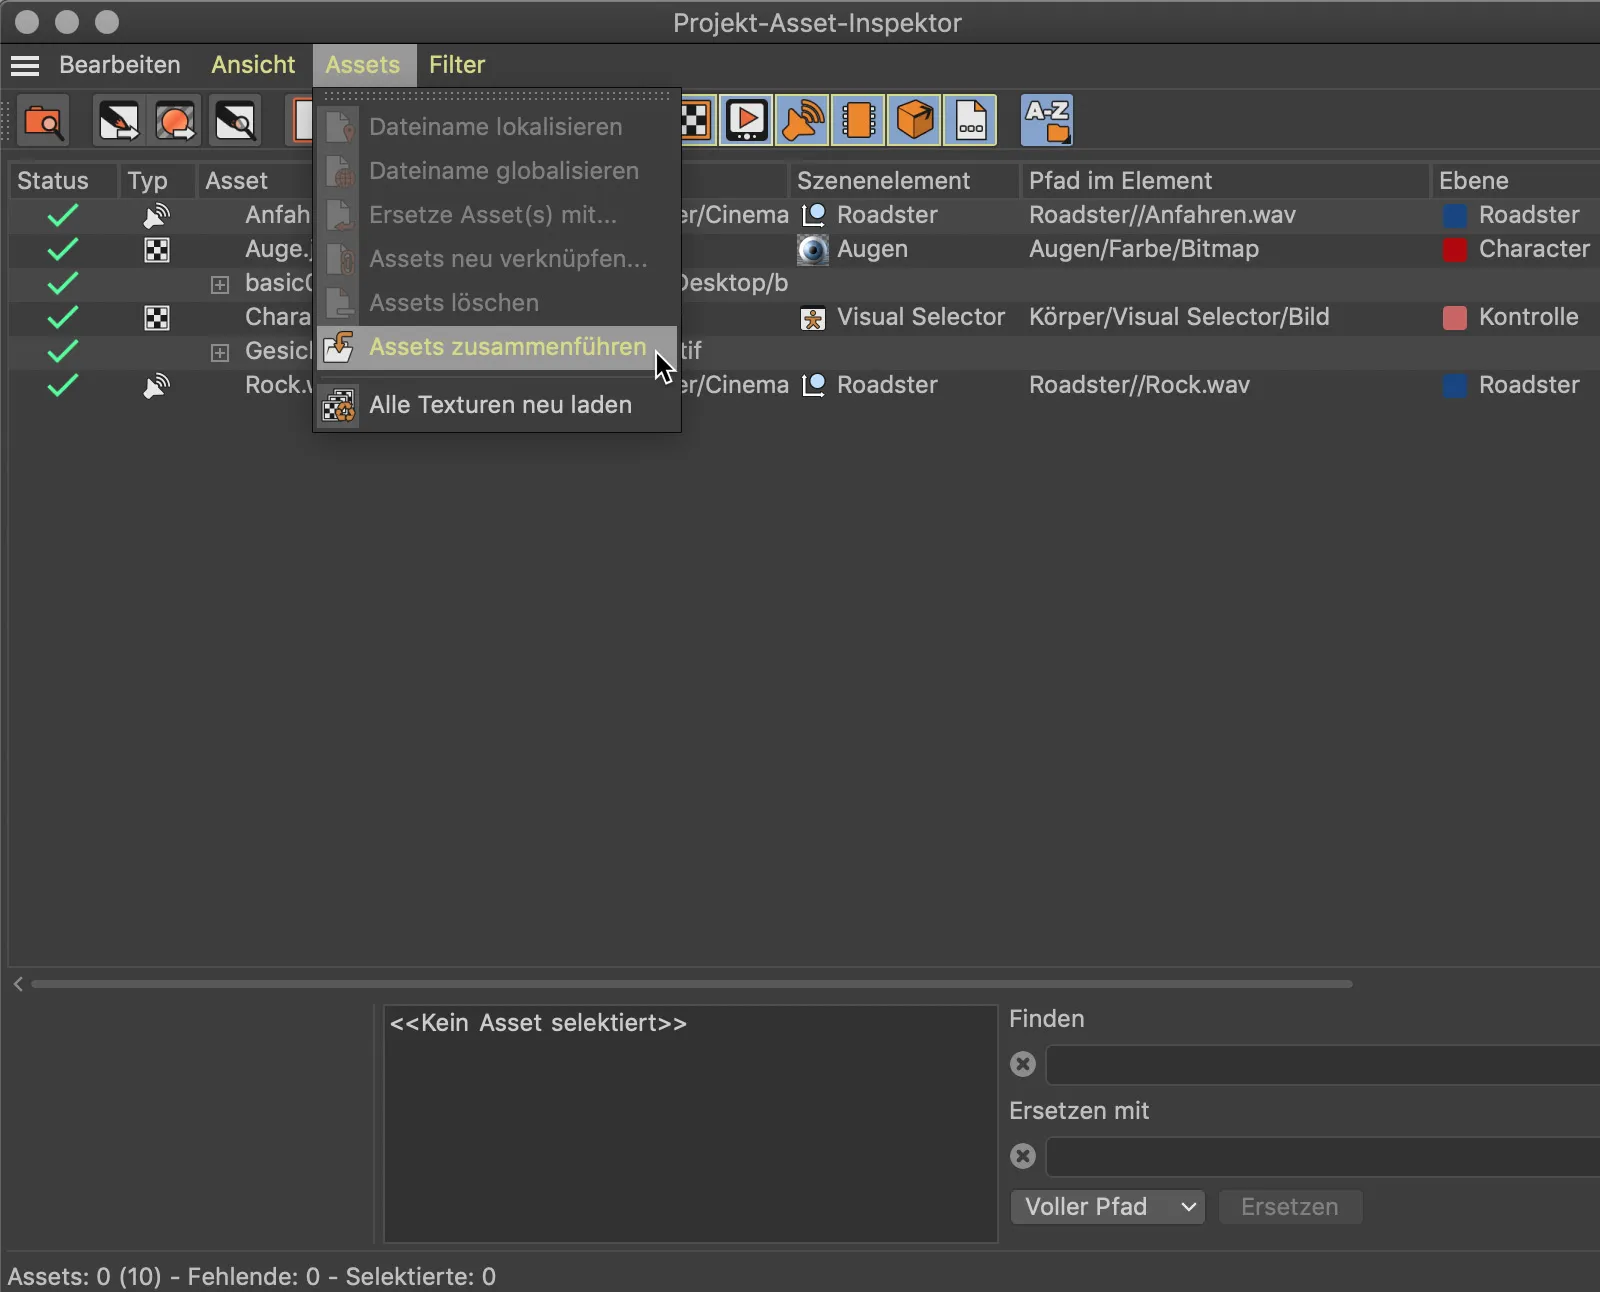
Icon settings
The last new feature I would like to mention is a few new options for customizing the object icons. Even though the object iconsare relatively small and inconspicuous, they provide welcome orientation and - as in the case of Release 21 - a little more information.
The fact that a light source produces shadows was already recognizable in earlier versions of Cinema 4D by the light source icon. What is new is that the color of the light source is also reflected in the object icon.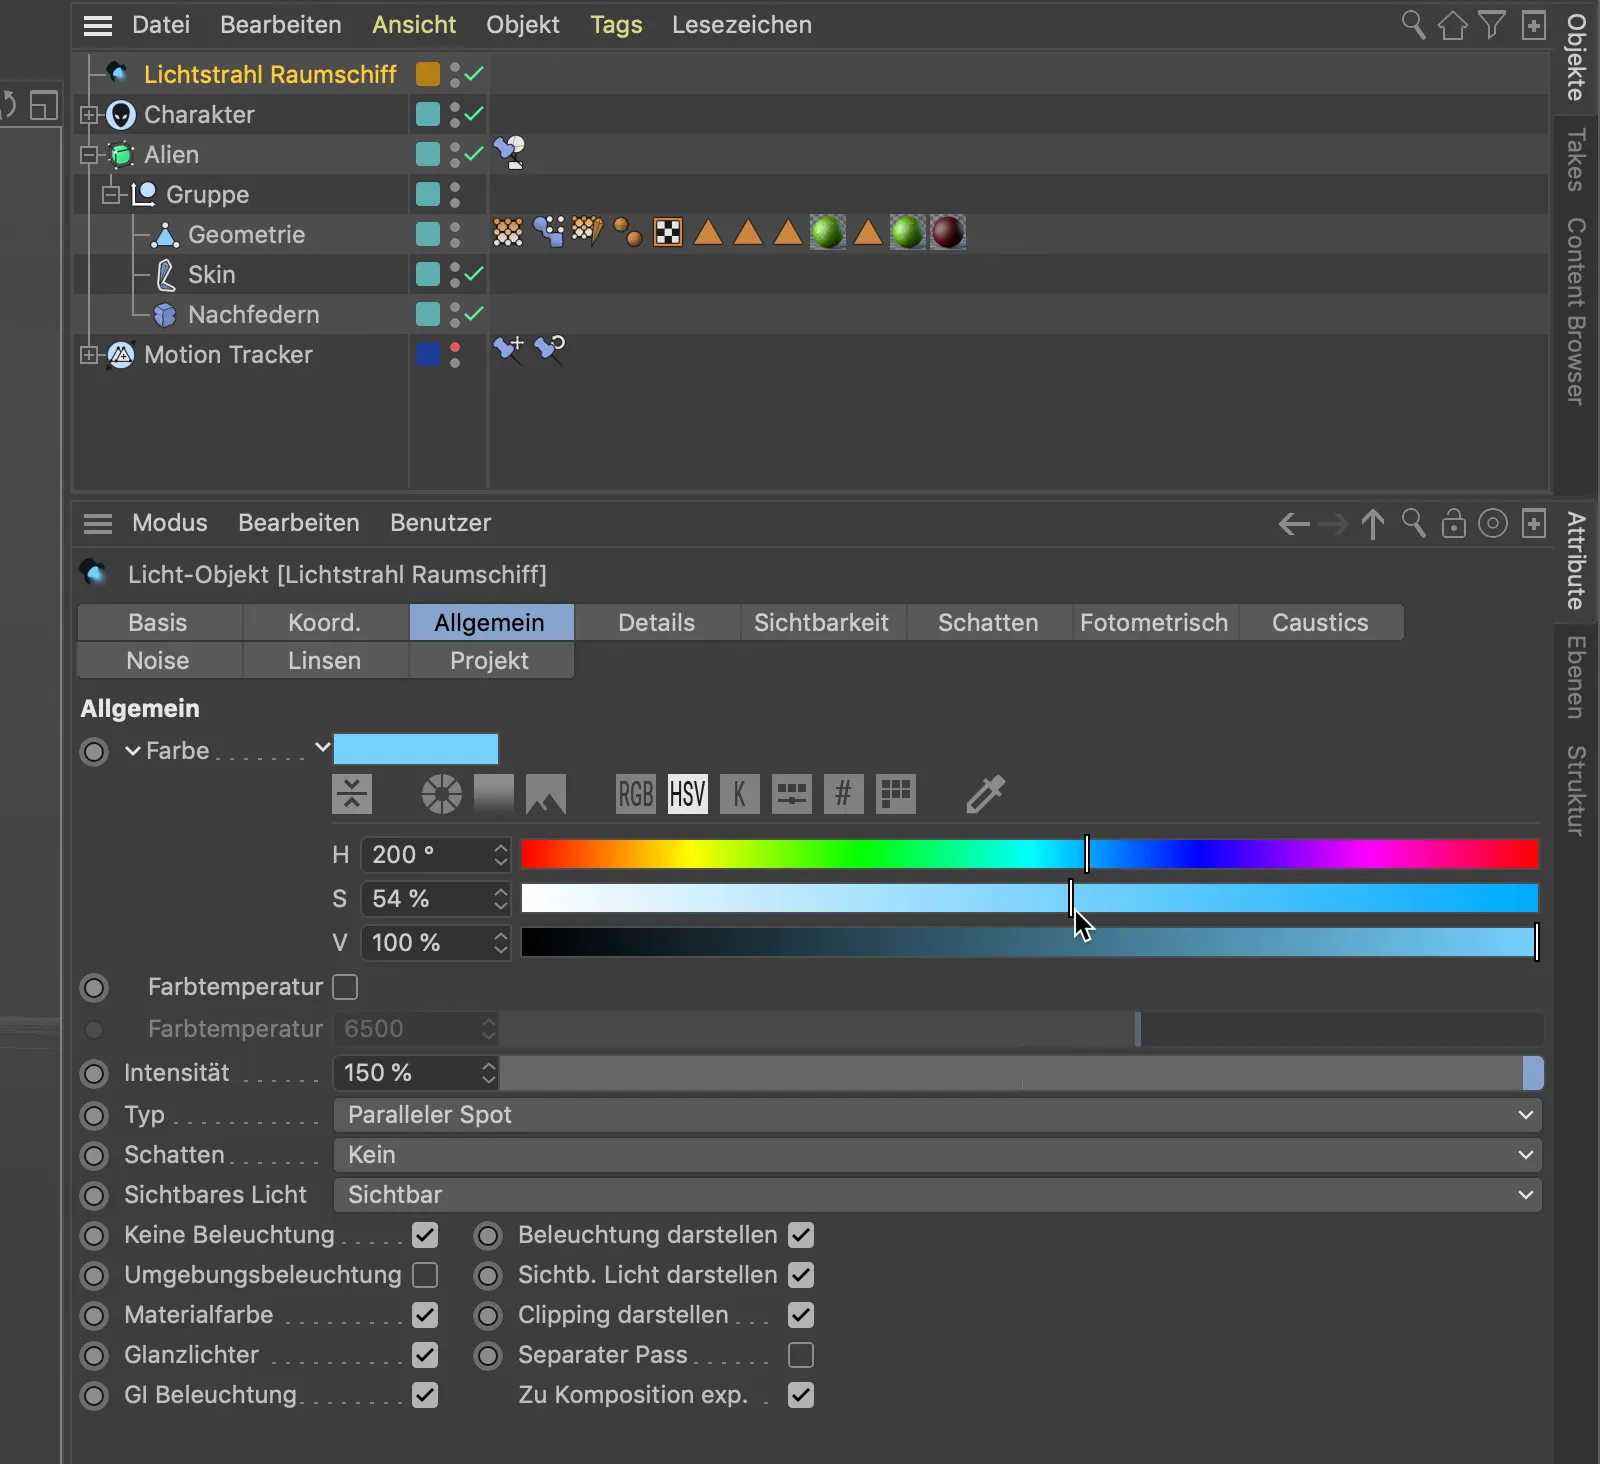
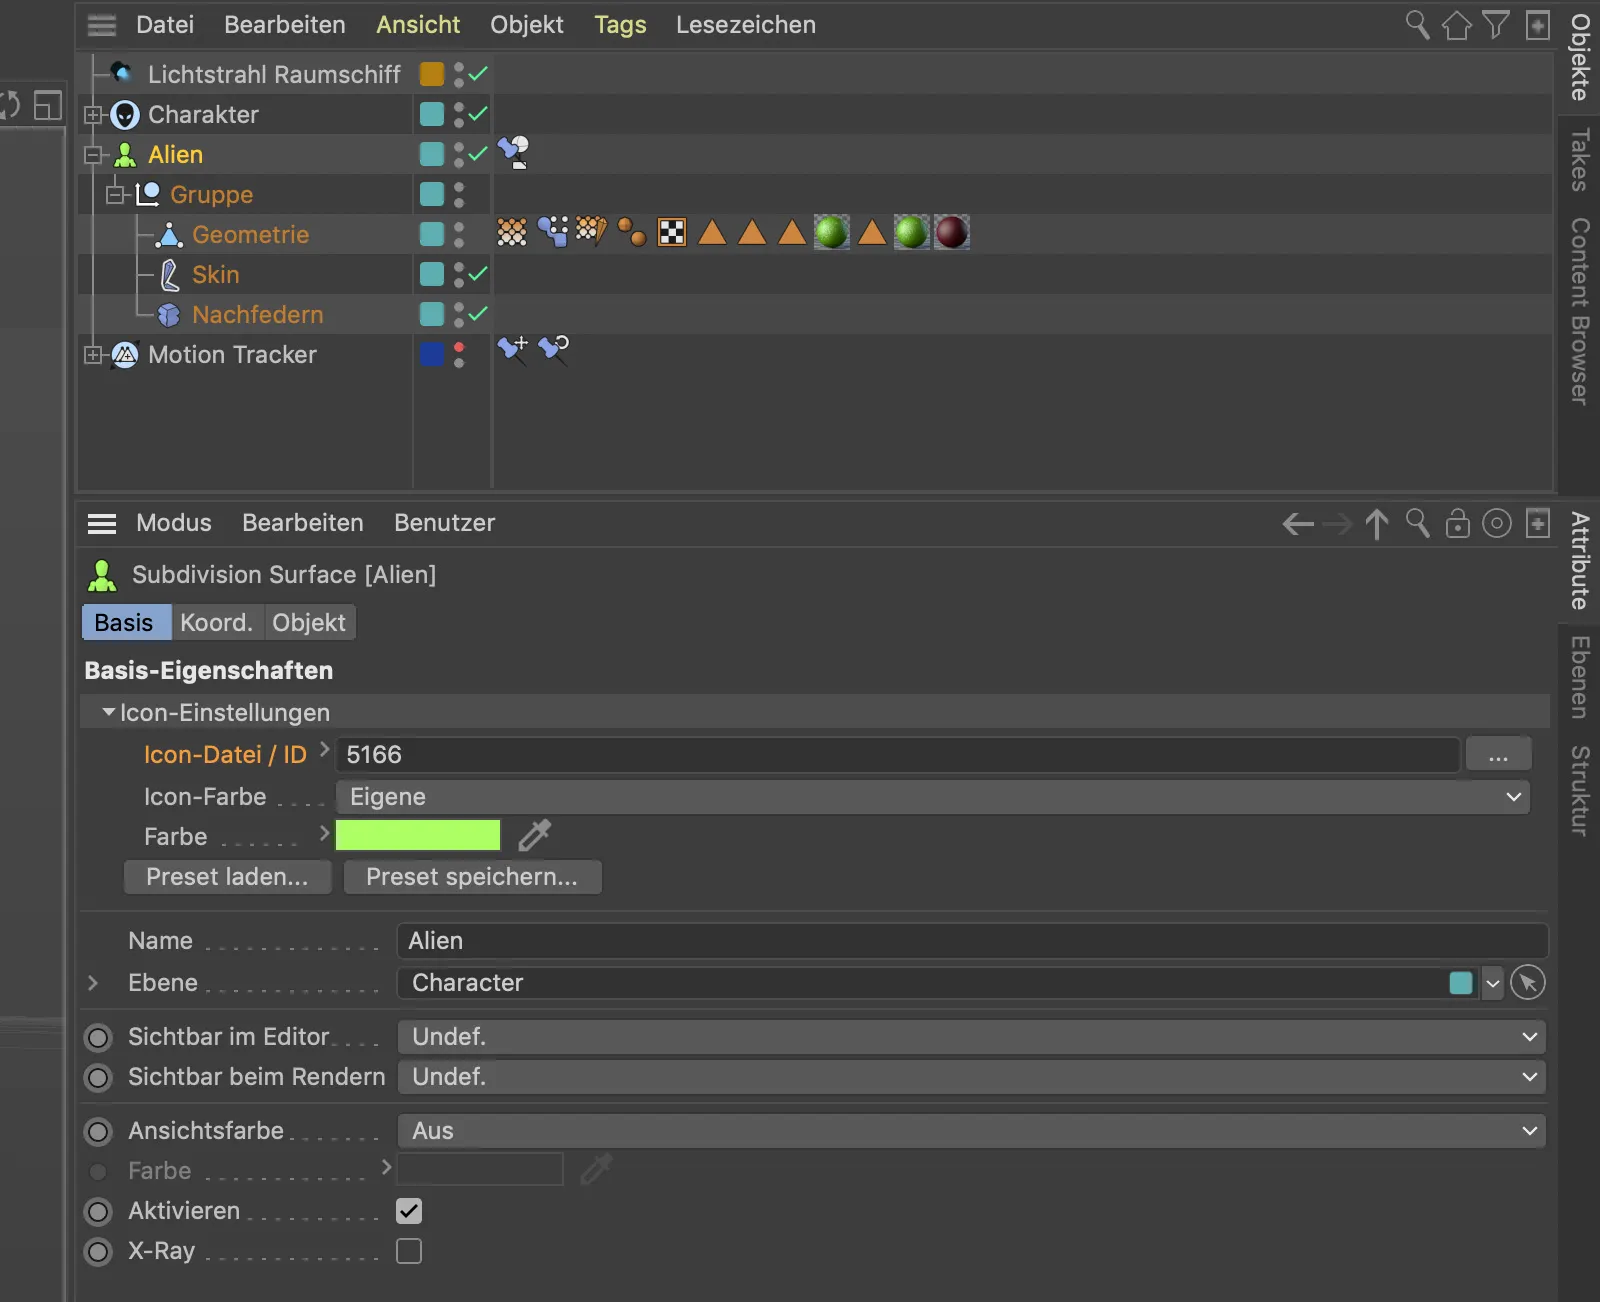
Cinema 4D Release 21 offers some new options for those who want to add different or more meaningful icons to their elements in the Object Manager. In the example shown, I would like to replace the icon of the subdivision surface cage with an icon that matches my character.
On the basic pageof the settings dialog for the subdivision surface object, you will find the Load preset... button , where Cinema 4D provides a selection of common symbols.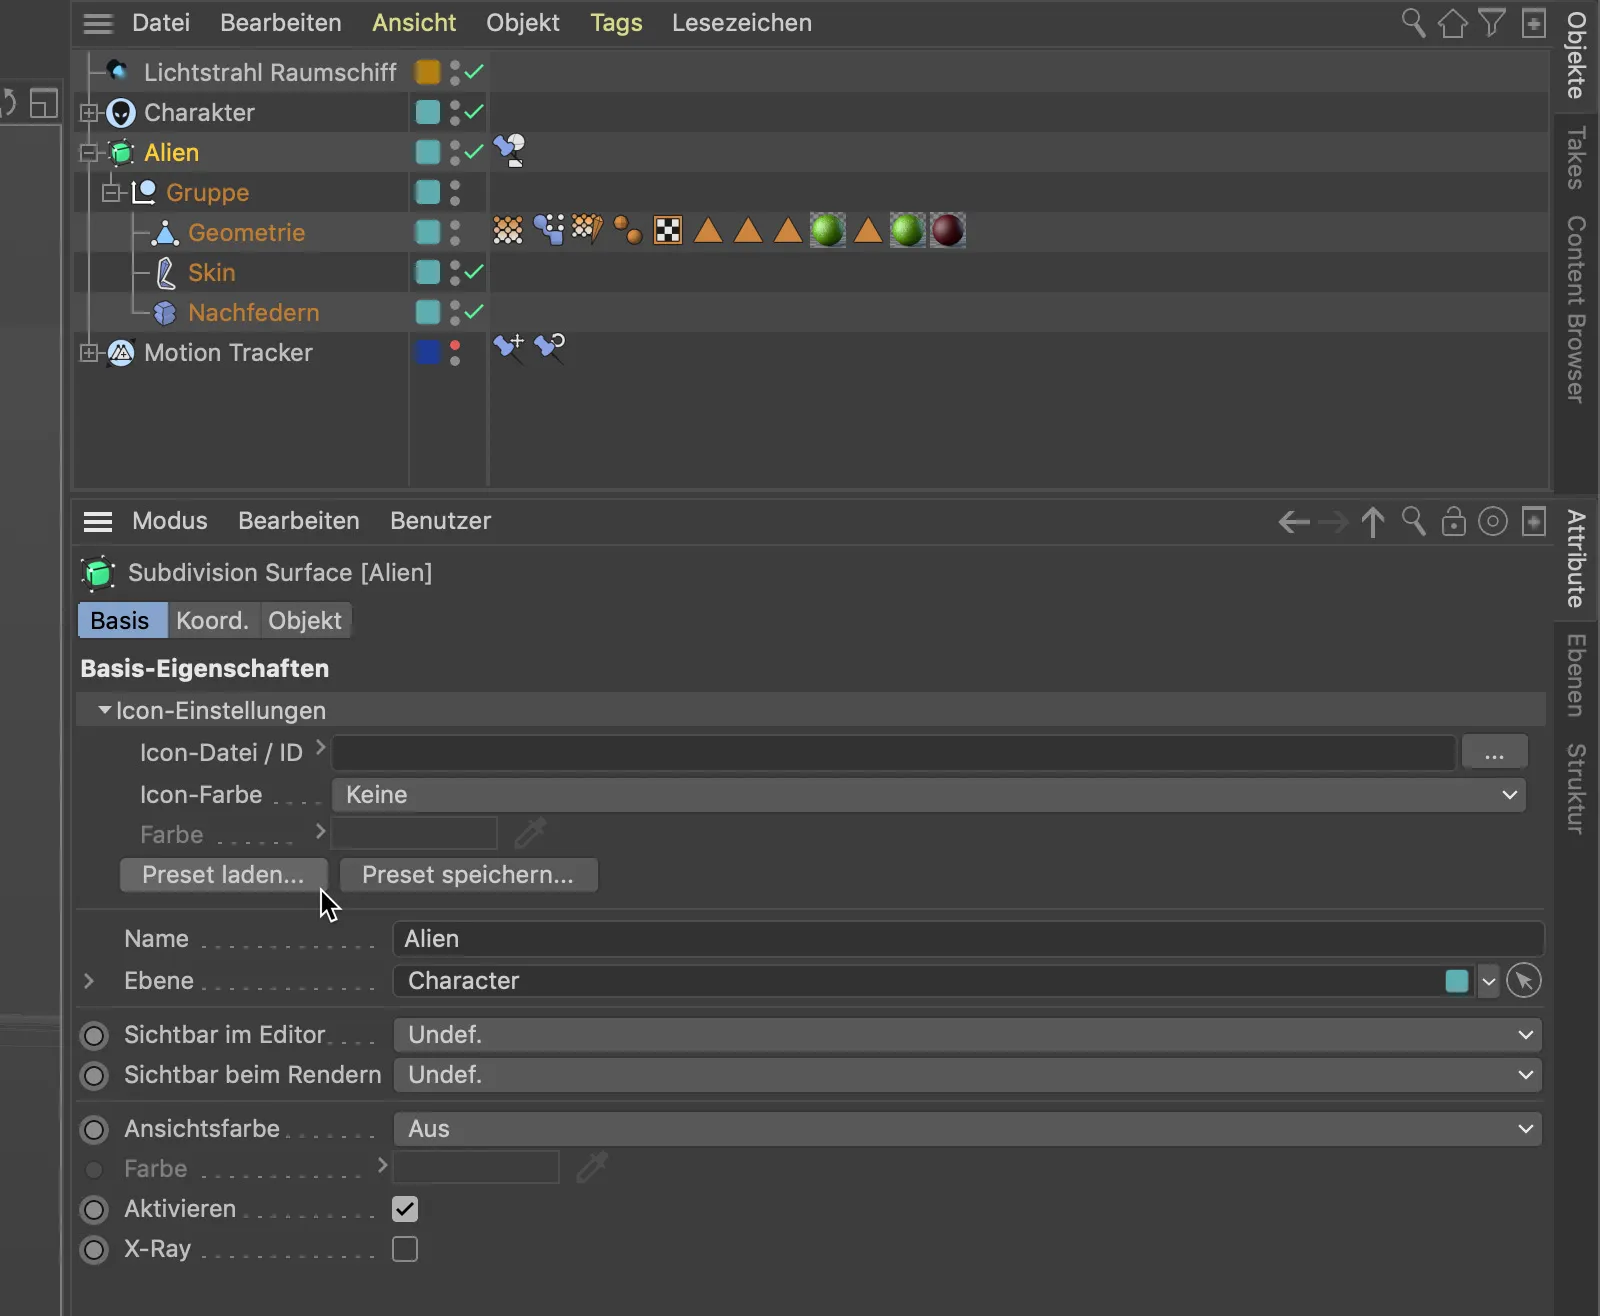
The icons contained therein should quickly provide more suitable icons for the character animation, for example, than the null object icons for the control elements that are available in most cases.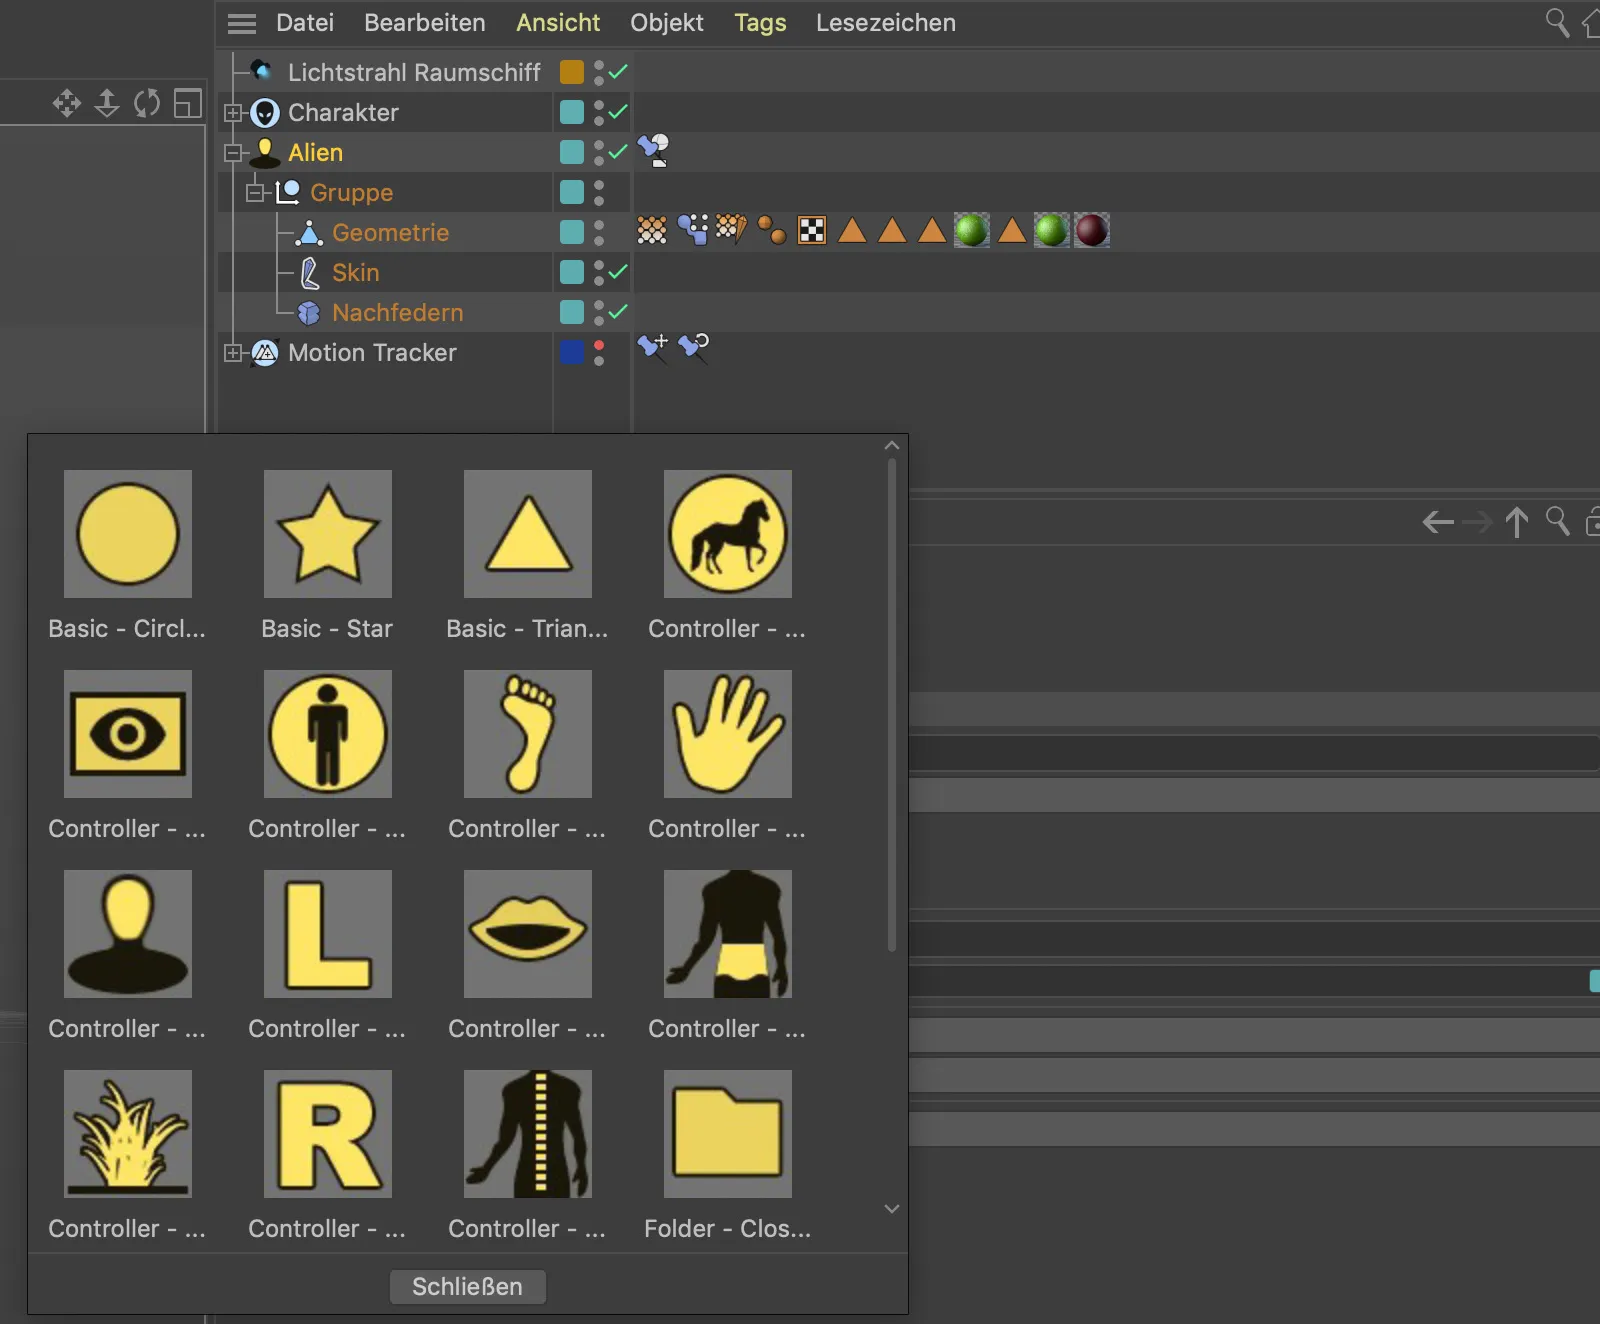
If you want to be a little more individual, use the command managerto select a suitable icon from the vast number of icons for functions and objects and memorize the corresponding ID number. By right-clicking on the ID entry, we can also copy the ID number via the context menu ...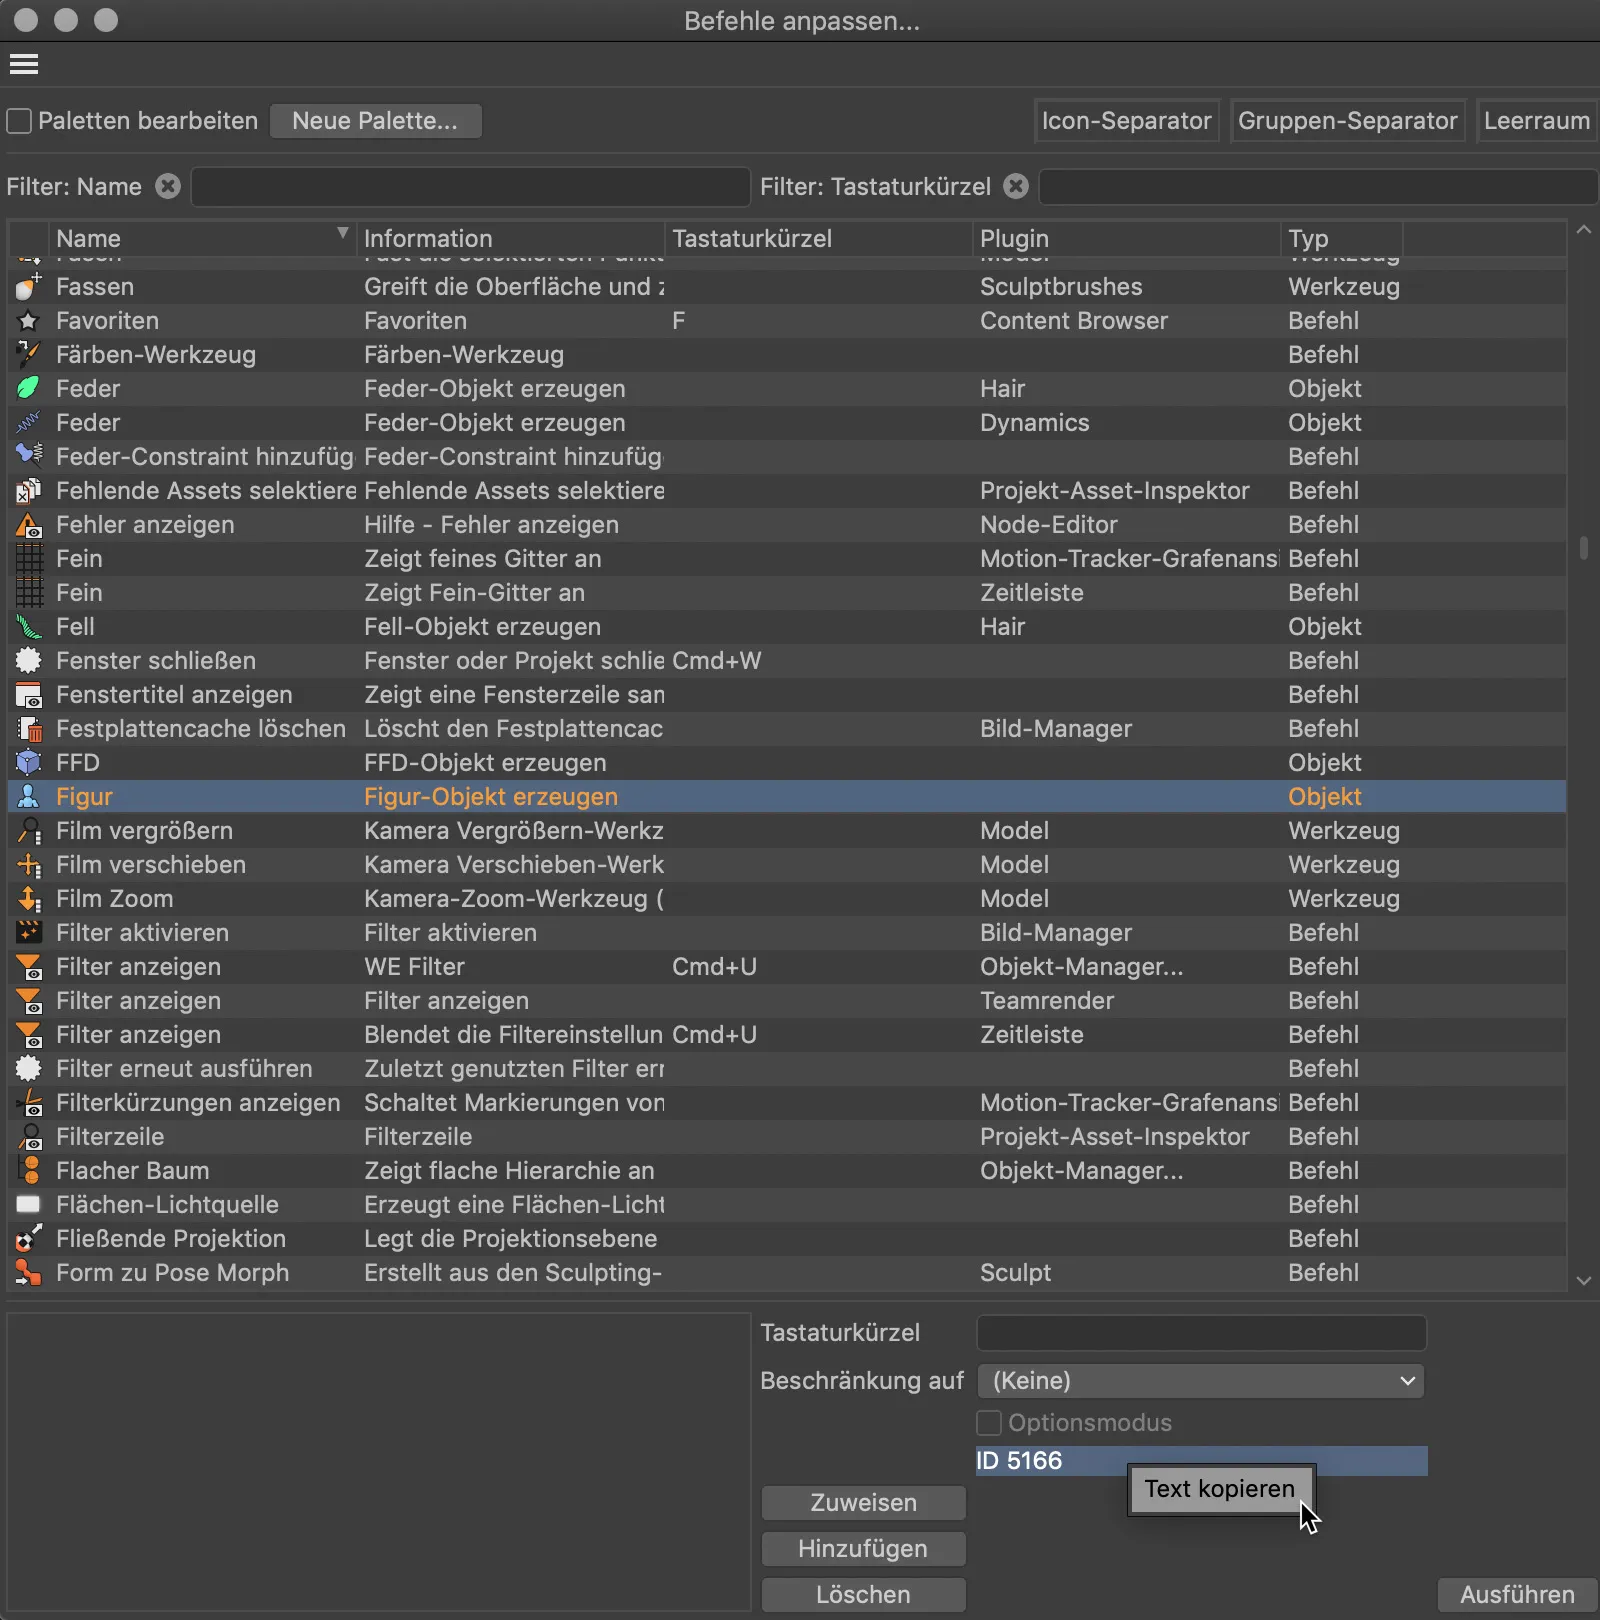
... and paste it directly into the Icon file/ID field of the object. Only the "ID" in front of the number needs to be deleted before the new icon appears. It is then given the finishing touch with its own color.