The start screen of Adobe InDesign is the central starting point to quickly work with new or existing projects. It provides you with an overview of recently used files, templates, and handy tools to facilitate your entry. In this guide, I will show you how to effectively use the start screen to start projects, explore templates, and optimize your workspace. I will also discuss the interface here. Let's get started and master the first steps in InDesign!
1. The Start Screen
When you open InDesign, you are first greeted by the start screen. This serves as a quick navigation to
• the recently used documents
• the option to create a document, a book, or a library
• helpful links to the InDesign community and the Adobe CS Live online services
• helpful links Getting Started, New Features, and Resources.
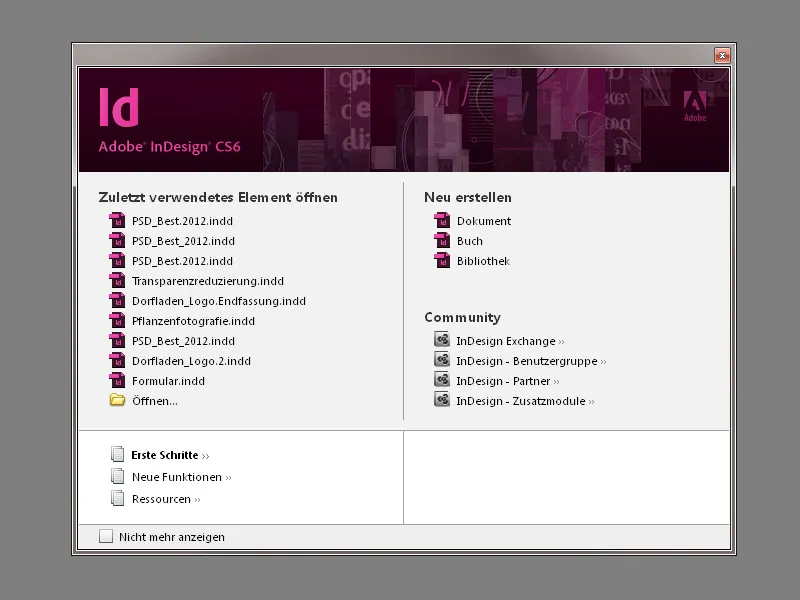
When in the midst of work, one occasionally uses the quick navigation to the recently used documents or creates a new document via the start screen after opening InDesign. The helpful links to getting started, new features of the current version, and resources where the Adobe Community Help is hidden are certainly useful. If you do not want to be greeted by the start screen every time you start, you can simply activate the Don't show again checkbox. However, the start screen remains available in the Help menu.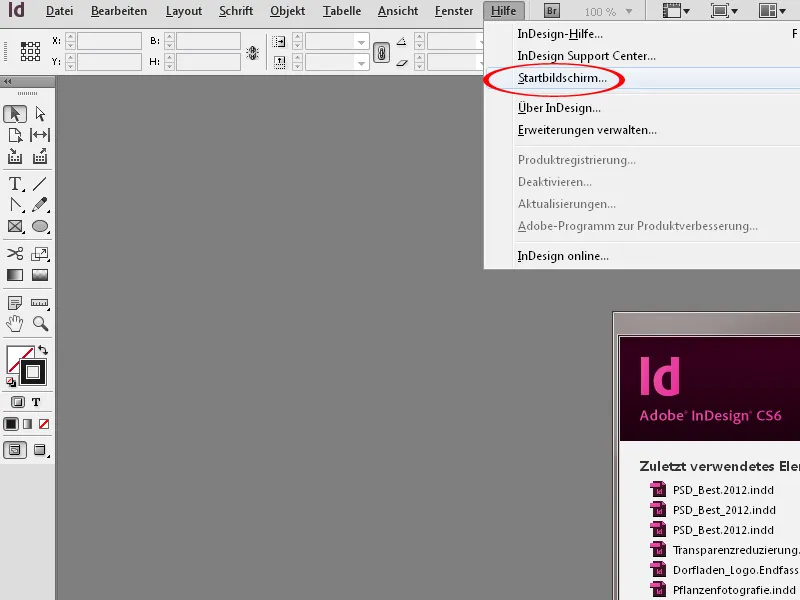
Alternative via the File Menu or Double Click
Through the File menu, you can also create or open a new document quickly and efficiently. Double-clicking in the gray area opens a file browser to open a working file.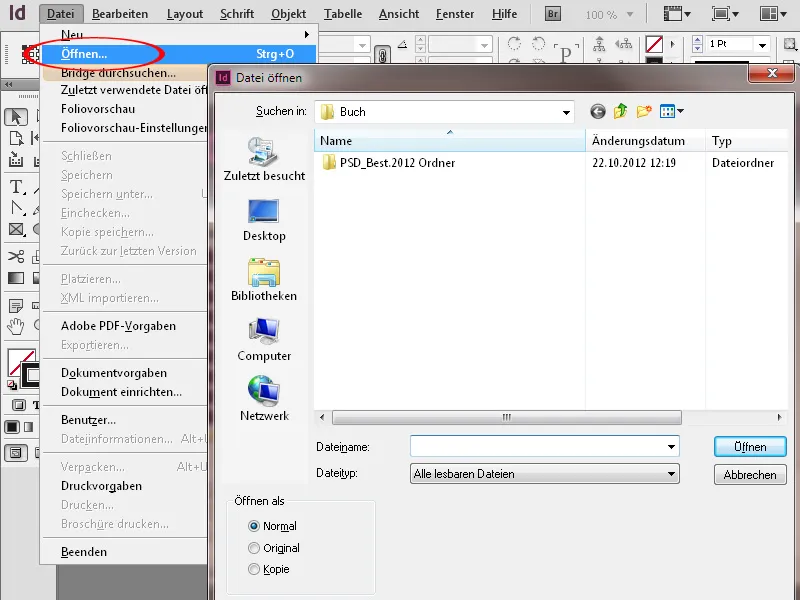
2. The Program Interface
Large screen = great fun
Working with a large screen is fun – especially in InDesign. The workspace of InDesign is designed based on the concept of a very large screen or multiple monitors. Each user should have the ability to customize and keep "their" panels needed for work open according to "their" needs.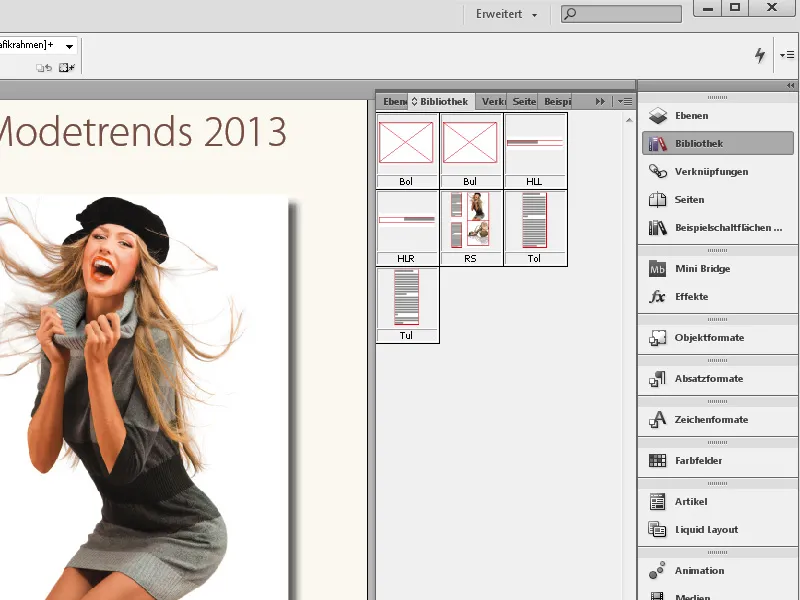
The Workspace
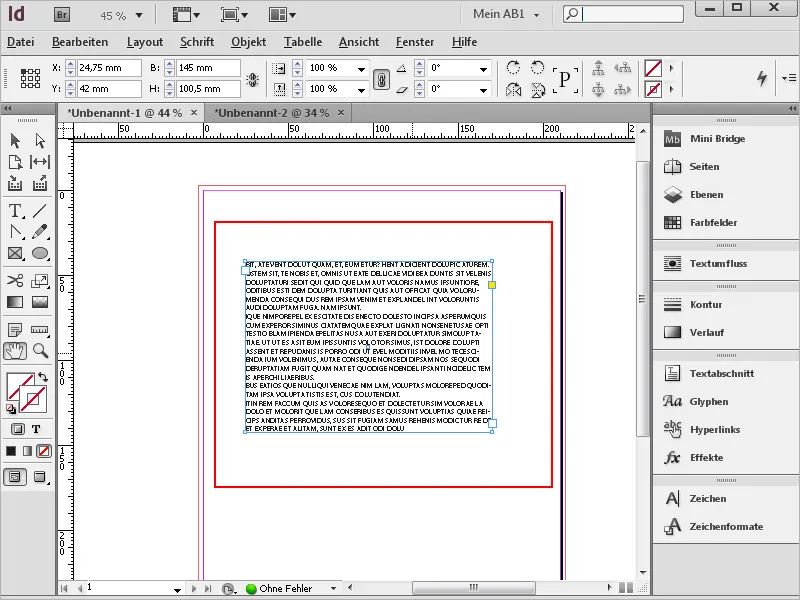
InDesign always creates new files in a document window, consisting of the toolbox panel (1) and the palettes, now called panels (2), and a white document page (3). The upper part of the interface includes the menu bar (4), the application bar (5), the dynamically adjusted control panel (6) based on the activated tool, and the document window with the tab bar (7) for quick navigation between multiple open documents through tabs.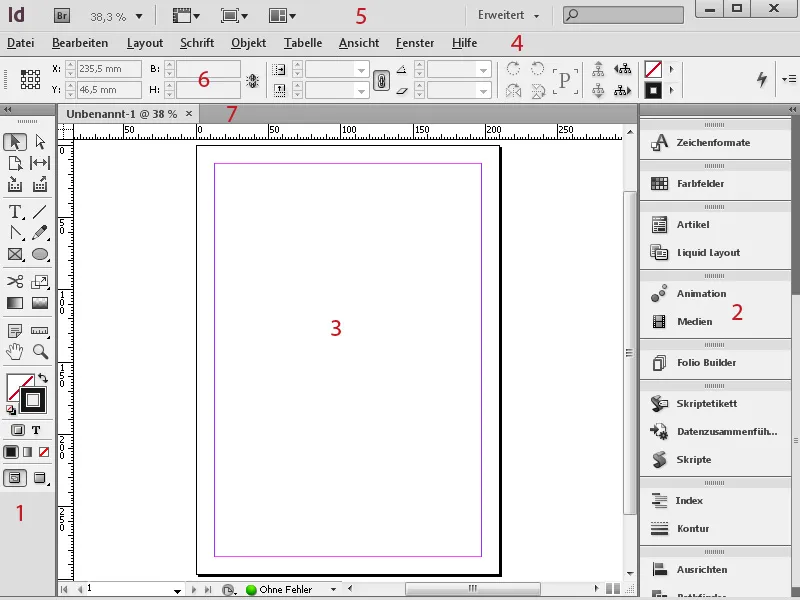
The document page is standardly bordered by a black line. If a bleed is set (7), it is indicated by a red line around my document. The space around the document page is called the pasteboard (8). The pasteboard allows for temporarily placing objects not needed in the document page, which can later be placed back onto the document page. When exporting a working file to a PDF document, only the content within the document page is included.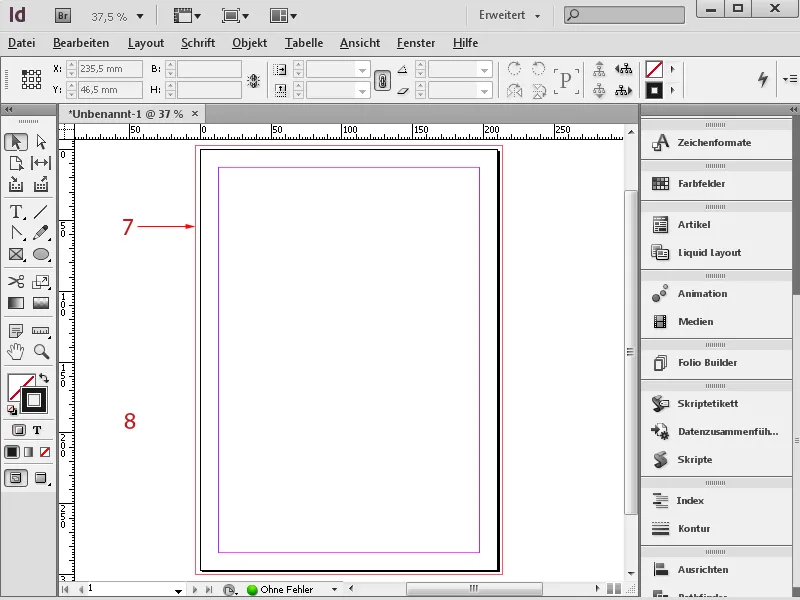
When creating a new document, the document page always includes a pink frame (9) as a default setting for margins and columns. You can adjust the frame at the beginning when creating the new document or during layouting via the Layout>Margins and Columns menu.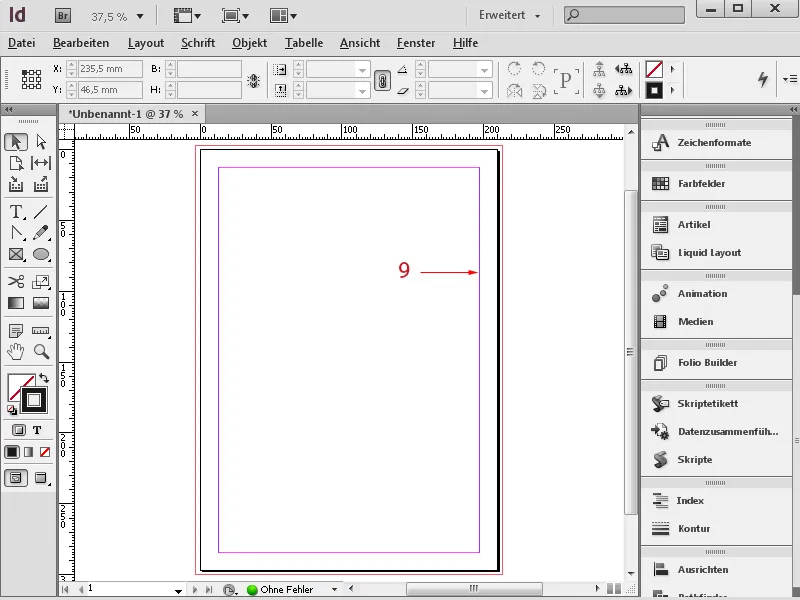
Tip: If you want to work on a new layout for a DVD cover in InDesign, it's recommended to hide the columns by pressing (Ctrl+Ö) or by setting them to 0 via the Layout>Margins and Columns menu. This way, the frame subtly influences you, even if only minimally, unconsciously adhering to the specified column sizes.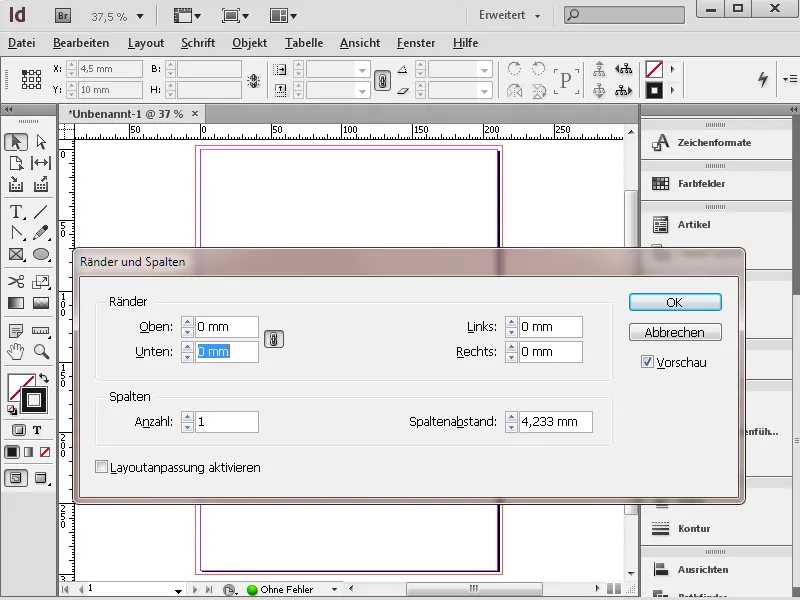
The Menu Bar and Menus
The menu bar follows a navigation-based operating concept familiar from common image editing, word processing programs, etc., and requires no further explanation.
Within the menu, the right side already contains keyboard shortcuts assigned by default to the listed commands. Some menu items also have submenus.
If you have objects selected in the document, the menu reacts dynamically by graying out commands that cannot be executed. For example, you cannot execute the Group command when only one object is selected.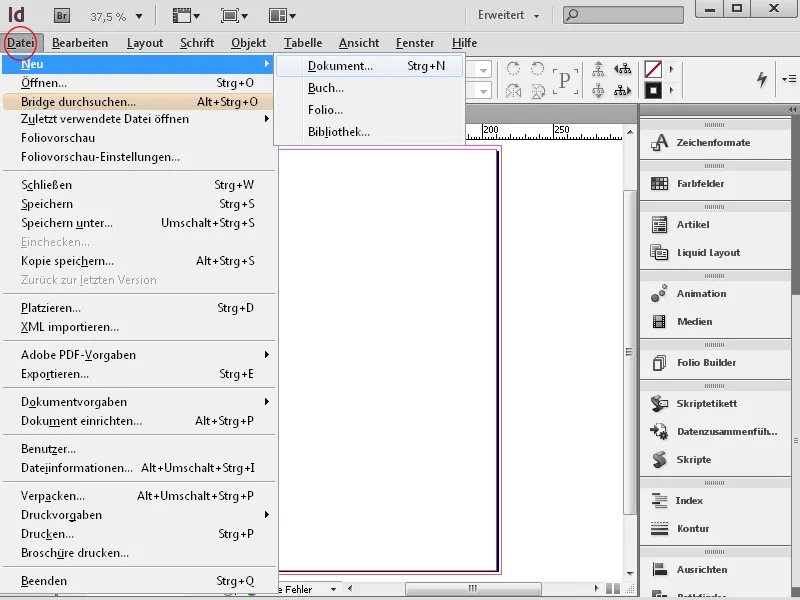
The context menus are similarly dynamic, popping up with a right-click directly on the highlighted object or text. Here you will find a selection of context-specific commands that allow you to edit the object/text.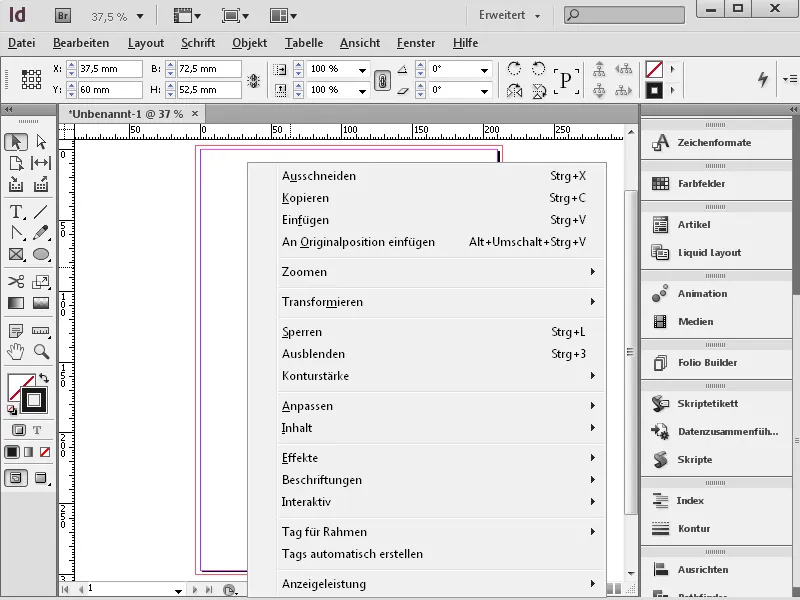
The commands in the menus can be customized to your needs via the Edit>Menus menu. Commands can be highlighted in color. For example, it makes sense to highlight the main commands for someone else - such as an intern who does not frequently use InDesign - for their work. Unused commands can be hidden. For instance, if you always print brochures through Acrobat because the printing options in Acrobat are simply more functional, you can hide this command in the File menu.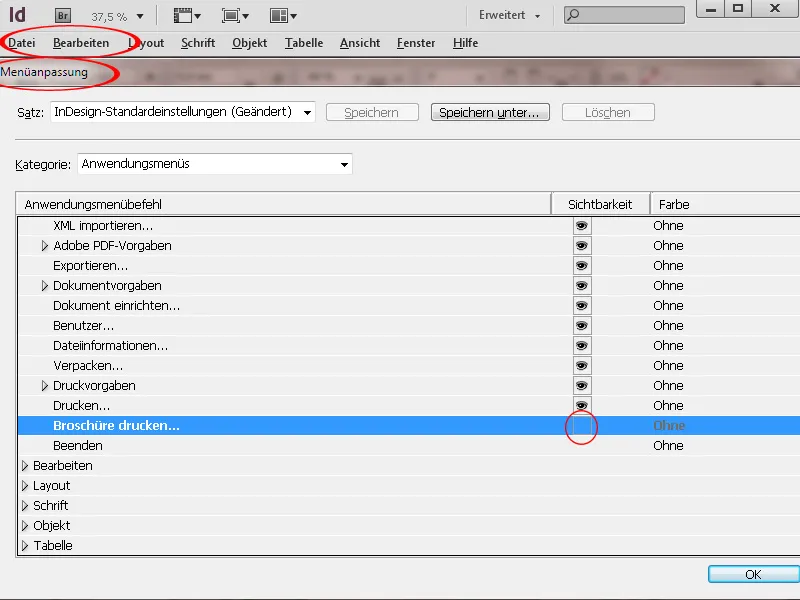
The Application Bar
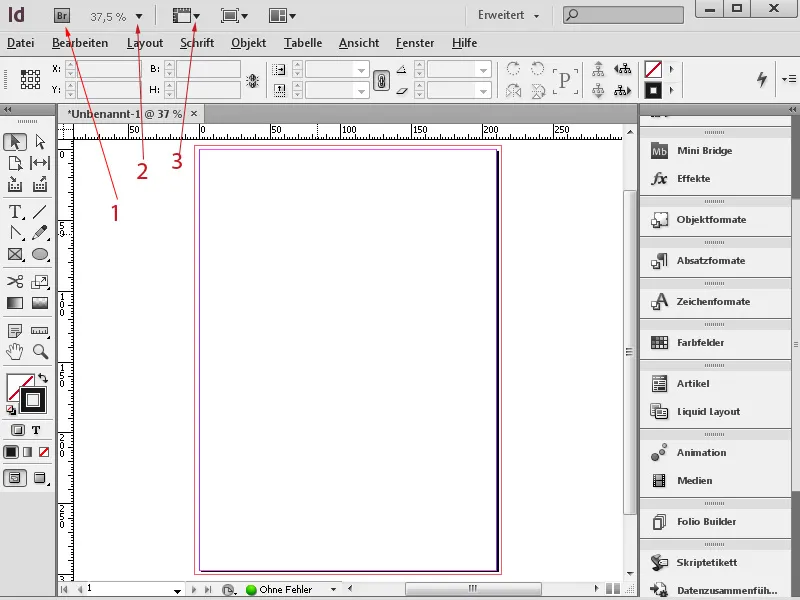
The application bar contains the following control buttons:
- Bridge Icon: Clicking on the Bridge Icon opens the Bridge. You can open the Mini Bridge panel with Shift+Click.
- Zoom Factor: In the drop-down menu, you can choose from various preset zoom levels. Numerical input is also possible.
- Display Options: This includes view aids such as Frame Edges, Rulers, Guides, Smart Guides, Baseline Grid, and Hidden Characters. Since the Display Options are not comprehensive in this list, it is recommended to control the View Options directly via shortcuts. In the View menu, you will find the other display options that are important for working with InDesign in addition to the mentioned ones.
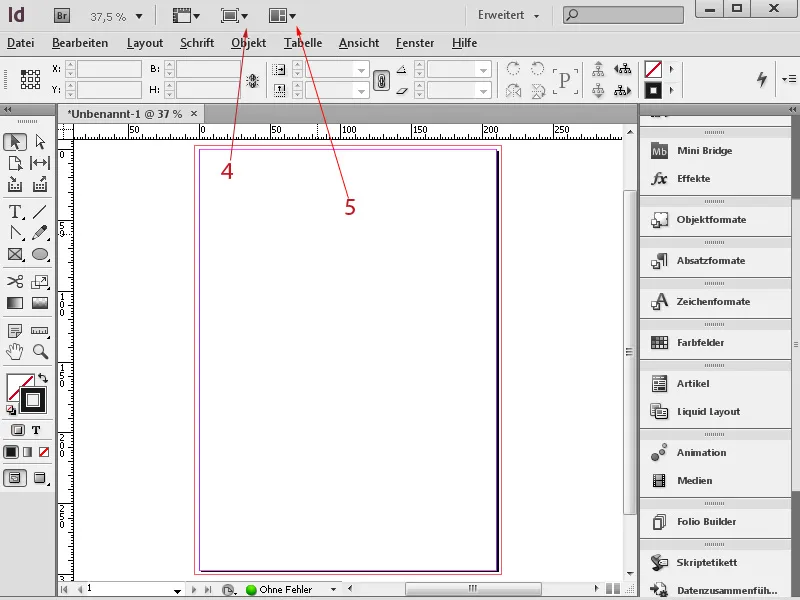
- Screen Mode: The drop-down menu offers different screen modes for your document. In essence, only Normal and Preview are important. The Normal option displays the familiar work mode with the set display aids like guides, frame edges, etc. Preview provides a view of the document without any display aids. You can switch between the two using the Tool Panel or the W shortcut.
- Document Arrangement: In this drop-down menu, you can choose how the arrangement of multiple open documents should be done.
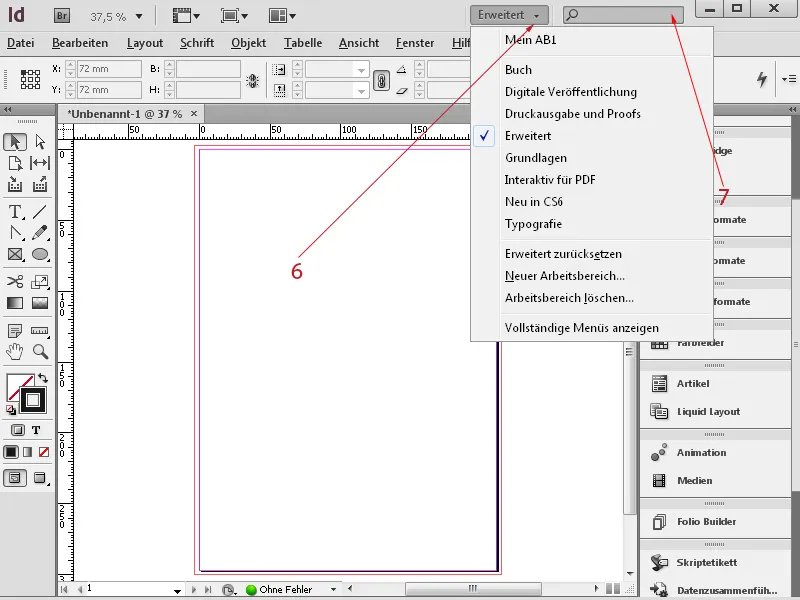
- Workspace: In the Workspace Menu, you can choose from various preset workspaces. These are set up based on the content work. For instance, if the focus is on placing and editing text, the Typography workspace is available. It is useful to save your own workspaces that specifically cover your panel needs.
- Input Field: Here you can directly enter search terms for Adobe Community Help.
The Control Panel
The Control Panel (8) is a multifunctional all-rounder. When an object, table, or text is activated, it displays specific information with the option to make setting changes. The contents cover setting options from various panels. The specific content of the Control Panel changes depending on what is currently active. In this example, text is selected, so the text-specific setting options are displayed in the Control Panel.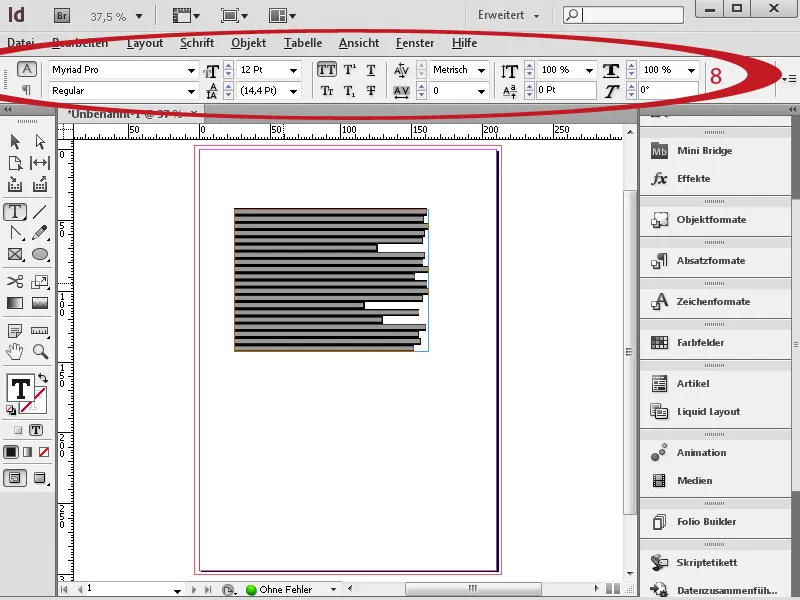
Functions get hidden in the Control Panel if no object is selected in the document window or on the pasteboard. You can navigate from one input field to the next with the Tab key. Pressing Shift+Tab will take you back. You can numerically change values in input fields. Alternatively, you can use the small arrows on the input fields to increase or decrease values. Pressing the Shift key while doing so changes the values in increments of 10. This also works if you use the cursor keys of your keyboard to adjust input values.
In input fields, you have the option to perform mathematical operations. To do this, enter the operators +, -, *, / and the numbers in the input fields. When calculating additions and subtractions, you can also work with different units of measurement. These must be specified by abbreviations such as mm, pt, px, etc.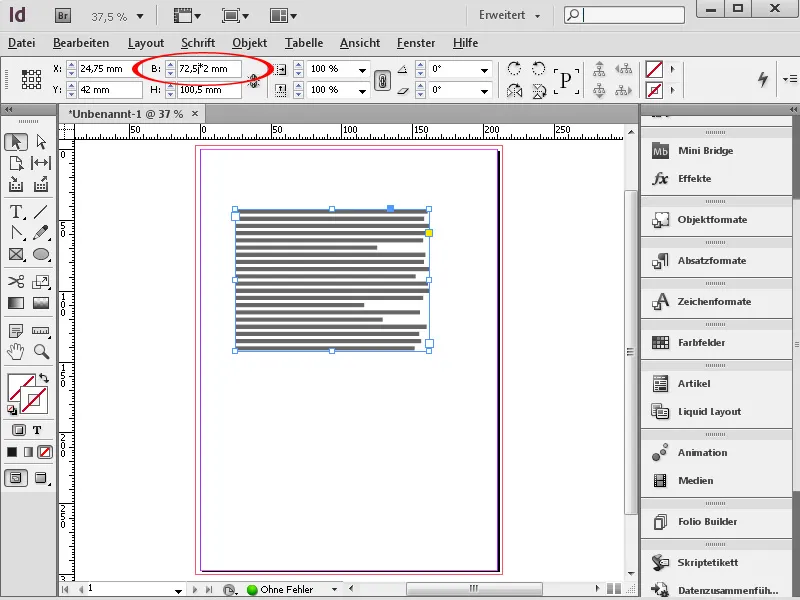
Especially when working with smaller monitors and on-demand tasks, it is advisable to customize the Control Panel according to your preferences. You can do this through the customization drop-down menu on the right in the Control-Panel. If there are some elements you do not need in your work, you can easily hide them. This is particularly useful, for example, if you have editors or proofreaders who are solely responsible for text tasks. In cases of tightly defined tasks, it is advisable to hide object-related adjustment options in the Control Panel.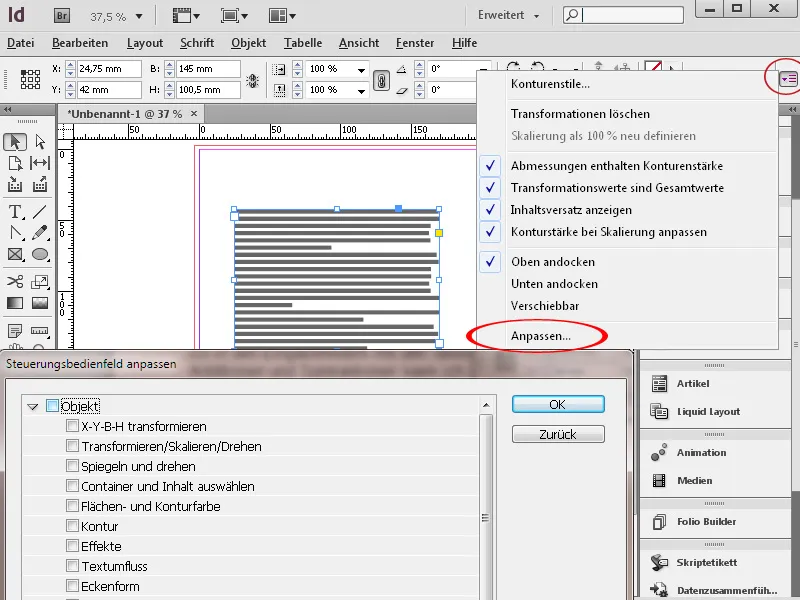
The Document Window Tab Bar
In the Tab Bar, the currently open documents are listed. You can switch between documents using the shortcut Ctrl+Tab. This works even if the documents are not stored in the tab bar but a different document arrangement was chosen through the arrangement menu.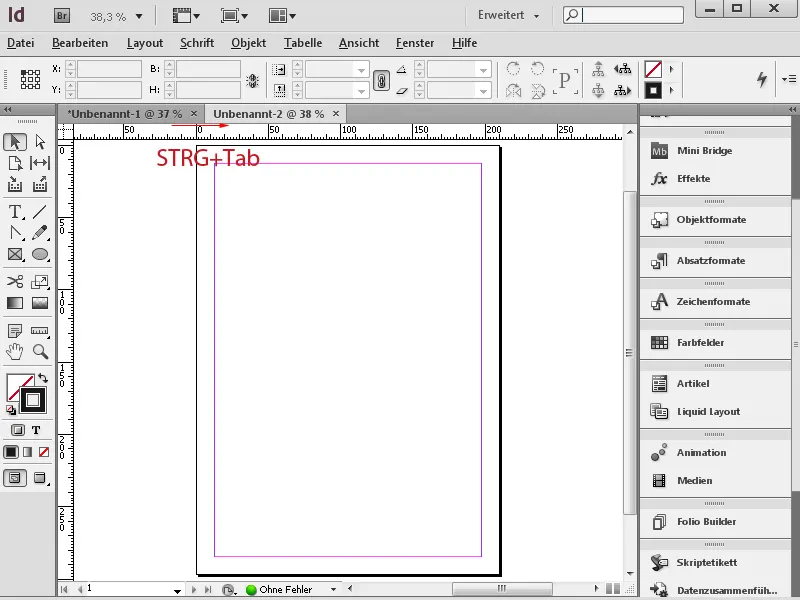
The Status Bar
At the bottom of the document you will find the status bar (11). The status bar contains:
• a page navigation for browsing through the document
• a preflight preview with real-time error display
• a bar for horizontal scrolling.
The advantage of the status bar is that you can navigate between pages and master templates without having to access the page panel separately. However, for general document browsing, the mouse wheel may be a bit more intuitive. By holding down the Shift key, you can cover a lot of ground with the mouse wheel as well. There are also some shortcuts available for navigation, which will be discussed later.
The preflight preview in particular is helpful because it immediately displays overset text/errors in embedded images, etc. in real time while editing in the document.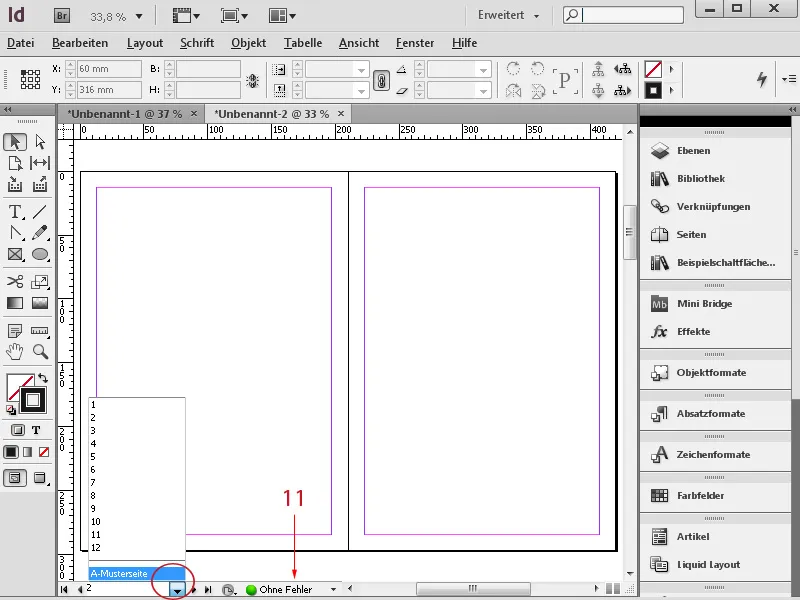
The Tool Panel
In the tool panel you will find all the tools that are important for layout editing. The specific function of each tool will be extensively explained in further tutorials.
You can set up the tool panel as a single-column or double-column bar by clicking on the double triangle in the panel header. You can also display it vertically or horizontally. To access hidden tools, simply click and hold on a tool or activate them directly via a shortcut.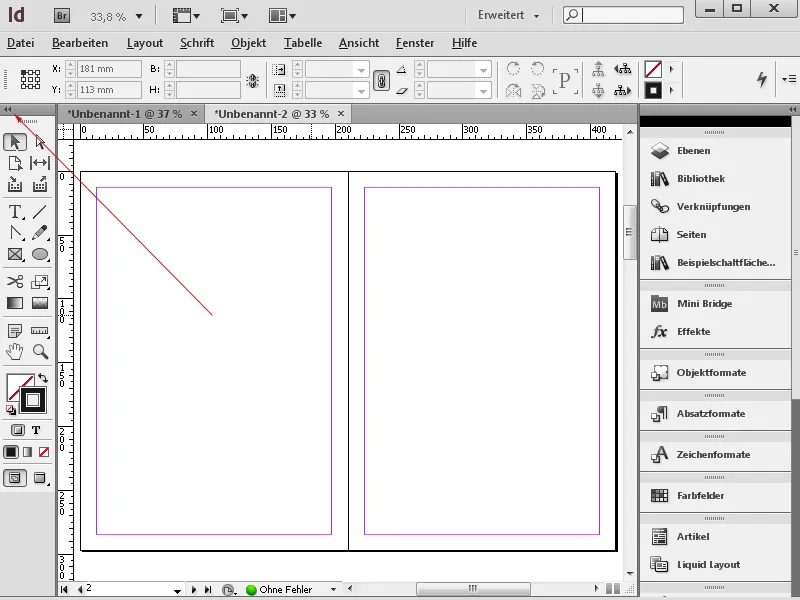
3. Handling of Panels
In addition to the panels described above, there are additional panels located at the right edge of the document and in the Window menu that serve specific functions and customization options for layouting.
Panels can generally be dragged out of the palettes with the left mouse button pressed, moved around on the layout sheet, and docked to document pages. When moving them, it is possible for floating panels to overlap each other.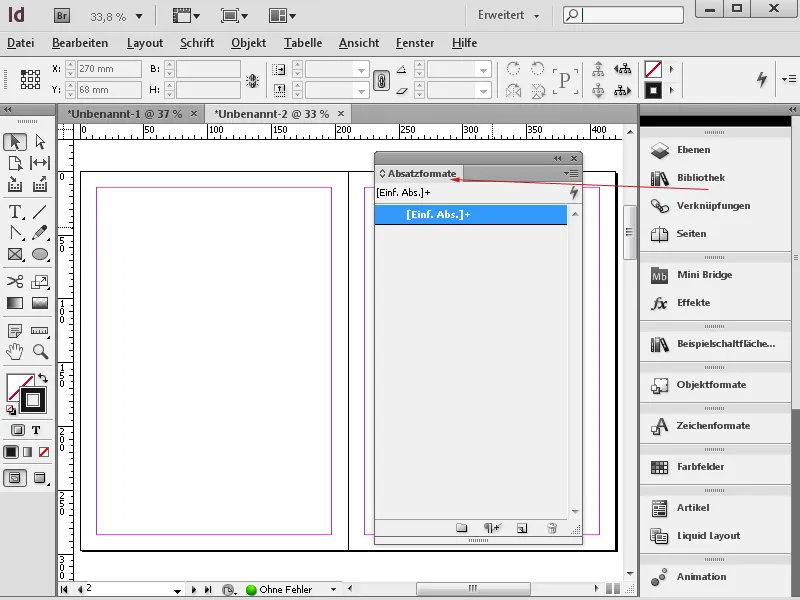
A panel usually has options that can activate settings not displayed. You access the context menu in the top right corner via the small icon with the triangle and three straight lines.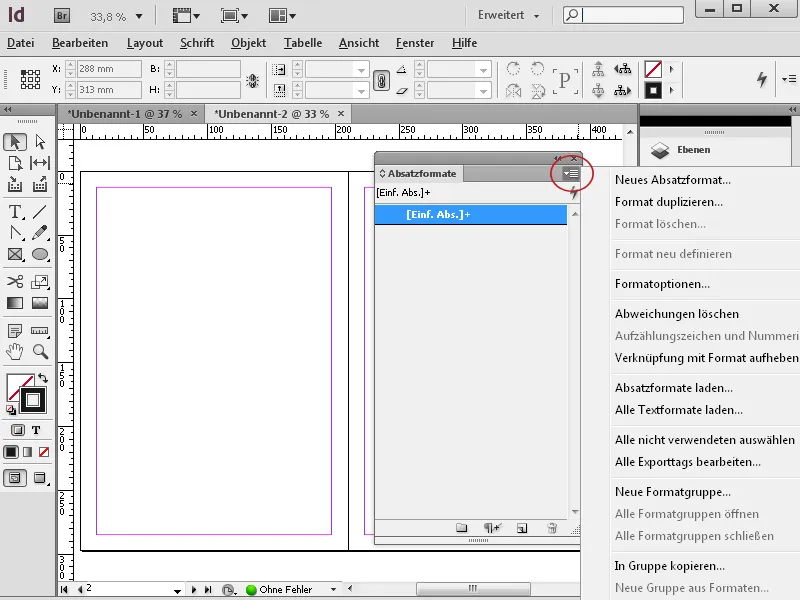
Panels can be stacked with other panels. Usually, this is the standard view of panels at the right edge of the document. There, you also have the option to set up multiple columns of docked panels.
To save space, it is useful to minimize panels using the double triangle in the panel header. You can choose whether your panel should be displayed with an icon and panel name, or just with an icon. If you want it to be displayed with just an icon, simply drag it over to the right panel edge to adjust its size.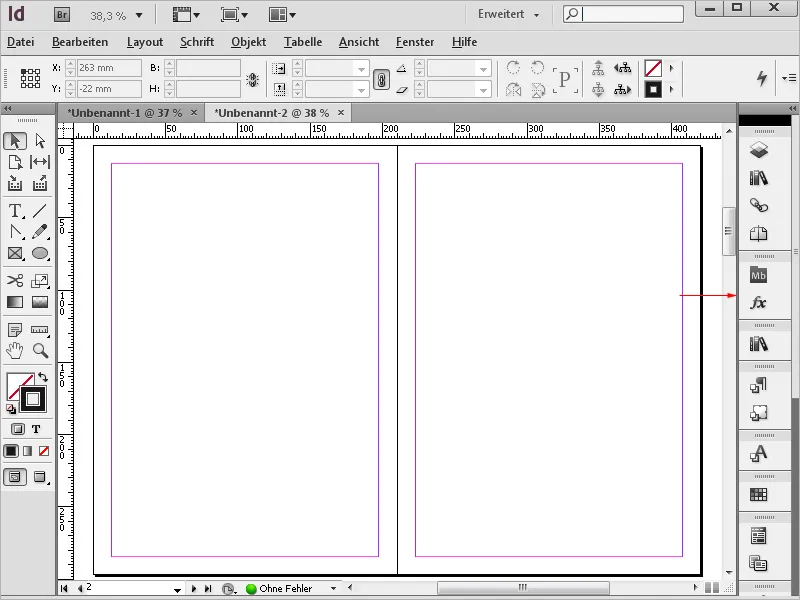
4. Setting Up Workspaces
It is optimal to set up a panel view that provides the greatest clarity while also allowing quick access to panel contents. For example, you can
• display the Mini Bridge panel and group it with the Links panel
• group the Layers panel with the Pages panel
• arrange the Effects panel together with the Object Styles panel
• group the Paragraph panel with the Character panel
• group the Paragraph Styles panel with the Character Styles panel
• adjust the layout of the print sheets in the Pages panel using the panel options by unchecking the Vertical Display checkbox
Once you have set up your workspace with the optimal combination of panels, select the Workspace menu from the application bar. In this menu, you can then set your workspace.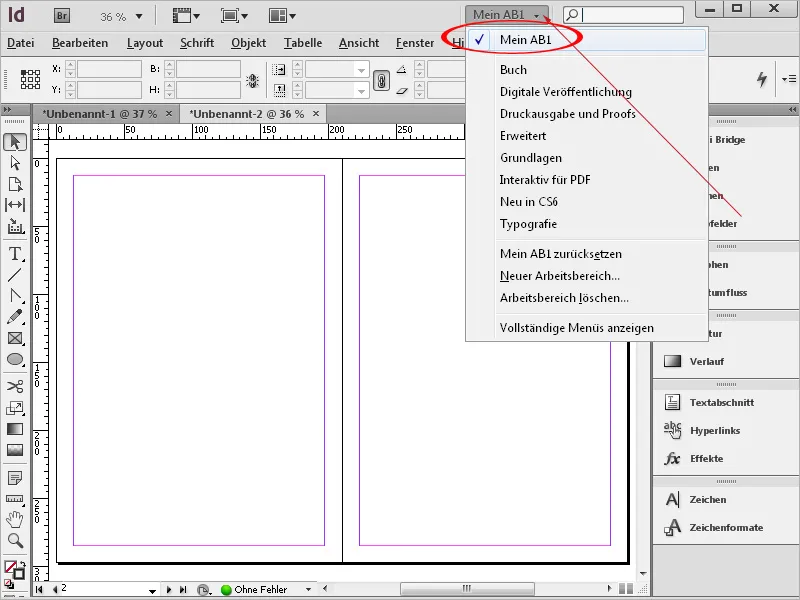
As you make changes, the predefined workspace will change. You simply need to reset it to the default setting because the panel positions and adjustments are saved in the menu for the active workspace. Otherwise, your customized workspace may appear twice in the Workspace menu – once newly defined as "My WS1" and once in the previous view of the Basic workspace. By resetting it, you will again have the InDesign-determined standard view of the Basic workspace.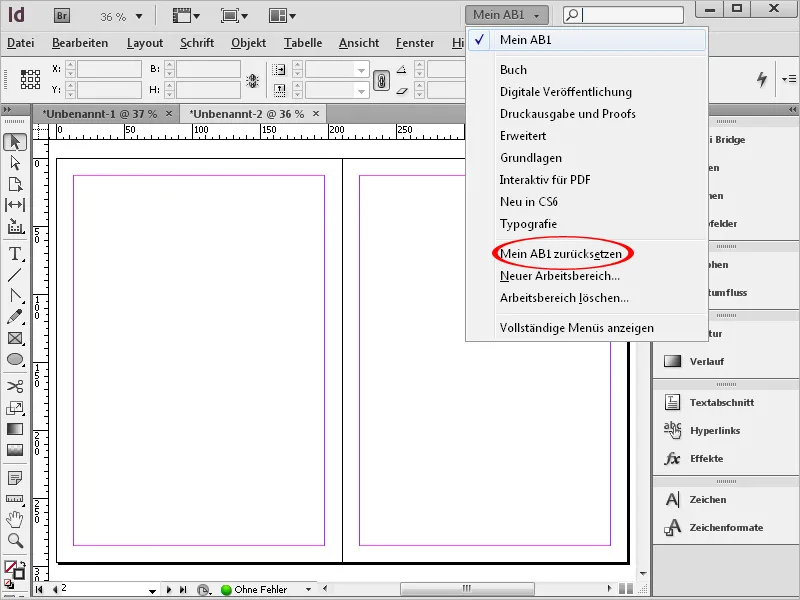
5. Zooming and Navigating
When working with InDesign, it is useful to have certain shortcuts to quickly navigate through different views of the document. These include:
• Hold Space bar: moves the view with the mouse button pressed
• Rotate scroll wheel: scrolls vertically through the document
• Rotate scroll wheel with Shift key: scrolls vertically with large jumps in the document
• Rotate scroll wheel with Ctrl key: scrolls horizontally through the document
• Rotate scroll wheel with Alt key: Zoom in and out
• Tab: hides all panels
• Tab+Shift: hides all panels except for the Application bar, the Control panel and the Tool panel
• W: toggles between Preview and Normal
• Ctrl+H: shows and hides frame edges
• Ctrl+U: shows and hides guides
• Ctrl+0: fits page in window size center
• Ctrl+Alt+0 or Double-click on the Hand Tool: fits spread to window size center. Unlike Ctrl+0, you use this shortcut with double-page spreads.
You can also switch between pages by clicking on the corresponding page in the Pages panel as well as using the page navigation buttons in the Status Bar. With the shortcut
• Ctrl+J: a dialog box will open where you can enter the desired page
• Ctrl+Shift+Arrow keys: First page/Last page
• Shift+Arrow keys: previous page/next page
• Alt+Arrow keys: previous spread/next spread
You should also know the shortcuts for the different zoom options:
• Ctrl++: Zoom in
• Ctrl+-: Zoom out
• Alt+mouse wheel rotate: Zoom in/out
• Ctrl+1: 100% view
While zooming in/out via the mouse wheel (with Alt), the zoom simply goes into the image where the mouse cursor is, I can use Ctrl++ to zoom in exactly on the object that is currently activated. This is great because then it really gets centered on the screen. Simply mark the object in question and zoom in there using Ctrl++. When zooming in with Alt and the mouse wheel, the view always focuses approximately where the cursor is.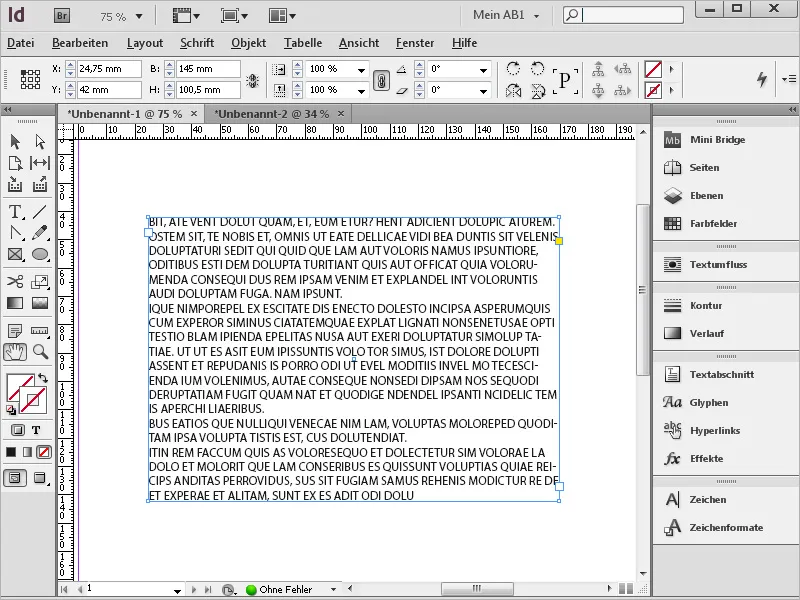
Another quick way to zoom is with Power Zoom. Here, the Hand Tool (H) must be activated, either directly in the Tool palette or indirectly via the space bar. Then, press and hold the left mouse button. A red frame appears and the document zooms out immediately. You can quickly navigate through the document and move to another page by moving the mouse in the corresponding direction.
The red rectangle represents the zoom area. This can be varied with the mouse wheel or the arrow keys. So, you can expand or reduce it when zooming in by turning the mouse wheel or with the arrow keys on the keyboard. Afterwards, the area outlined in red is in focus.