In this guide, I will show you how to apply the popular Dodge-and-Burn technique in Photoshop to give your images more depth and dimension. These methods are not only effective but also easy to apply, so as a beginner, you can achieve impressive results right away. Here you will learn how to enhance your images with just a few clicks without needing to use the Dodge and Burn tools.
Key Insights
- The Dodge-and-Burn technique helps to enhance light and shadow effects.
- By using Curves adjustments, you can easily and effectively adjust the light and shadow areas of your image.
- A consistent and subtractive editing method ensures realistic results.
- Using Smart Objects allows for non-destructive editing.
Step-by-Step Guide
Let's start with the Dodge-and-Burn technique in Photoshop.
Step 1: Preparations
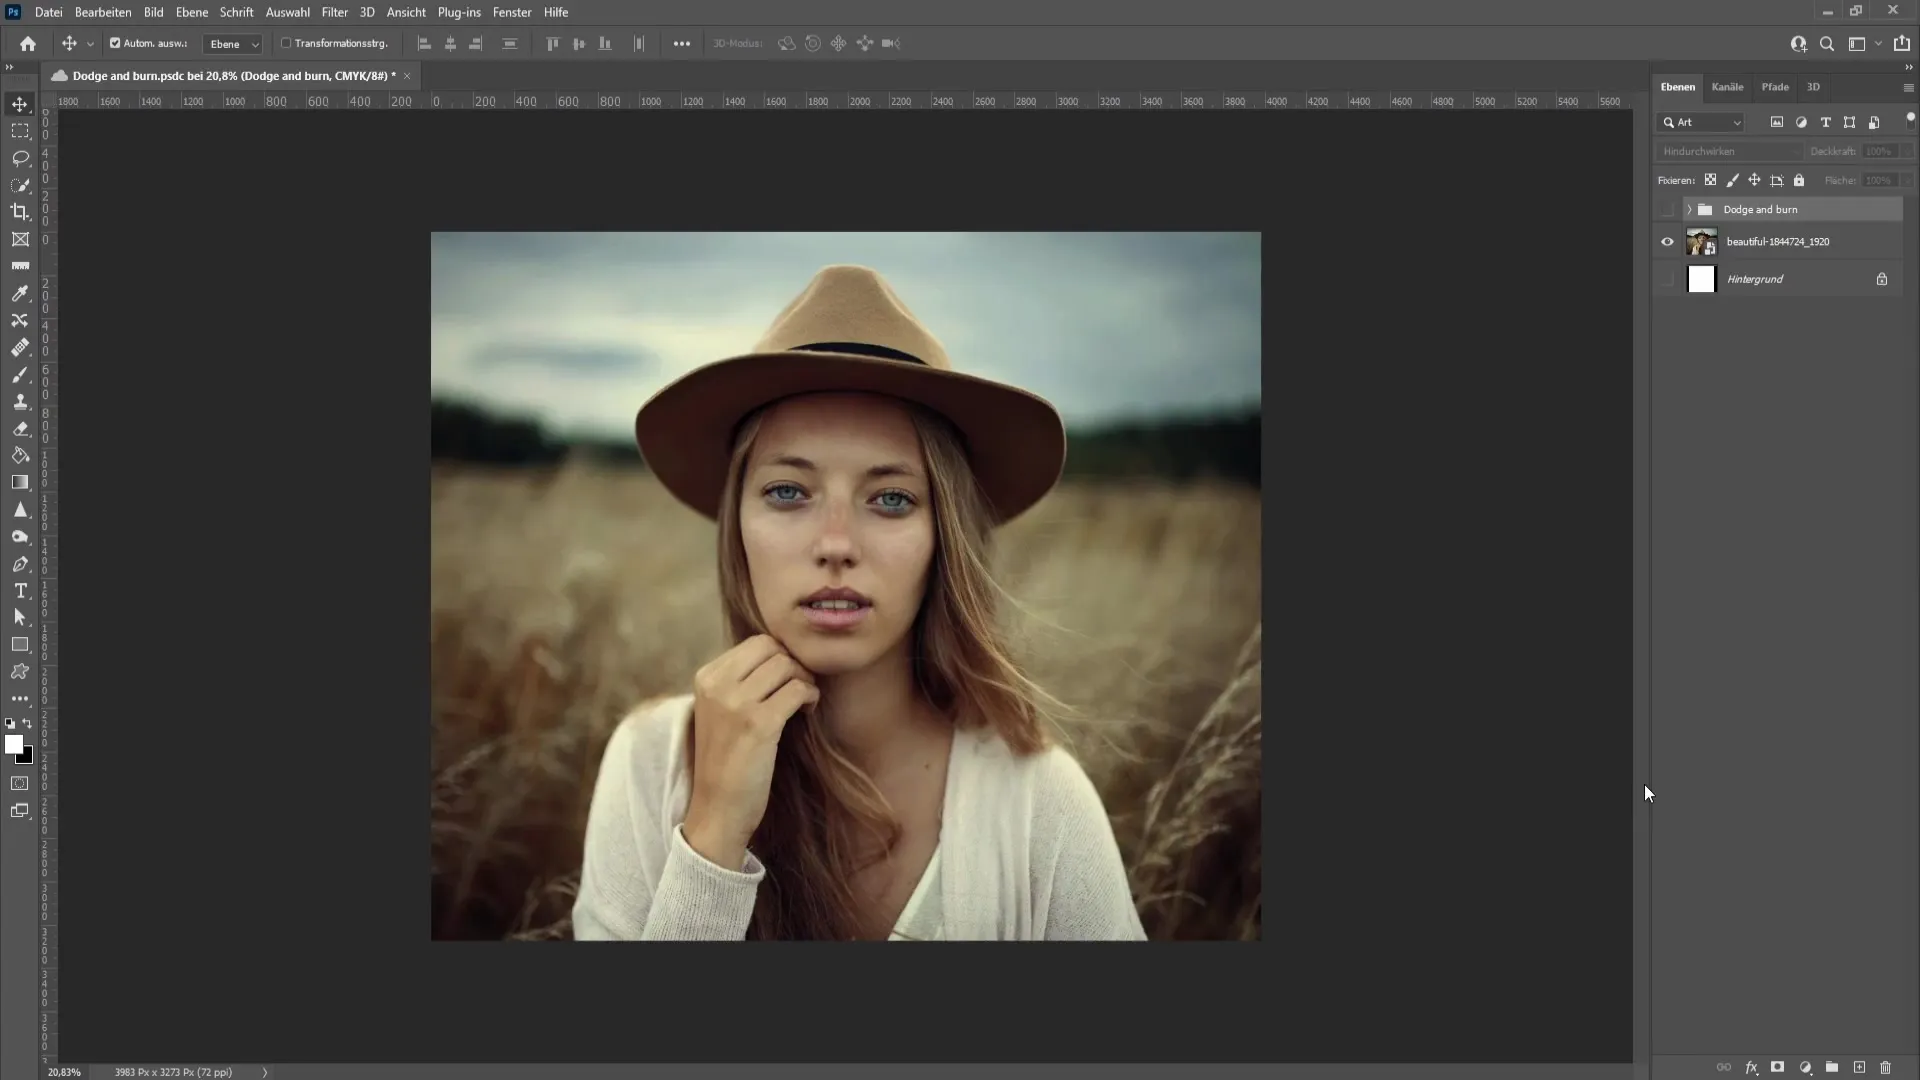
First, open your image in Photoshop. Ideally, you should have already optimized the image quality before starting with the Dodge-and-Burn technique.
Step 2: Adjustments Window
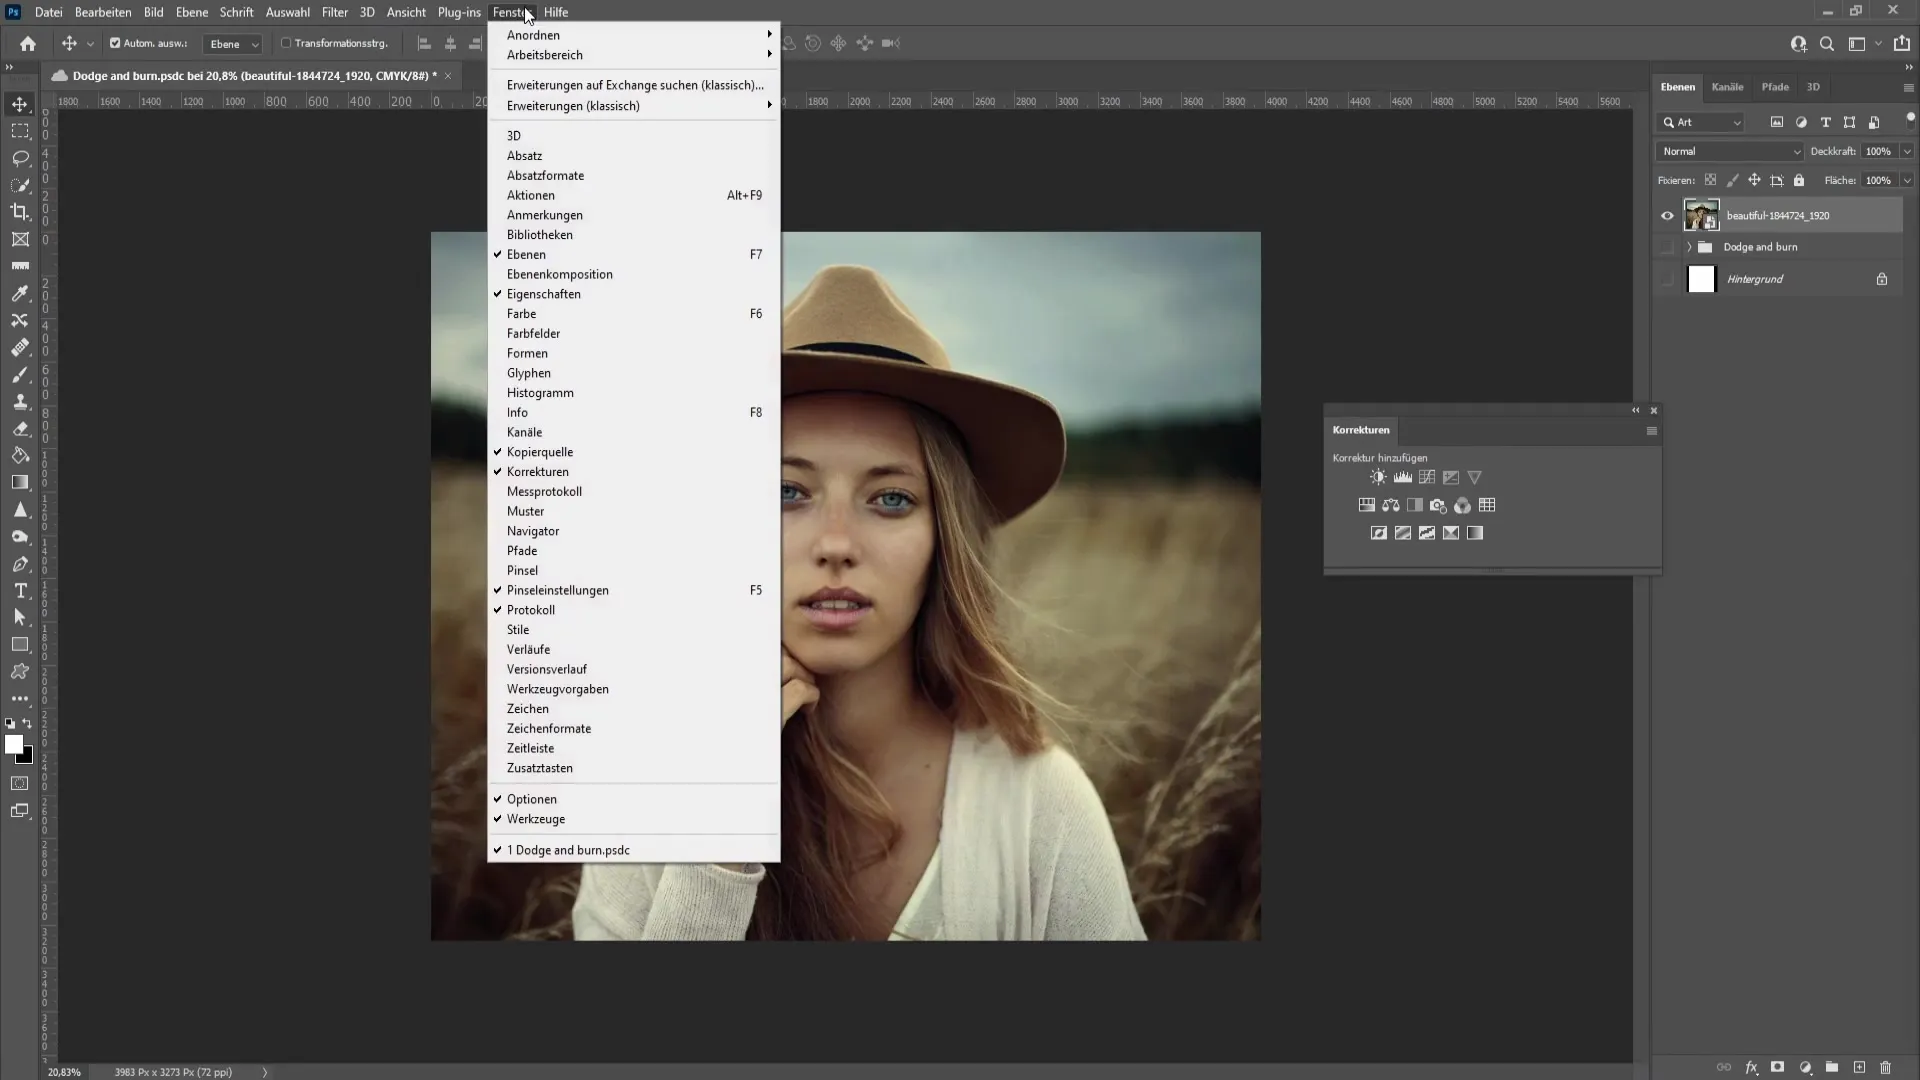
Go to the "Window" menu at the top and choose "Adjustments." There you will find the option to select the Curves adjustment. Click on it to open the corresponding window.
Step 3: Dodge Adjustment
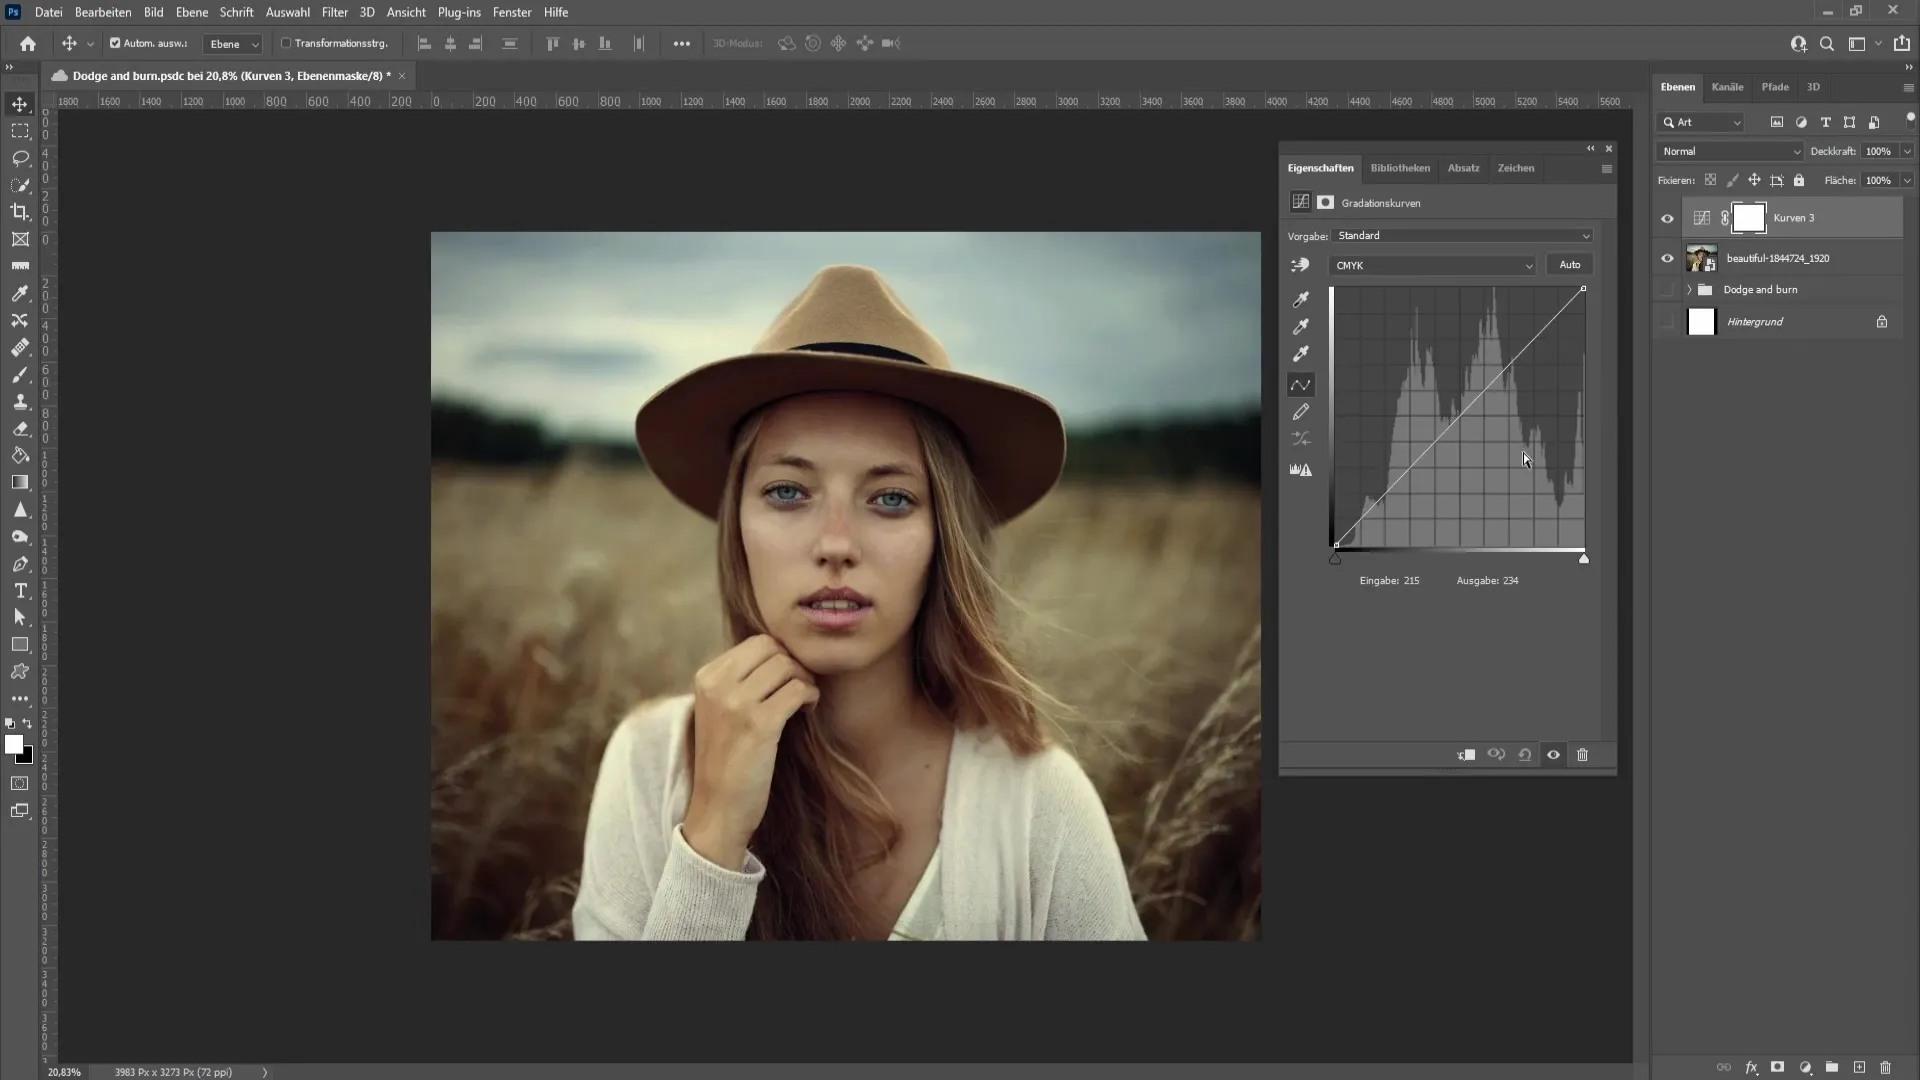
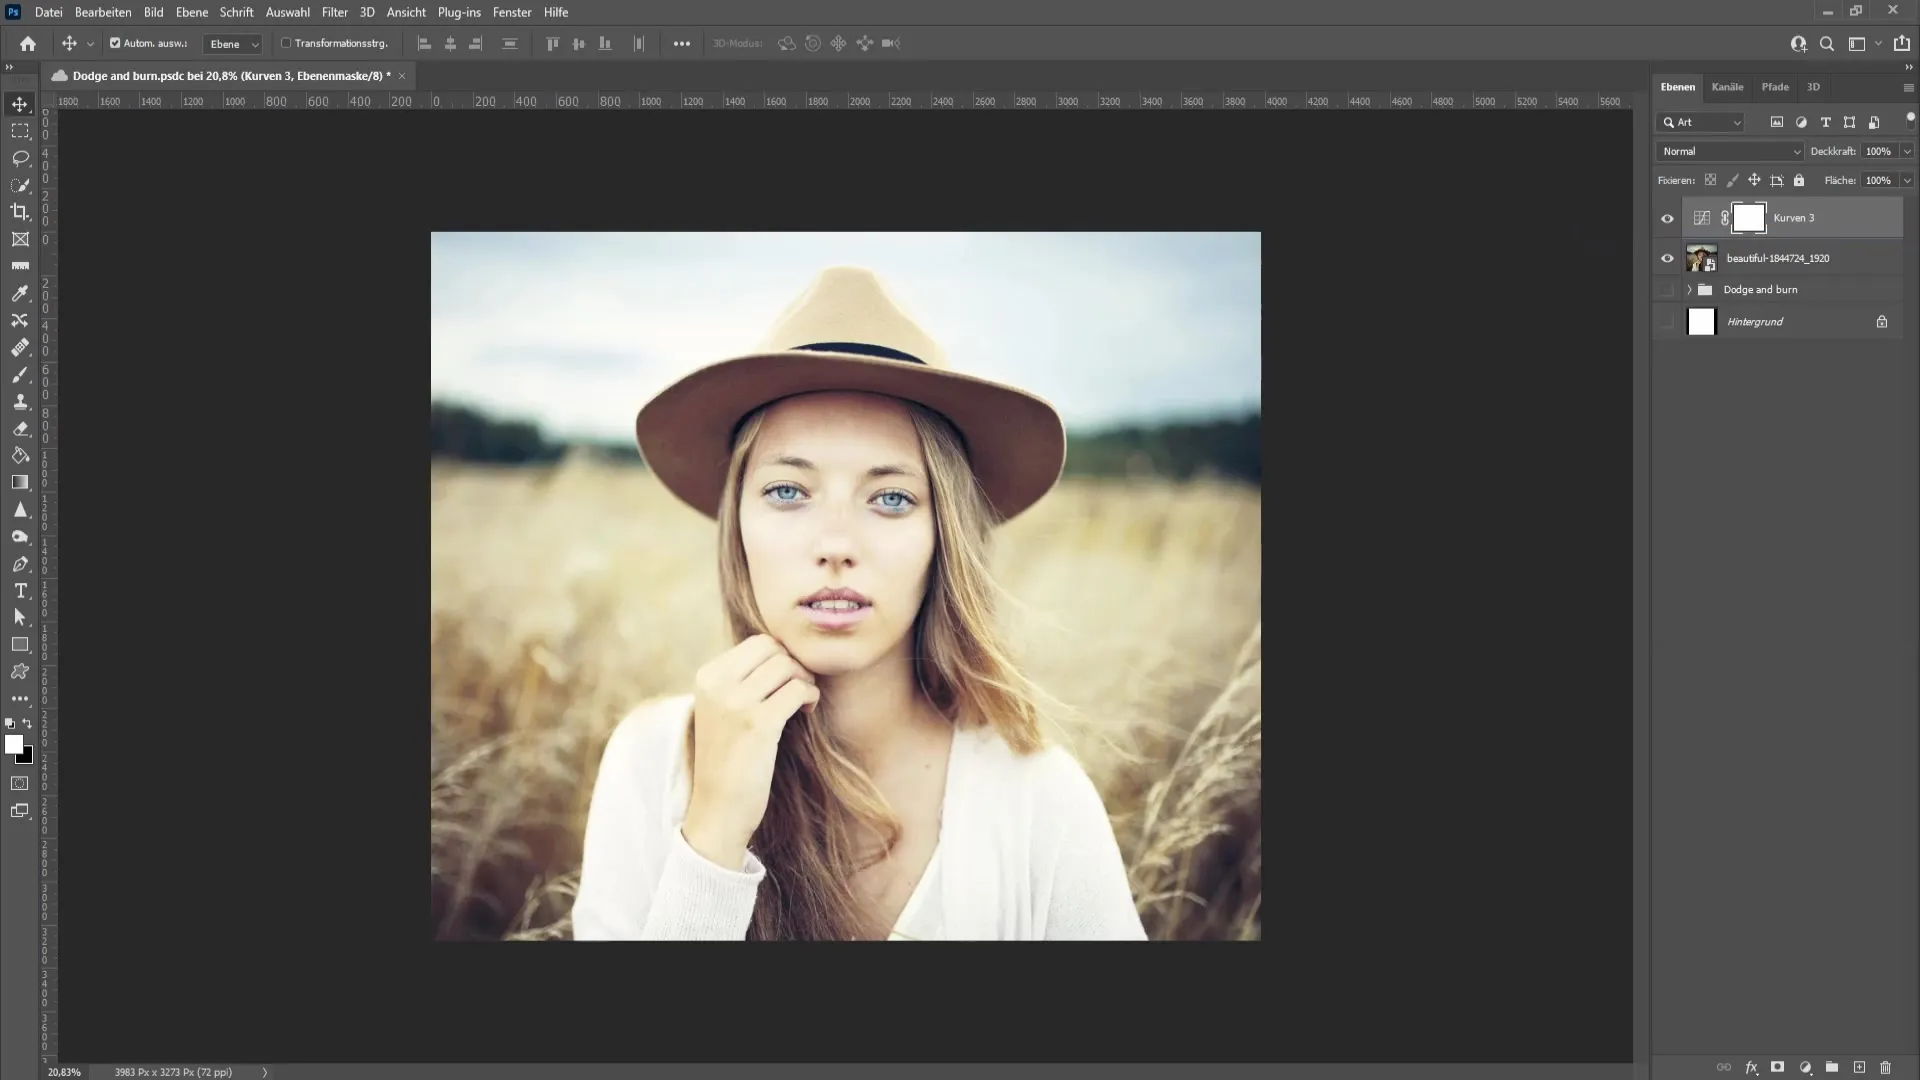
We start by brightening the image. Drag the slider in the Curves adjustment upwards until the bright areas of the image become visible. Be careful not to over-brighten to avoid losing image details.
Step 4: Adjust Blend If options
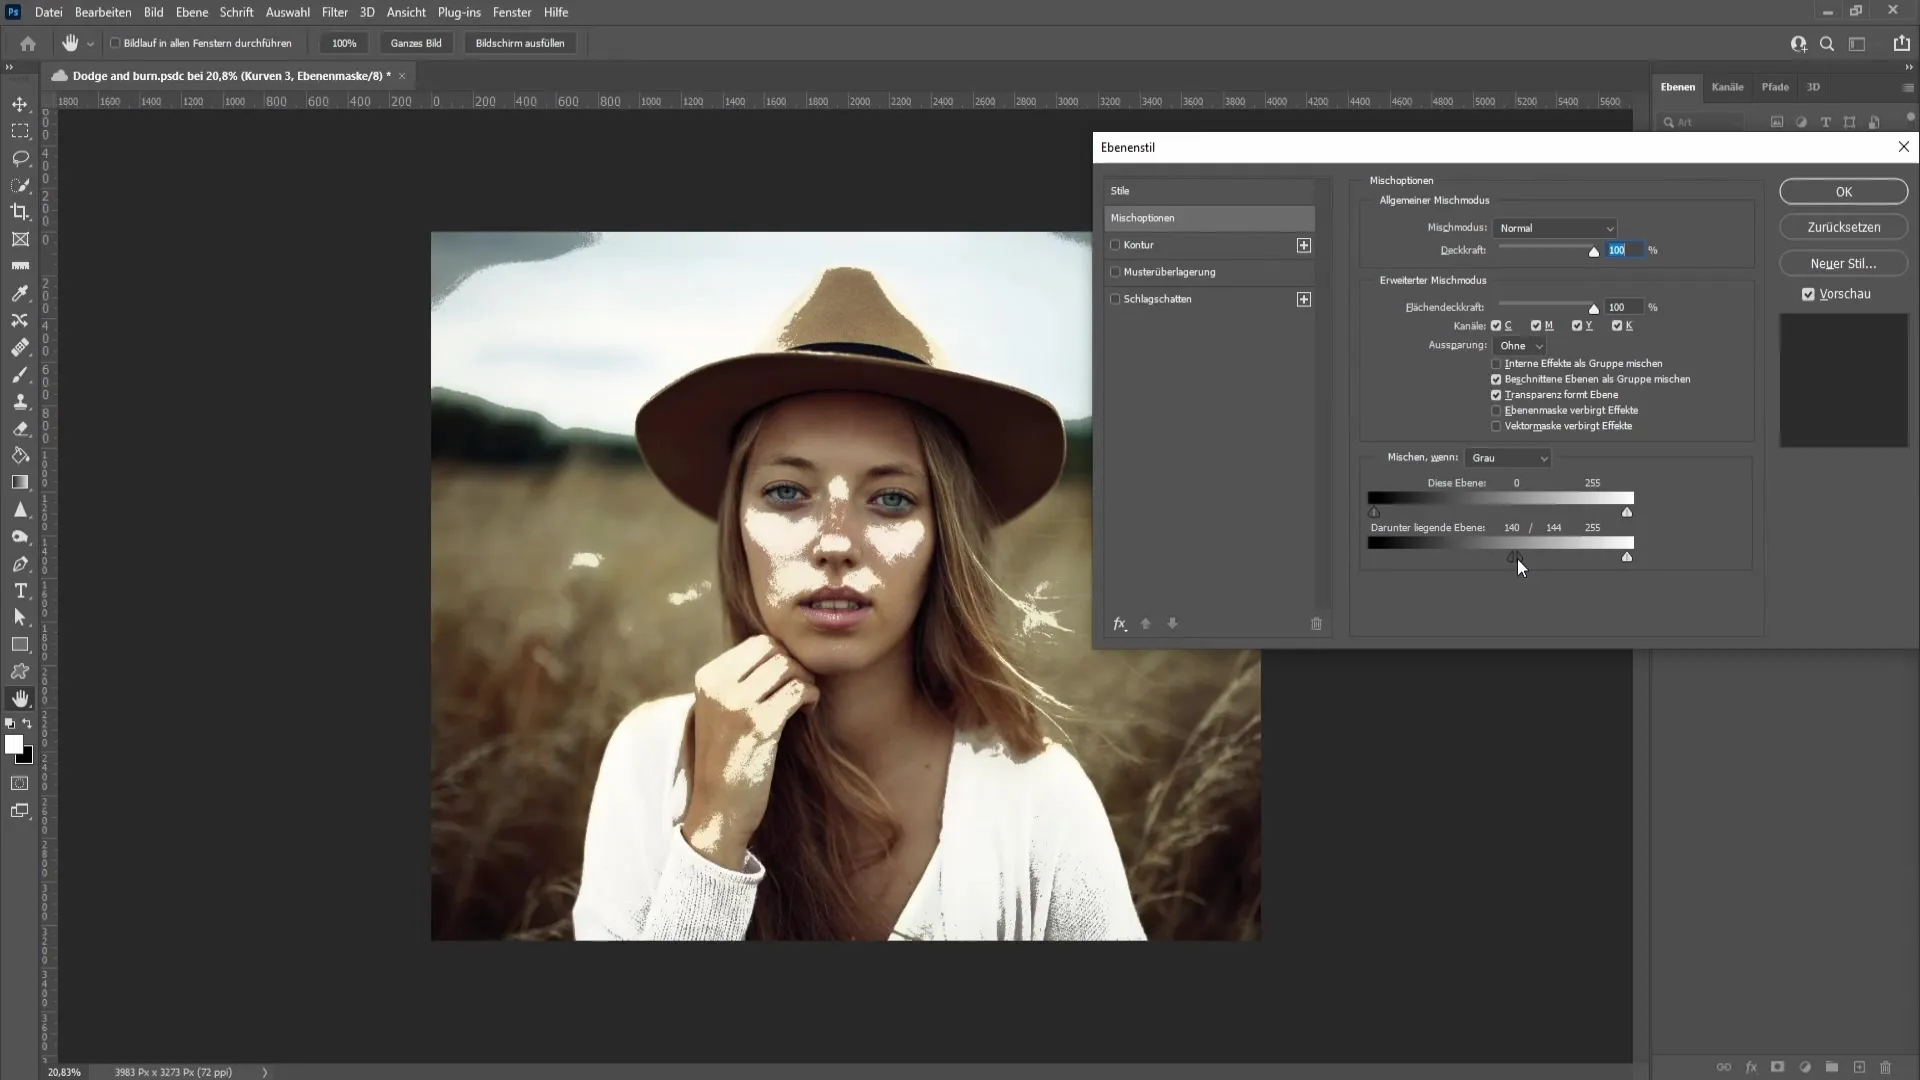
Right-click on the Curves adjustment and choose "Blending Options." Now, you should adjust the Blend If options. Drag the slider for the dark areas to the right, selecting only the white areas you want to lighten.
Step 5: Soften Transitions
With the Alt key pressed, drag the two sliders of the Curves adjustment apart to soften the transitions. This helps to create more realistic brightness adjustments.
Step 6: Merge Layers
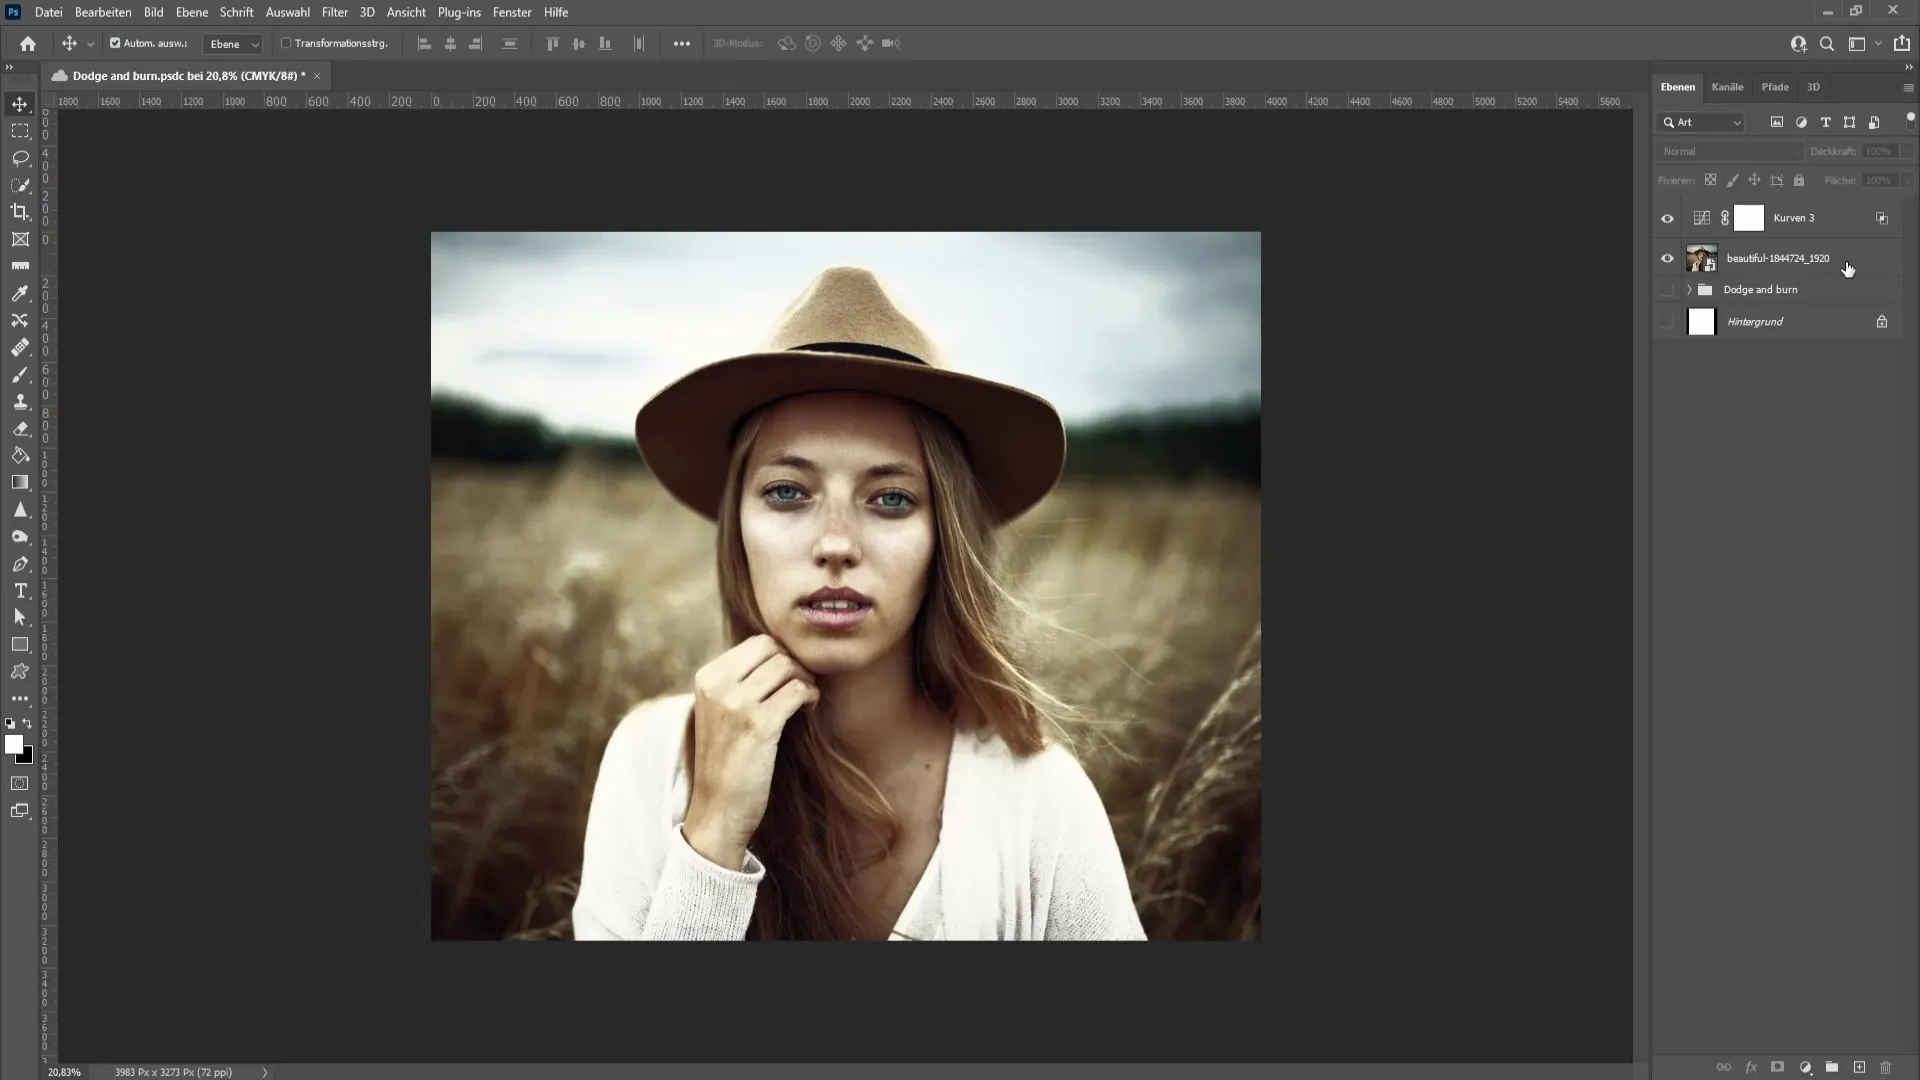
To save the adjustments, merge all layers together. Press and hold CTRL + ALT + SHIFT + E to create a new layer that combines the adjustments.
Step 7: Naming the Layers
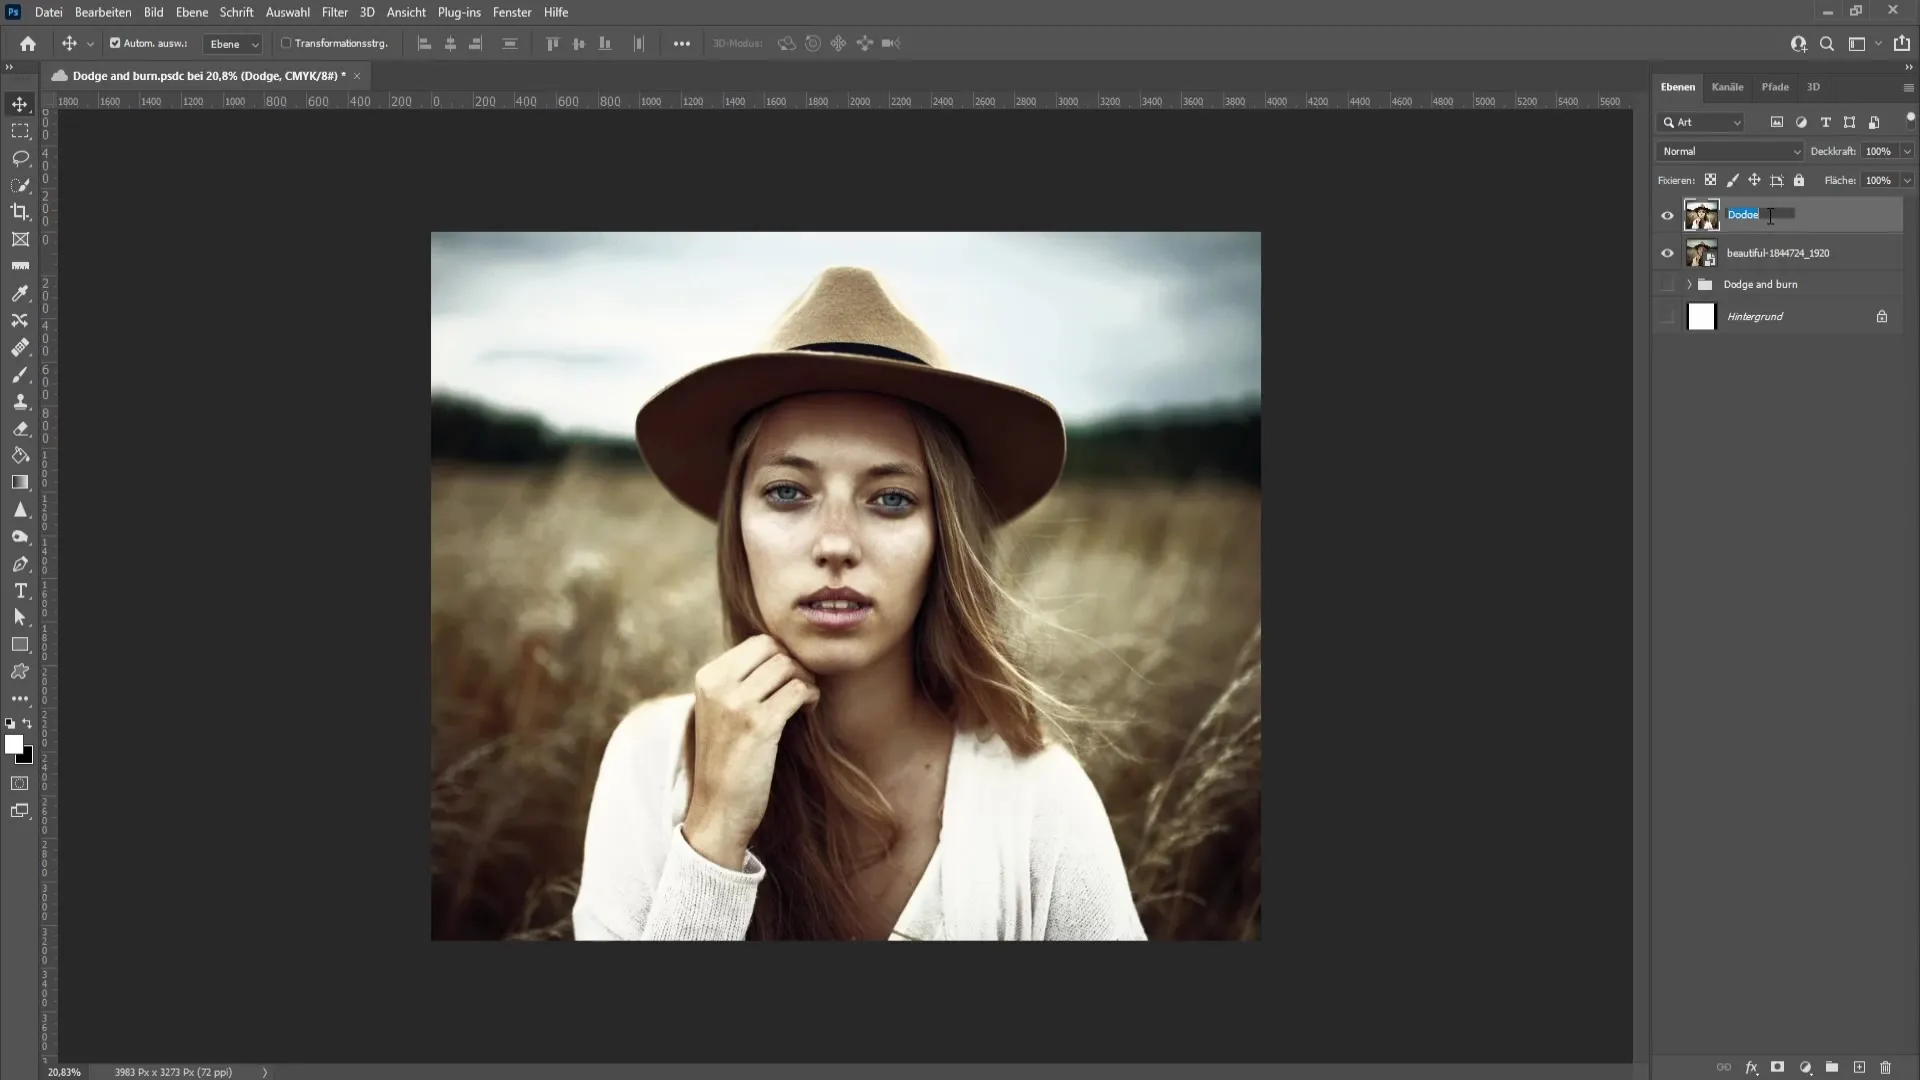
Name the top layer "Dodge" (Brighten) and the underlying layer "Normal." Now, your image adjustments are well organized.
Step 8: Image Calculation
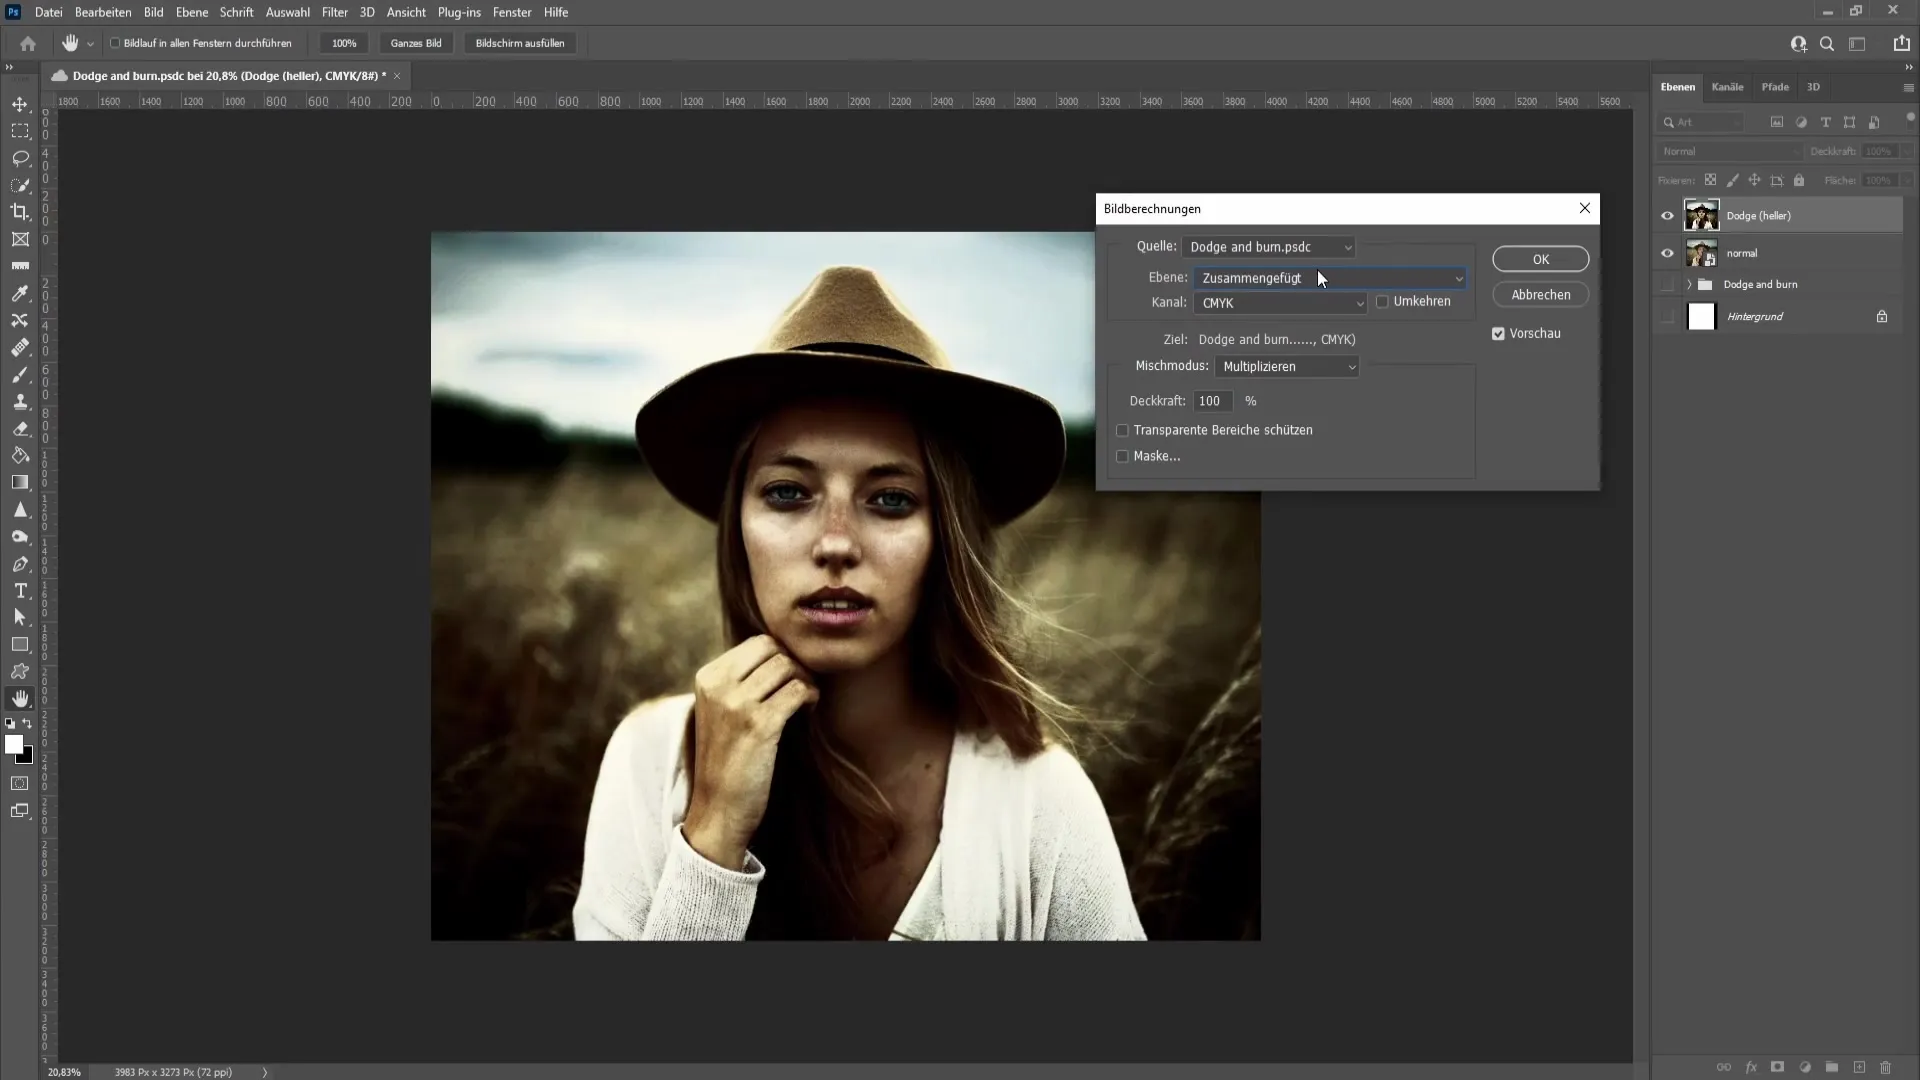
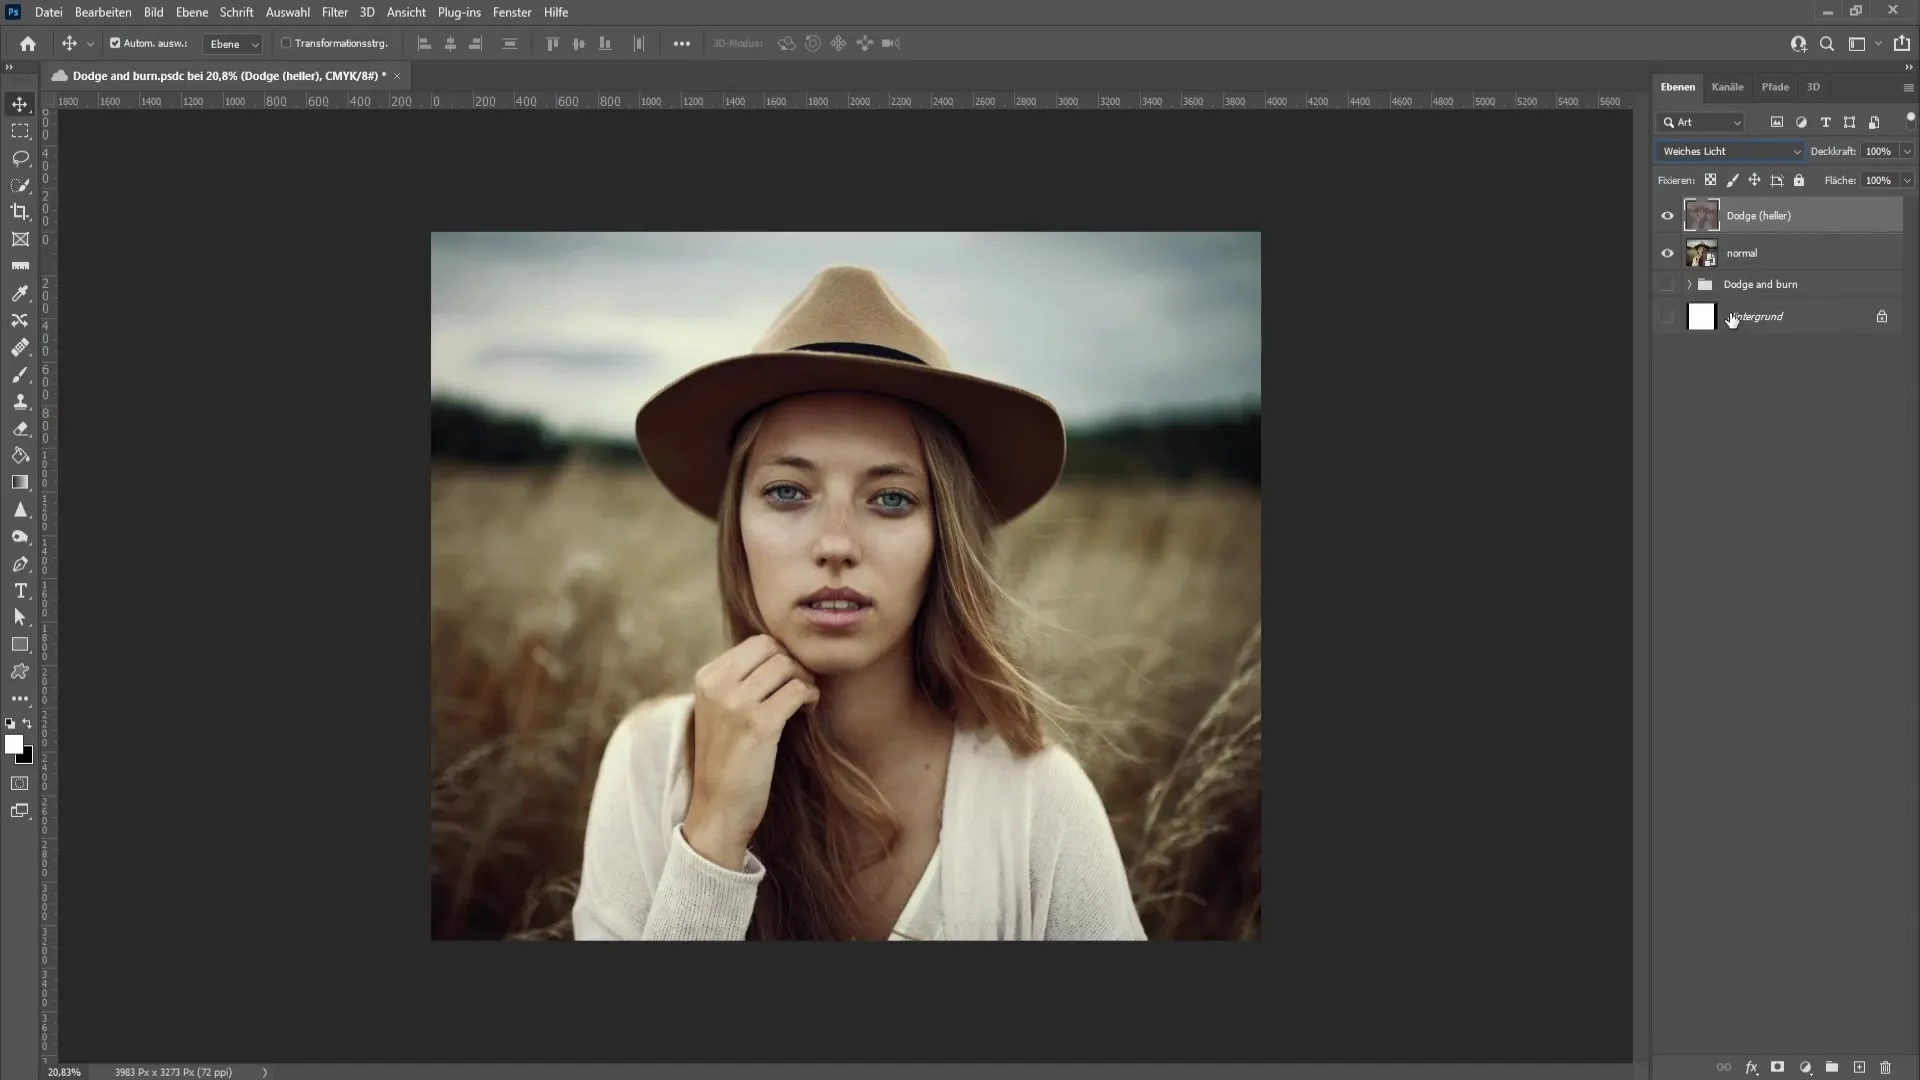
Select the Dodge layer. Go to "Image" > "Apply Image." Choose the normal layer as the layer you want to subtract. Set the blending mode to "Subtract" and the offset to 128 to obtain a neutral gray tone.
Step 9: Soft Light
To avoid making the Dodge effects too strong, set the blend mode for the top layer to "Soft Light." Now, you should notice a clear difference in the brightness areas of your image.
Step 10: Burn Adjustment
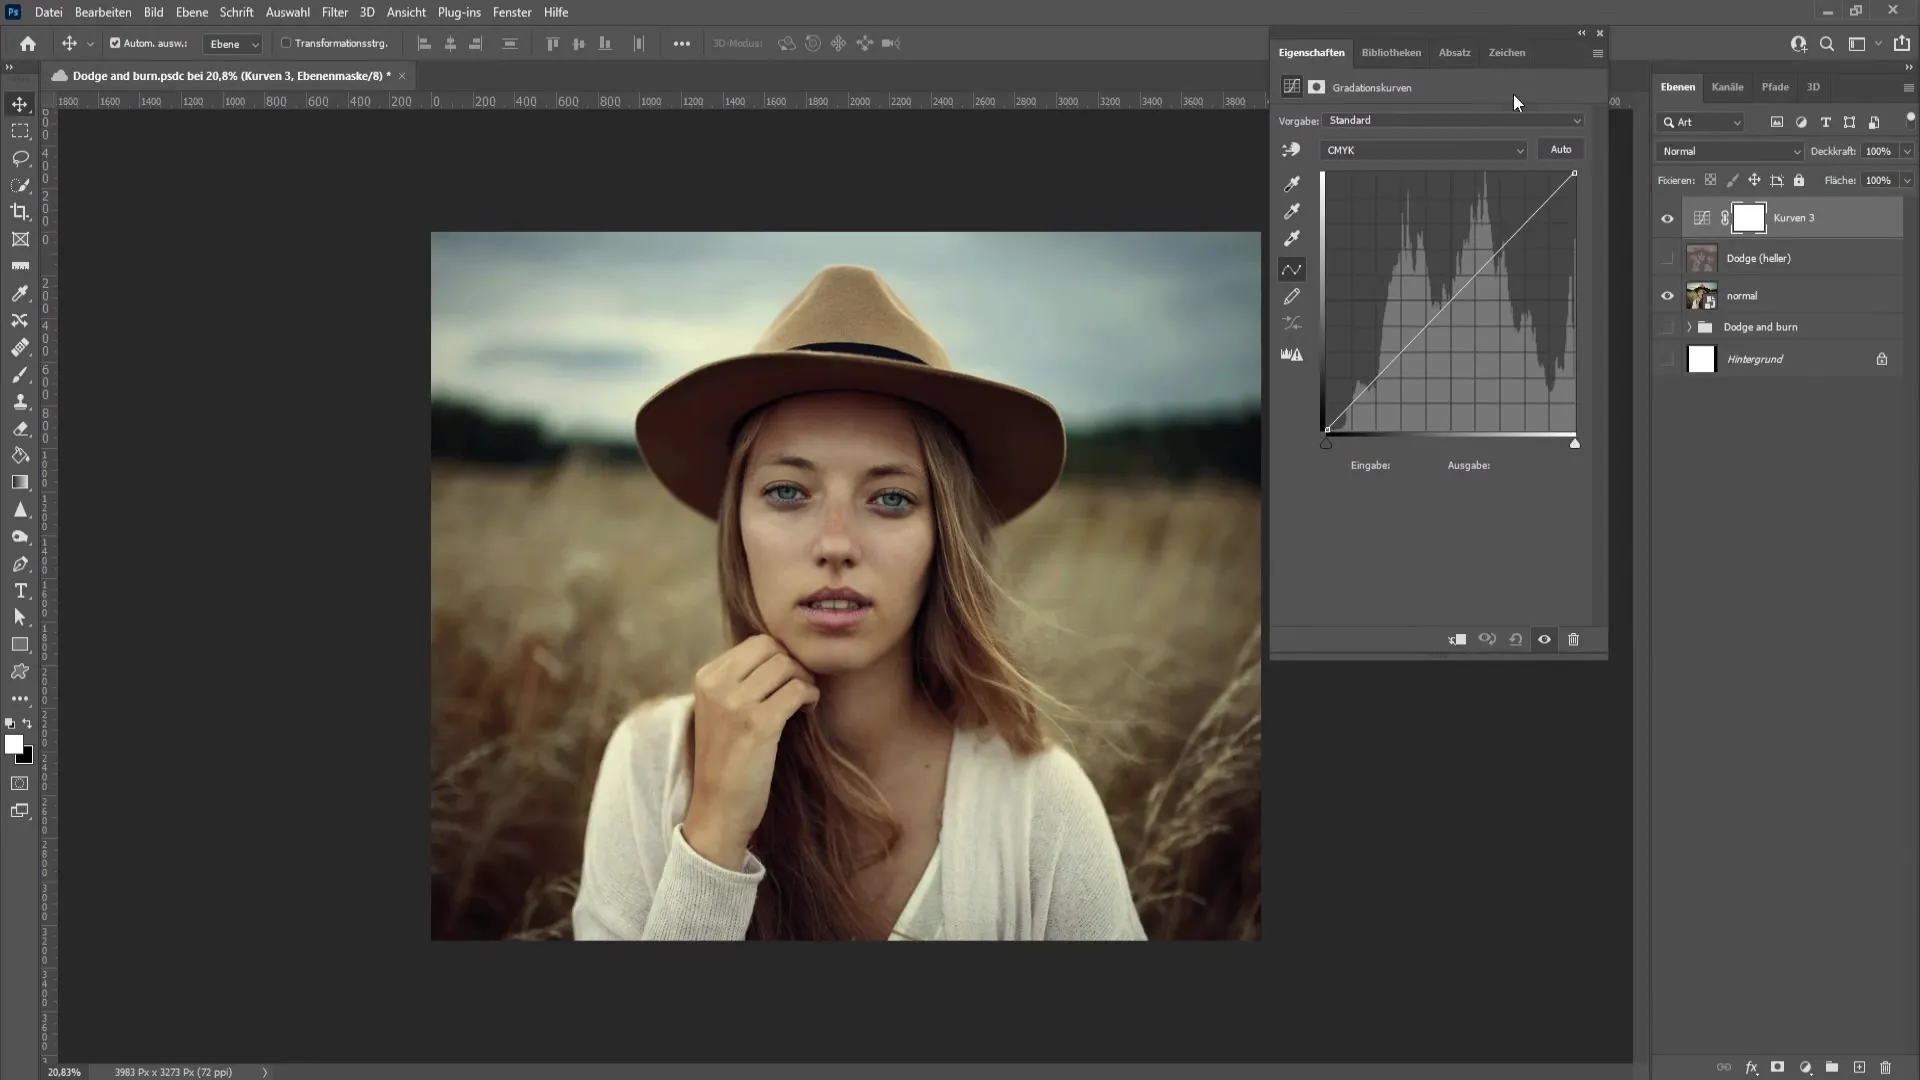
Now we do the same for the dark areas of the image. Hide the Dodge layer and repeat the steps with a new curve for the Burn adjustment (darkening).
Step 11: Blending options for Burn
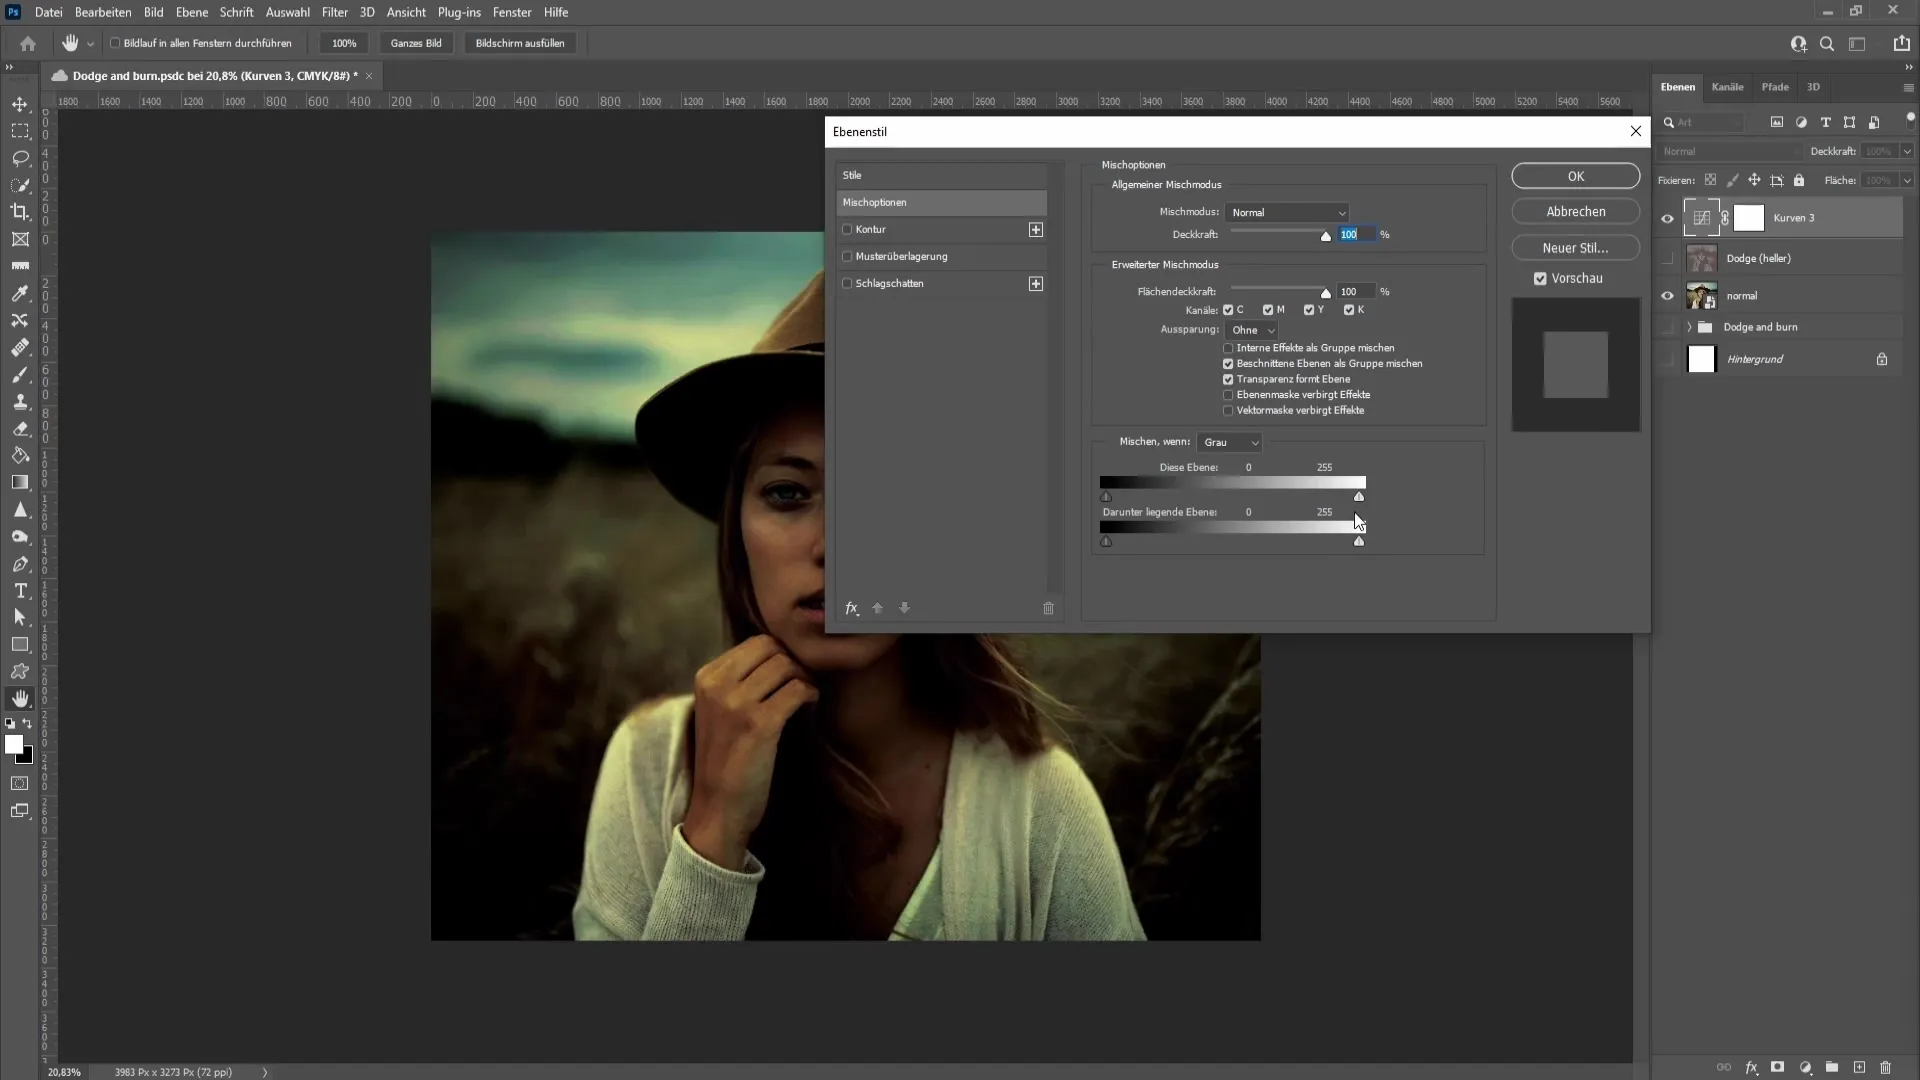
For the Burn adjustments, you need to move the right slider of the curve to the left to remove the bright areas. Once again, the goal is to only select the dark areas.
Step 12: Image calculation for Burn
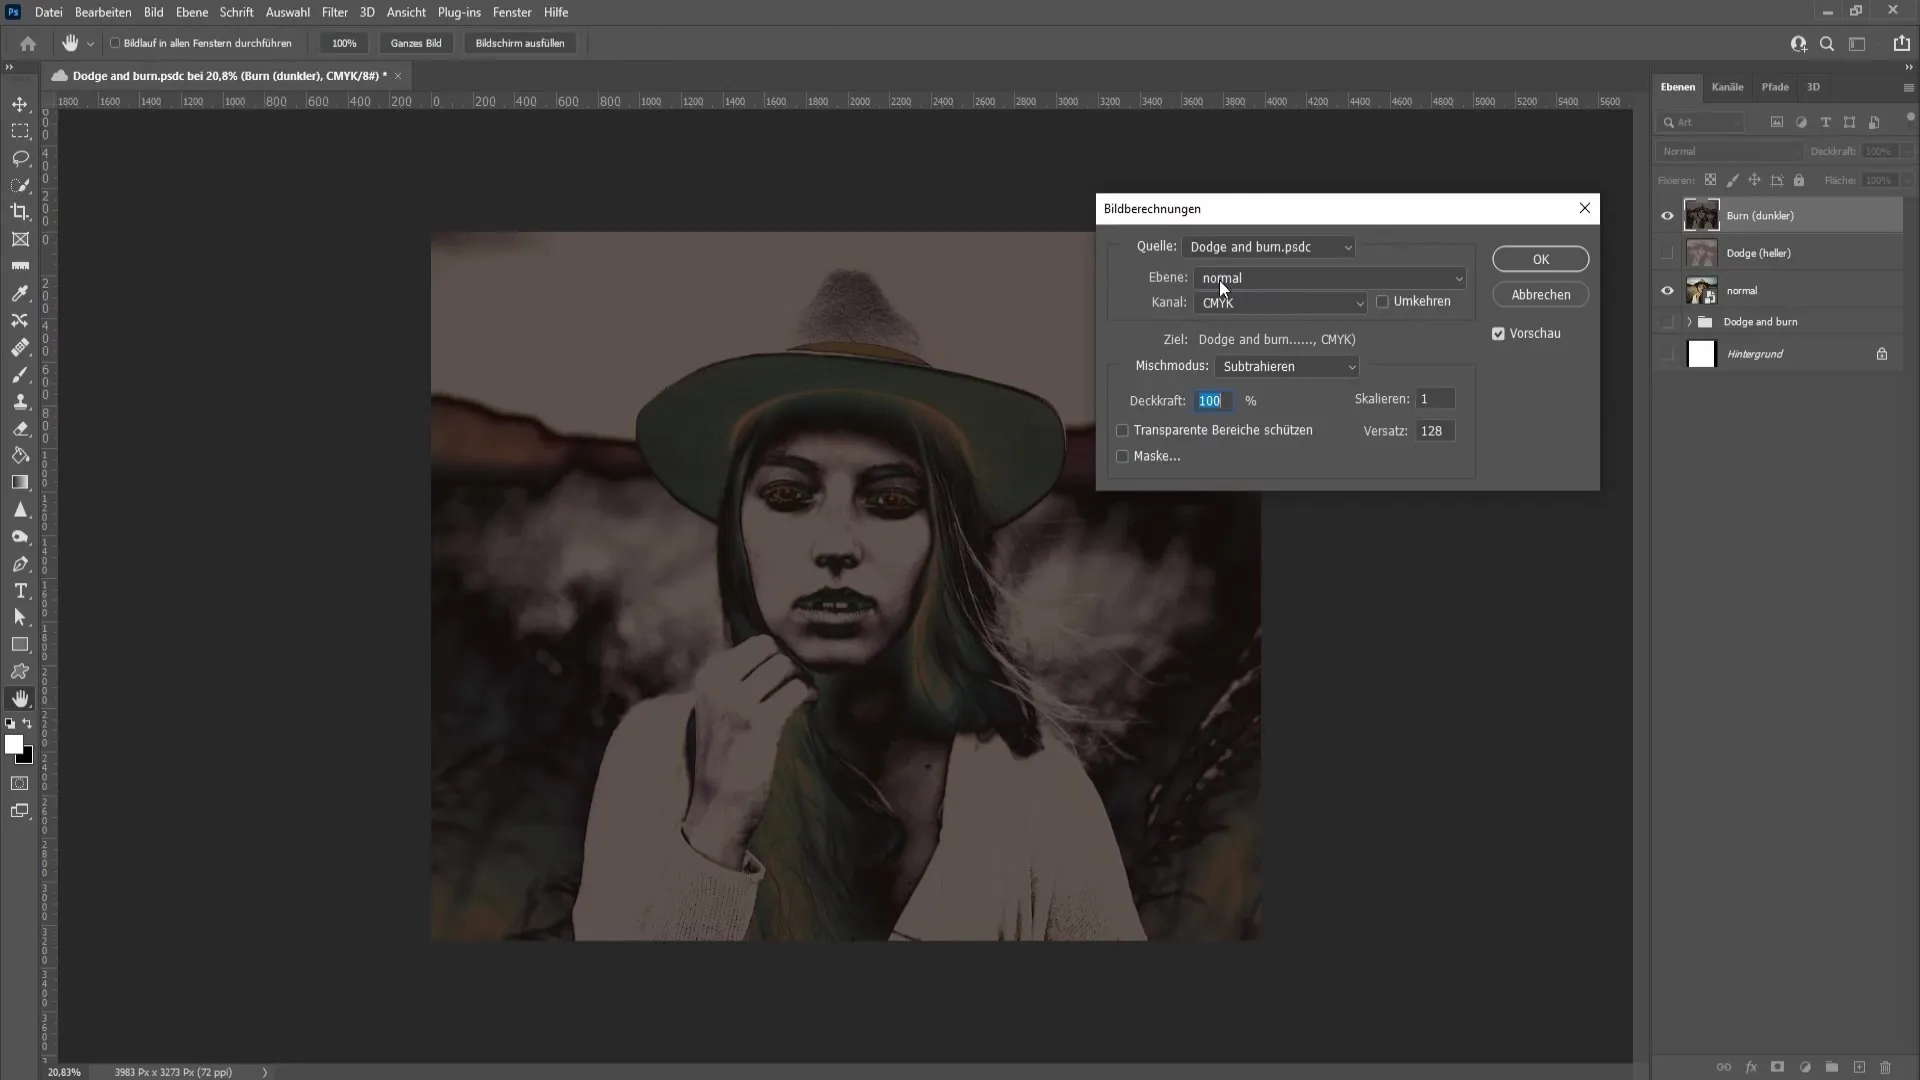
Repeat the steps from the Dodge adjustment by performing the image calculation again and subtracting the Burn layer.
Step 13: Checking the effects
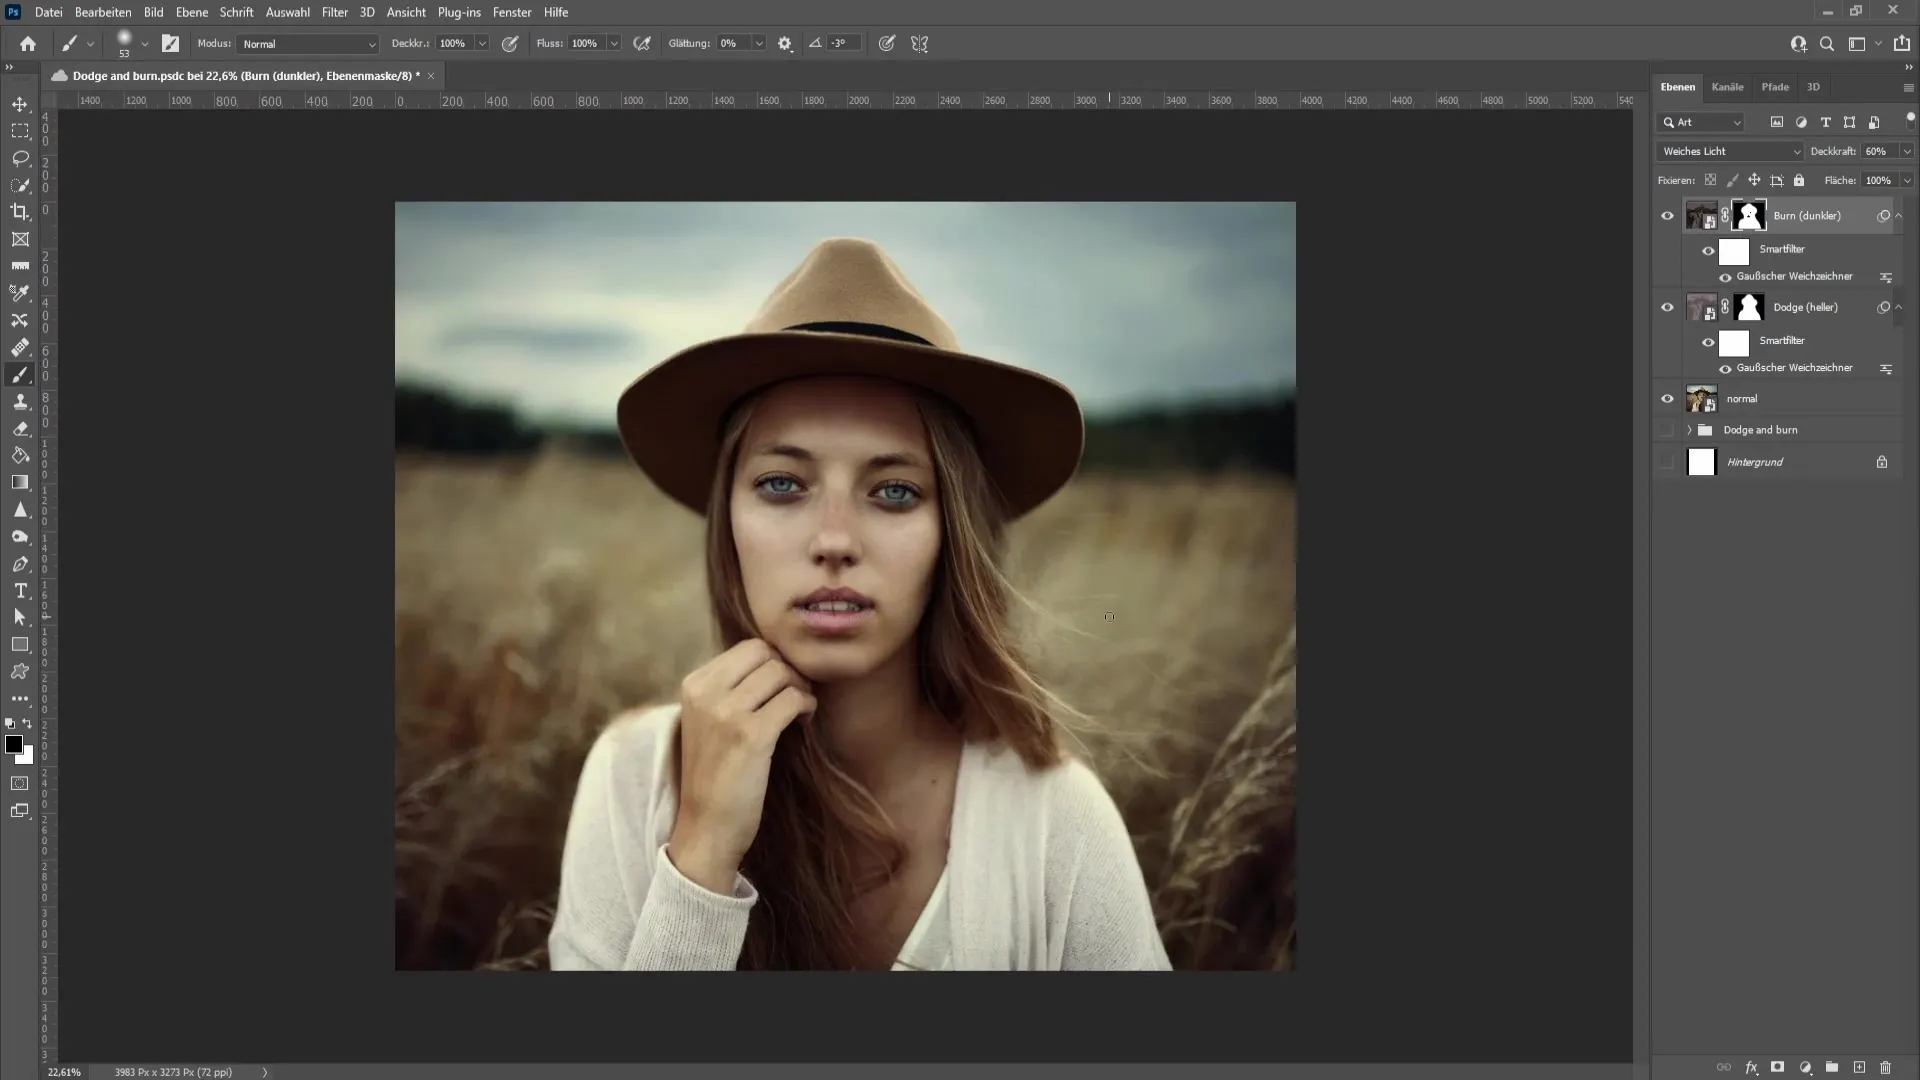
Get a Smart Object with CTRL + ALT + SHIFT + E, so that you can edit all adjustments non-destructively. This is crucial now to refine the effects if necessary.
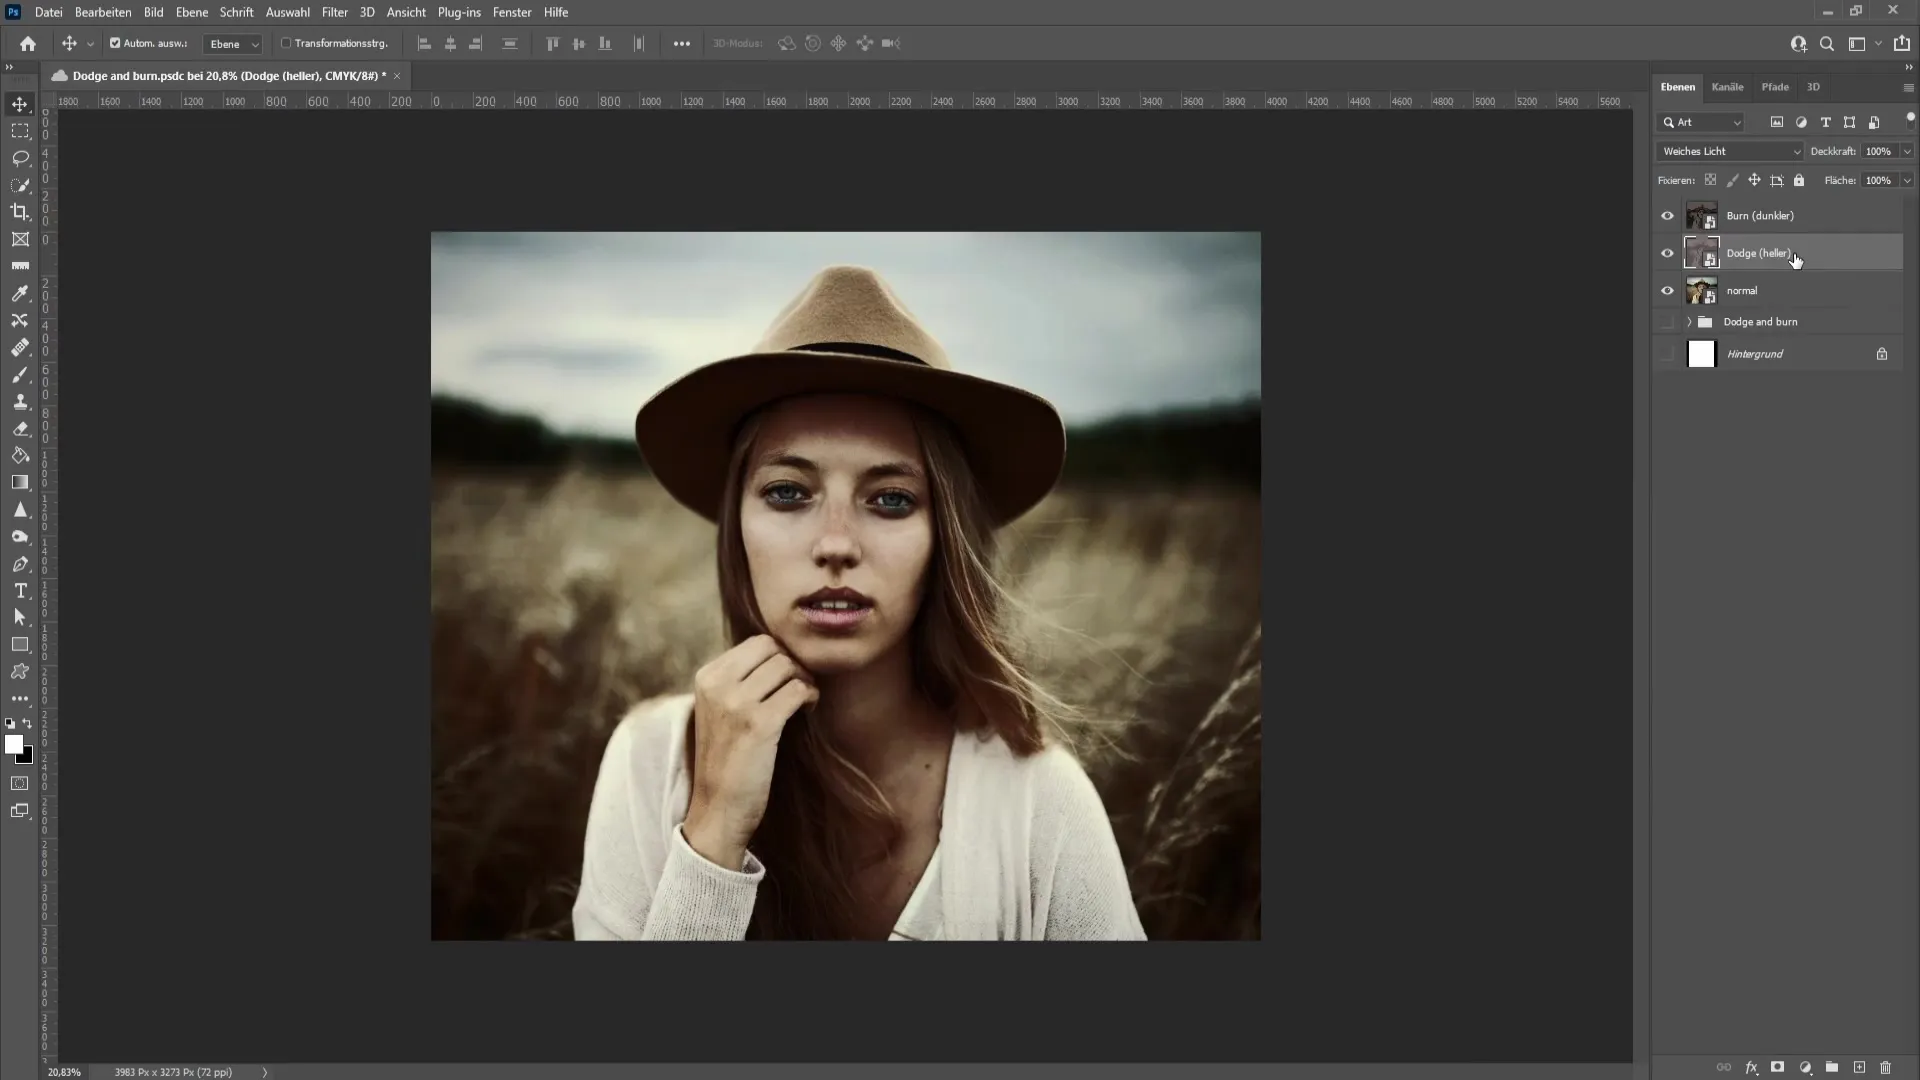
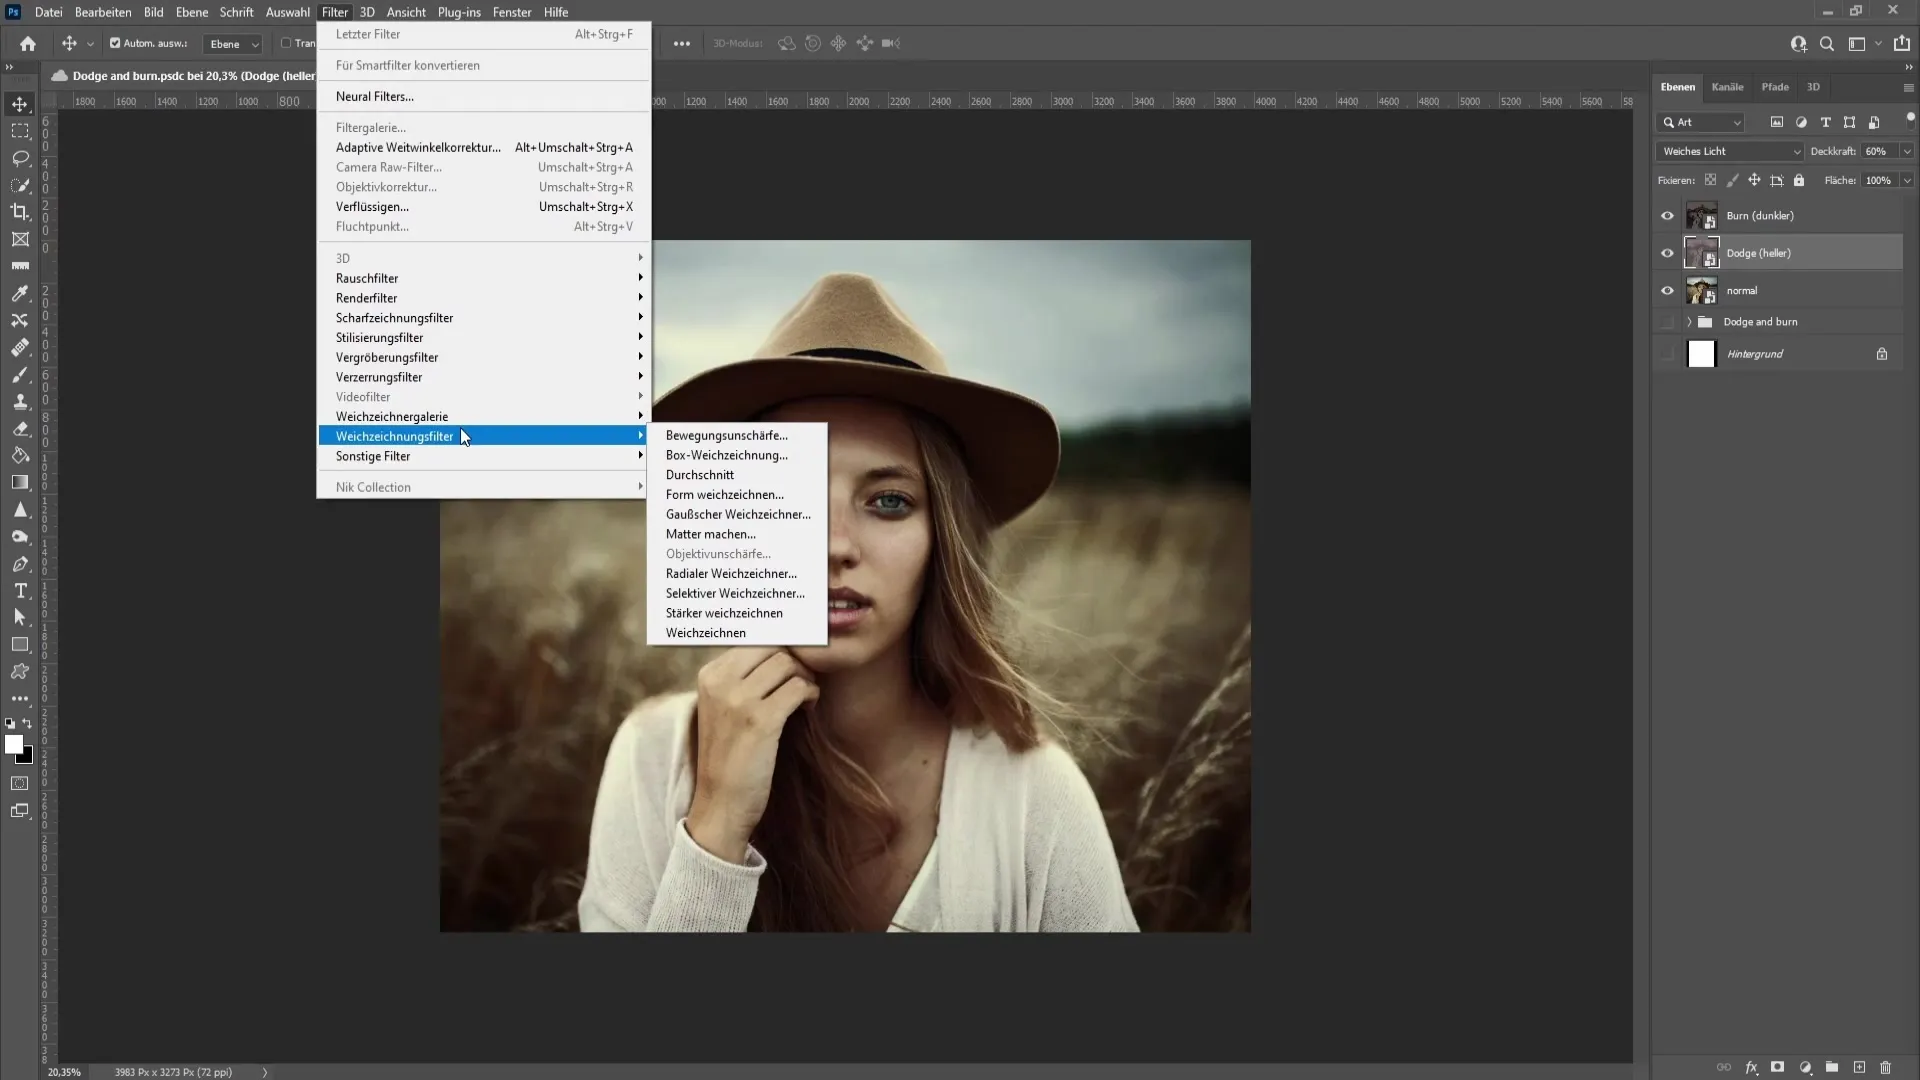
Step 14: Gaussian Blur
Now apply a Gaussian Blur to soften the transitions of the Dodge and Burn layers. Go to "Filter" > "Blur Filters" and choose the appropriate values (e.g. 22.2).
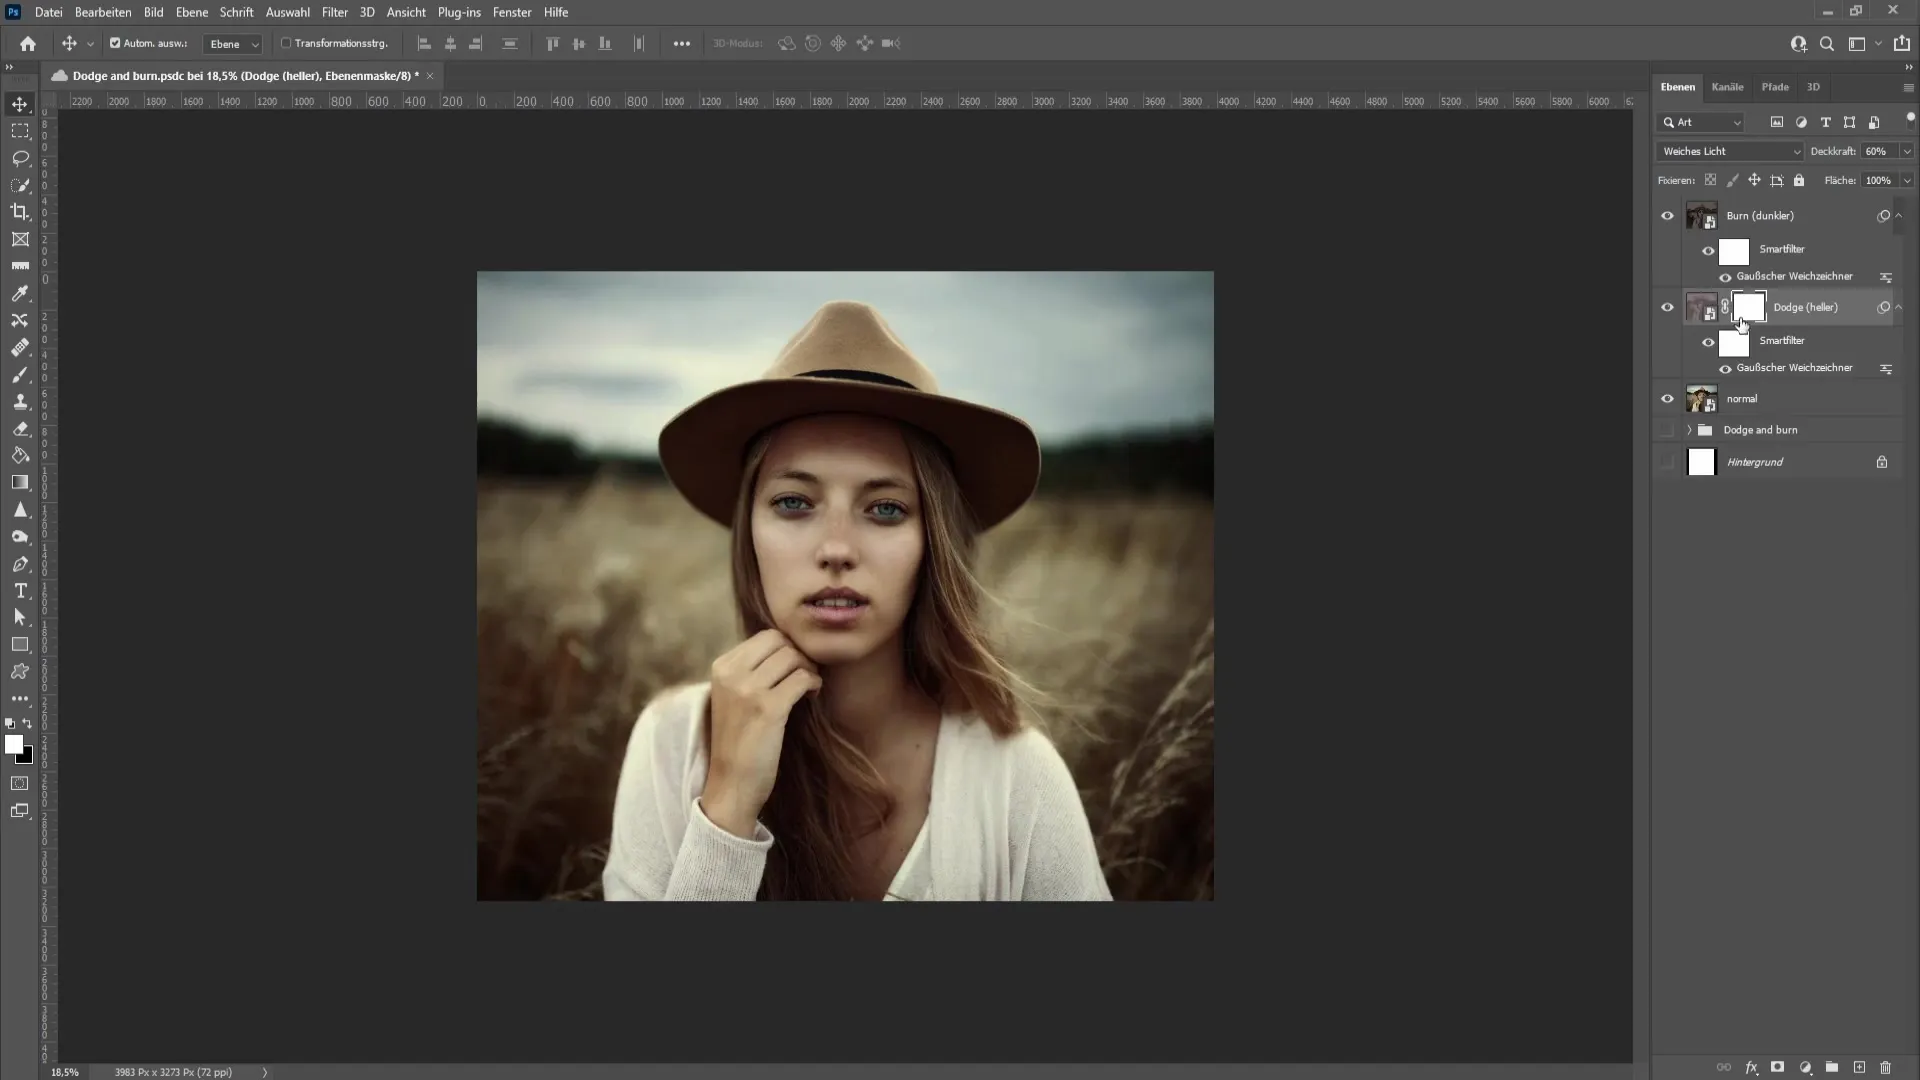
Step 15: Masking the effects
To ensure that the Dodge-and-Burn effect does not affect the entire background of the image, create a mask and paint the areas that do not require the effect if necessary.
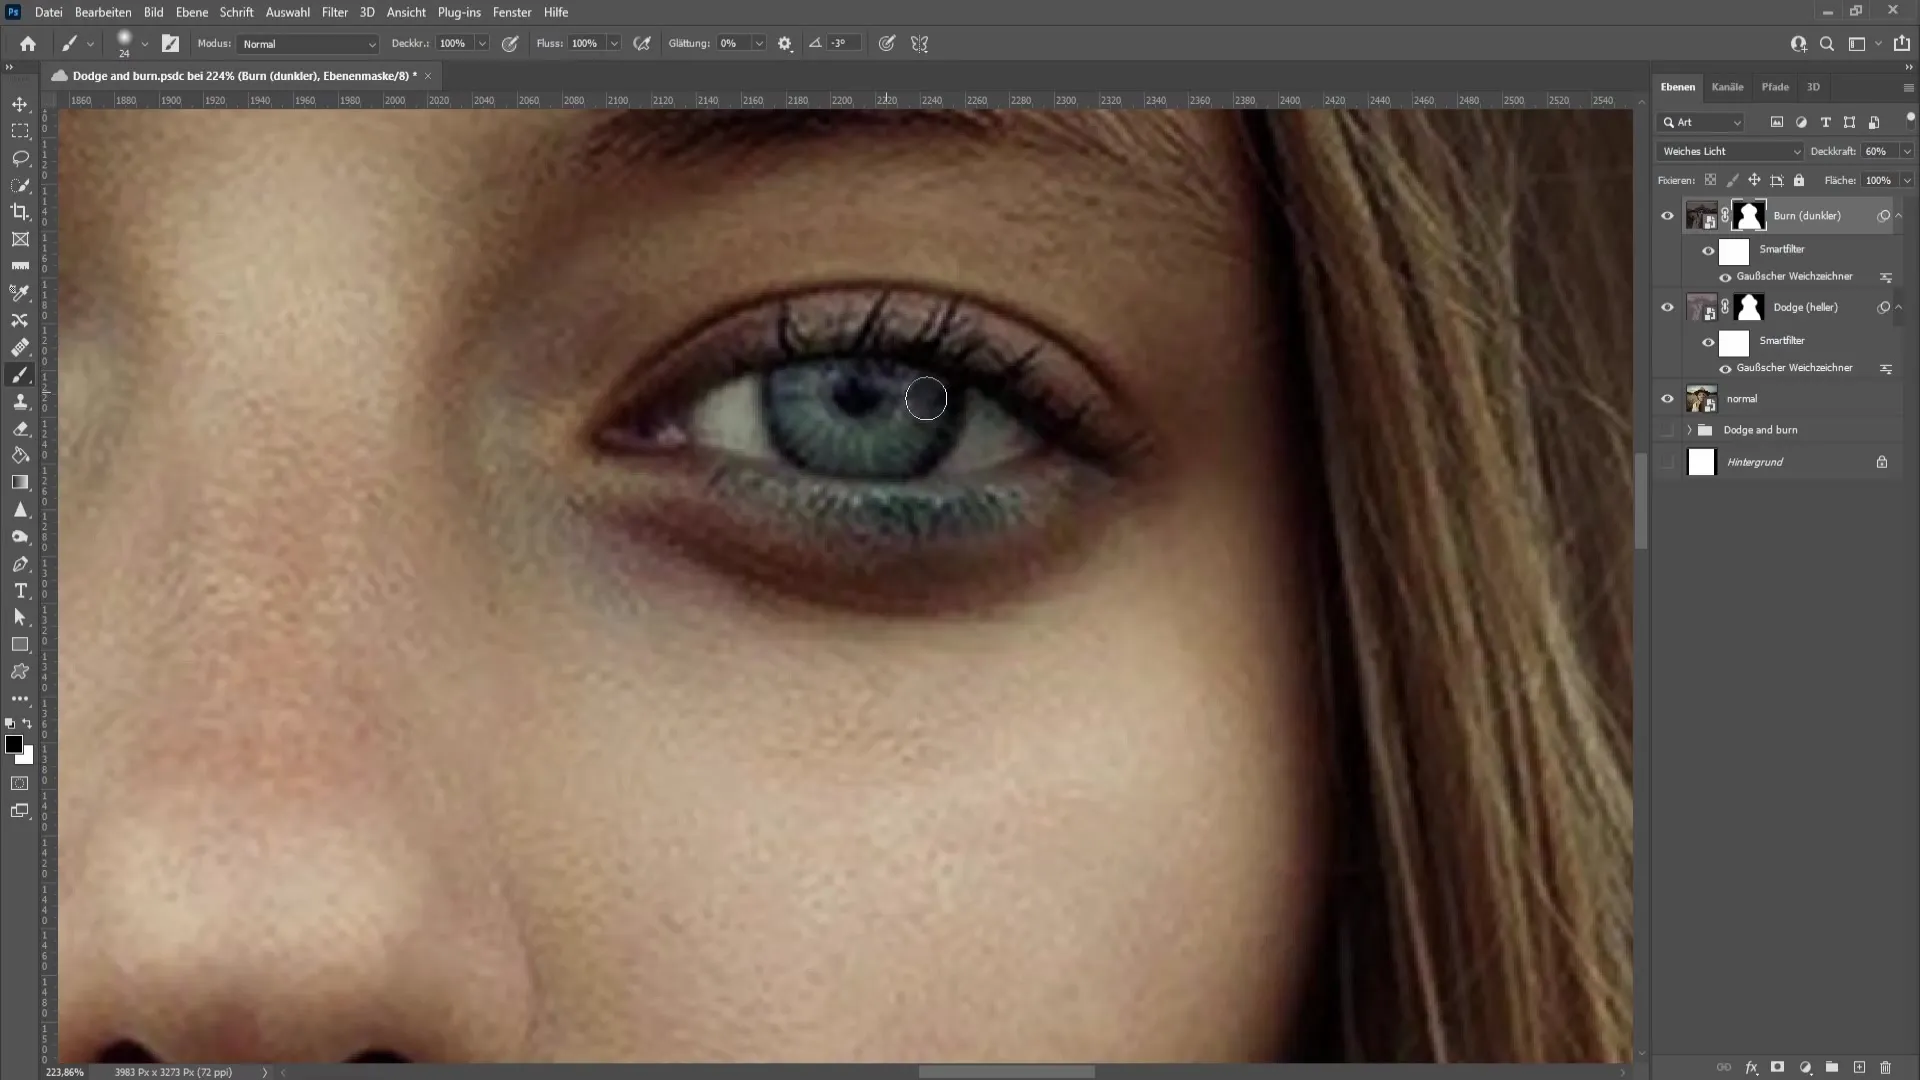
Step 16: Finishing Touch
Now you can mask out the eyes and lips to highlight them. Use a small brush and work precisely to achieve the desired effects.
Step 17: Reviewing the Final Result
Understand how the Dodge-and-Burn technique has changed the image. Turn the layers on and off to see the difference and make final adjustments.
Summary
In this tutorial, you have learned how to apply the Dodge-and-Burn technique in Photoshop to significantly improve the image quality. With the described steps, you have the opportunity to edit images in a professional way and bring more dimension to your photos.
Frequently Asked Questions
How does the Dodge-and-Burn technique work?The technique enhances the light and shadows in an image, resulting in more depth.
Can I undo the adjustments?Yes, by using Smart Objects you can change or undo adjustments at any time.
Do I need special skills to apply this technique?No, the described steps are simple and suitable for beginners in Photoshop.


