In this tutorial, you will learn how to cut out glass in Photoshop. Cutting out glass can be a challenging task, especially because of the transparency and reflections often associated with it. I will show you the best techniques to do this accurately and effectively. You will work with the pen tool to make a precise selection, and then use various tricks to enhance the appearance of the glass. Let's dive right into the steps!
Main takeaways
- Use the pen tool for precise selections.
- Utilize layer masks for a clean separation.
- Experiment with different blending modes to optimize the appearance of the glass.
Step-by-step guide
Step 1: Open image and tool selection
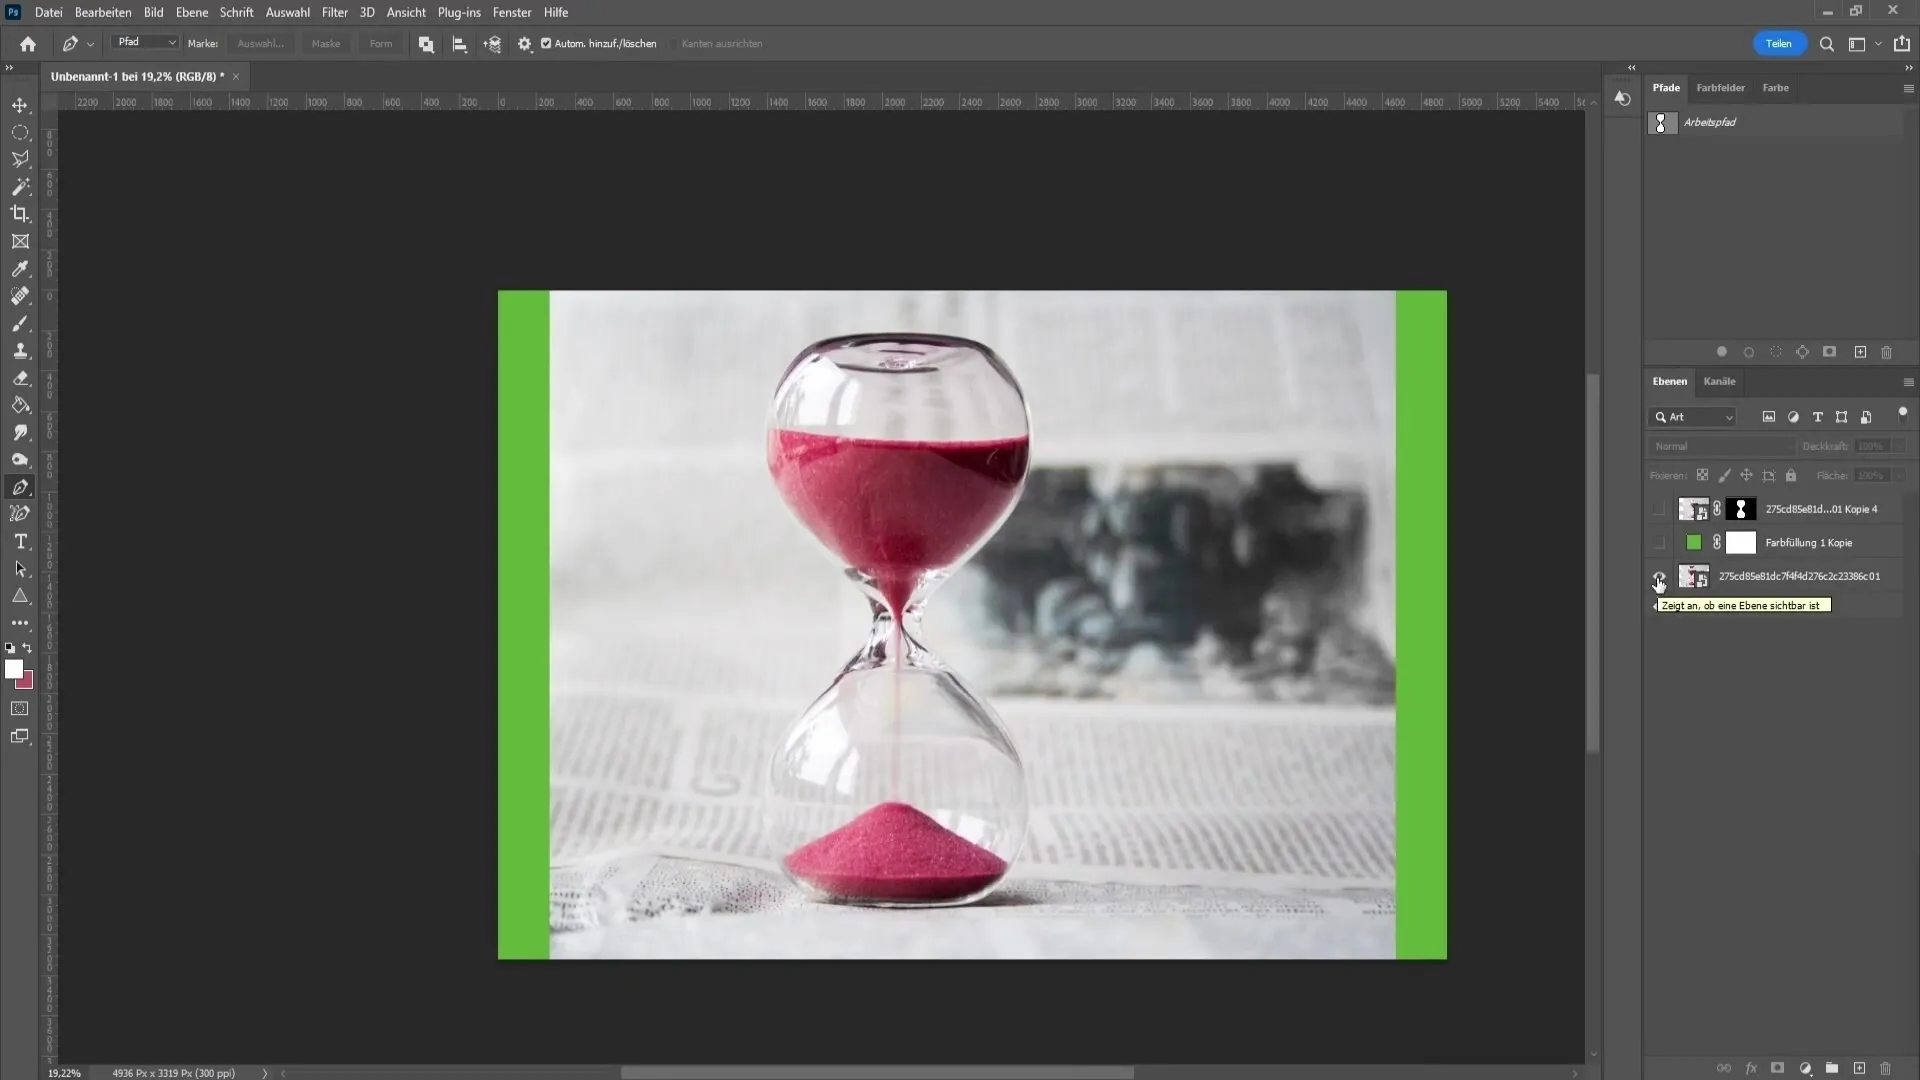
Open your image in Photoshop that contains the glass object to be edited. In this tutorial, we are using an image of an hourglass. To achieve the best effect, select the pen tool from the toolbar. This tool gives you the control you need to work precisely along the contours of the glass.
Step 2: Start selection
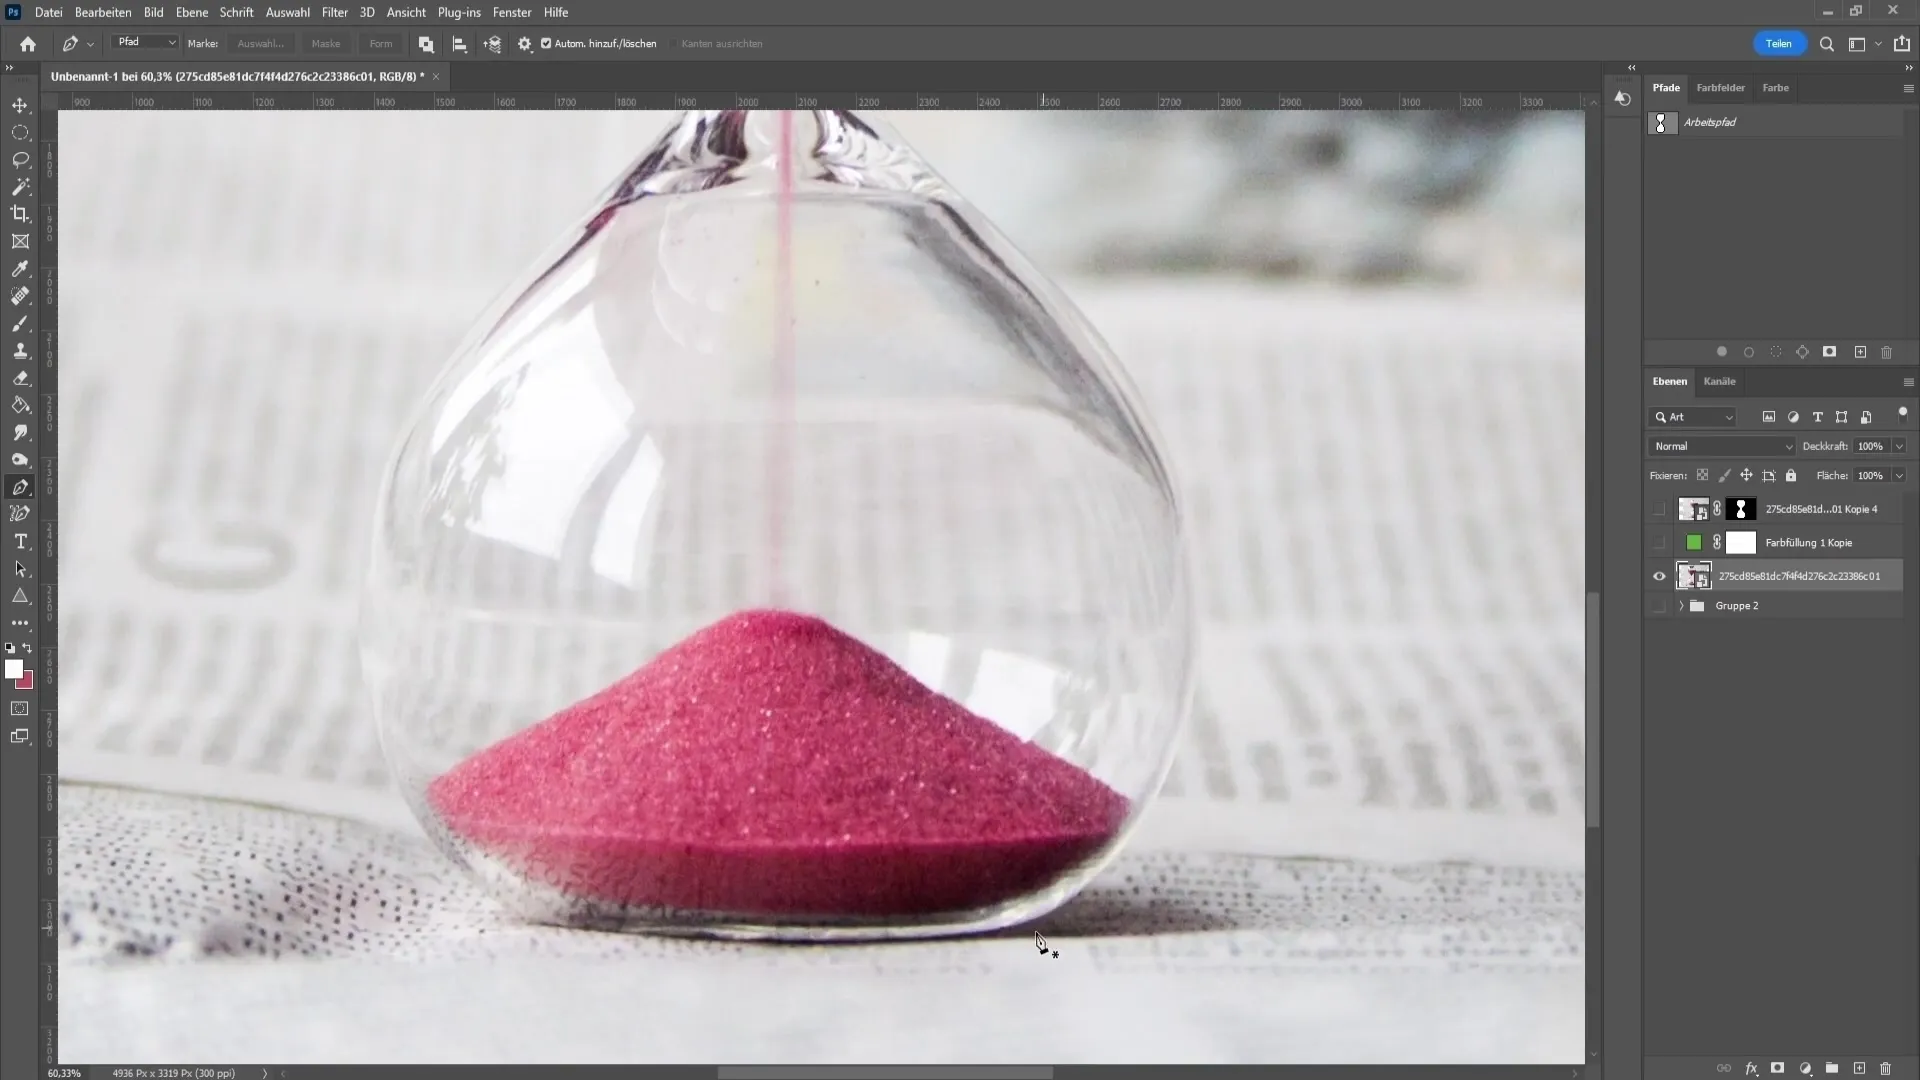
Place the first point at one of the edges of the glass and draw curves by placing more points to trace the shape of the glass. Hold down the control key to move and adjust points as you work.
Step 3: Adjust contour
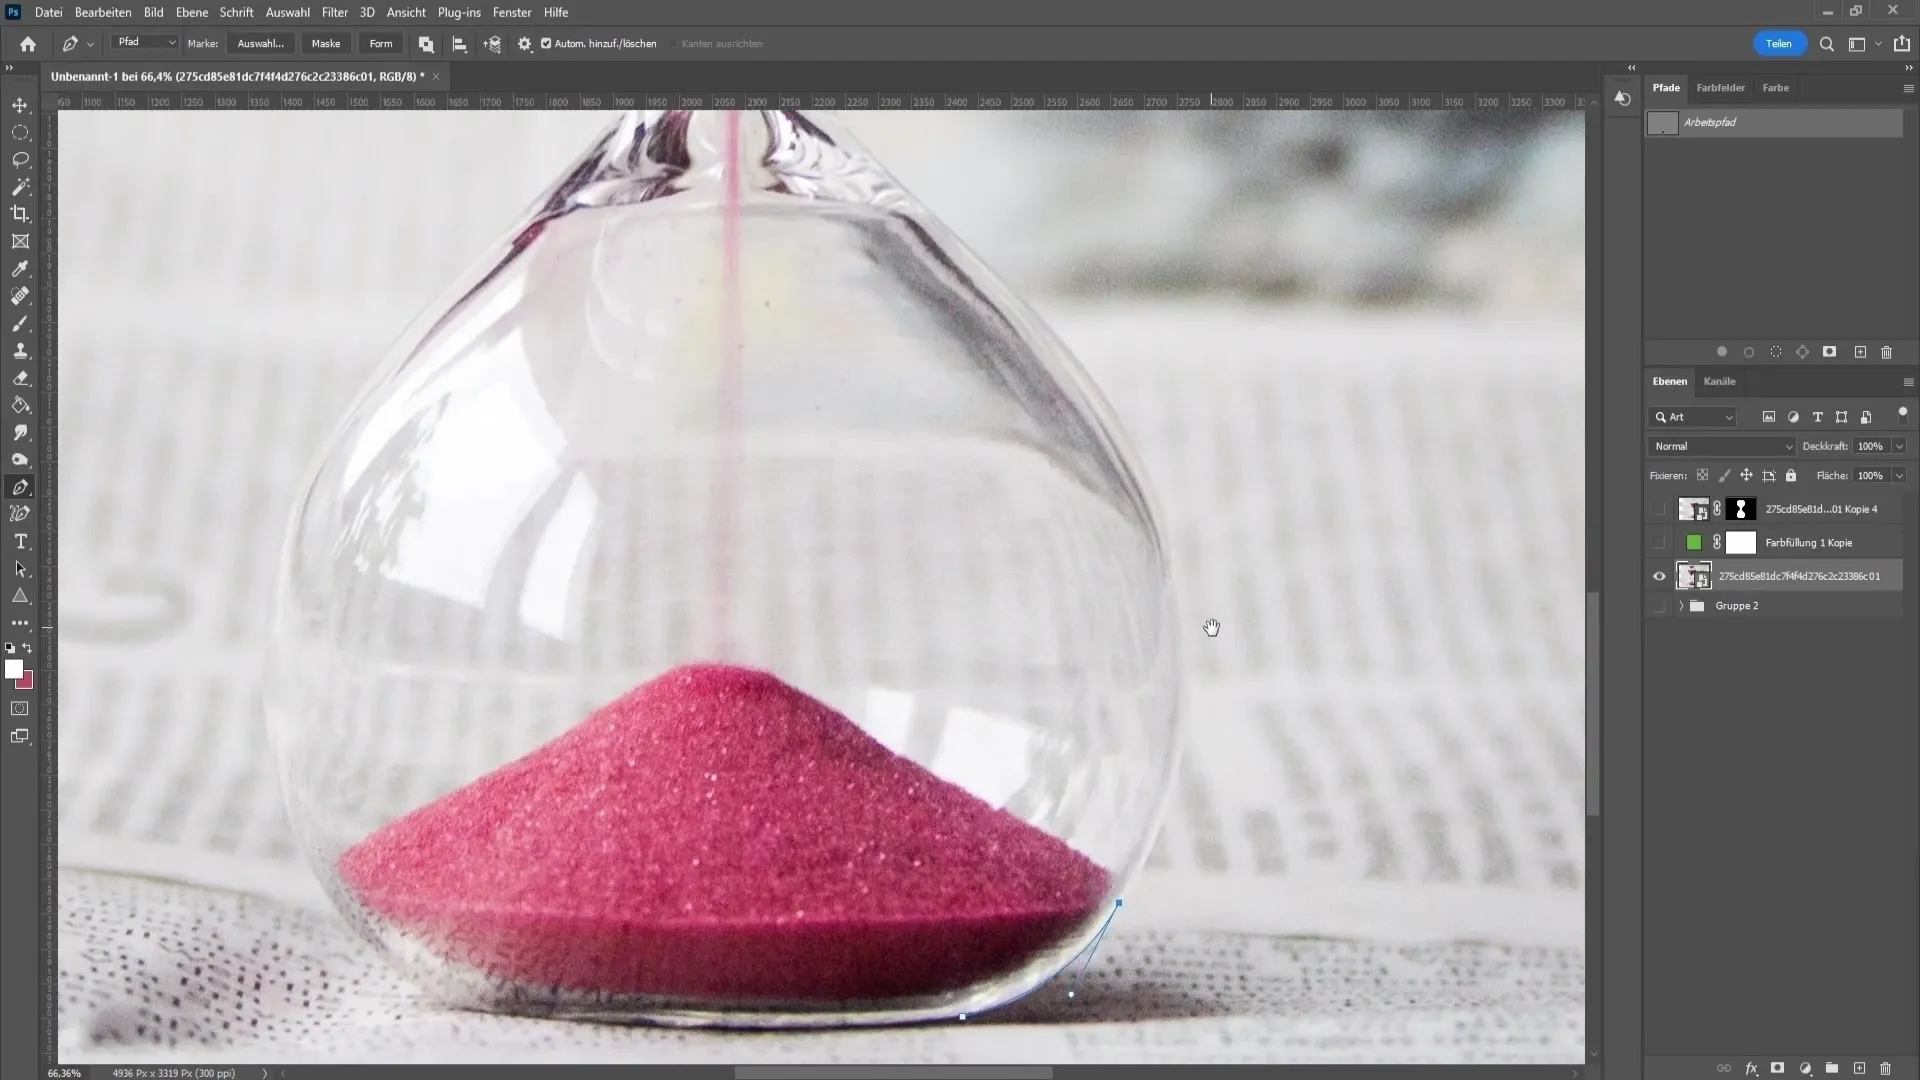
If you have drawn your selection around the edges of the glass and find that some points are not optimally placed, you can adjust them easily. Simply hold down the Alt key and click on the point you want to edit. This is especially important for complex shapes.
Step 4: Close selection and add soft edges
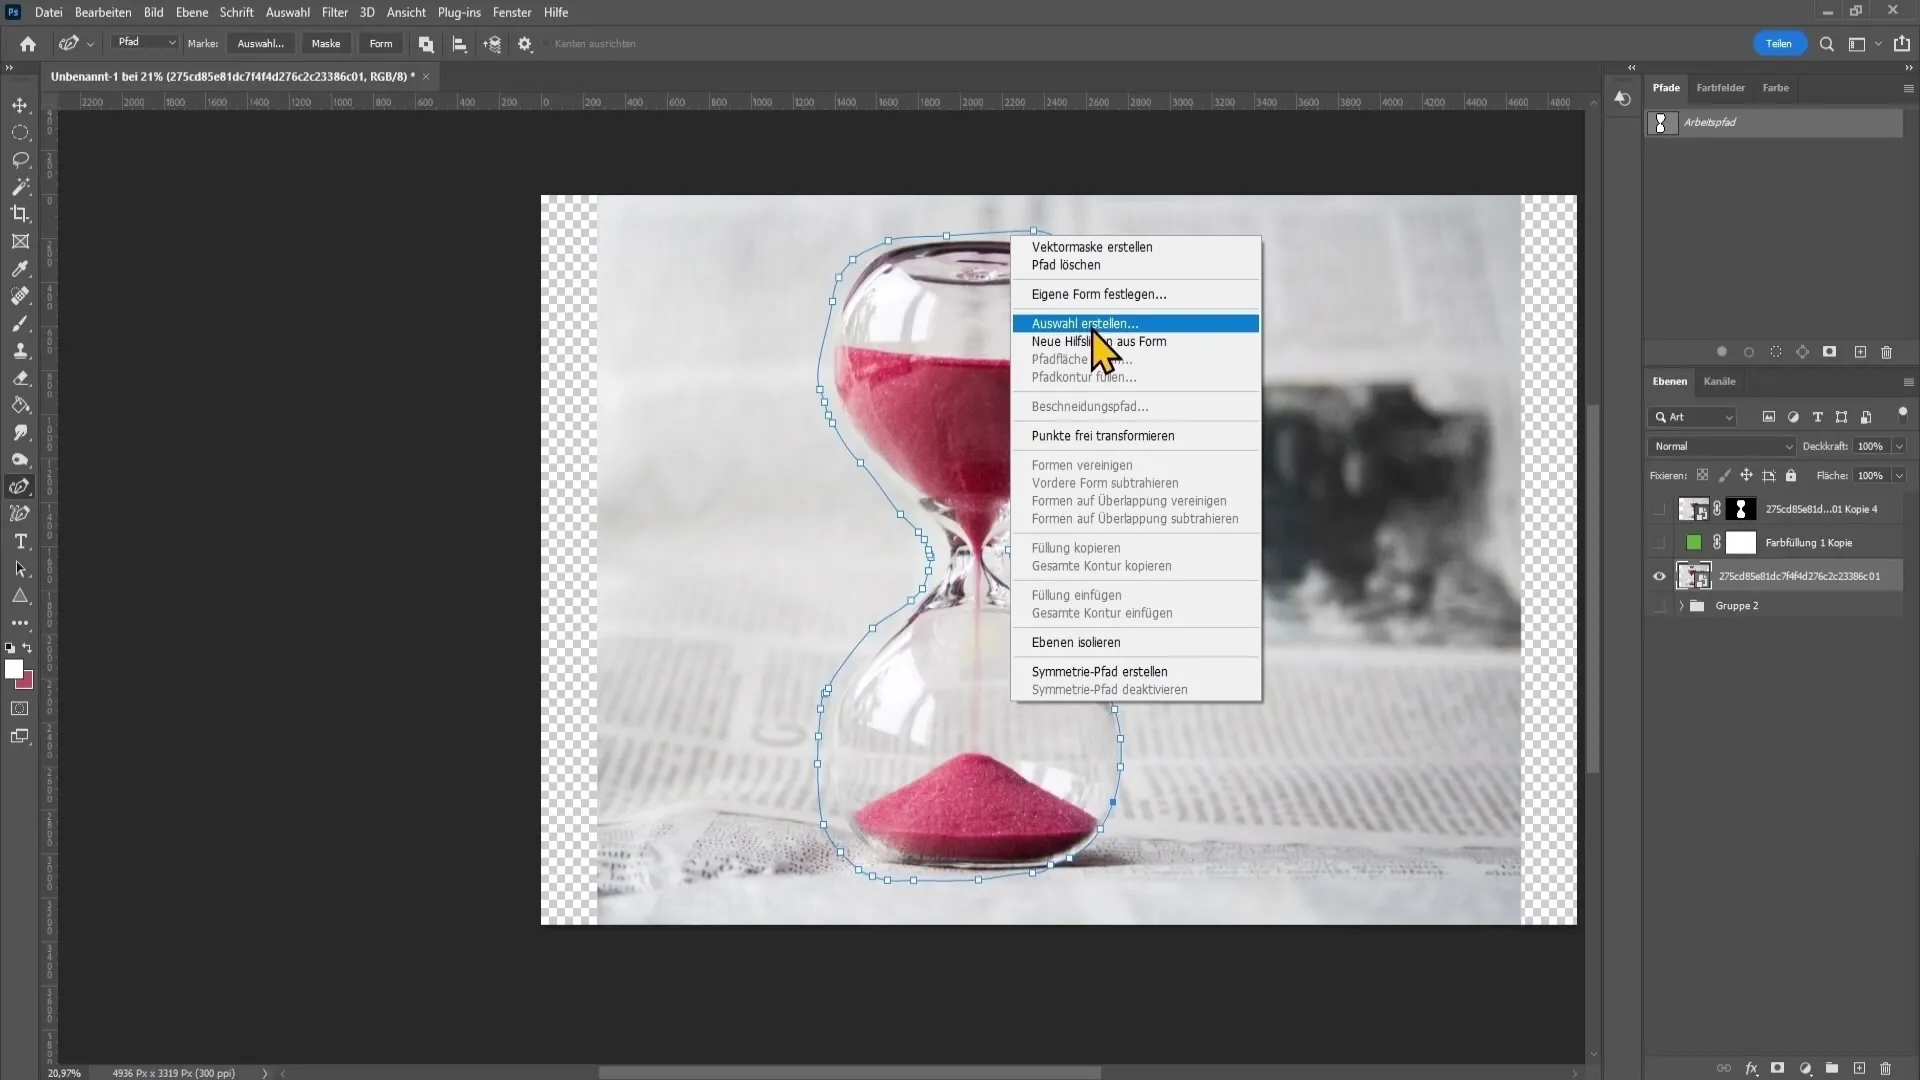
Once you are satisfied with your selection, right-click and choose "Create selection." Set the feather to about 0.5 pixels to soften the edges. This ensures that the selection does not look too sharp.
Step 5: Mask the layer
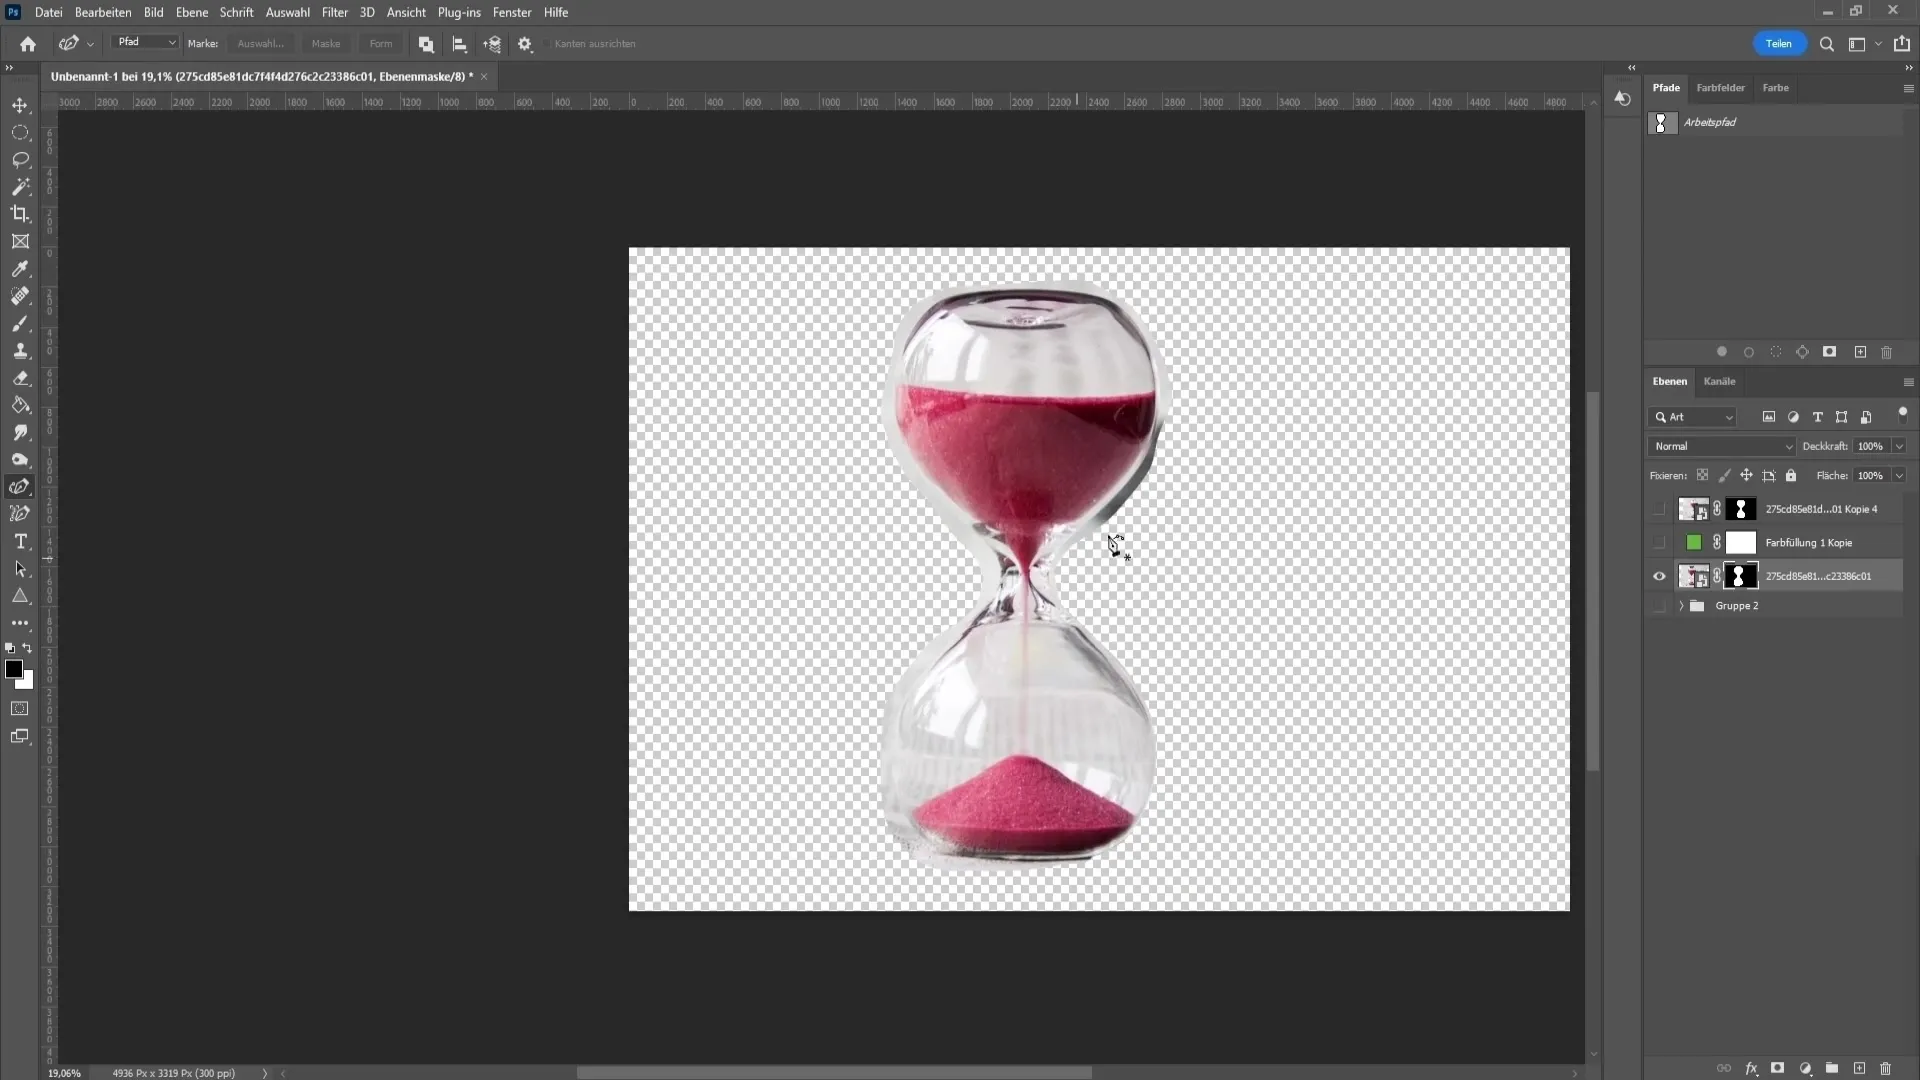
Now you can convert the selection into a layer mask. Click on the mask icon in the bottom toolbar. This will cut out the glass and remove the background.
Step 6: Create background
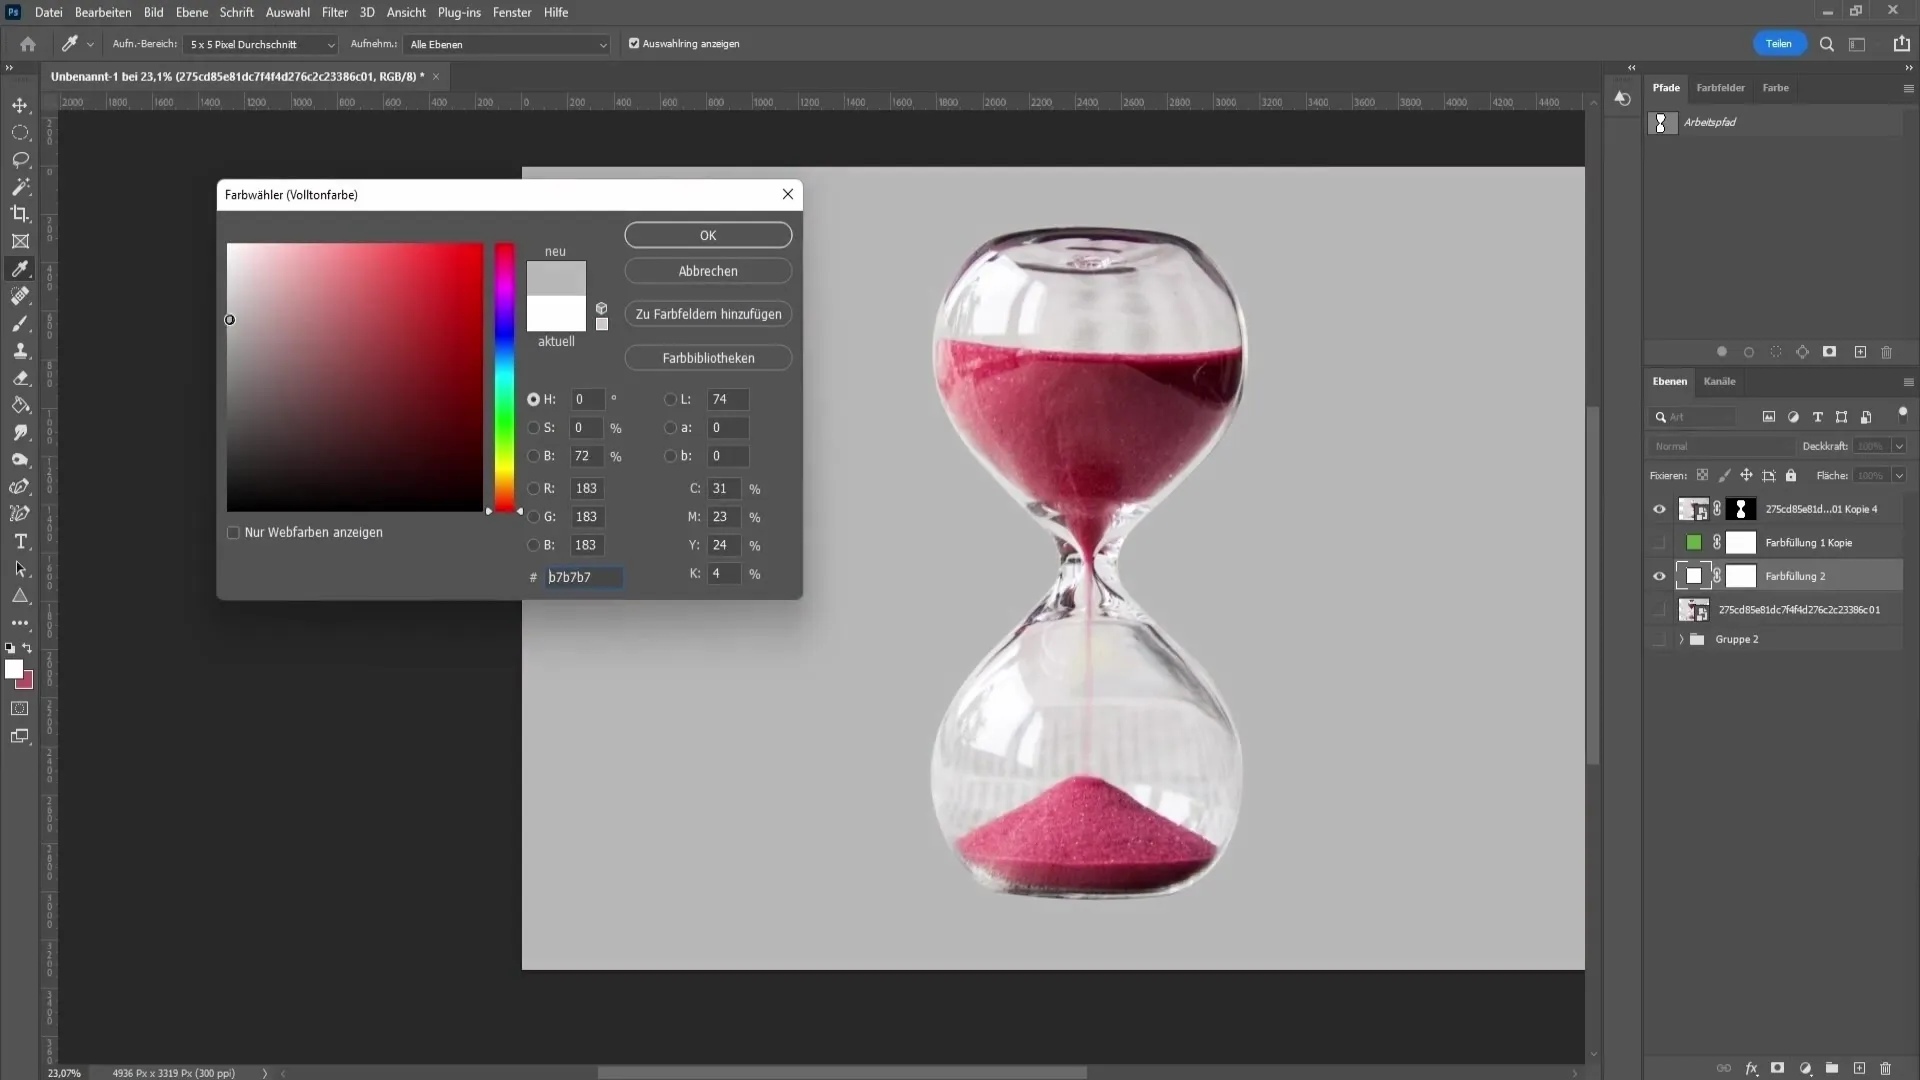
To give more depth to your cutout object, add a new background. Click on the color fill symbol and choose a color that complements the glass well. Here we are using a green background.
Step 7: Use blending modes
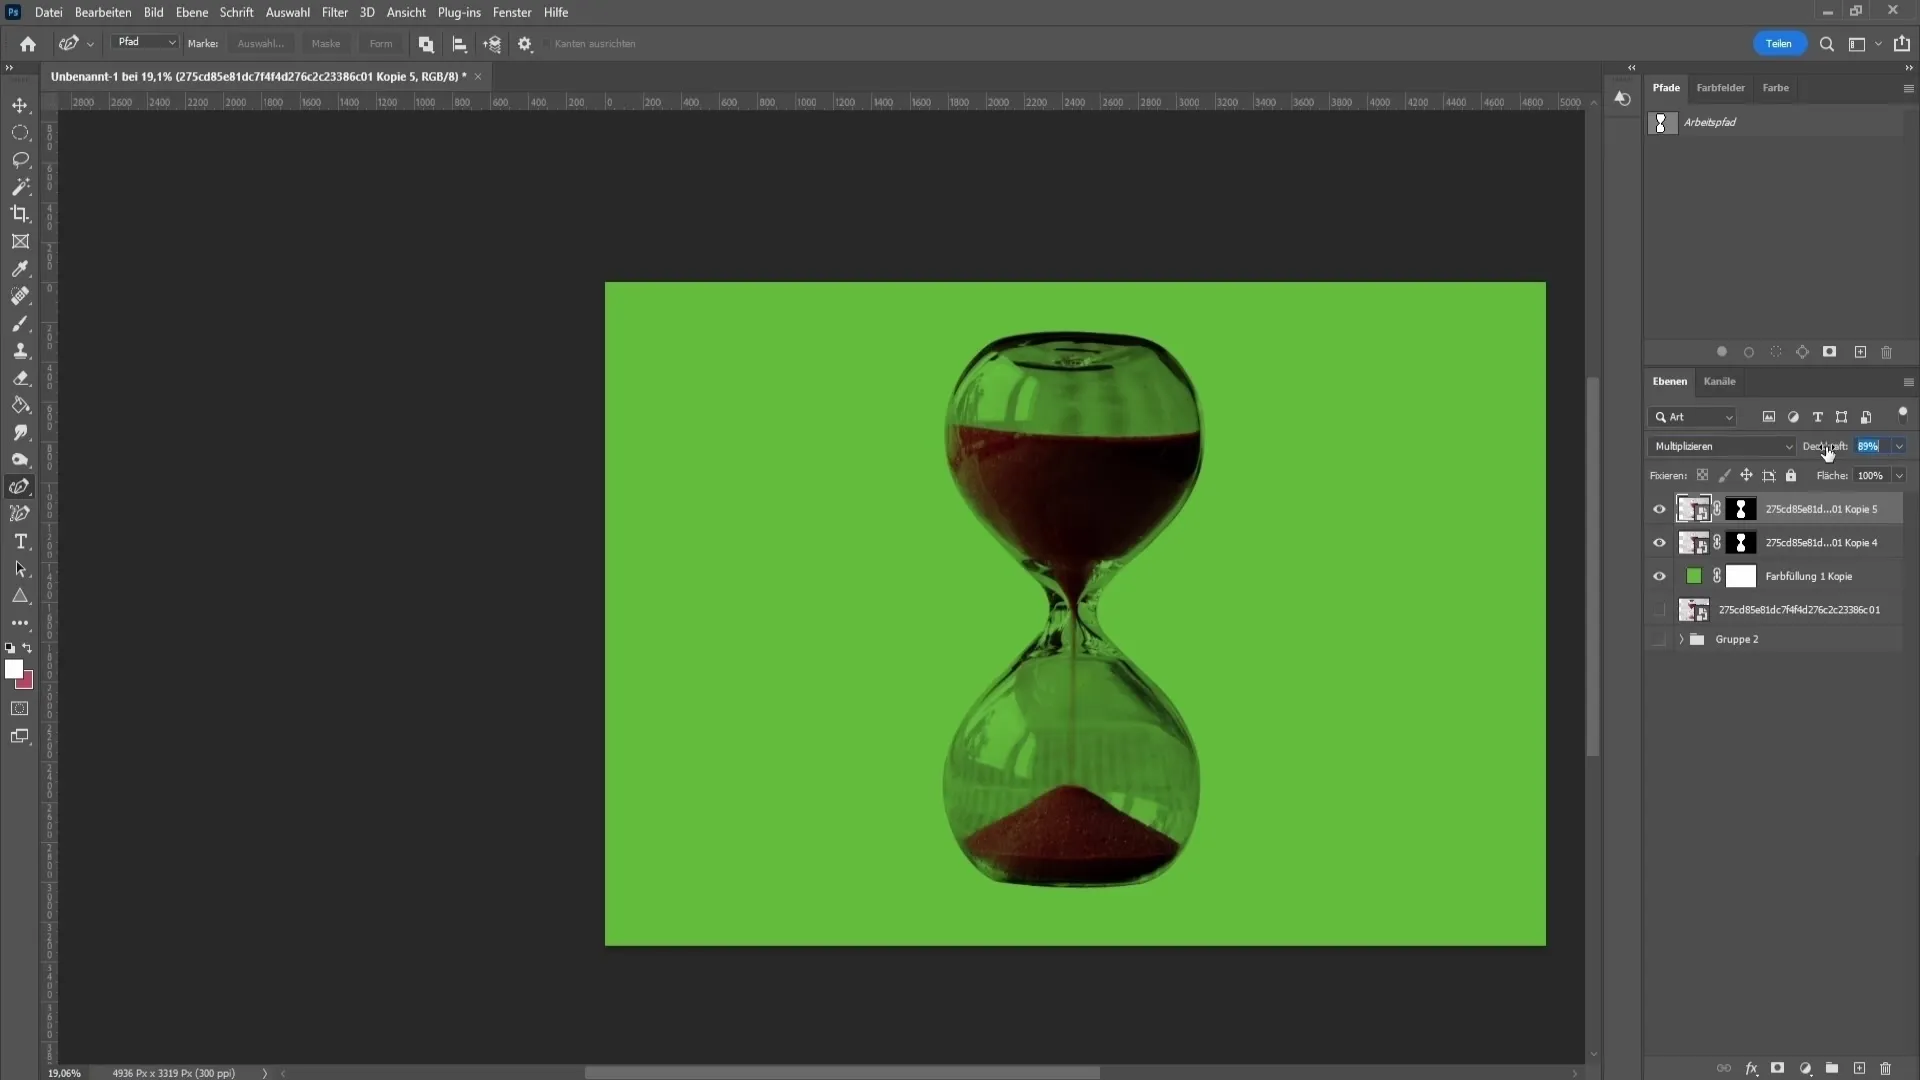
Select the layer of your cutout hourglass and set the blending mode to "Multiply." This will remove white areas and give the glass a more realistic depth. Be sure to make a copy of the layer to avoid losing the original. You can do this with Ctrl + J.
Step 8: Add reflections
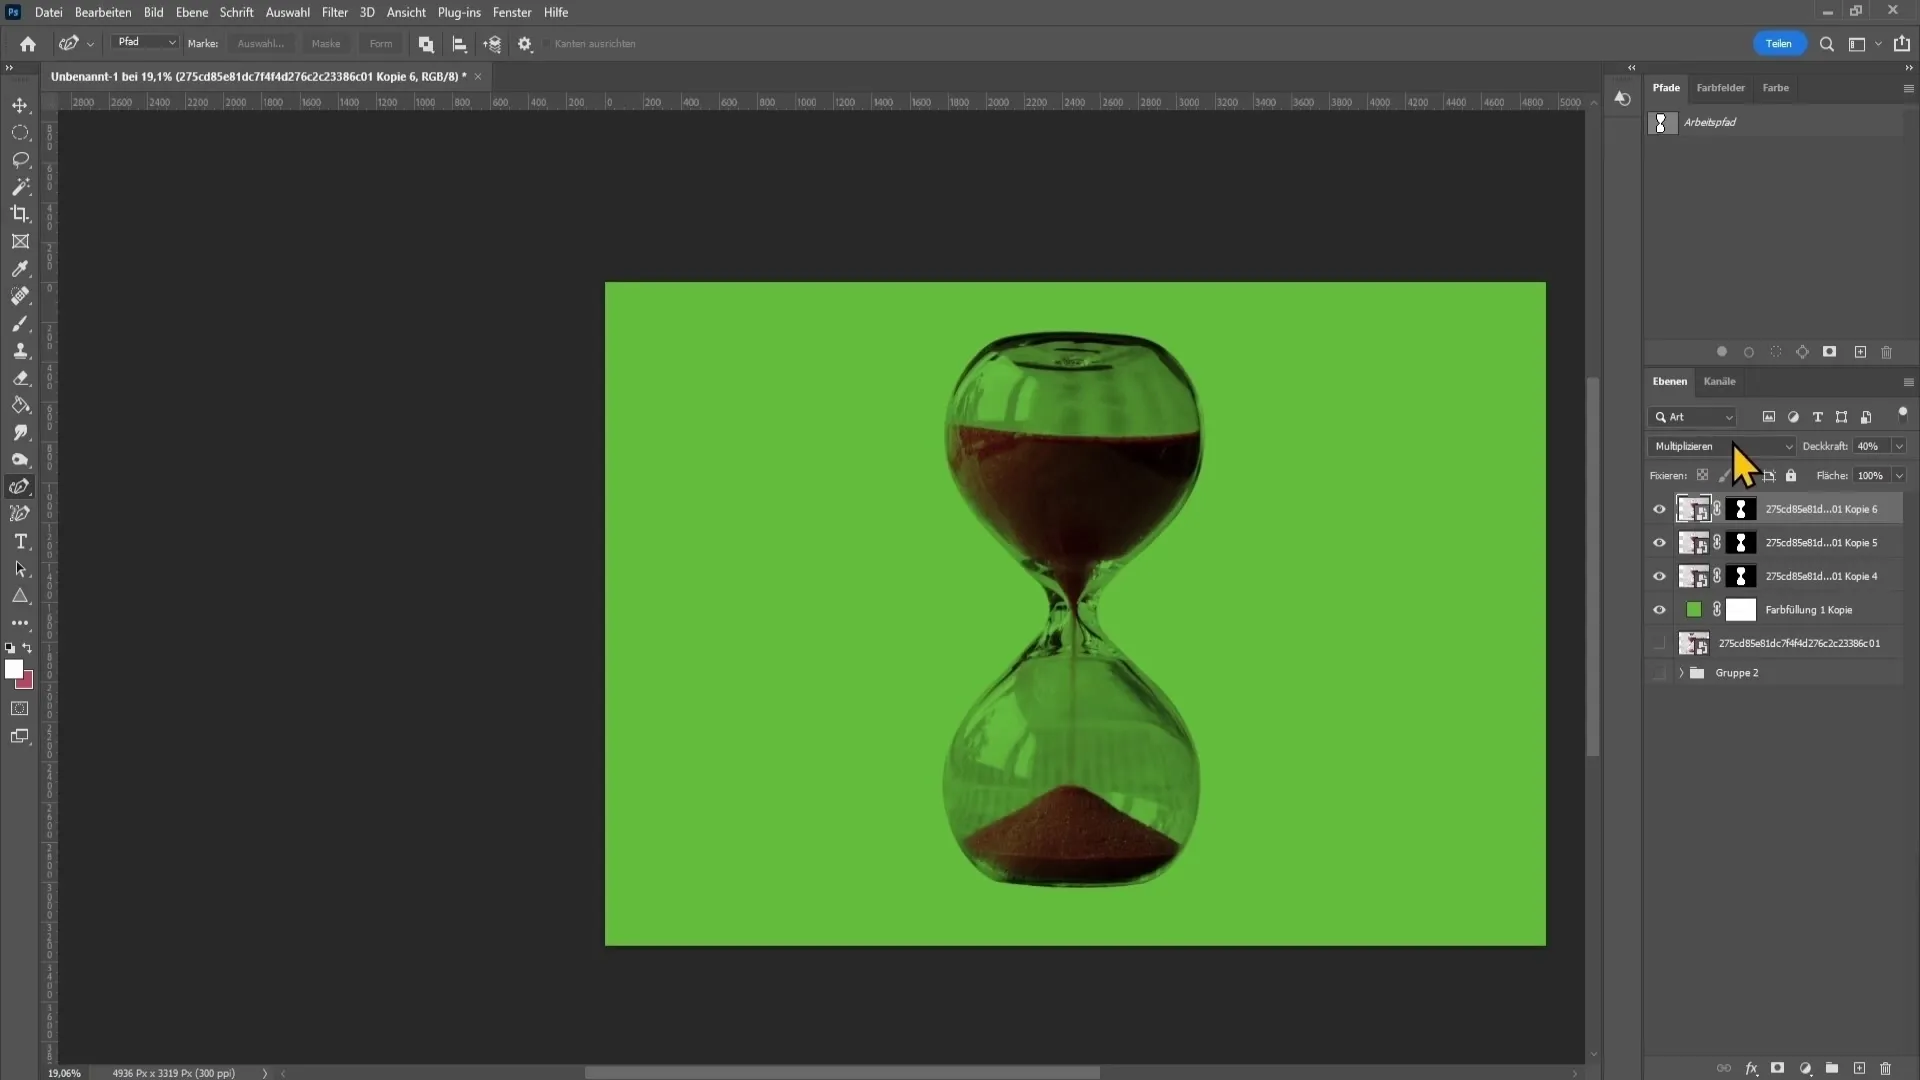
To restore reflections, make another copy of the previous layer and set the blending mode to "Negative Multiply." Now the reflections should be more clearly visible, and you can adjust the transparency as needed.
Step 9: Make color adjustments
If you notice that the colors of your glass have been affected by the previous steps, create a new empty layer and then select your original color with the brush. Make sure the blending mode is set to "Color" while restoring the areas that need adjustment.
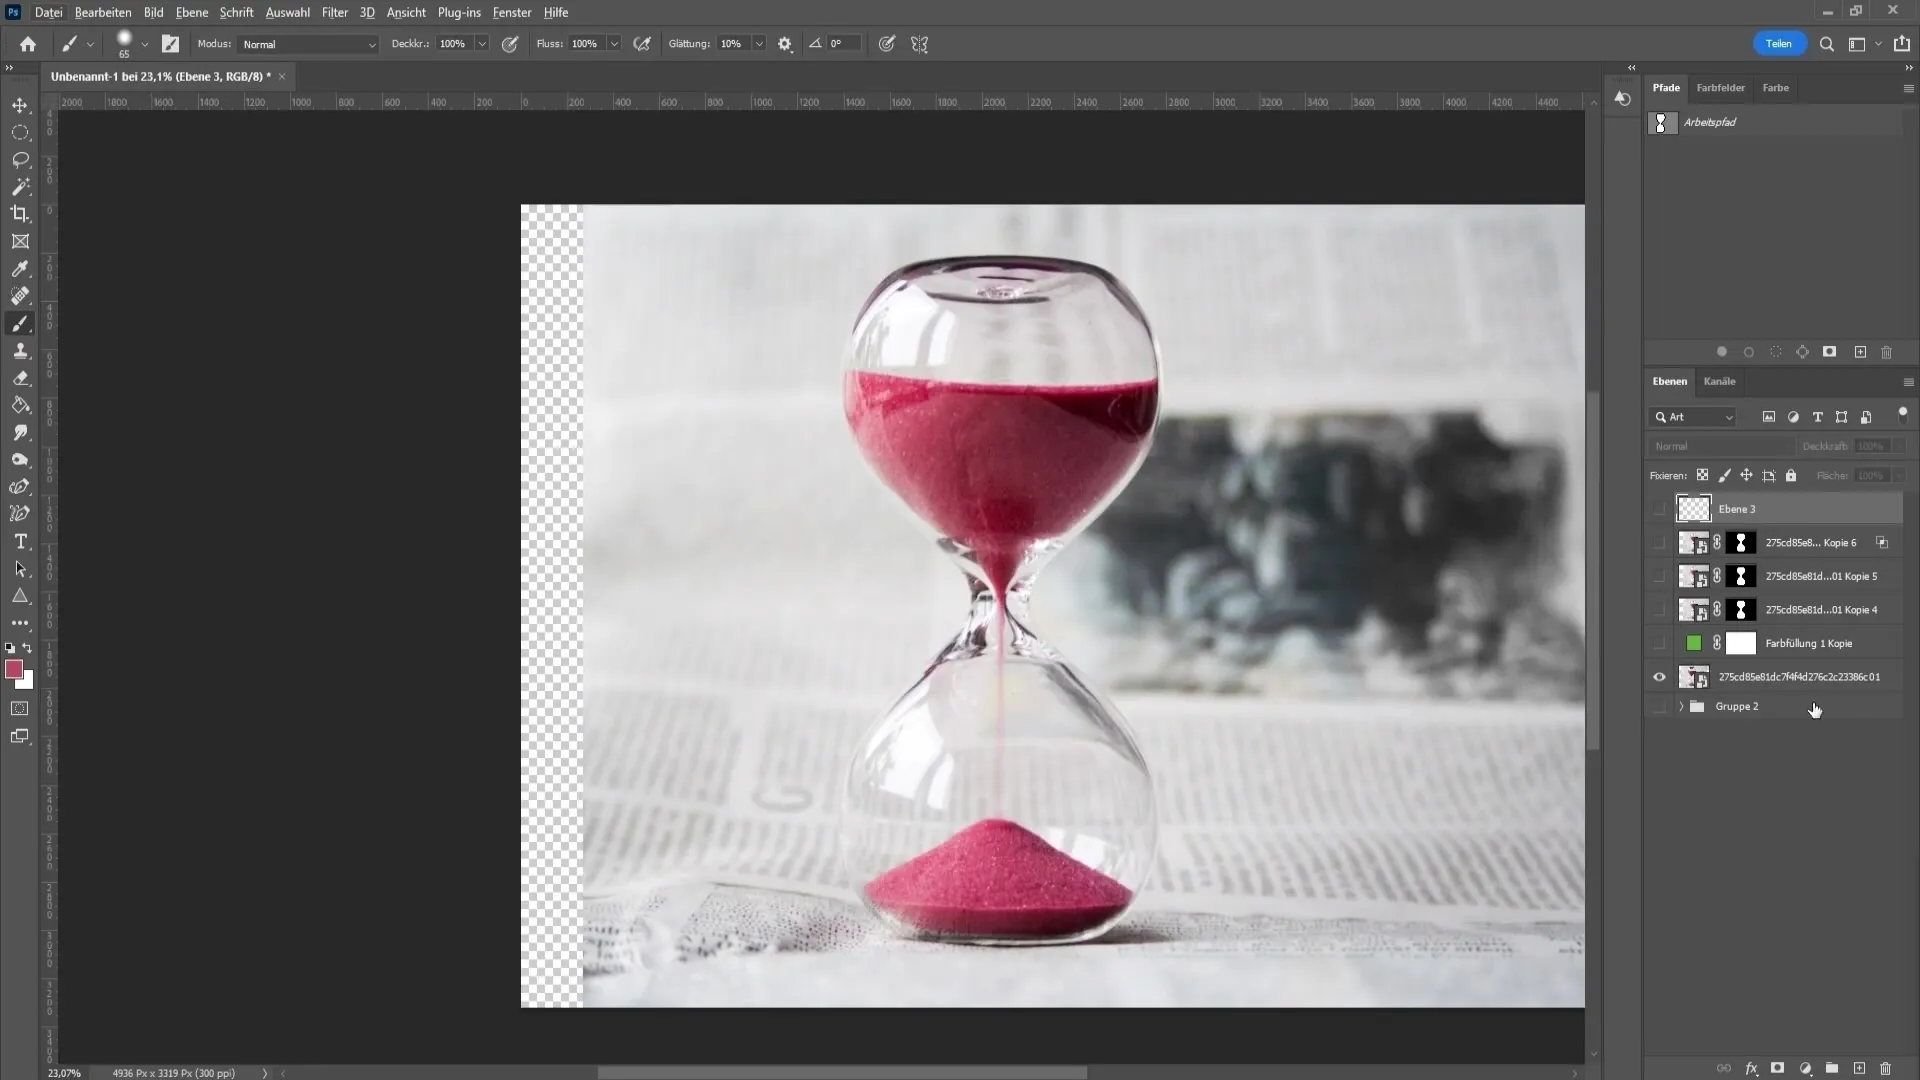
Step 10: Combine adjustments
You can group together the different layers that are relevant for the hourglass. Use the shortcut Ctrl + G for this. Add a levels adjustment to optimize the brightness and contrast of the glass. Make sure the adjustment layer is applied to the group for the adjustments to take effect.
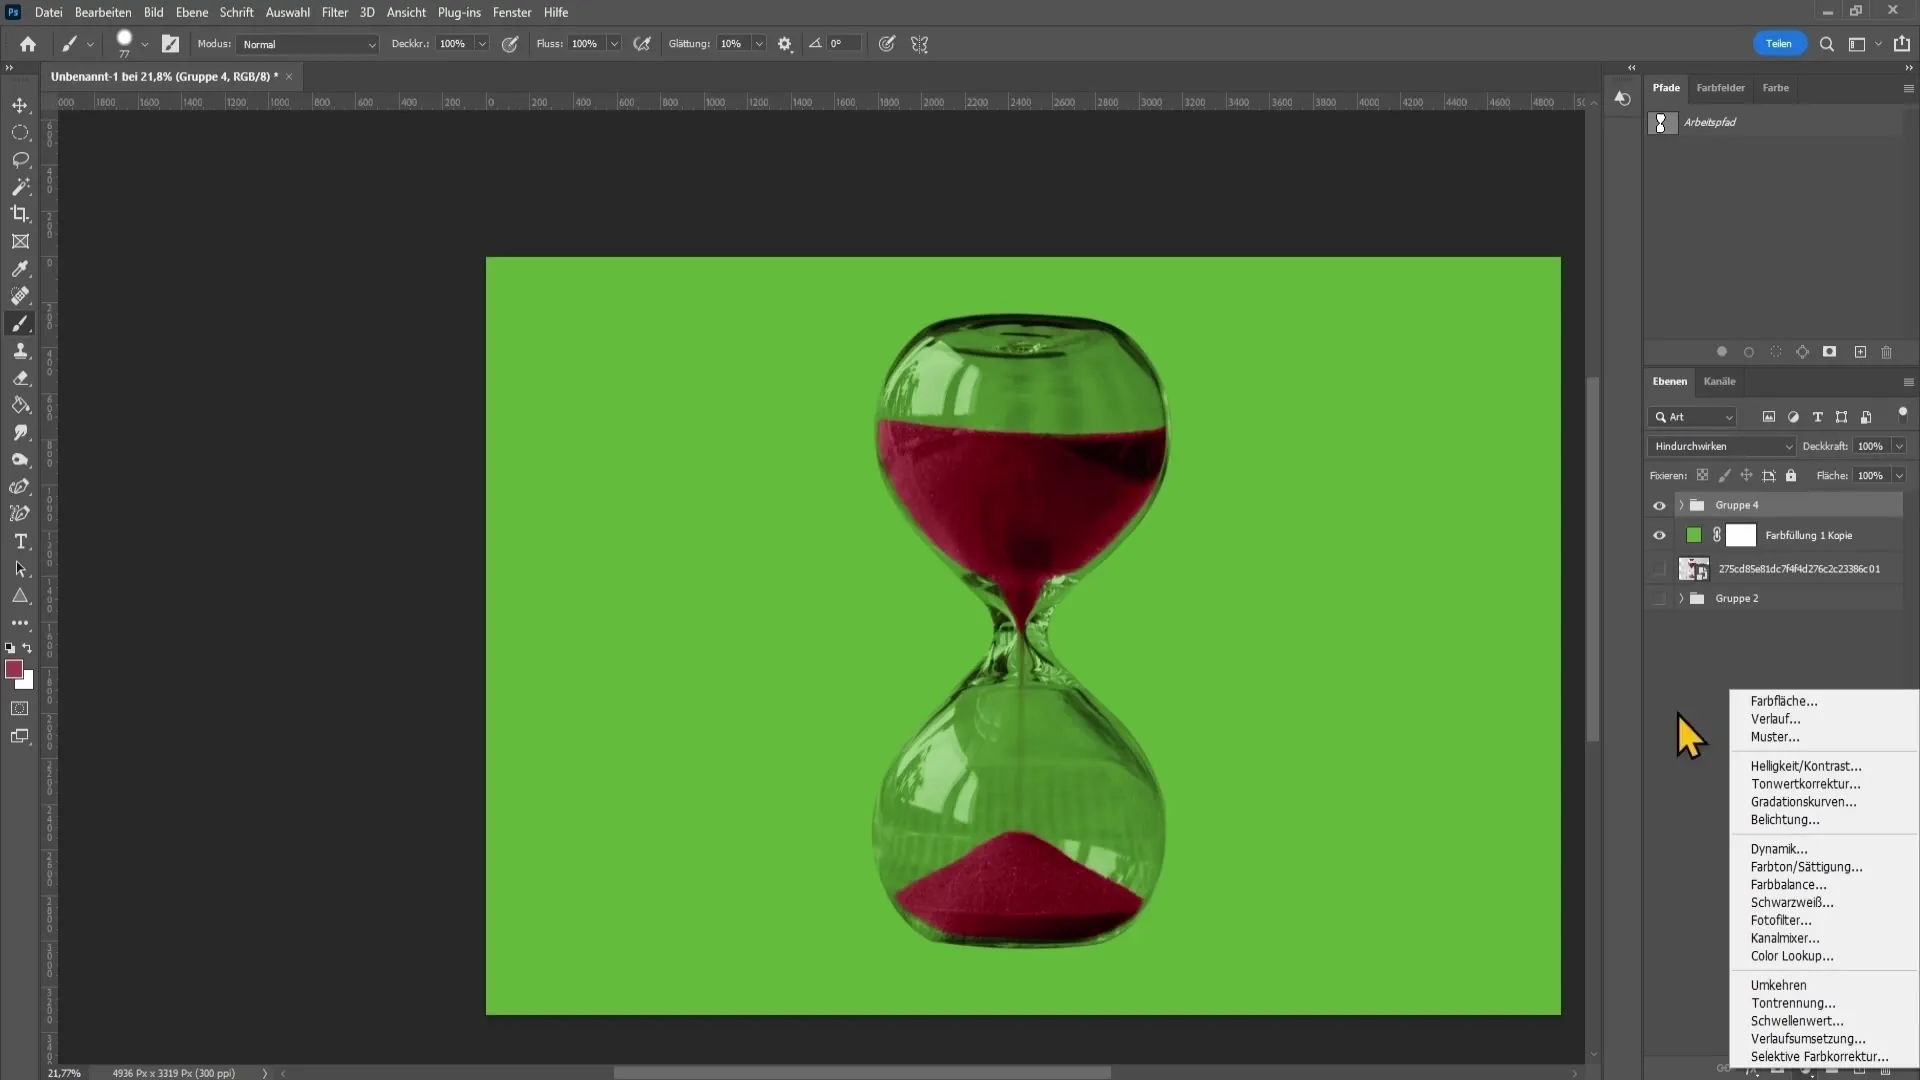
Step 11: Create drop shadow
To add depth to the entire image, include a drop shadow. Right-click on the layer, choose "Layer Style", and select the Drop Shadow option. Adjust the opacity, distance, and size to achieve your desired shadow effect.
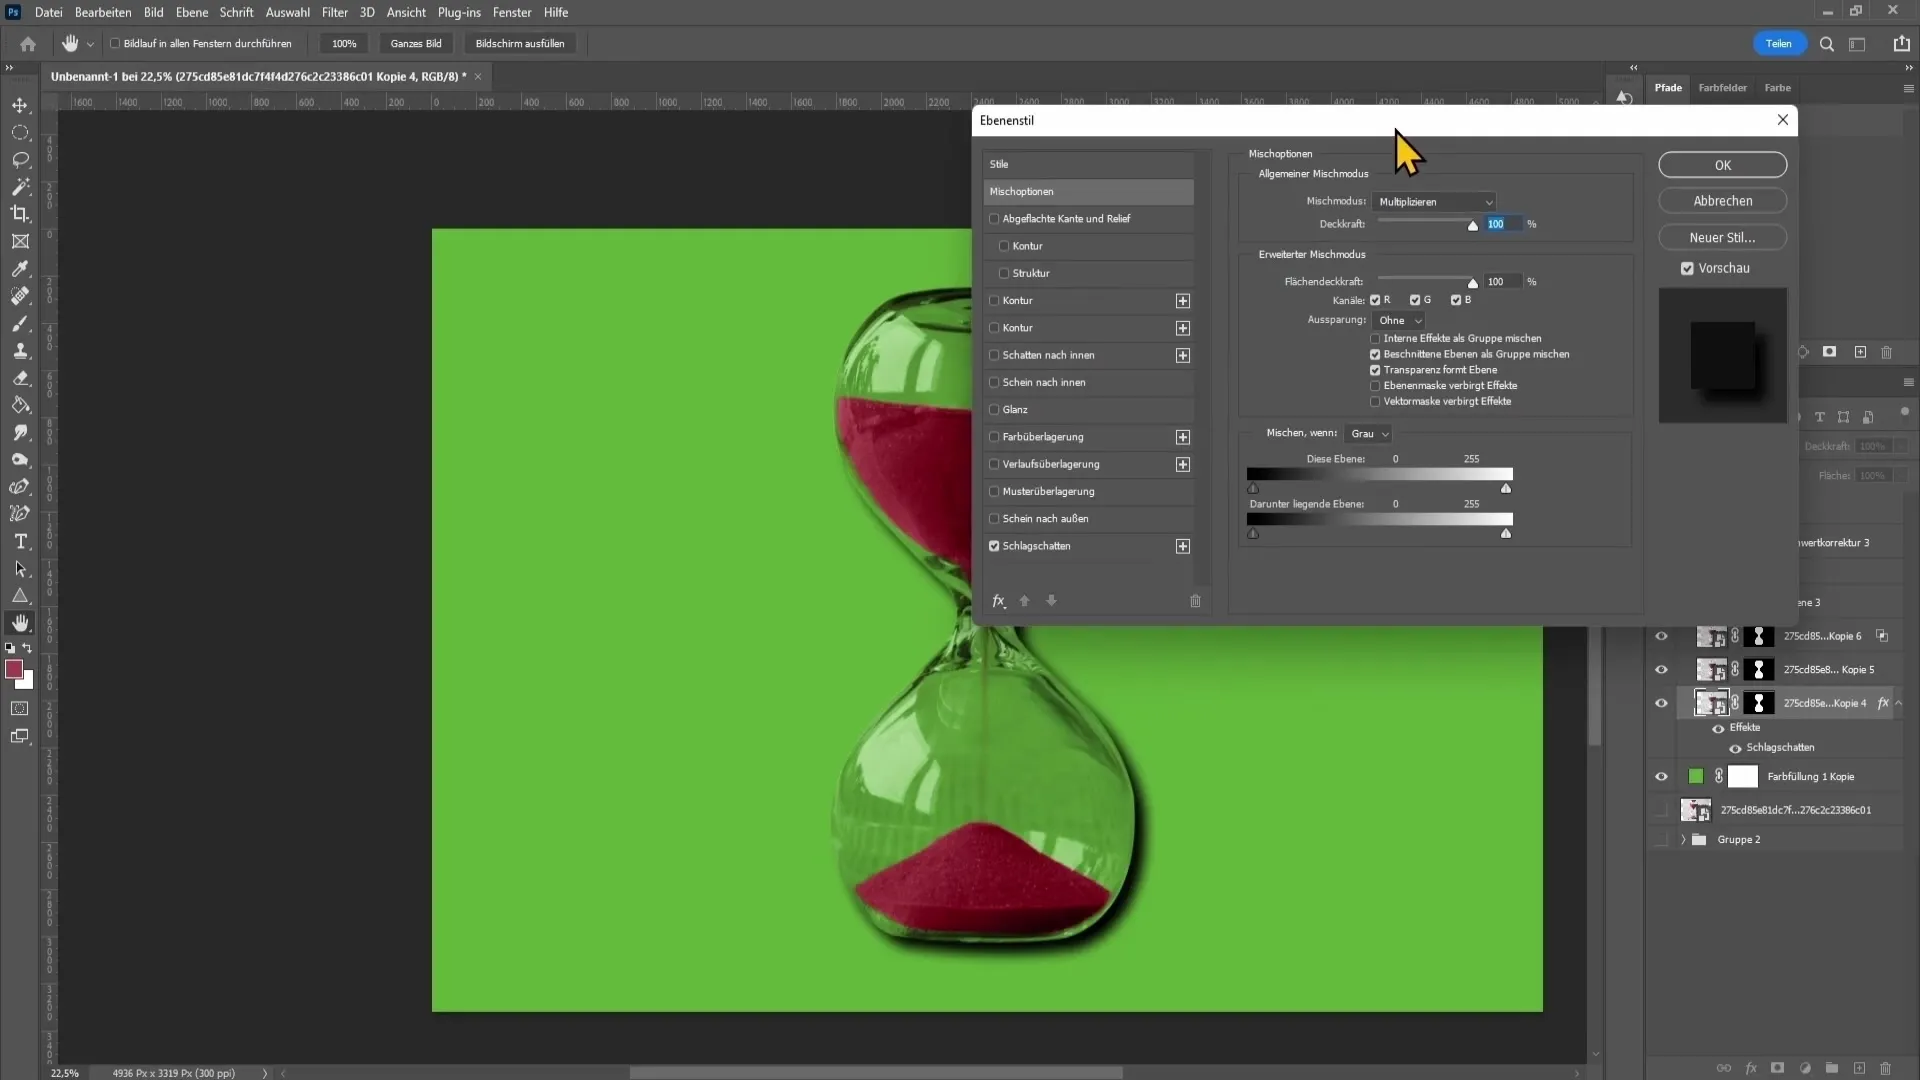
Step 12: Add reflection
If you don't have reflections yet, you can create one yourself. Create a new empty layer and use the Lasso tool to draw a reflection. Fill the selection with white and adjust the opacity to craft the effect.
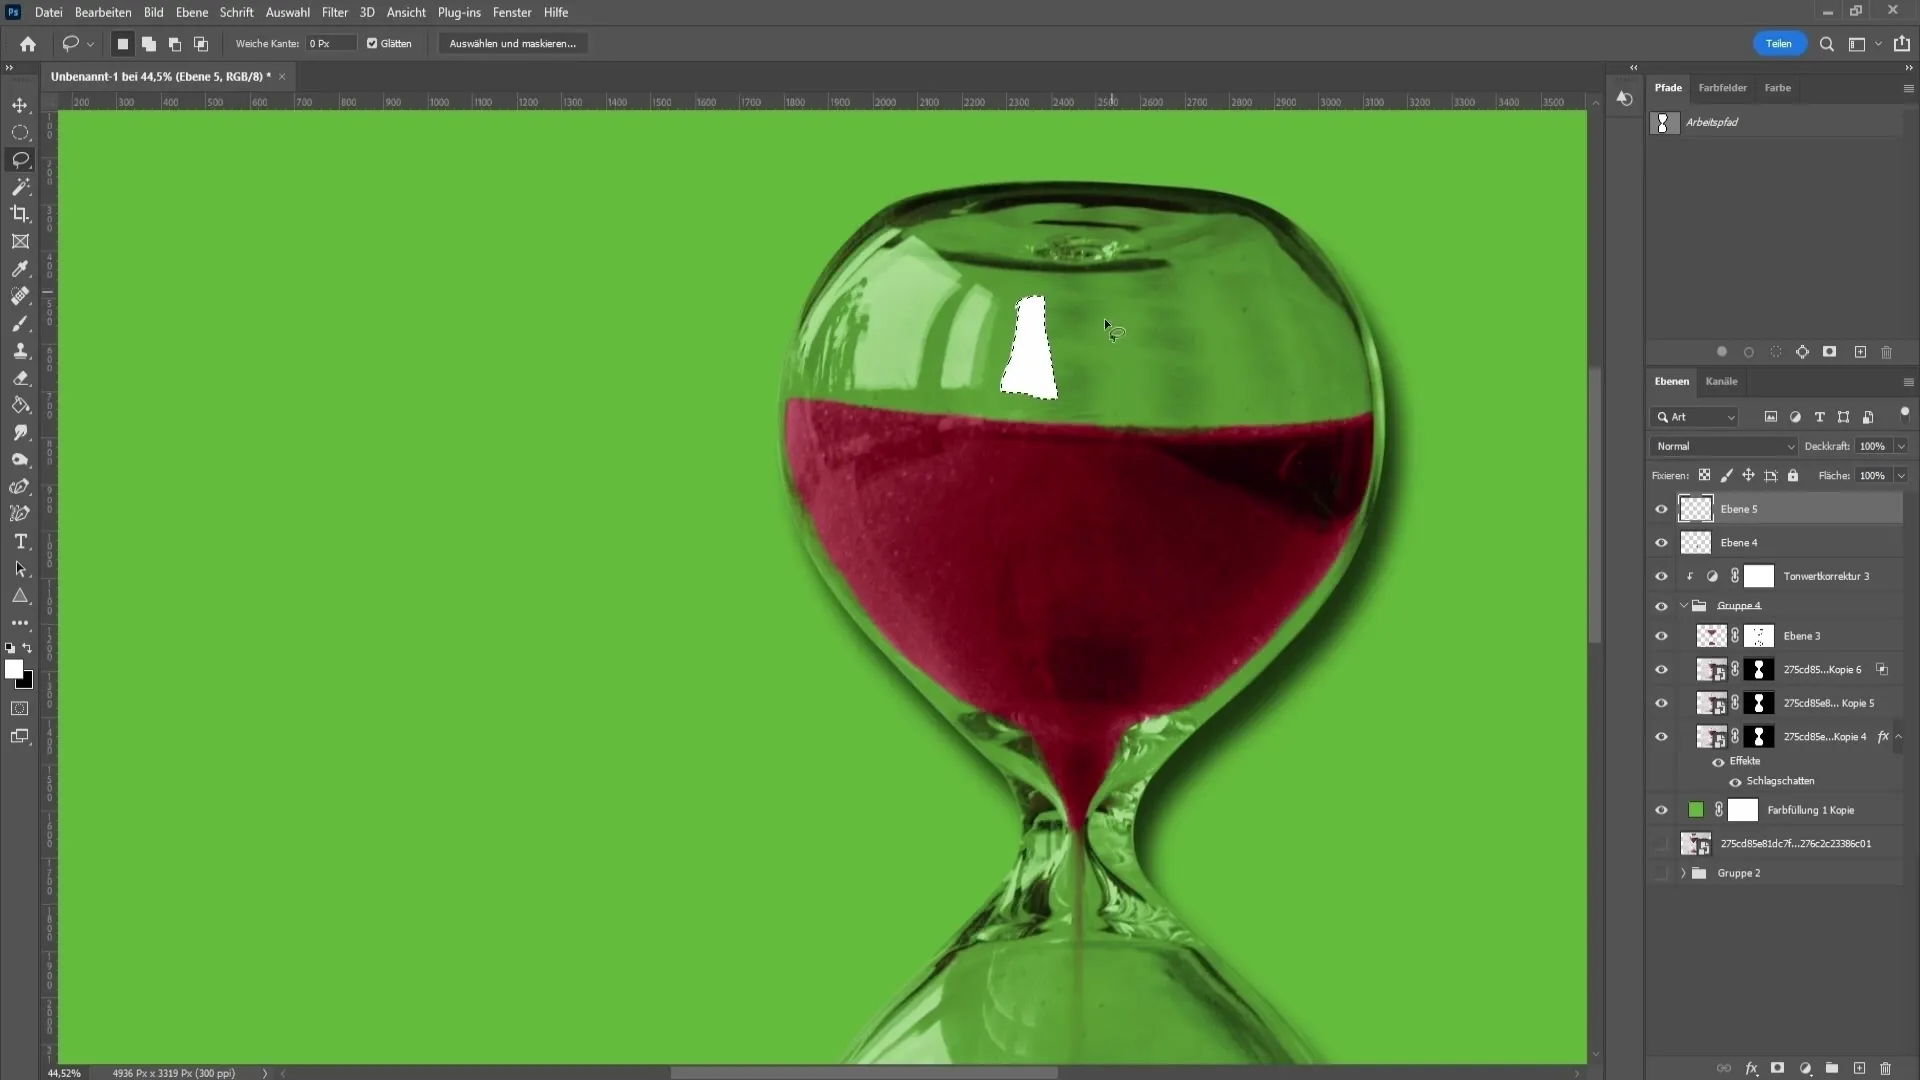
Summary
In this tutorial, you have learned basic techniques for cutting out glass in Photoshop. From using the pen tool for selection to applying blending modes and assembling effects like drop shadows and reflections – you are now capable of realistically editing glass.
FAQ
How can I ensure my image looks good when cutting out the glass?Make sure to make the selection as precise as possible and experiment with different blending modes to achieve the best effect.
What are the benefits of blending modes in Photoshop?Blending modes help optimize transparent areas and control the visible light and colors of objects.
Can I cut out other objects using this method?Yes, these techniques are not only applicable to glass but can also be used for other transparent or reflective objects.


