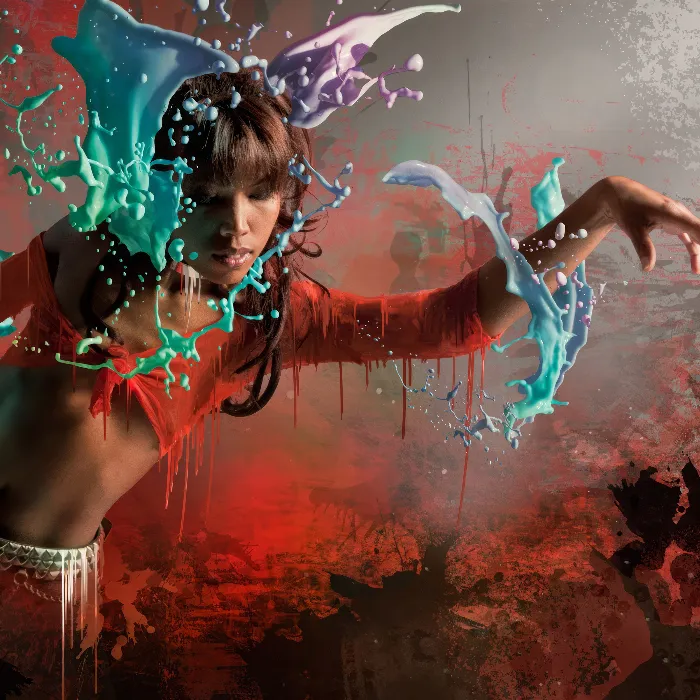
With the Dragan effect, named after the Polish photographer Andrzej Dragan, portraits receive an interesting and distinctive look. This tutorial explains how to recreate this effect in Adobe Photoshop. A graphics tablet is used during editing. Its usage is recommended for a better result, but not mandatory.
As the base image, I use a photo of a person with well-defined facial features. This supports the effect shown, as this editing method particularly focuses on the individual facial features.
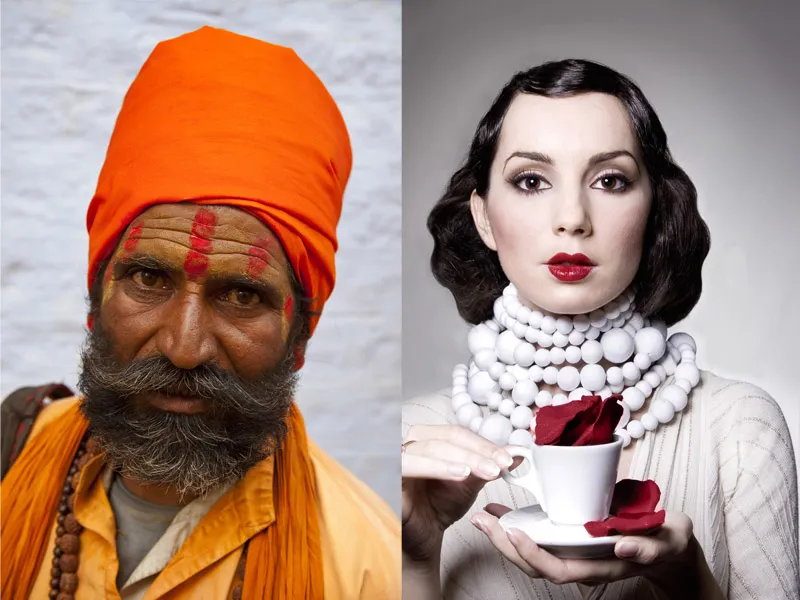
Our base image (left: Fotolia_21678831_M-© D. Ott - Fotolia.com. Right: © V. Kudryavtsev - Fotolia_3283580_M).
The result in images: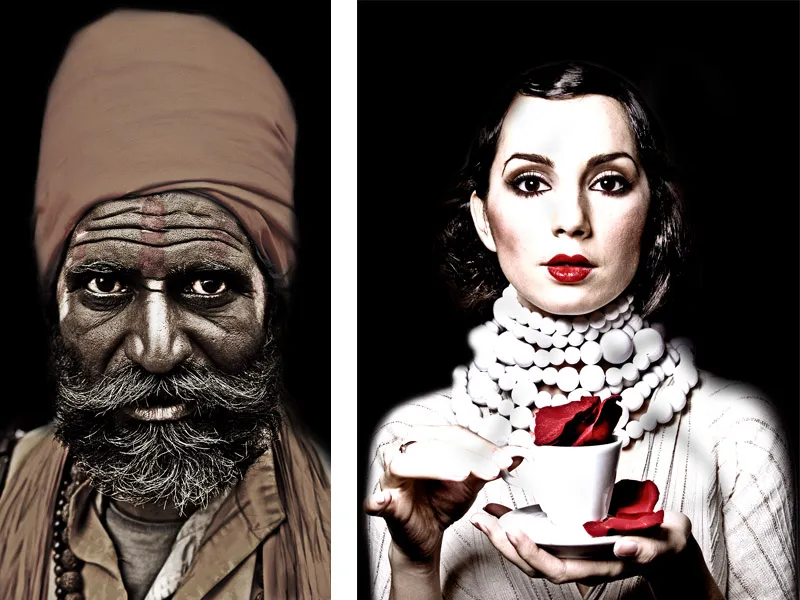
Step 1: Straightening
First, I open the image and straighten it to the correct perspective using the classic transformation tools. Depending on the base image, this essentially involves using the Rotate or Perspective Distort function.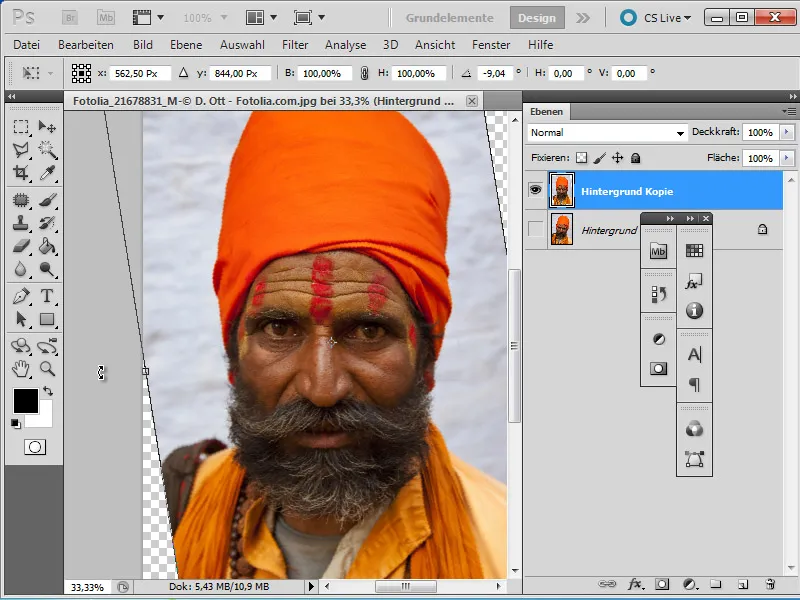
Then, I crop the image using the Crop tool.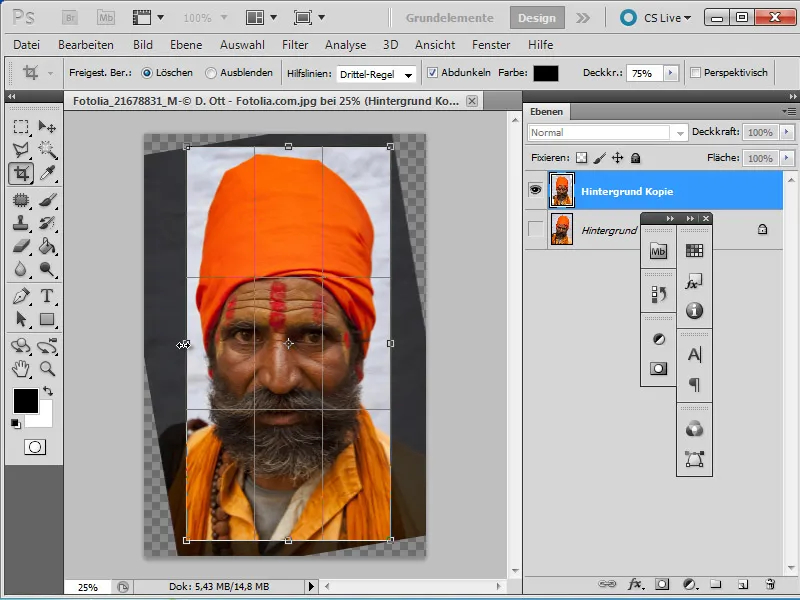
Step 2: Shadows and Highlights
The base image still appears very bright and somewhat flat. To change this, I use the Shadows/Highlights correction option through the Image>Adjustments menu. Depending on the base image, I make various adjustments to achieve a more balanced overall image.
For my used photo, I make the following adjustments:
Strength slider for Shadows: about 30%
Tone Width slider for Shadows: about 40%
The Strength slider for Highlights is set at about 10%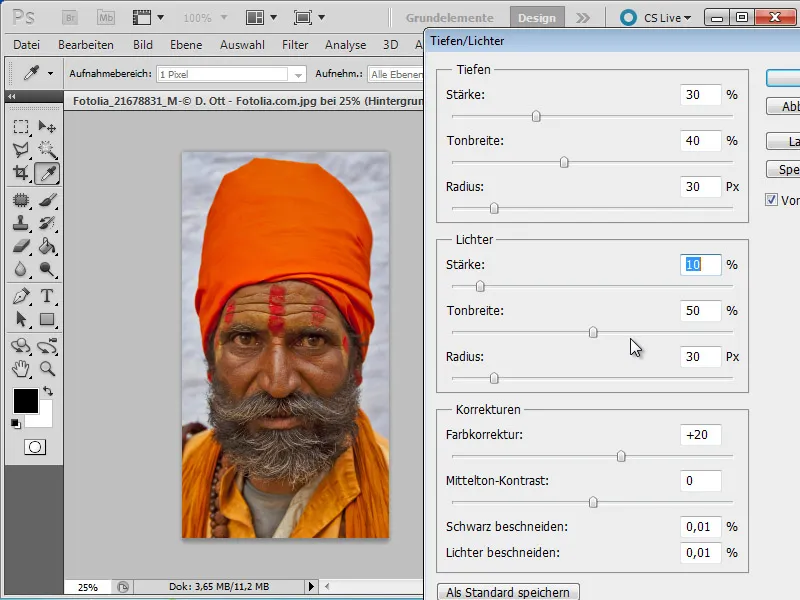
Step 3: Adjustment Layer
For further optimization, I use an adjustment layer. I click on the corresponding icon in the Layers panel and select the Levels adjustment.
The Shadows are set to value: 35,
the Midtones to 1.00, and
the Brightness values to 215.
Now I have more saturation and contrast.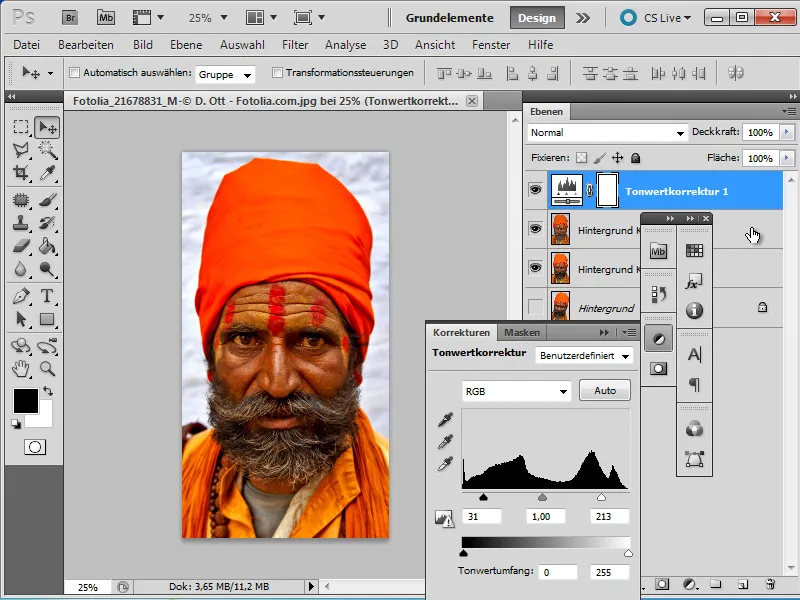
Note: The significant advantage of an adjustment layer is that it can be modified or adjusted at any time without altering the original file.
Step 4: Monochrome
Now, to secure the editing stage, I combine all the editing steps on a new layer. I first create a new (blank) layer and name it "Merged". With the layer selected, I press the keyboard shortcut Shift+Ctrl+Alt+E to merge all visible layers onto this new one. This new layer is then edited via the menu option: Image>Adjustments>Desaturate.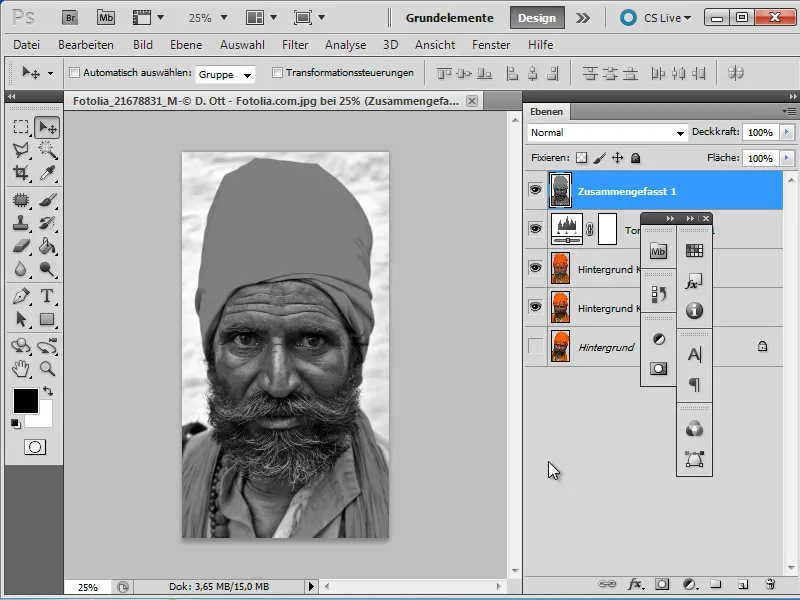
Step 5: Tonal Values
Once again, I add a Levels adjustment layer, using the values (from left to right):
Shadows: 25
Midtones: 1.00
Highlights: 235
This achieves a broader tonal range in the image. Again, I merge all visible layers using the keyboard shortcut Shift+Ctrl+Alt+E and name this layer "Merged 2".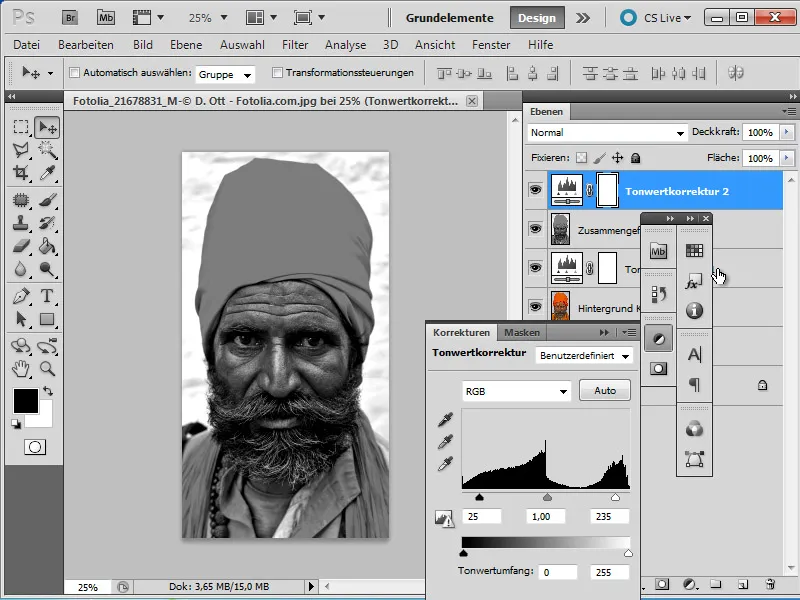
Step 6: Invert, Blur, and Blend
The "Merged 2" layer is now inverted. I press Ctrl+I on my keyboard to invert it.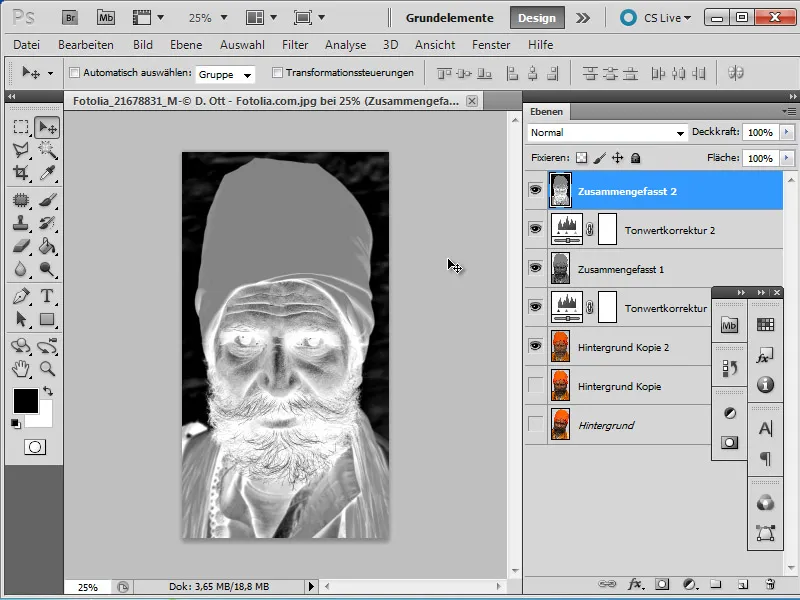
In addition, I now apply a Blur filter. I set the Radius to a value between 10 and 15 pixels depending on the base image.
I apply the resulting blurred layer with the Soft Light blending mode and slightly reduce the Opacity.
TIP: Also adjust the Opacity of the first merged layer to around 80 percent.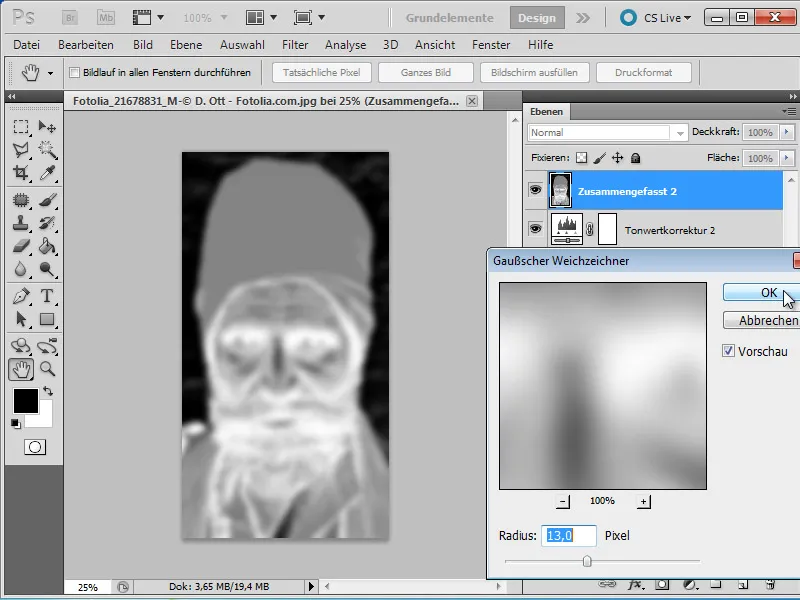
Step 7: Shadows and Highlights through Overlay (create a neutral gray layer)
To achieve the special contrast effect, parts of the image need to be darkened (burned) or lightened (dodged). To correct these changes, it is advisable not to paint directly on the base image but to use an auxiliary layer with a neutral gray.
To do this, we create a new layer using the keyboard shortcut Shift+Ctrl+N. In the mode selection dialog window, I set the blending mode to Soft Light and check With neutral color… For better orientation, I rename this layer to "Highlights and Shadows".
Changes to the image are not yet visible using the Soft Light mode and will only be visible with the following steps.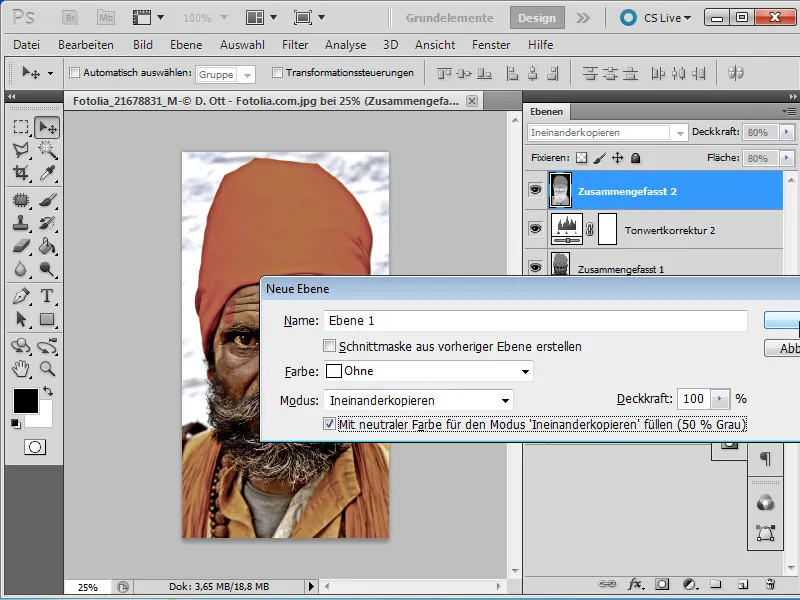
Step 8: Retouching Facial Features
Using black and white brushes, you can now emphasize the facial features. Black brushes darken the image - white ones, on the other hand, brighten specific areas. I use a graphics tablet and highlight the shadow areas of the face with a large, soft brush tip in black. I approach the areas to be edited with a low opacity of about 10%. Thanks to opacity adjustment and variable brush size (keys O & # for zooming in and out), I can work very precisely.
Attention: This work is the most important component and takes a little more time.
In the so-called layer mode, I sculpt the shadows out of the face. The focus is particularly on the wrinkles that are characteristic of a face and tell their own stories.
Bright areas are consciously emphasized with a white brush tip. Here, too, care should be taken. Depending on the original image and because our focus when looking at faces is essentially on the eyes, I emphasize the eyes by retouching the whites of the eyes and the iris accordingly. For this purpose, I set a small brush tip and increase the opacity to about 30%.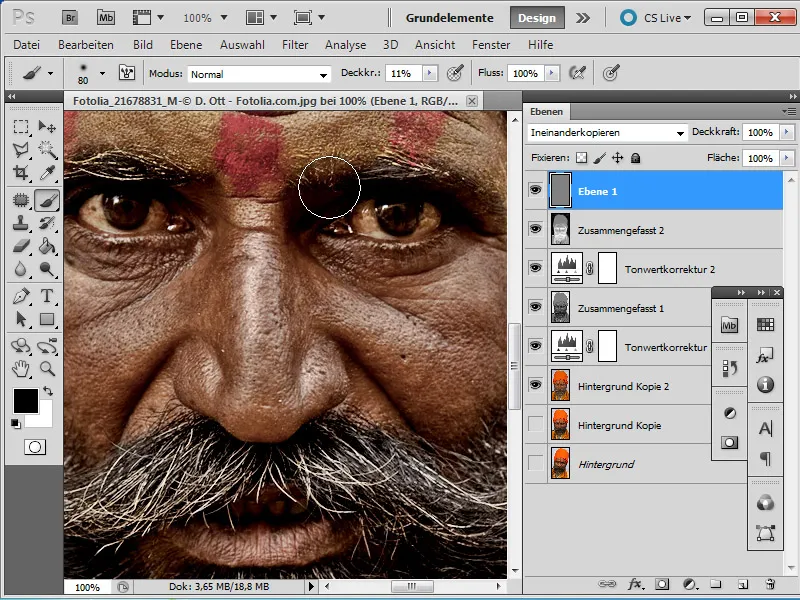
Step 9: Color Design
The original image has now gone through various editing steps and is approaching the finish. To achieve a homogeneous color effect, I merge all layers again using Shift+Ctrl+Alt+E. To do this, I first create a new blank layer and rename it to "Color." I duplicate the newly created layer using Ctrl+J and temporarily hide the copy.
On the initially created layer, I now make corrections to hue and saturation. To do this, I go to the menu Image > Adjustments > Hue/Saturation. In the dialog box, I decrease the saturation to a value of -30.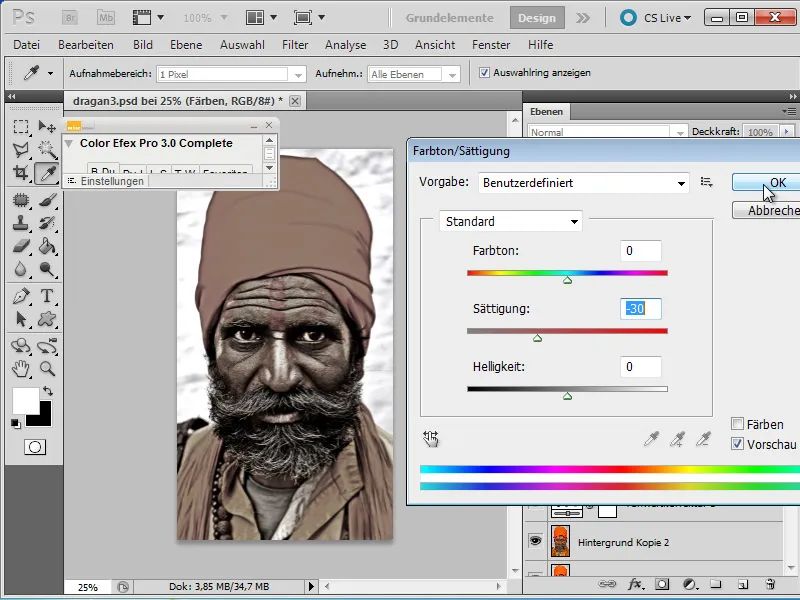
Now the layer copy "Color Copy" is displayed again, and the Hue/Saturation dialog box is called up again. I check the box on Colorize and adjust the hue to about 30 and the saturation to about 15.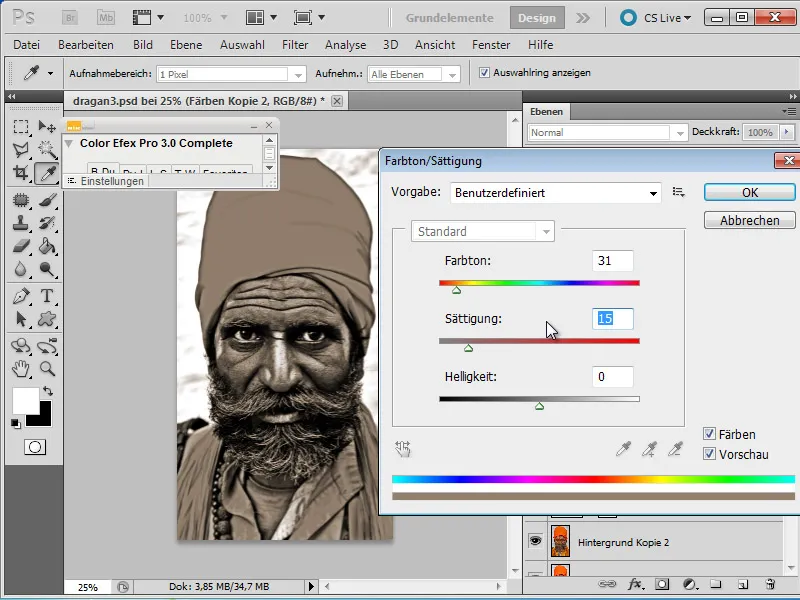
The blending mode of this layer is set to Overlay. The opacity of the layer can then be set to about 60%.
If necessary, the "Shadows and Highlights" layer can be moved up in the layer stack and its opacity reduced for a "more dramatic" look.
Step 10: Highlighting the Essentials
My portrait photo currently contains unimportant elements that distract from the actual effect. These should be eliminated in the following steps. For this, I create a new layer and press the shortcut Shift+F5. In the dialog box, I set to use Black. This newly created layer receives a layer mask.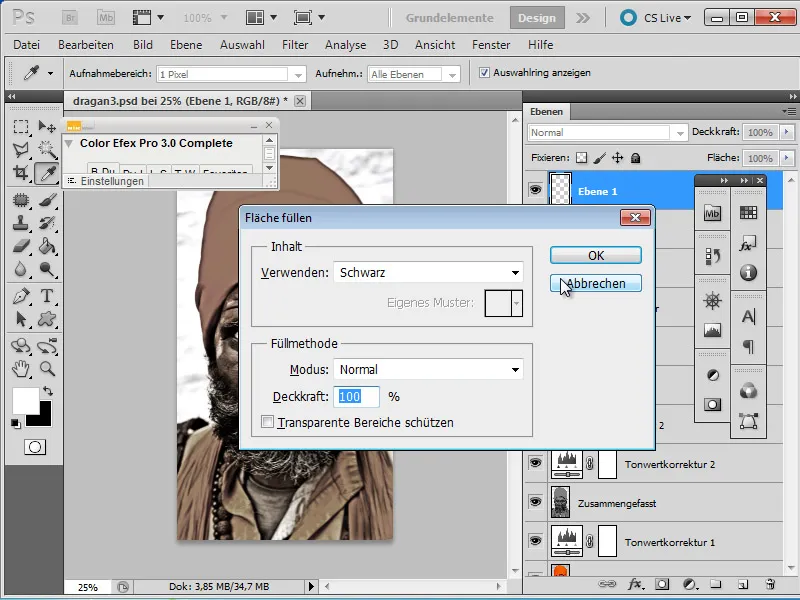
With black and white, I can now hide distracting details in close proximity to the face. The goal is to obtain a black background that only includes the actual portrait, thus highlighting it.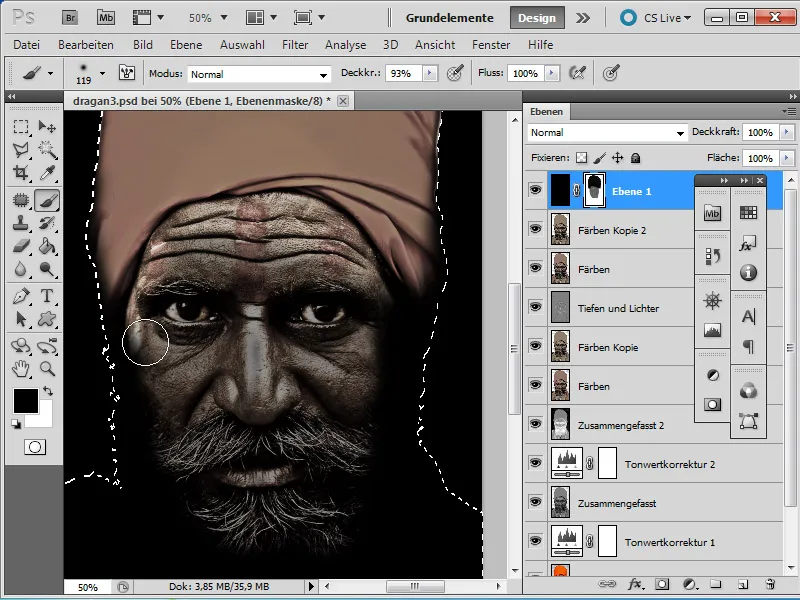
Step 11: Additional Work/Completion
It may be, as in my original photo, that certain parts of the image, like the turban here, require further editing. In my example, I took this from the original image, freed it using a mask, and chose the Luminosity layer mode.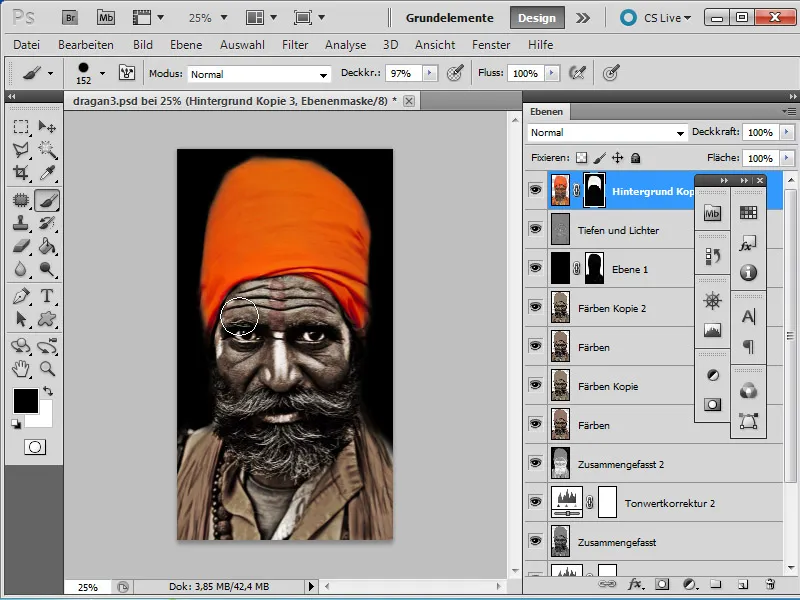
Finally, I create a new layer and merge all existing layers again using Shift+Ctrl+Alt+E. I want to achieve a higher level of sharpness and use the Sharpen Filter>Unsharp Mask with the values:
• Amount: 232
• Radius: 0.5
• Threshold: 6.
The image is now complete.
