In this tutorial, you will receive a comprehensive guide on using AI technology in Adobe Photoshop to select specific objects, remove them, or replace them with new ones. Adobe Firefly has revolutionized the possibilities of image editing and allows you to achieve impressive results with just a few clicks. Whether you want to remove an object or replace it with something else, here you will learn step by step how to effectively use the tool.
Main Takeaways
- Use the object selection tool to mark specific areas in the image.
- Generative filling allows for replacing or removing objects with remarkable results.
- Make sure to leave enough space around the object to be removed to ensure optimal editing.
Step-by-Step Guide
1. Open and Prepare the Image
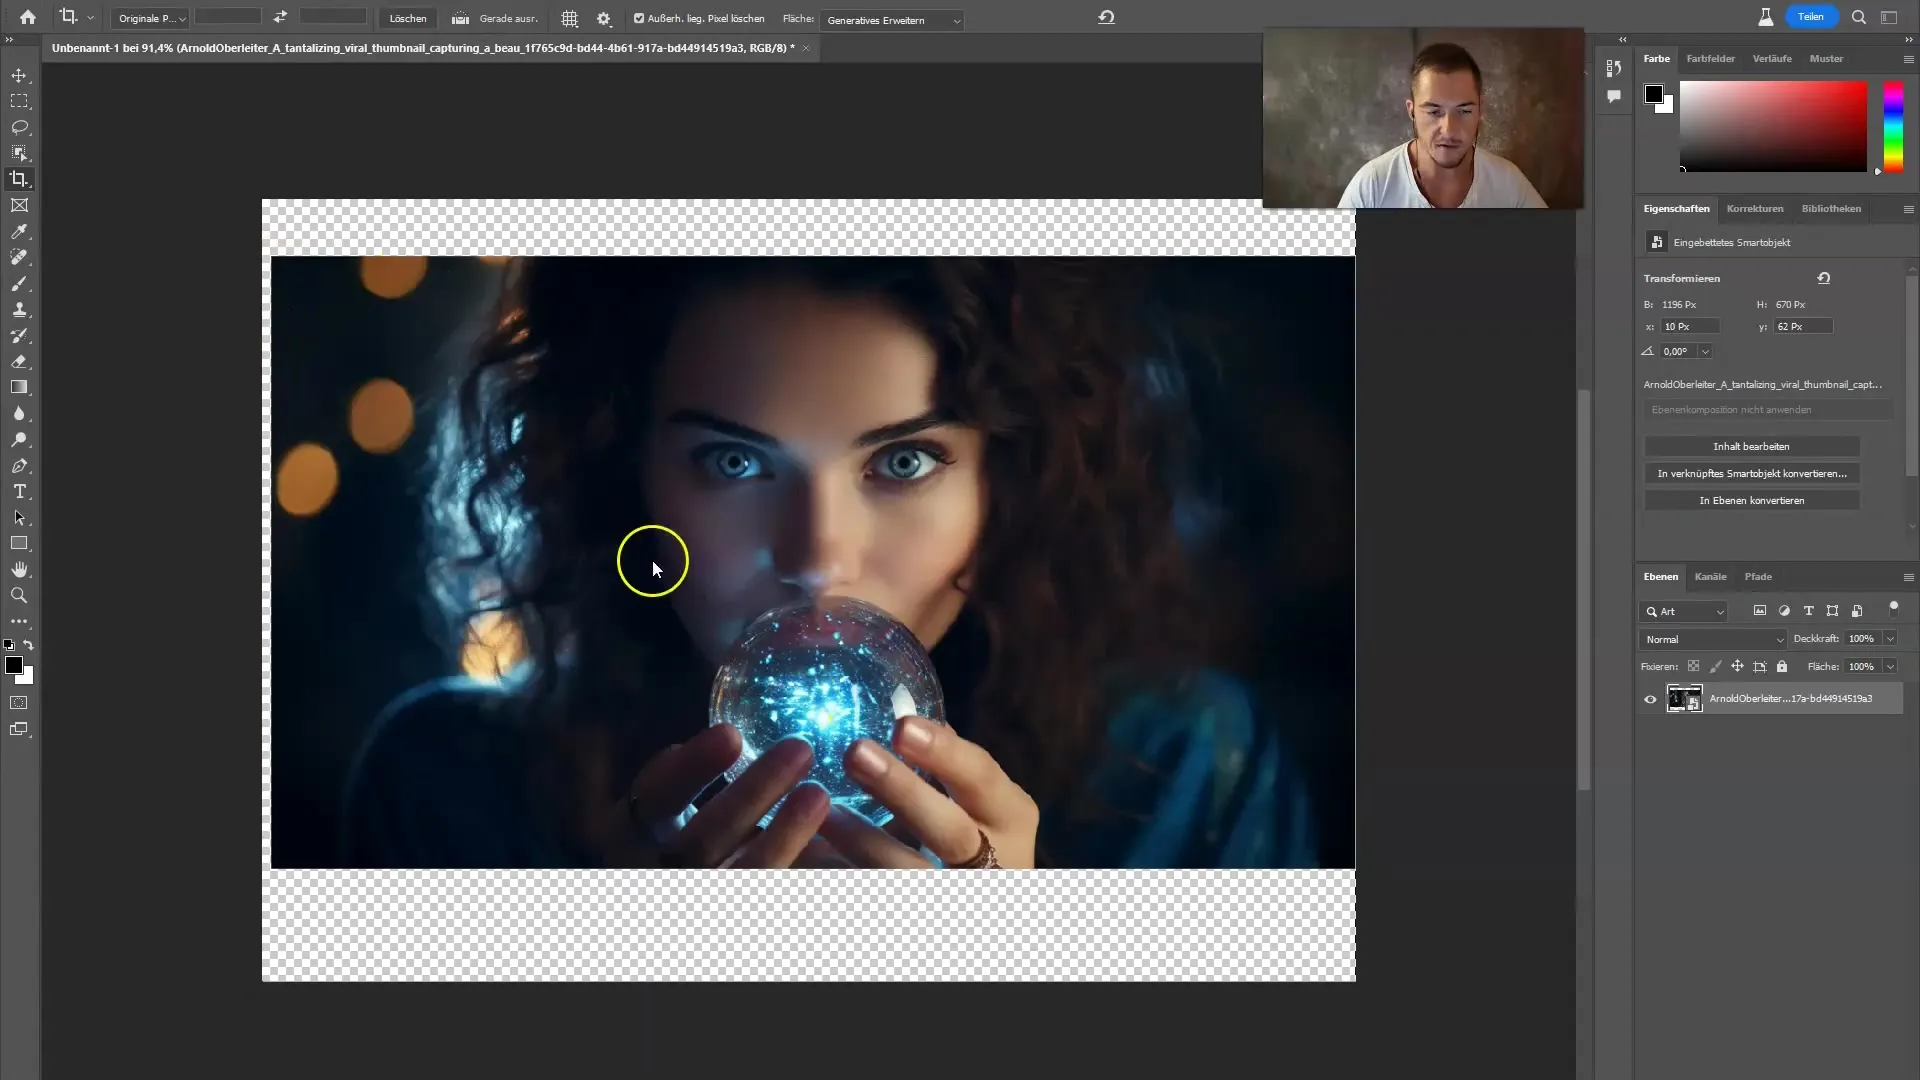
Start by opening a new image in Adobe Photoshop. In this example, we are using an image created with Midjourney. The first step is to load the image and ensure that you have access to the object selection tools.

2. Activate the Object Selection Tool
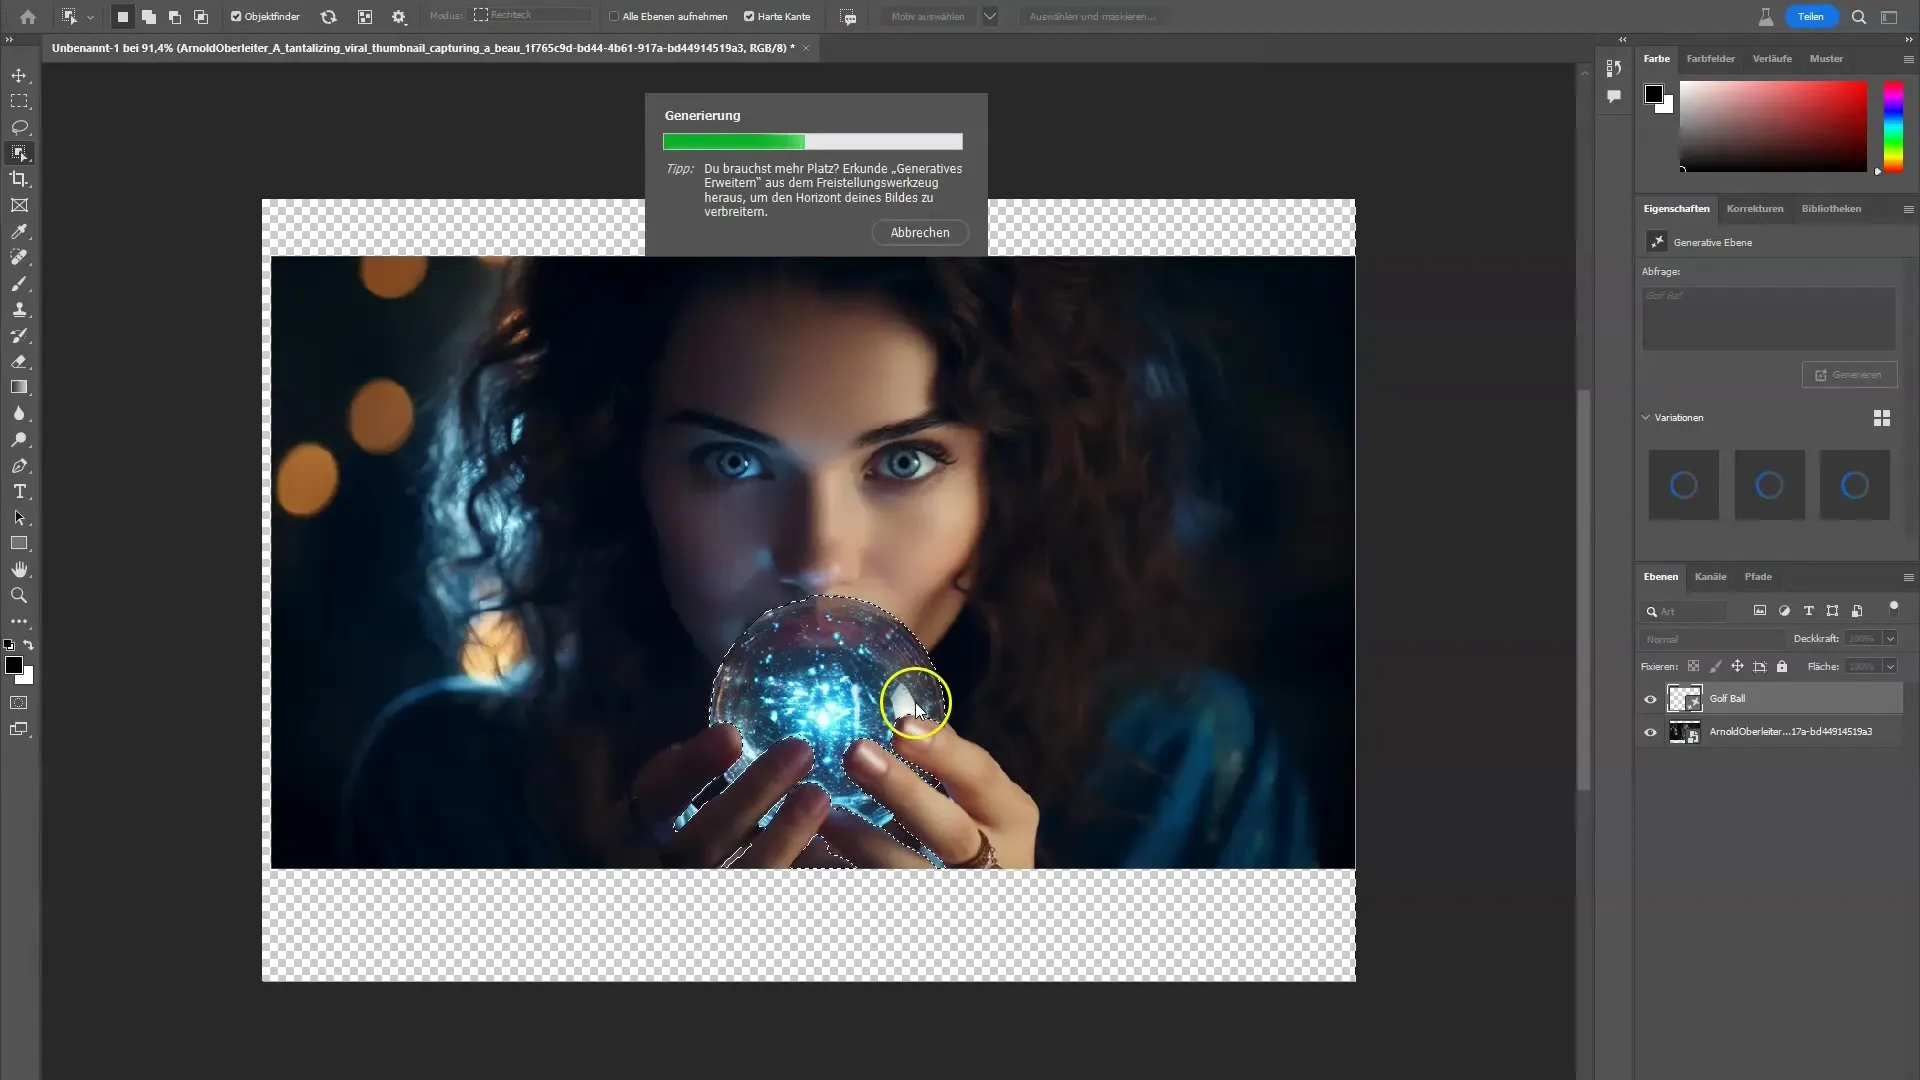
Click on the appropriate button for the object selection tool in the toolbar. With this tool, you can selectively choose different objects within your image. For example, if you want to select the crystal ball in the image, simply click on the object.
3. Selecting a Specific Object
You have the option to select different objects within the image. For instance, clicking on a person's hair will instantly select the entire person. In this tutorial, however, we will try to replace a specific object instead of making a complete selection.
4. Apply Generative Filling
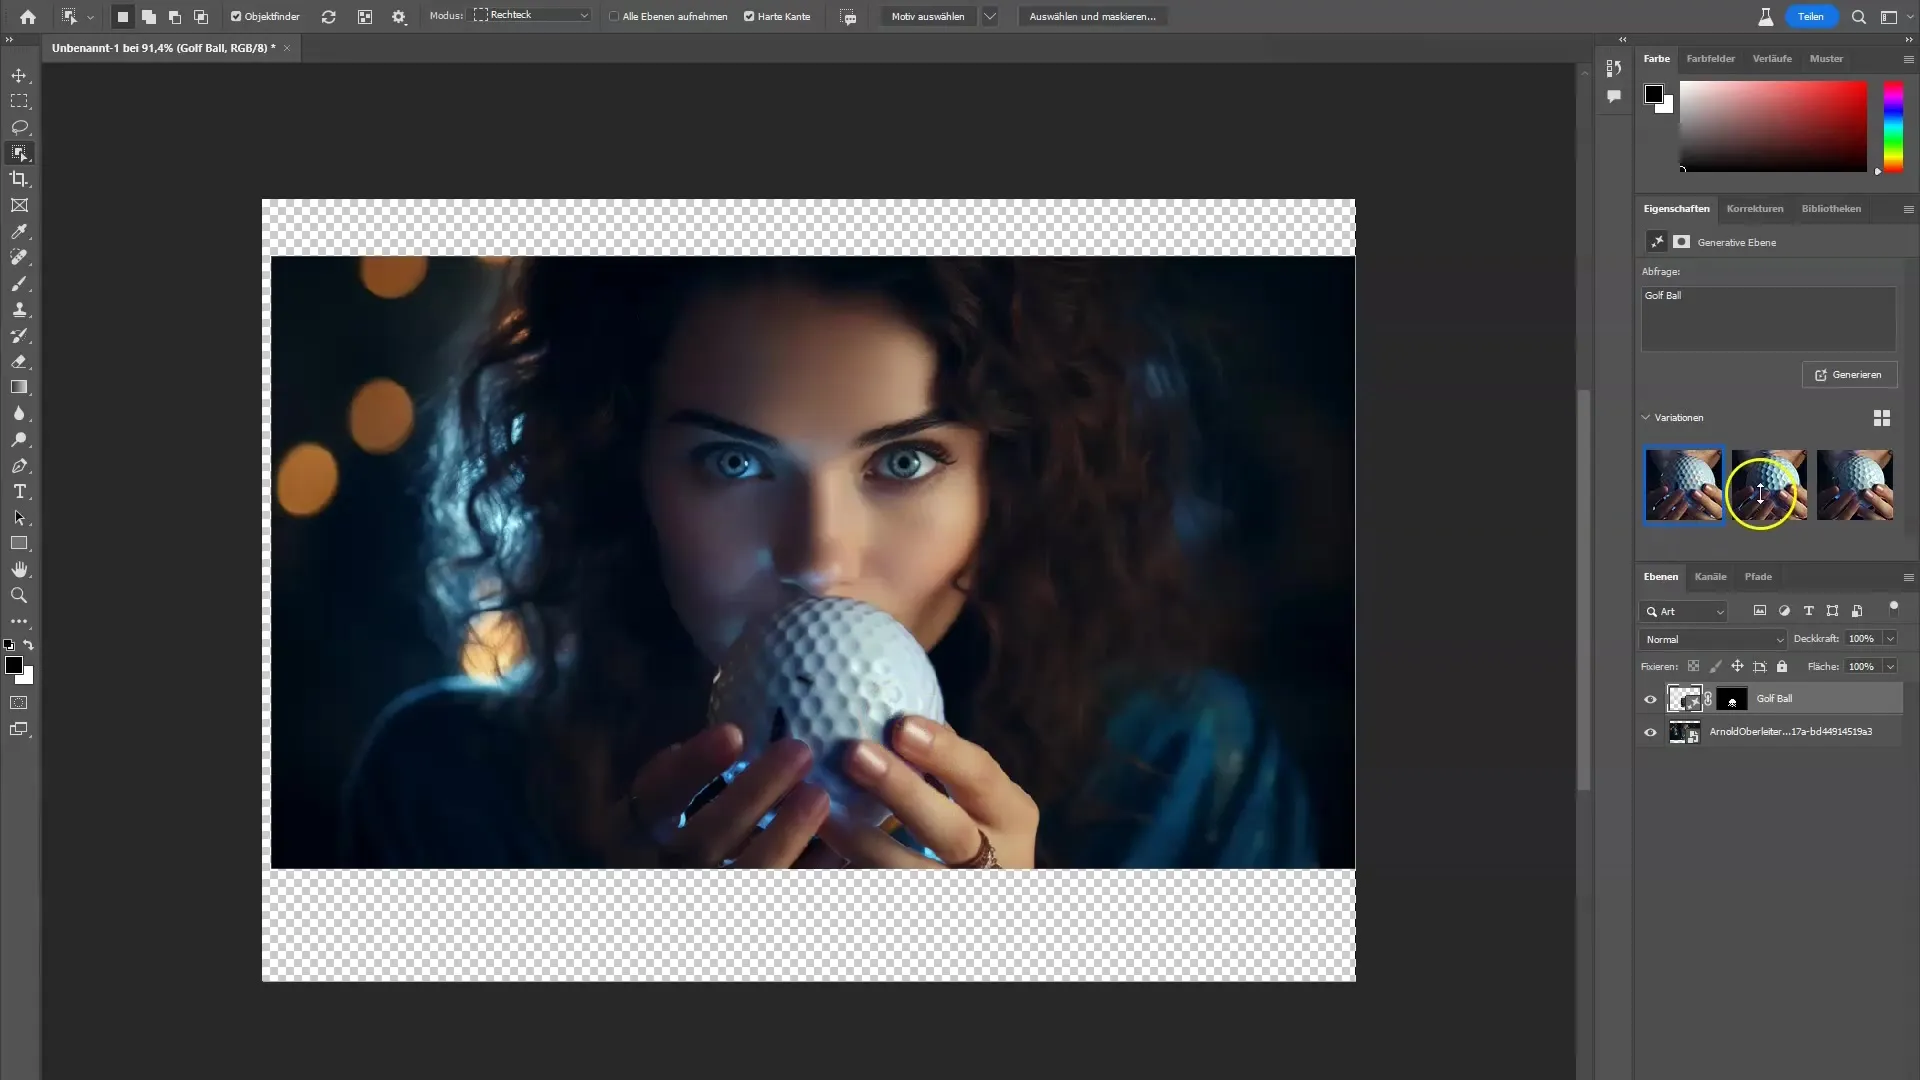
After selecting your desired object, go to the generative filling option. Choose the type of object you want to insert, such as a golf ball. Simply click the generate button to see a preview of the new objects.
5. Variations of Generative Filling
The tool often provides multiple variations of your new object. In our example, we get three different golf ball variants. Take the opportunity to view each variant to choose the best one. It's clear that generative fillings deliver remarkable results.

6. Make Further Adjustments
Now that you are satisfied with the initial generation, there is still the option to experiment with additional settings. For example, you can adjust the pixel count to further enhance the image. Click "Generate" to continue the process.

7. Removing People from the Image
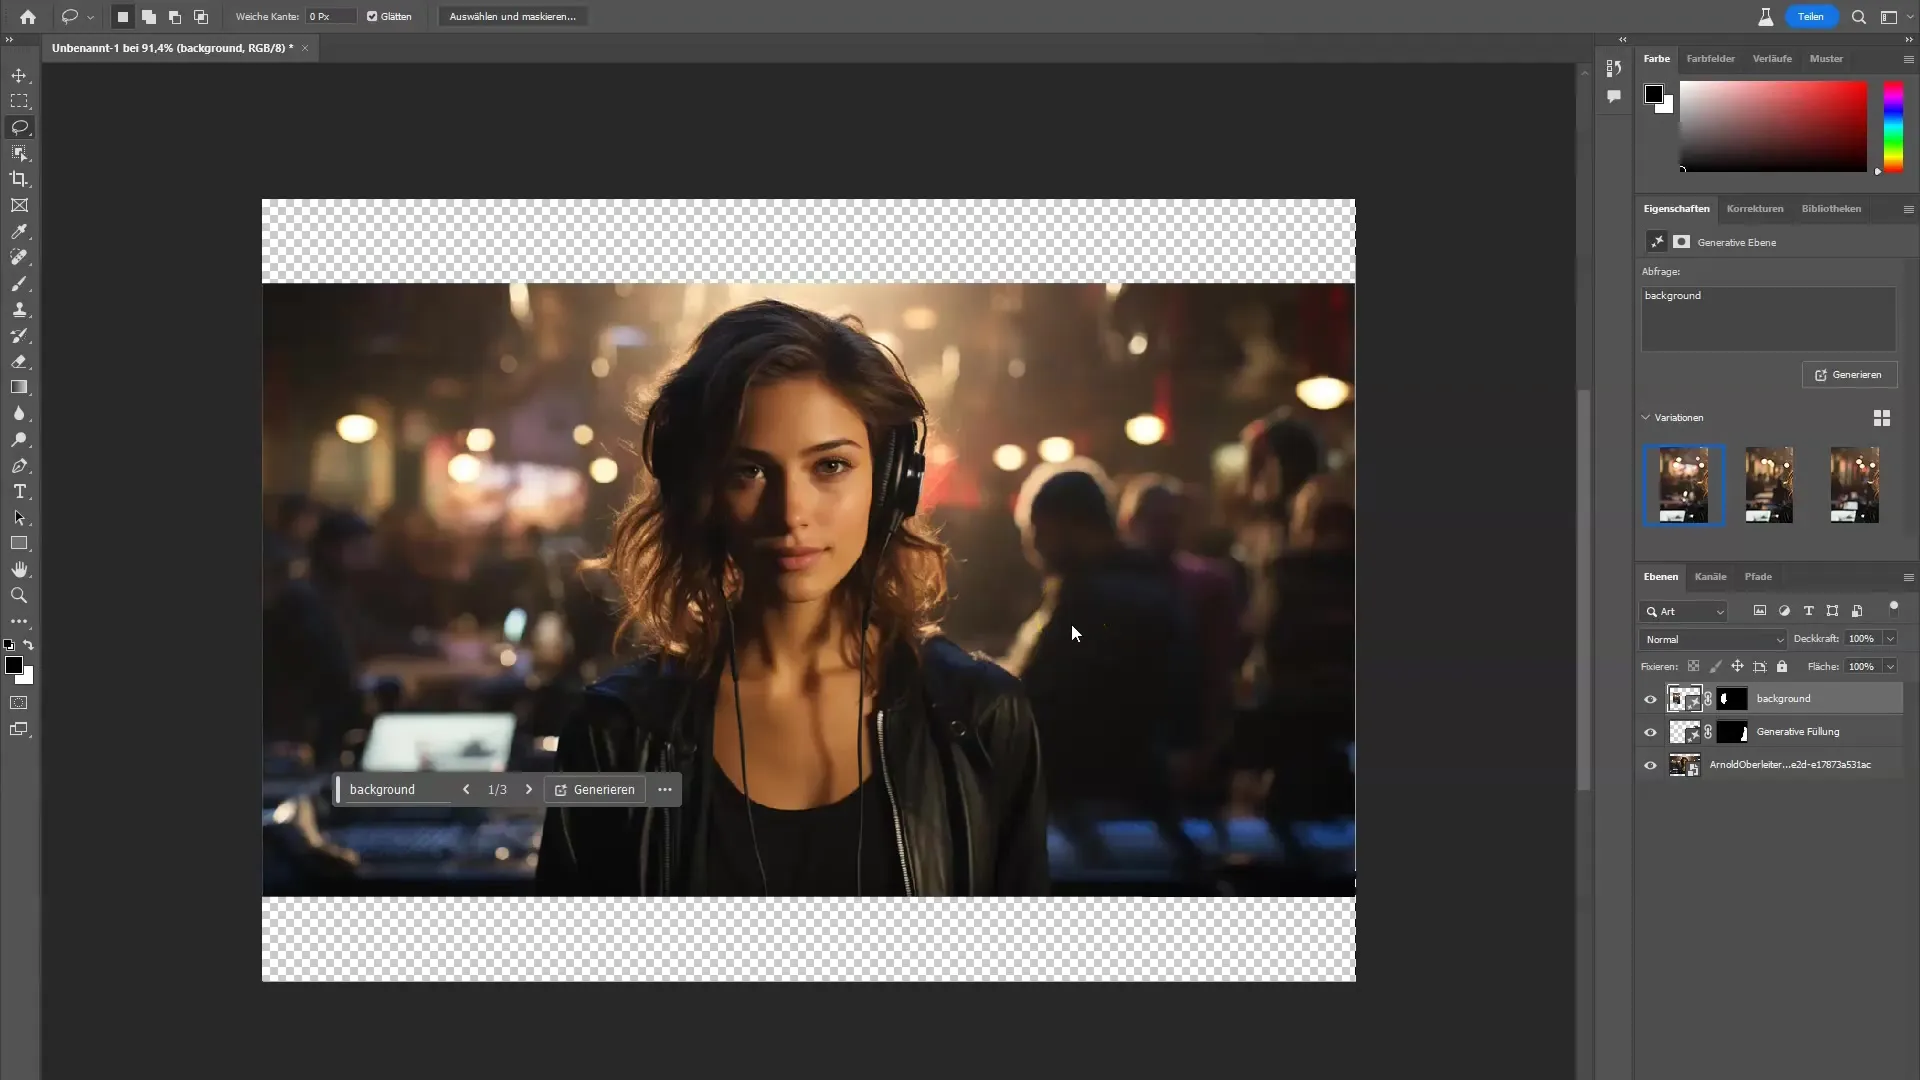
If you want to eliminate a specific object, such as a person in the background, that works very well too. Simply select the corresponding object and click again on the generative filling option. The tool will then attempt to remove the person and adjust the background.
8. Consider Optimal Selection Size
When removing objects, it's important to ensure that your selection is large enough. A too small selection field can result in noticeable outlines. Consider this when you want to remove a person from the image, for example.
9. Use of the Lasso Tool
If you are removing a larger object, the lasso tool might be a better choice. Draw generously around the object and use the generative filling to enable seamless transitions. This can be particularly helpful when the object's surroundings are messy or cluttered.
10. Adjusting the Background
Sometimes it's recommended to enter the command "background" to optimize the background and ensure all unwanted elements are removed. This significantly enhances the overall quality of the edited image.
11. Completing the Project
After you have made all the desired changes to your image, review your adjustments. Make final fine-tunings and save your edited image. You will find that the results appear surprisingly professional.

Summary
In this tutorial, you have learned how to use Adobe Firefly and the generative functions of Photoshop to select, remove, or replace specific objects. By understanding and applying these steps, you will be able to make impressive image changes with ease.
Frequently Asked Questions
How does the object selection tool work?The object selection tool allows you to select specific objects in the image by simply clicking on them.
What can I achieve with generative filling?With generative filling, you can replace or remove objects, and the background will be automatically adjusted.
Why should I consider the selection size?A selection that is too small can result in outlines remaining visible, which can affect the quality of the final result.


