The presentation of your products is crucial. Whether you want to launch a new product or showcase existing products in an appealing light, Mockups are an essential tool. Adobe Firefly provides a user-friendly solution for creating high-quality mockups. This guide shows you how to quickly and easily create mockups in Adobe Firefly.
Main Insights
- With Adobe Firefly, you can easily create mockups.
- Use generative fill to remove backgrounds and place your product in appealing environments.
- Experiment with different prompts for the best results and get impressive mockups in no time.
Step-by-Step Guide
Step 1: Prepare the Image
First, you should prepare the image of your product. You can either take a photo of your product or use an existing image. It is important that your product is clearly visible and well presented.
Step 2: Upload Your Image
Open Adobe Firefly and click on the "Generative Fill" function. You can simply drag and drop your image into the workspace or upload the image manually. For this example, we will use an image of a soap.
Step 3: Remove Background
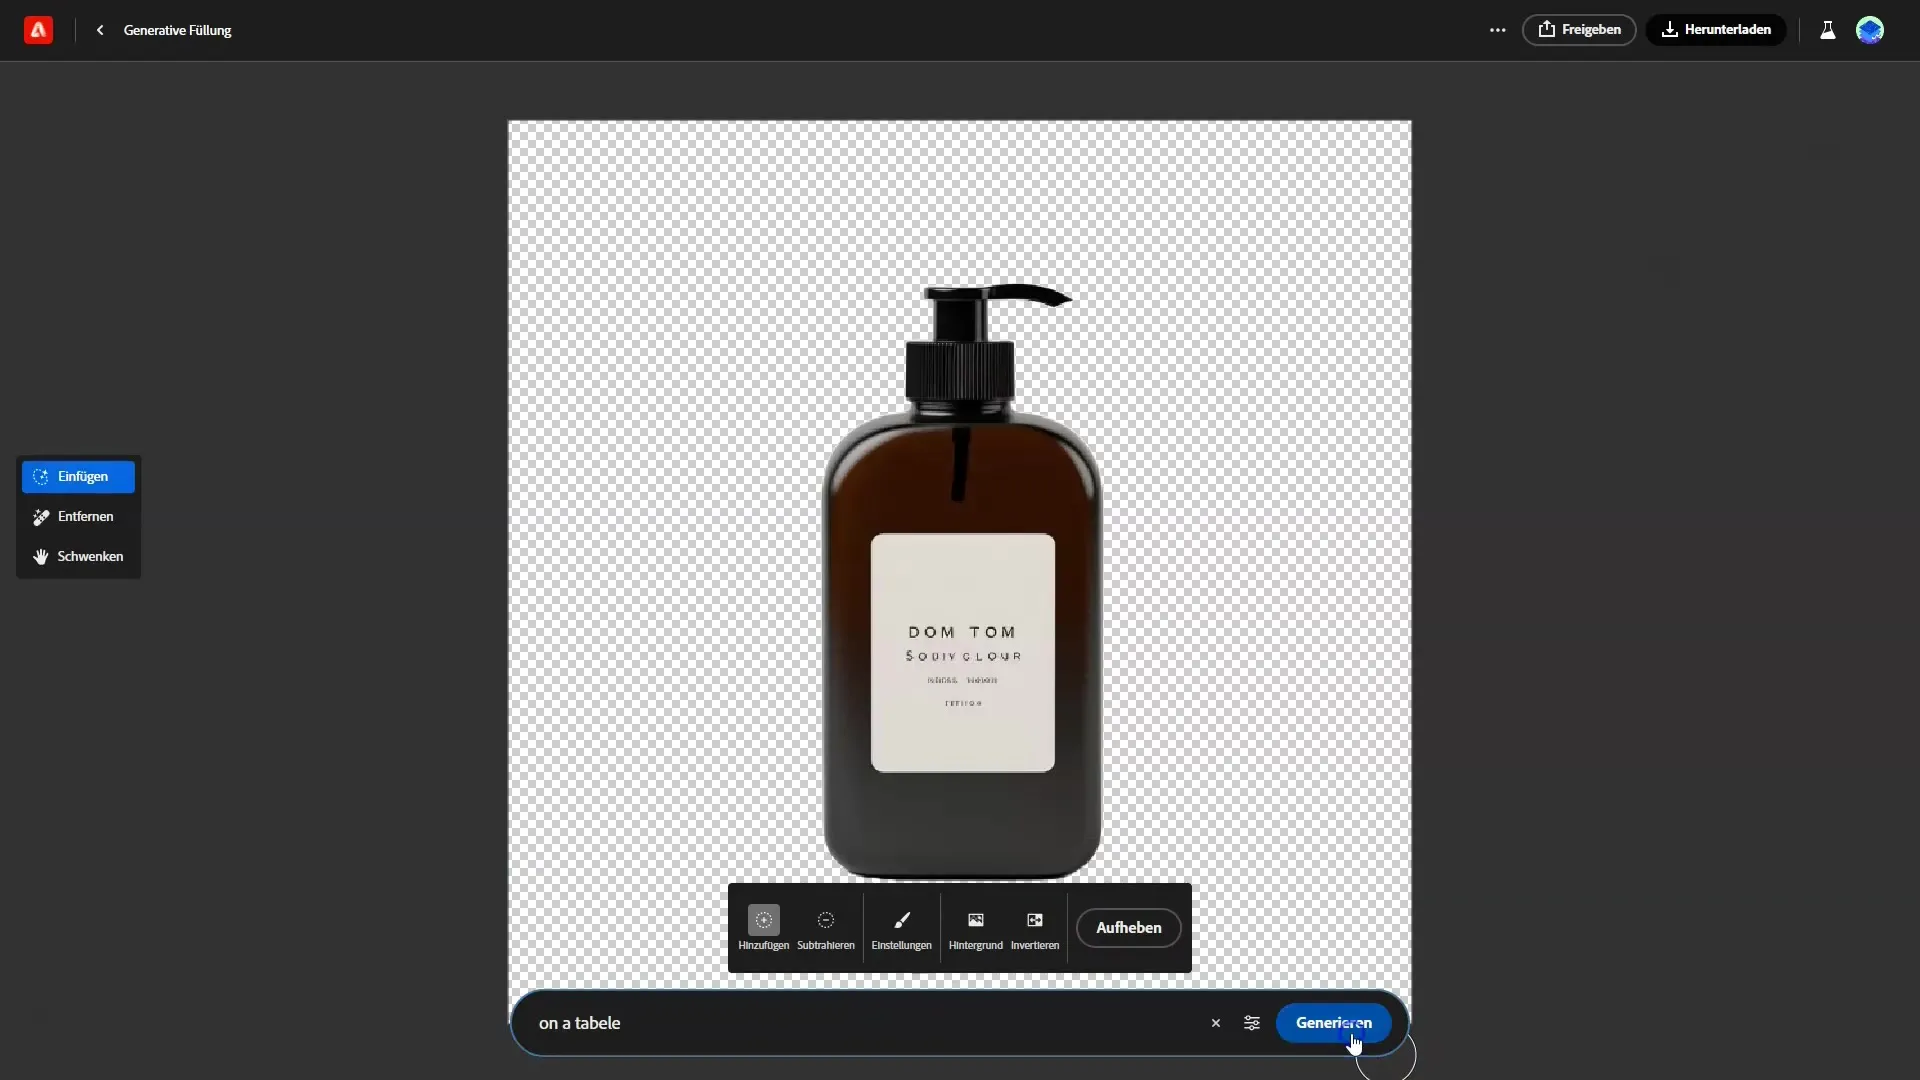
Once your image is uploaded, click on the background of the image. Adobe Firefly will automatically remove the background, allowing you to highlight the soap-specific details.
Step 4: Adjust the Background
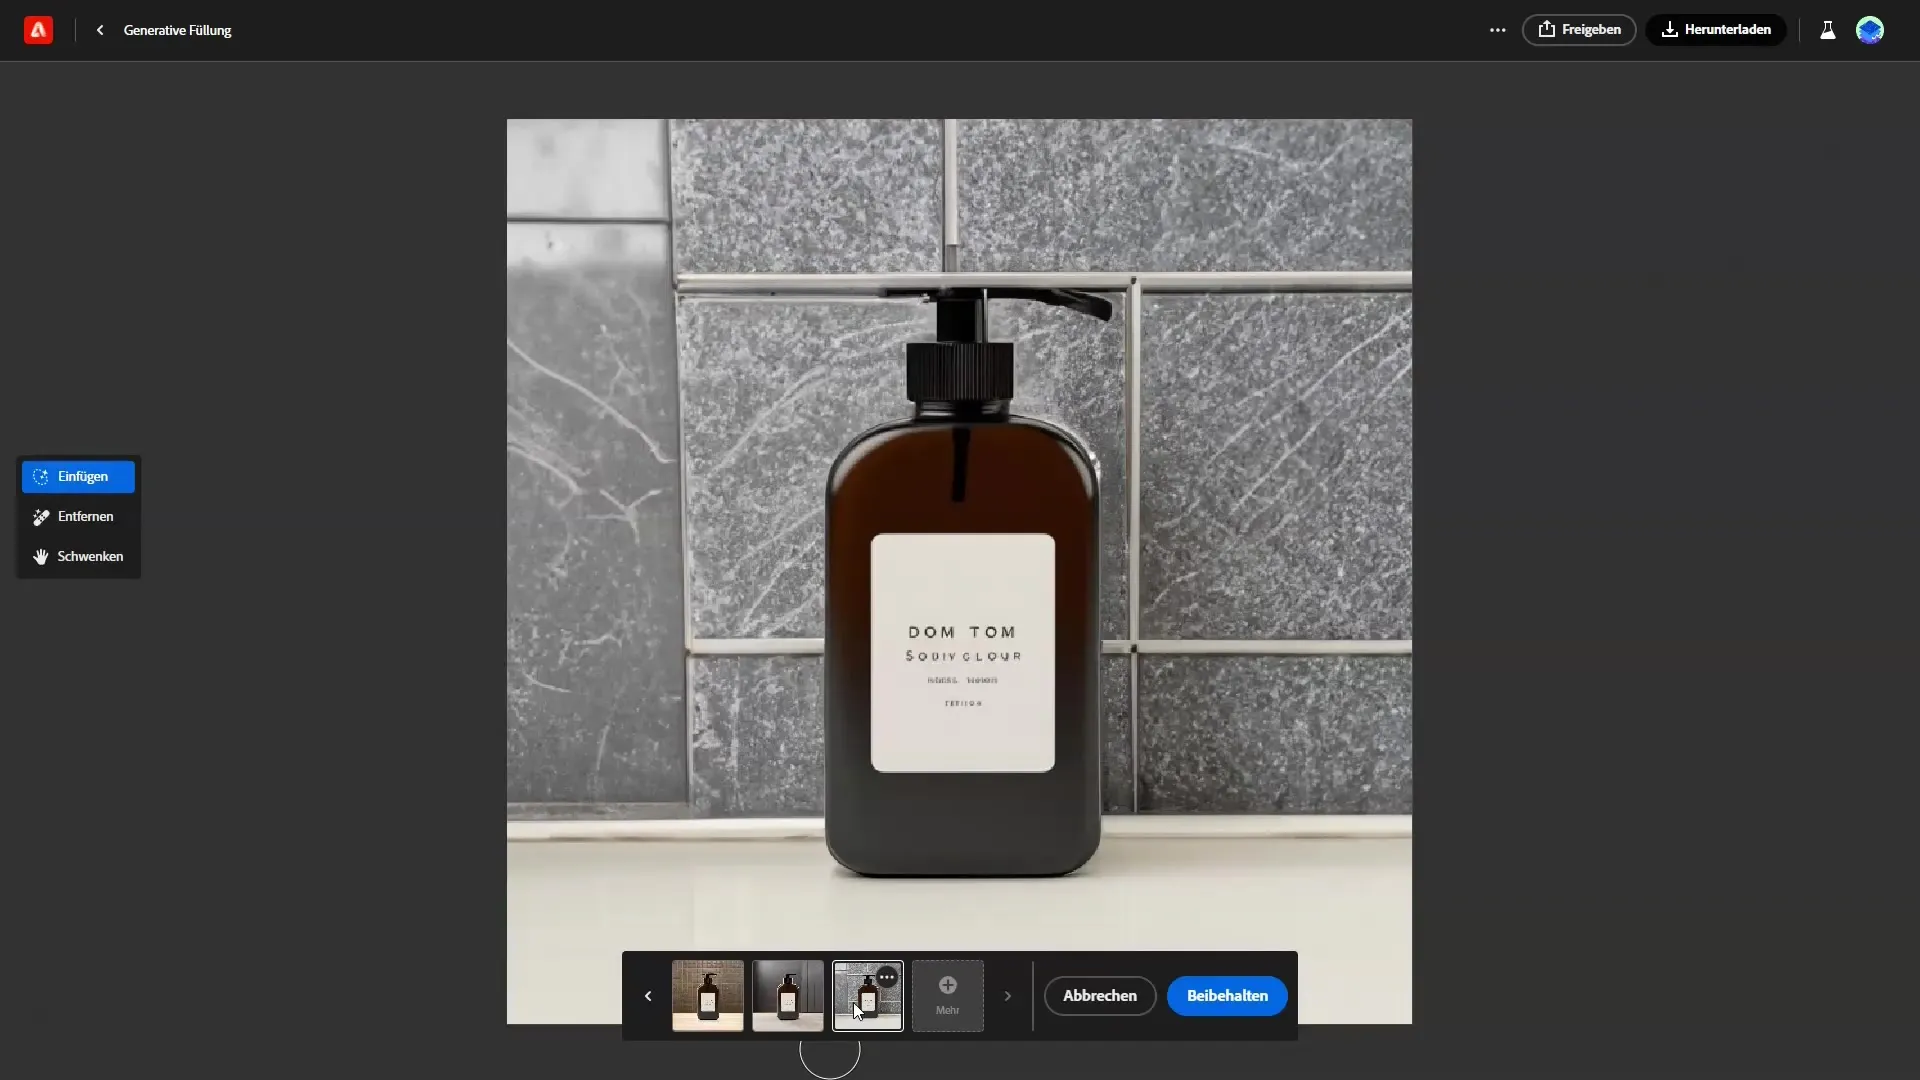
Now you can specify in the input field (Prompt) where you want your product to be placed. For example, you could enter "on a table." After entering the prompt, click on "Generate." Firefly will then create a mockup of your product on the specified background.
Step 5: Check the Results
Multiple variations of your mockup will appear. Check the results and choose the mockup that you like the most. You can also click on Plus here to see more options.

Step 6: Fine-Tuning
If you are not satisfied with the result, you can experiment again with the prompt. For example, write "on a kitchen table" and let Firefly generate another mockup. It can be useful to try different descriptions to find the best look.
Step 7: Further Adjustments
Review your results and choose the best mockup. If you feel that the object is too large, you can also try different sizes or perspectives. Fine-tuning your creations can often lead to better results.

Step 8: Use in Photoshop
Adobe Firefly allows you to use generative filling in Photoshop as well. You can edit your mockups directly in Photoshop to make specific adjustments. This flexibility gives you the freedom to further refine your project.
Step 9: Experiment
Remember to always experiment with Firefly. The first version is rarely the best. With a little patience and creativity, you will be able to create some truly impressive mockups.
Summary
This guide has introduced you to the steps for creating mockups with Adobe Firefly. From preparing your product image to uploading it, adjusting it, and using it in Photoshop – you are now ready to create your own mockups.
Frequently Asked Questions
What is Adobe Firefly?Adobe Firefly is software by Adobe that allows users to create and edit creative content with AI-powered features.
How do I create a mockup in Adobe Firefly?Upload your product image, remove the background, and use generative filling to present your product in different environments.
Can I use Adobe Firefly for free?Adobe Firefly offers various pricing models, some features may be free while others may be paid.
Can I use mockups in Photoshop as well?Yes, you can directly use the generative fill feature of Adobe Firefly in Photoshop.
Is Adobe Firefly suitable for beginners?Yes, Adobe Firefly is user-friendly and suitable for both beginners and experienced designers.


