In this tutorial, I will show you how you can effectively improve blurry photos in Adobe Photoshop. You will learn how to analyze motion blur, make the right adjustments, and ultimately enhance the details in your images. The process may seem complicated at first, but it is very achievable if you follow the necessary steps. Let's get started!
Main Takeaways
- You can simulate and then correct blurs in photos using Photoshop.
- The use of the ruler tool is crucial in correctly identifying the angle and distance of the motion blur.
- The "Motion Blur" and "Smart Sharpen" filters are key tools for improving blurry images.
Step-by-Step Guide
Start by opening your blurry image in Photoshop. To better understand the following steps, we will first simulate an artificial blur that we will later correct.
First, go to the menu and select Filter. Scroll to Blur Gallery and look for Motion Blur. Set the distance to about 20 pixels and the angle to 40 degrees. This simulates camera shake. Confirm your selection with "OK." You now have a blurry image that you want to improve in the future.
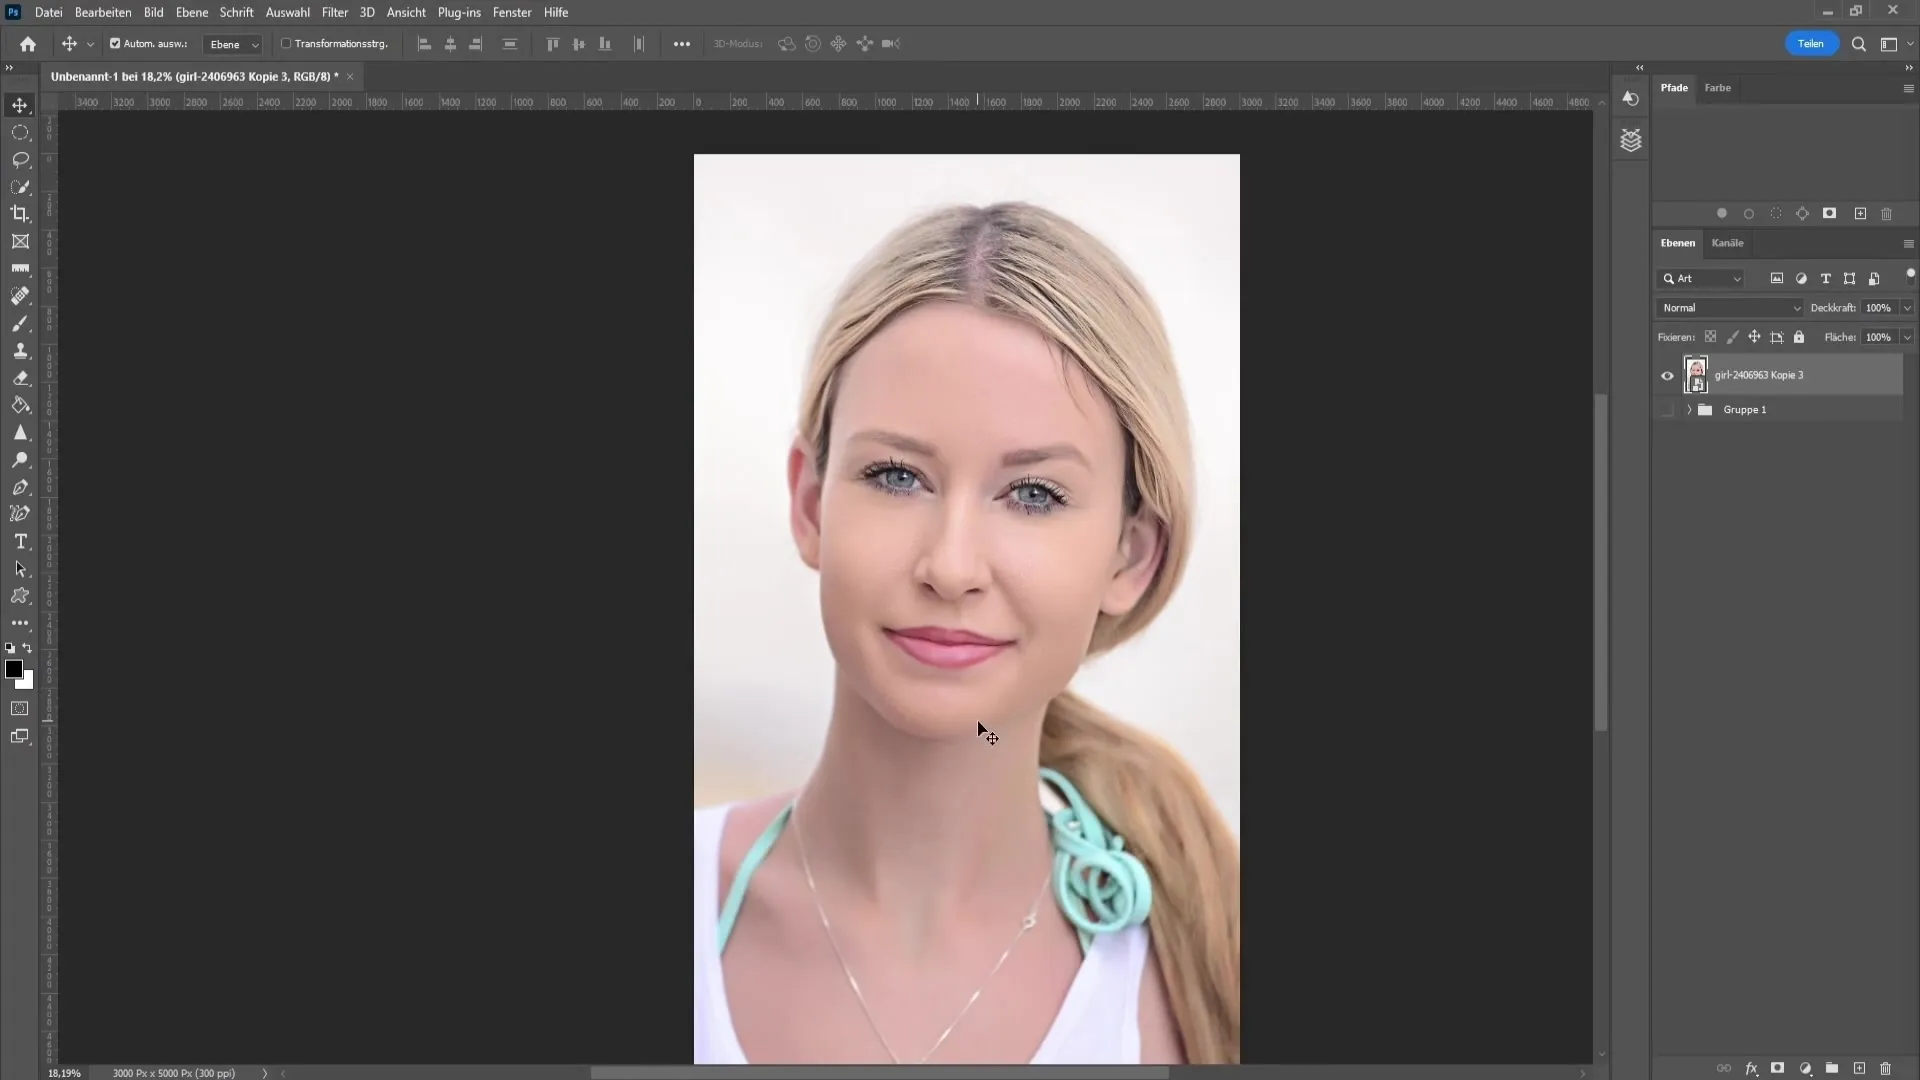
This is our base image. Now, let's see how to determine the angle at which the image was blurred. First, you would need to use the Ruler tool in the toolbar. By zooming in, you can measure the distance of the blur more accurately. In our example, the blur goes slightly upwards and to the right, approximately at a 40° angle as previously set.
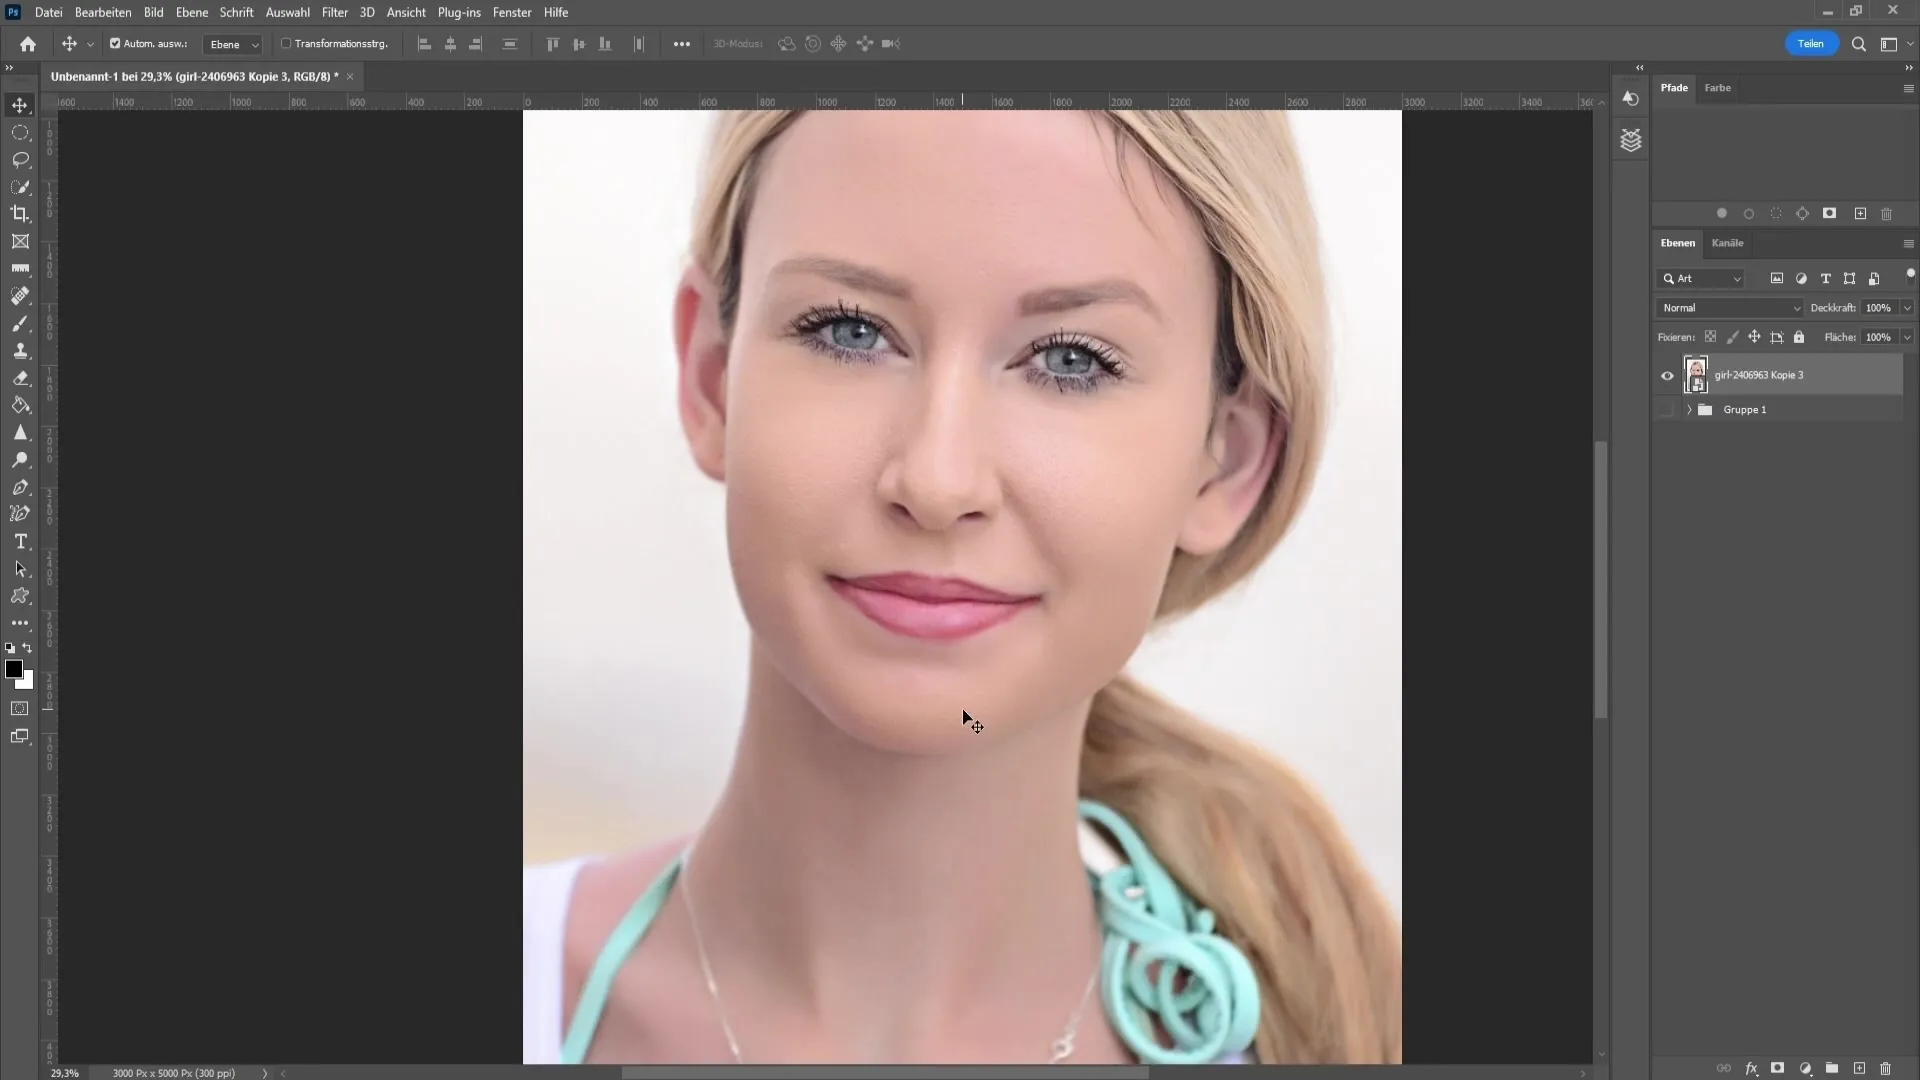
To measure the blur distance accurately, draw a line from the blurred edge to the point where the image becomes sharp again. In this case, the distance measures about 12.5 pixels. It doesn't need to be exact; it's more about using it as a rough guide.
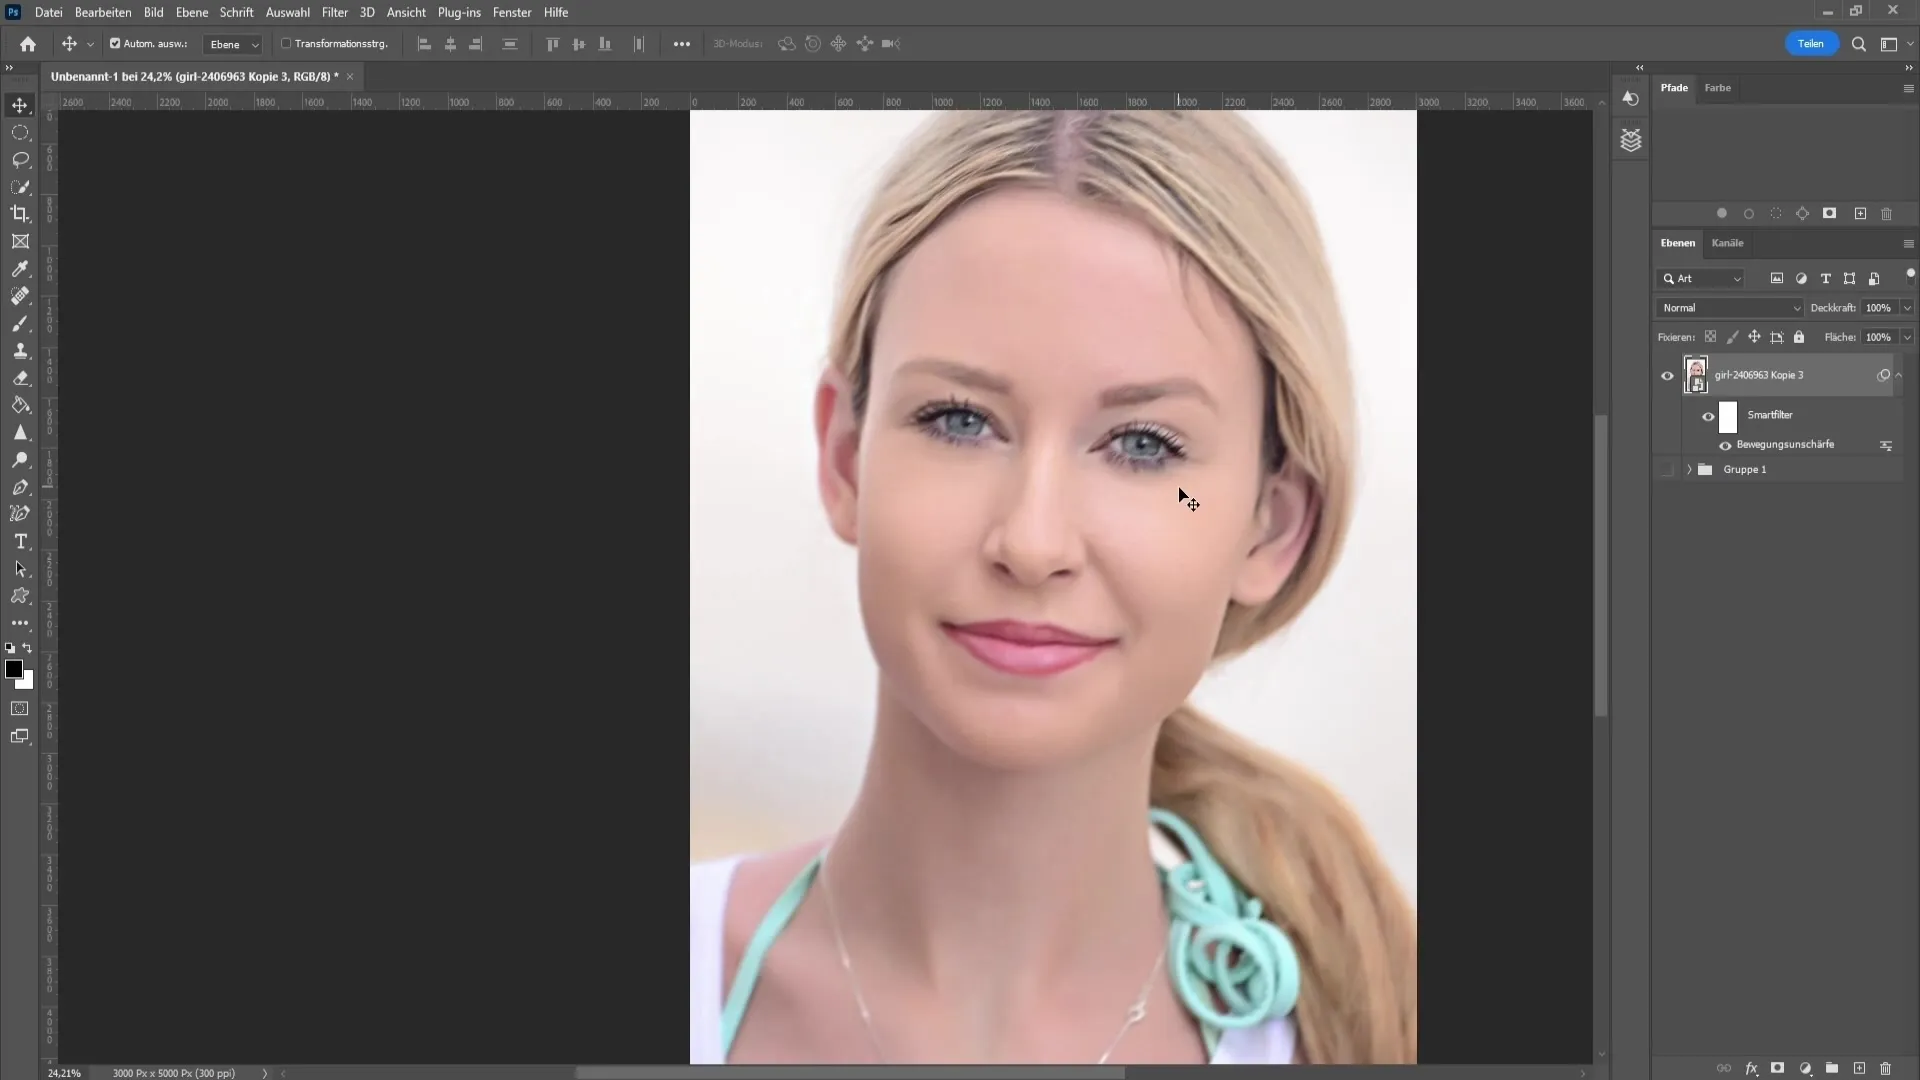
To correct the motion blur, create a Smart Object from the layer by right-clicking on the layer and selecting Convert to Smart Object. Then, make a copy of this layer (Ctrl + J). Enlarge the image area to see the blurry edge better.
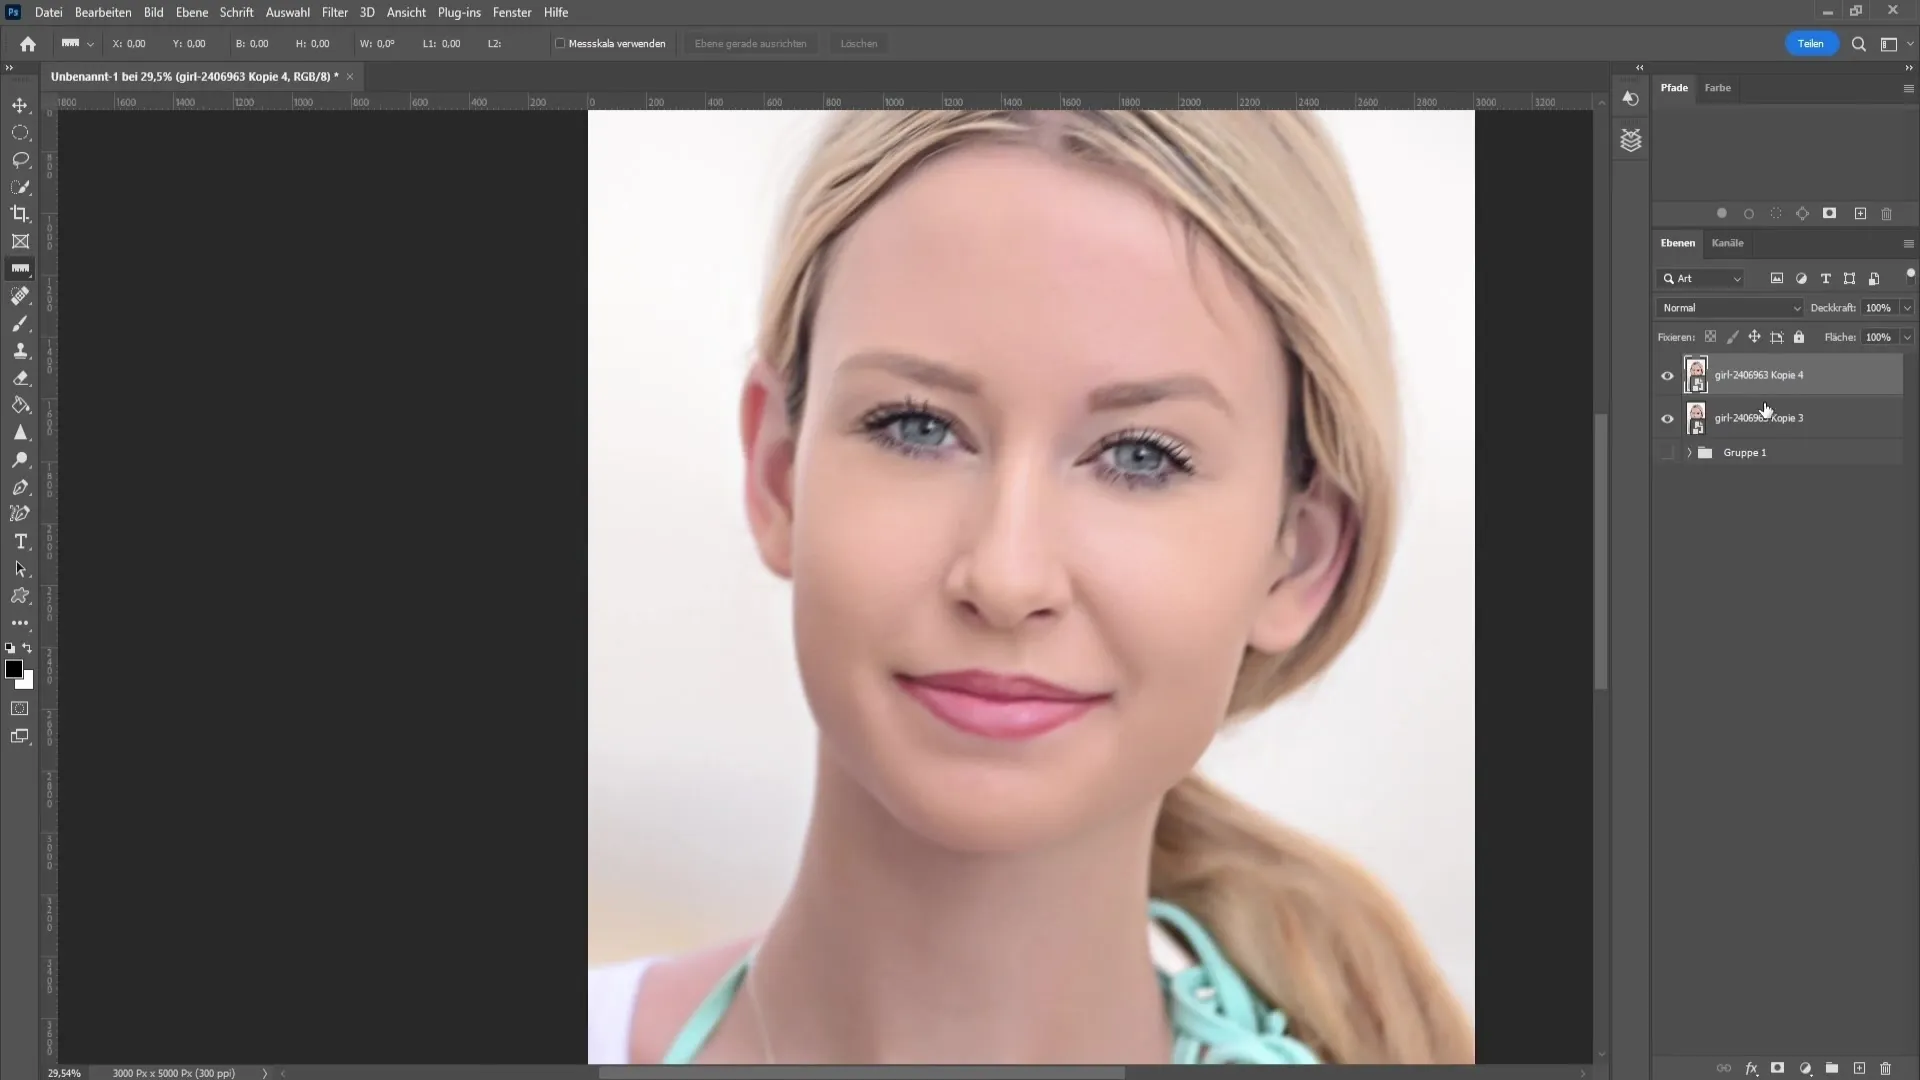
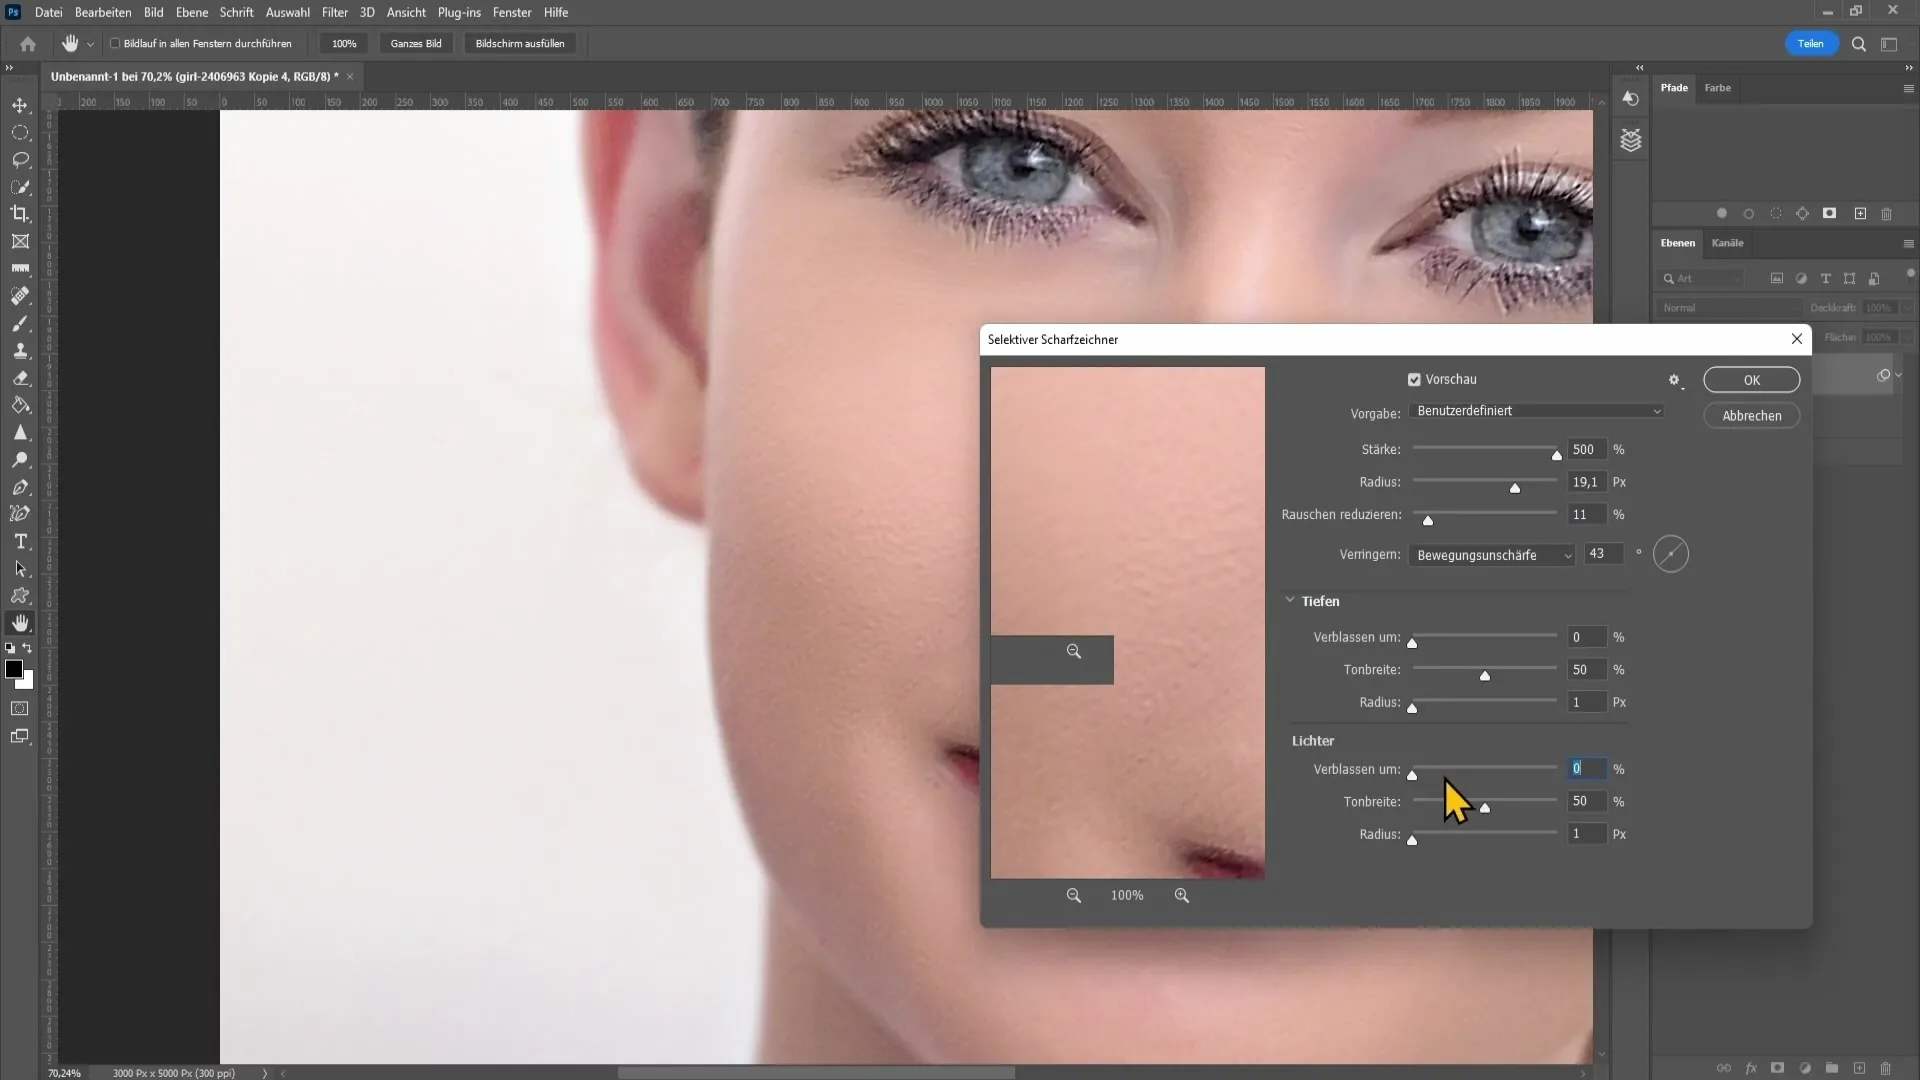
Go back to Filter and select Sharpen. Here, you should choose the Smart Sharpen. Firstly, set the Reduce Motion Blur settings to 43°, the angle we determined earlier, and the radius to the measured value of 12 pixels.
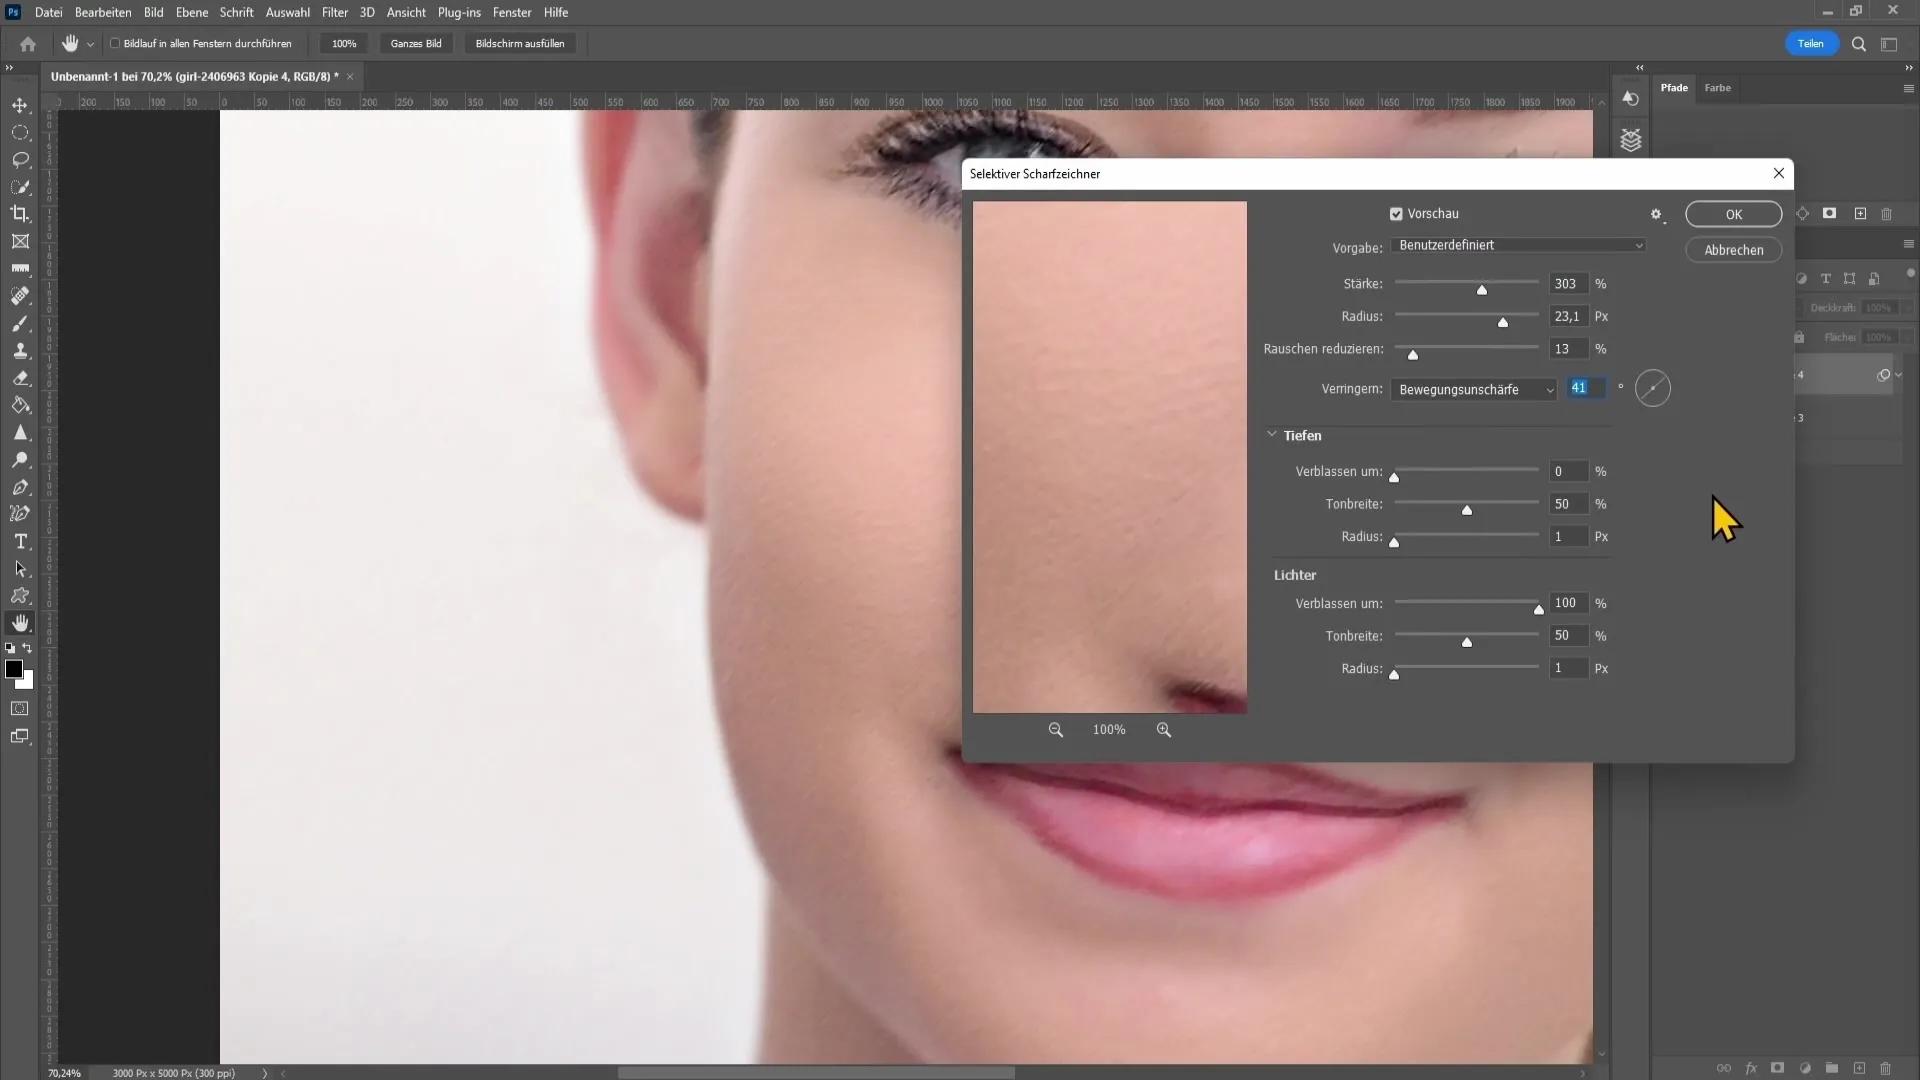
Set the strength to 500% to achieve a clear sharpening effect. You can also reduce noise, which helps make your image appear clearer. Set the noise reduction value to about 10-11%. This should make the image more contrasted and enhance the edges.
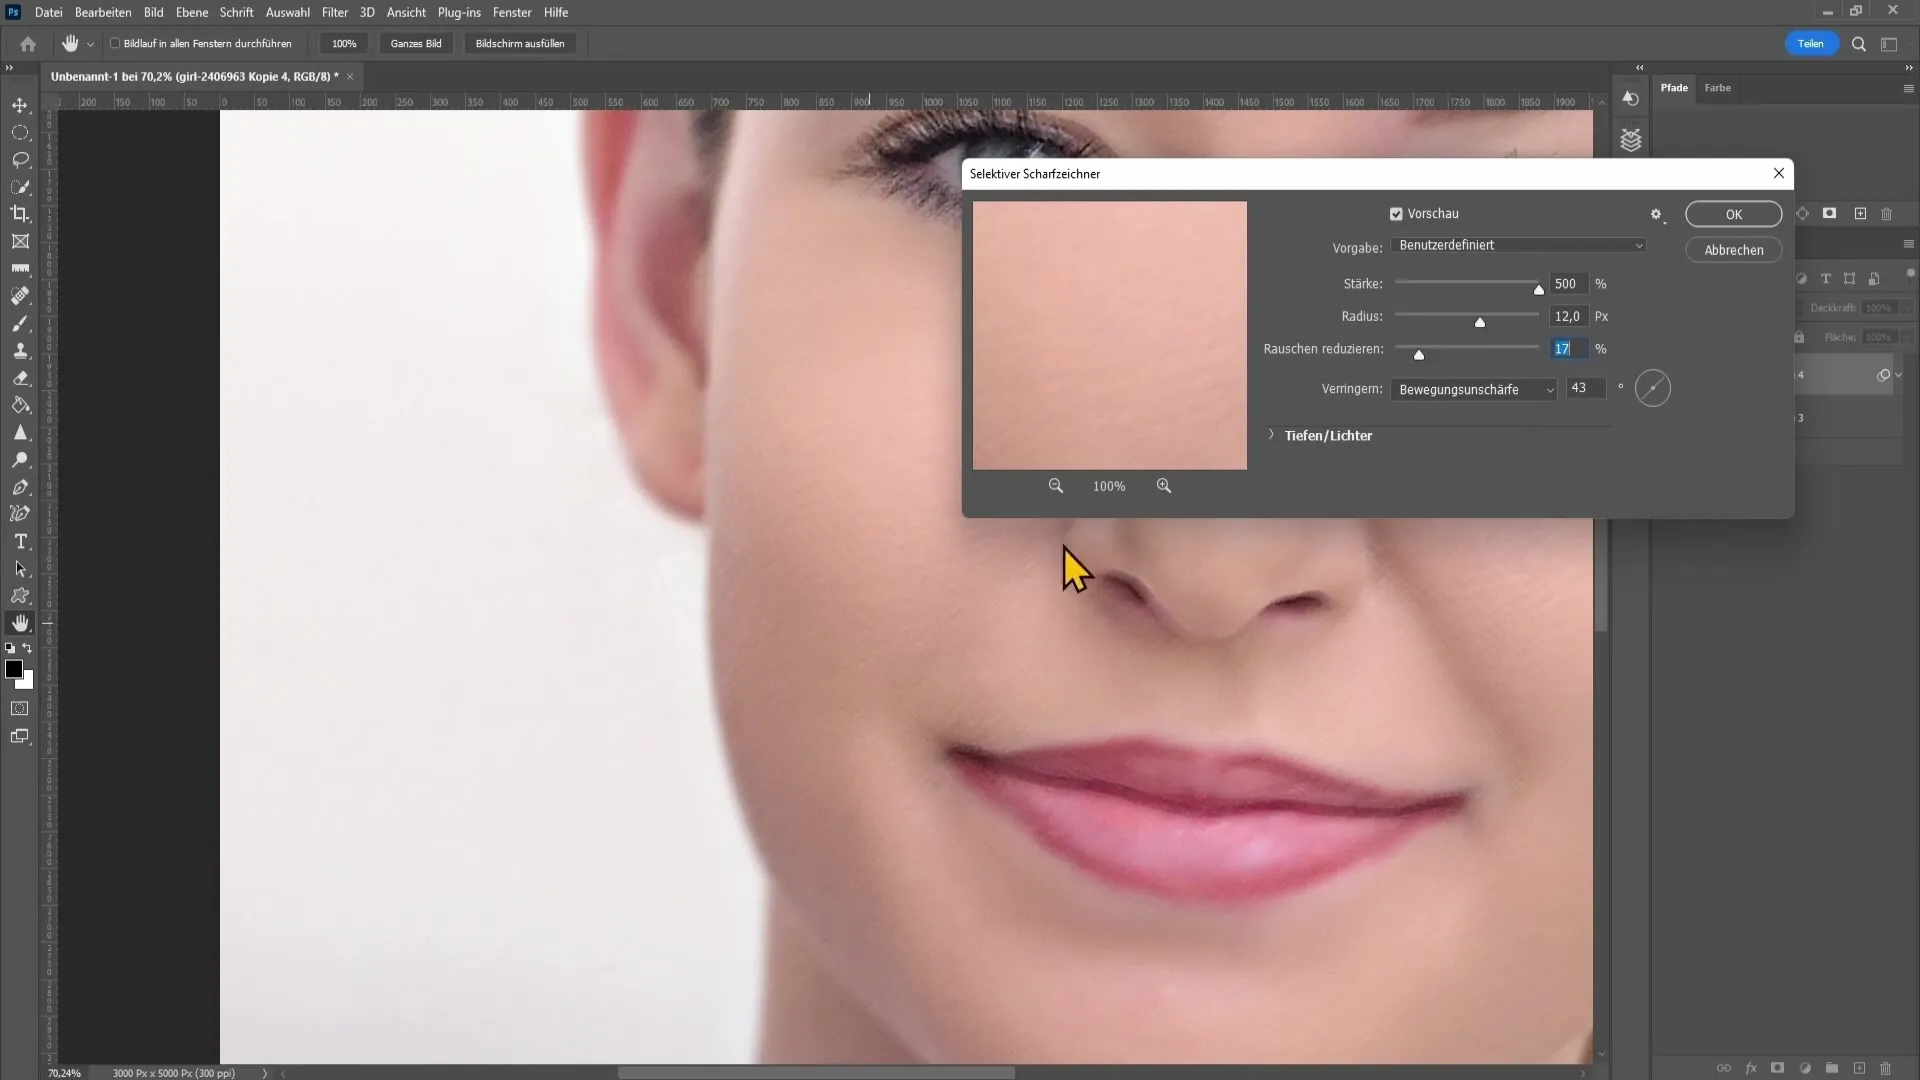
Now, test this sharpening effect. Go to the preview and see the changes. You will notice that the edges have already improved significantly, but there is still room for improvement. Experiment with the radius values to achieve the optimal effect for your image.
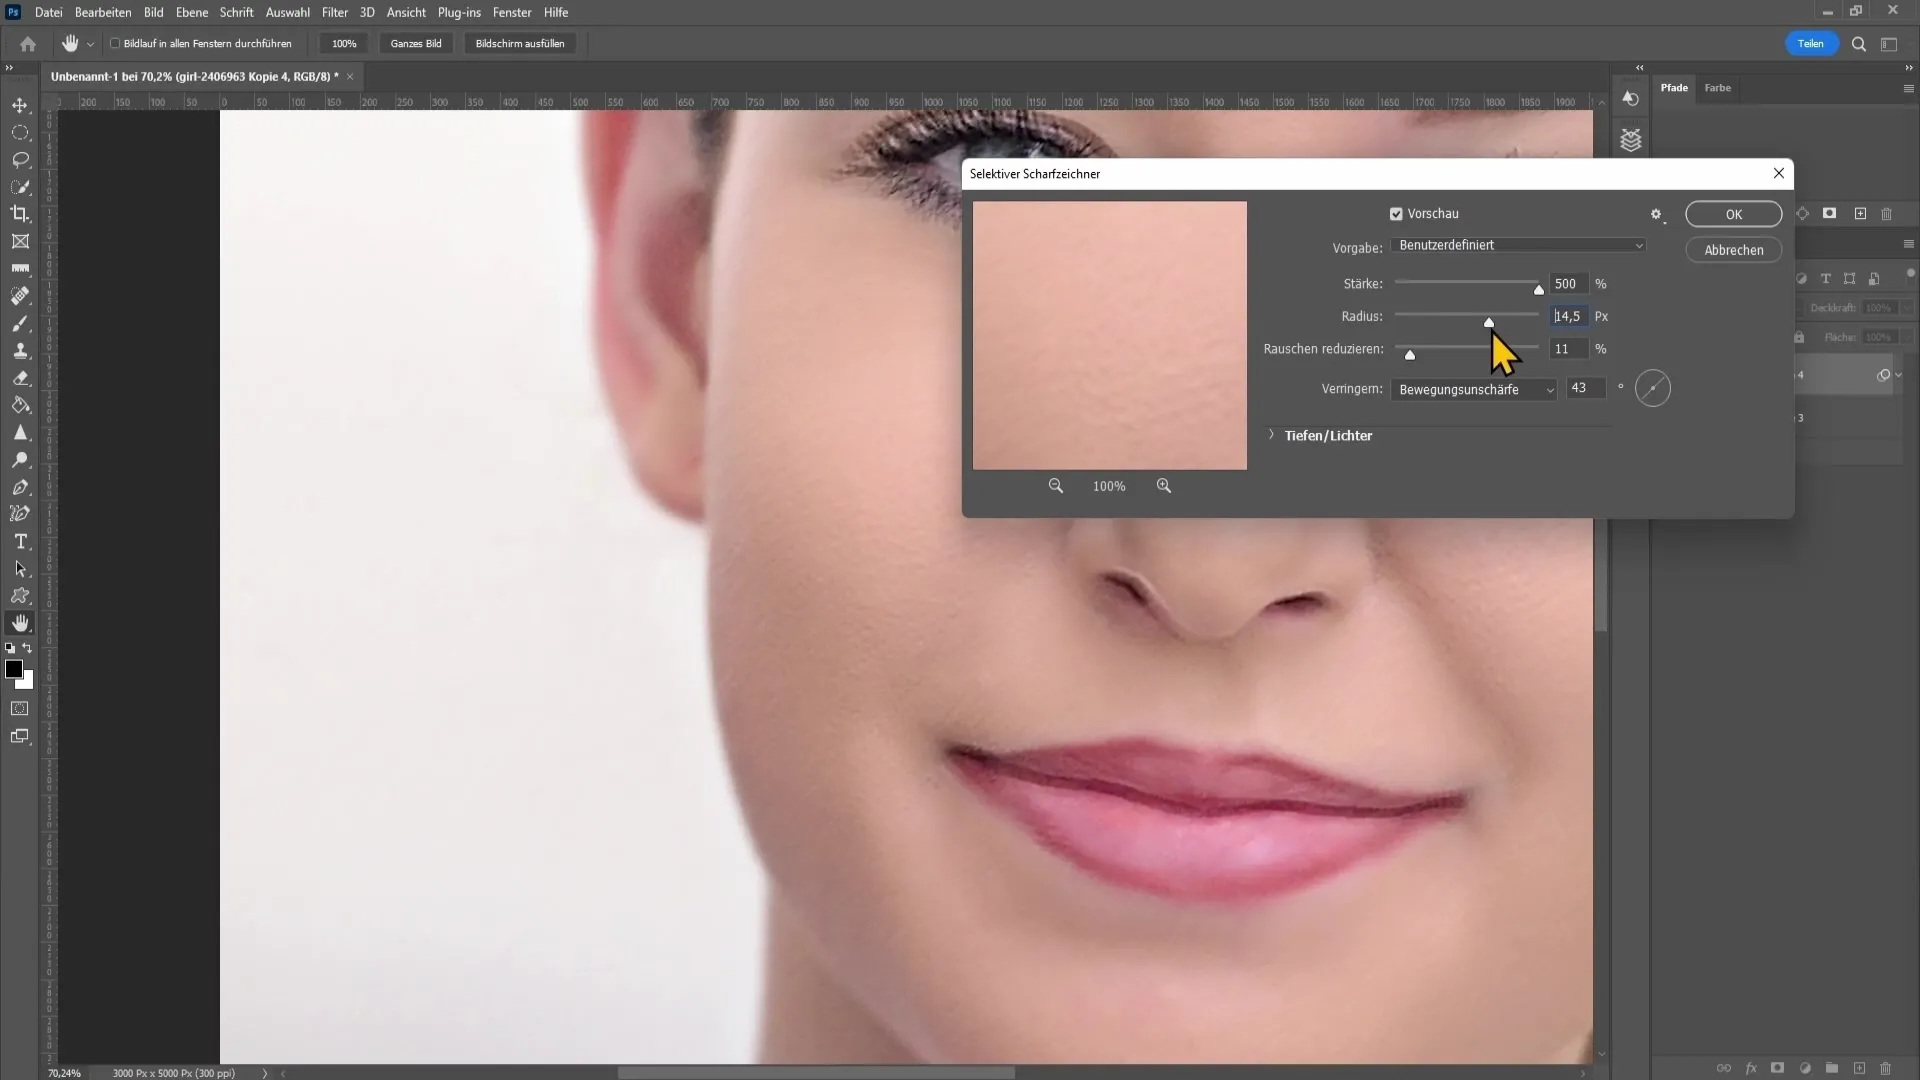
If your edges are good, proceed and work on the artifacts caused by sharpening to reduce these unsightly effects. Use the settings for shadows and highlights to further optimize depending on the background.
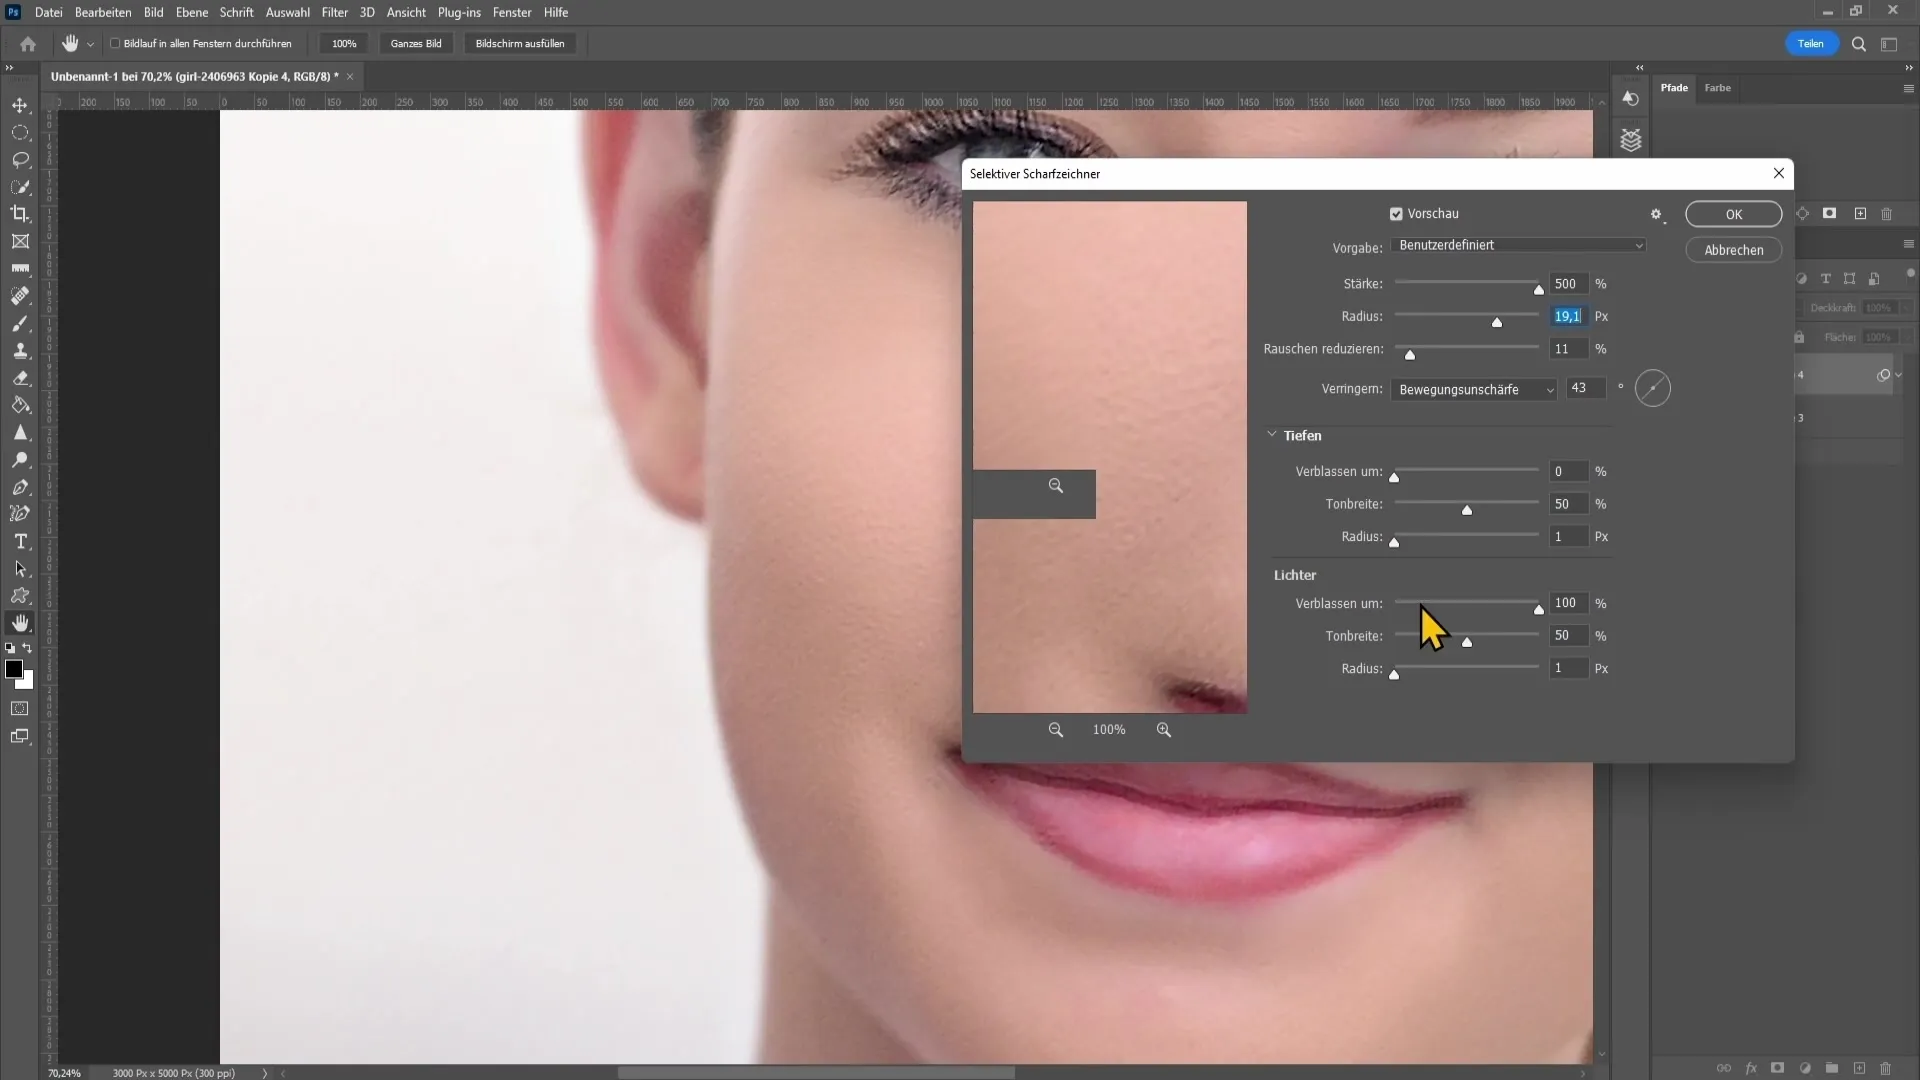
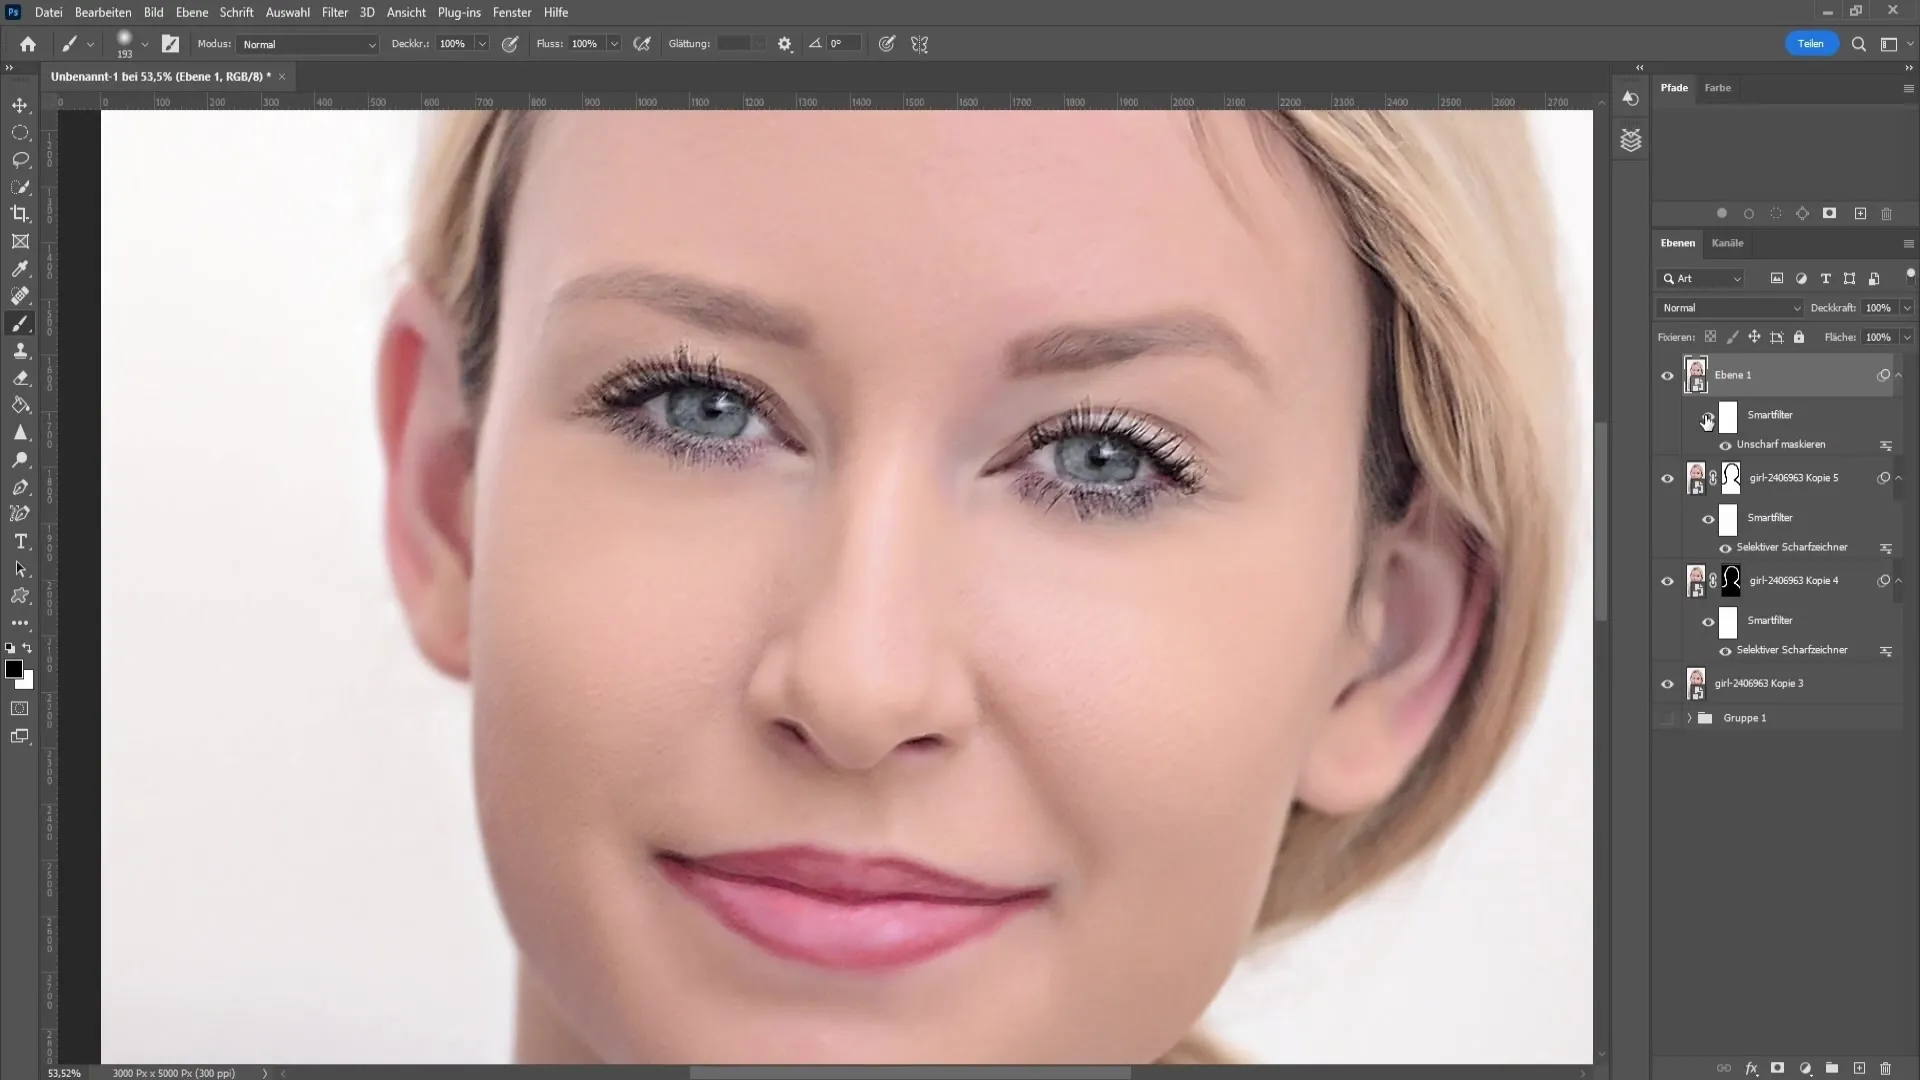
Be sure to adjust the fade value to achieve a harmonious image. If you see that details, such as the eyes of the person in the picture, are losing clarity, you may need to edit and sharpen the image again.
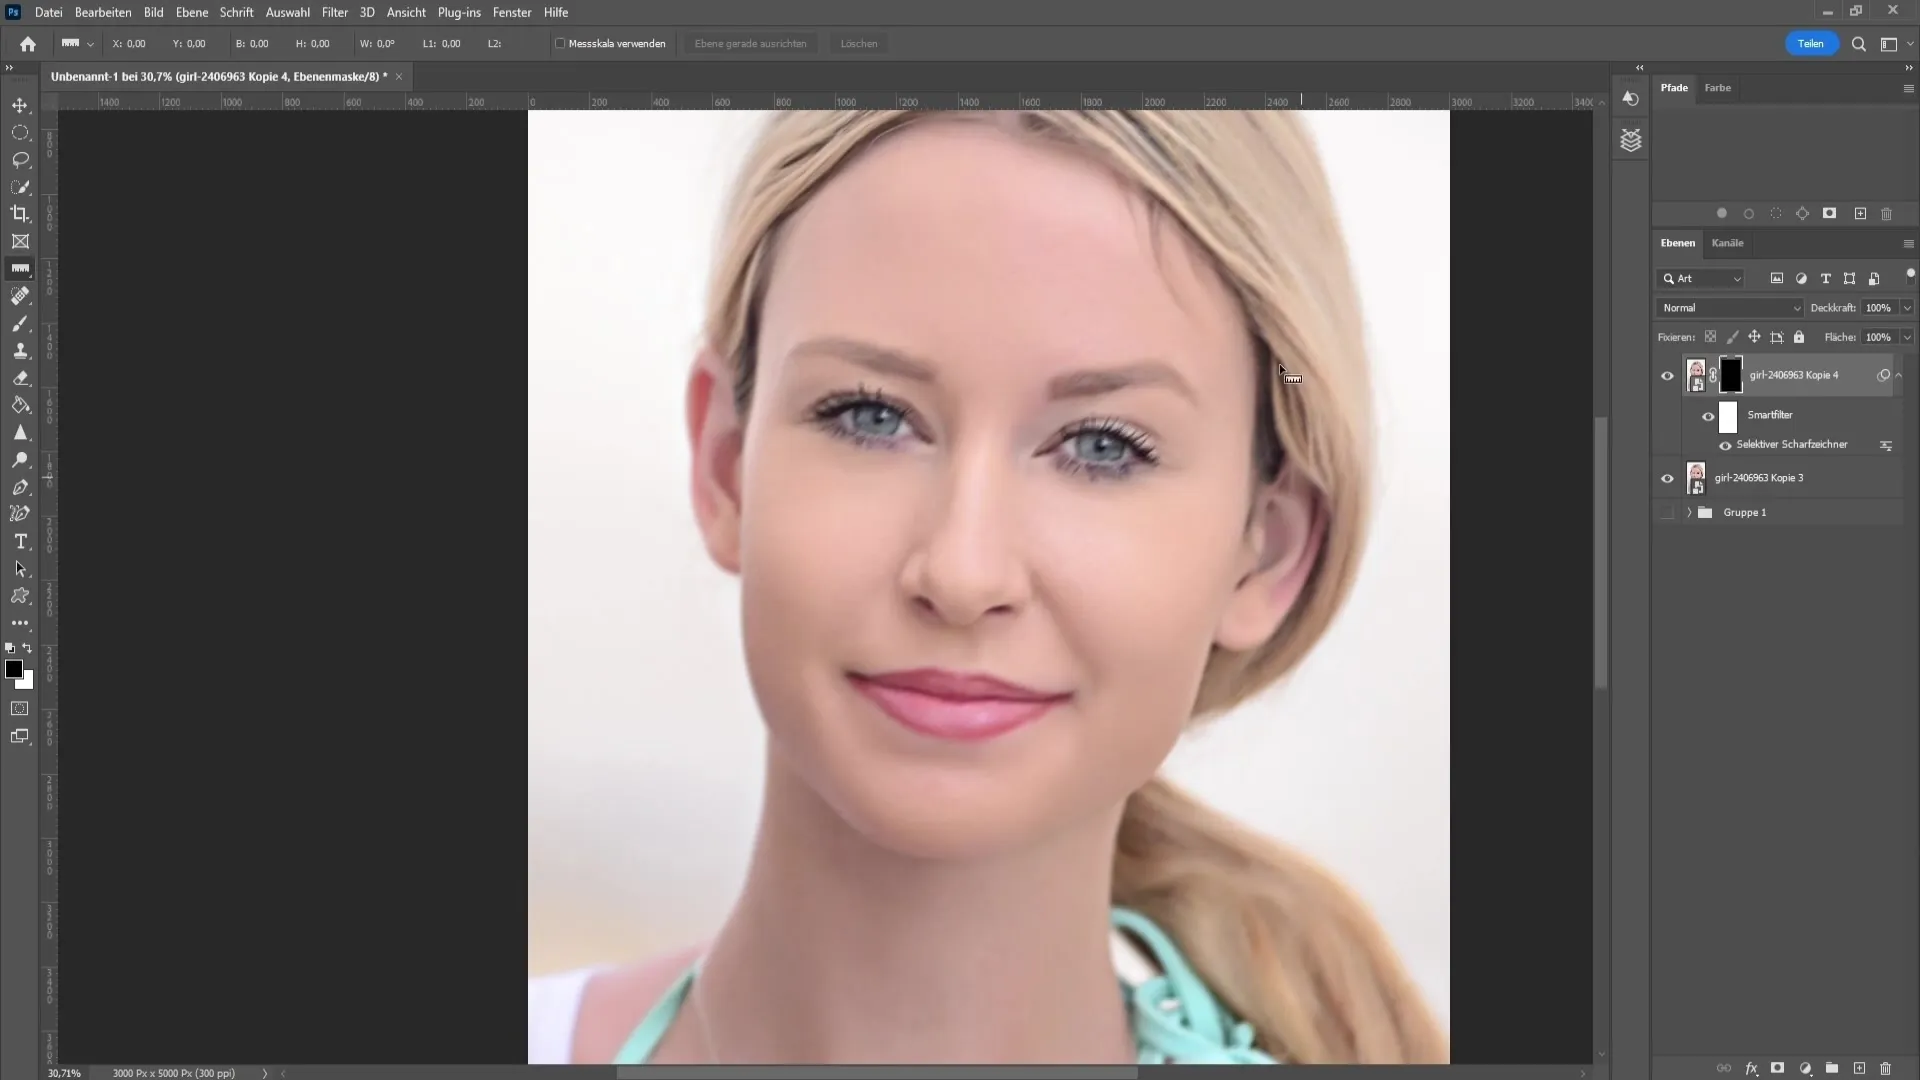
Use a layer mask for this. Hold down the Alt key and click on the mask icon to create a black layer mask that makes the objects on this layer invisible. Use a brush with 0% hardness and a white foreground color to sharpen the edges of the person.
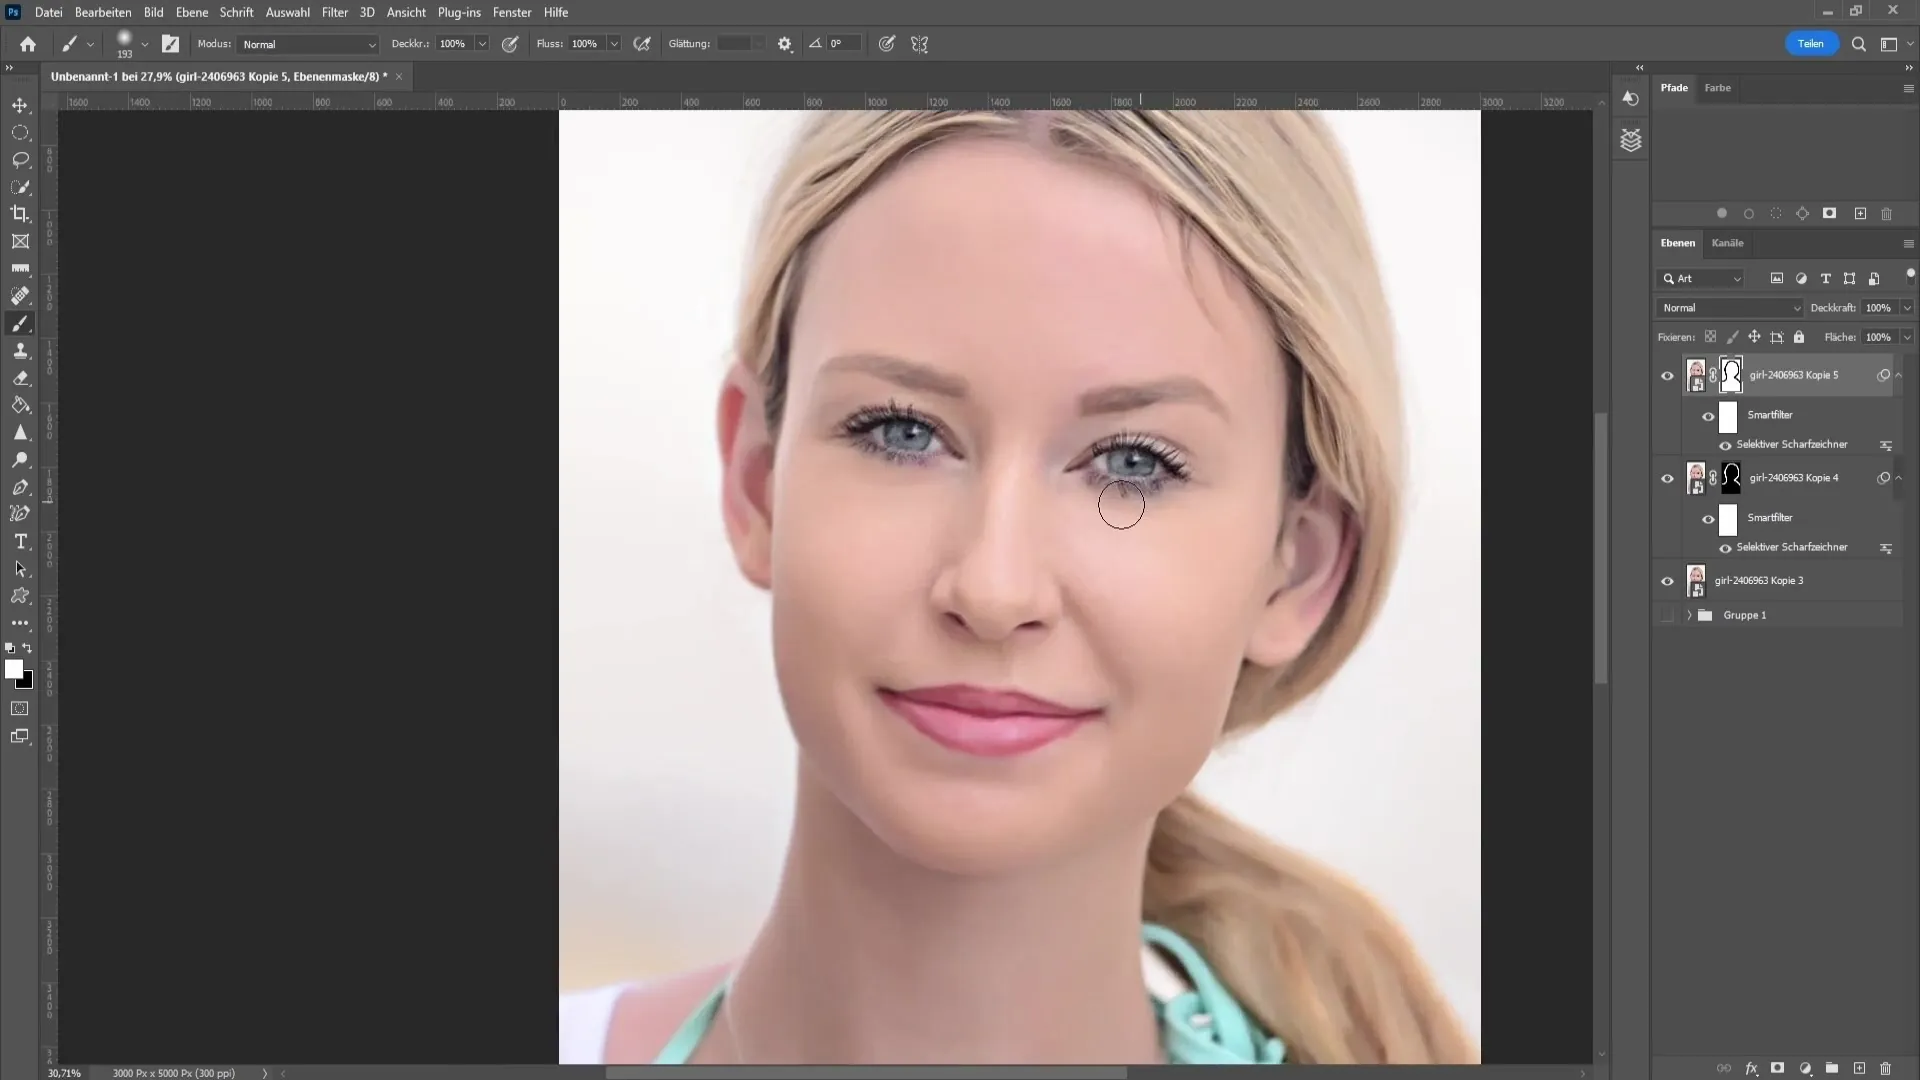
When you are done, you can duplicate the layer with Ctrl + J and invert the layer mask by pressing Ctrl + I. This will give you a nice sharpness in the eyes, while the rest of the image remains less affected.
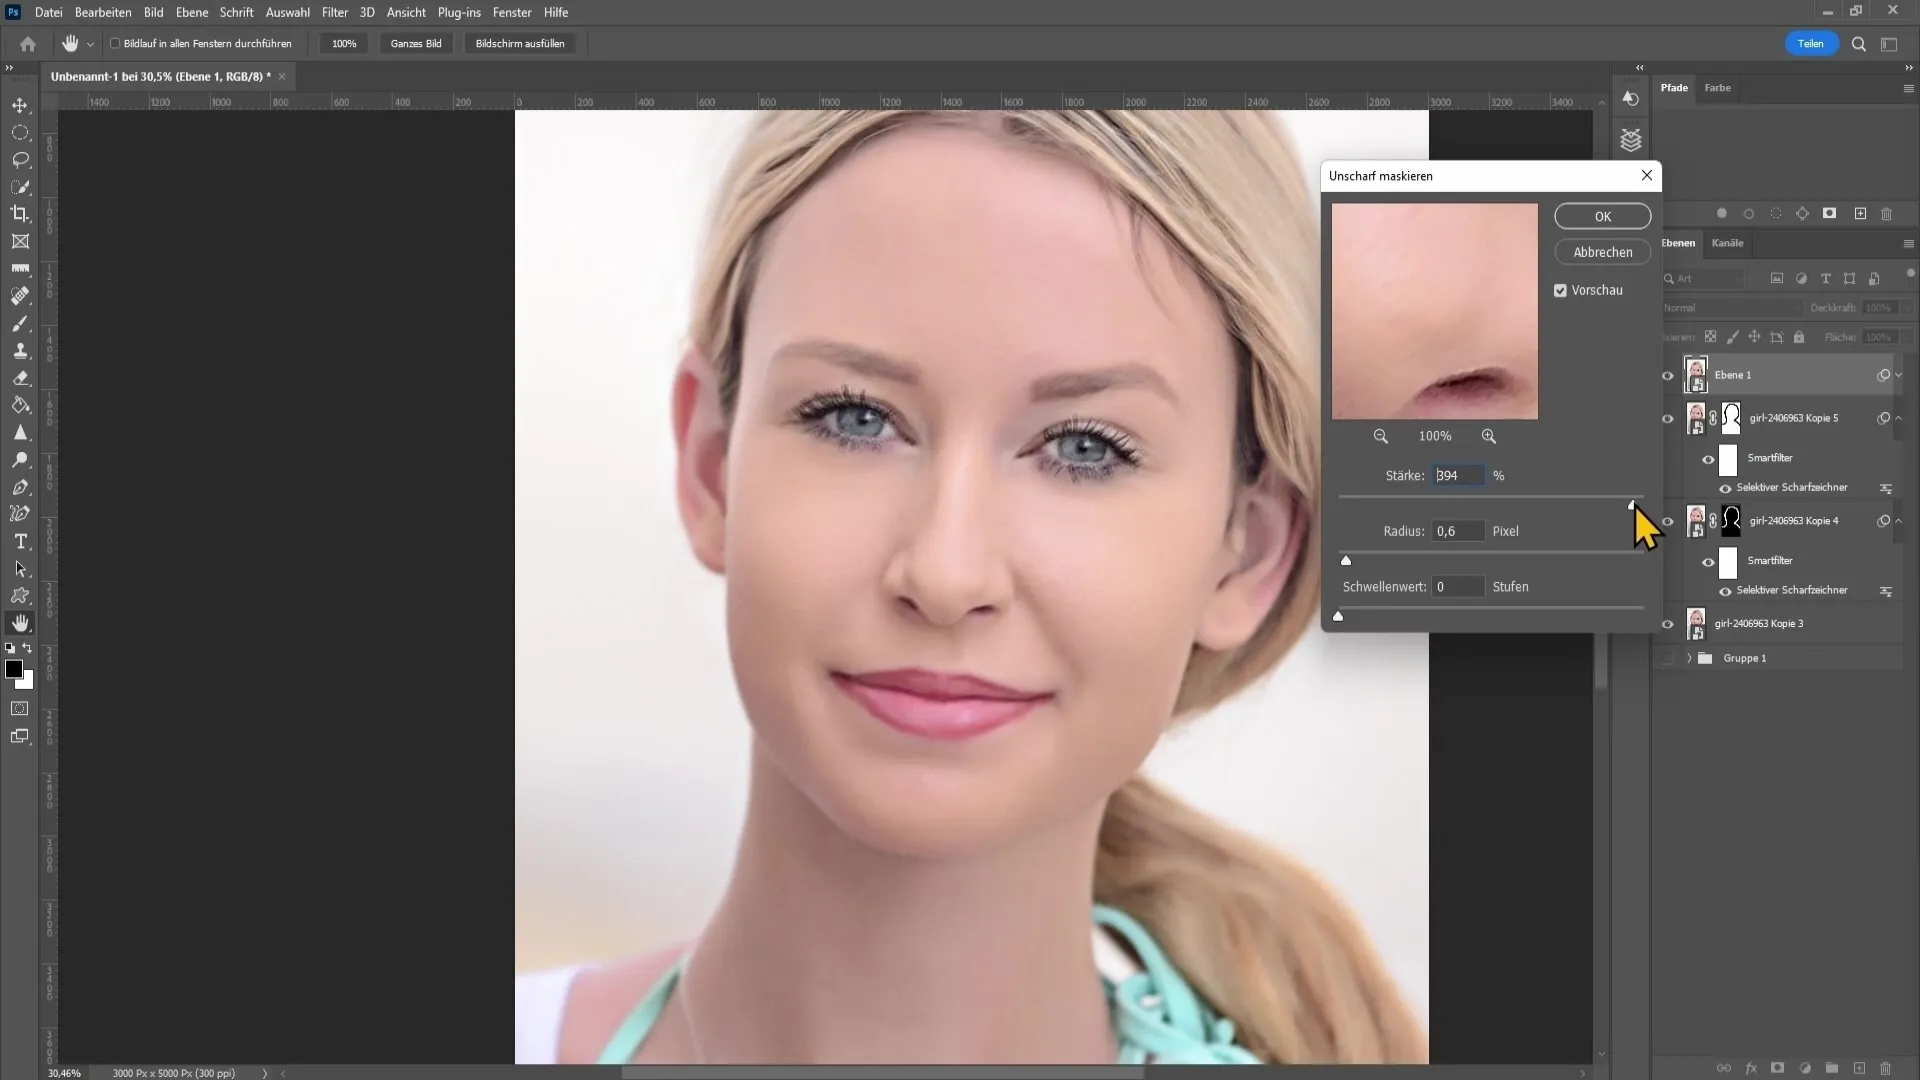
Finally, to further optimize the image, you can convert the layer back into a Smart Object and apply a final filter in the sharpening settings. Experiment here with the radius and strength to achieve the best possible result.
After these adjustments, you should be able to see a significant improvement in your original image. You can now restore the image to its previous state and see how much you have gained with these techniques.
Summary
In this tutorial, you have learned how to analyze shakes in photos, measure the angle and distance, and efficiently correct with specific Photoshop tools and filters. With these tools, you can significantly improve blurred images and make the details sharper again.
Frequently Asked Questions
How can I find out at which angle my image is blurred?Use the ruler tool in Photoshop to measure the direction and angle of the blur.
What can I do if my image is too blurred?Images that are too blurred are difficult to repair and often offer limited possibilities for improvement.
How do I adjust the radius for selective sharpening?The radius should be set to the distance you measured when determining the blur.
Can I save every image with these techniques?It depends on the image; slightly blurred photos are often easier to repair than heavily blurred ones.


