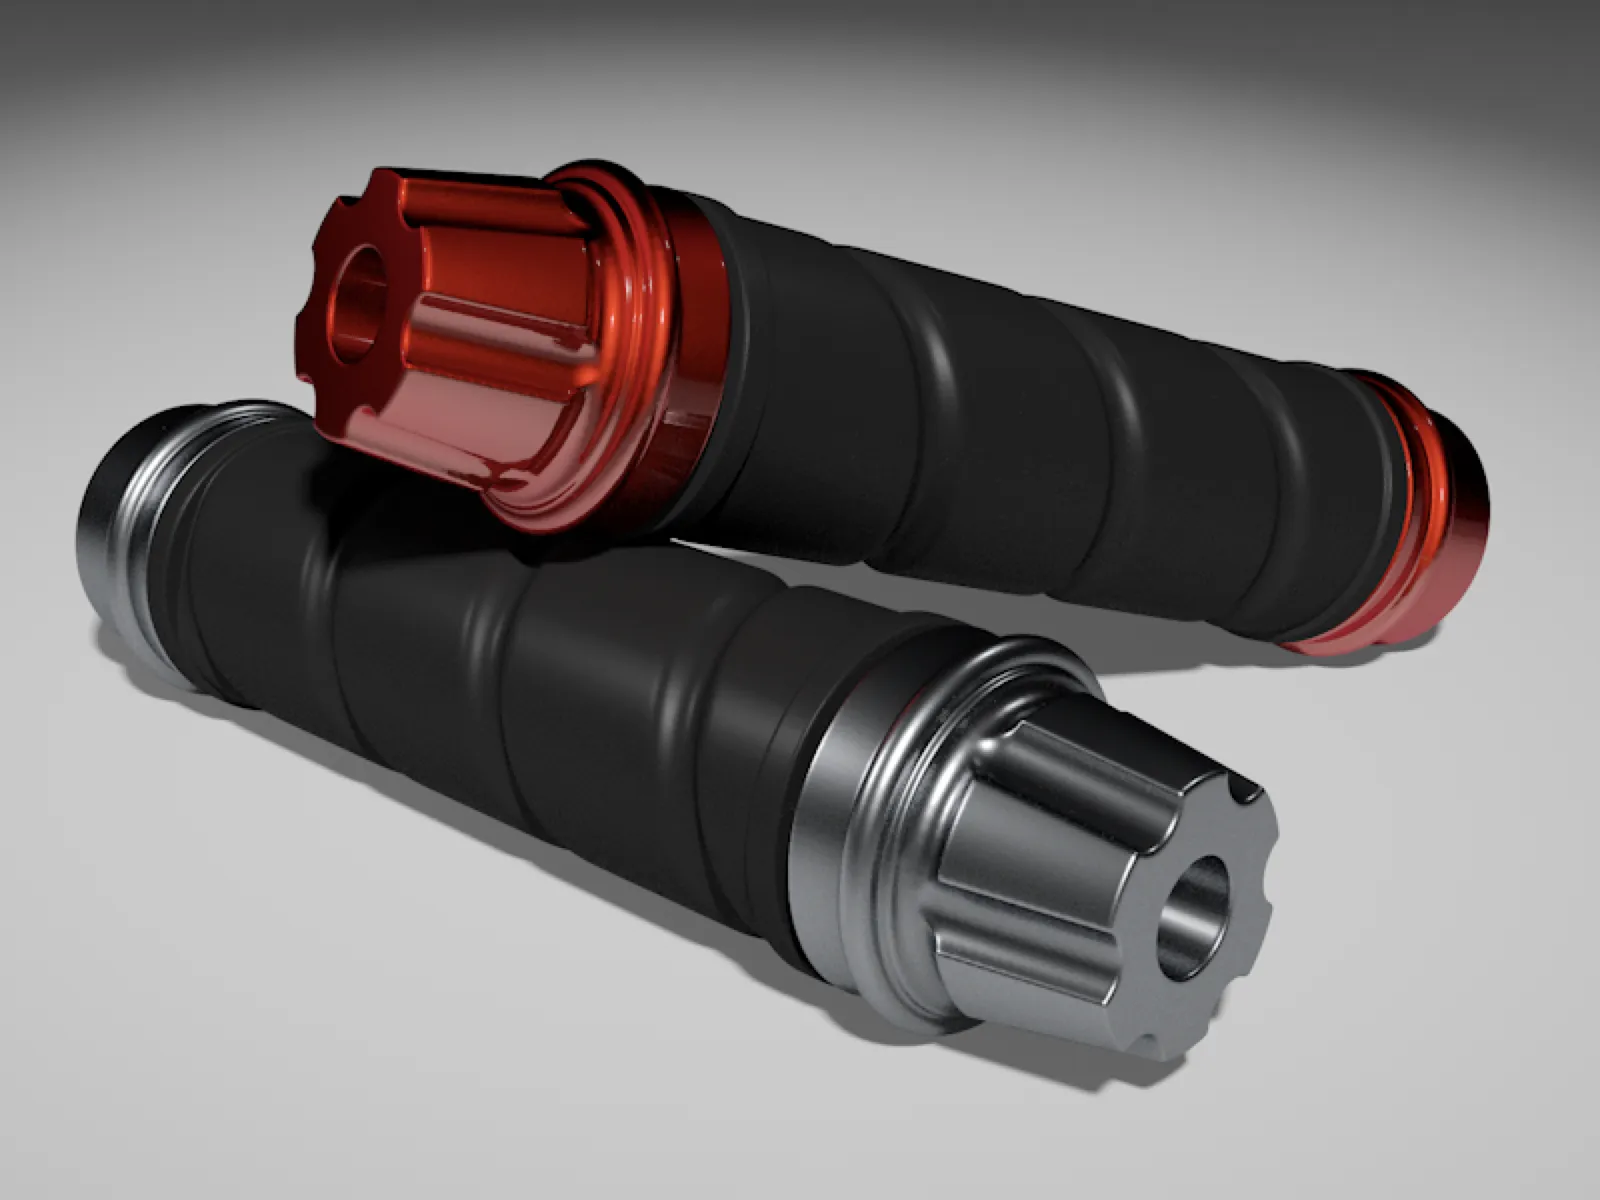
We don't want to approach this tutorial too theoretically - the best way to show how volume-based modeling works is with a concrete practical example. But first, let's take a quick crash course in the components involved in working with volume.
Modeling with volume - in a nutshell
A new Volume menu has been integrated into the user interface for volume modeling in Cinema 4D Release 20. Here we find the two most important functions for volumes - the volume generator, which generates the volume from the objects assigned to it, and the volume mesher, which generates the actual mesh from it.
Two filters are also available for fine-tuning and customizing the mesh. More on this shortly.
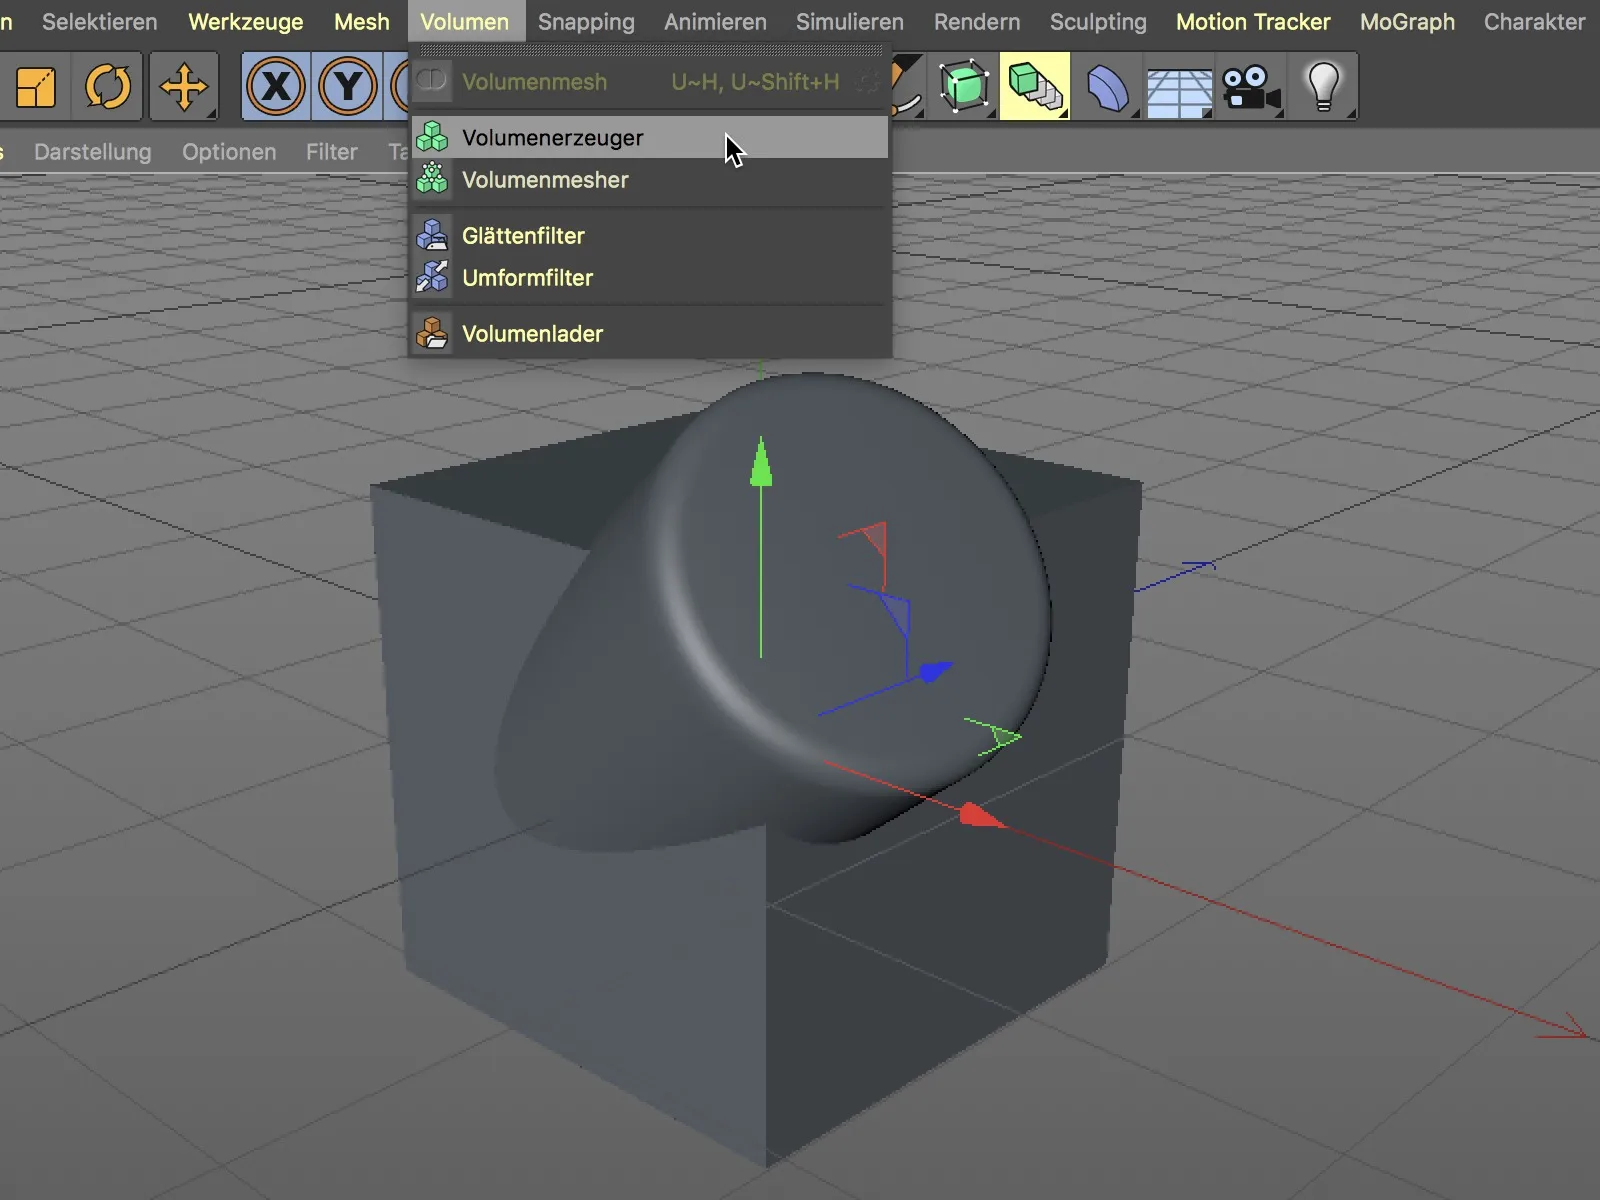
To generate a joint volume from two objects, we simply place them as a sub-object in a volume generator or drag and drop the objects into the Objects field in the Attribute Managerof the volume generator.
The light grey colored result shows the common three-dimensional shape converted into voxels (volume pixels ). Depending on the voxel size, the voxel structure is coarser or finer.
In order to generate a renderable mesh from the voxels, we need a volume mesher. We assign the volume generator to it via the object manager. Now the light gray voxel structure has also been transformed into a usable mesh.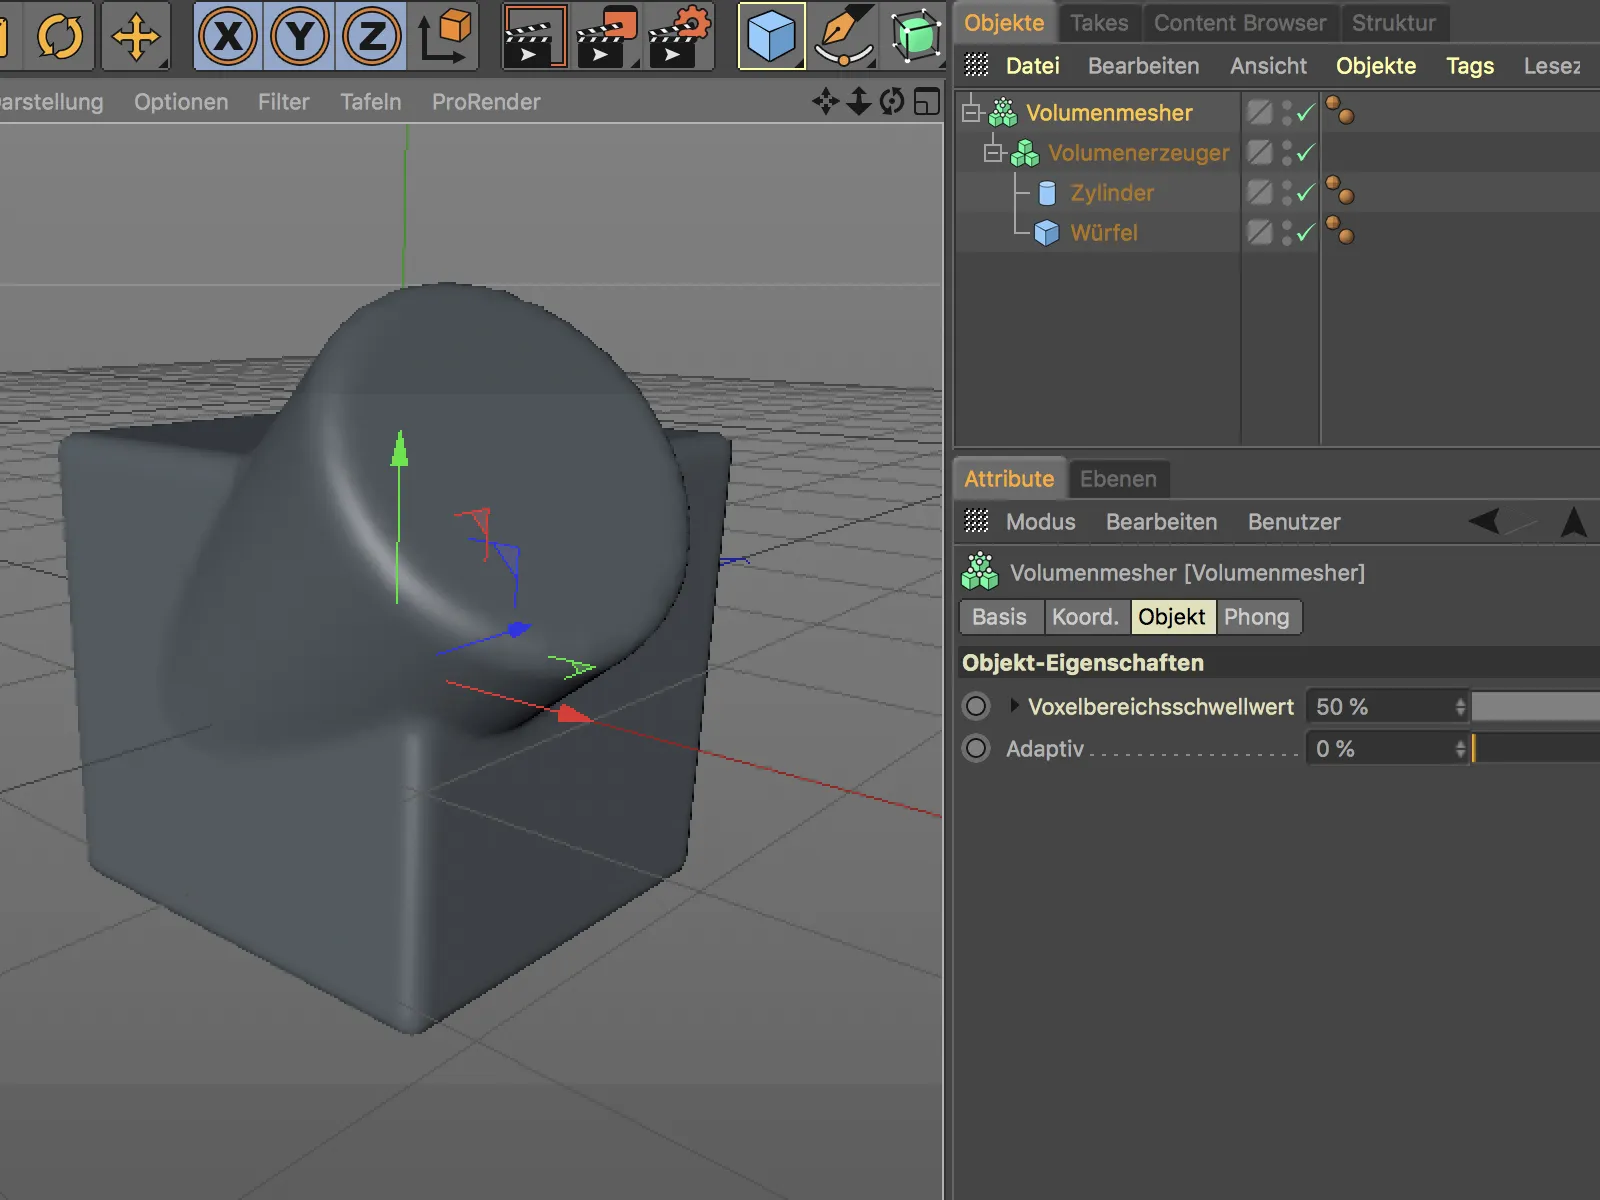
The special feature of the volume mesher is that when the mesh is generated, a very clean polygon mesh consisting exclusively of squares is created. The resolution of the mesh can be adjusted using the Adaptive slider in the Volume Meshers settings dialog.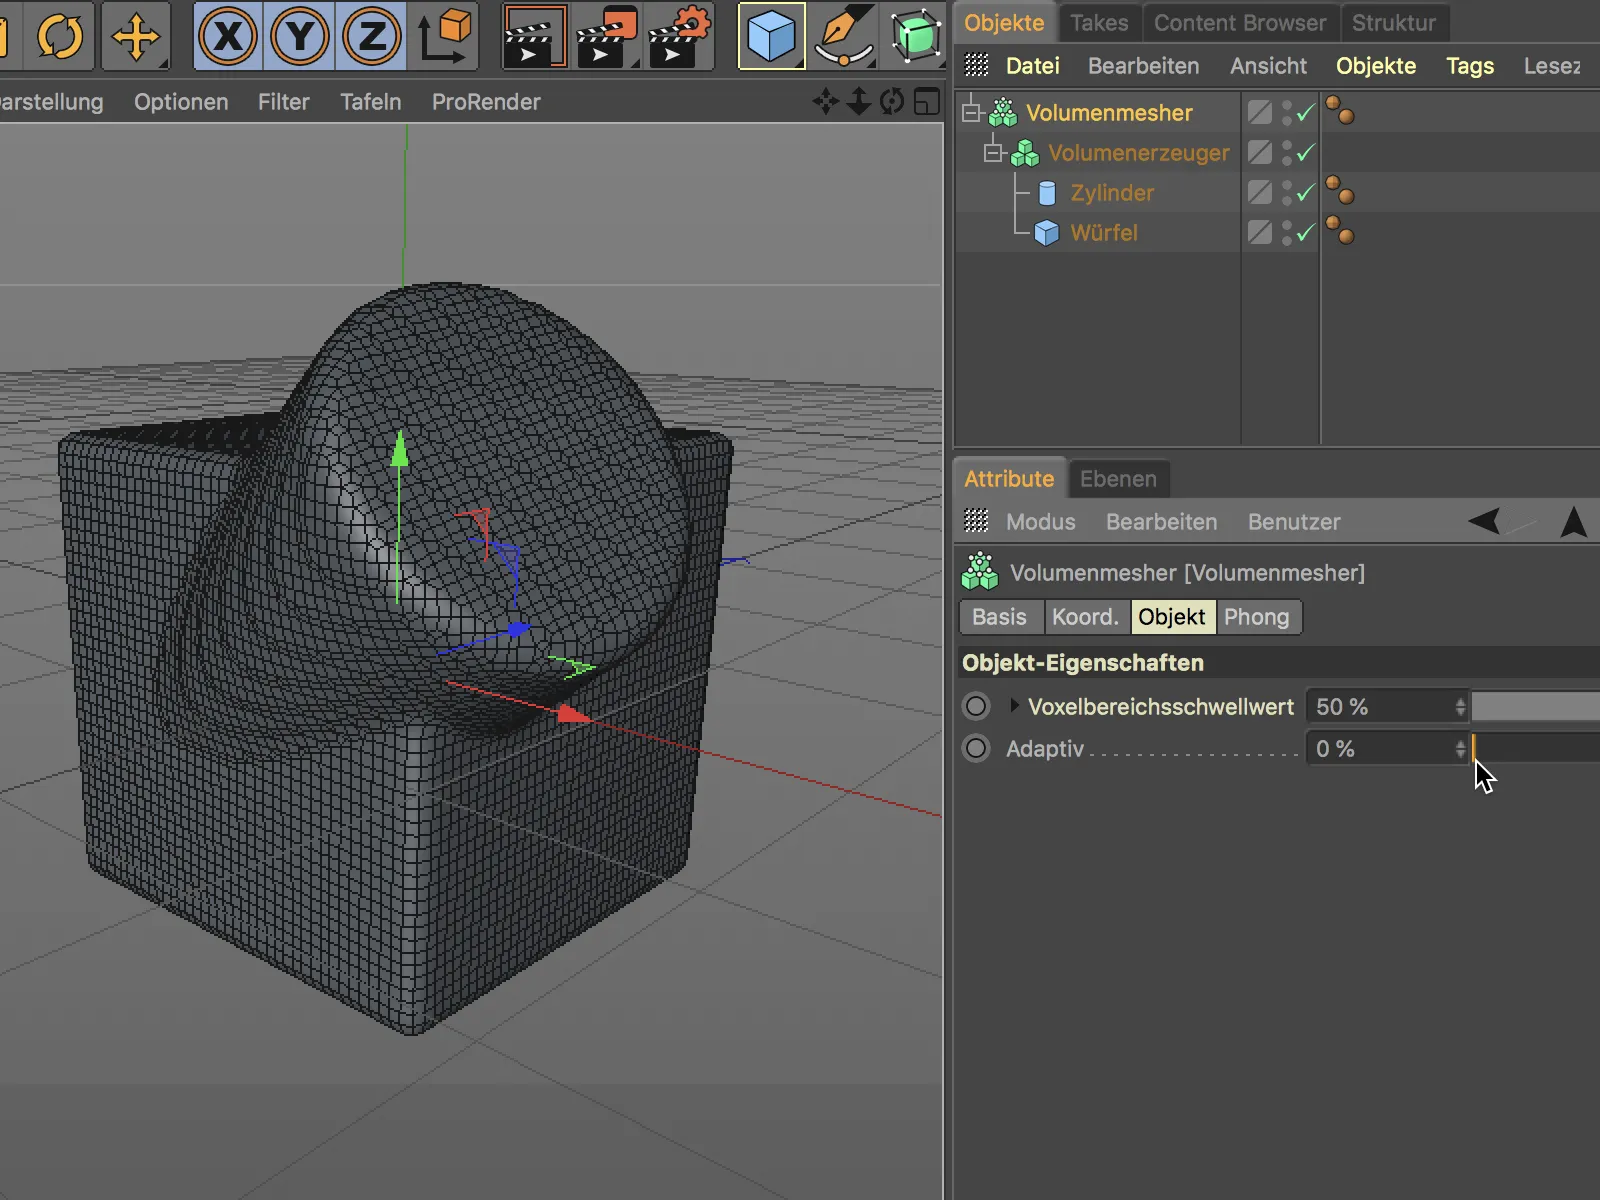
As with a polygon reduction, we can reduce the number of polygons in the mesh by increasing the Adaptive value. The volume mesher does its best to retain the basic shape of the object.
Modeling a motorcycle handle - building the basic objects
After this short crash course, let's move on to a real practical example - the modeling of a motorcycle handle, consisting of a metal construction and the actual rubber twist grip. To avoid constantly showing the parameters of basic objects in this tutorial, I will focus more on working with the volume mesher. In the working materials for this workshop you will find the finished handle with all the elements included as well as the scene known from the lead image.
It starts with a cylinder object, at both ends of which further parametric basic objects are placed to create a common volume for the metal shape. Sufficient subdivision or segmentation is important for a good mesh for each of the basic objects. We do not need to be unnecessarily frugal here, as the subsequent volume object primarily uses the shape, but not the resolution, to generate the volume.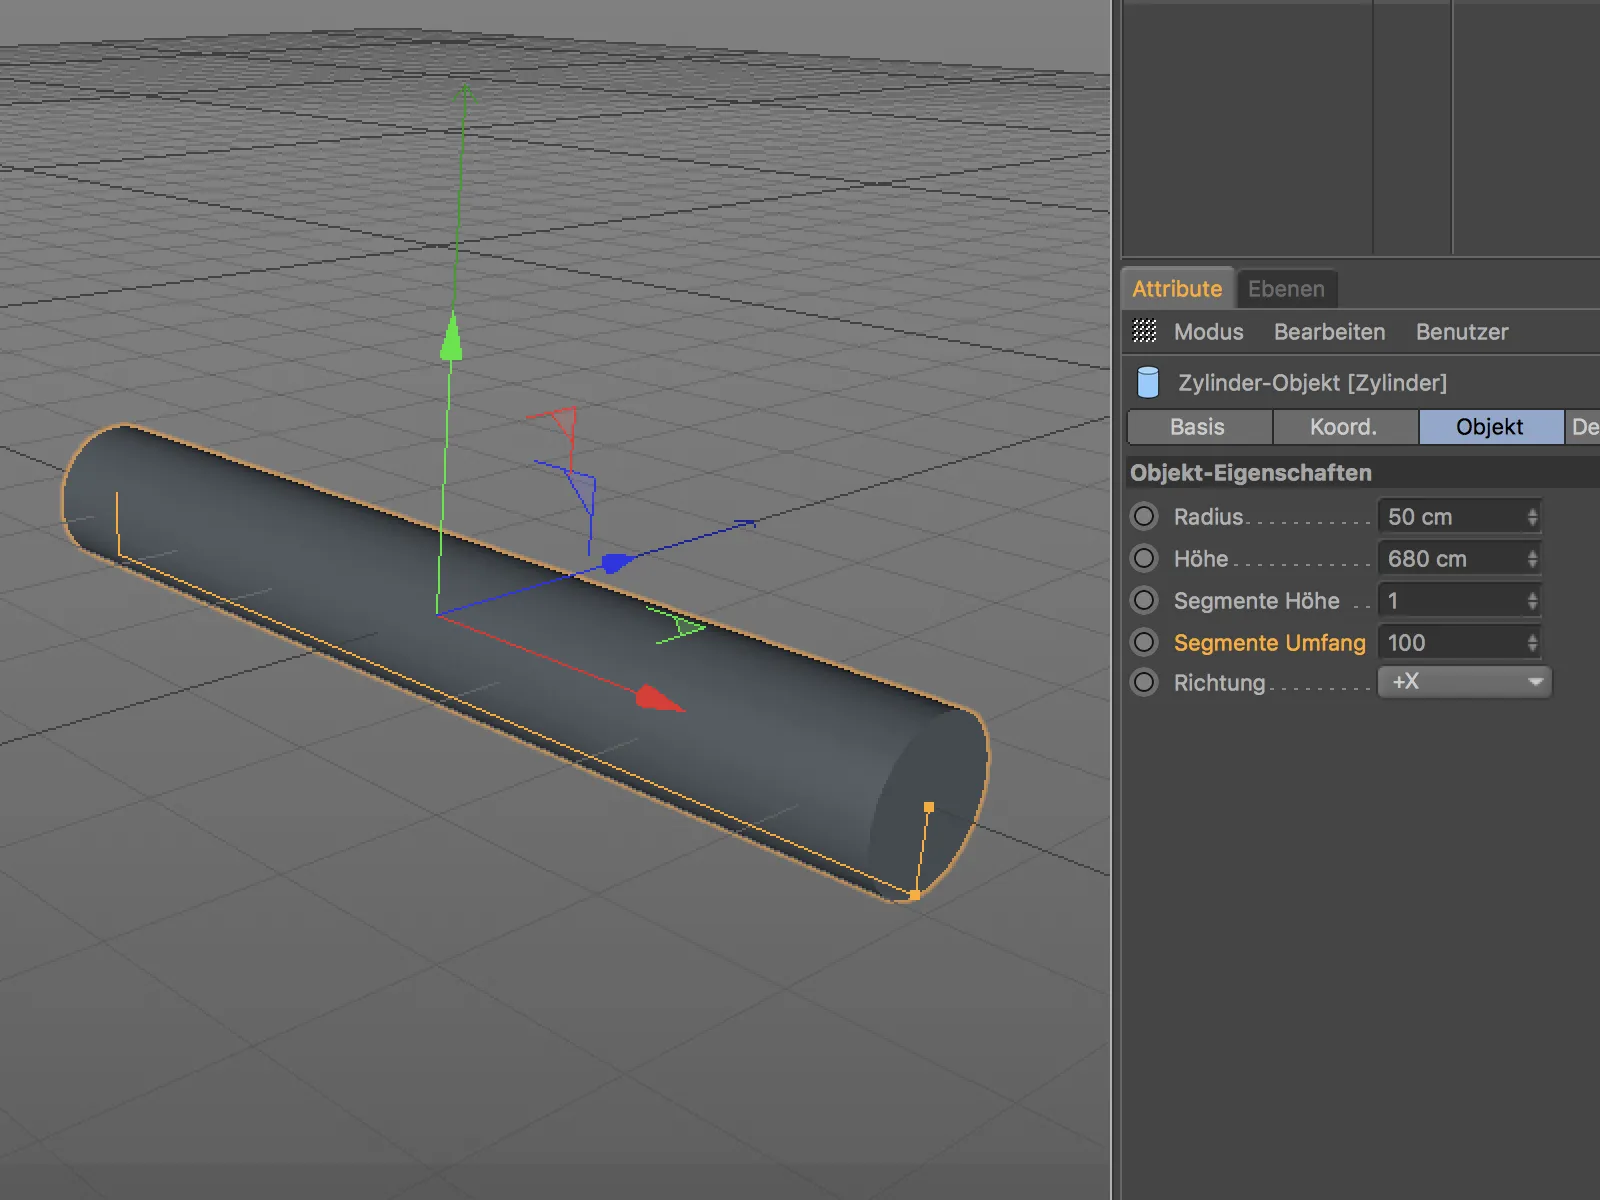
To shape the left, inner side of the handle, I have put together a cylinder object, a ring object and a cone object with a wide "tip". For a better overview, I show the three objects lined up next to each other.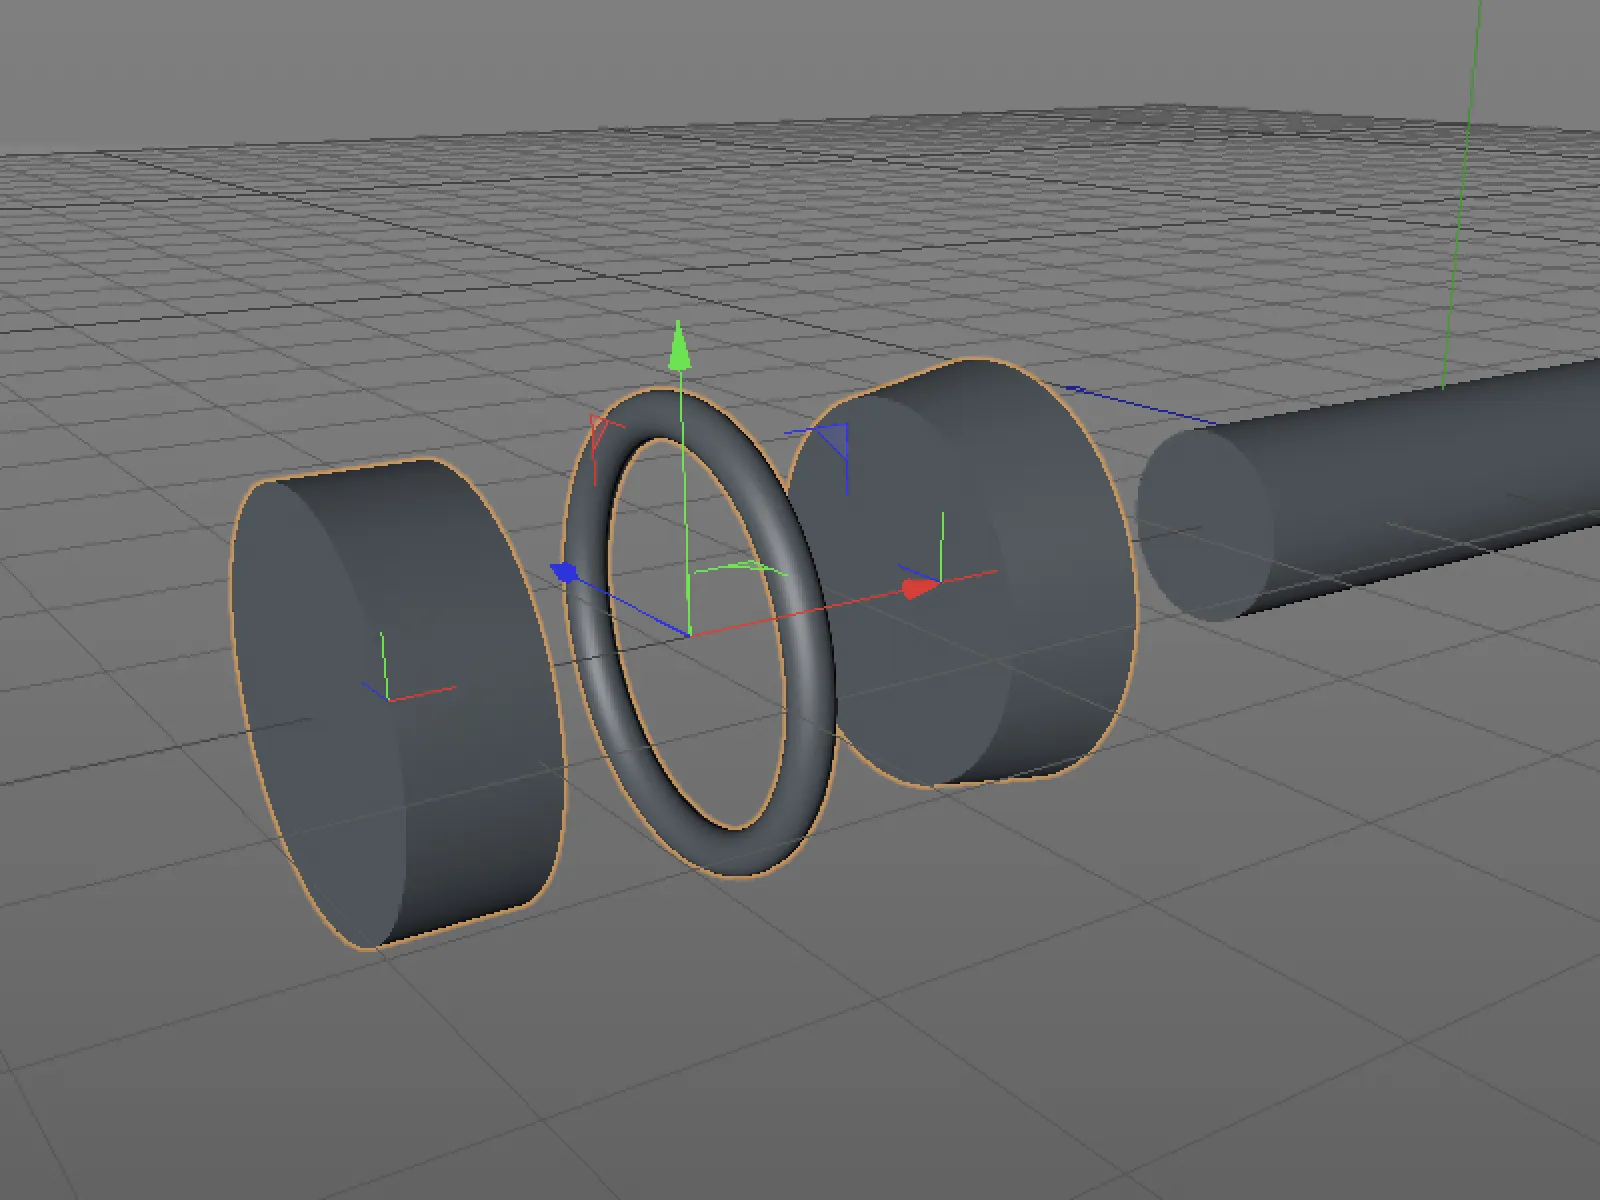
In order to generate a common shape from these three basic objects and the basic cylinder later on, I simply push them together in the way I imagine the shape of the handle later on. Overlaps or intersections are completely unproblematic, it is only a matter of the visible surfaces.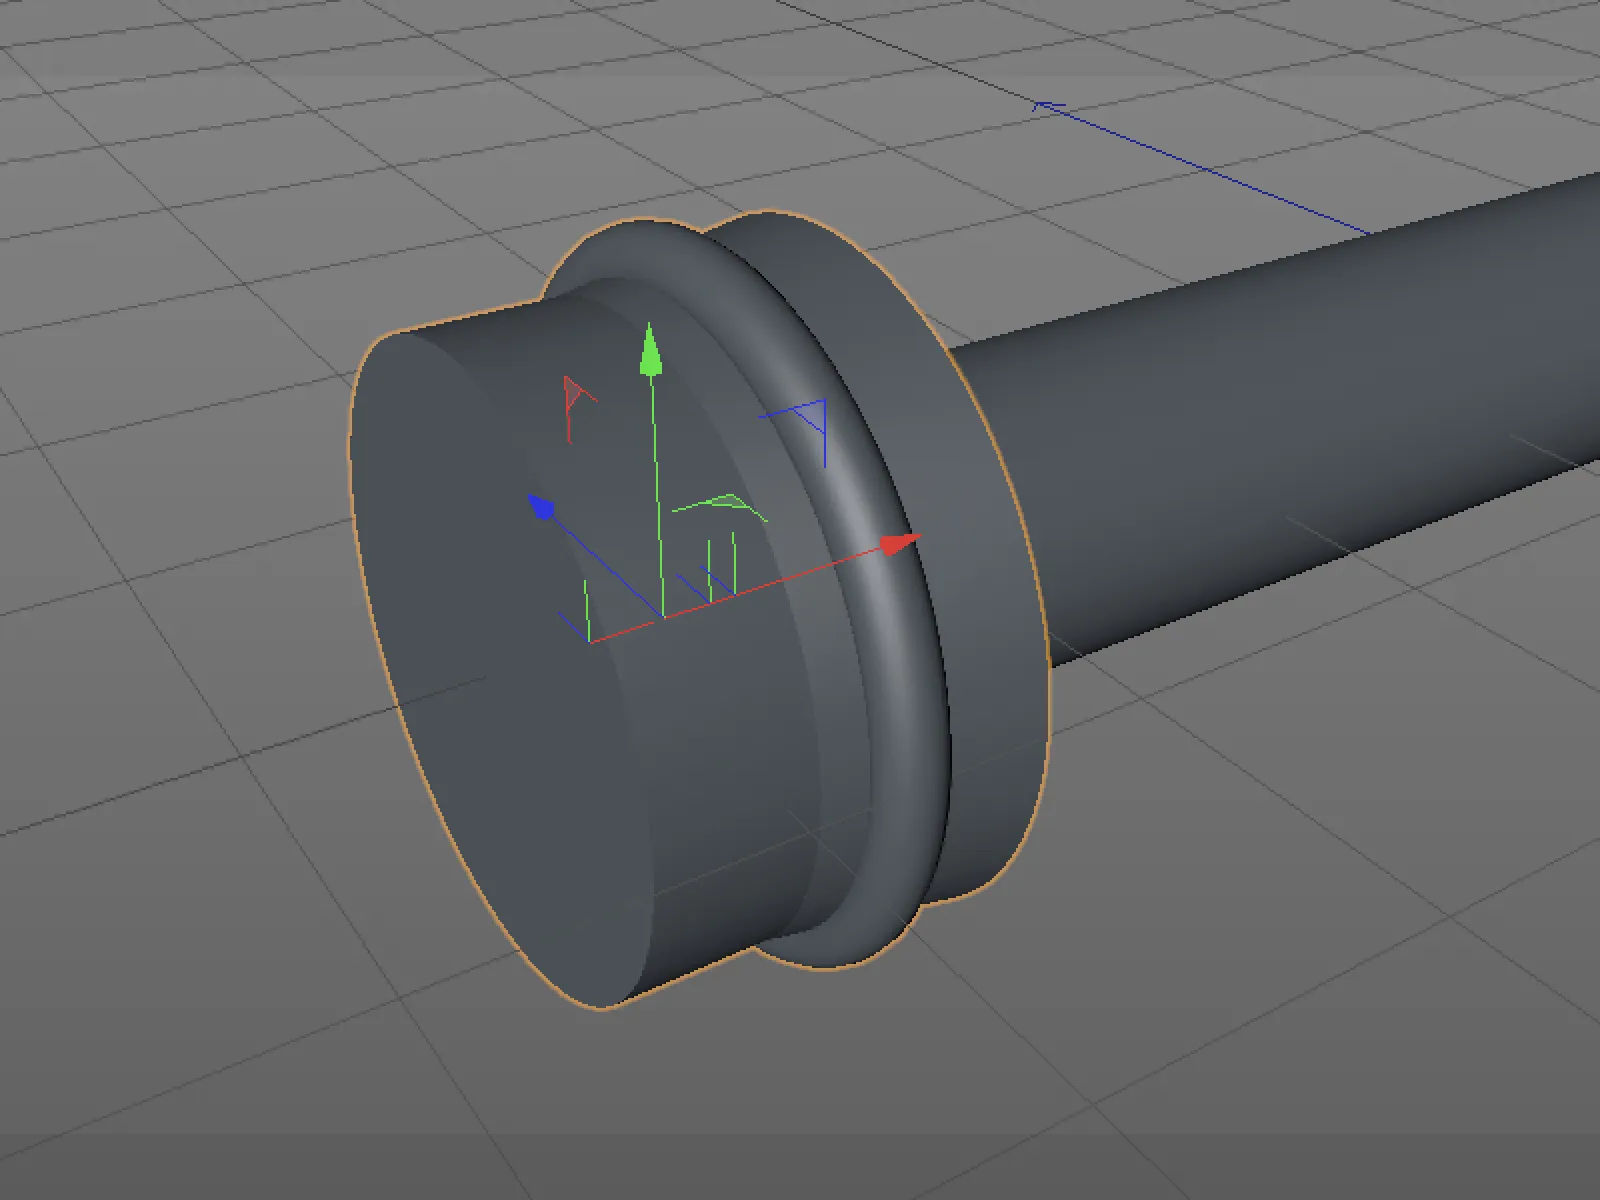
The same procedure applies to the other side of the handle. To start with, I provide two basic objects here - a blunt cone object and a copy of the ring object from the left-hand side of the handle.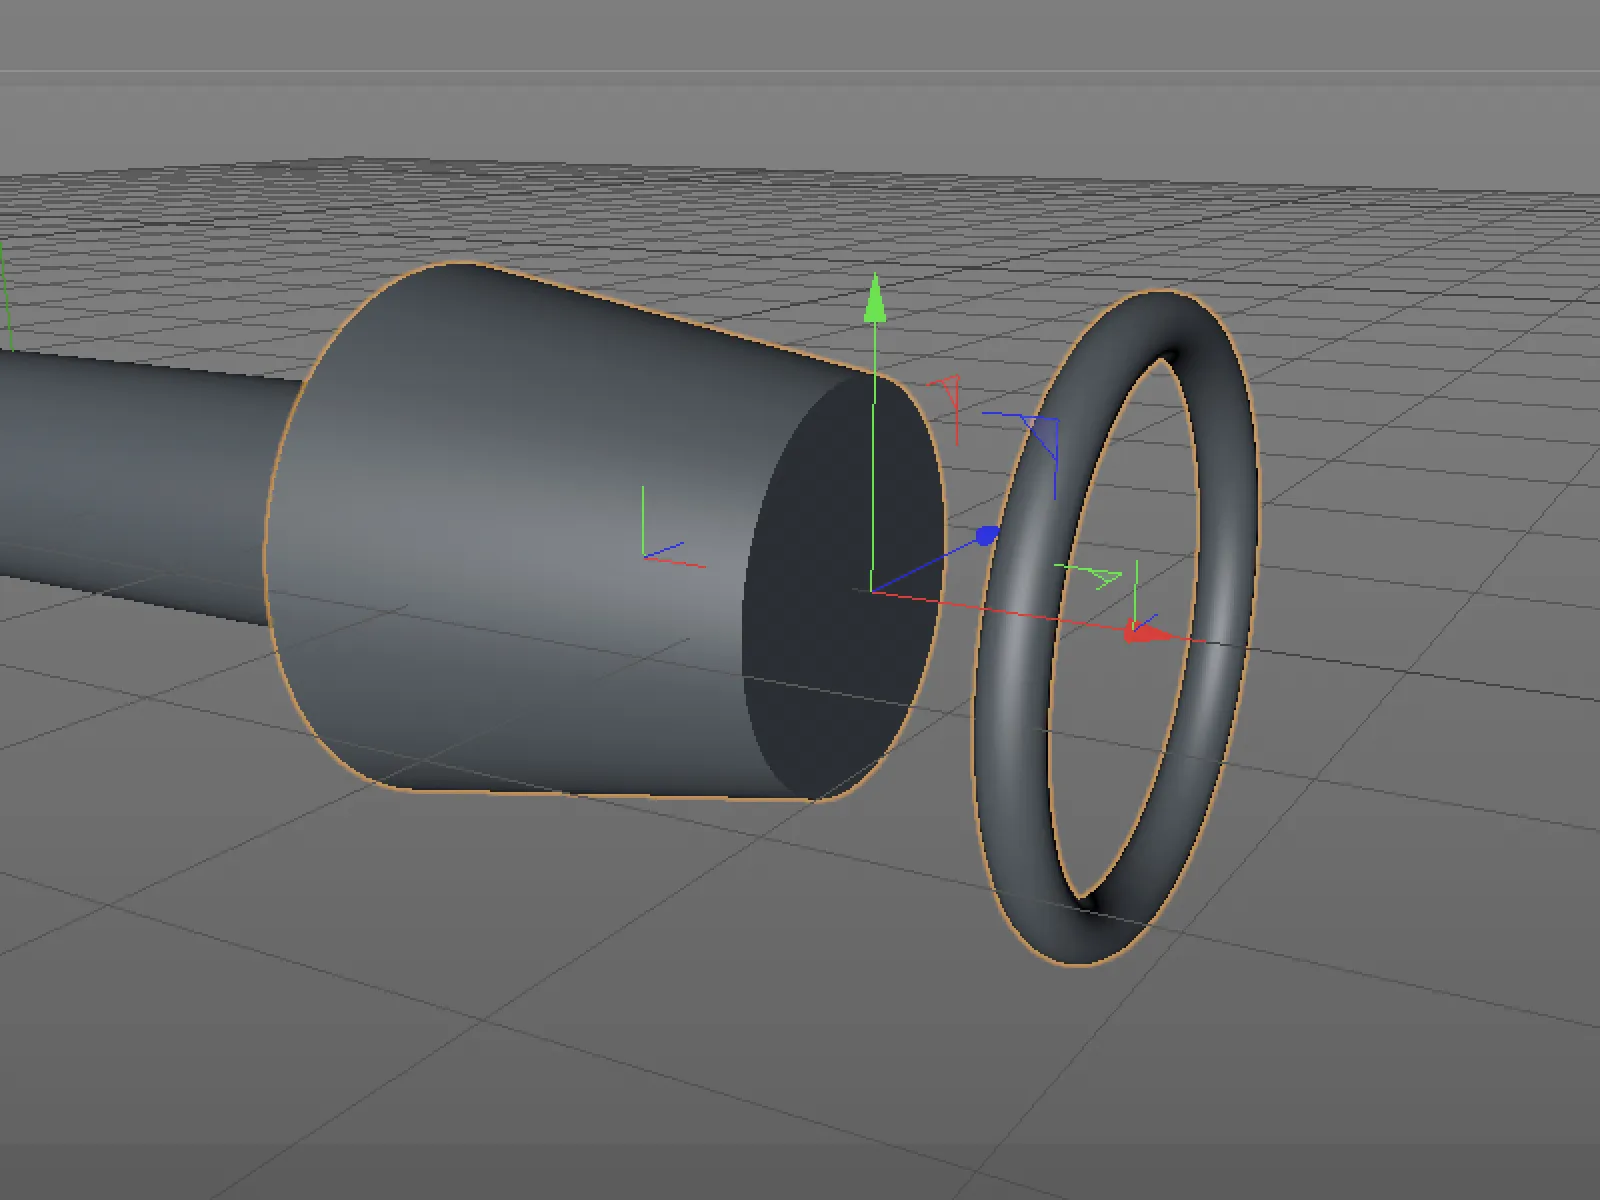
Again, I move both parametric basic objects together as desired and place them at the right end of the future handle.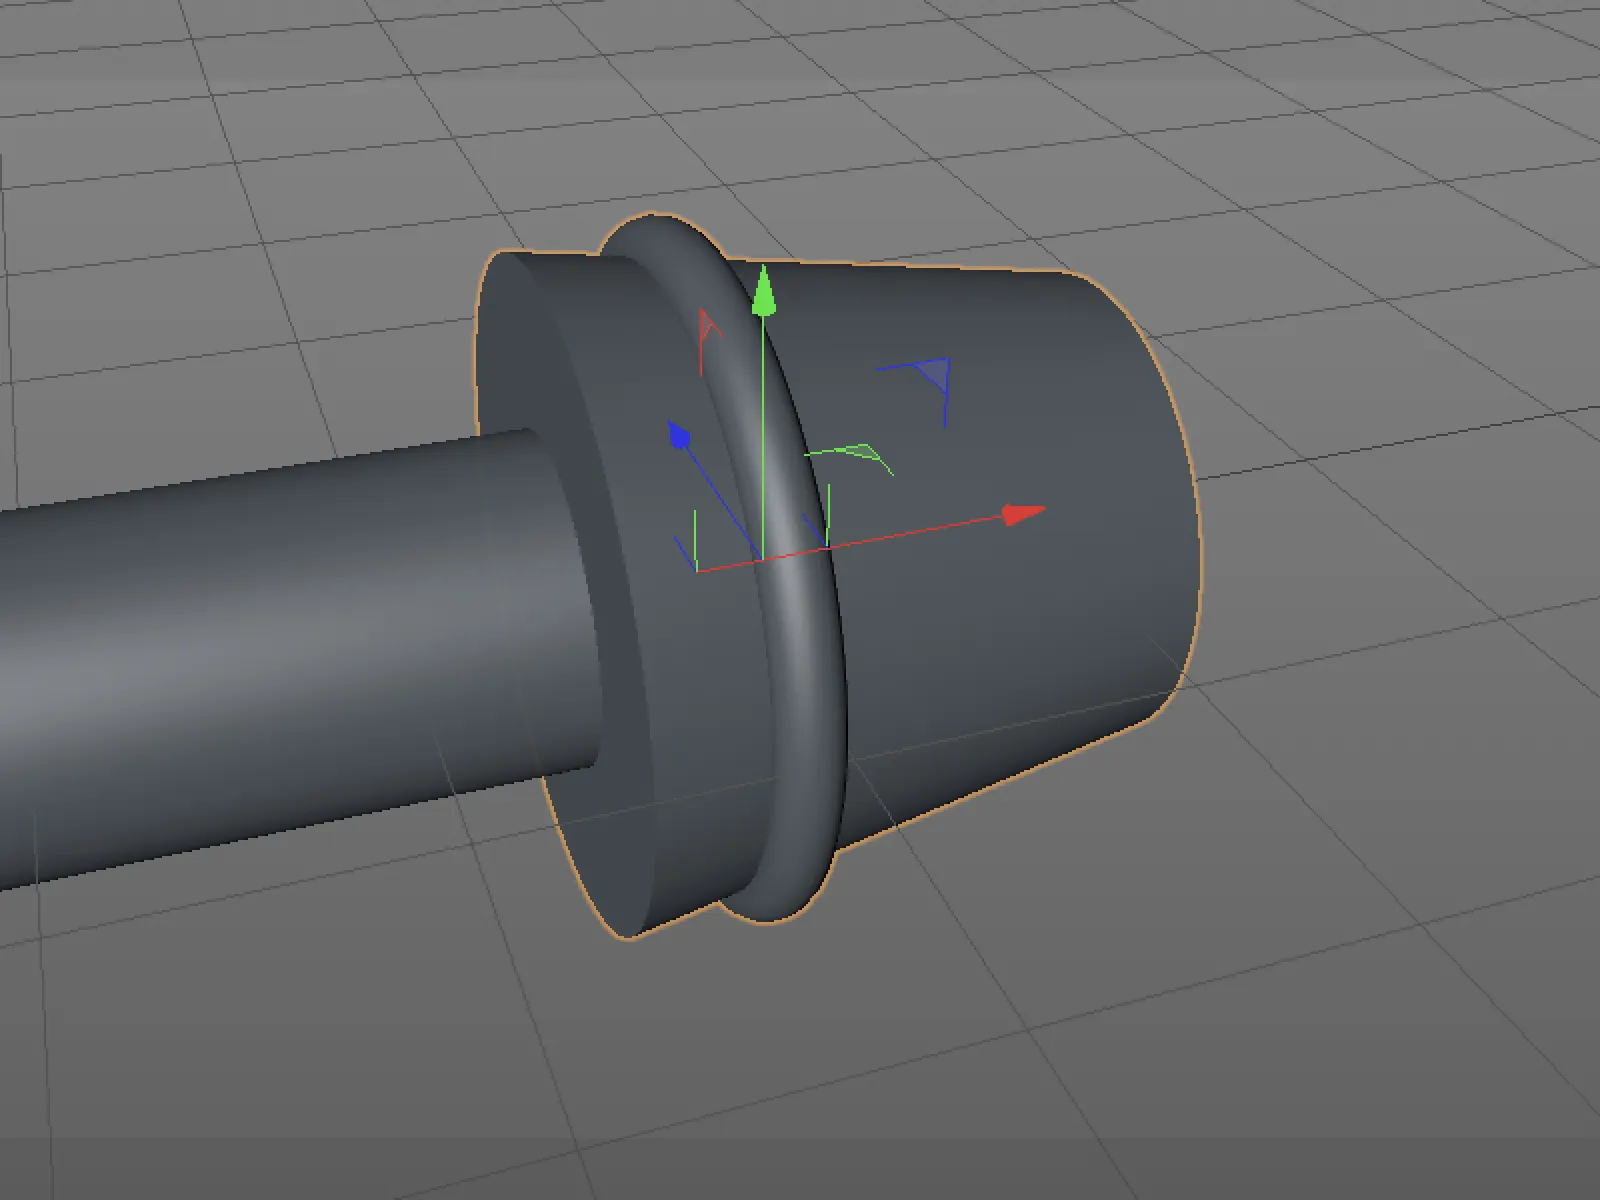
Modeling a motorcycle handle - creating a unified volume
At the moment, the handle consists of independent, individual basic objects. In order to generate a common volume from these individual elements, we call up a volume generator from the Volume menu and assign all the basic objects of the handle to it. To obtain a mesh at the same time, we also create a volume mesher and assign the volume generator to it.
In the settings dialog of the volume generator, we find all basic objects in the Objects grouped field. Their mode is set to Unite by default, which is why we already have a common volume object. With a voxel size of 3 cm, we achieve a finer resolution of the volume, which we need for further work on the model.
At the moment, despite the reduced voxel size, the mesh still looks very rough and uneven, especially at the transitions between the basic objects. Here we can use the smoothing filter, which we create using the button of the same name in the settings dialog of the volume generator.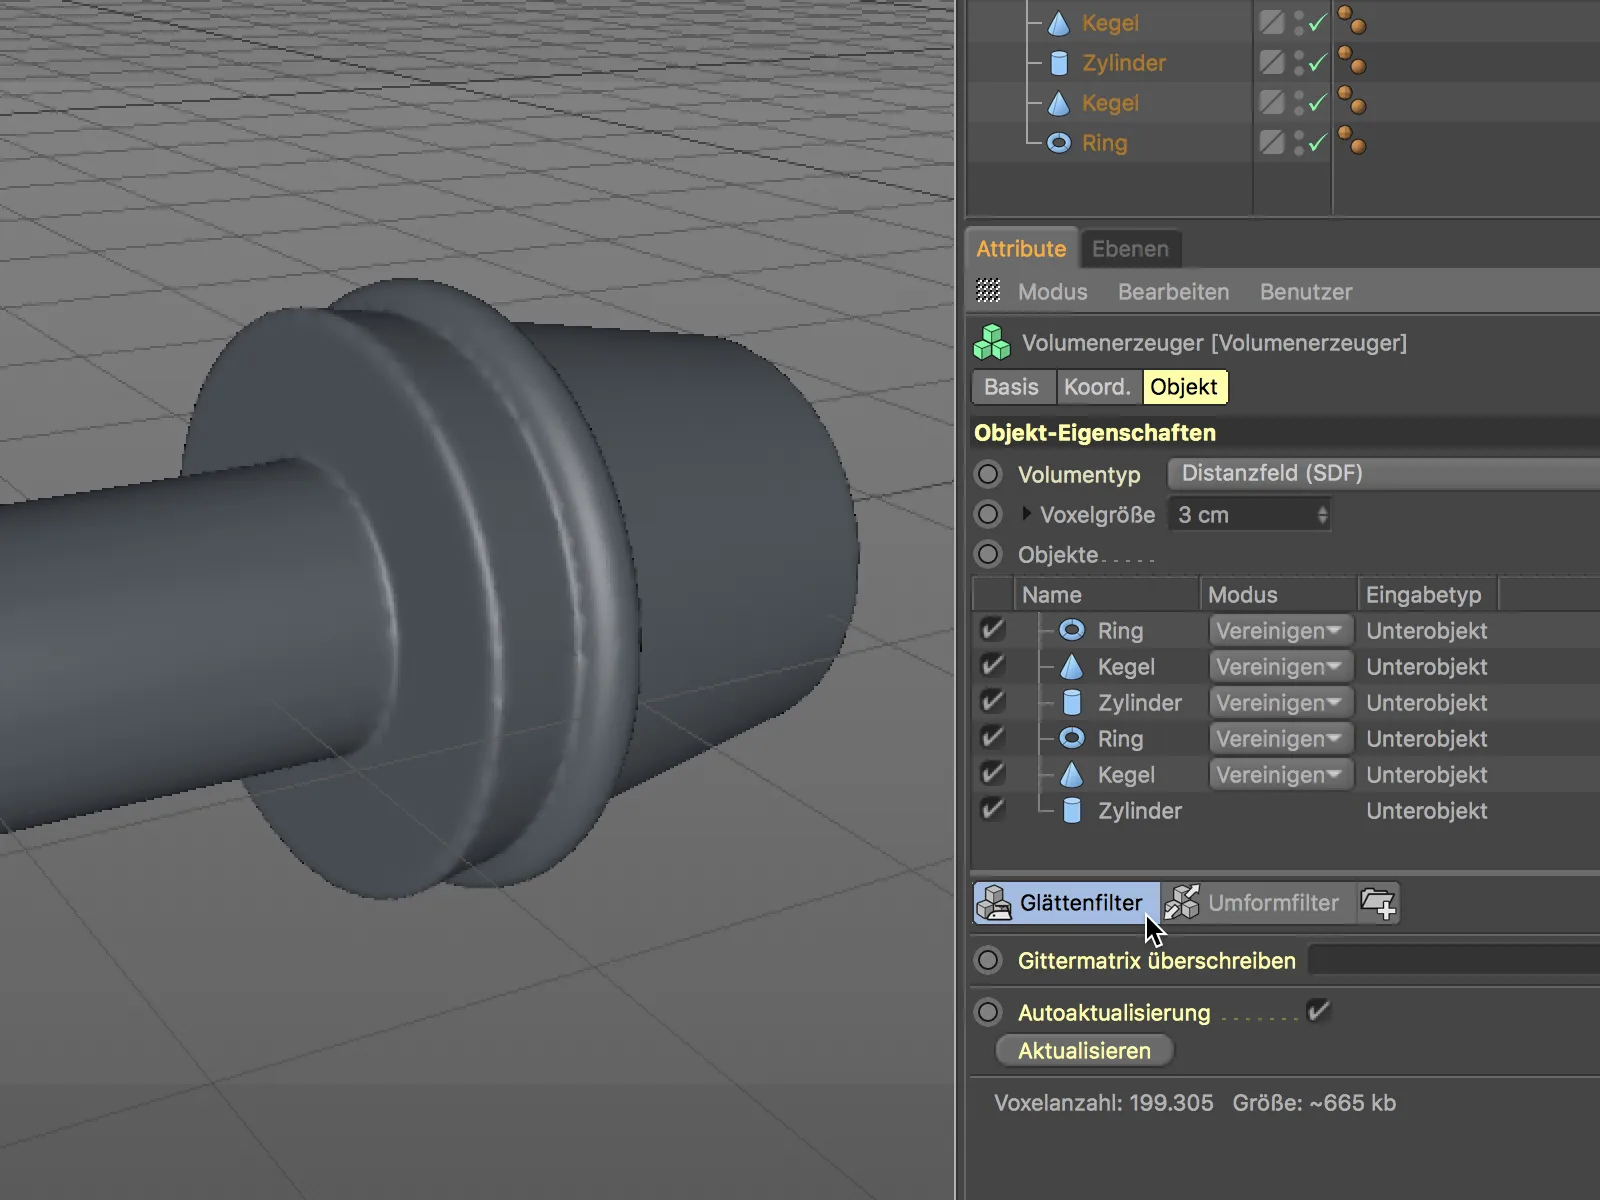
The integrated smoothing filter is automatically set to the top position in the Objects field and therefore affects all elements below it. In the smoothing filter settings, we set the filter type to Laplace flow with 4 iterations. This type of smoothing works well for shapes that should be strongly oriented towards the original objects. The result already looks better - later, when we have created the final shape of the handle, we will take care of the fine-tuning.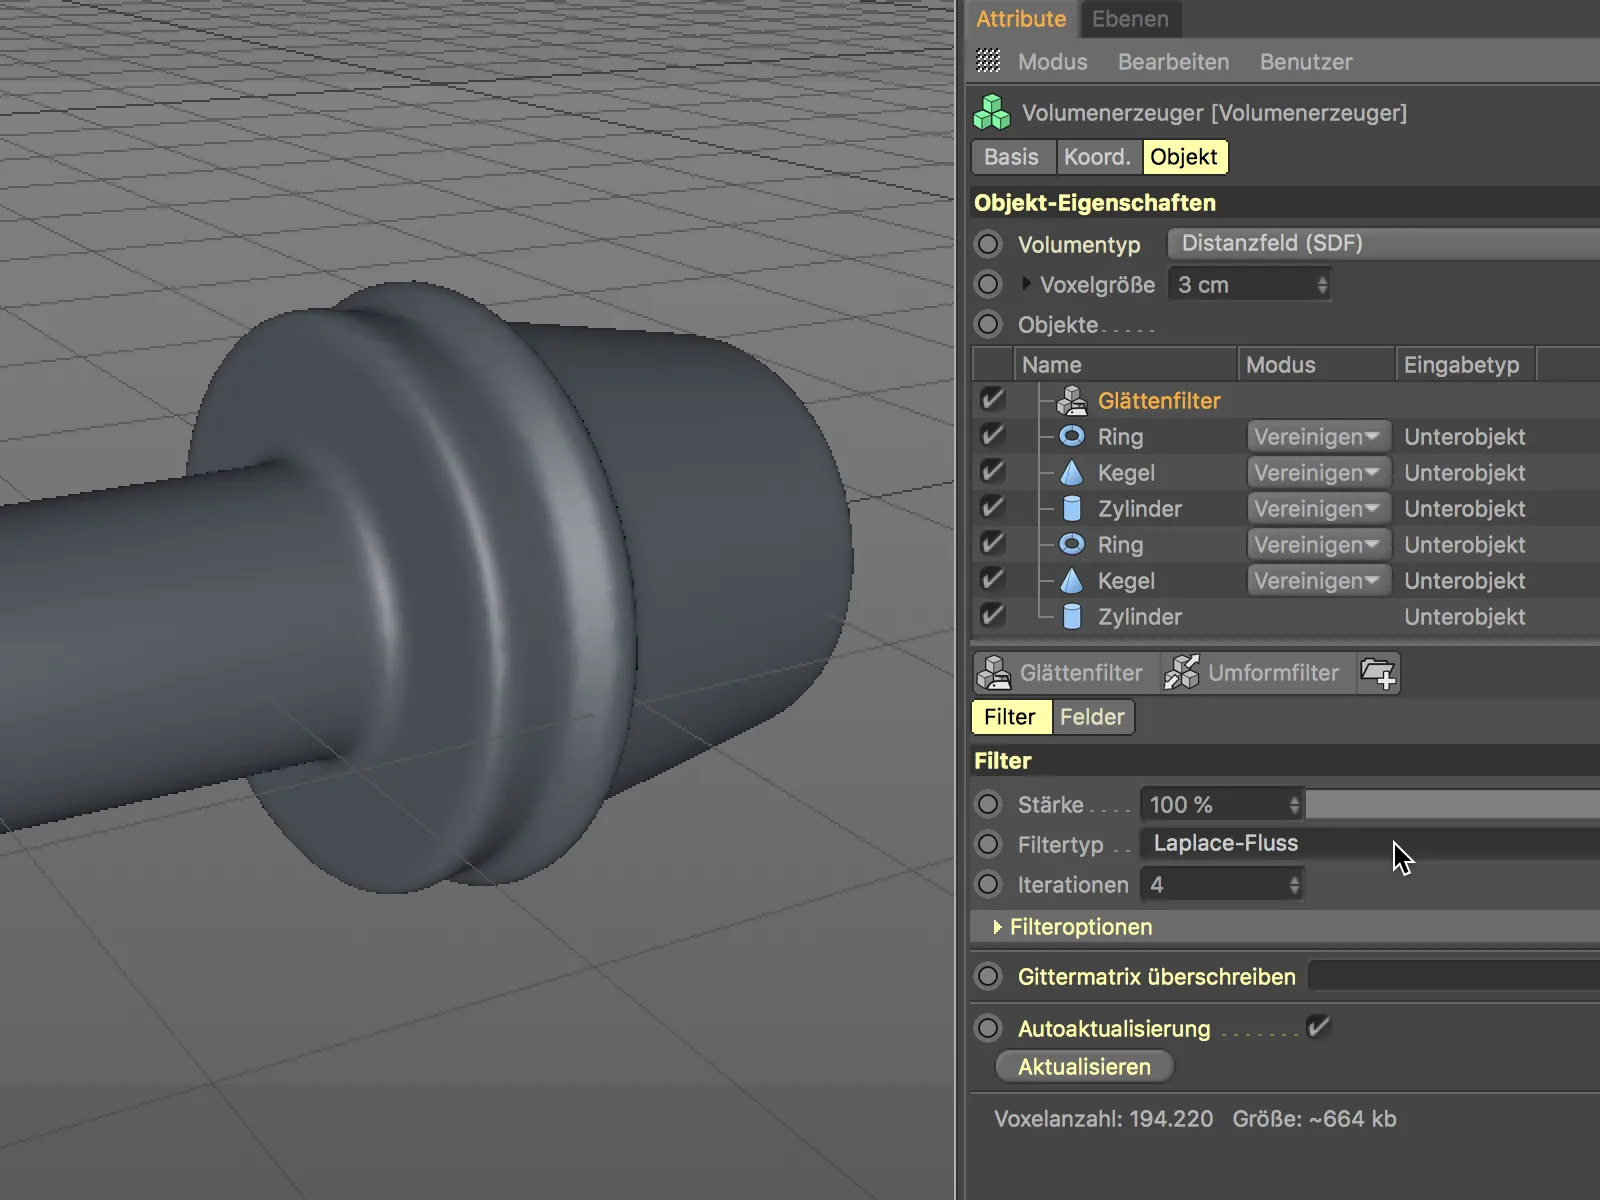
Modeling a motorcycle handle - subtraction from the volume
To further refine the right-hand end of the handle, we subtract basic objects from the volume. This allows us to create indentations, grooves or holes, for example.
A copy of the existing ring object is used to create a circumferential groove; a newly created cylinder object is used to create a hole in which a screw can be placed at the end of the handle.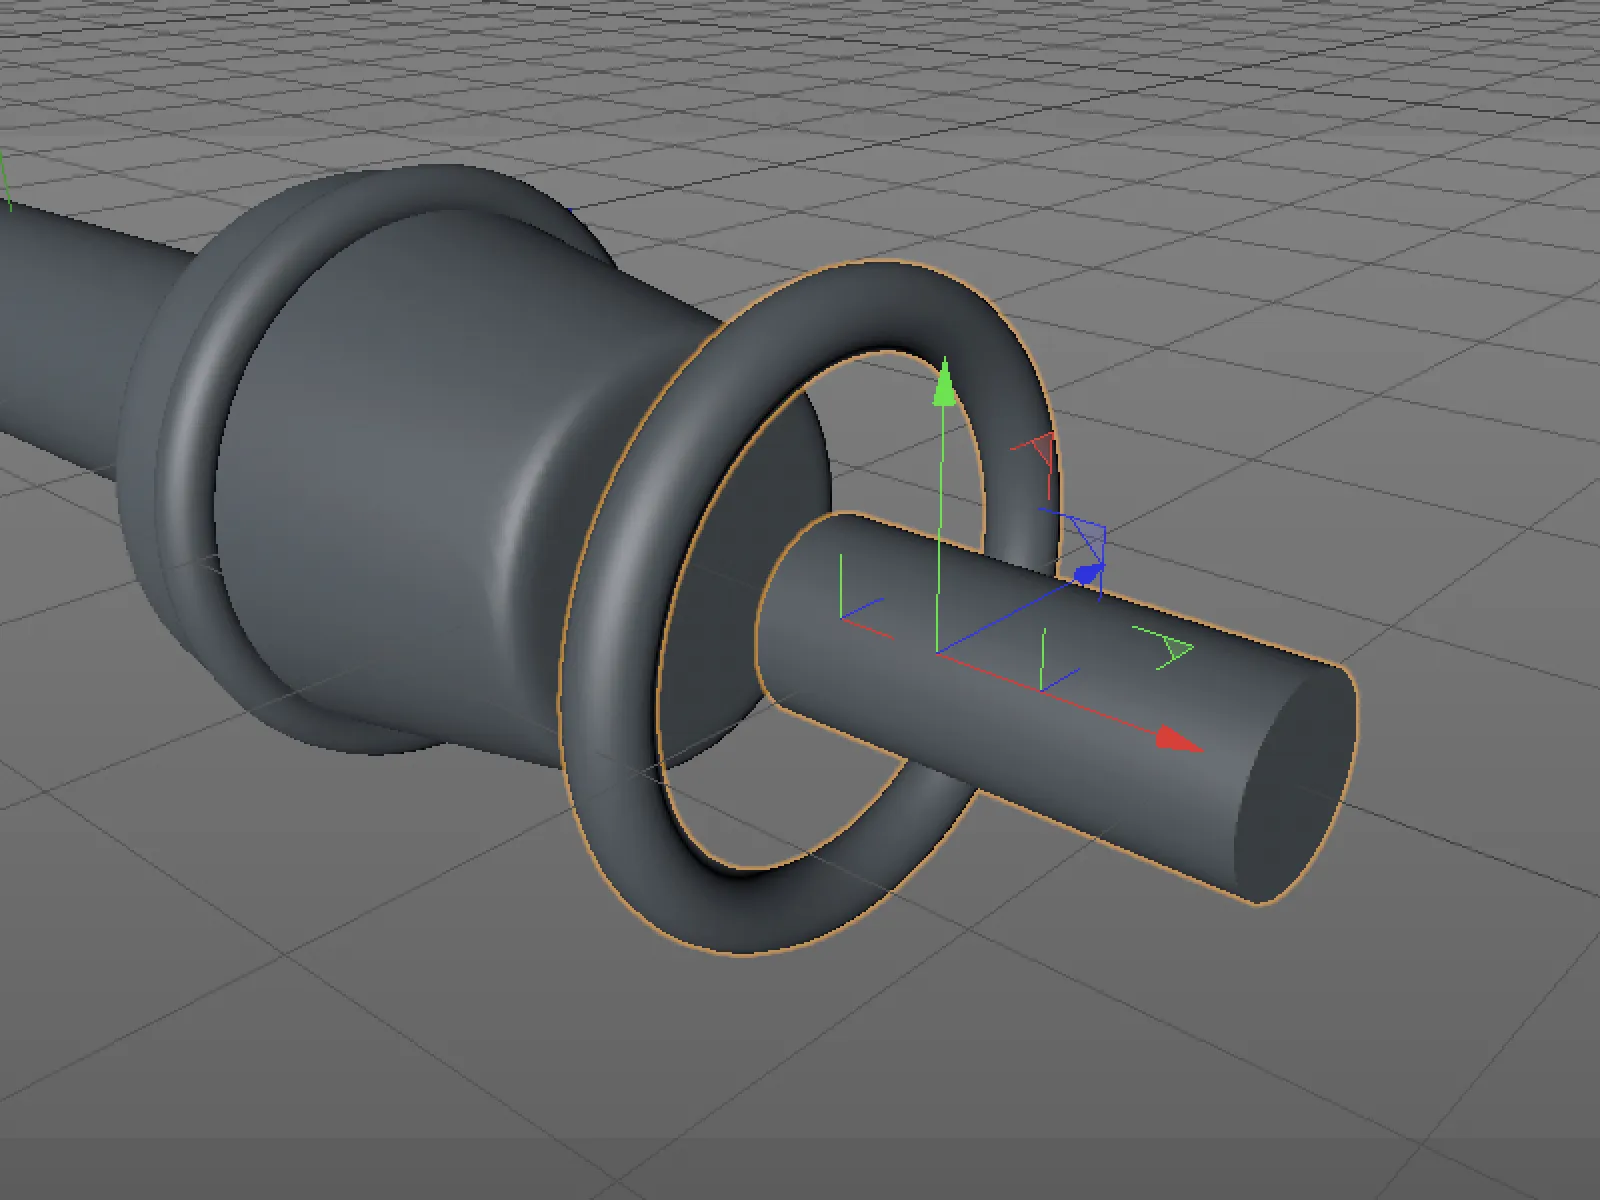
Again, we place the two basic objects intended for subtraction from the volume in the places where we want to process the volume with them.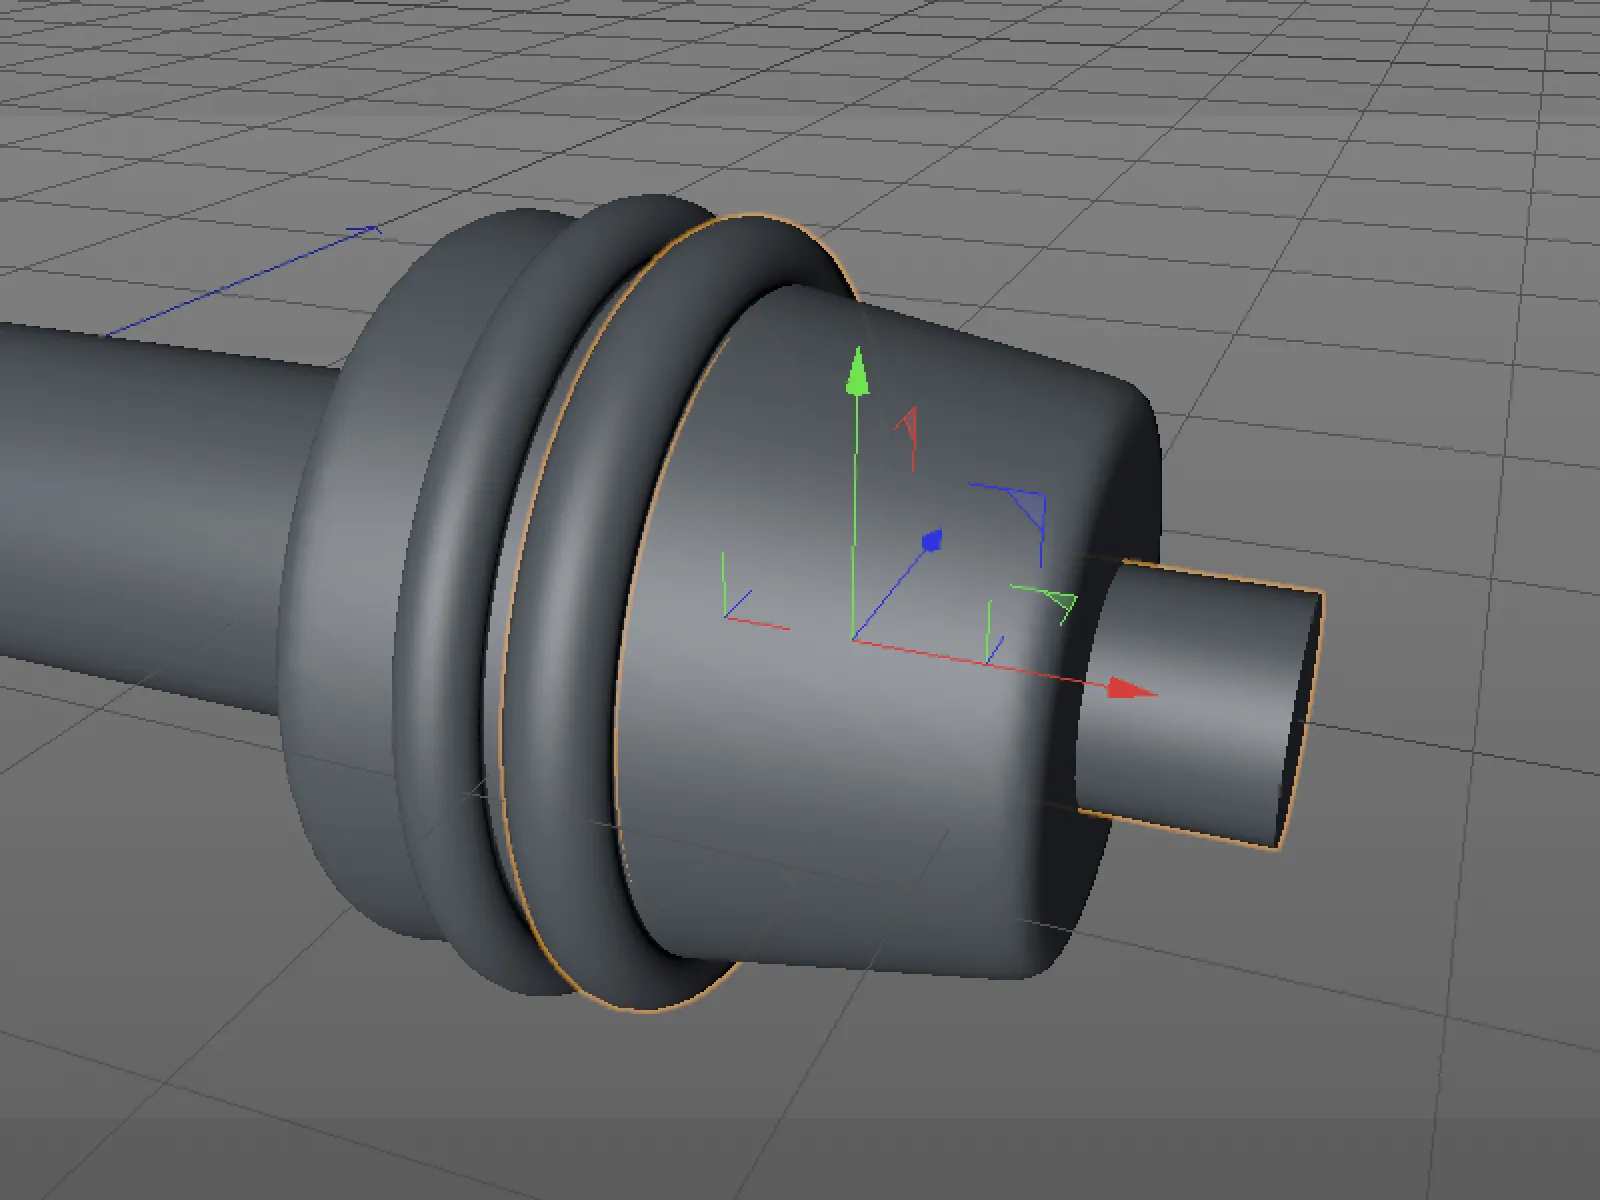
The two new entries in the Objects field of the volume generator are each assigned the Subtract mode. The sequence also plays a role in the processing of the individual entries. In order for the ring object to leave a groove in the cone object, it must be positioned above the cone object.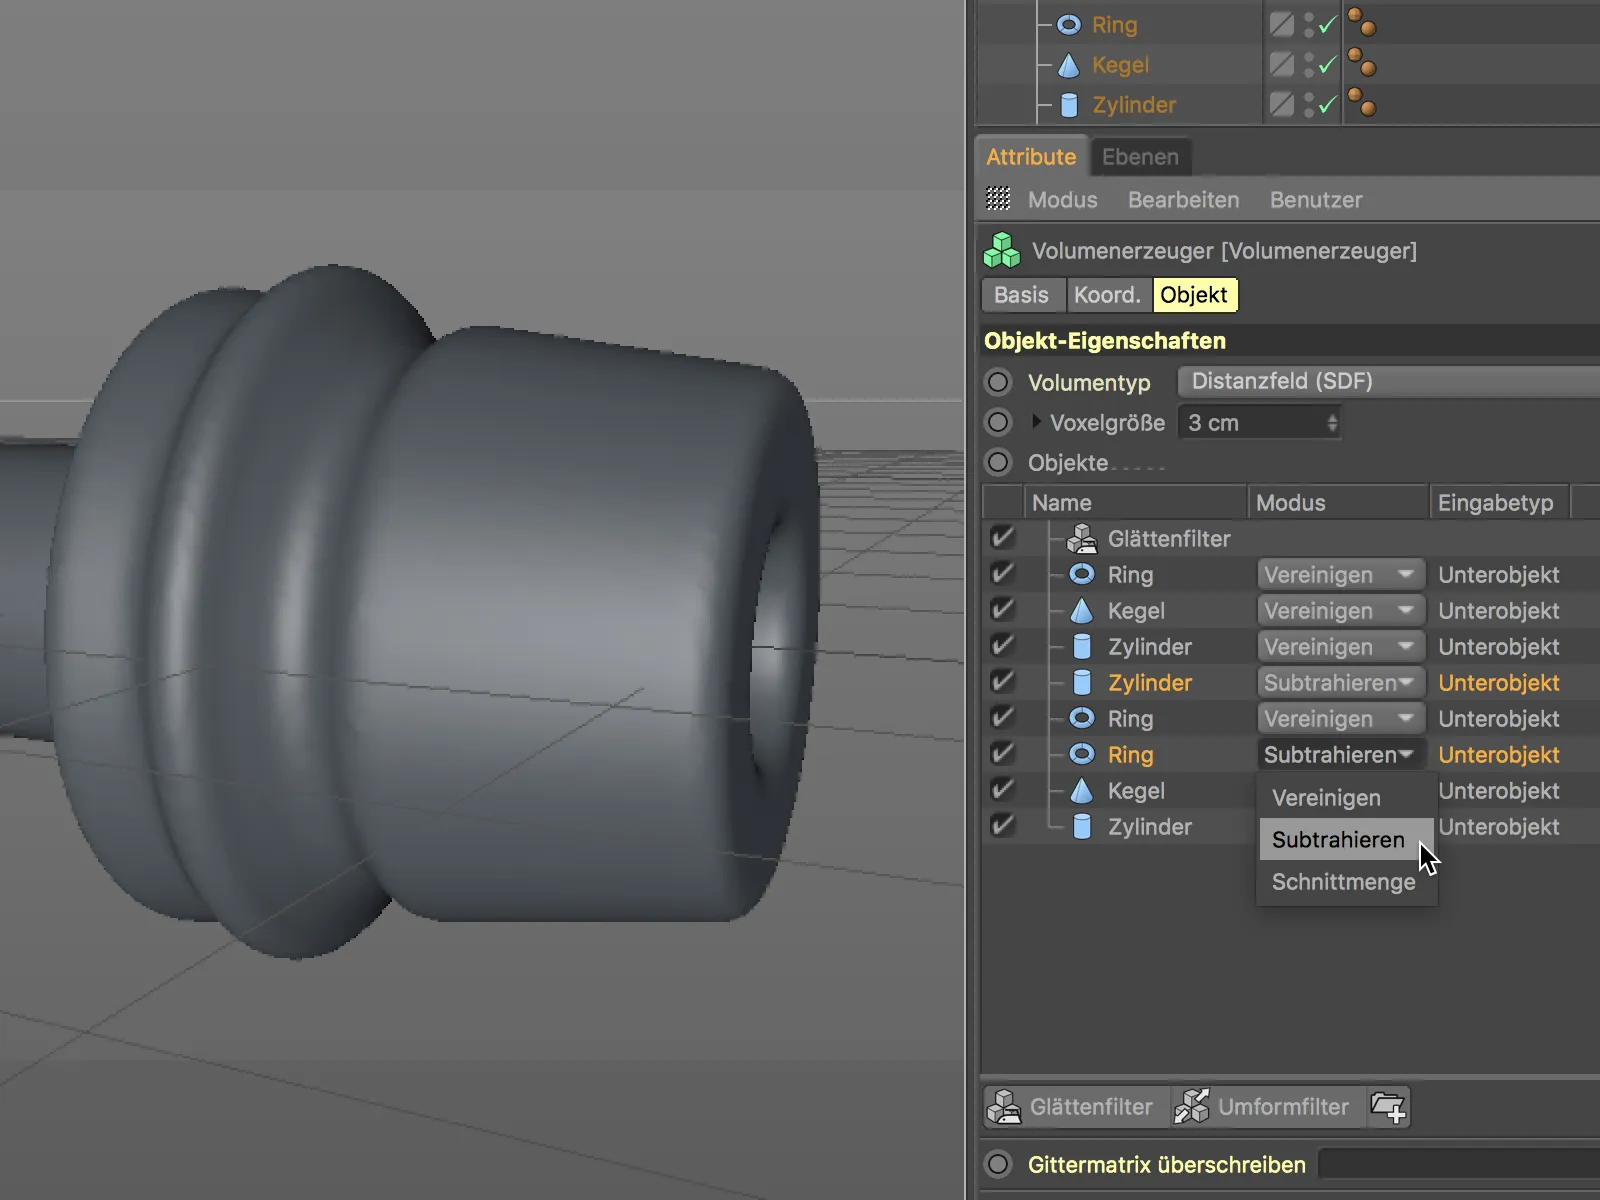
To make the end of the handle a little more elaborate and to make even better use of the possibilities of volume modeling, we add additional indentations around the cone-shaped end.
For a better overview, it is best to temporarily switch off the visibility and the calculation of the volume mesher and volume generator and create a new capsule object with the specified parameters.
The capsule object should now be extended by five copies and arranged in a circle. This task is performed by a clone object from the MoGraph menu. We place the capsule as a sub-object in the clone object and select the Radial mode with the specified number, radius and alignment to the XZ plane in the settings dialog of the clone object on the object page.
On the coordinates pageof the clone object, we enter a banking angle of 90° so that all clones are correctly aligned for use with our volume.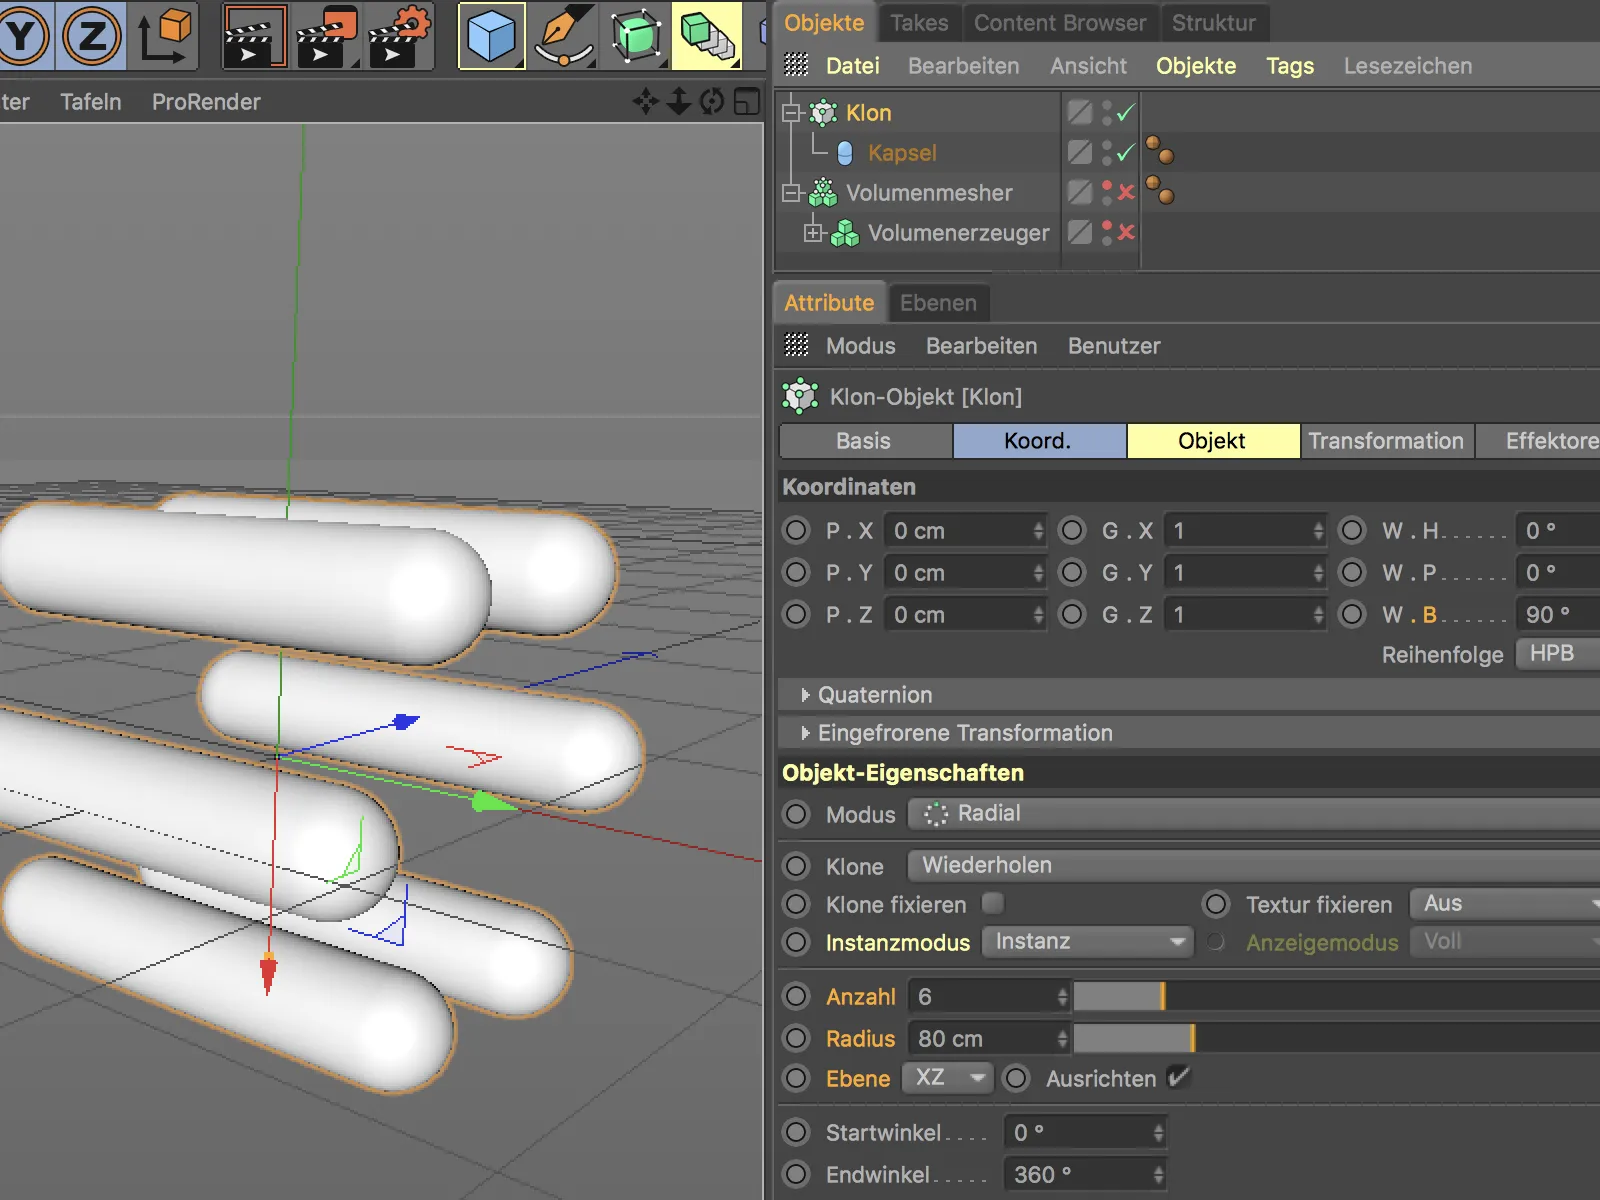
After reactivating the volume mesher and volume generator in the Object Manager, we can subordinate the clone object including the capsule to the existing objects in the volume generator.
In the settings dialog of the volume generator, we move the clone object on the objects pagein front of the two ring objects at the right-hand end of the handle and set the mode to Subtract. This gives us the desired indentations around the end of the handle.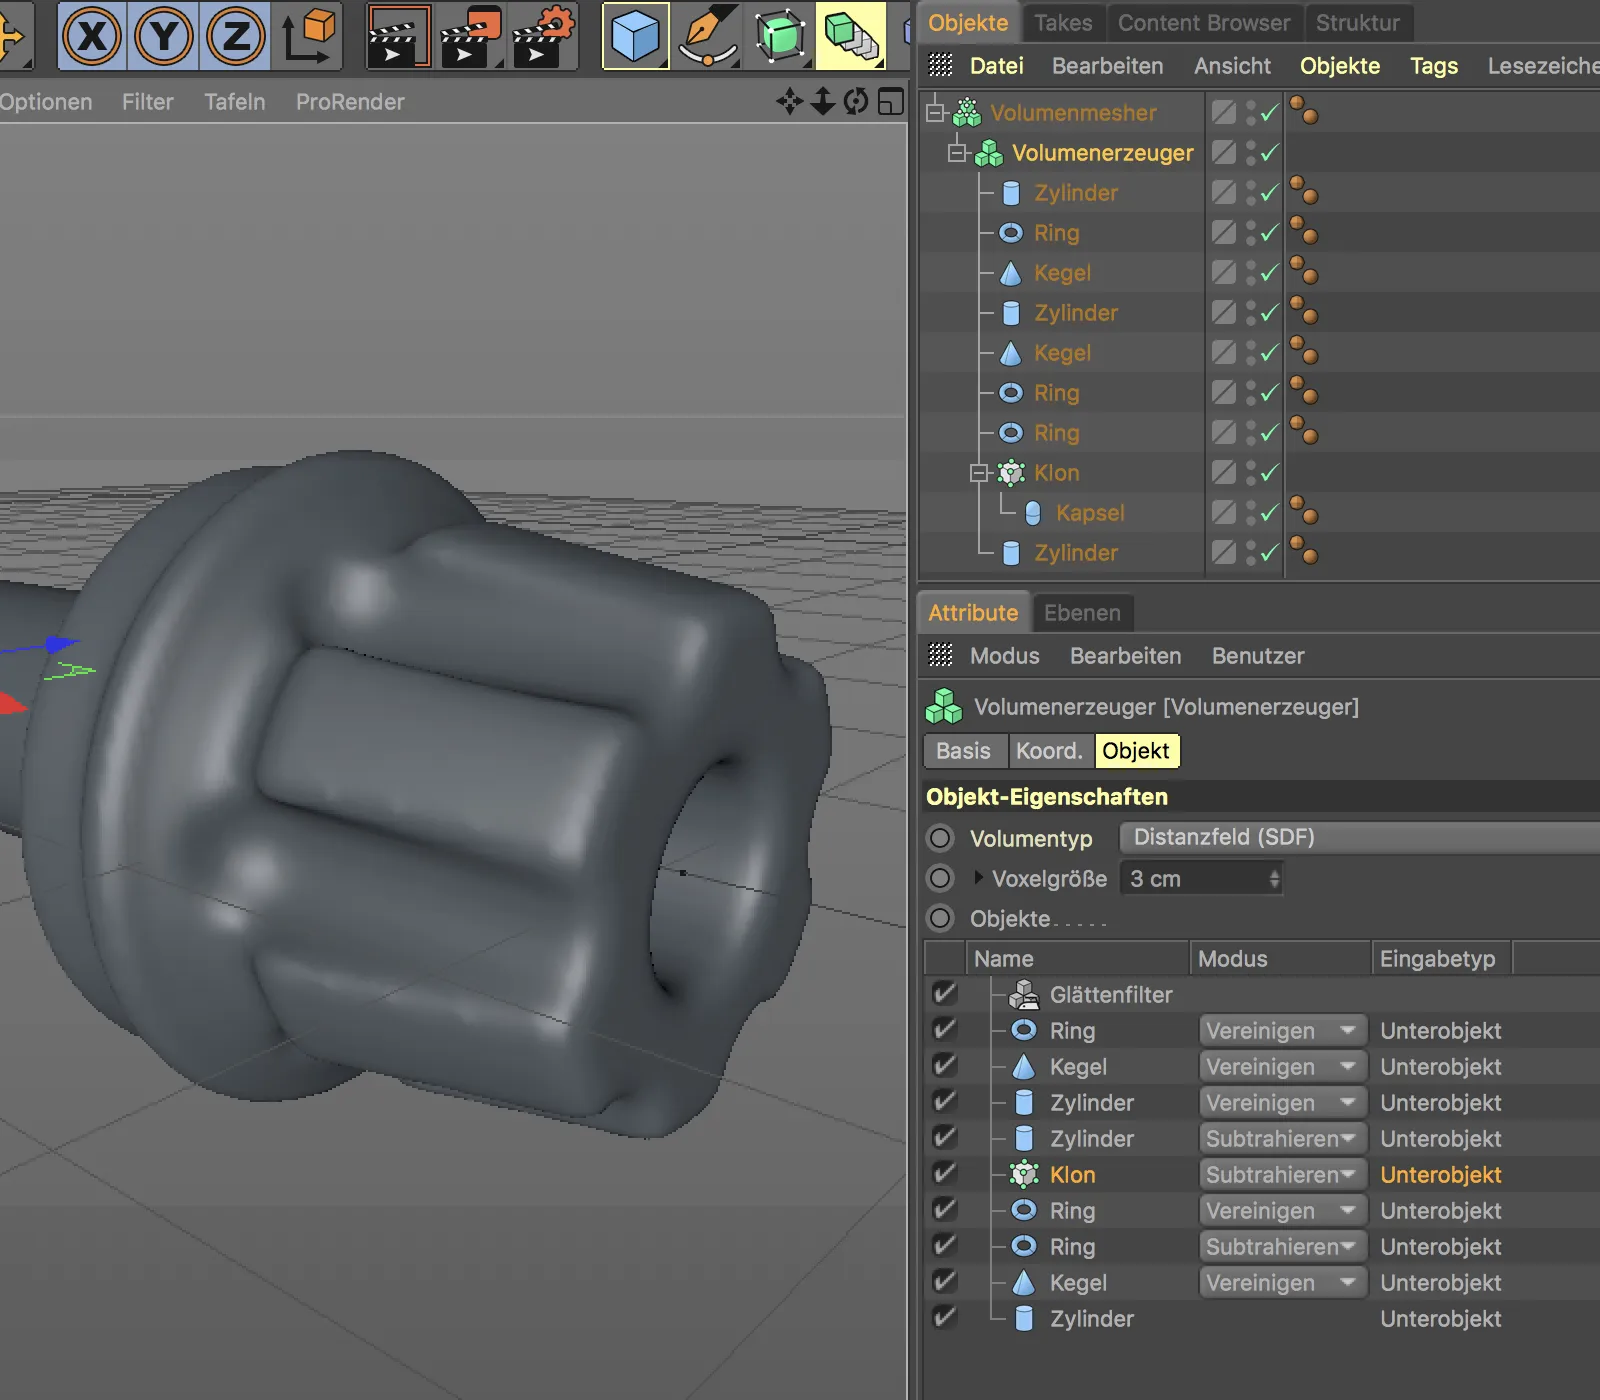
To slightly chamfer the indentations or adjust them to the angle of the cone object, we select the capsule object in the Object Manager, activate the Rotate tooland rotate the capsule slightly around the X-axis or through the pitching angle.
Modeling a motorcycle handle - fine-tuning the volume
Now that all the elements involved in the model have been set up in their function, let's fine-tune the volume generator to create the impression of a technical part. As the surface is already smoothed using the smoothing filter, we only need to reduce the voxel size in the settings dialog of the volume generator. A value of 1 cm ensures a clean, sufficiently finely resolved surface.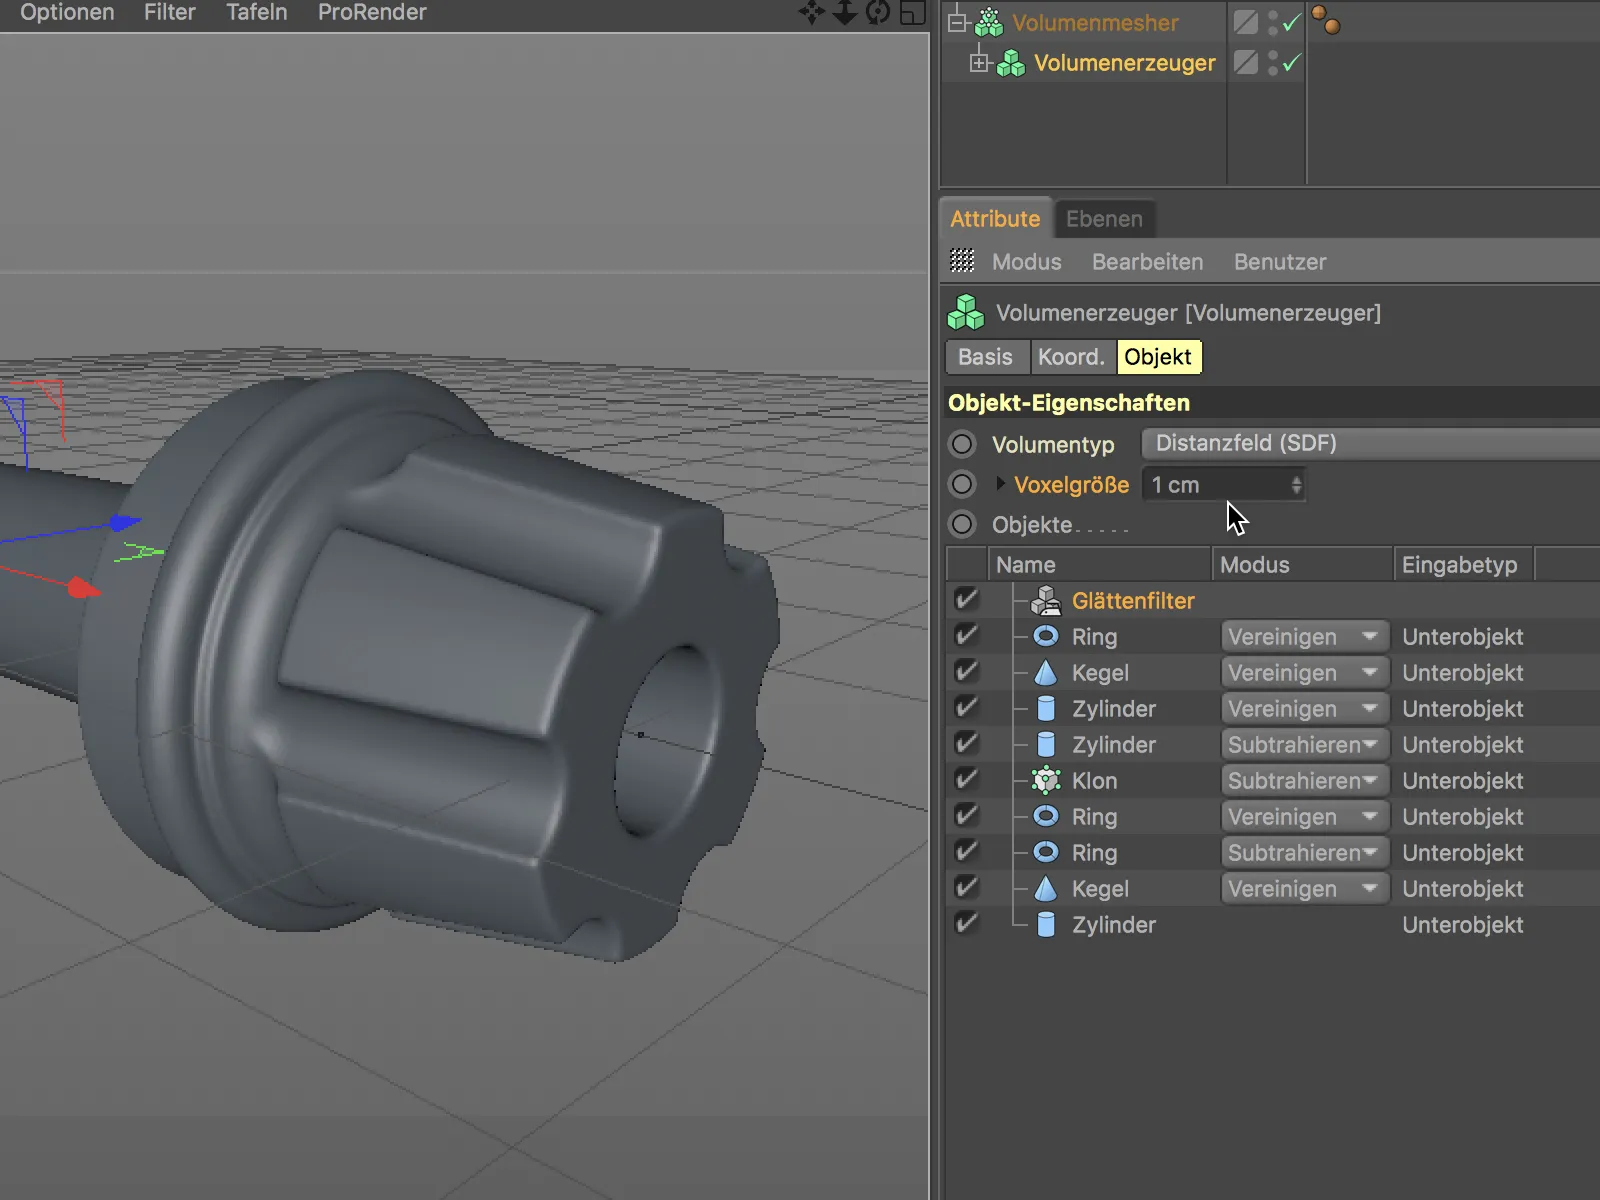
Modeling a motorcycle handle - building the objects for the twist grip
As the twist grip is a separate object, we also model it independently - again, volume-based modeling is used here. A total of three cylinder objects are used for the basic shape.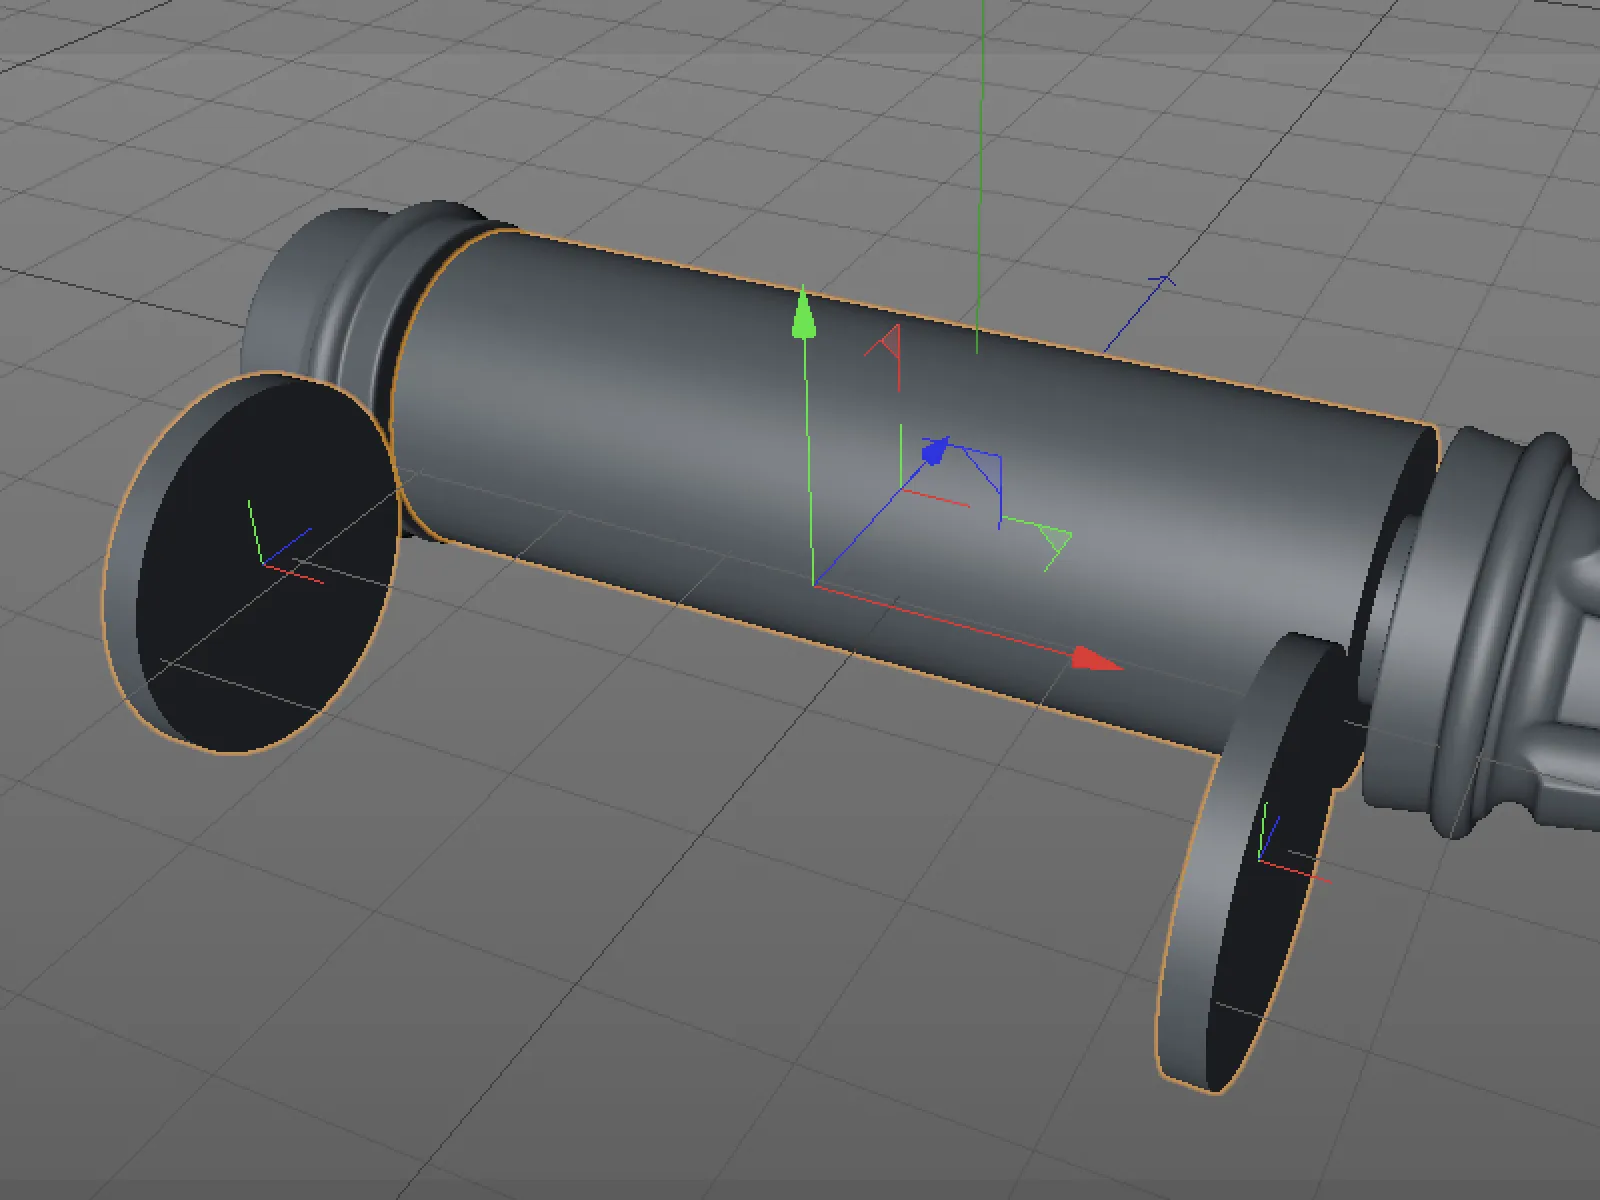
To merge the three cylinder objects into a common volume, we again need a volume generator and a volume mesher from the Volume menu. Once again, we assign the three cylinders to the volume generator via the object managerand place it in the volume mesher. As we now already know the correct resolution for the volume mesher, we set the voxel size to 1 cm in its settings dialog.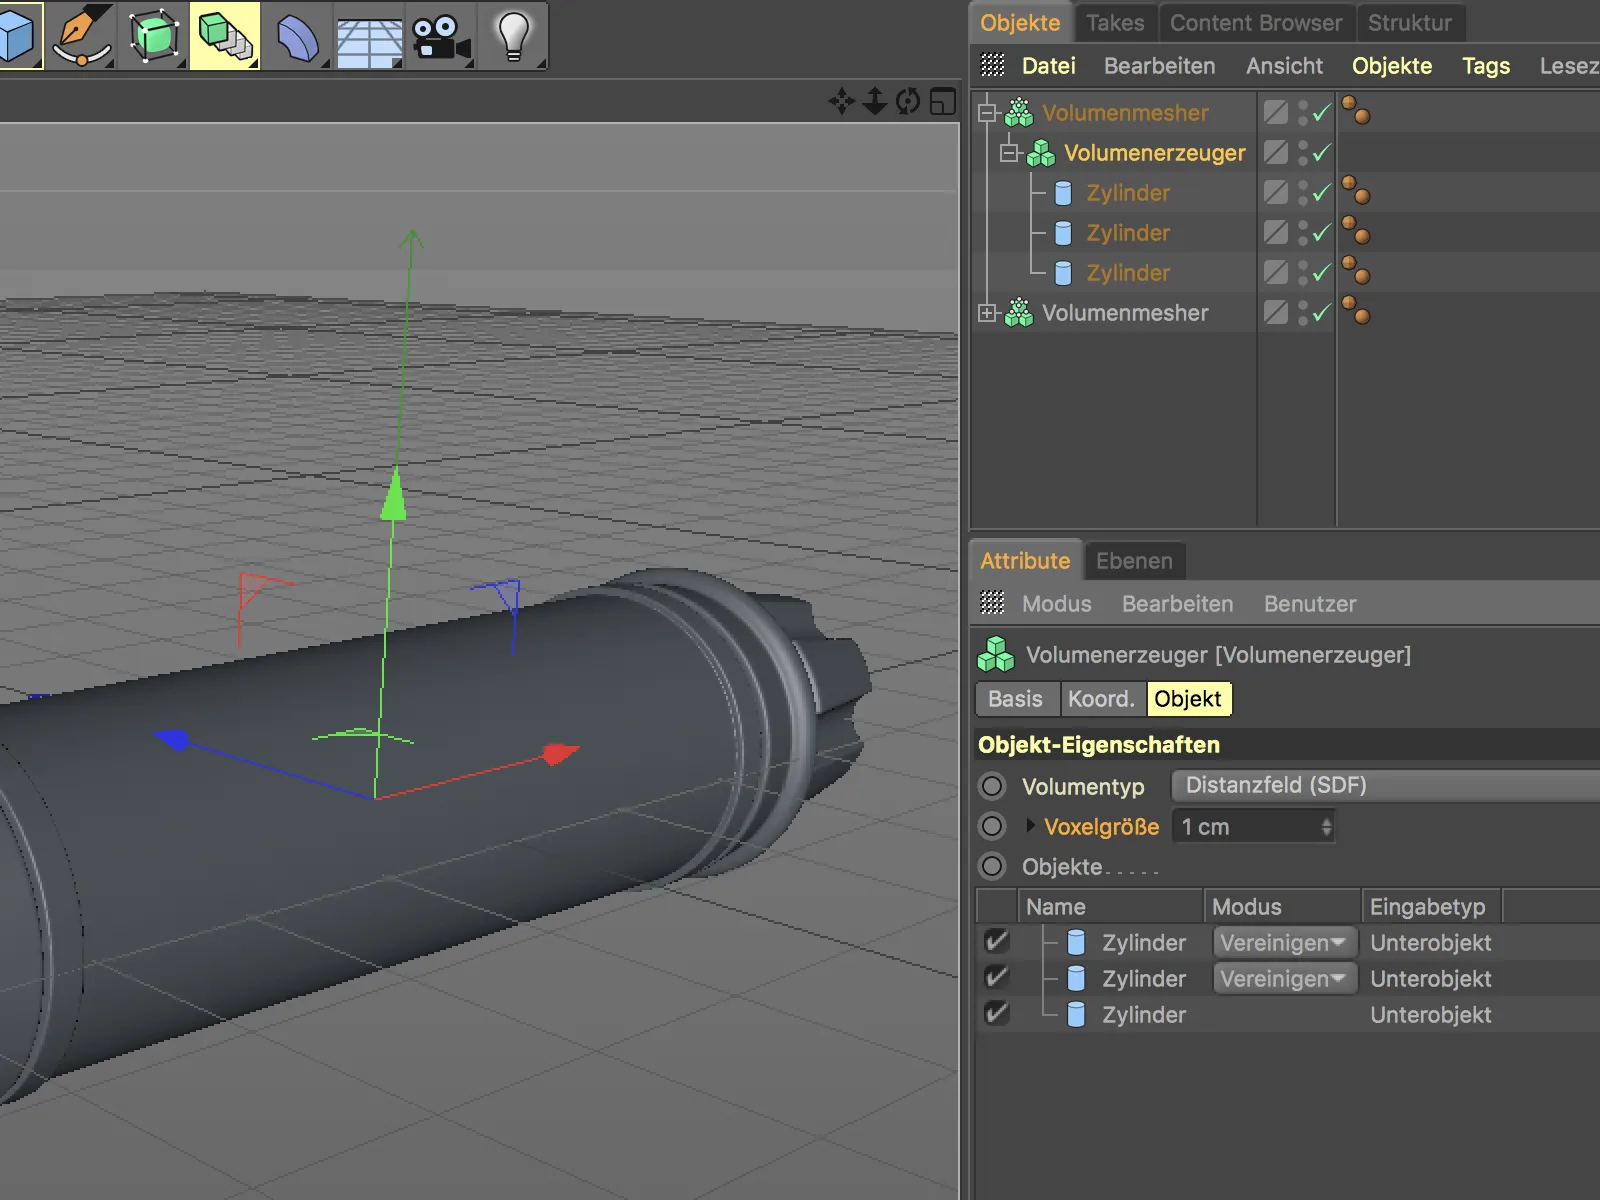
As with the metal handle part, the volume generator is given a smoothing effect on all cylinder objects via the Smooth filter button. We also use the Laplace flow filter type here, but this time 3 iterations are sufficient.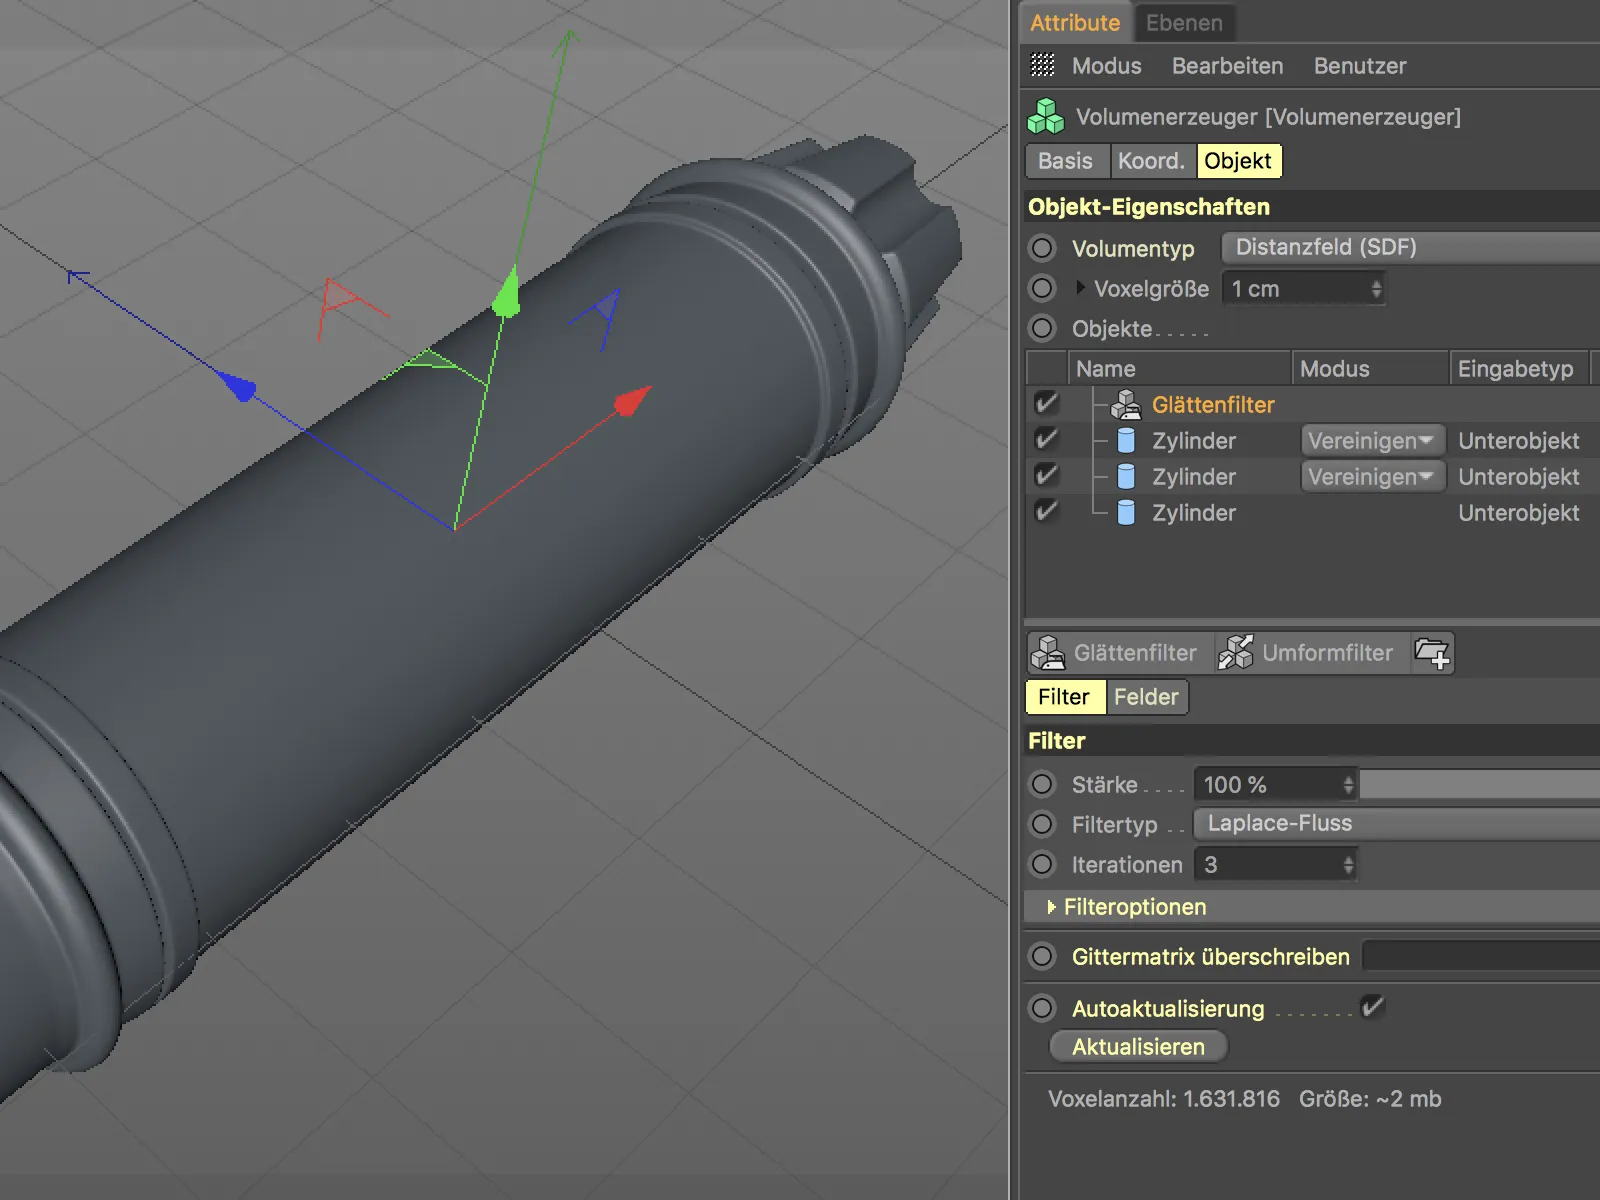
Modeling a motorcycle grip - subtraction of notches in the grip rubber
The twist grip naturally needs indentations to ensure a non-slip grip. A spiral arrangement also provides a sporty look.
A helix object serves as the object for the spiral-shaped notches. We can use this basic spline object directly for working on the volume without first creating a three-dimensional object with it.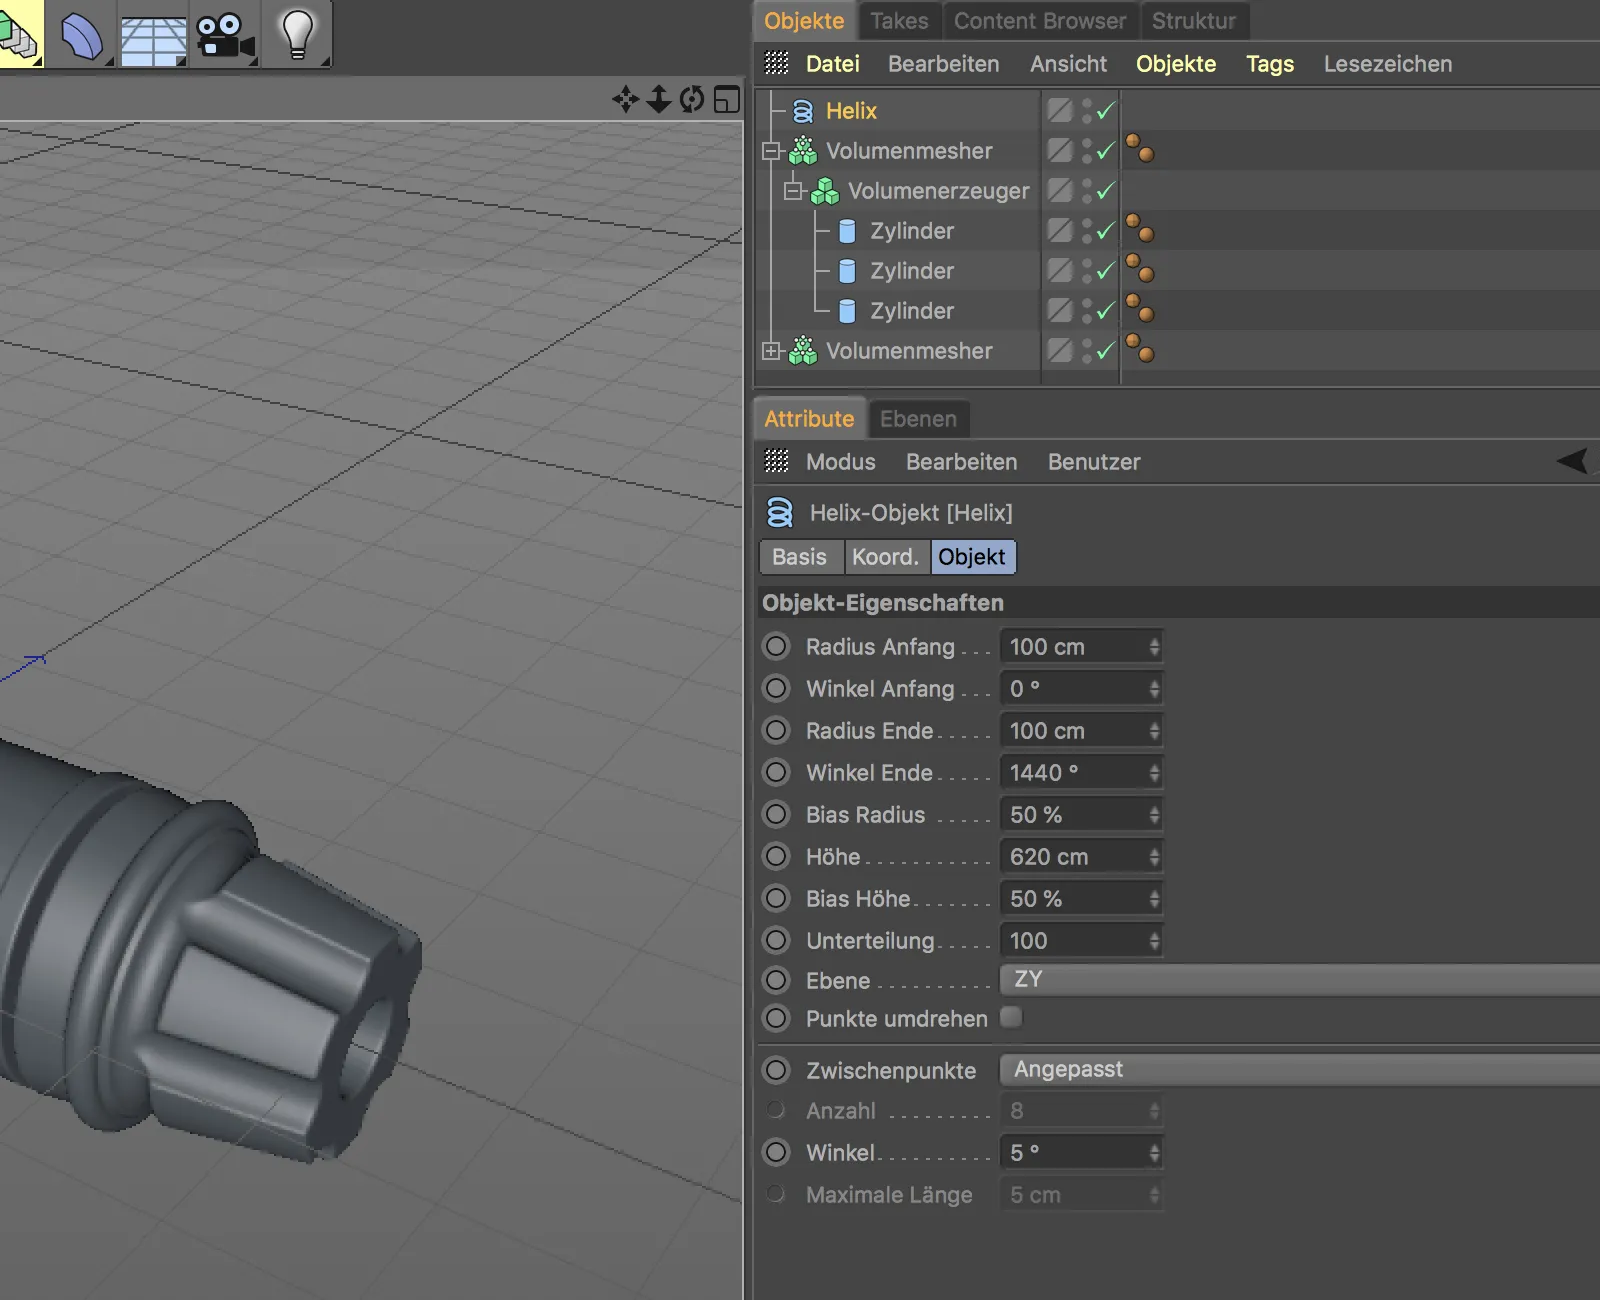
If we subordinate the helix object to the volume generator, we first generate a tube consisting of many spheres. We now correct this using the volume generator .
First, we set the mode for the helix object to subtract in order to obtain the desired indentations. However, as the indentations should only appear on the actual handle in the middle and not on the two cylinder objects at the edge, we move the helix object in the sequence above the handle cylinder.
Now only the poor smoothing of the notches in the handle rubber is disturbing. This is due to the strong Laplace flow smoothing of the smoothing filter.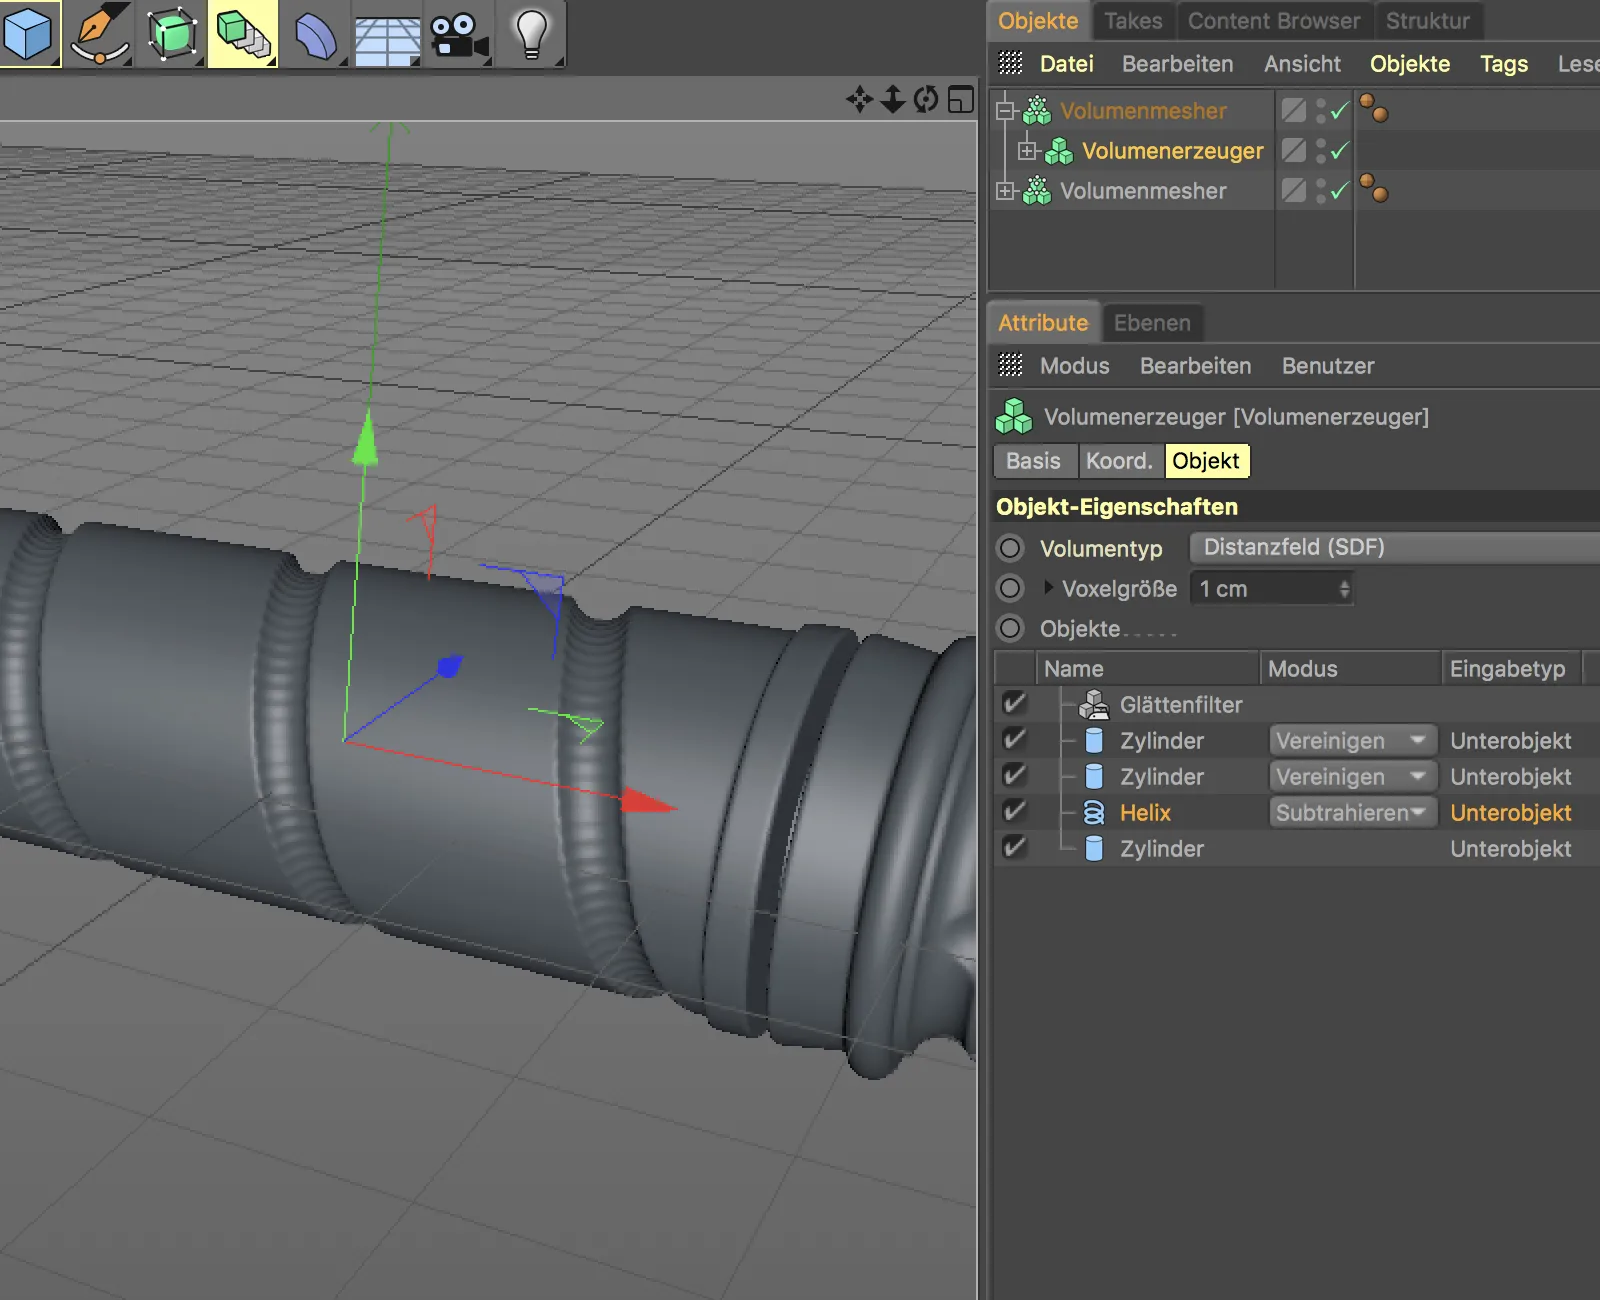
To apply a different smoothing to the indentations, we simply create an additional smoothing filter and place it above the helix and cylinder object of the handle center. This time we use the Gaussian filter type. This gives us an organic, soft smoothing effect.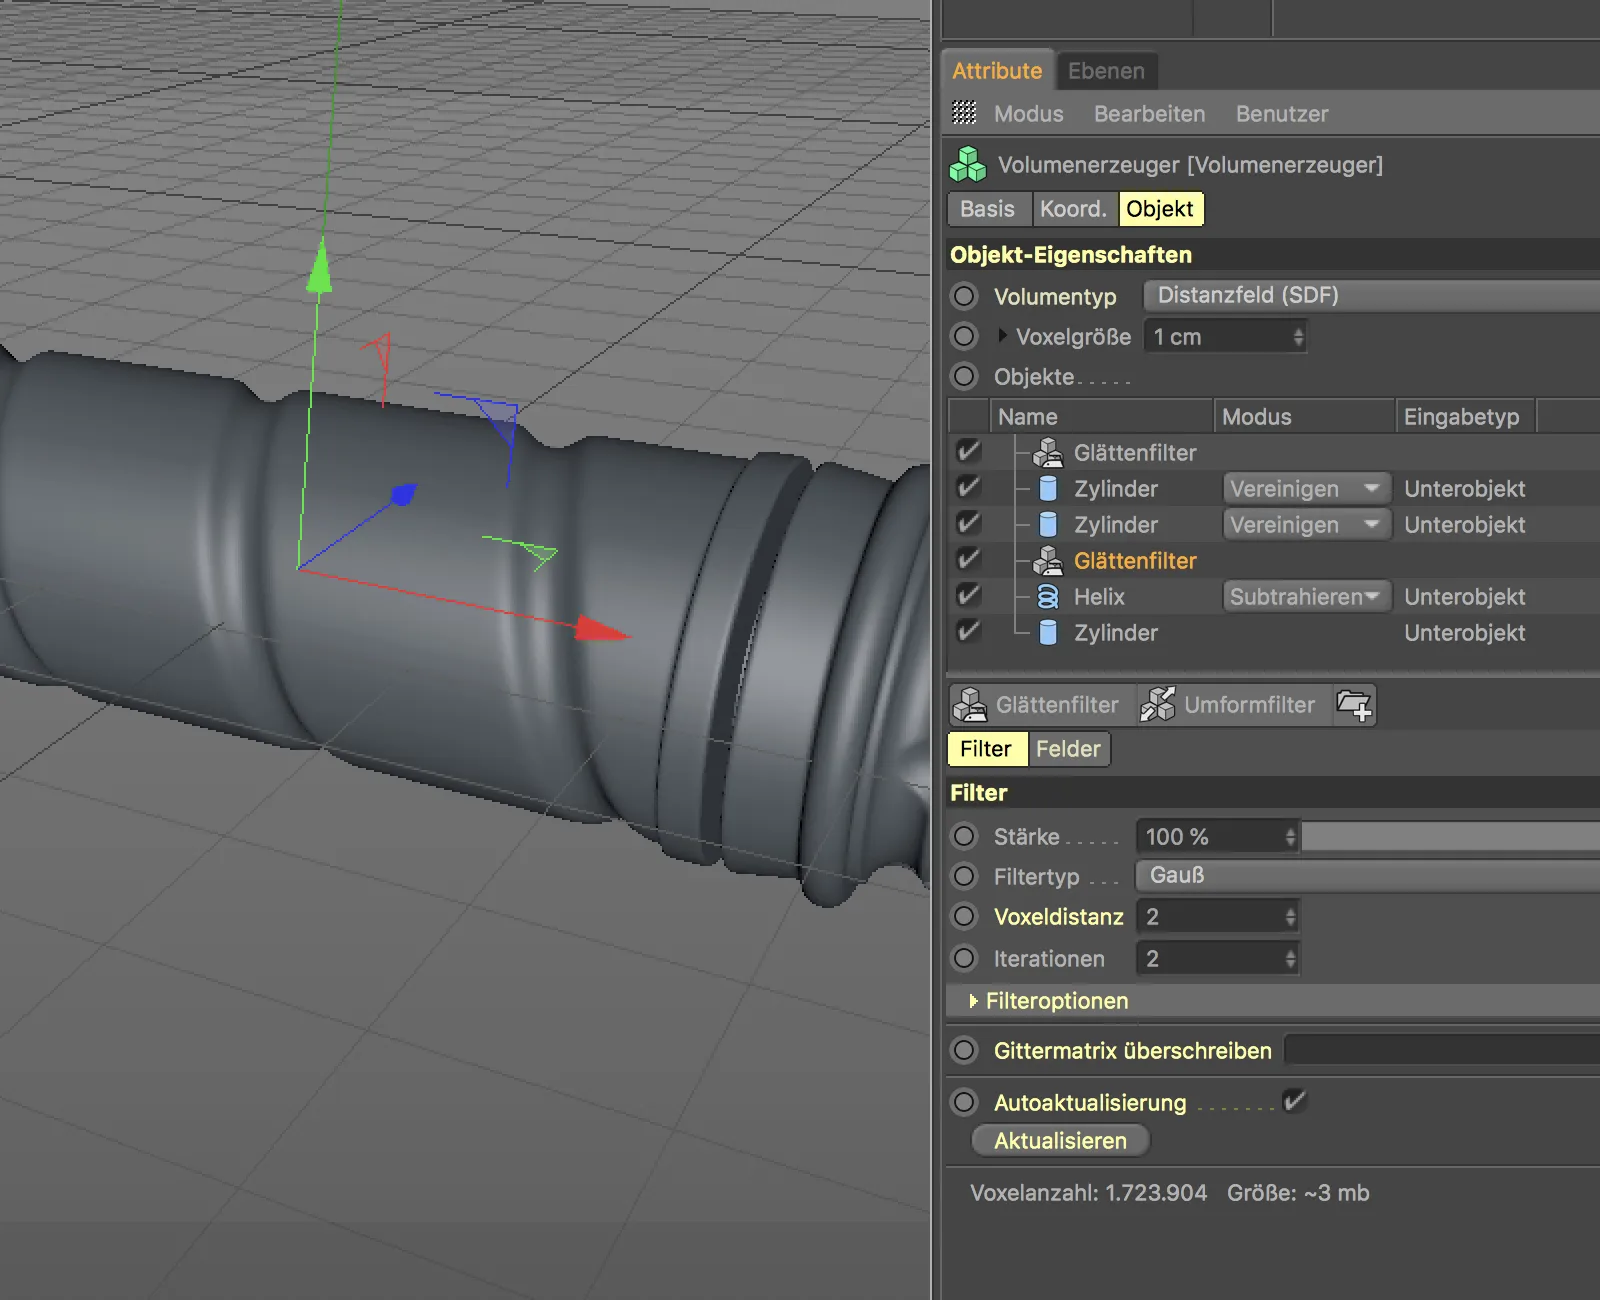
Finished model
After this step, we have finished modeling our motorcycle handle. The advantage of this new modeling method in Cinema 4D becomes particularly clear when we imagine the amount of work involved with conventional modeling tools.
And best of all: to change the winding of the indentations in the rubber grip or the number or width of the indentations at the end of the grip, for example, we only need to adjust a few parameters.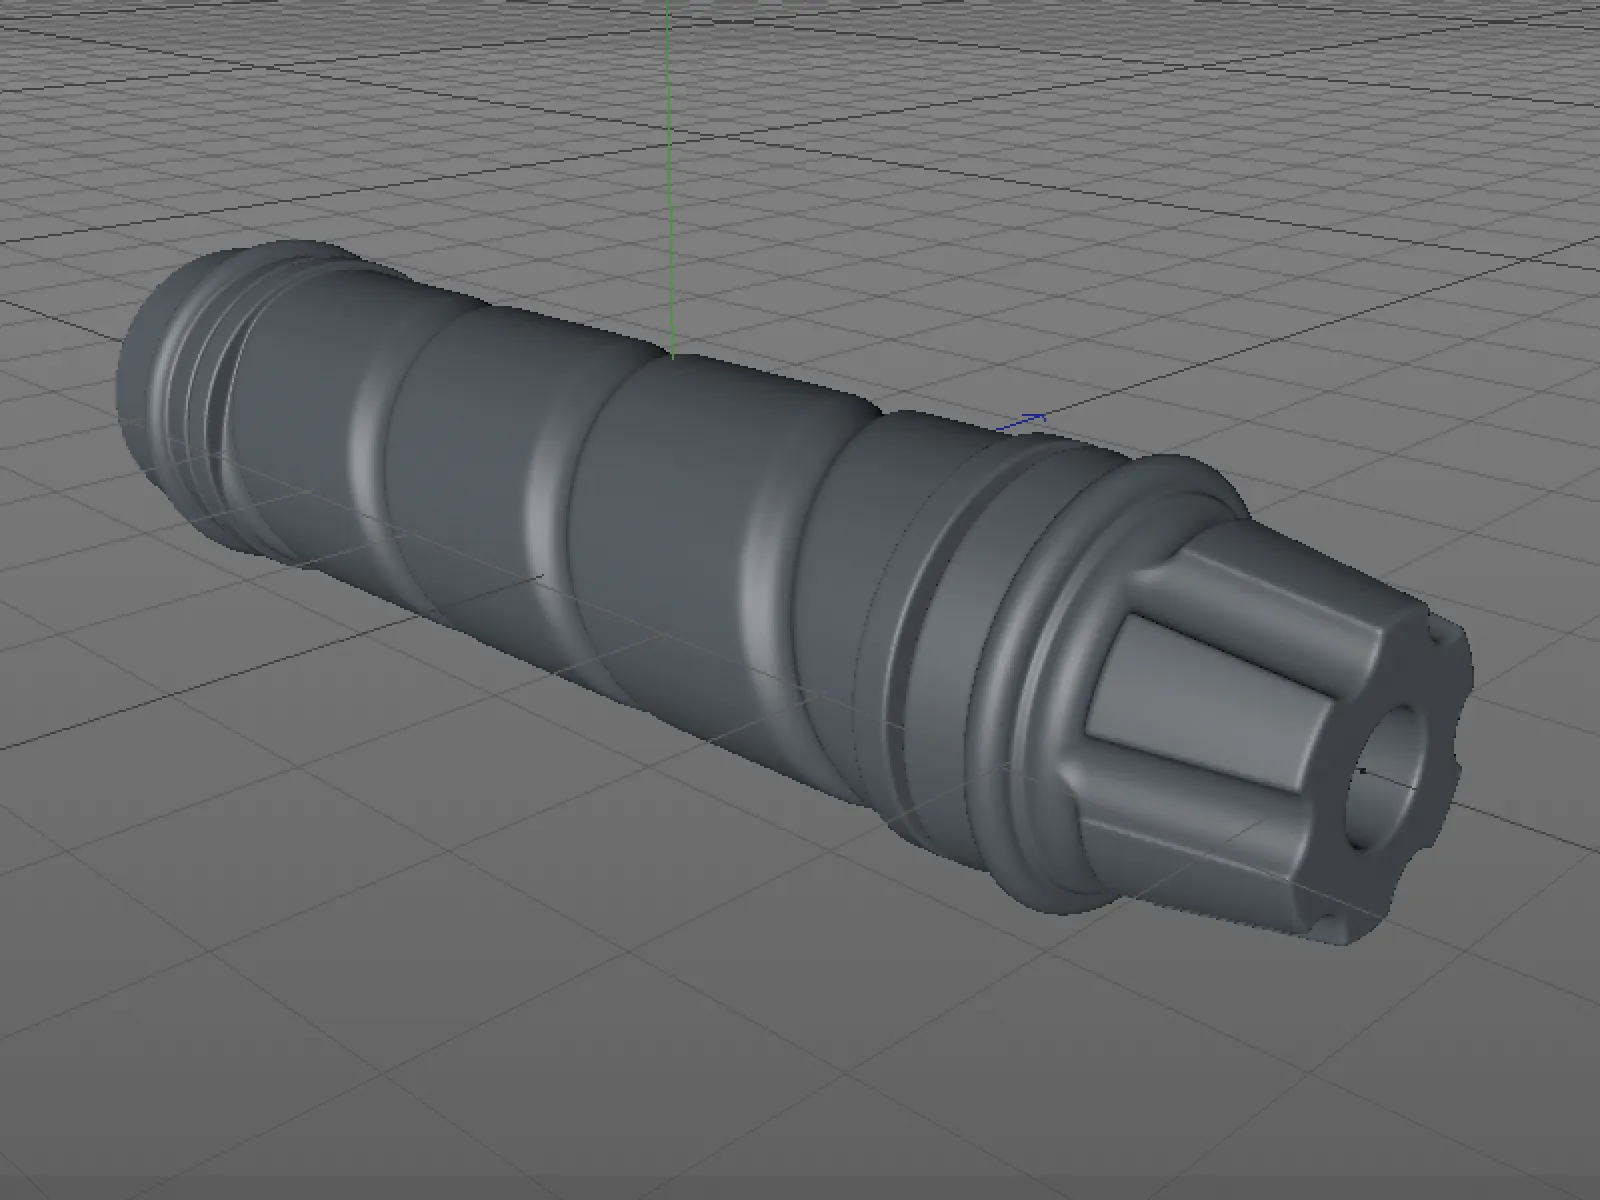
This brings us to the end of this tutorial. With a few of the new node-based material presets, the motorcycle grips modeled from just a few basic objects look quite realistic. More about this in another tutorial for Cinema 4D Release 20.