In this tutorial, I will show you how you can quickly and efficiently adjust facial proportions in Photoshop using just a single filter. You can enlarge the eyes, make the nose slimmer, or adjust your model's smile – the possibilities are almost limitless. Let's dive right in!
Key Takeaways
- You can effectively adjust facial proportions using the "Liquify" filter.
- There are multiple options for adjusting the eyes, nose, and mouth.
- You can alter the face shape by changing the forehead, chin, and face width.
- Changes can be undone or modified at any time.
Step-by-Step Guide
To edit facial proportions in Photoshop, follow these steps:
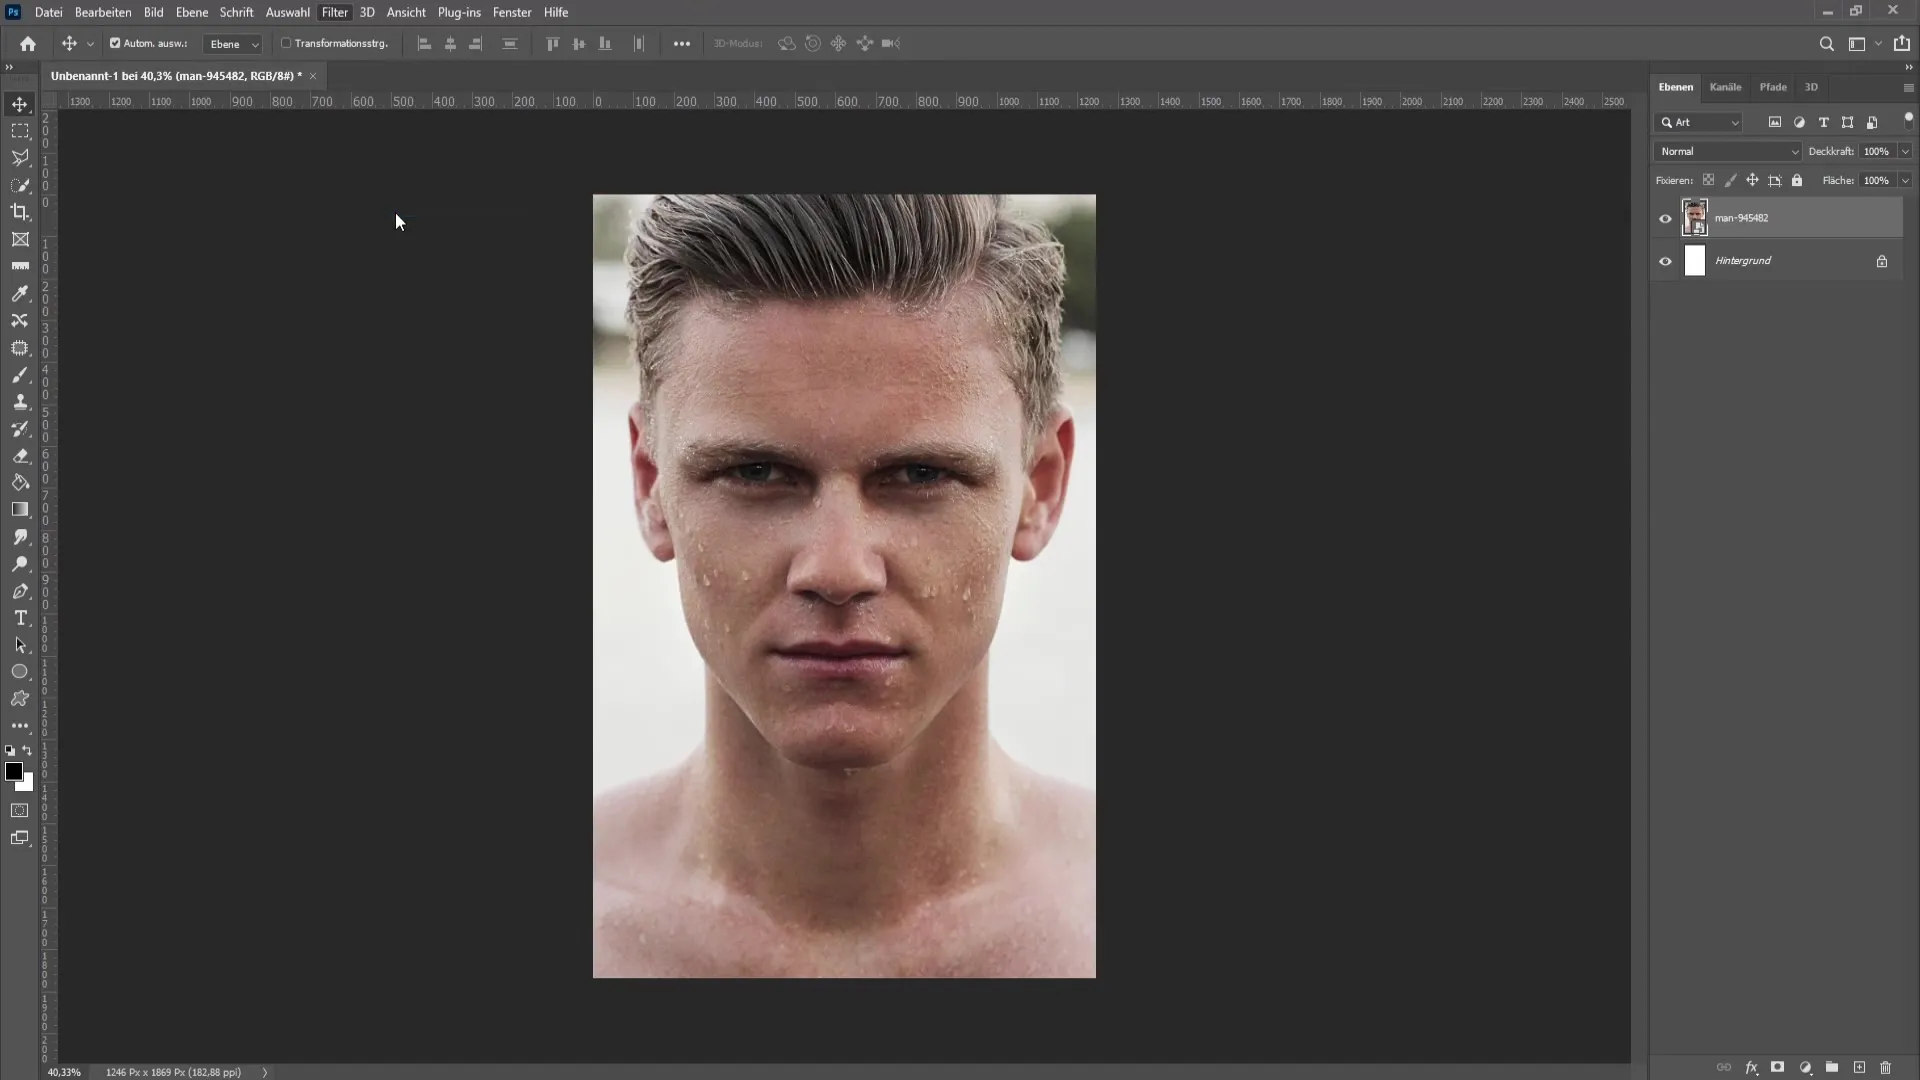
Begin the process by opening your image in Photoshop. Select the image whose facial proportions you wish to edit. To activate the "Liquify" tool, go to the menu bar and click on Filter and then Liquify.
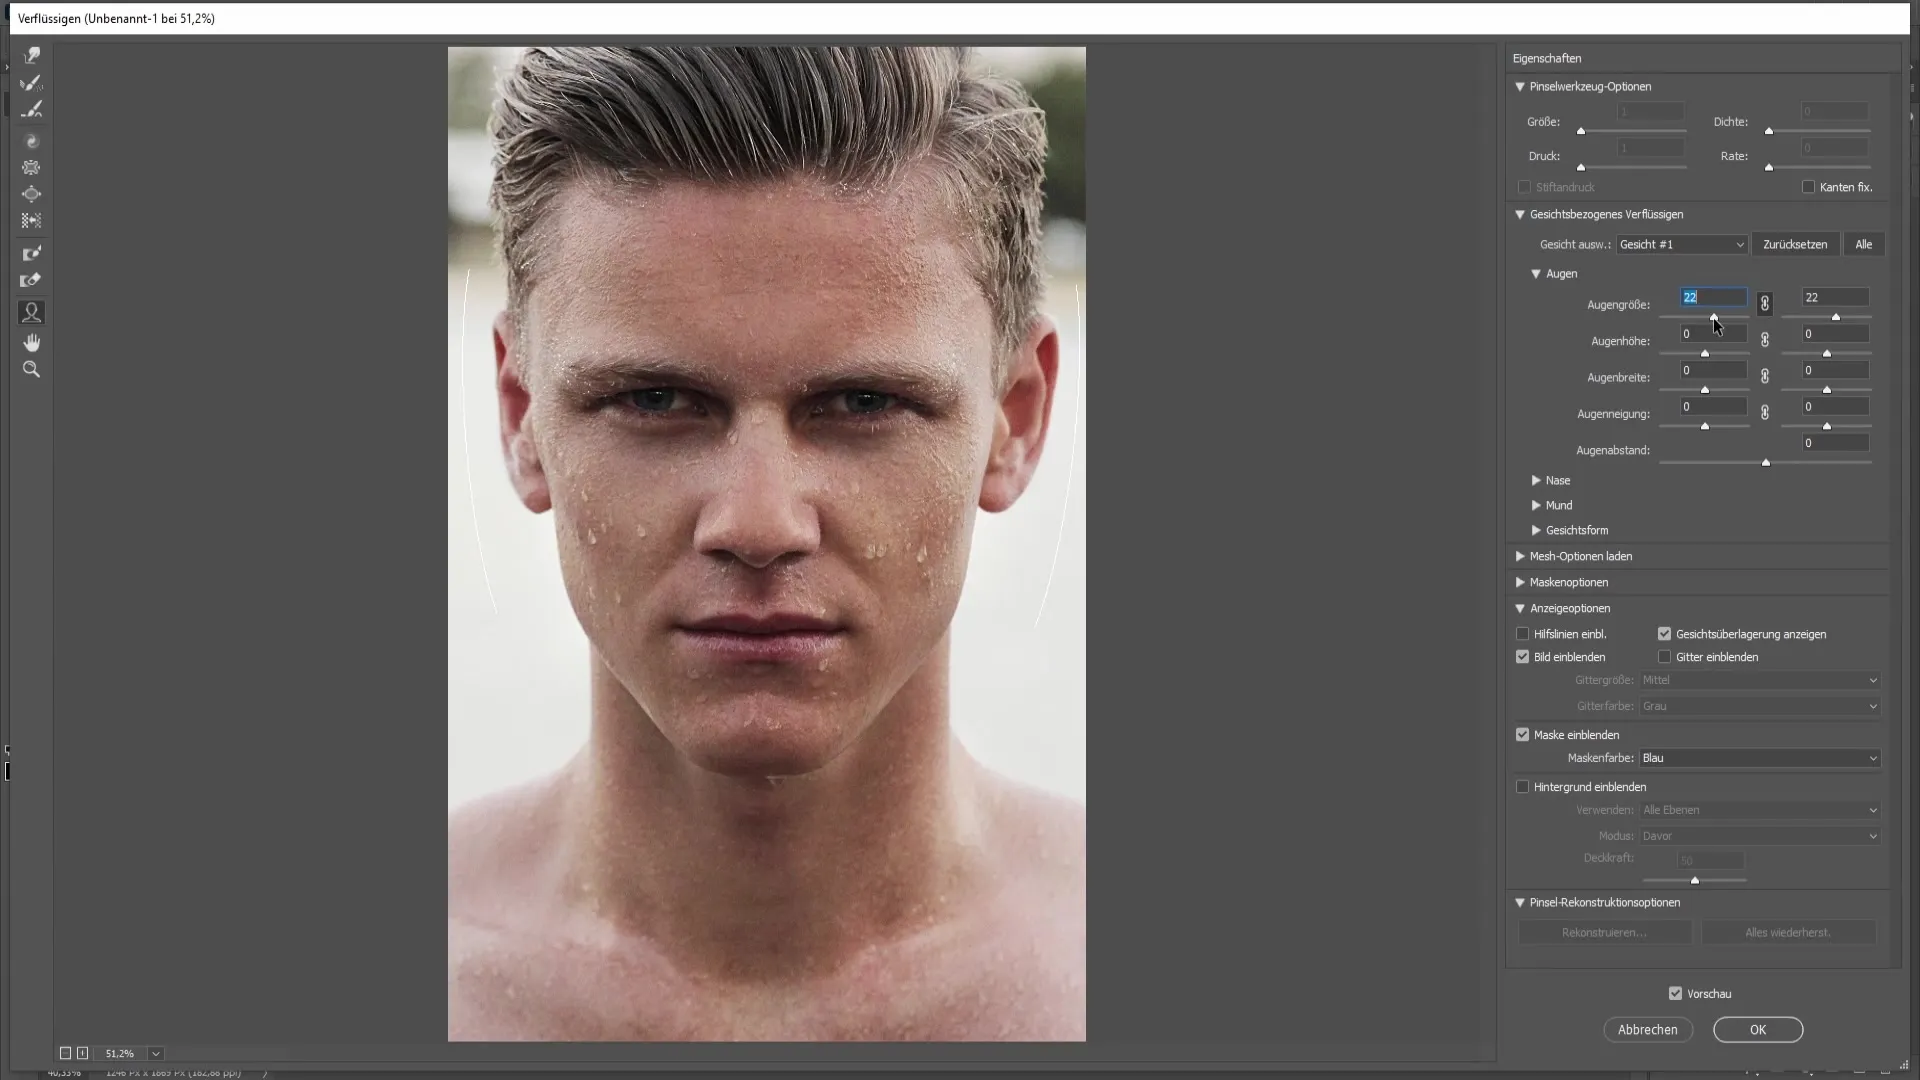
When the "Liquify" window opens, you will see various options on the right side for adjusting facial features. You can start by looking at the eyes. To make the eyes larger, you can adjust the eye size. Click on the chain beforehand to ensure that both sides are proportionally changed.
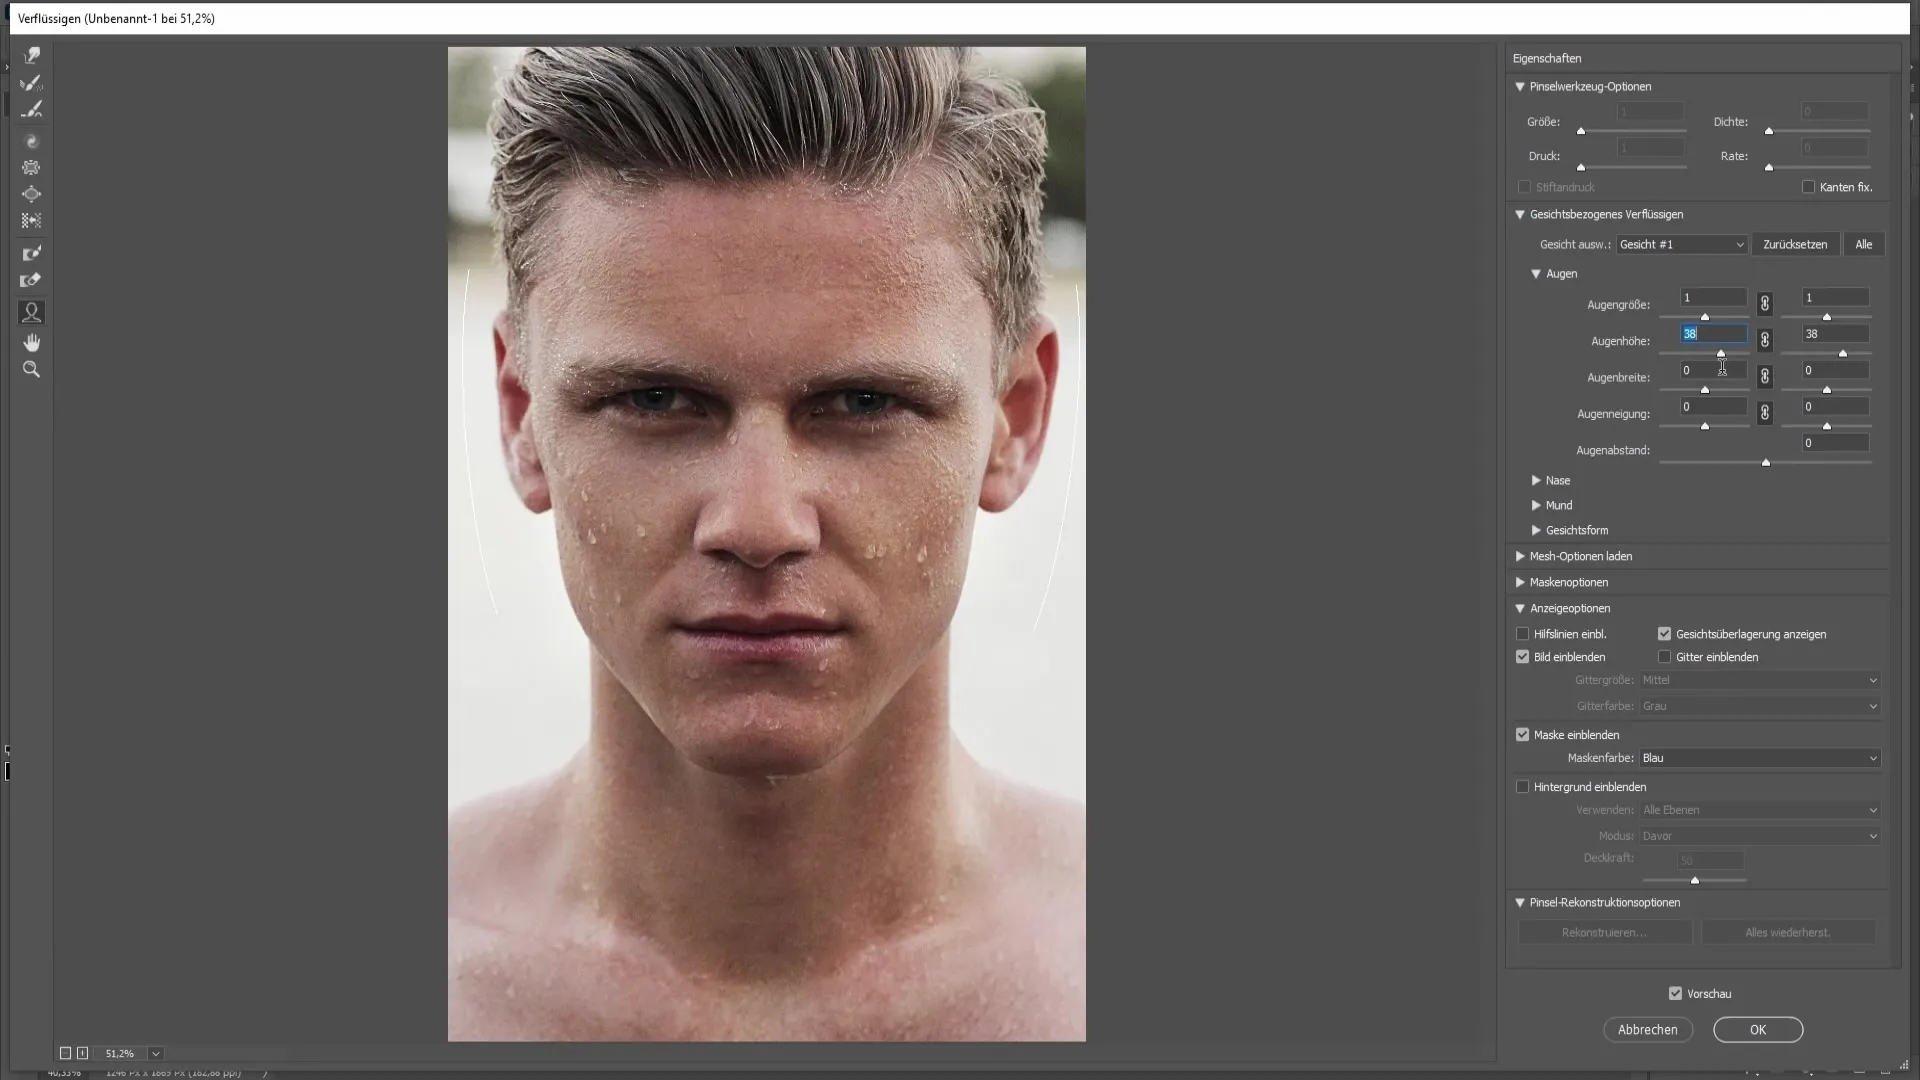
Now select one of the options to change the eye height. This allows you to further modify the proportions of the eyes and make them appear wider or narrower, depending on your preferences.
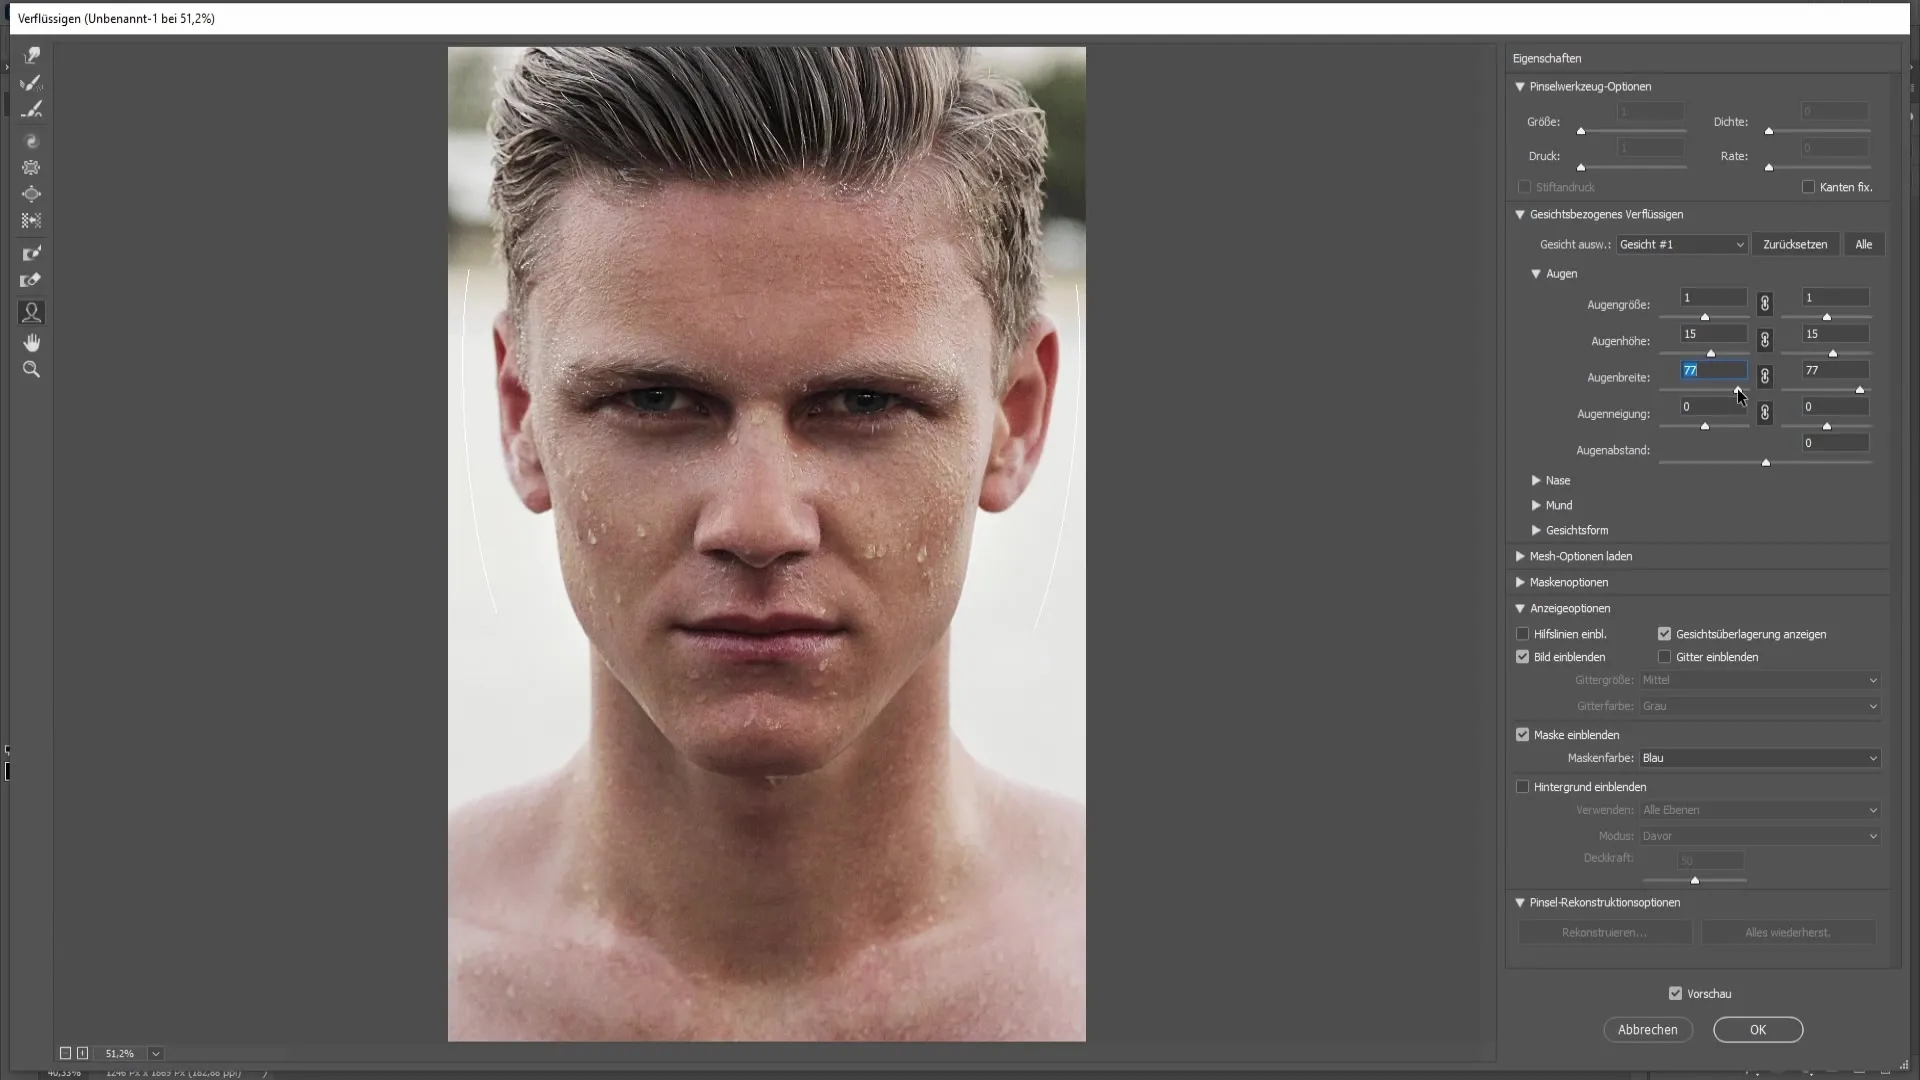
In addition, you can adjust the eye width. This function affects the entire eye, giving you more control over the appearance of the eyes.
Another effective tool is eye tilt, which allows you to slightly rotate the eyes. The eye distance can also be adjusted to increase or decrease the distance between the eyes.
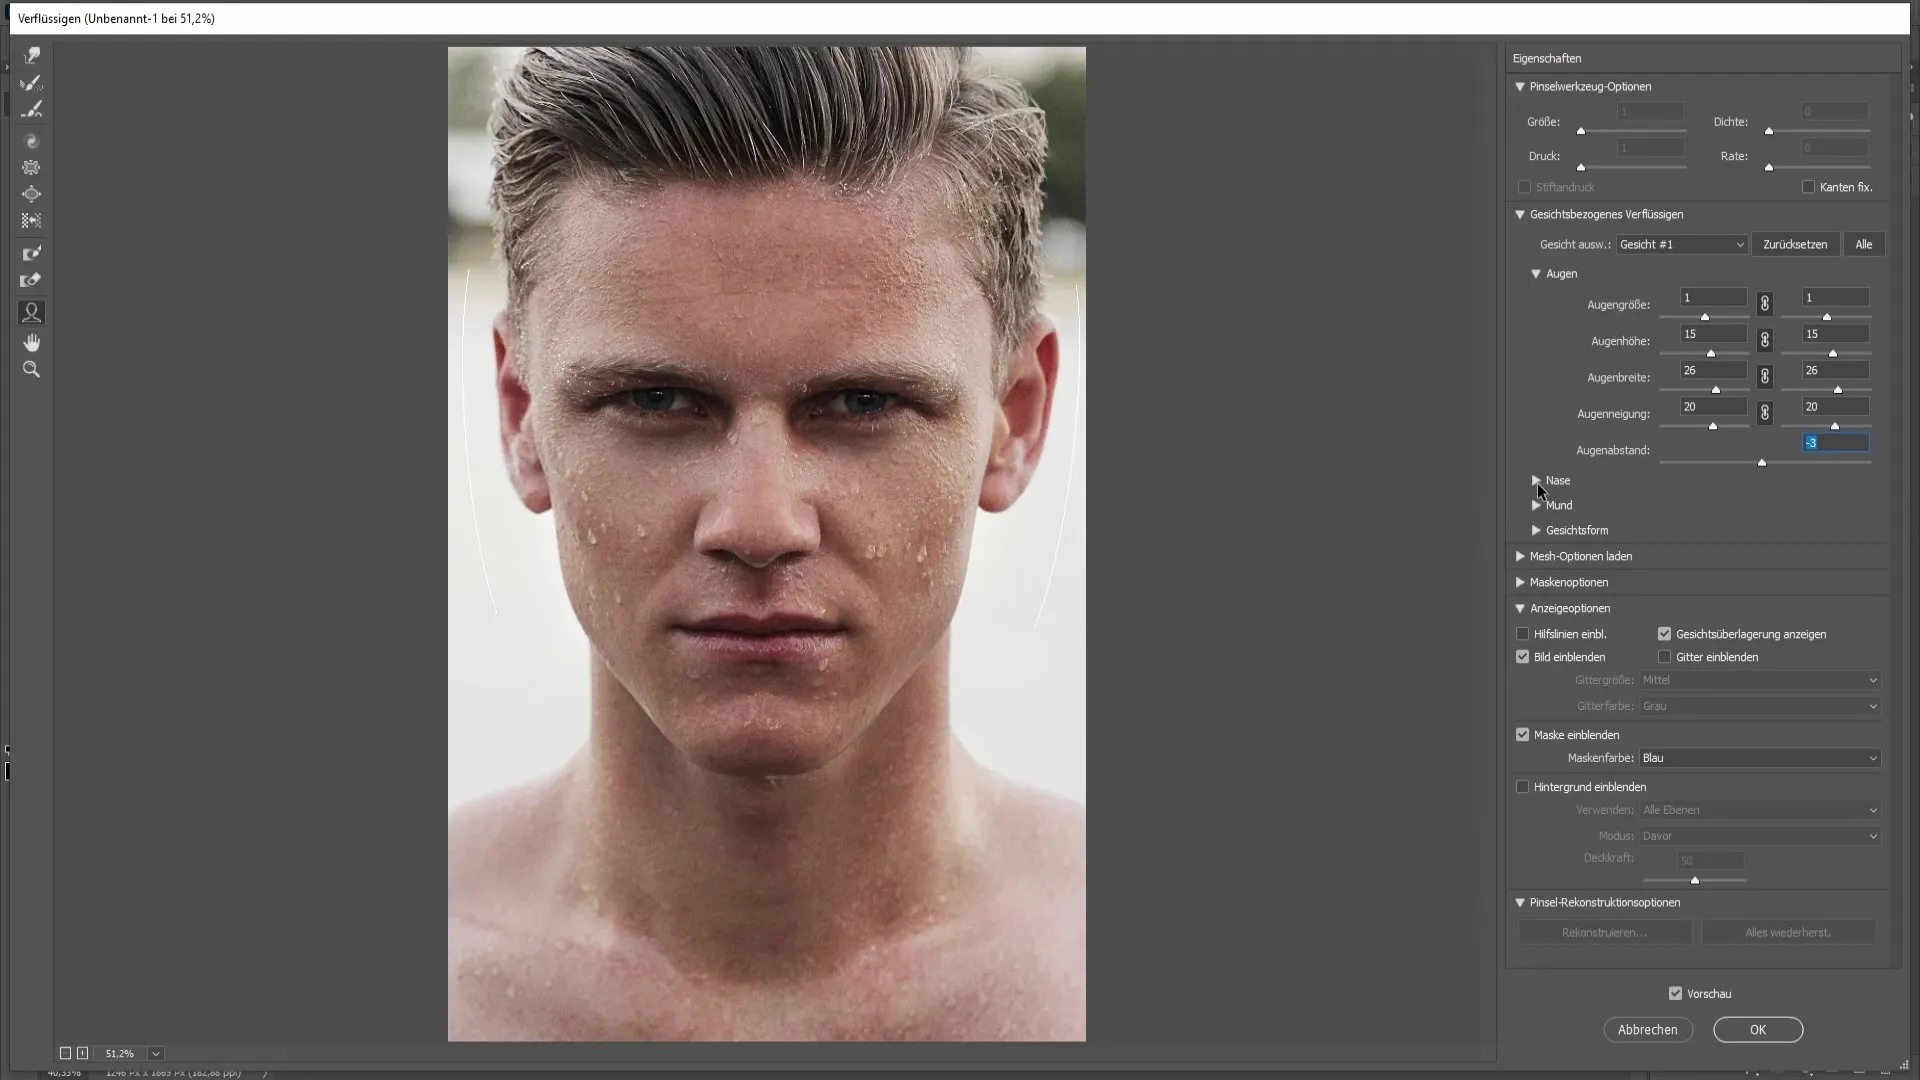
Now let's focus on the nose. Here, you can adjust the nose height. You have the option to raise or lower the nose slightly to modify it attractively.
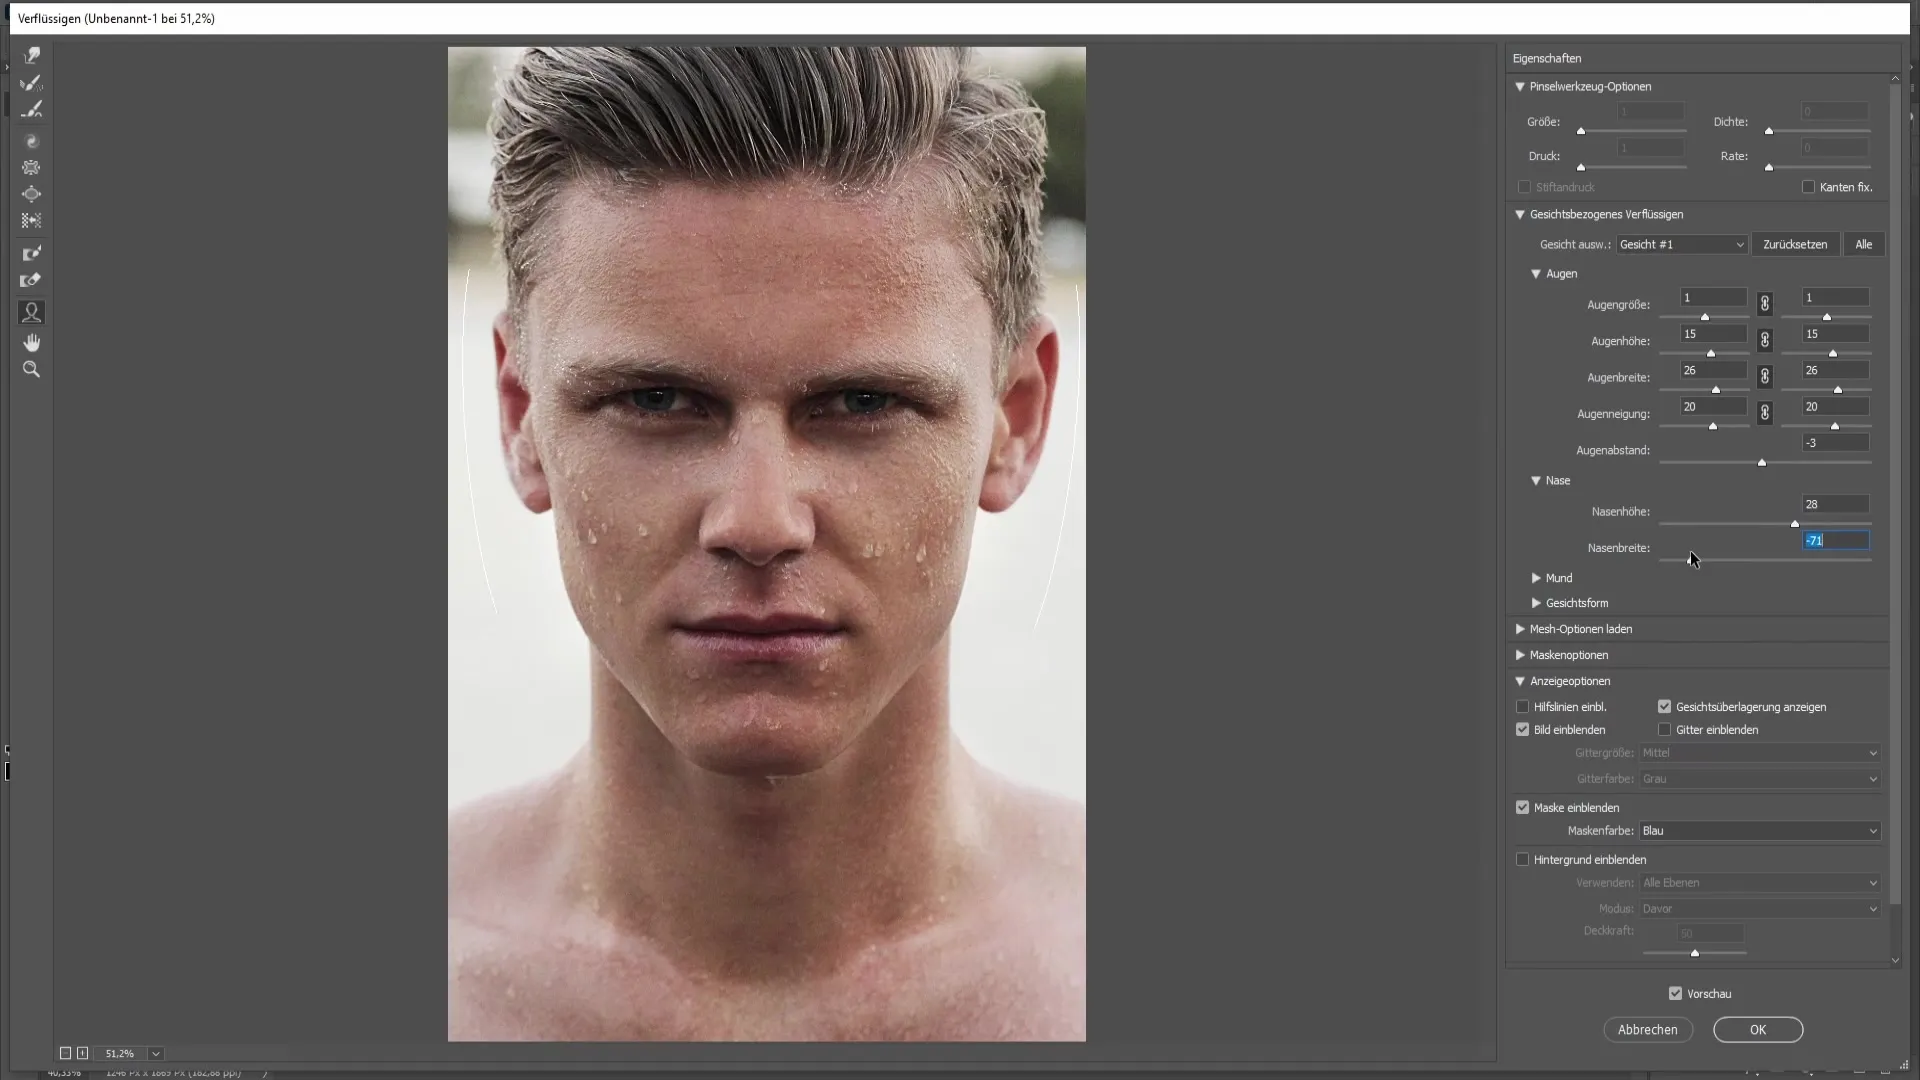
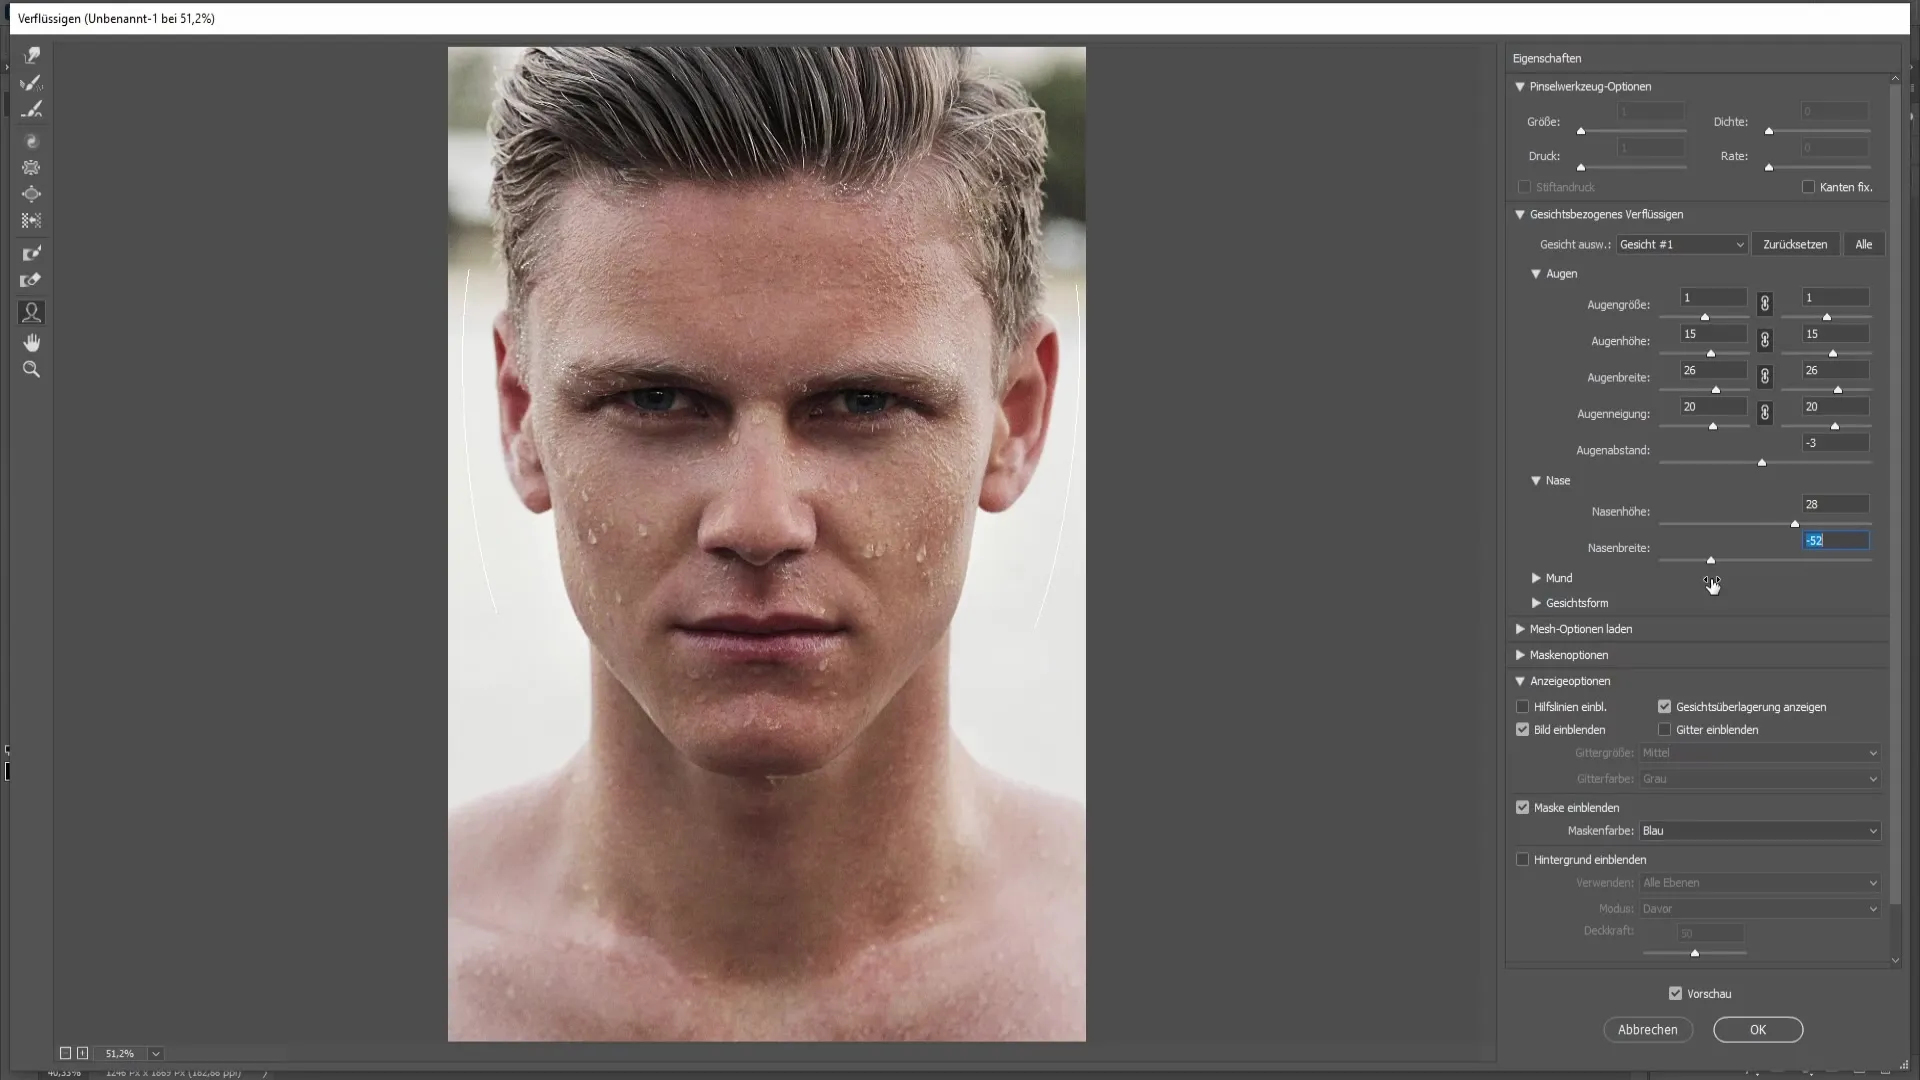
In addition, you can adjust the nose width. Make the nose narrower or, if desired, wider as well.
In the next step, we can move on to the mouth. If you want to adjust the mouth, you can "put on" a smile here. This function shows you how a smile affects the overall representation.
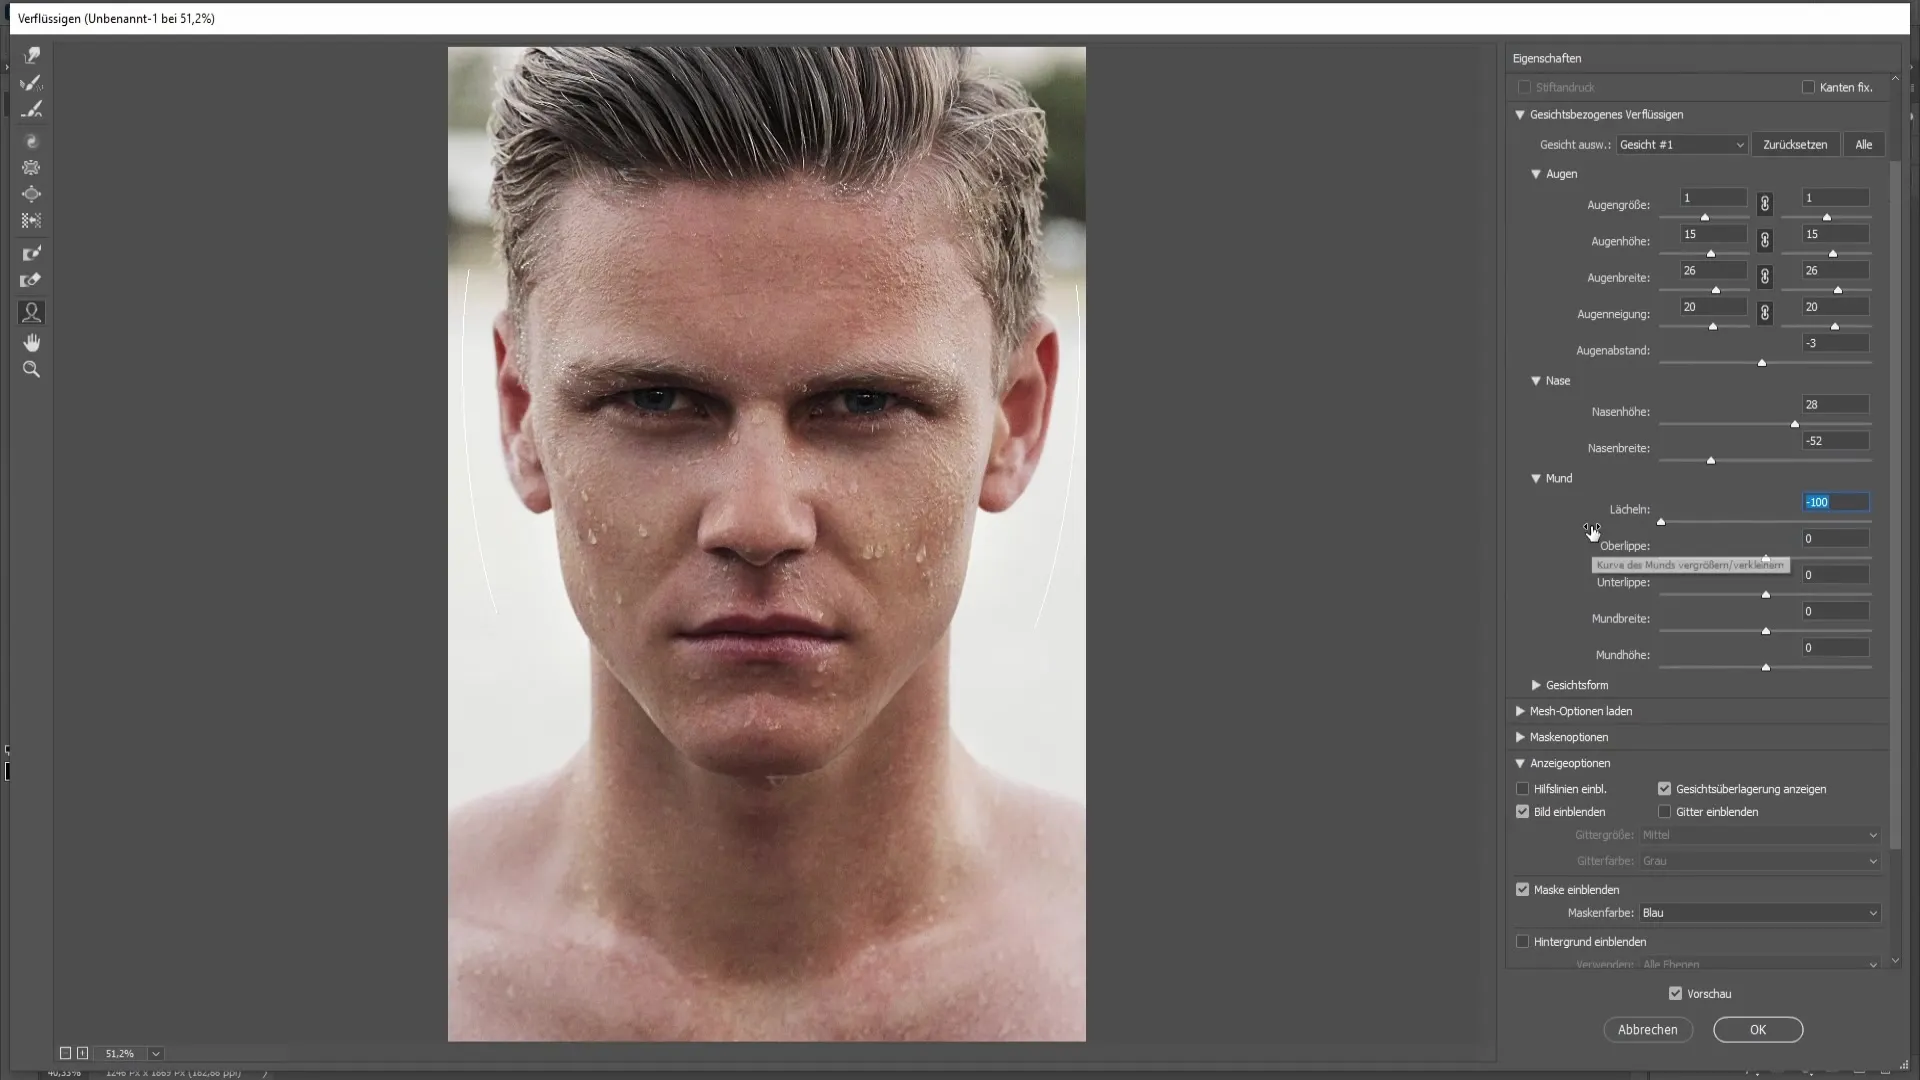
You can also raise or lower the upper lip. The same goes for the lower lip, which you can tuck in or emphasize depending on the desired effect.
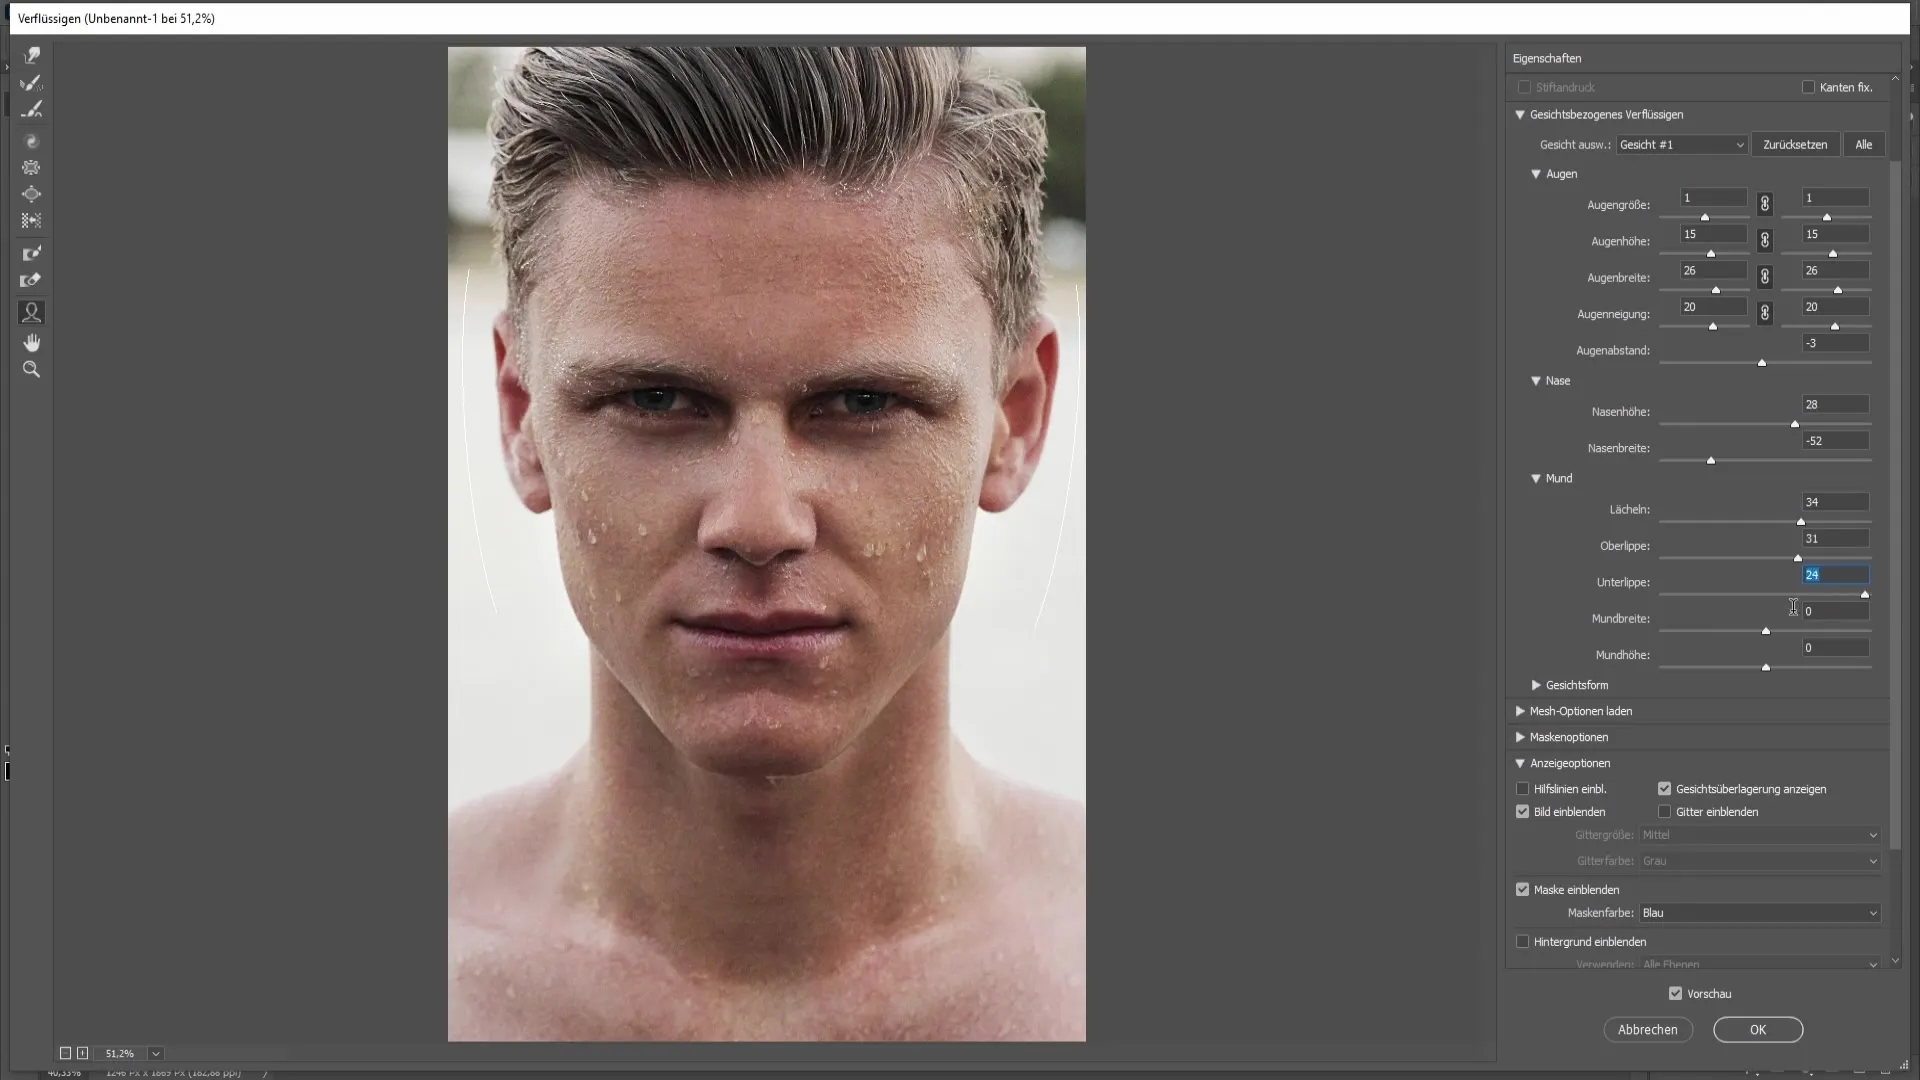
The mouth width can also be changed, allowing for the overall width of the mouth to be adjustable. Subsequently, you can adjust the mouth height to place the mouth higher or lower from the center.
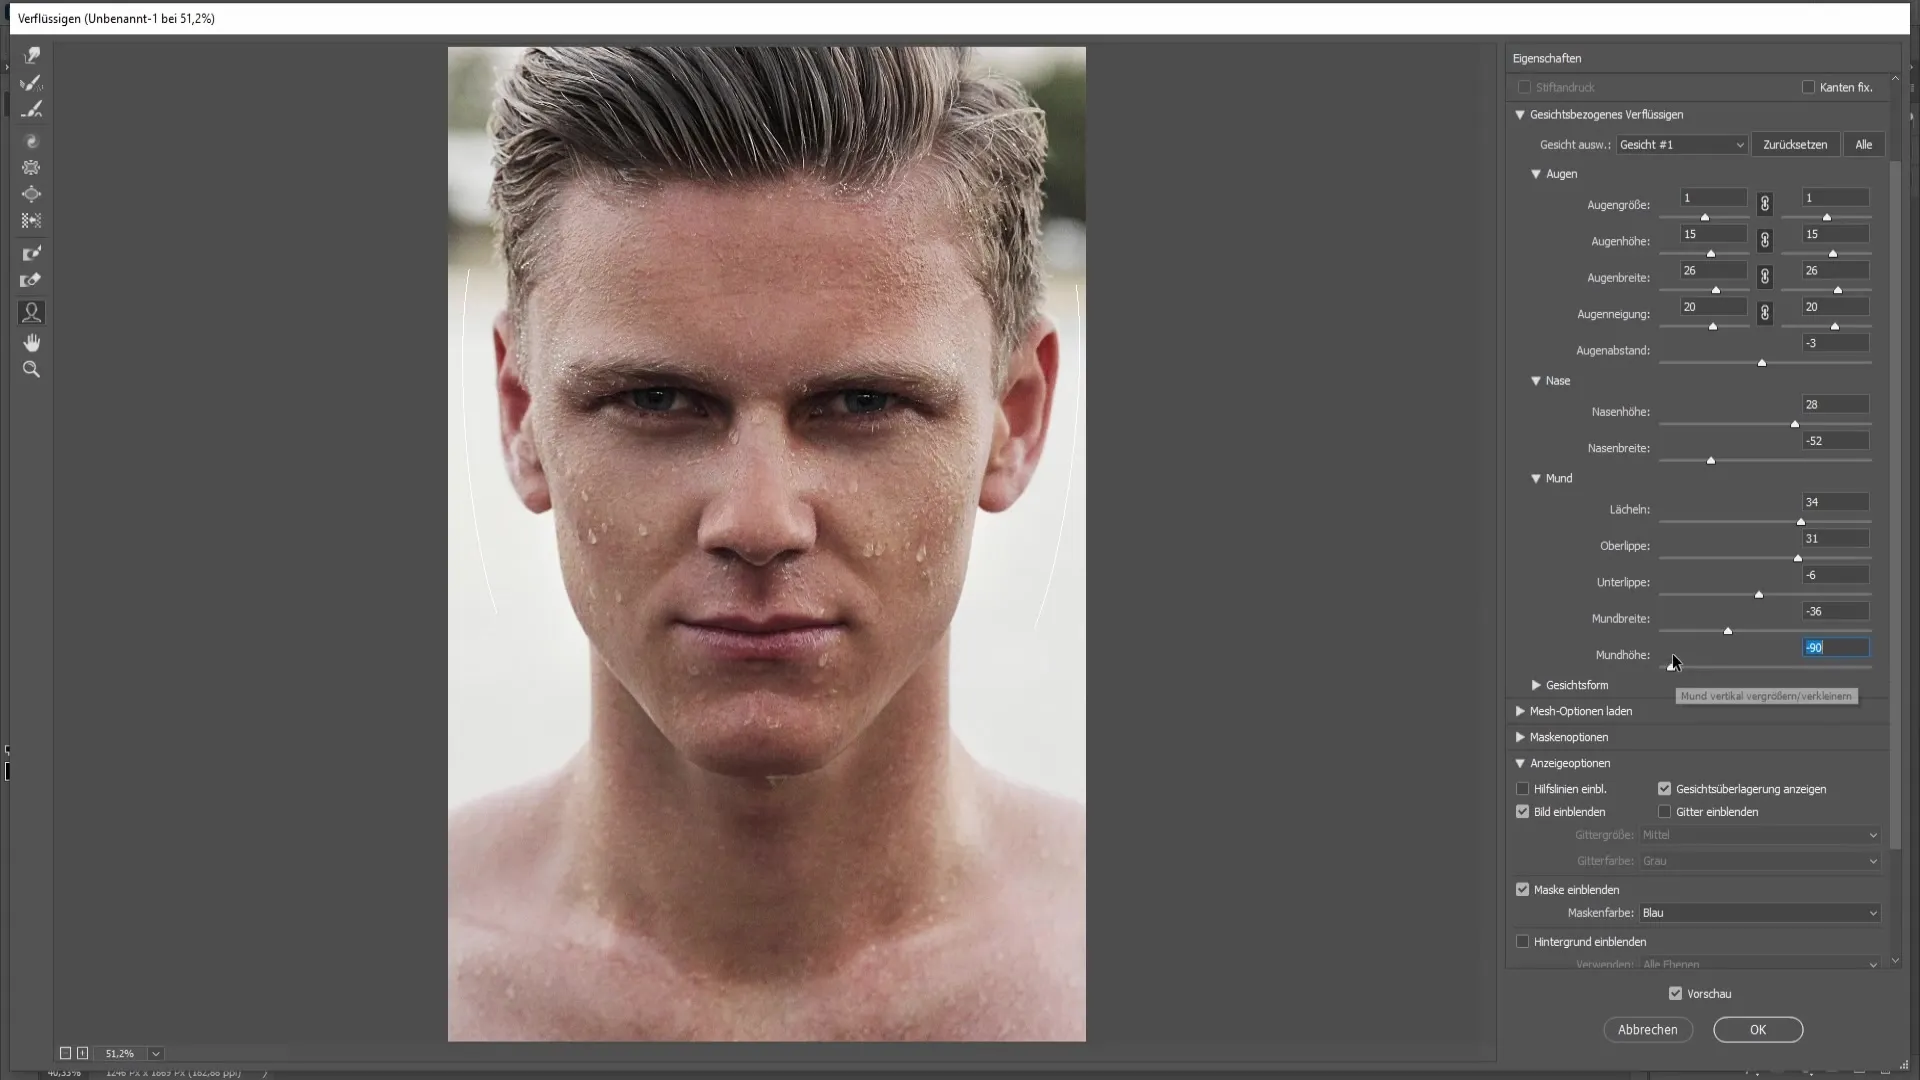
Now let's move on to the face shapes. Here, you have the option to adjust the height of the forehead, chin, and the overall width of the face. With the forehead function, you can raise it slightly if you desire a higher hairline or a different facial shape.
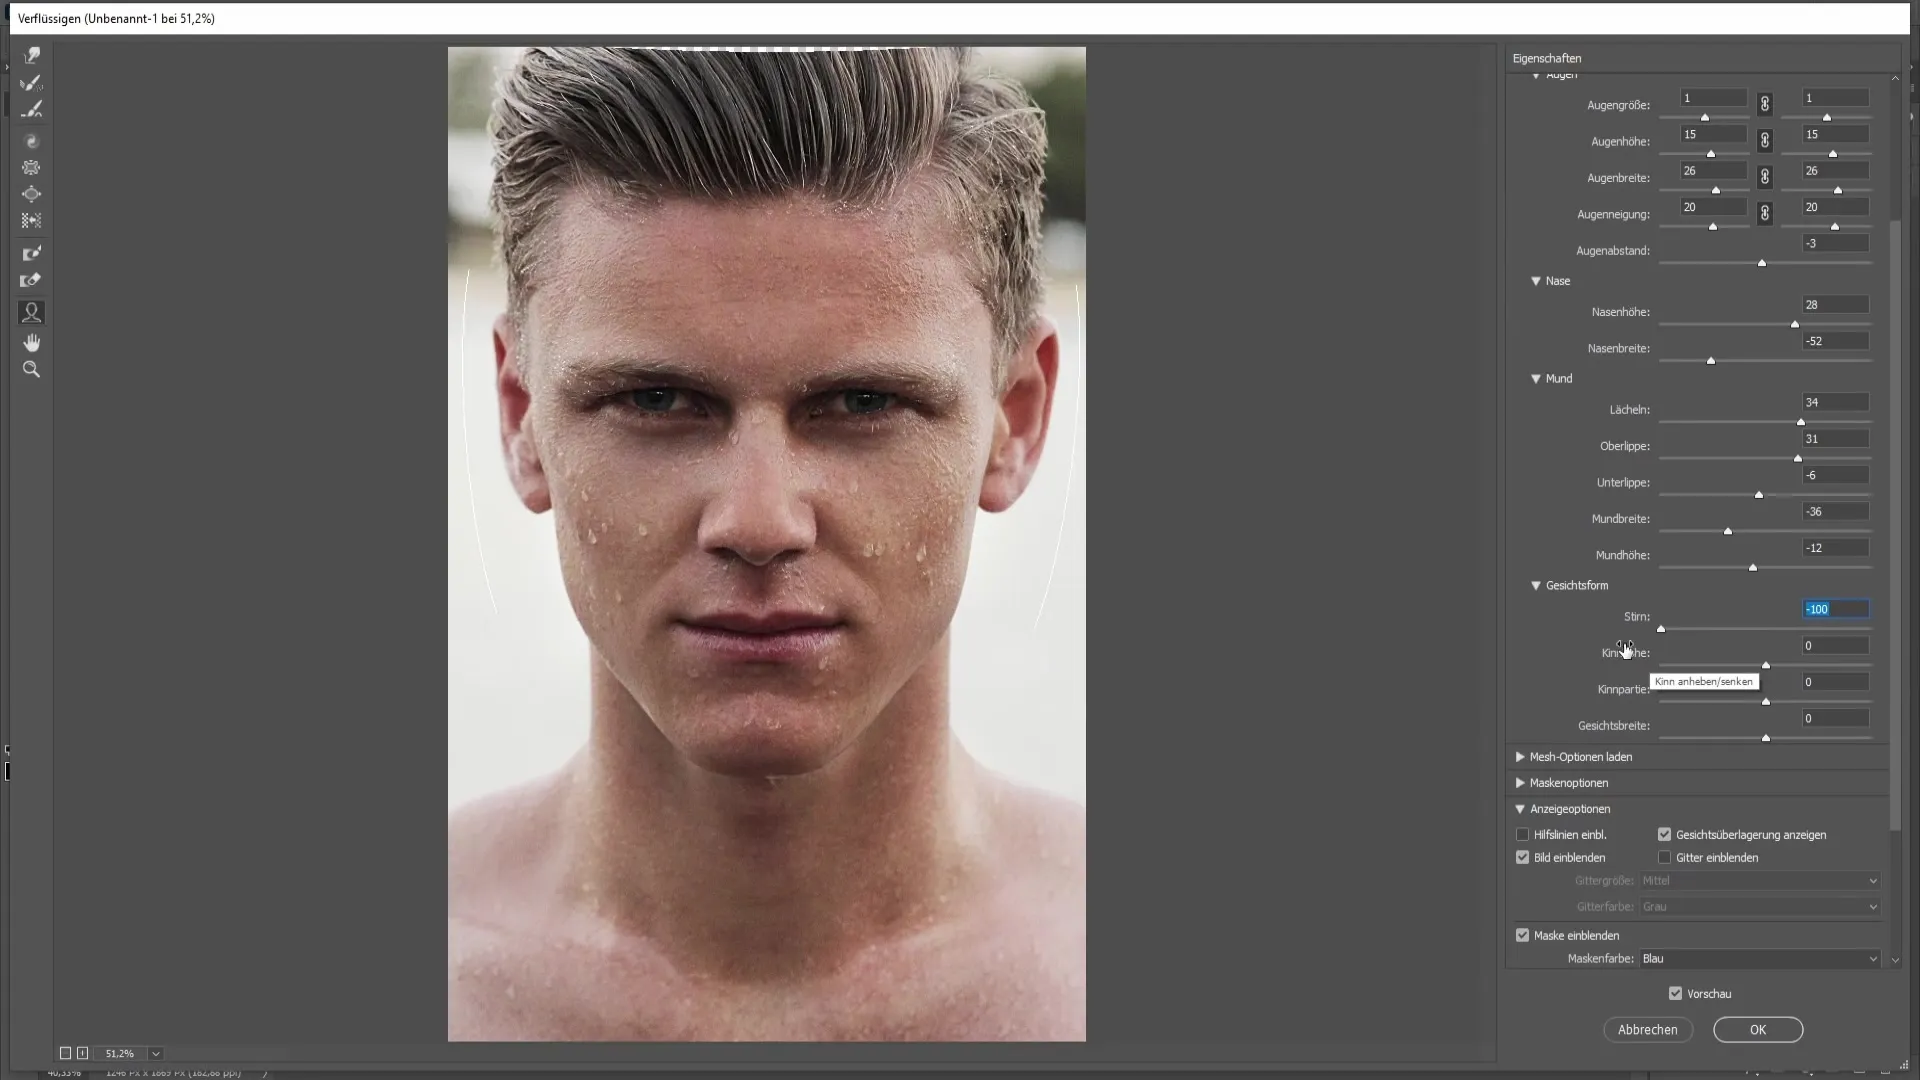
When it comes to chin height, you have the option to raise or lower the chin, which can lead to a different facial expression.
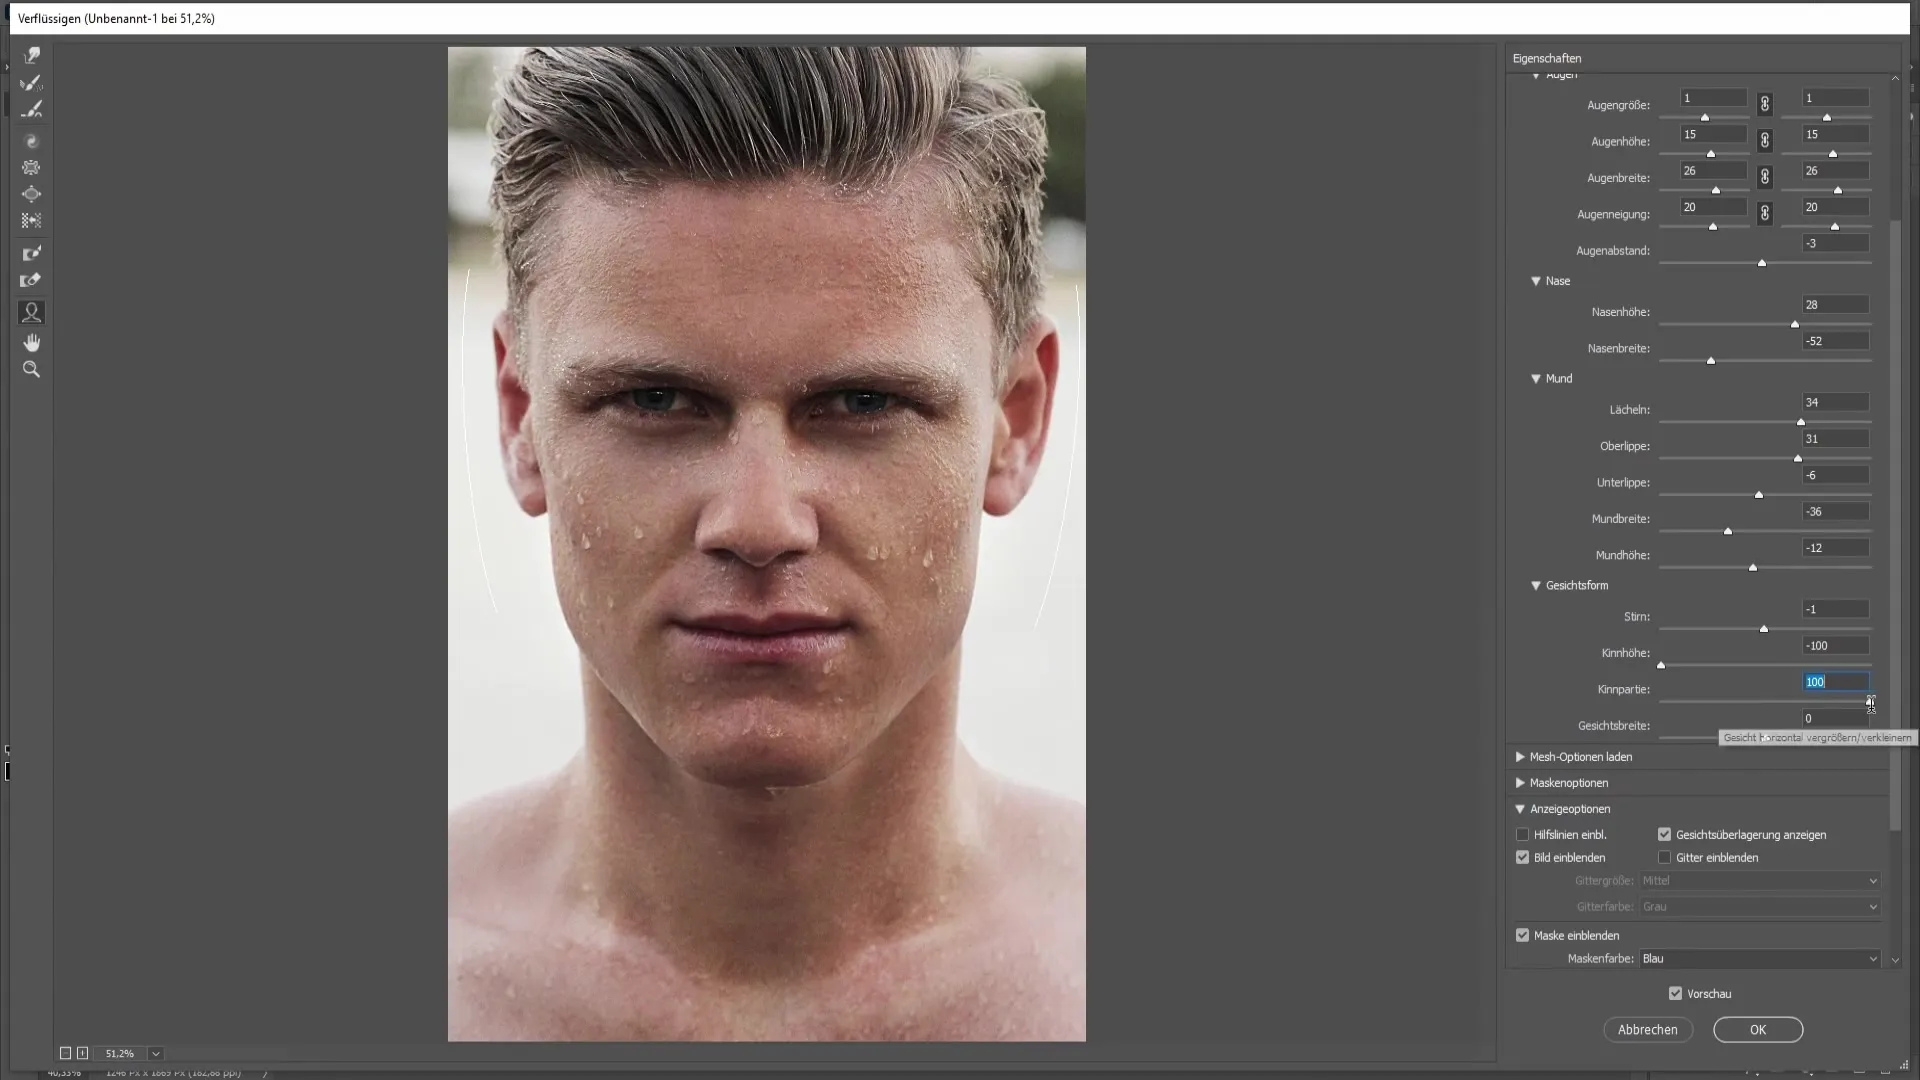
The face width can also be adjusted. You can make the face appear wider or narrower.
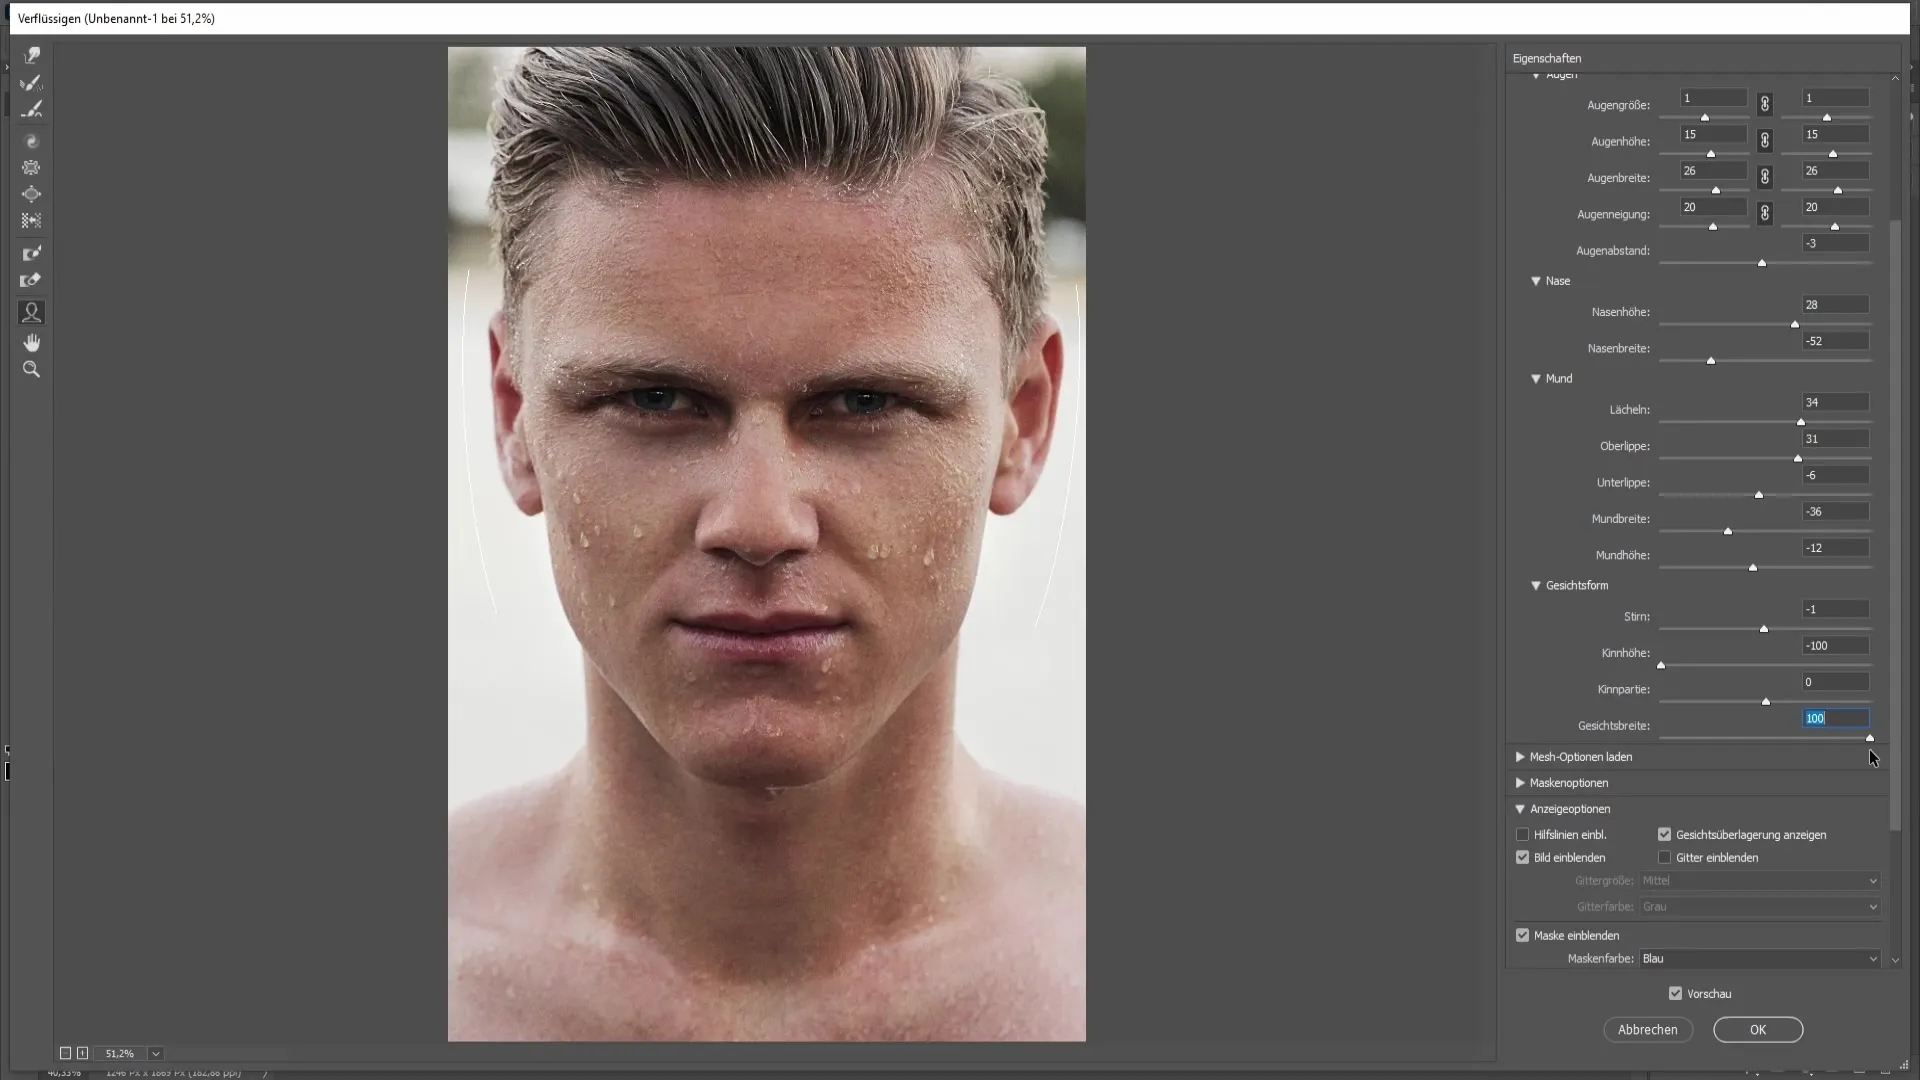
If you are satisfied with the changes, click on OK to confirm the adjustments. Your basic facial changes are now complete, resulting in a new, fascinating facial shape.
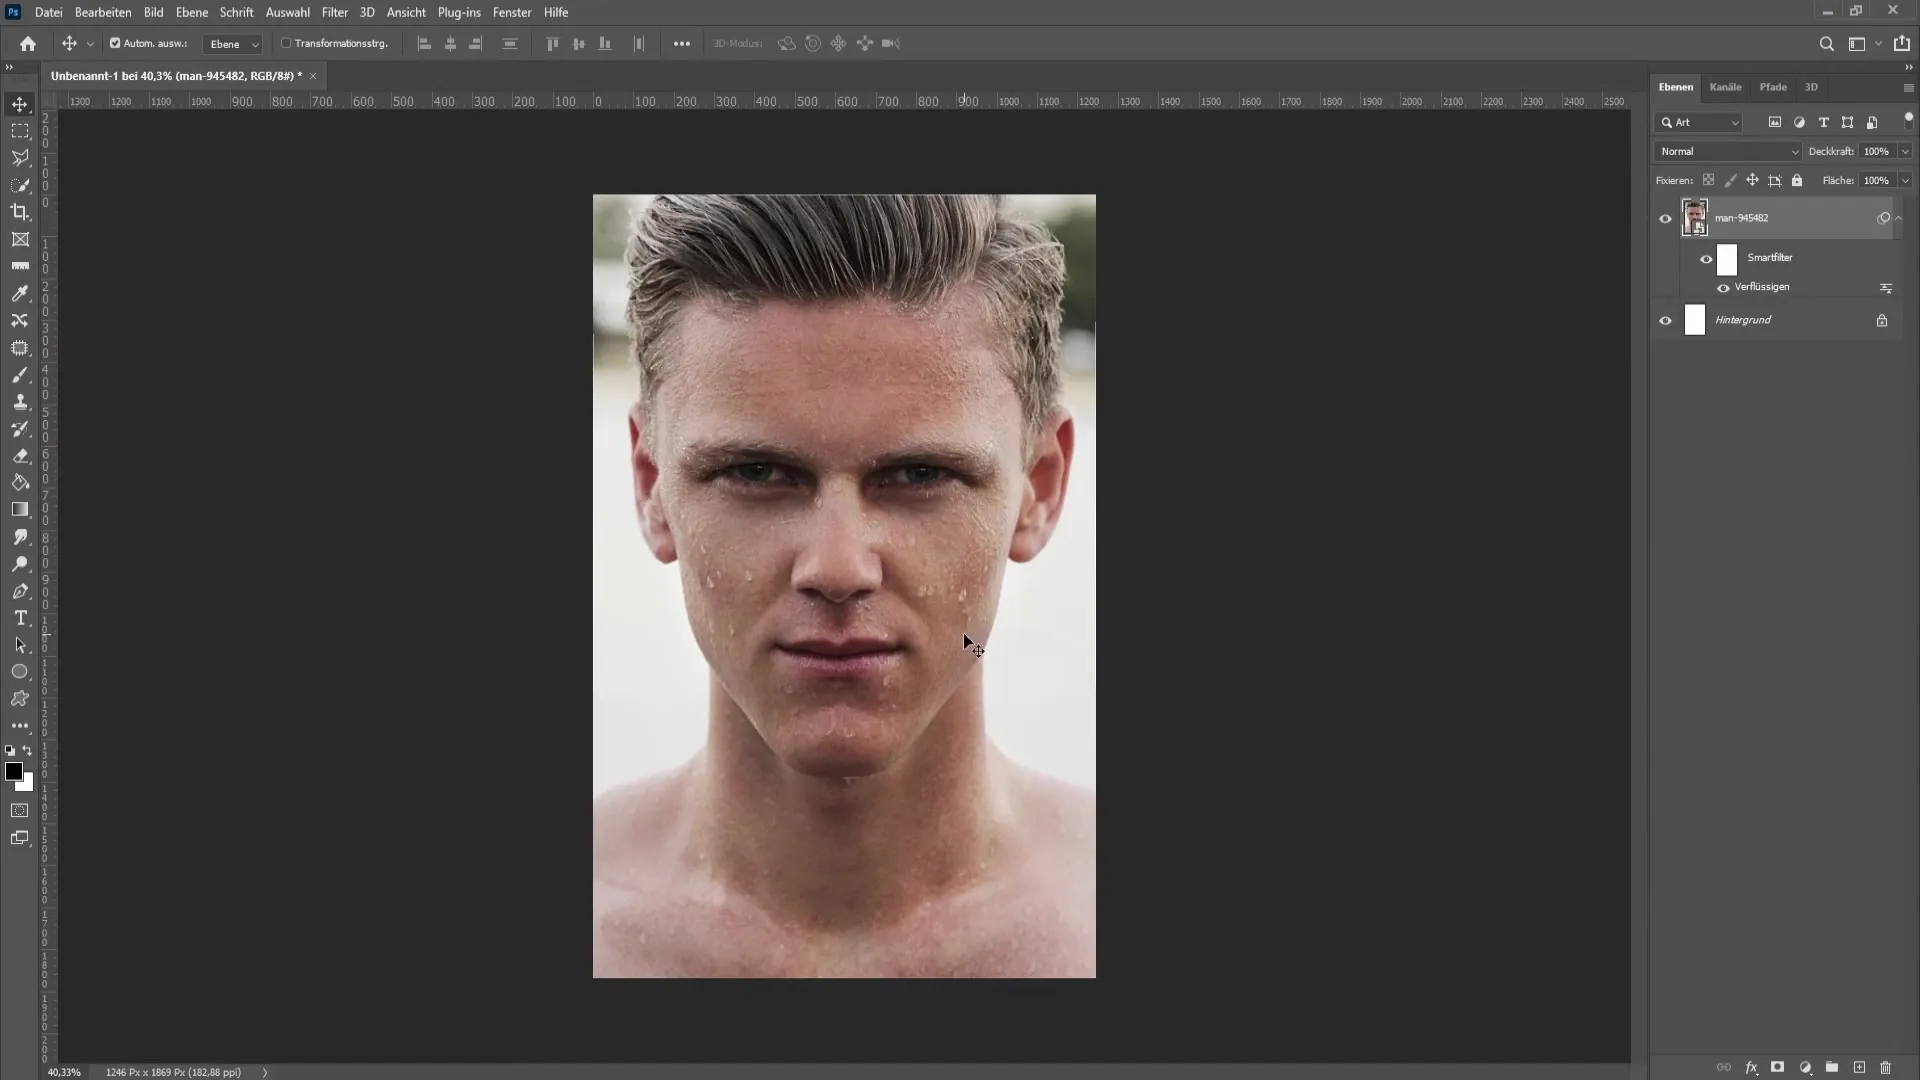
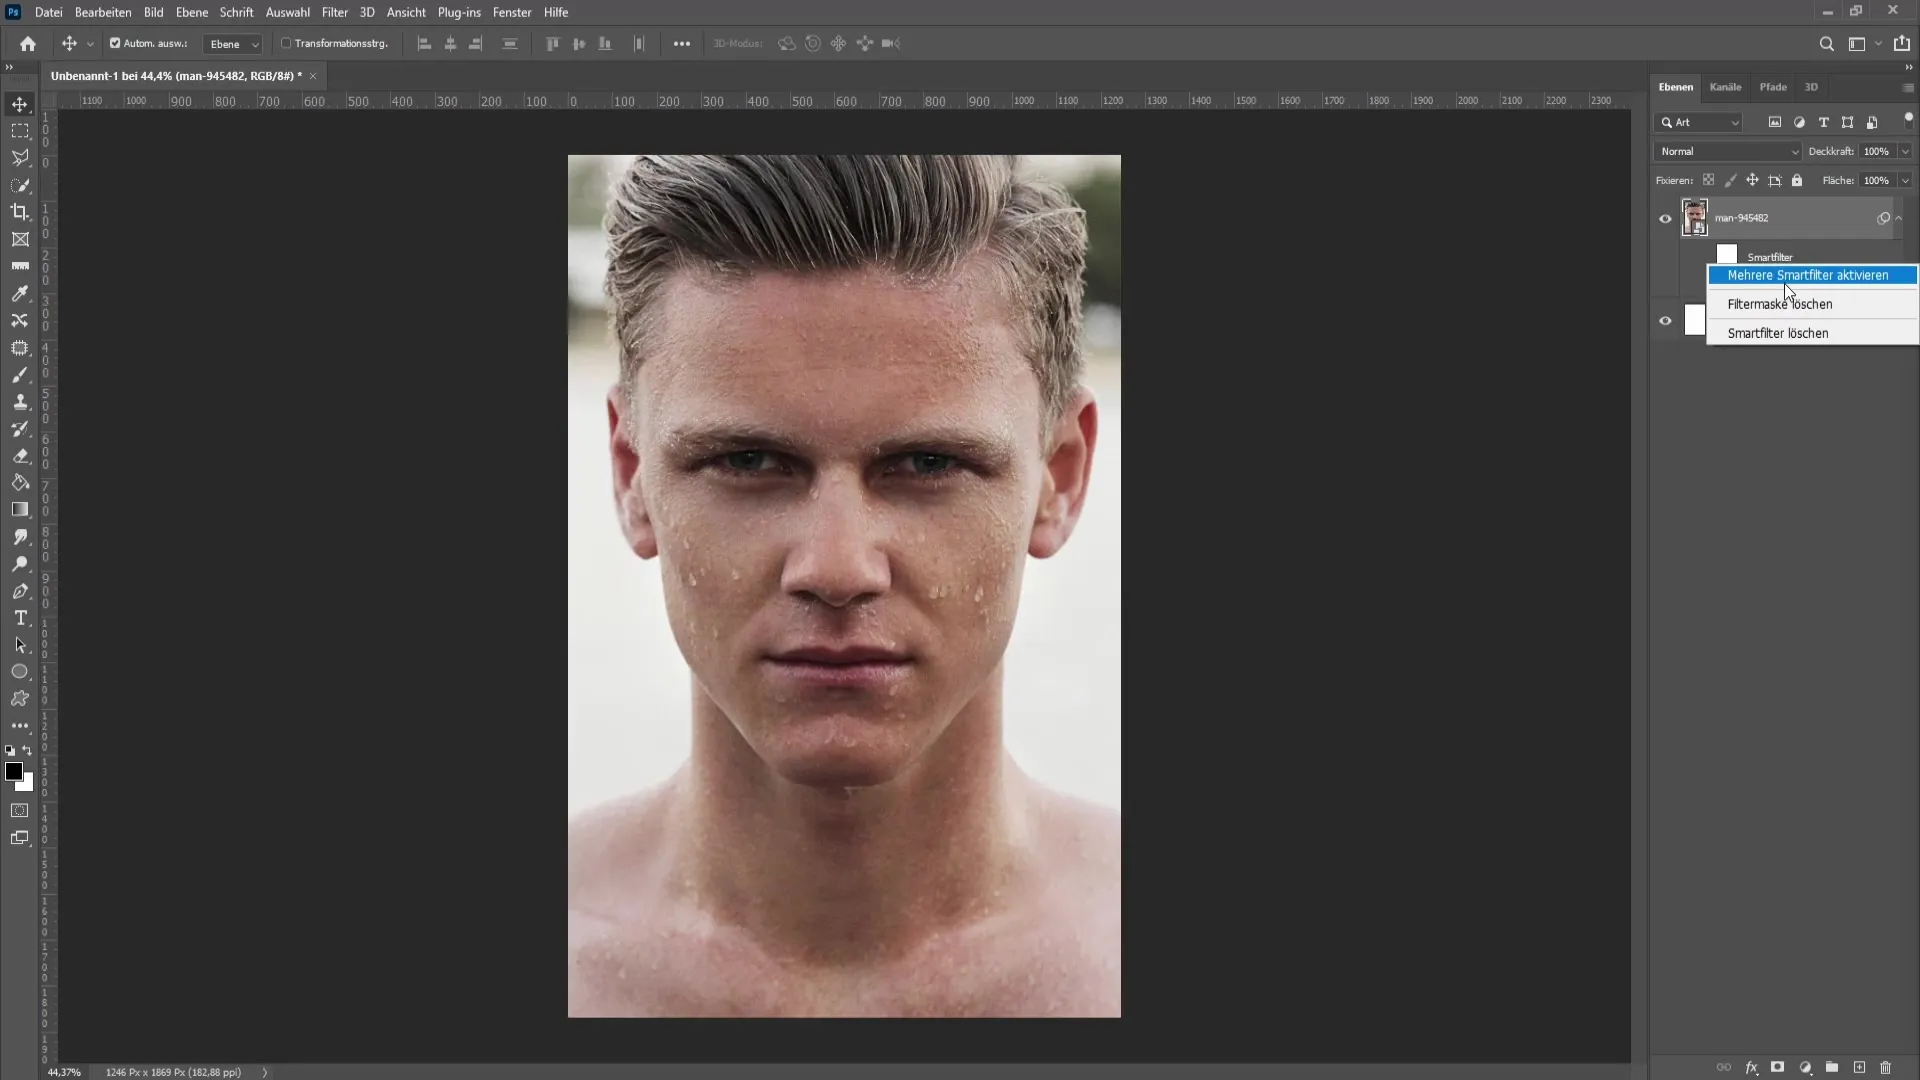
If you are no longer satisfied with the changes made, you have the option to hide the filter. This can be done by clicking on the Smart Filter and selecting the option to delete the Smart Filter via a right-click.
Summary
In this guide, you have learned how to adjust different facial proportions using the "Liquify" filter in Photoshop. You can customize eyes, nose, and mouth individually, and even modify the entire facial shape. With these practical adjustment options, it is easy to create creative portraits and transform your image into an appealing representation.
Frequently Asked Questions
Could I make these changes without using the Liquify filter?Yes, there are other tools in Photoshop, but the Liquify filter is most effective for this type of editing.
Can I undo the changes at any time?Yes, all changes can be undone as long as you stay within the Photoshop session.
Is there a feature for eyebrows?There are no specific adjustments for eyebrows in the Liquify filter, but you can modify the face shape to make them look more appealing.


