In digital image editing, there are many techniques to optimize photos and remove unwanted elements. A common challenge is the double chin - a phenomenon that often causes discomfort, especially in photos. In this guide, I'll show you how to easily remove a double chin with Adobe Photoshop. The steps are straightforward, and I'll guide you through each one to help you achieve an excellent result.
Key Takeaways
This guide covers creating selection areas, working with layer masks, and using the Liquify tool. With these techniques, you can selectively remove the double chin and adjust the overall image.
Step-by-Step Guide
1. Making the Double Chin Selection
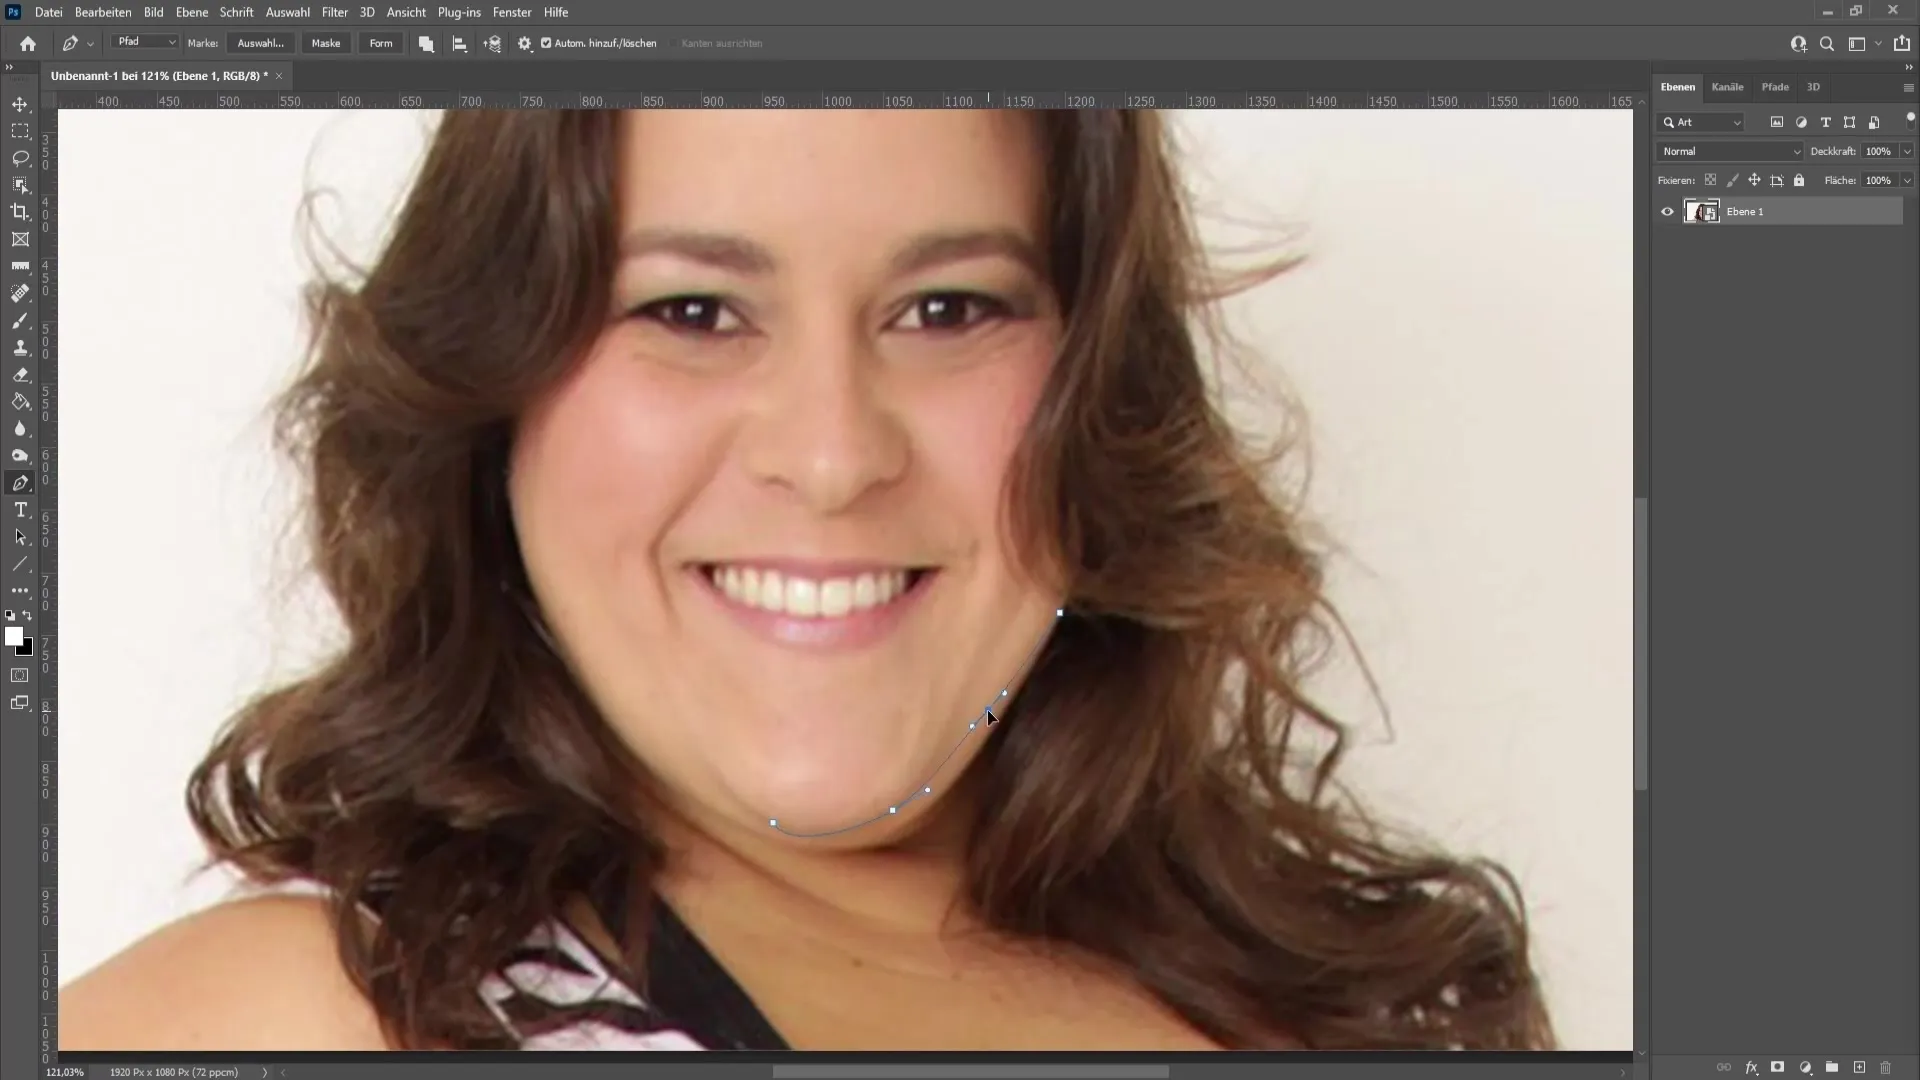
To remove the double chin in Photoshop, you first need to make a precise selection of the chin. For this, use the Pen tool. Place a point on the edge of the chin, then move on to the next point and work your way around the contours of the chin. Be sure to only select the double chin so that you can edit it more effectively later.
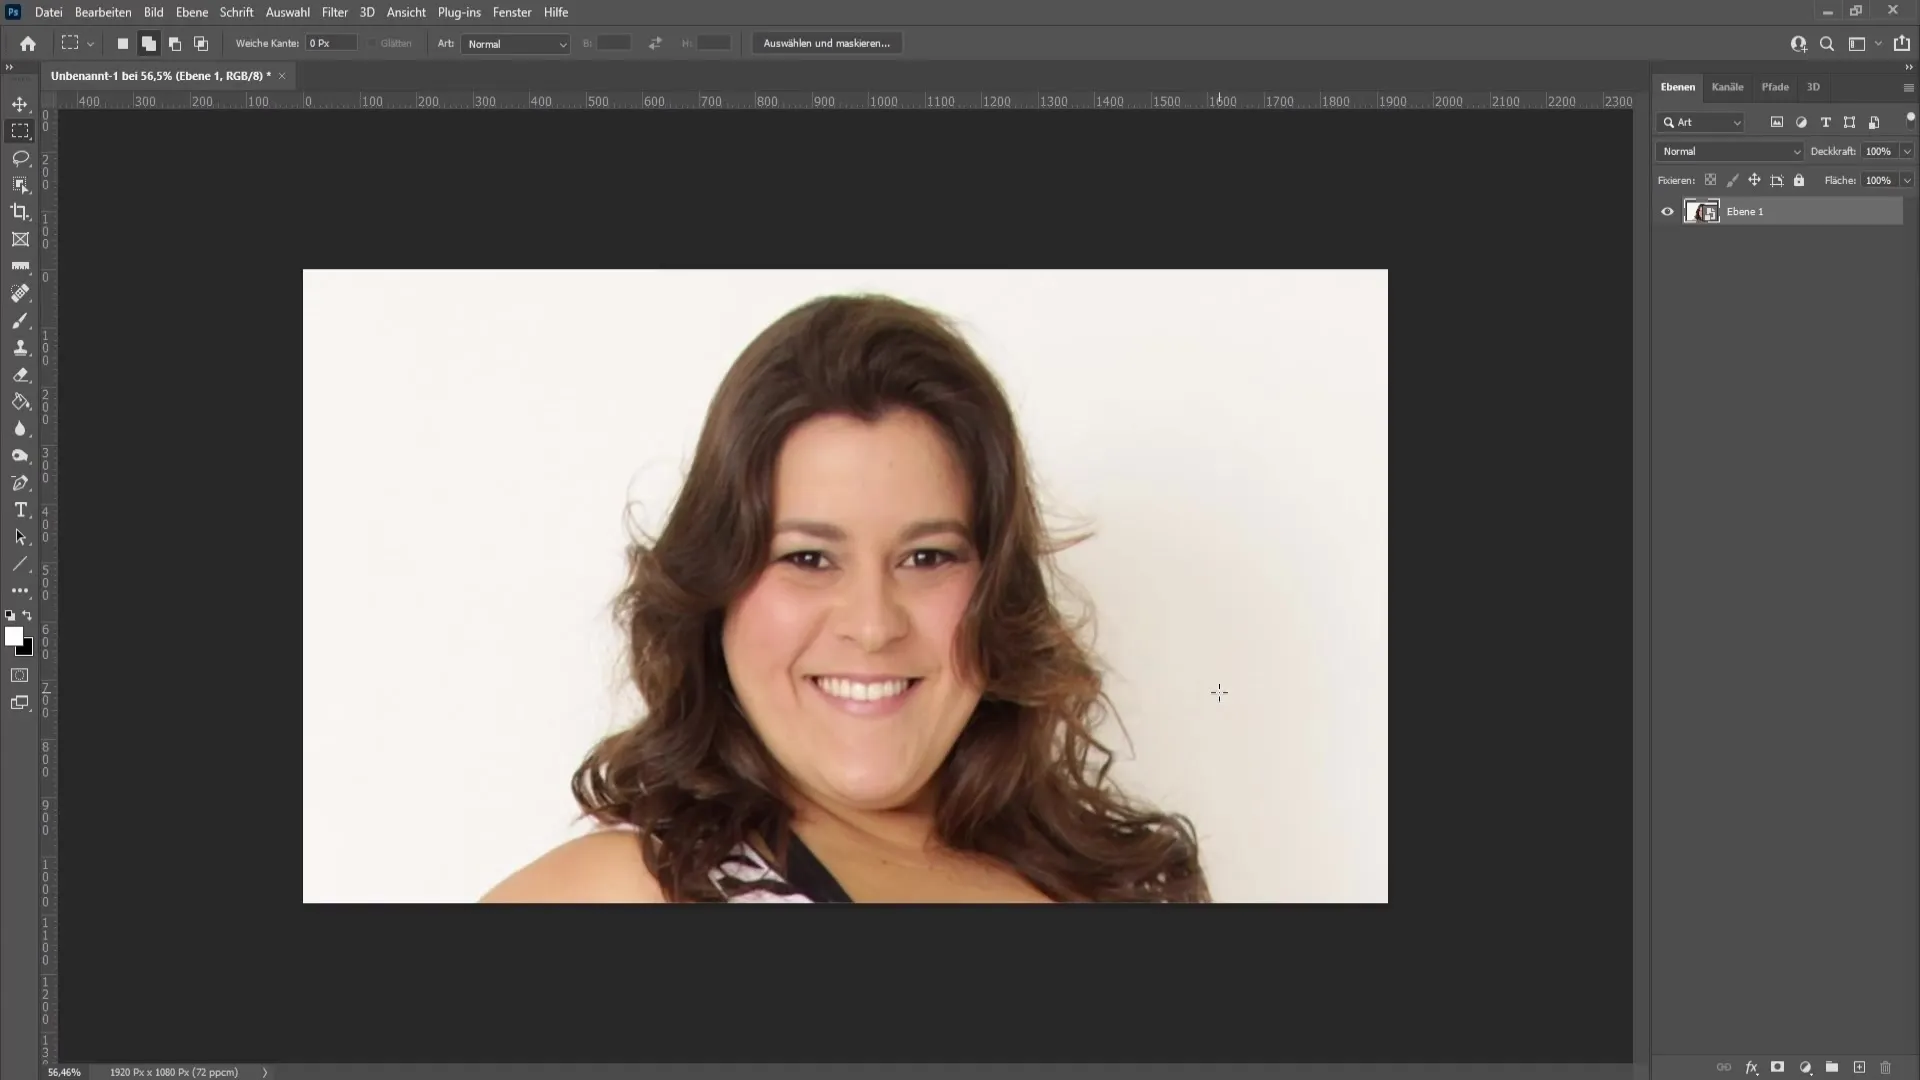
If you placed a point inaccurately, you can easily move it - just hold down the Control key (or the Command key on Mac) and click on the point to reposition it. It is important to handle the selection carefully to achieve a natural result.
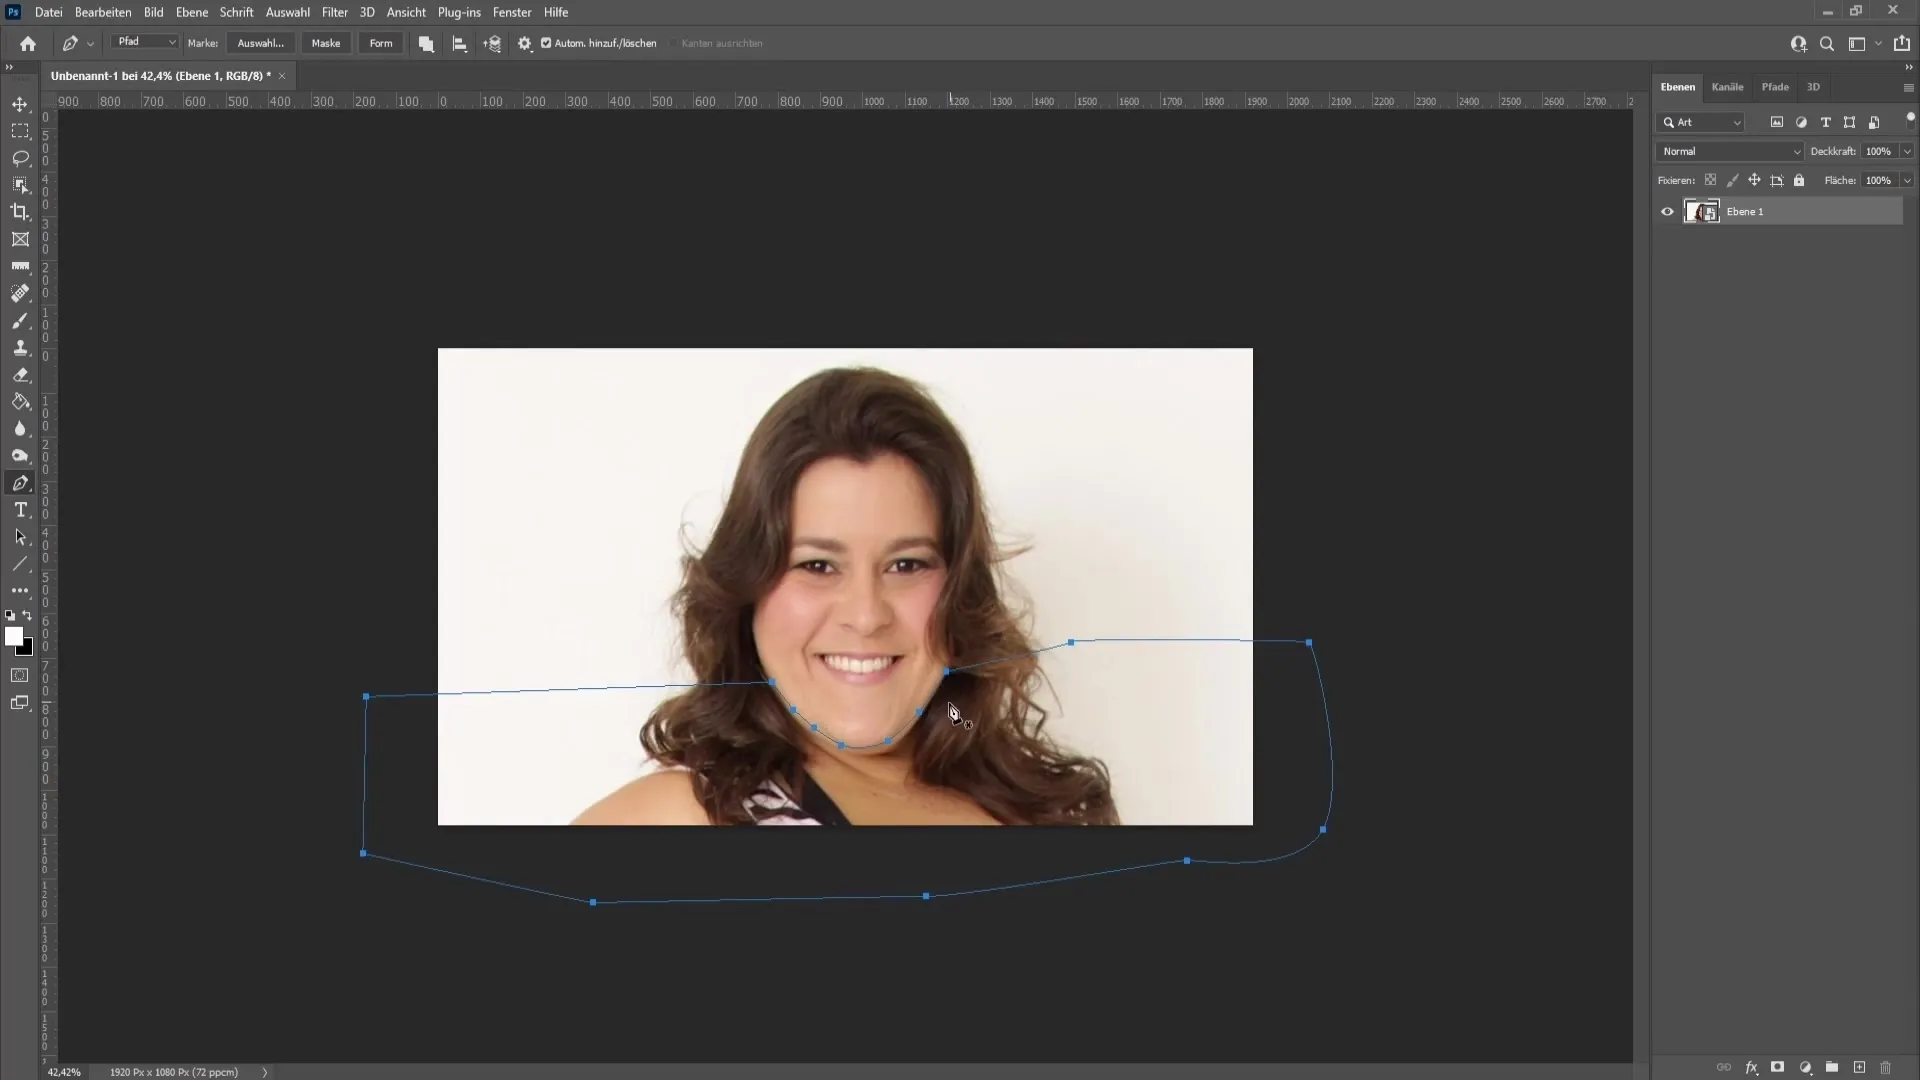
2. Closing the Selection
Once you have placed all the points, close the selection by returning to your first point. Then press the Enter key to activate the selection.
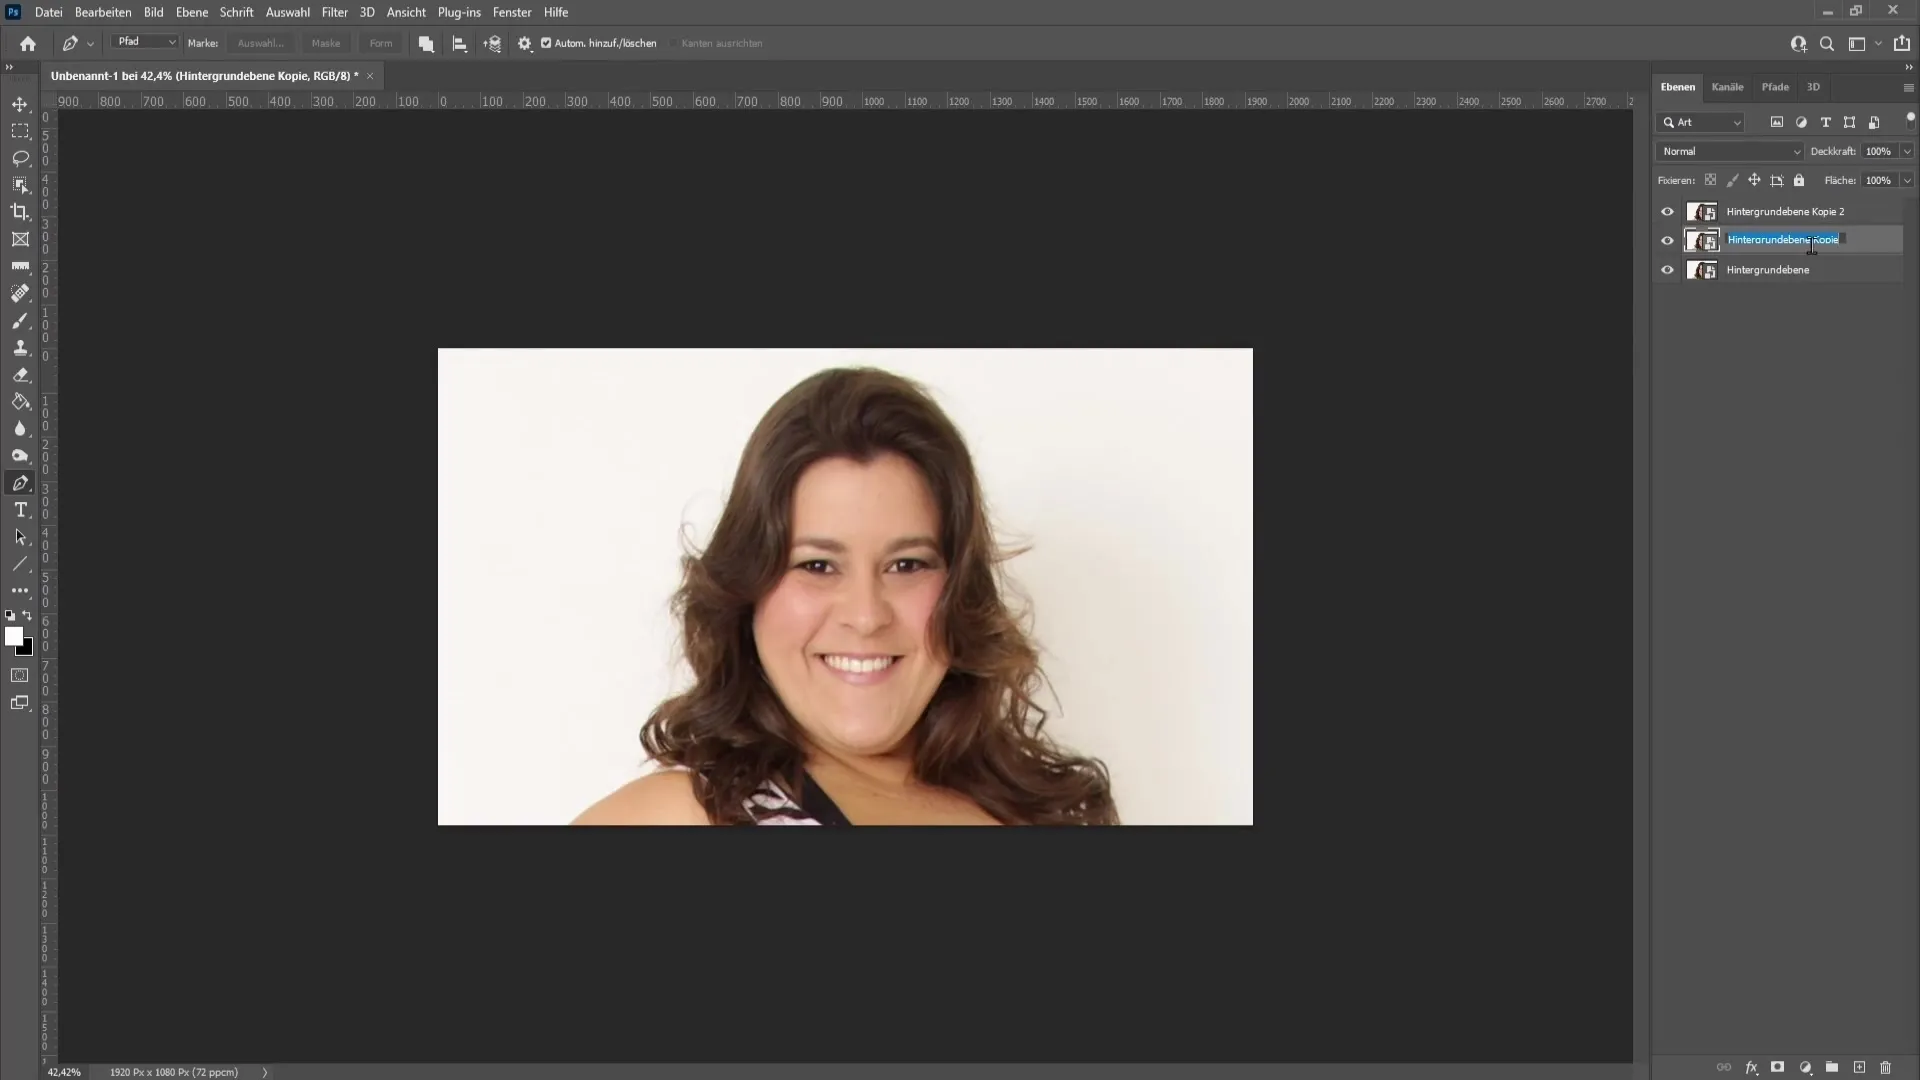
3. Copying the Layers
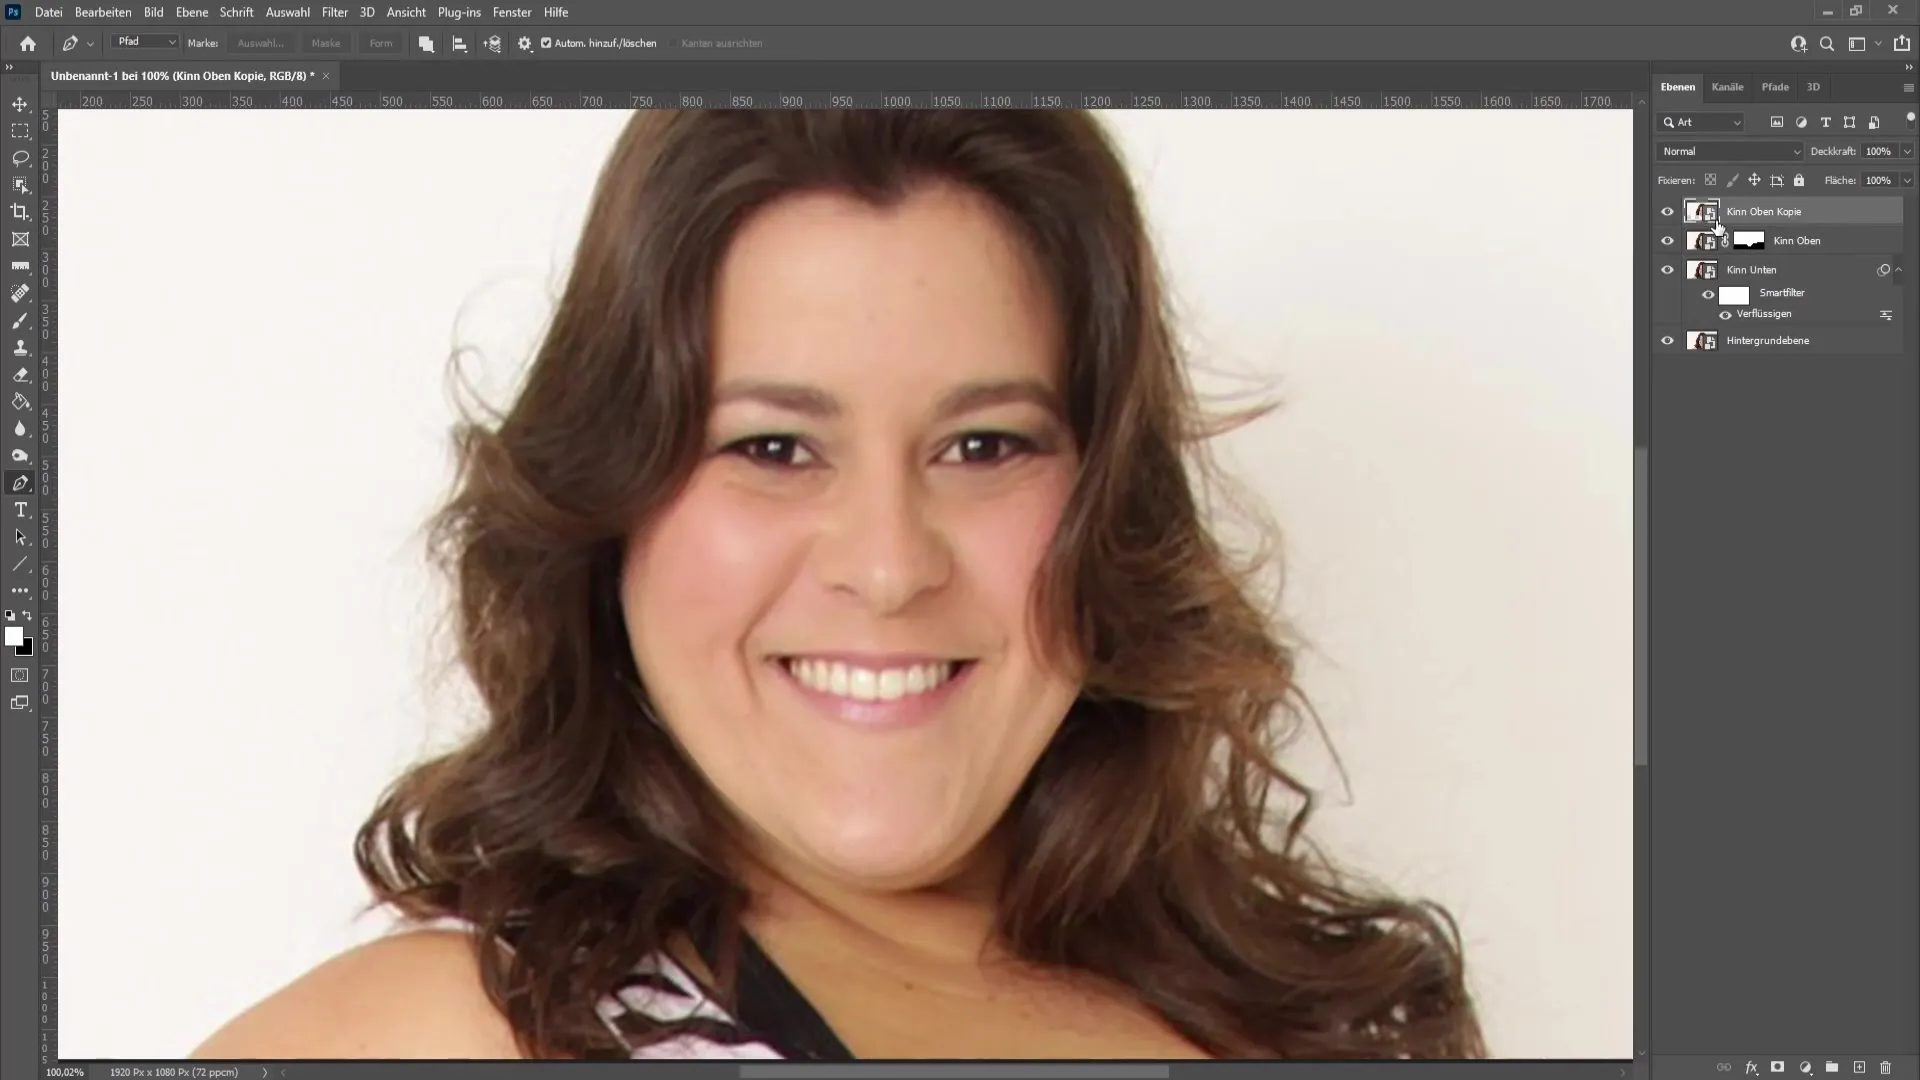
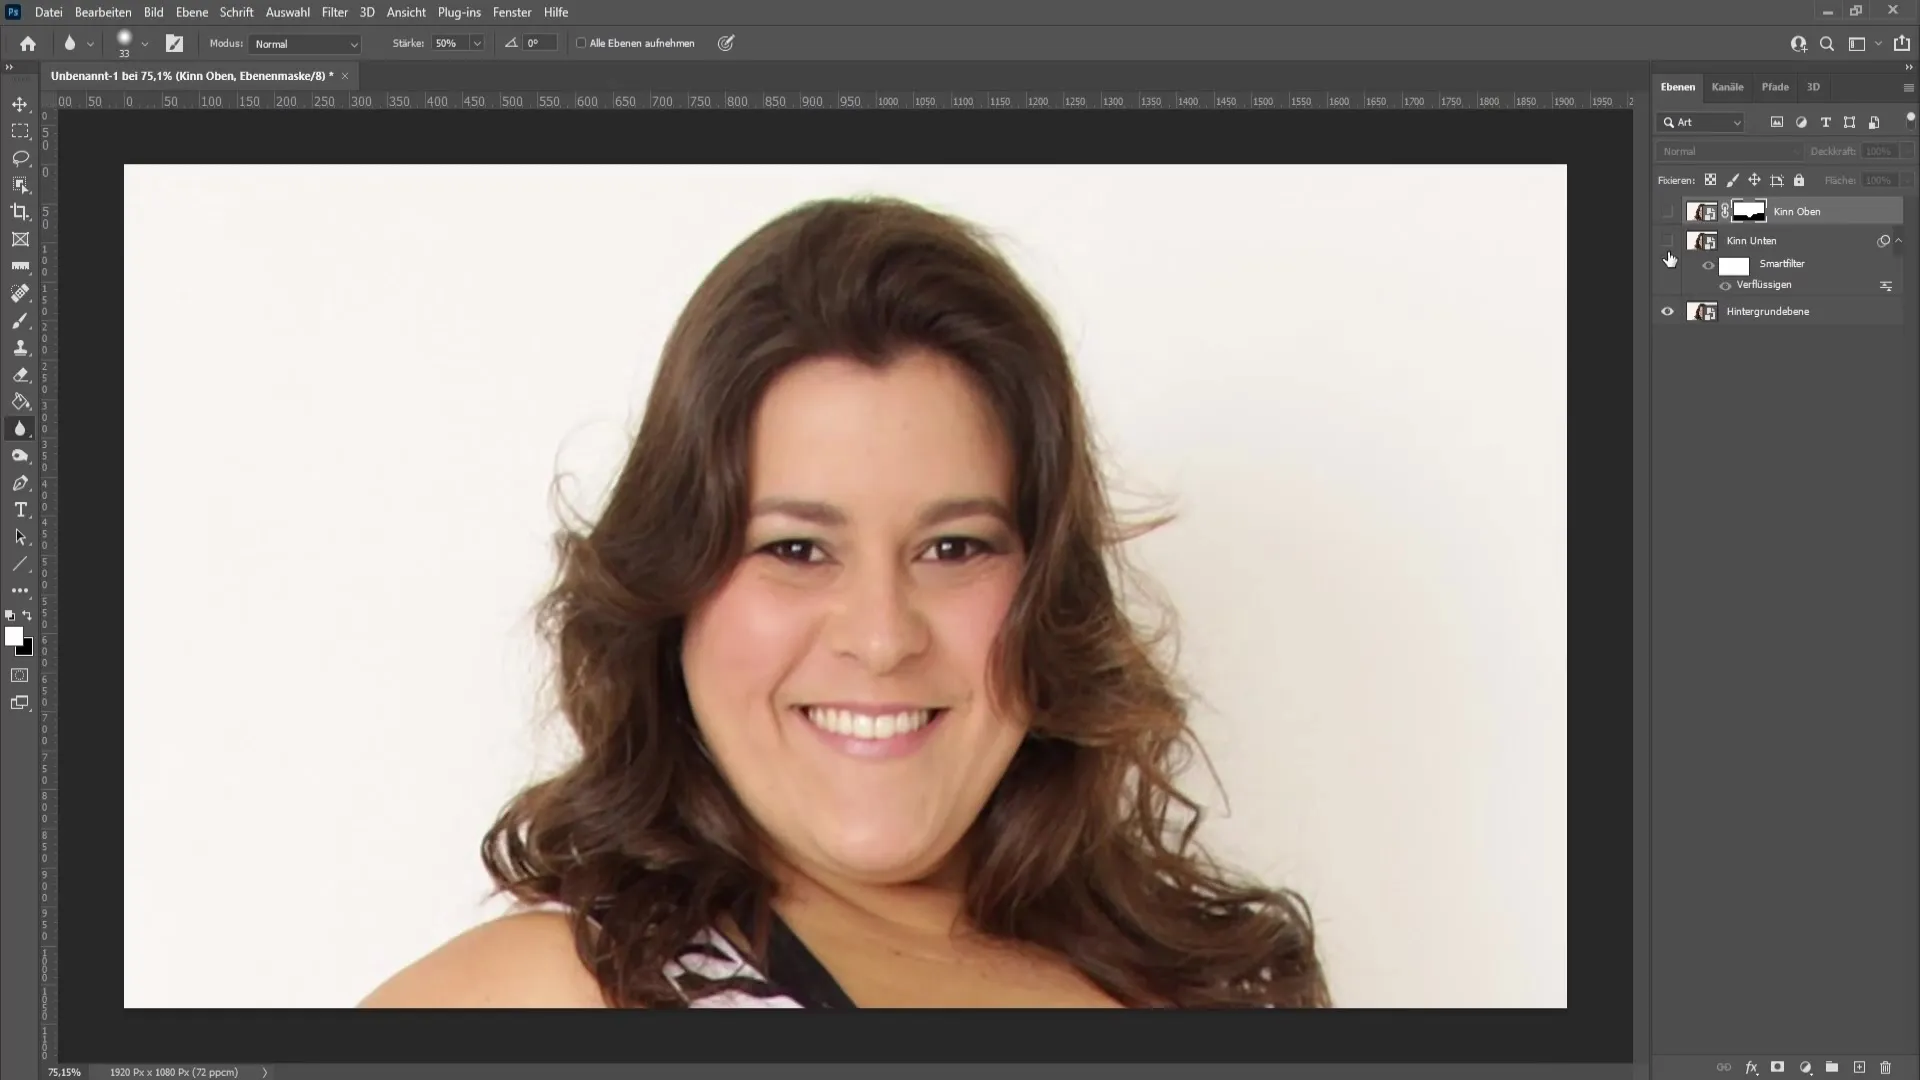
Now, you should make two copies of the background layer to avoid risking your edits. Hold down the Control key and press "J" (or Command and J on Mac). Rename the lower copy to "Chin Bottom" and the upper copy to "Chin Top".
4. Working with the Layer Mask
Switch to the "Chin Top" layer. Click on the layer mask icon. This will make only the upper chin visible, while the double chin below remains hidden.
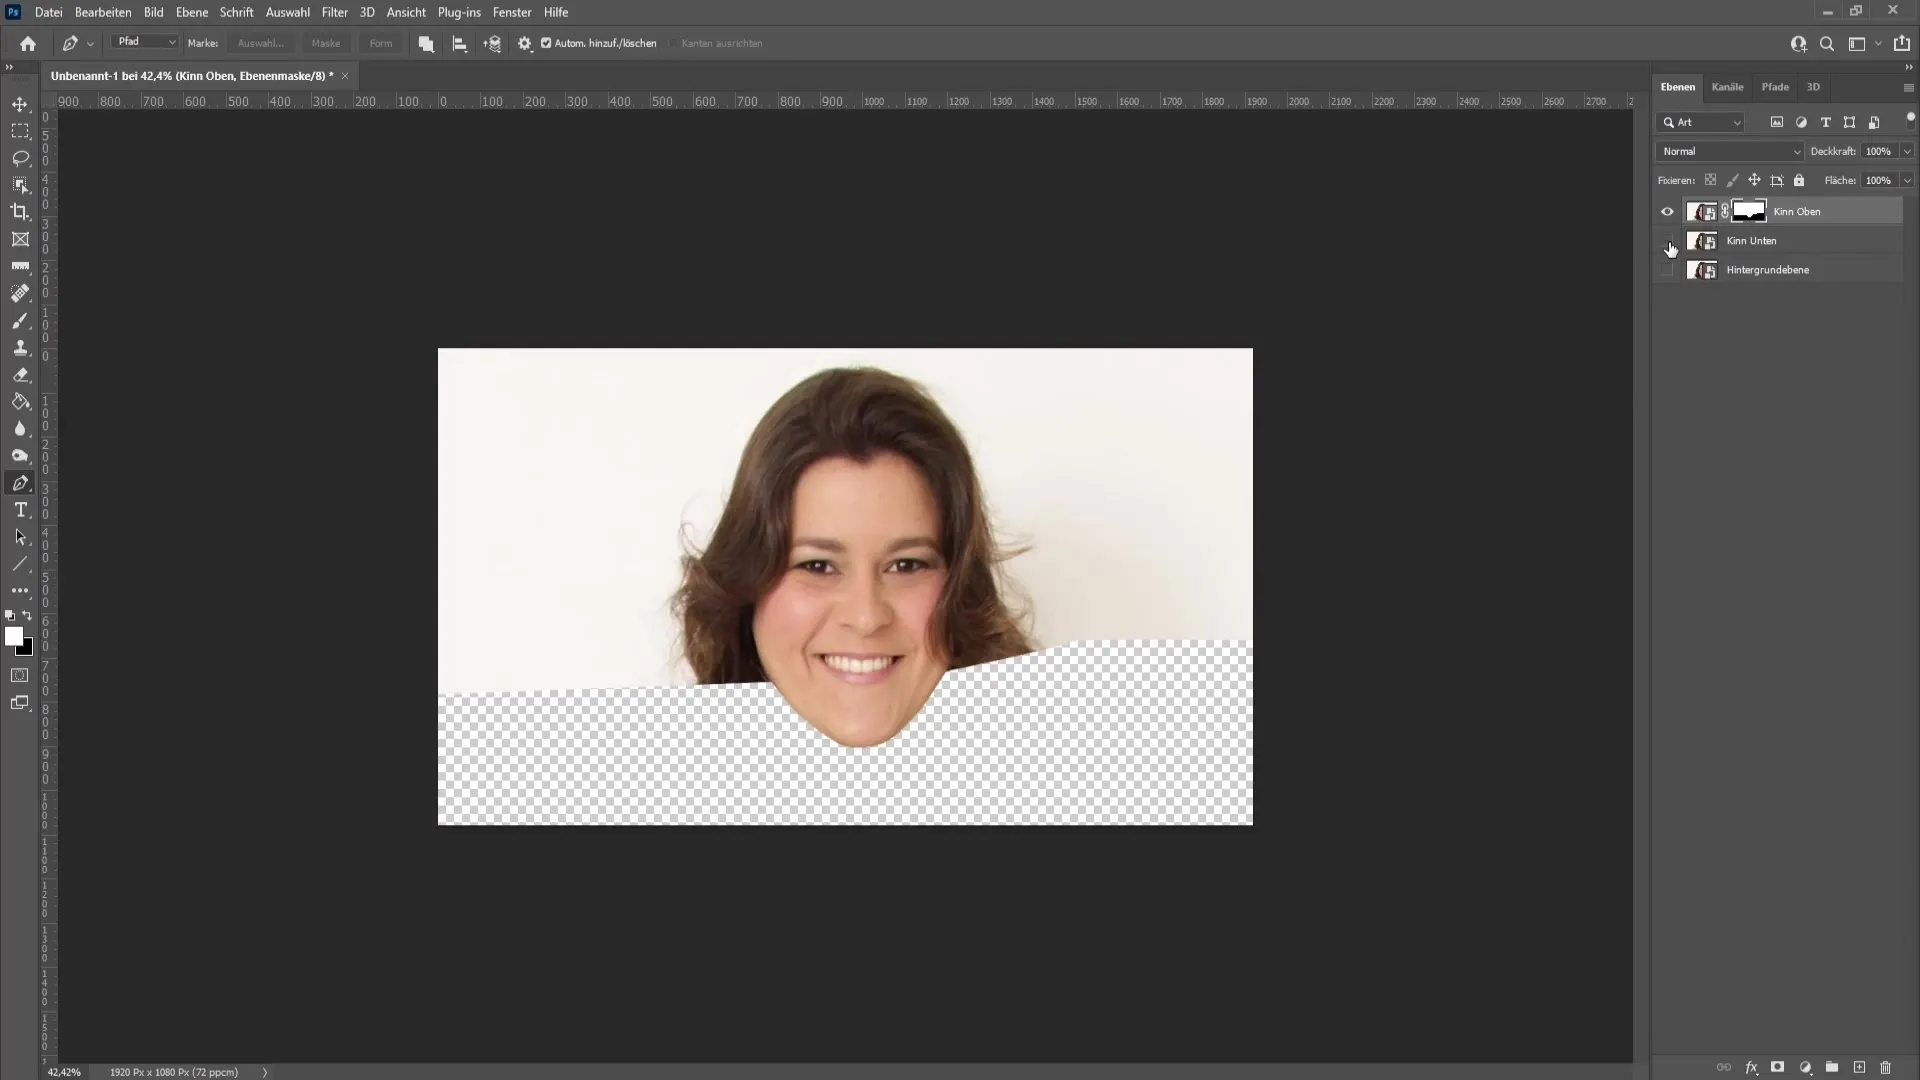
5. Creating a Copy of the Upper Chin Layer
It is also important now to create another copy of the "Chin Top" layer. Right-click on the layer and choose "Rasterize Layer".
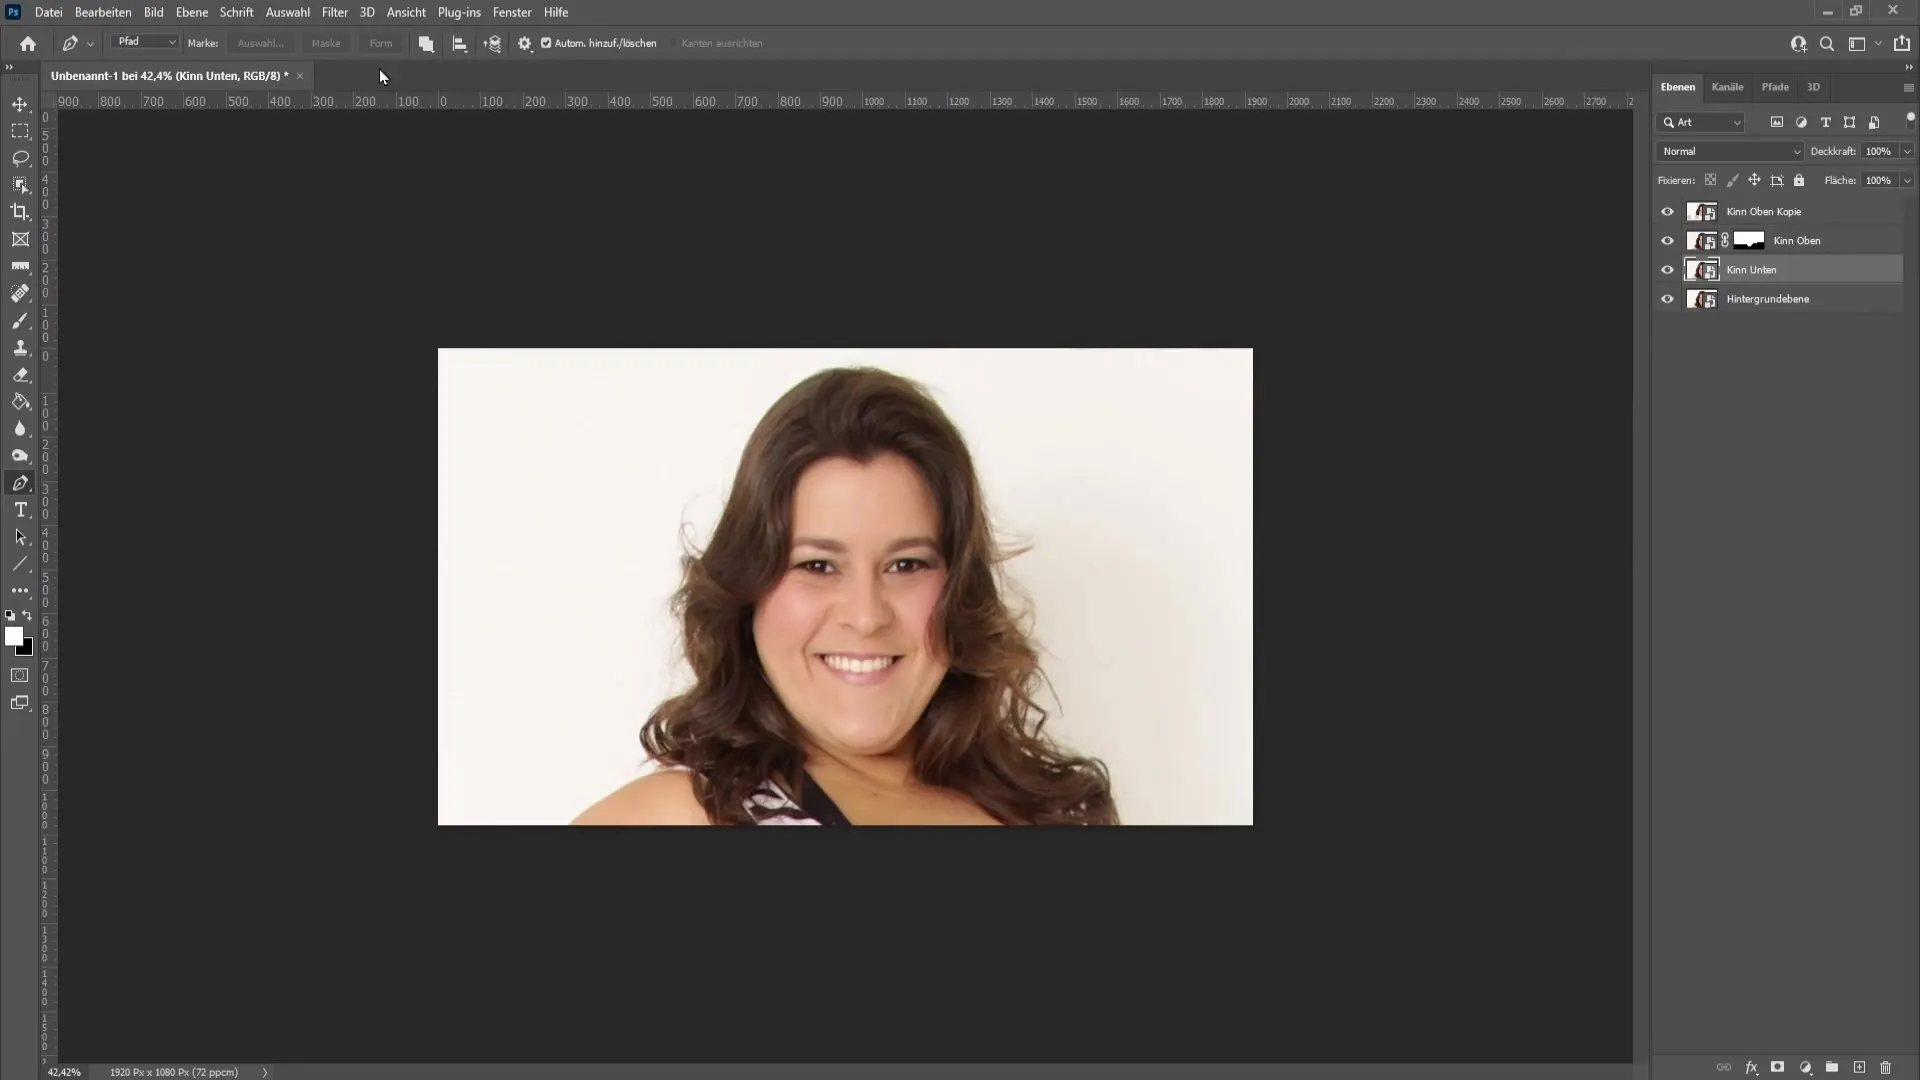
6. Applying the Liquify Filter
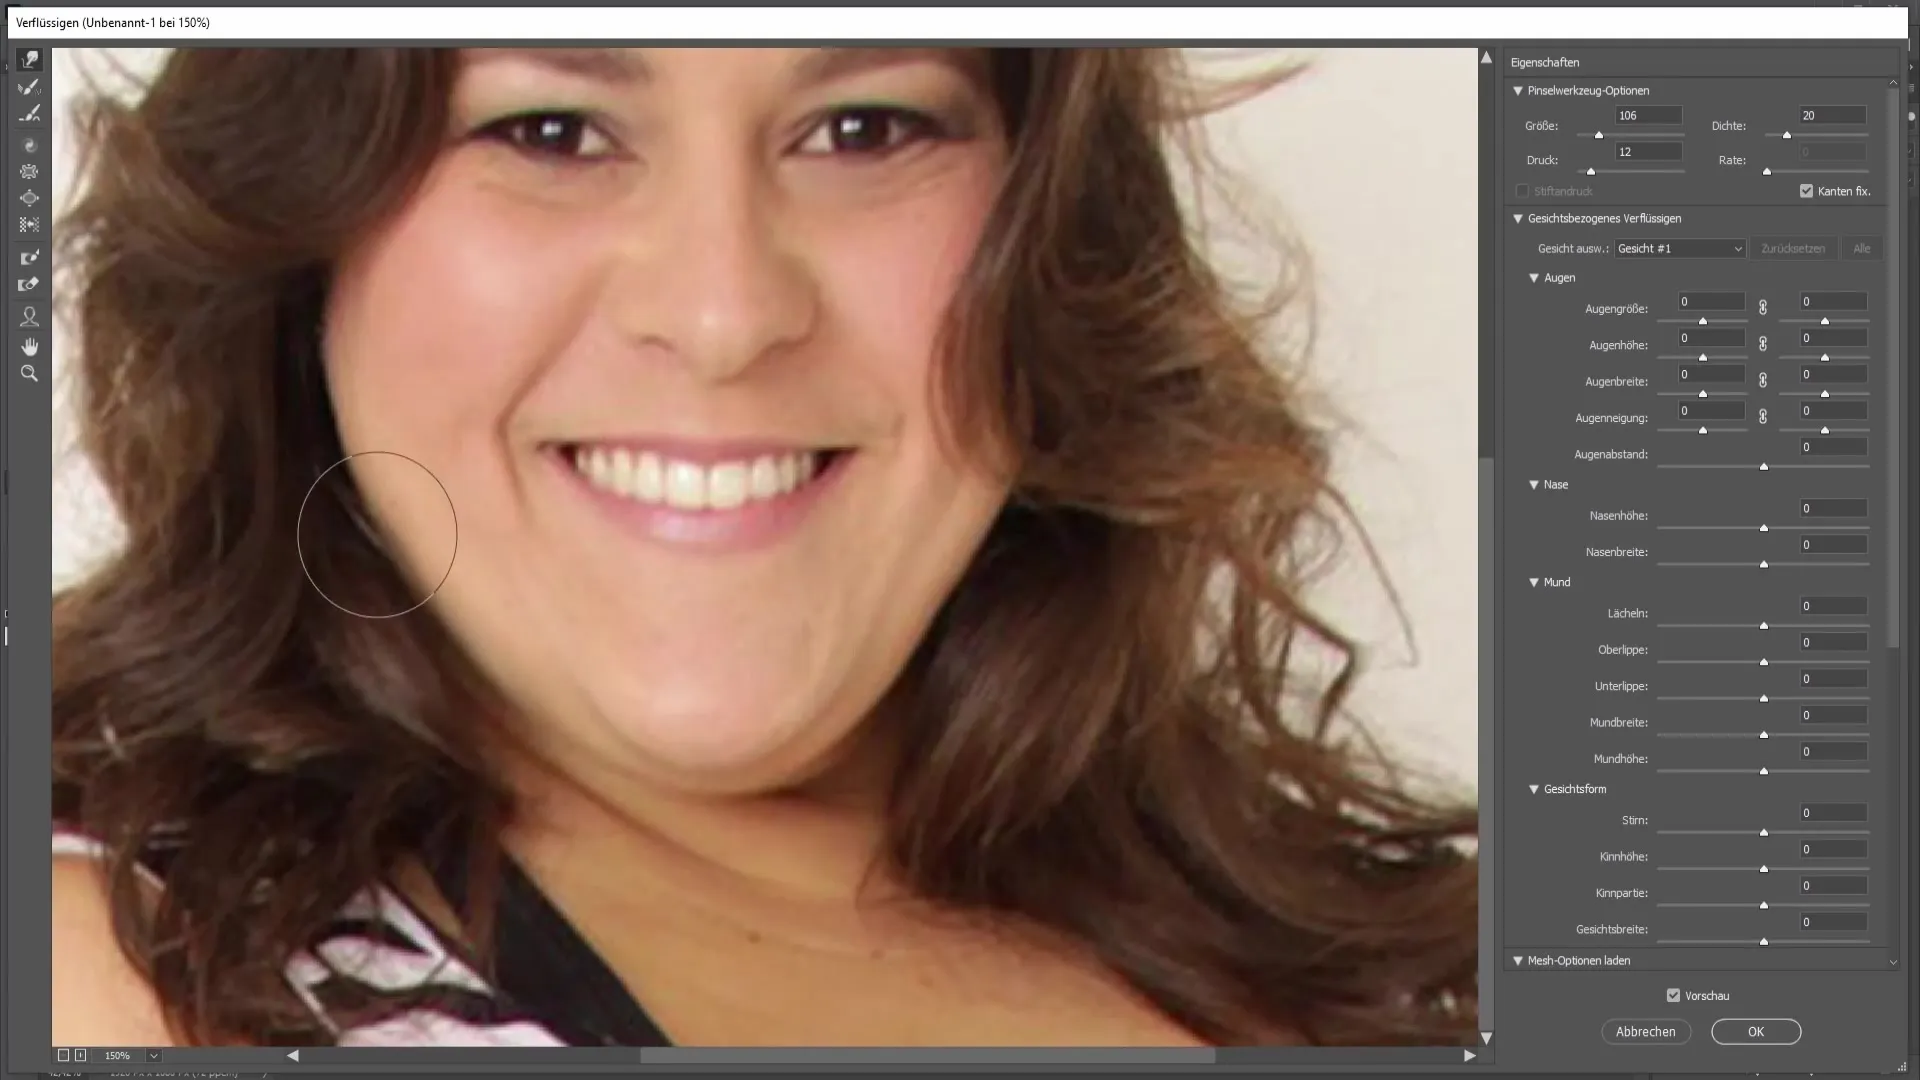
Now go to "Chin Bottom" and navigate to the filters, select "Liquify". Make sure you have "Chin Bottom" selected at this point and set the opacity to zero initially.
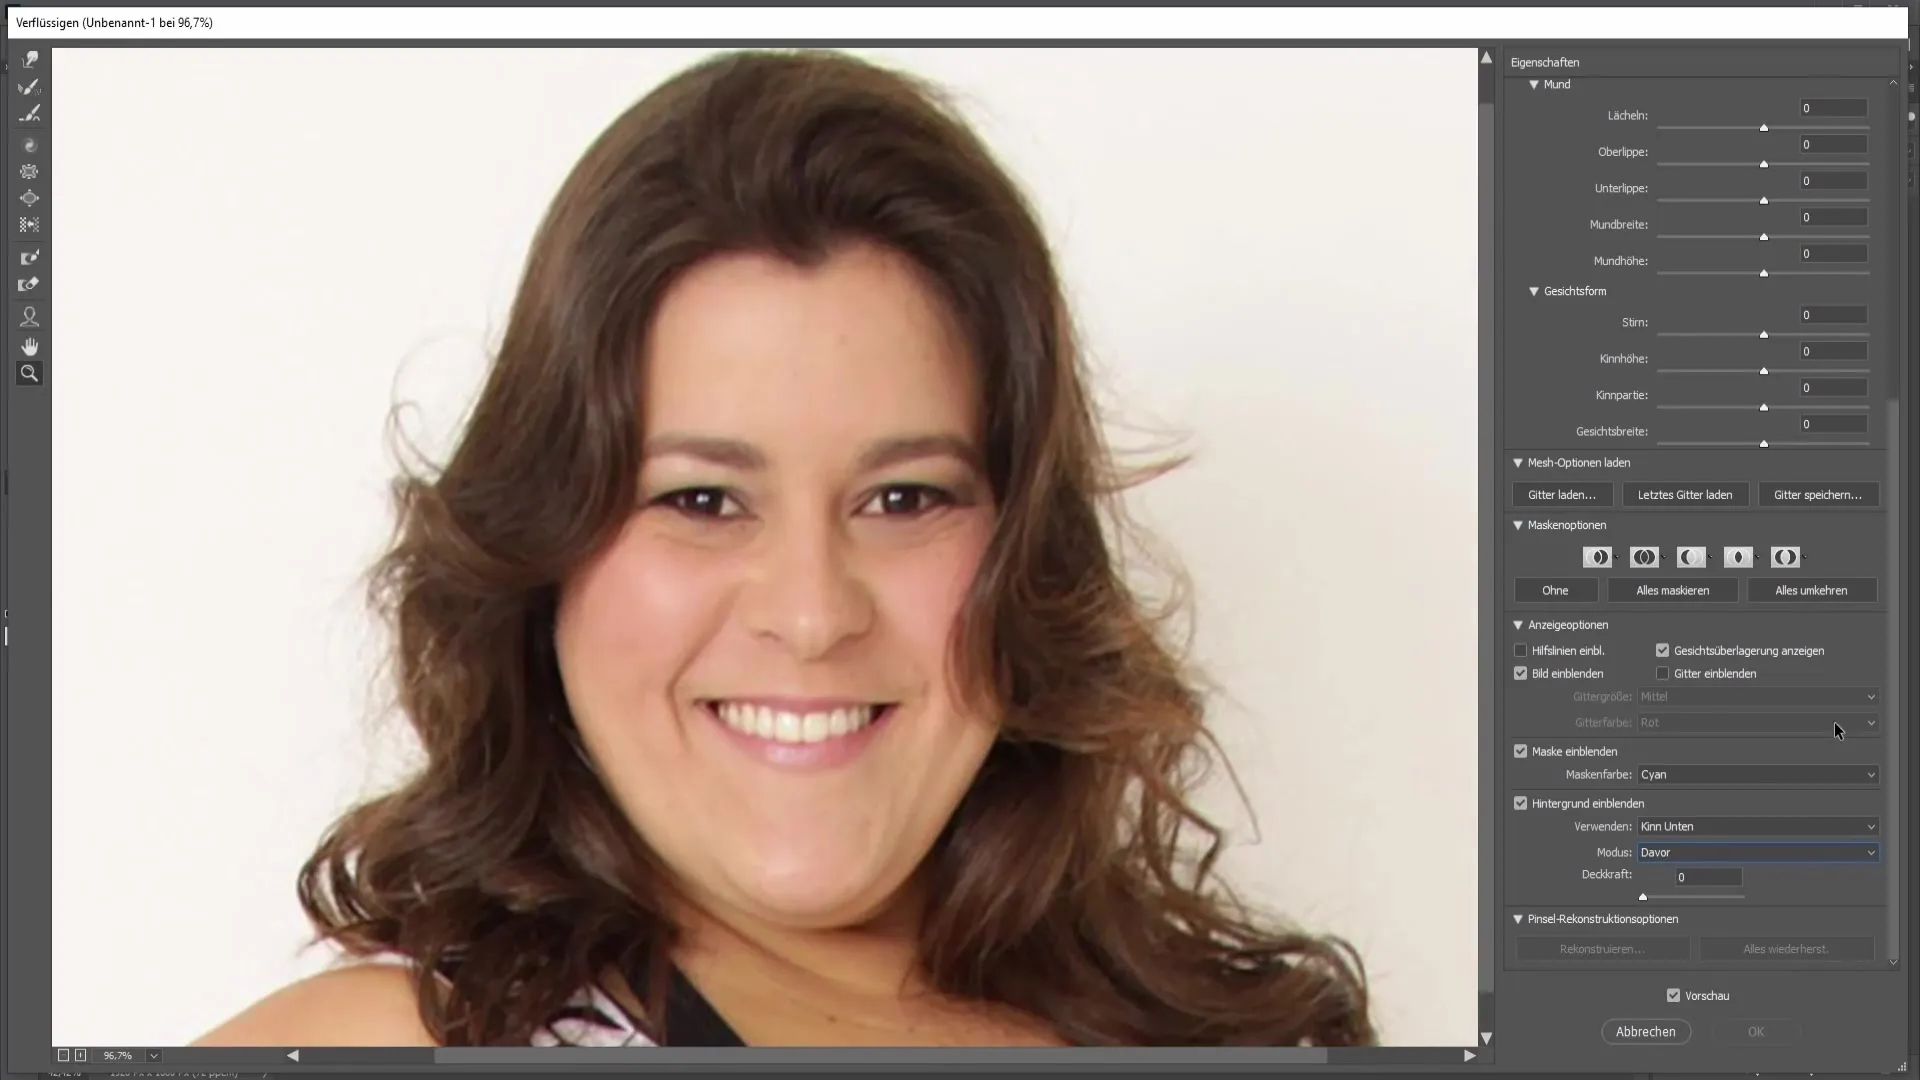
7. Using the Liquify Tool
Select the Forward Warp tool and set a pressure of about 12. If a message appears, select "Don't show again" and confirm. You can then gently push the double chin inwards.
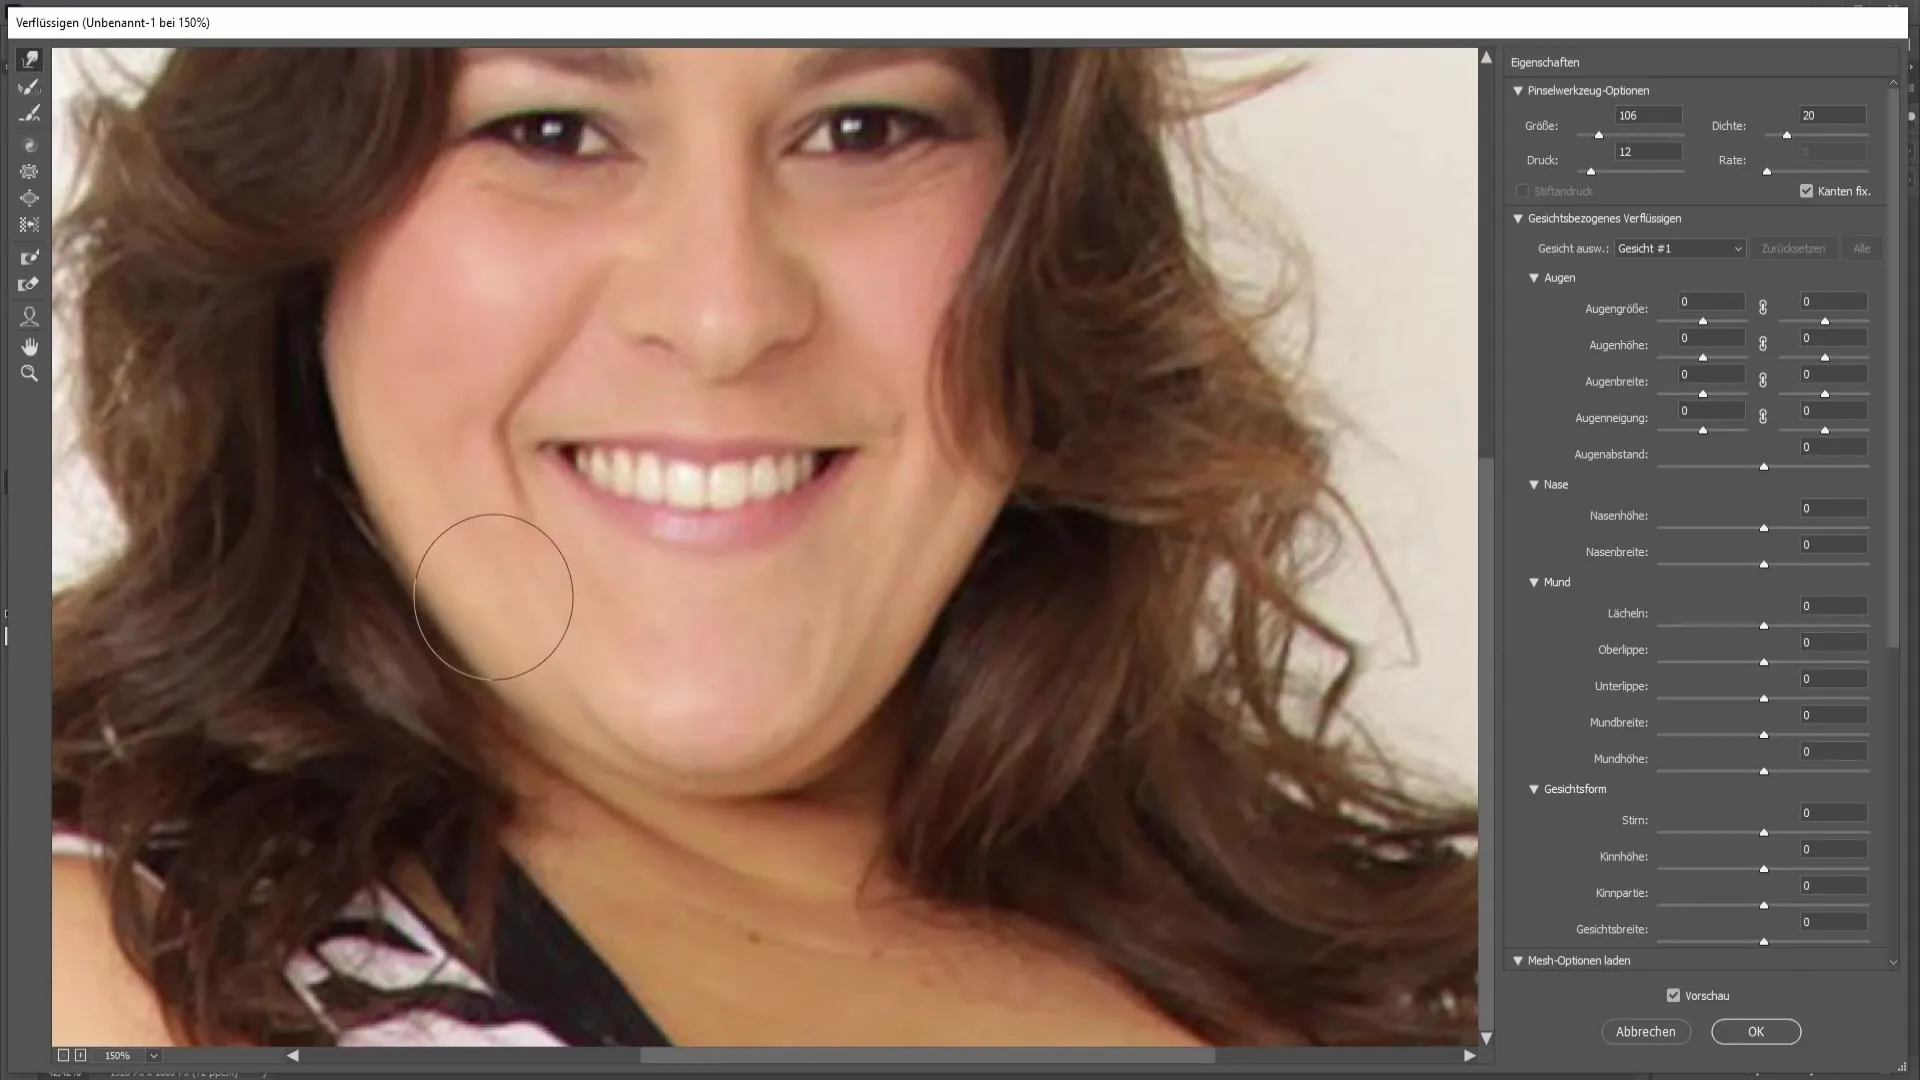
Take your time with this to achieve natural results. The goal is to reshape the chin area to make it more appealing.
8. Checking the Result
If you are satisfied with your result, click on "OK". A before-and-after view will show you how effective your edit was.
9. Delete unnecessary layers
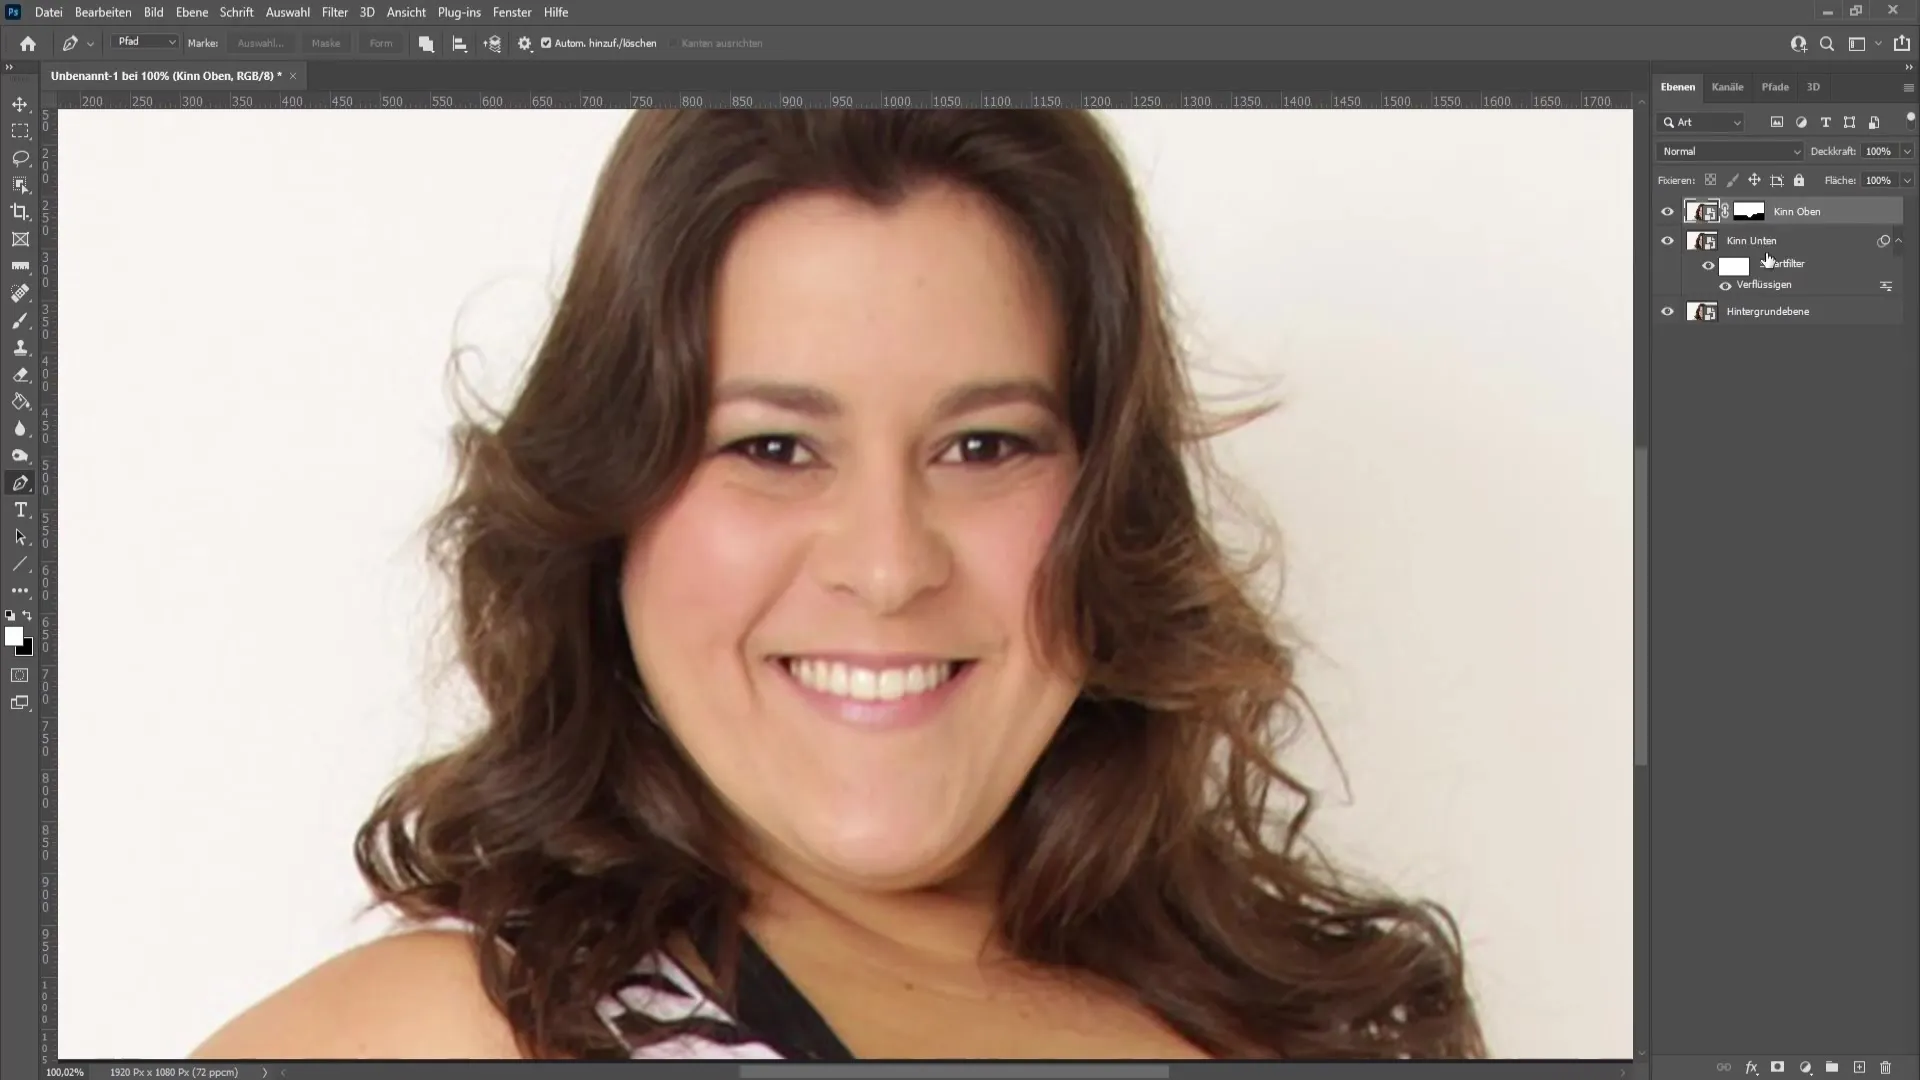
You can now delete the top layer that you needed for the Liquify filter, as you no longer need it.
10. Blur edges
To create a harmonious transition between the edited and untouched skin, use the Blur tool. Set the strength to about 50%. Then gently go along the edges to soften them and optimize the merging of the chin layers.
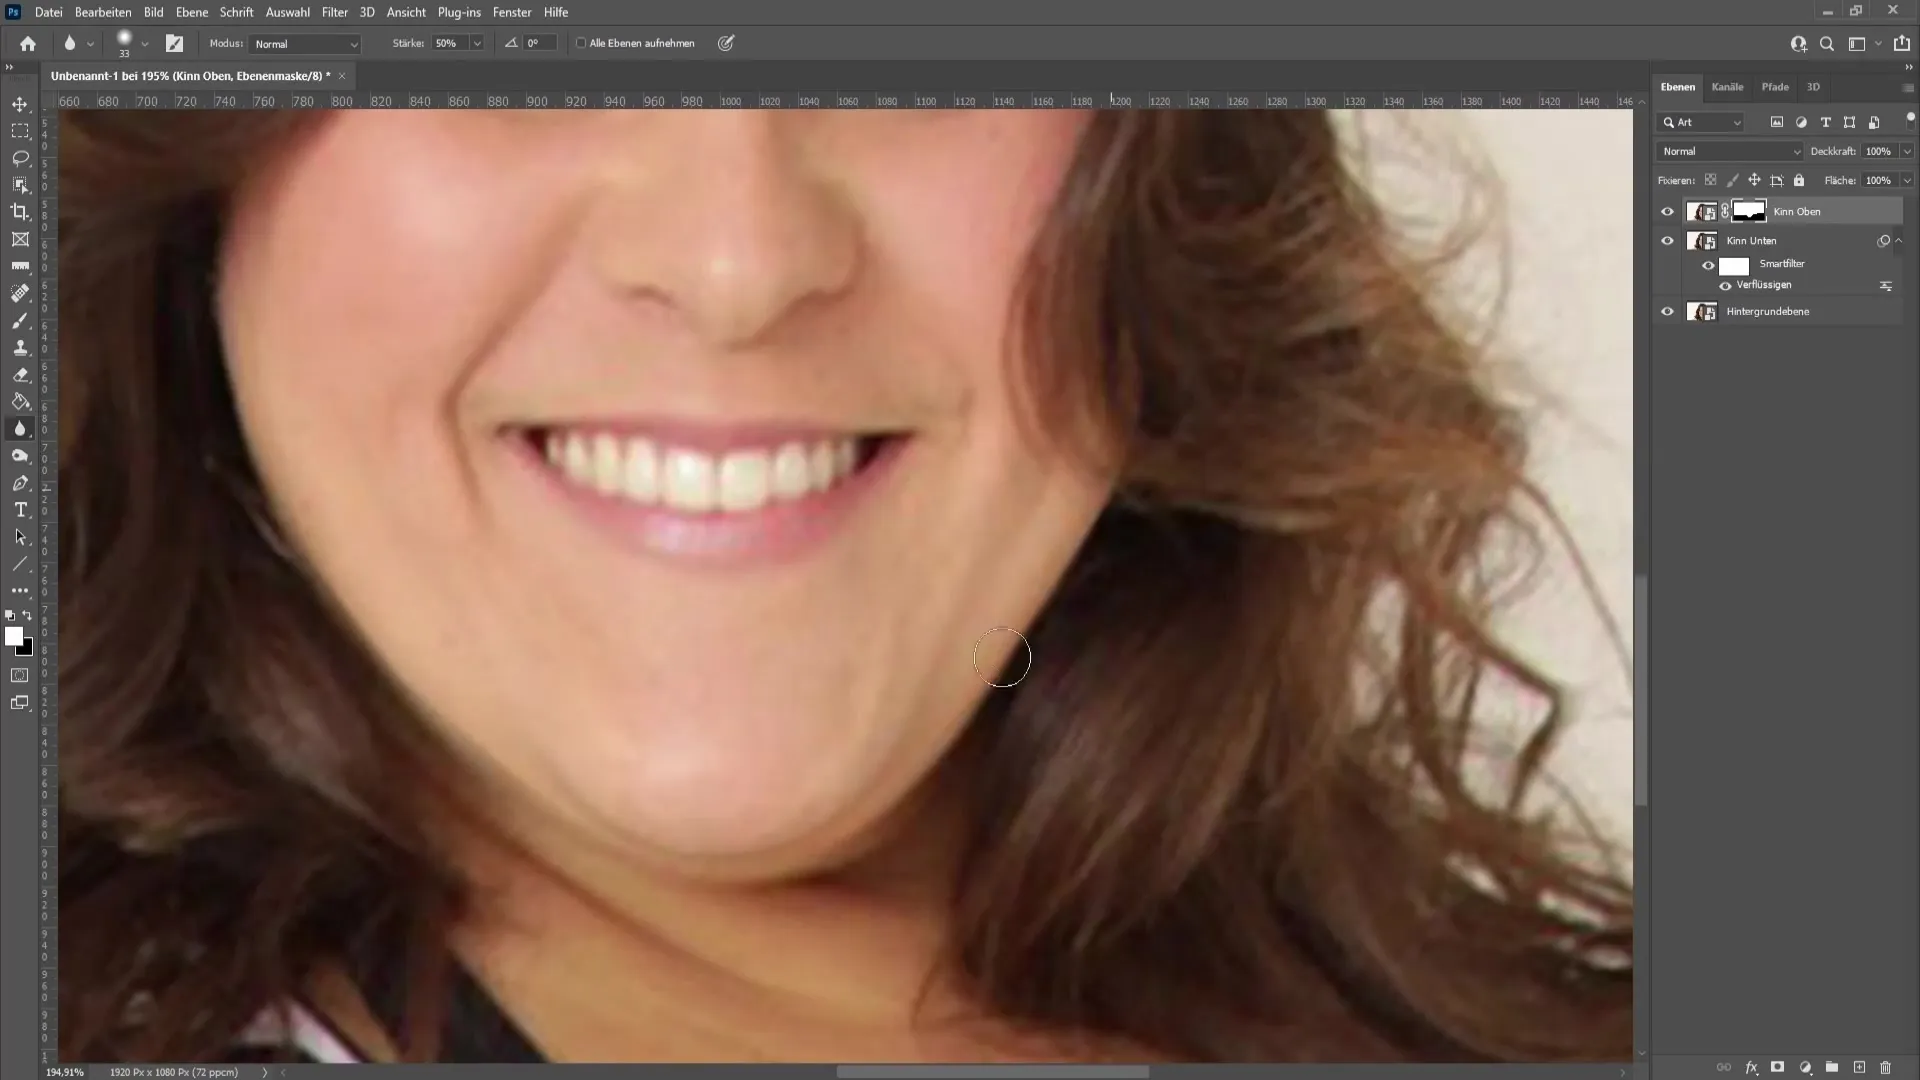
With these steps, you have removed the double chin in Photoshop and achieved a much more natural look. Feel free to experiment with the edges until you are satisfied with the final result.
Summary
You have learned how to remove a double chin using Photoshop. By making precise selections, working with layer masks, and using the Liquify tool, you have followed the key steps to naturally enhance the image.
Frequently Asked Questions
How can I remove a double chin without Photoshop?There are other software and mobile apps that offer similar features to Photoshop for double chin removal.
Could removing a double chin make the image look unnatural?It is important to make changes subtly to achieve a natural result.
How can I undo my changes?In Photoshop, you can undo changes at any time using the "Undo" command or the Ctrl+Z (Cmd+Z on Macs) keyboard shortcut.


