2.1 Camera purchase criteria
What criteria should be considered when buying a camera? In addition to the price, there are many other aspects to consider. Here are a few of the most important ones.
Figure 2.1: Ease of use is certainly one of the most important purchase criteria. Only if the camera sits comfortably in your hands will you be able to shoot with it for hours at a time without getting tired. It is therefore necessary to have tried out your favorite model personally. Nikon D3 with 2.8/105mm Micro Nikkor. 1/200 second, Blender 7.1, ISO 800.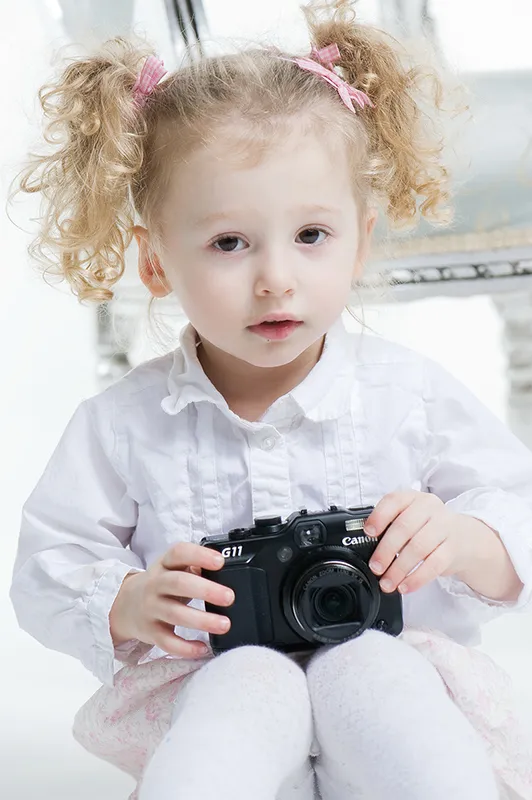
(Photo © 2010: Jens Brüggemann - www.jensbrueggemann.de)
How many megapixels do people need?
When buying a camera, many photographers first and foremost look for a large number of megapixels. But do you really need them? It's certainly a good thing if you're an advertising photographer who can deliver sufficiently large amounts of data for 18/1 posters or trade fair displays. But how often does that happen?
Everyday work is different: More than 70% of the photos I take are primarily needed for publication on the Internet. In this respect, I don't attach great importance to dozens of megapixels. Image quality is more important to me! Not the quantity.
In addition, large amounts of data have to be archived. And that costs storage space and time. So you'd better think twice about whether you absolutely need a camera with so many pixels!
Figure 2.2: With these two cameras, I have everything I need. The Nikon D4 (Design by www.pimpyourcam.com) with an effective resolution of 16.2 megapixels and the Nikon D3X with 24.5 megapixels.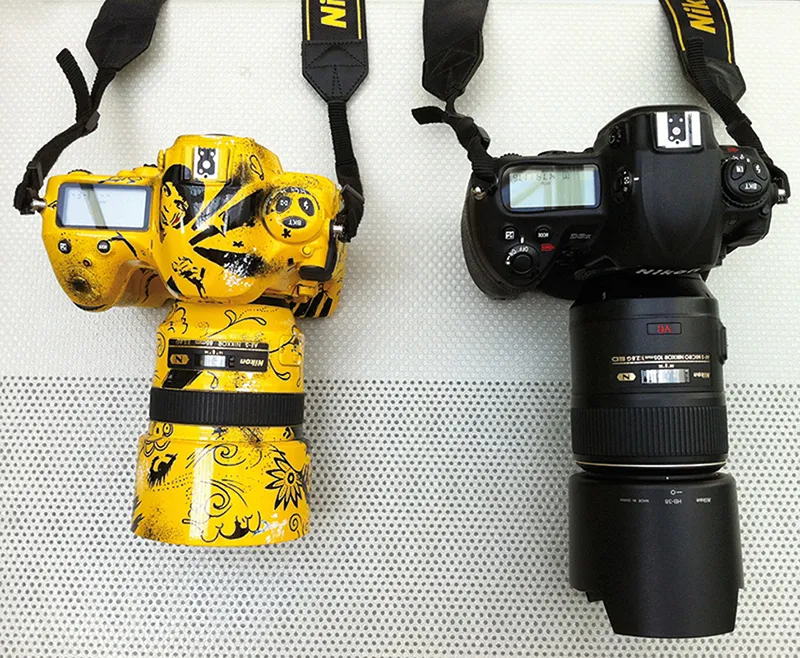
(Photo © Jens Brüggemann - www.jensbrueggemann.de)
2.1.2 Dynamic range
Hand on heart: How many of you know the dynamic range of your camera?
The dynamic range indicates how many f-stops of contrast the camera can handle (at a certain ISO value). Everything that lies outside the dynamic range is either reproduced in black without any detail or is washed out in white.
The dynamic range, which is technically specified, therefore plays a key role in determining whether the photos you take are technically flawless or have areas that are blurred or washed out.
This makes it clear that the widest possible dynamic range contributes significantly to the technical quality of your photos!
Figure 2.3: If there is still some detail in the darkest and lightest areas of the photo, this indicates a high dynamic range. For example, the dynamic range of the Nikon D4 I am currently using is 13.4 f-stops (at ISO 100); this camera therefore has one of the largest dynamic ranges currently available. If you want to know the dynamic range of your camera, you should inform yourself in photo magazines or search the Internet. Nikon D3S with 2.8/14-24mm Nikkor. 1/1000 second, Blender 8, ISO 200.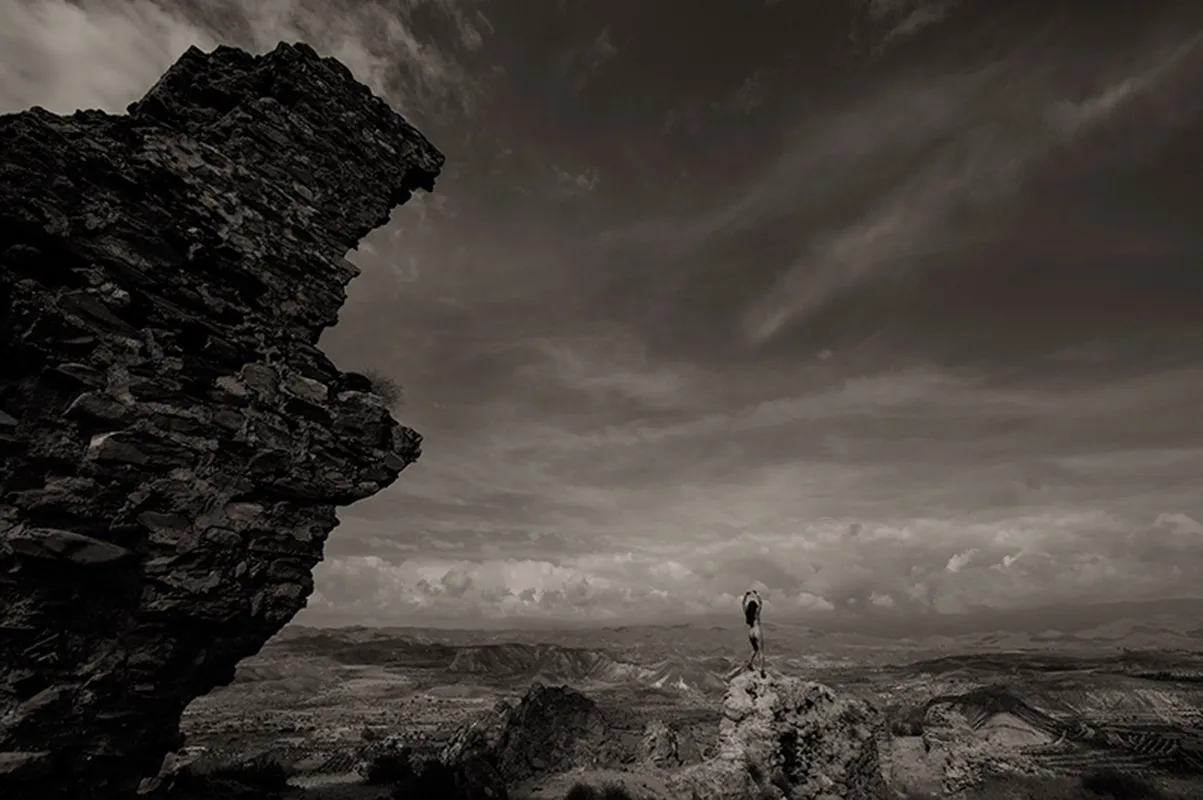
(Photo © 2011: Jens Brüggemann - www.jensbrueggemann.de)
2.1.3 The size (of the display!) matters!
At the workshops I organize, I notice time and again that some participants take photos with camera models that they seem to have grown fond of - but which are already outdated. This is often less visible in the image quality than in the display, which is too small, because the large, high-quality displays that allow you to view the image result in bright light (transreflective is the key word here) have only been around for a few years, depending on the camera model.
However, a large display is worth its weight in gold, because everyone will look at individual results on the camera display X times during his or her photo shoots. Especially if you have changed the lighting or are shooting with manual settings, you will look at the display to check.
Figure 2.4: I would really like to know how often I look at my camera's display during a photo shoot. A few dozen times for sure. Especially in a hectic working day, it's good if the display is large enough and has a good resolution so that I can capture and check as many details as possible as quickly as possible.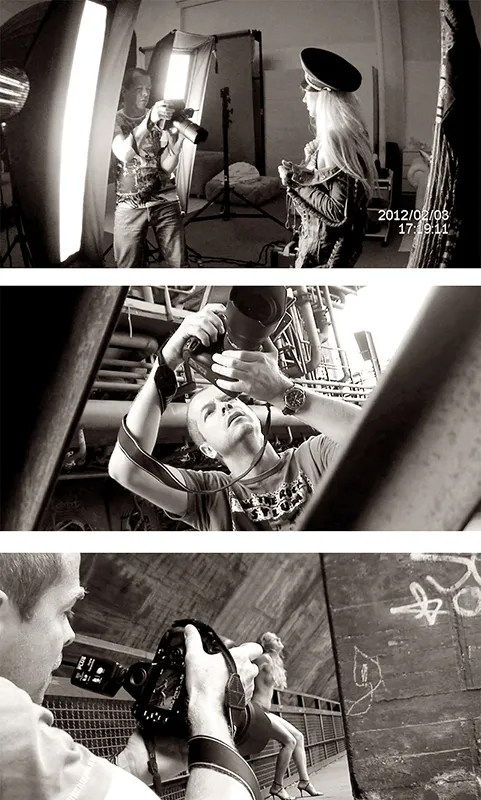
(Photos ©: Jens Brüggemann - www.jensbrueggemann.de (1) and LI-Design(2))
To save time, I recommend using the automatic image playback function. After each shot, the photo taken appears for a short time (how many seconds can be set in the camera menu). The display disappears immediately when you tap the shutter button again. (Or after a few seconds. This function saves time and you can keep your hands on the camera because you don't have to press a button to view the last photo you took.
Note: Even if you are still very happy with your "old" (camera), it may make sense to switch to a successor model. In addition to technical improvements, which will pay off above all in terms of image quality, the larger, more modern display will help you to work faster and more efficiently. This is absolutely essential for professional photographers!
2.1.4 Fast shutter release
A short shutter release delay is important if you don't want to miss a moment. Model photography is sometimes almost like action photography: it all depends on the decisive moment. There are fractions of a second when the model simply looks much better than usual; you shouldn't miss these moments!
If you don't believe how much more convenient an extremely short shutter release delay is, you should compare a camera with a short shutter release delay with one with a longer one immediately afterwards. The difference is enormous! Just try it out!
Figure 2.5: A very short shutter release delay enables precise work. I decide when the photo is taken, not the camera! Anyone who has ever taken a photo with a camera with a short shutter release delay will never want to do without this feature again.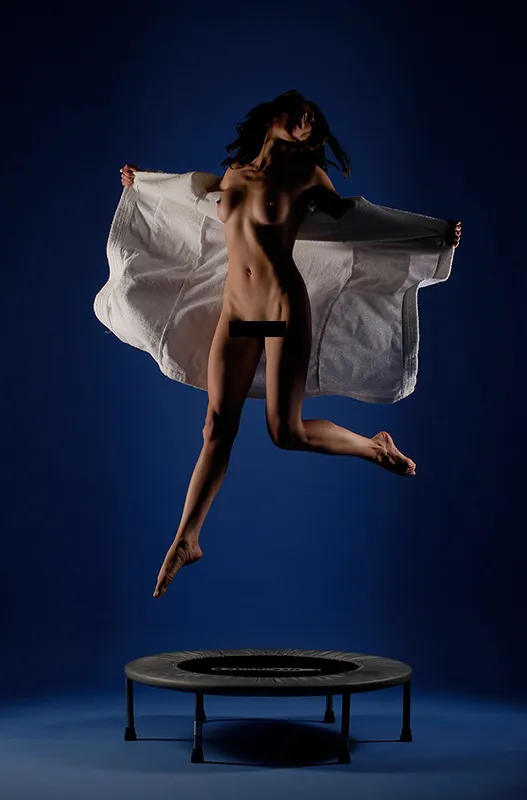
(Photo © 2010: Jens Brüggemann - www.jensbrueggemann.de)
2.1.5 100% viewfinder image
Back in my analog days, I got into the habit of photographing as accurately as possible and filling the frame. To this day, I choose the image section very precisely and avoid cropping the photo on the computer afterwards.
This way of working guarantees me maximum quality; I make full use of the camera sensor, which is why large enlargements are possible even with 16 megapixels (on my D4). On the other hand, if you always crop your photos, you are wasting potential unnecessarily.
However, utilizing the entire sensor means that I have to see exactly 100% of the viewfinder image in the viewfinder of my DSLR, otherwise cropping-free photography is not possible (not sensible). However, only a few cameras (only the professional models) have this feature. For me, however, it is K.O. criterion no. 1 when buying a camera.
2.1.6 Reliability and robustness
I am very careful with my equipment. Unlike other photographers, I don't leave my camera bag lying around open on the beach. I also take care not to touch the rear glass element when changing lenses. I would never touch my camera with dirty or sticky hands and I also avoid placing drinks near my camera equipment, for example. In short: I know the value of my equipment and treat it accordingly.
Nevertheless, there are situations in my day-to-day work where I have to take photos in adverse conditions: be it in the rain, in a dusty location or lying half in salt water on the beach due to the low perspective. It's good to know that my camera is dust and splash-proof.
Figure 2.6: For many years, I believed that camera manufacturers' claims about the dust and splash protection of their cameras were just a marketing argument. But after lying on the beach with my cameras half in the salt water (several times in the meantime) and having one wave after another wash over me and my camera, I know that they are much more robust than I had hoped in my wildest dreams.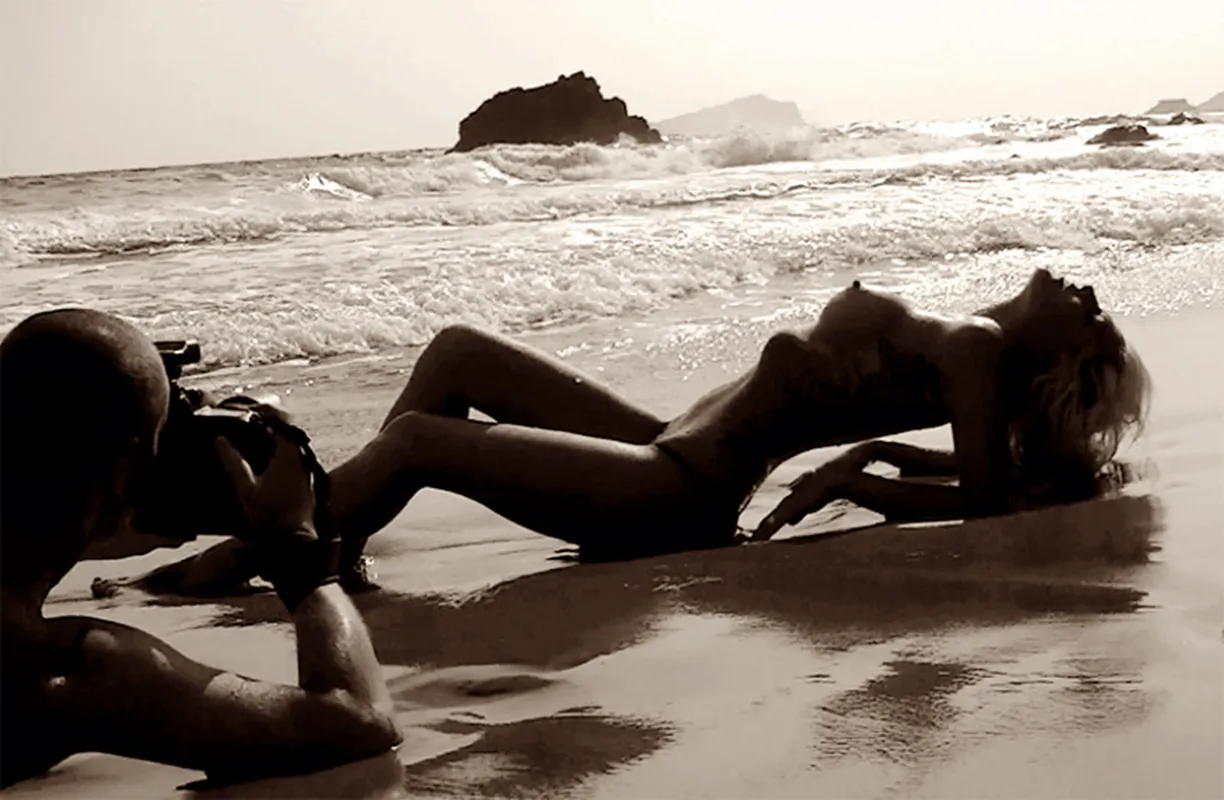
(Photo © Jens Brüggemann - www.jensbrueggemann.de)
2.1.7 Low image noise at high ISO values
As a photographer, you always come up against limits. However, thanks to technical progress over the last 10 years, these limits have been pushed further and further back.
One of the most significant technical developments in the field of camera technology is undoubtedly the fact that it is still possible to take photos in very good quality, i.e. with virtually no image noise, even in low light.
Why is this so important? There are great system flash units that enable carefree lighting thanks to TTL control.
The reason for this is that it is usually much more atmospheric to include as much of the existing low continuous light (for example at parties, night shots, etc.) in the photo thanks to the high ISO setting, and then only light up the scene very slightly using the flash unit. If you take photos at parties at ISO 100 and then possibly also use a low-light zoom lens, your photos will quickly look "dead-flashed". :-(
Figure 2.7: I took the shelf lighting into account in this photo so that the flash character does not dominate unattractively. I achieved this by setting the ISO sensitivity to 3,200 ISO. Nikon D3 with 2.8/105mm micro Nikkor. 1/100 second, Blender 7.1, ISO 3200.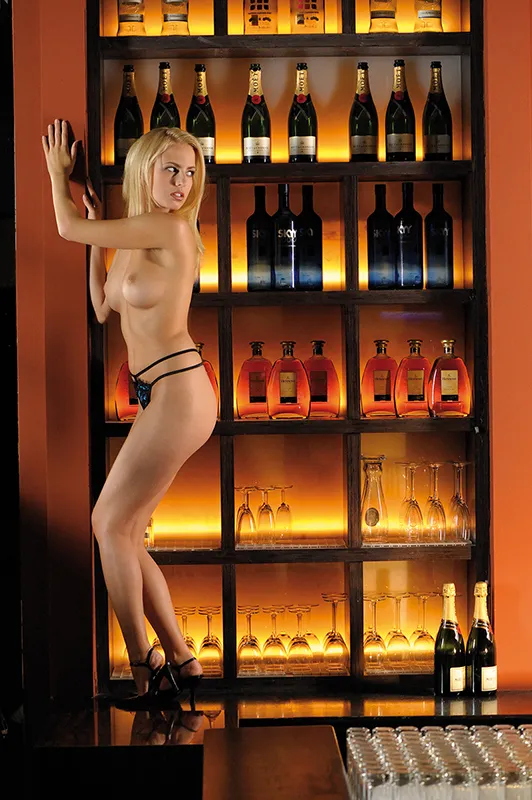
(Photo © 2008: Jens Brüggemann - www.jensbrueggemann.de)
2.2 Buying high-quality lenses
Lenses are the "eyes" of your camera. Accordingly, the optical quality of these lenses is very important.
Almost even more important, however, is the "light intensity" of the lenses. This determines which photographer can continue taking pictures at dusk or in semi-darkness, while the others are already packing up their cameras.
The extent of the difference between lenses of different light intensities is demonstrated here using the example of "party photos":
"Party photos" example:
- A uses a normal 50mm lens with a lens speed of 1.4.
- B, on the other hand, uses a zoom lens with a speed of 4 for his photos.
- The difference is therefore 3 (whole) f-stops.
- One f-stop difference means twice as much light (or half as much, depending on which side you look at it from).
- A only needs 1/8 of the light that B needs to be able to take photos (under otherwise identical conditions).
- In other words: B needs 8 times as much light as A.
This makes it clear how big the differences in the aperture values of the various lenses really are. This is also the reason why professional photographers attach so much importance to fast lenses. At parties, when they take place at night in poorly lit rooms, it is important to use fast lenses. Because this can be crucial for taking usable photos in adverse conditions with little light.
However, fast lenses have another advantage (which is important for creative photography): if you use them with an almost open aperture, you can work very well with limited depth of field. This means that you can take photos with very little depth of field, which can look particularly good in portraits (or product photos).
Figure 2.8: I wanted the shallow depth of field range for creative reasons. To optimize the sharpness performance, I stopped down the lens by one f-stop. Lenses are at their "crispest" when they are stopped down by one to two f-stops from the starting aperture. If they are then stopped down even further, only the depth of field increases, but not the "crispness". On the contrary: this then decreases again slightly. So if you want to take impressively sharp photos, you should set the aperture to a value between 4 and 5.6 for a lens with an initial aperture of 2.8. Nikon D4 with 2.8/105mm Micro Nikkor. 1/125 second, Blender 4, ISO 100.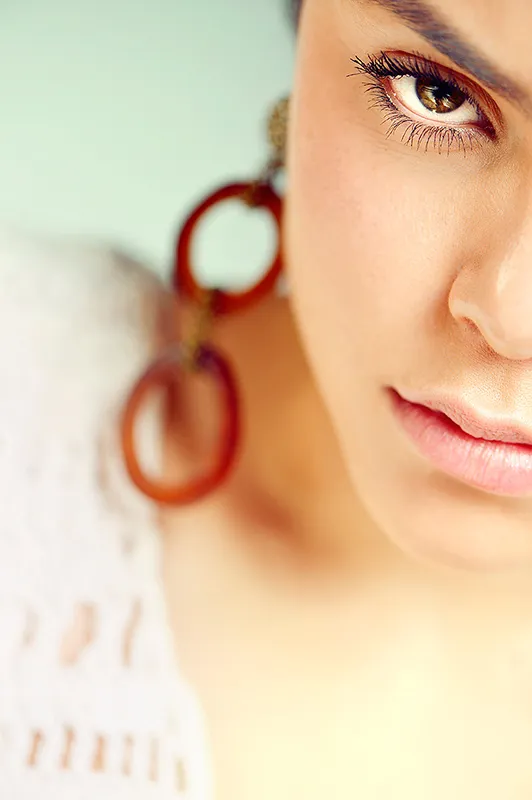
(Photo © 2013: Jens Brüggemann - www.jensbrueggemann.de)
Figure 2.9: Detail, original size (100%). Only slightly sharpened. Here it becomes clear why the 105 micro Nikkor is one of the favorites of many portrait photographers.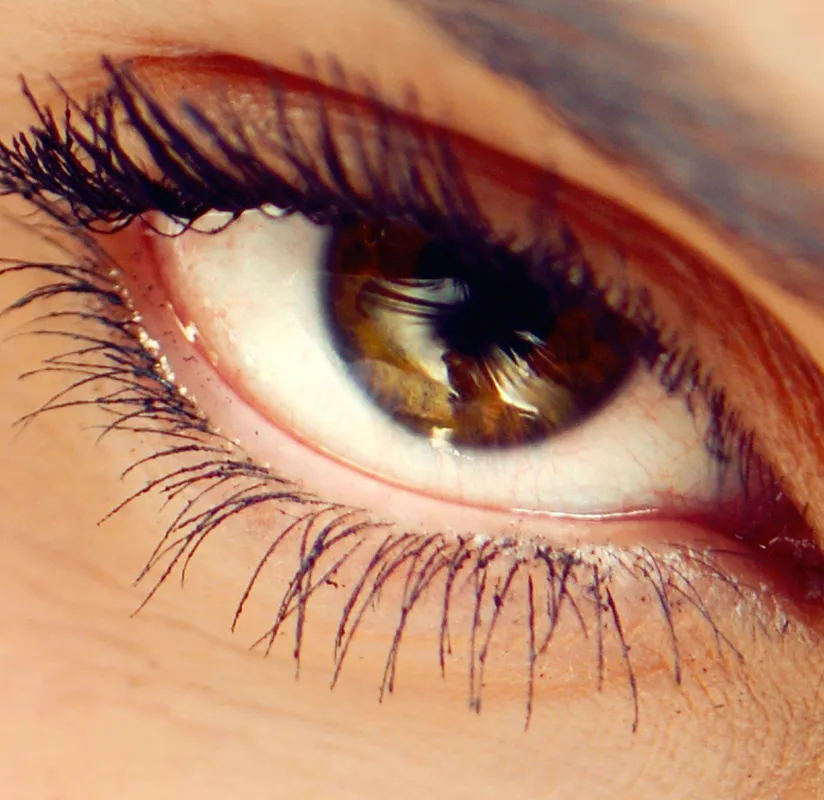
(Photo © 2013: Jens Brüggemann - www.jensbrueggemann.de)
2.3 Lighting technique
Note: If you want to take professional model photos and not limit yourself unnecessarily in your creativity, you cannot do without suitable lighting equipment.
Every model photographer should have at least the "basic equipment", consisting of a fill light, shading and system flash unit (which can be used unleashed).
If you want to "paint" with light, i.e. create a more elaborate lighting effect, there is no way around using a studio or outdoor flash system in the long term. Before you buy one, however, you should definitely read my tips on buying a flash system, which are published on PSD-Tutorials.de in my 10-part tutorial series "Professional lighting". Because it really is important to find a suitable flash system that meets your individual requirements!
However, before you buy an expensive flash system, I recommend that you first attend a workshop where you are instructed in the operation and functionality of flash systems.
In addition, some photo retailers, for example the Calumet photo chain (stores in Berlin, Düsseldorf, Munich, Stuttgart, Essen, among others), allow you to rent and test various flash units. This makes sense, as it allows you to try out whether the selected system meets your requirements before you buy it.
Part 8 ("Lighting models skillfully") of this tutorial series describes in detail which tools can be used for professional lighting in model photography!
2.4 Computer technology
In the last 10-13 years, the computer has become an indispensable tool for photographers. For many of my colleagues, working on the computer takes up more time than working with the camera.
Digitally captured photos are saved and archived, have to be viewed, the best ones selected and then (depending on the photographer's understanding, more or less time-consuming) edited.
In short: the computer, including the corresponding accessories, is the photographer's most important tool (on an equal footing with the camera and lighting equipment). You should therefore think carefully about what requirements the computer technology should meet when buying. After all, you want to use it productively for several years.
Internal SSD hard disks are highly recommended, at least for professional photographers who are often under time pressure during a job. It was the biggest work relief in recent years after I had the hard disks replaced on my Mac. Now the computer (the operating system) starts in about 5 seconds, and the programs, especially Photoshop, start immediately. Before the upgrade, I used to make coffee (or tea) after pressing the start button to kill the waiting time. Today, I switch on the computer, enter the password and start working. Brilliant! :-)
The computer you use for image editing should also have a good graphics card and as much RAM as possible. The more RAM, the better!
The monitor should also not be selected solely on the basis of "price": After all, you will be spending quite a few hours concentrating on image editing on this. That's why the quality of the (naturally calibratable) monitor is more important than anything else!
For photographers who earn money by selling their photos, the issue of data backup and archiving is particularly tricky. Imagine the mega disaster if all your photos were irrevocably lost, deleted or destroyed...!
Figure 2.10: I therefore use RAID systems for archiving (here on the left is the "Blueline" RAID from Certon, which also has the advantage that it can be used as an FTP server). With RAID systems, any one (in the case of the "Blueline" even 2 of the 8) of the several existing hard disks can fail and all data is still 100% preserved.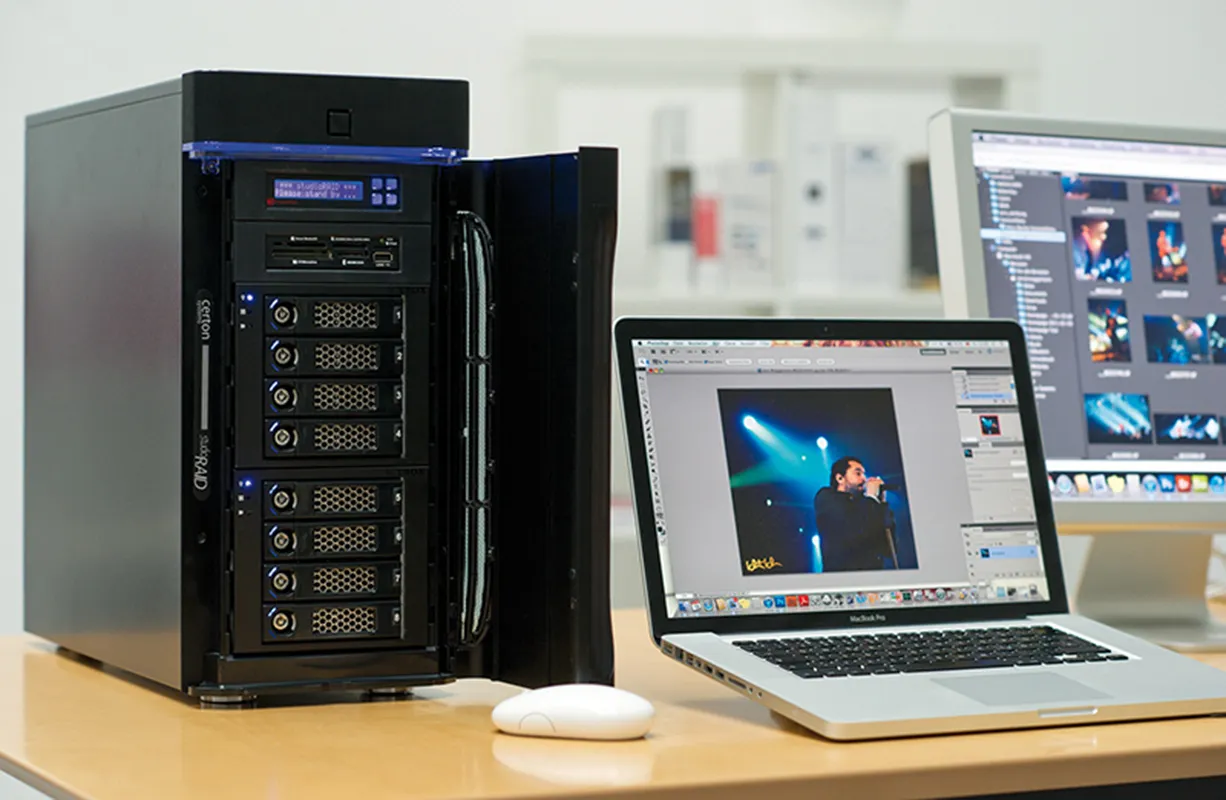
(Photo © 2011: Jens Brüggemann - www.jensbrueggemann.de)
For the greatest possible security (to prevent risks such as theft, fire or water damage), I have backed up my photos twice on RAID systems, both of which are located 100km apart from each other in independent locations.
The use of mobile hard disks is also indispensable, at least if you take photos on location and the photos cannot be archived immediately. Or if customers want to take the photos with them immediately after the photo shoot, which is almost always the case with advertising photos.
Figure 2.11: Digittrade's high security hard disks, which have a two-stage security system, prove to be quite ingenious when it comes to exchanging sensitive photos, such as erotic photos of celebrities or product photos of as yet undisclosed innovations. You need both a smart card and a PIN to access the 256-bit AES encrypted data on the hard disk.
For example, after a shoot, you can first send the customer the hard disk and then (after receiving the data storage) the smart card. Once the customer has received both securely, the 8-digit PIN can be given over the phone as a final step. Only then can the photos be accessed. The fact that these mini vault hard drives are also available as an SSD version and that the crypto key is automatically destroyed in the event of tampering attempts by unauthorized persons (but without attacking the data itself) rounds off this great system, which was awarded the IT Innovation Prize in 2012.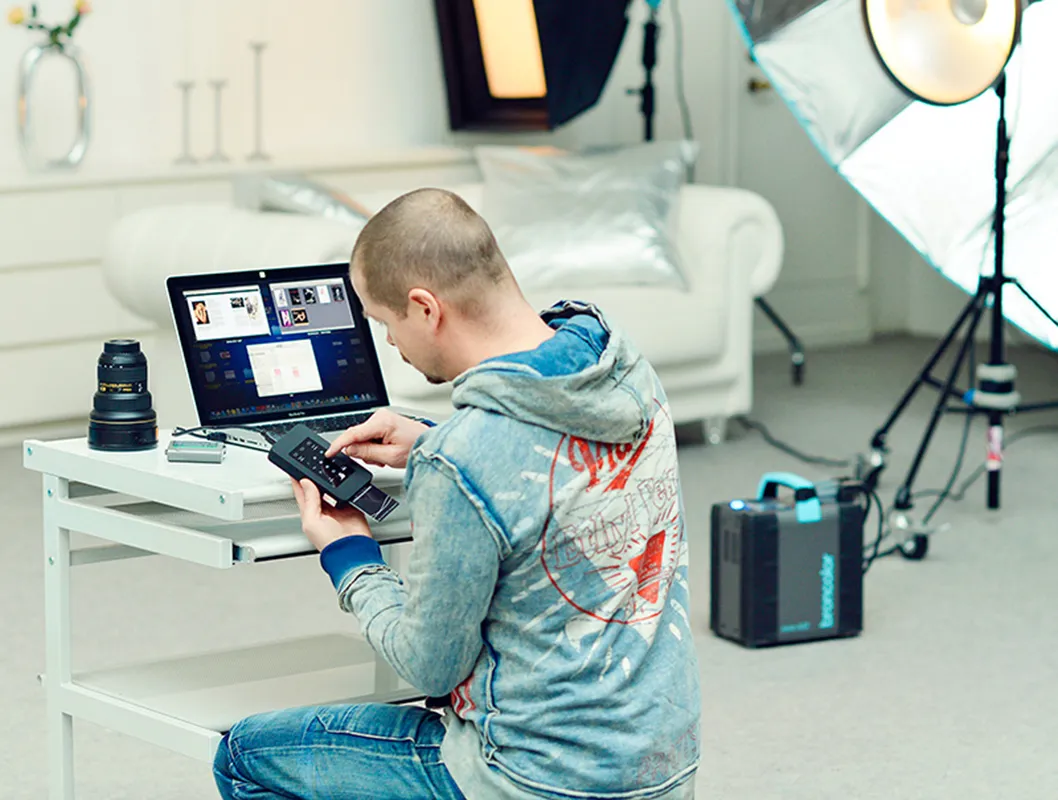
(Photo © 2013: Jens Brüggemann - www.jensbrueggemann.de)
Figure 2.12: Almost every photographer now has a graphics tablet with a pressure-sensitive pen. But there are also interesting innovations for those who prefer to (or most often) work with a mouse: This R.A.T.9 wireless gamer mouse not only has numerous customization options to suit individual hand sizes and working methods (including adjusting the angle of the thumb rest, changing the length, height and weight of the mouse), but it is also possible to assign individual commands or even macros to the buttons and wheels using different profiles and keyboard assignments (which you can program yourself using software). This makes working with Photoshop a pleasure even without knowing the keyboard commands!
For example, I have assigned the red scroll wheel with the adjustment (to the right: larger; to the left: smaller) of the tool tip circumference. The adjustable scanning accuracy (up to 6,400 DPI), which can be changed using a rocker switch, the ergonomic design and the option of charging the second Li-Io battery, which is included in the scope of delivery, using a USB charging station round off the package, which is well worth recommending (price between 99 and 159 euros).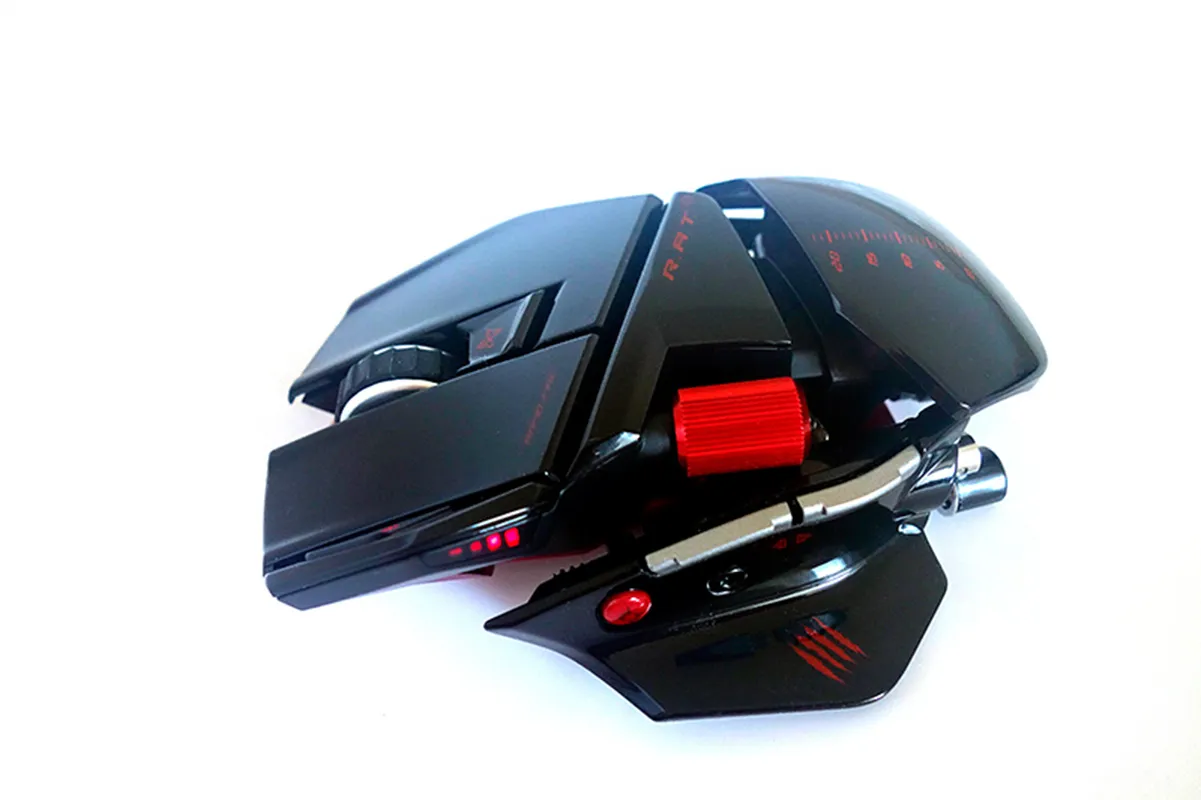
(Photo © Jens Brüggemann - www.jensbrueggemann.de)
2.5 Other accessories
Note: There are many other useful accessories for photographers! If you want to get an overview of what is available, we recommend the Brenner Fotoversand catalog (can be requested from www.fotobrenner.de). It lists more than 10,000 items relating to photography!
Figure 2.13: As my photo workshops take place not only in the Düsseldorf studio, but also abroad, for example in the south where there is a lot of sunshine, it is often difficult to check images directly on location due to the bright ambient light. Some experienced participants have therefore adopted the use of magnifying glasses, which are placed precisely on the display for subsequent viewing.
The rubber coating ensures that the display does not get scratched. And for regular, frequent image checks, the magnifying glass can be worn on a lanyard around the neck, for example (so that it is quickly to hand).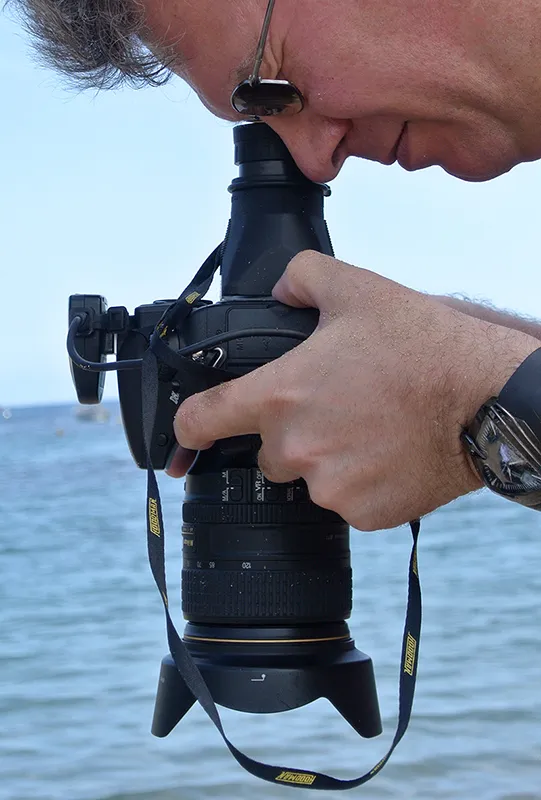
(Photo © 2013: Jens Brüggemann - www.jensbrueggemann.de)
Note: One of the biggest problems for many model photographers is not buying suitable equipment, but finding suitable models. In the next part of this tutorial, I will therefore give you valuable tips on how and where to find great models.
