In digital image editing, HDR toning provides an impressive enhancement of the visual quality of photos. This technique increases the dynamic range, intensifies the colors, and brings out details in both bright and dark areas. In this guide, I will walk you through the process of HDR toning in Photoshop so that you can take your images to the next level. Whether you are a beginner or an experienced user, this guide will help you understand and apply HDR specifications.
Main Takeaways
- HDR toning improves the dynamic range and color reproduction.
- You must first create the image as a background layer in Photoshop.
- HDR toning requires adjustments to various sliders for optimal results.
- Experimenting with the sliders is crucial to achieve the desired effects.
Step-by-Step Guide to HDR Toning
First, open your image in Photoshop. Once the image is loaded, you need to follow the first step to begin the editing process.
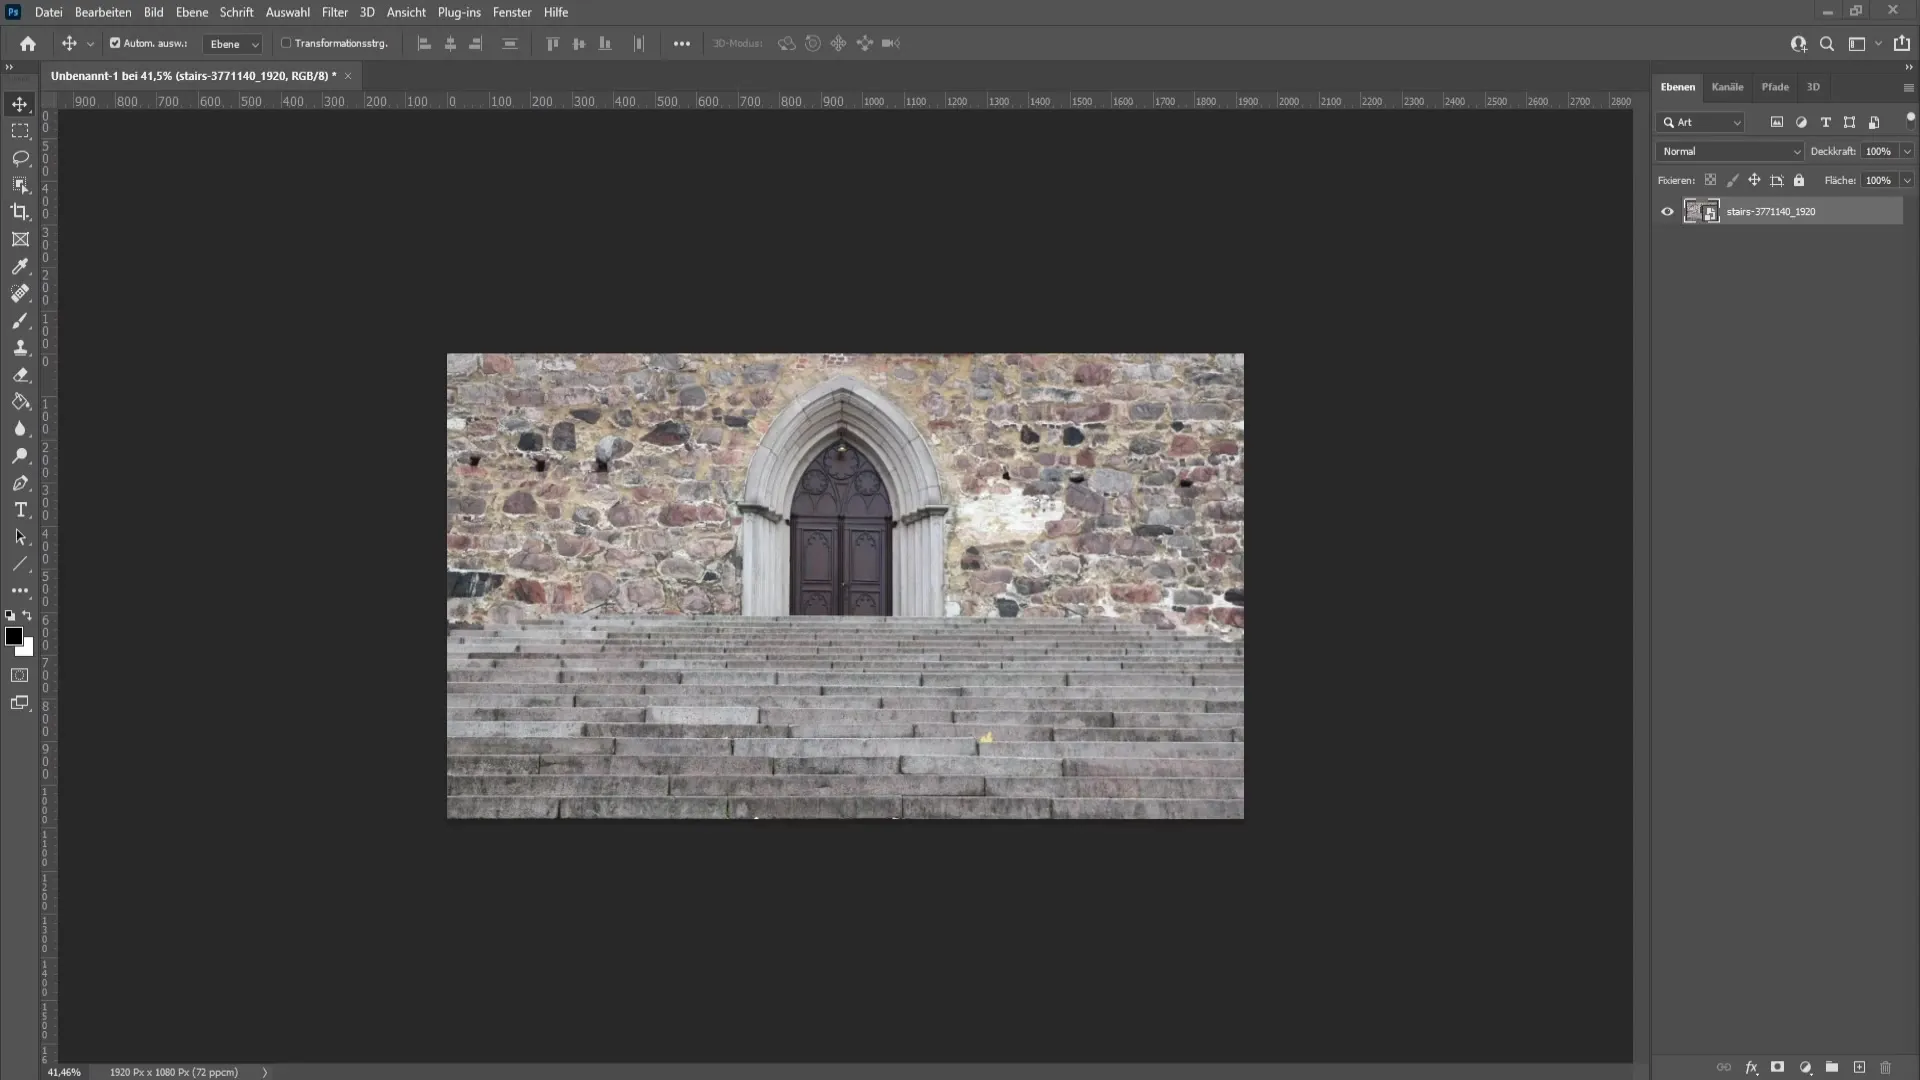
To apply HDR toning, right-click on the background layer in the Layers panel and select the "Flatten Image" option. This prepares the layer for HDR adjustments.
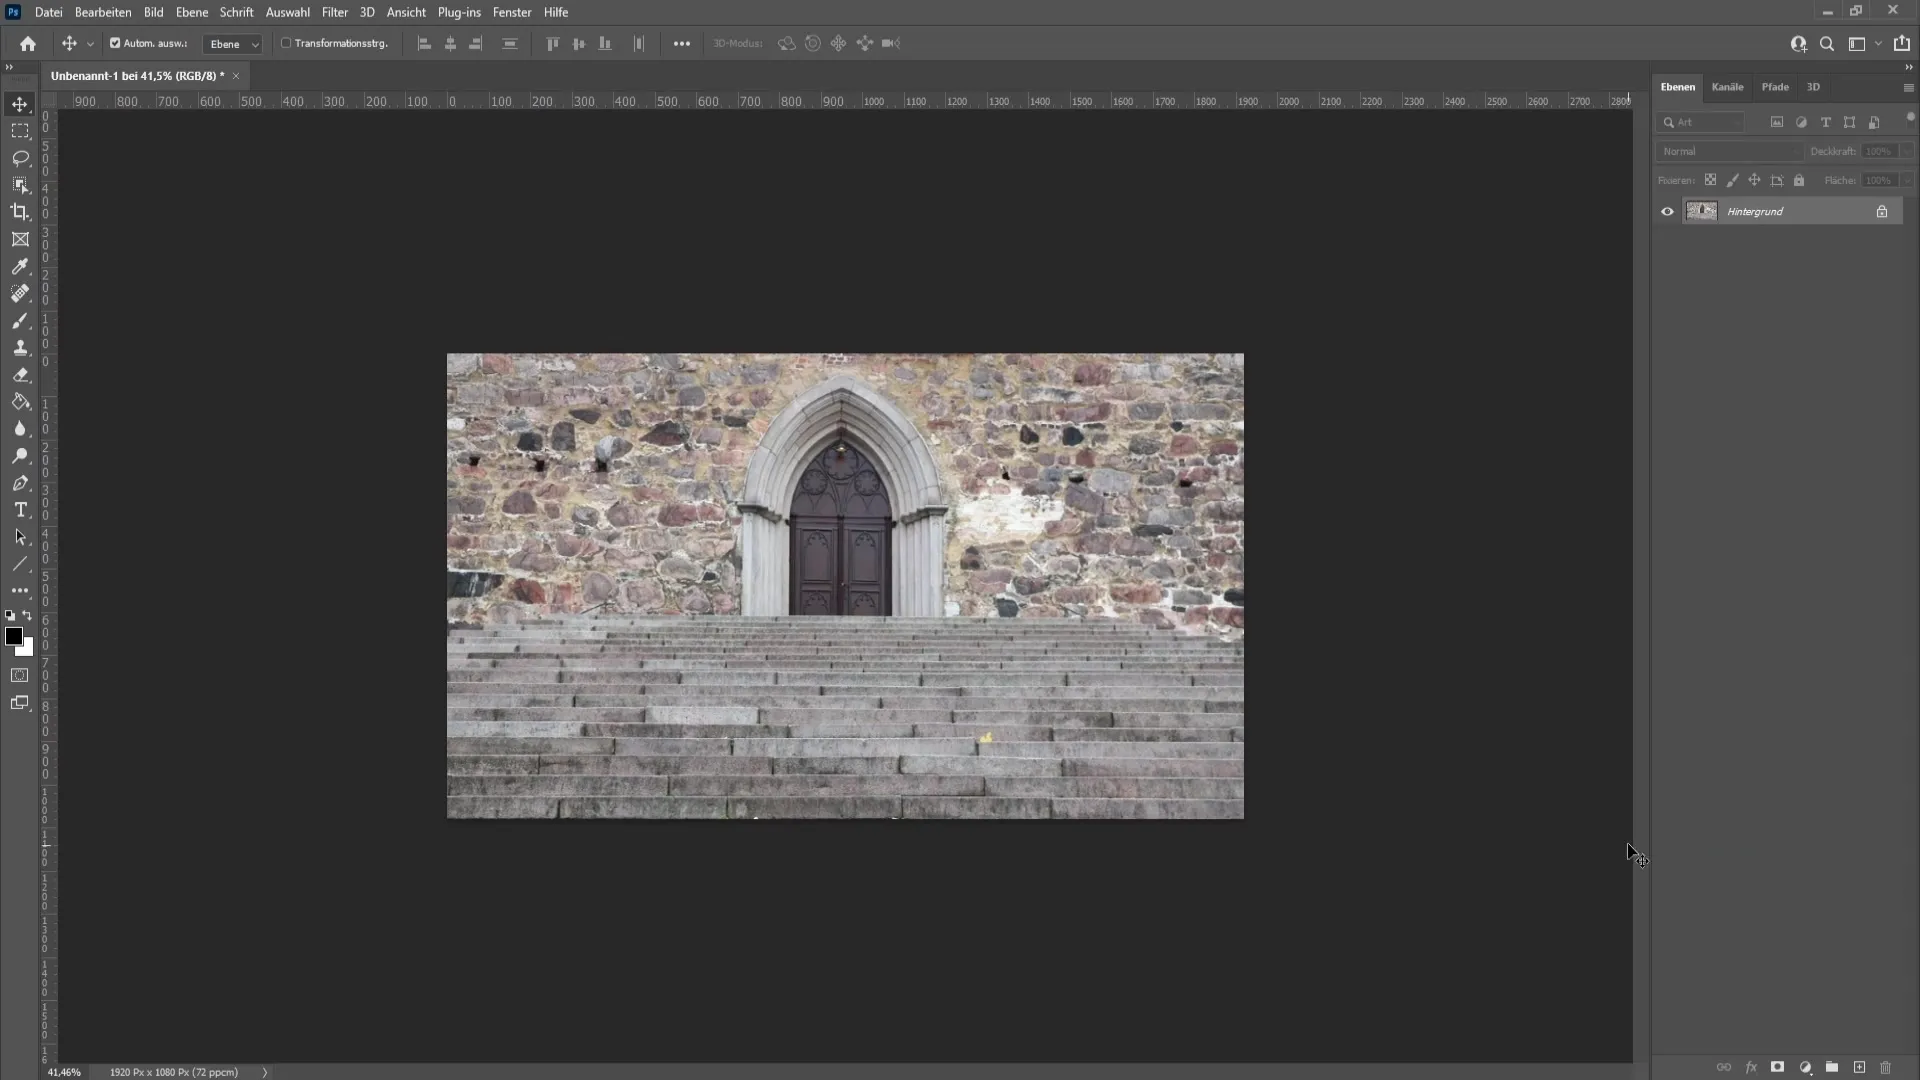
Now you are ready for the next step. Navigate to the "Image" menu in the top menu bar, go to "Adjustments," and choose "HDR Toning." A window will open where you can see the adjustment options for HDR toning.
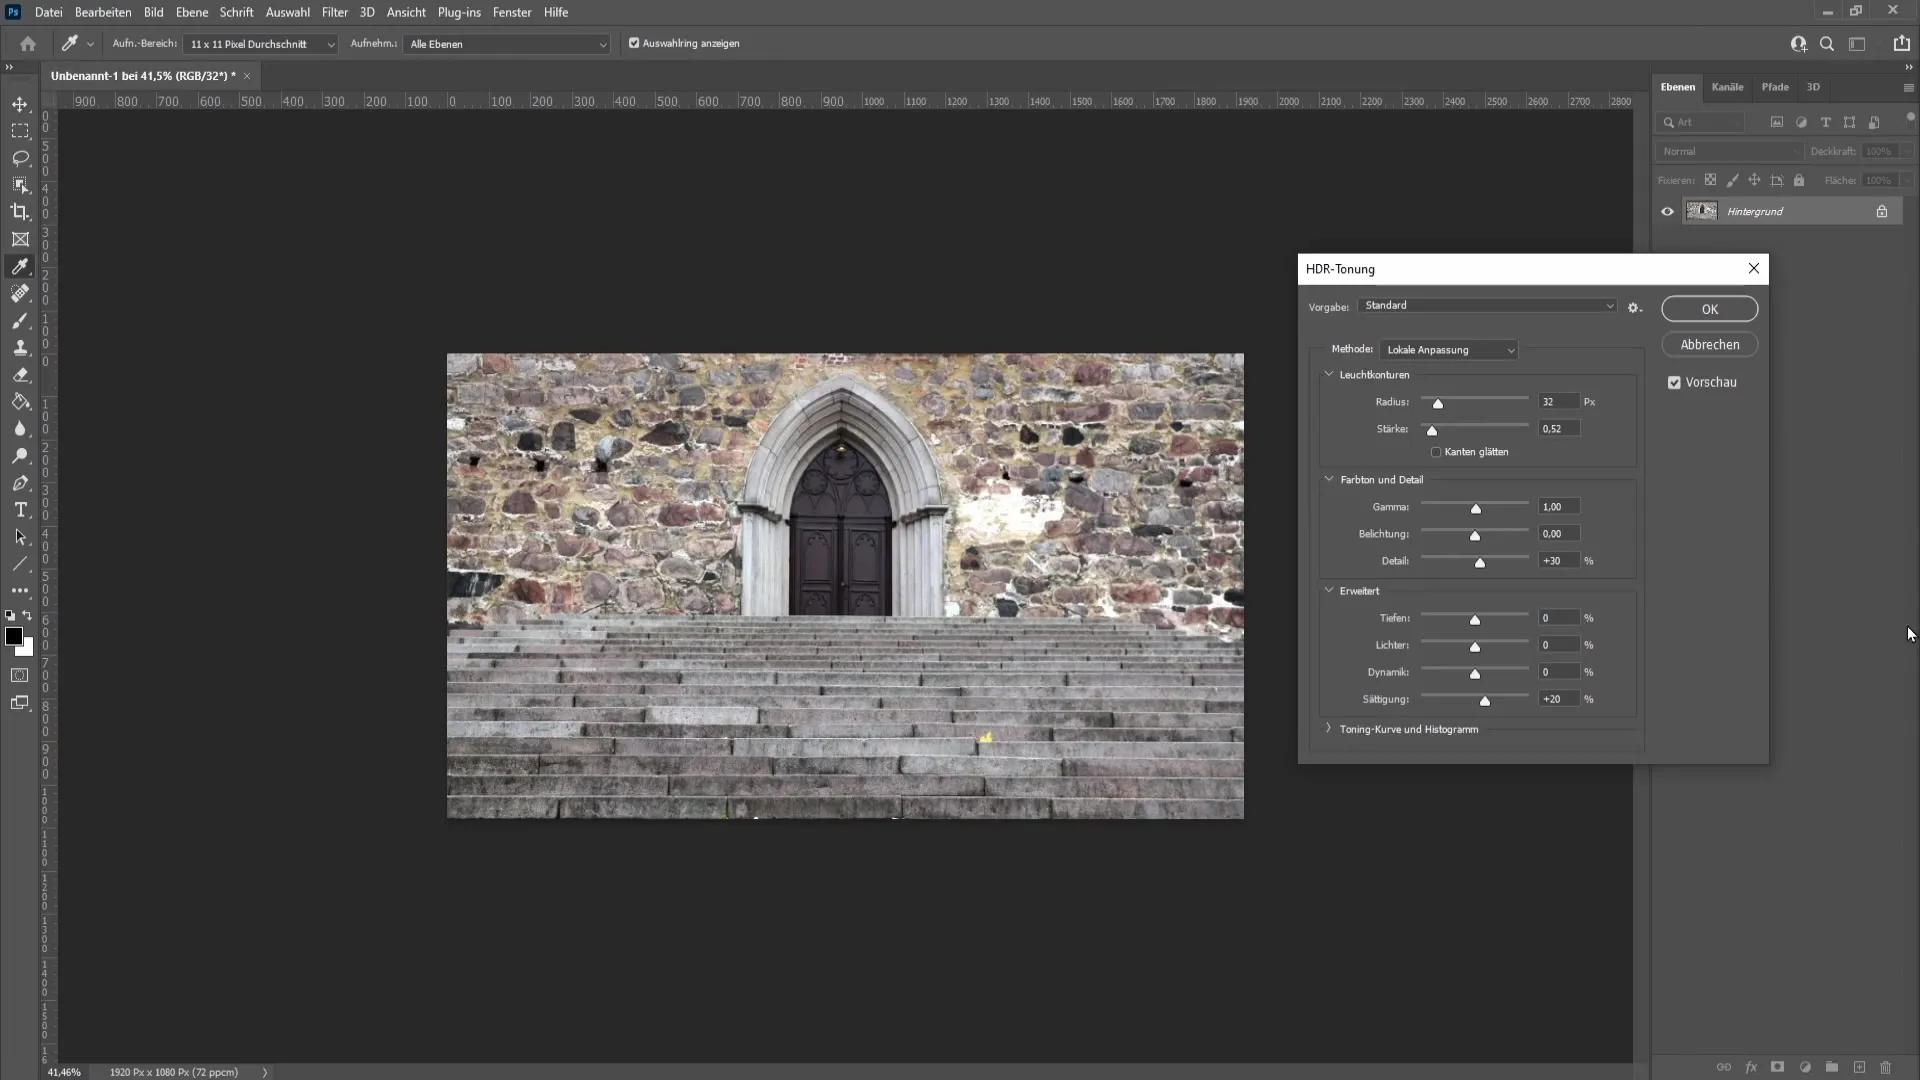
In this HDR toning window, you can choose from various presets. These presets are pre-made settings that help you achieve results more quickly. One of the presets is called "more saturated." Clicking on it will change the sliders in the window - a good foundation for your fine-tuning adjustments.
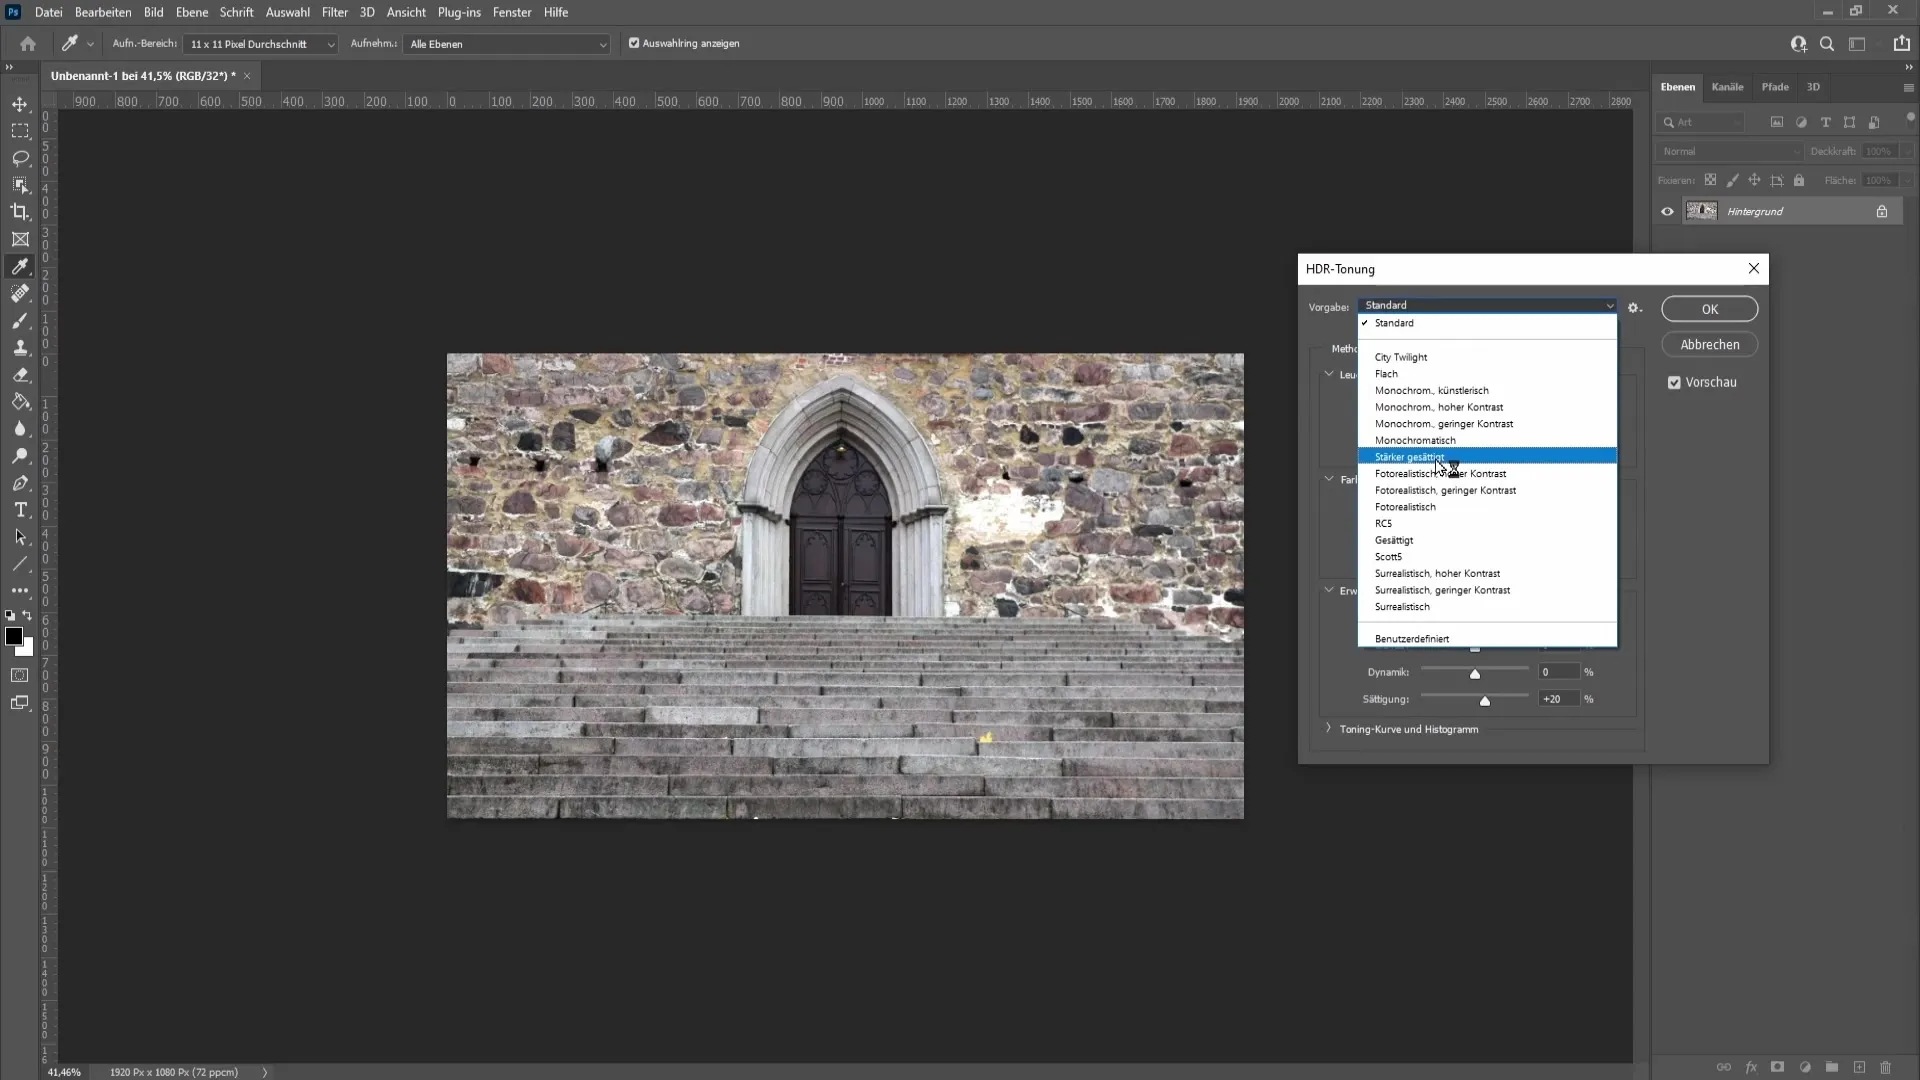
You have the option to adjust the sliders to your liking. Start by adjusting the "Glow" to see which changes you like best. You may want to slightly decrease the value for smoother transitions.
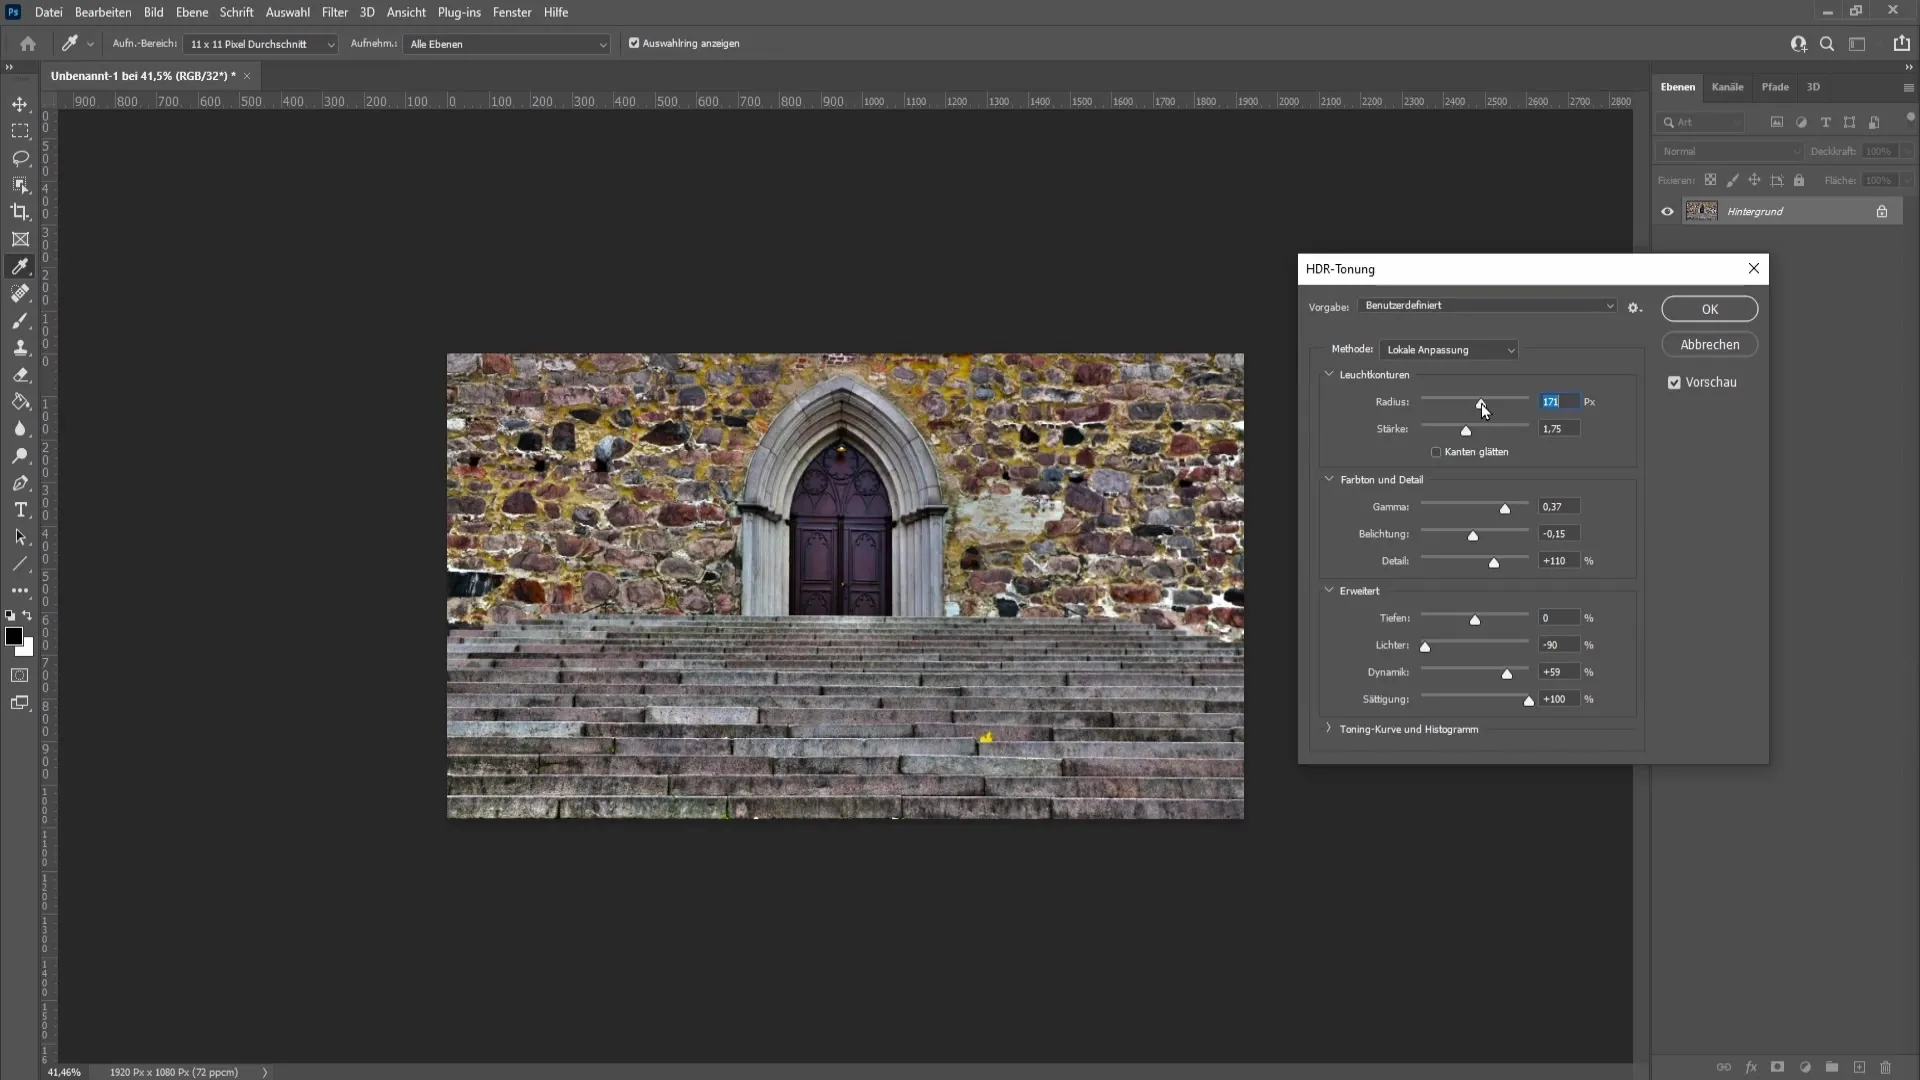
Another important slider is the "Strength." Here, you can set a desired value to influence the intensity of your HDR toning. Try different values to see how they change the image. For example, you could set the strength to 2.28.
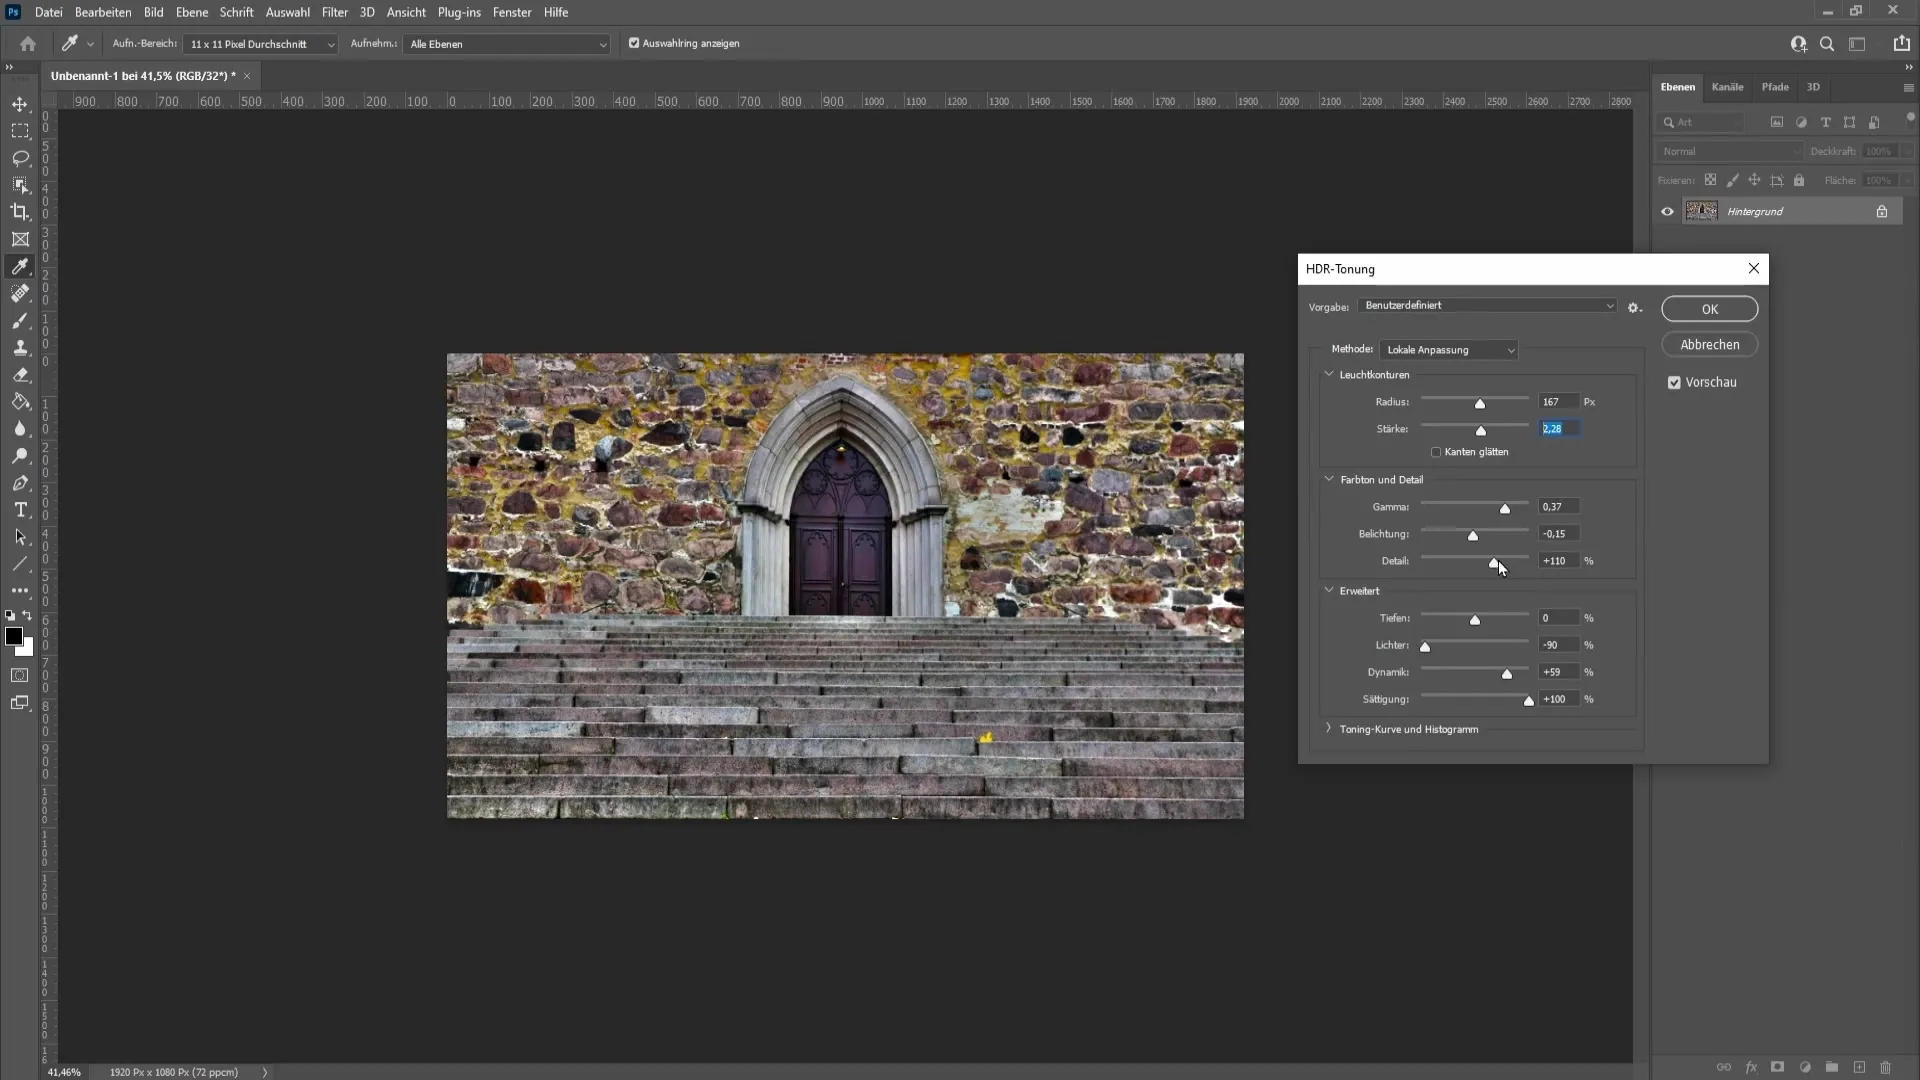
Next, check the hue and detail adjustments. Start with the details and determine whether you want to increase or decrease the detail strength. If you try a value like +102%, see if the image has too much noise or if it improves sharpness.
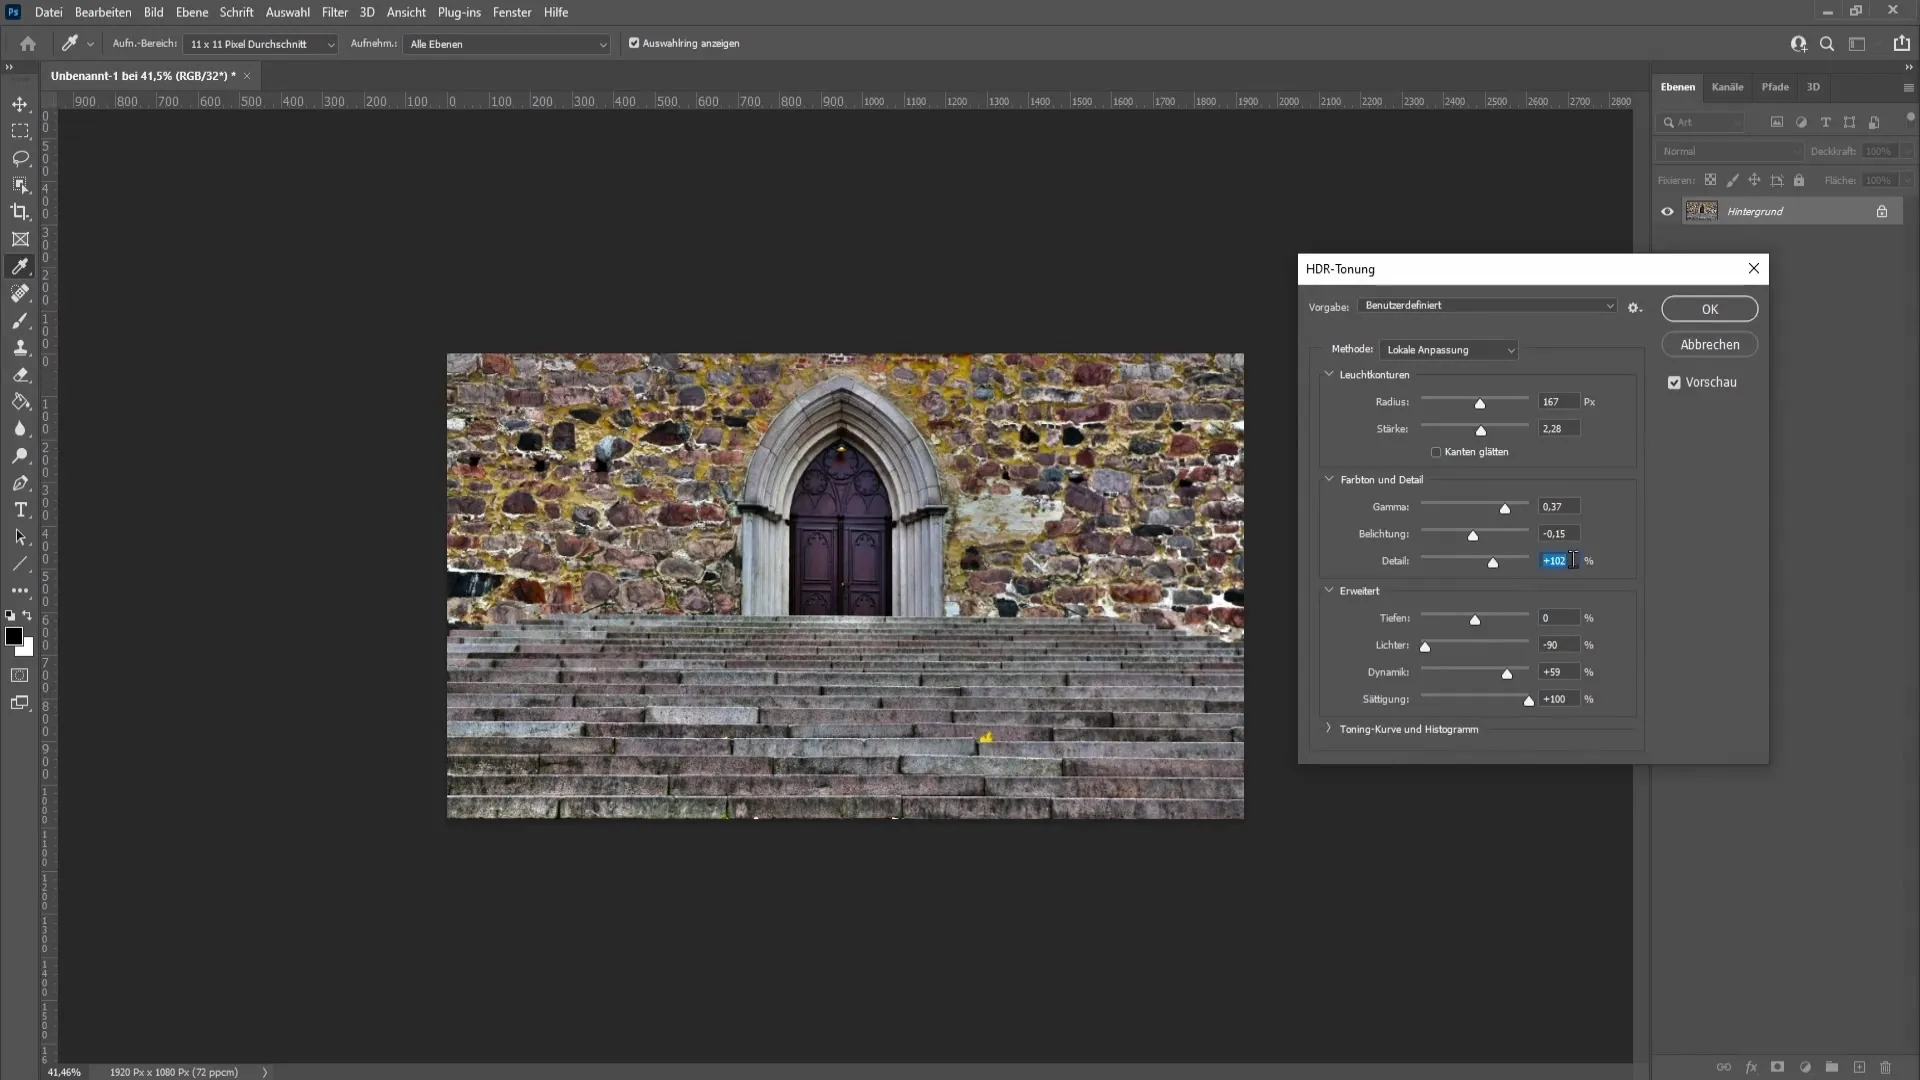
For exposure, you can add a small value to brighten the image. A value of +0.14 might be suitable here. Check how this value affects the overall brightness of the image.
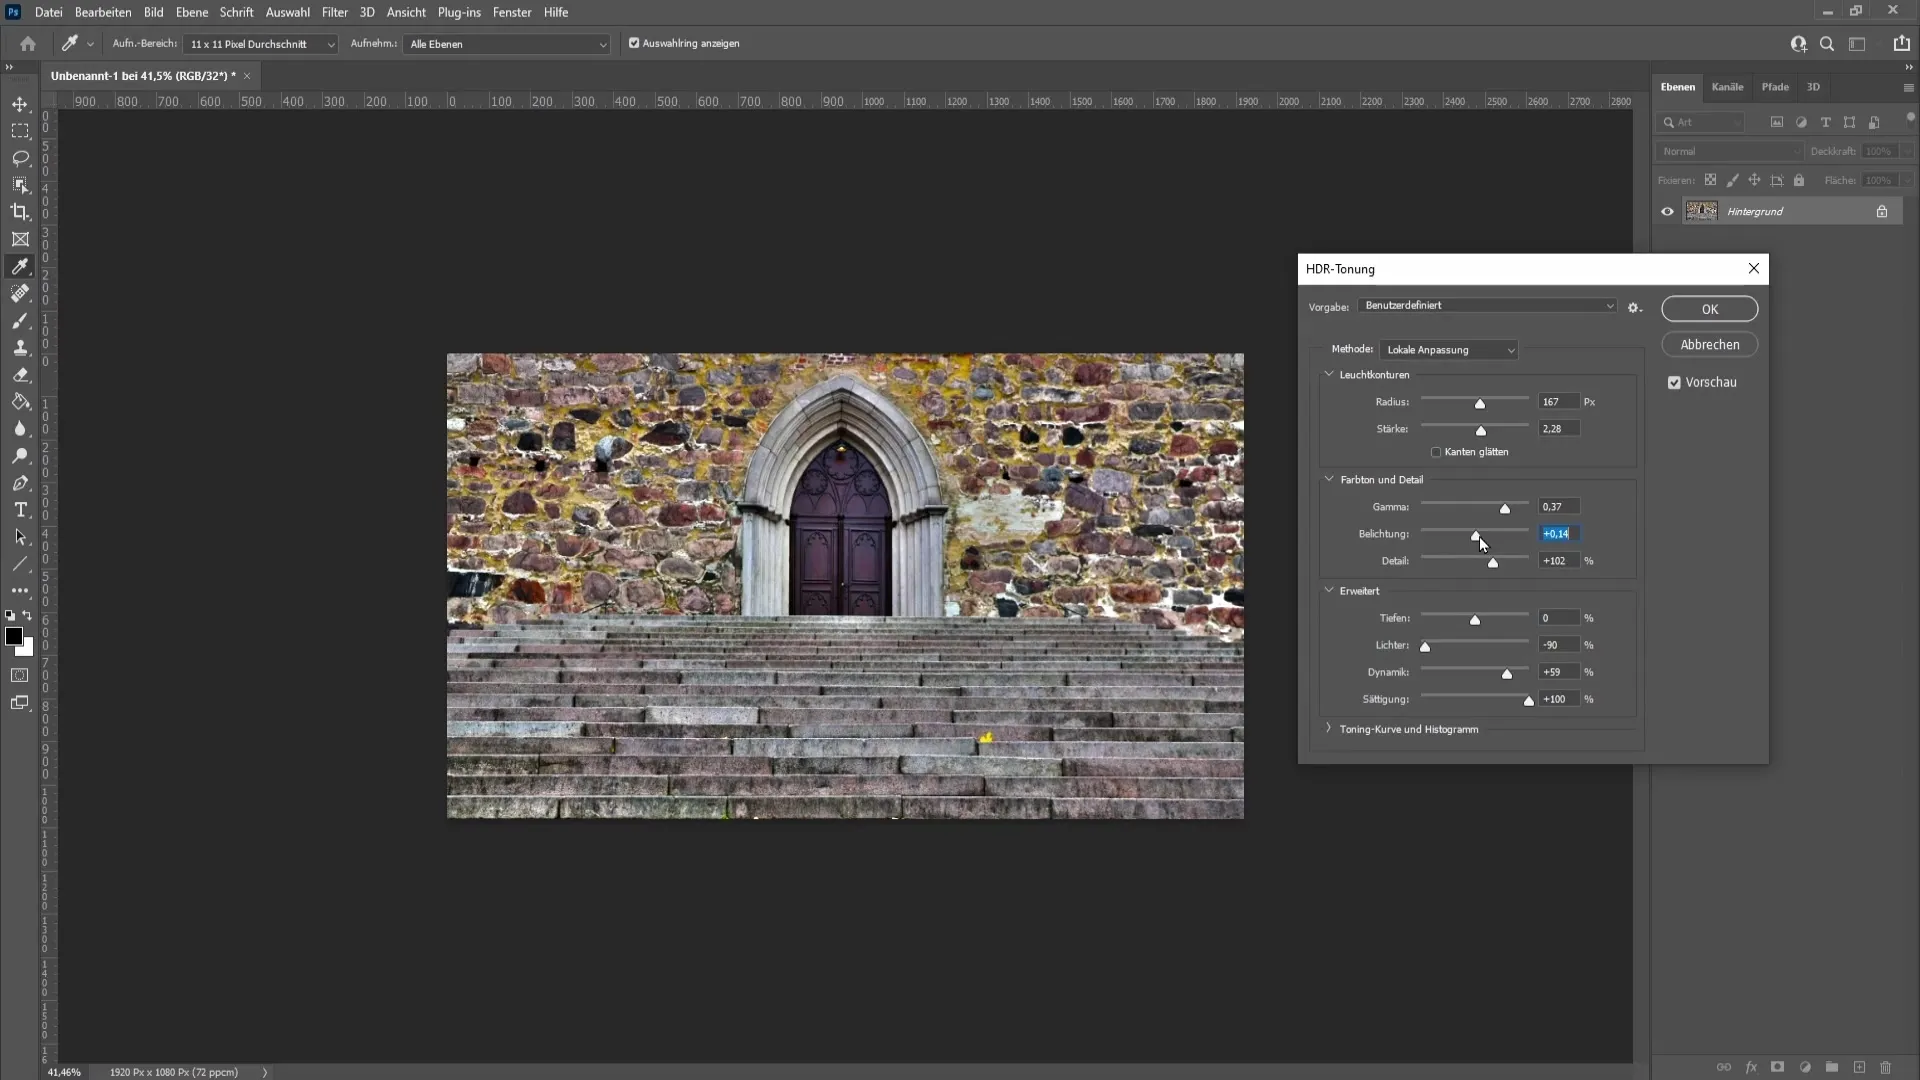
Now it's time to look at the "Gamma" value. Experiment with this slider to balance the dark and bright areas of the image. The goal is to achieve a balanced look without overexposed or too dark spots.
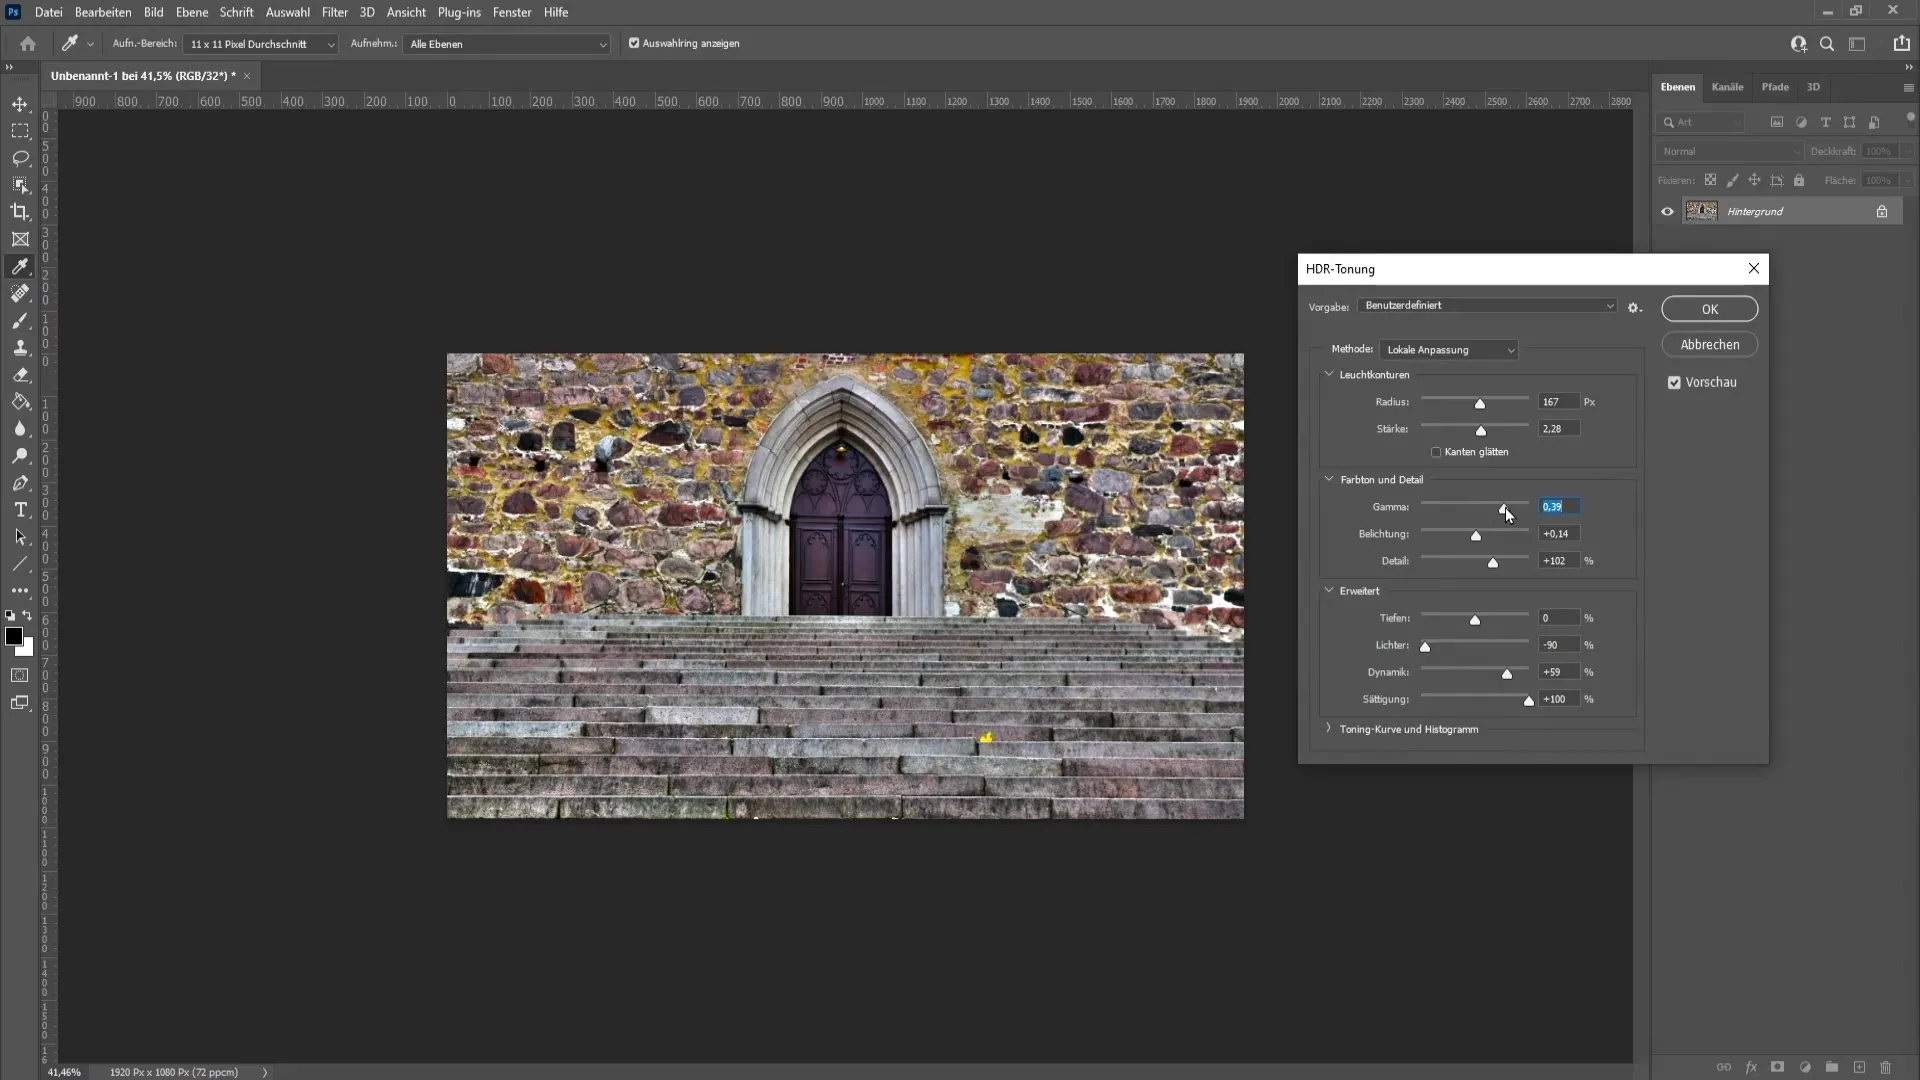
In the advanced view under "Shadows," you can readjust the shadows and dark areas. Sometimes it is good to leave this value at zero to maintain the natural shadows.
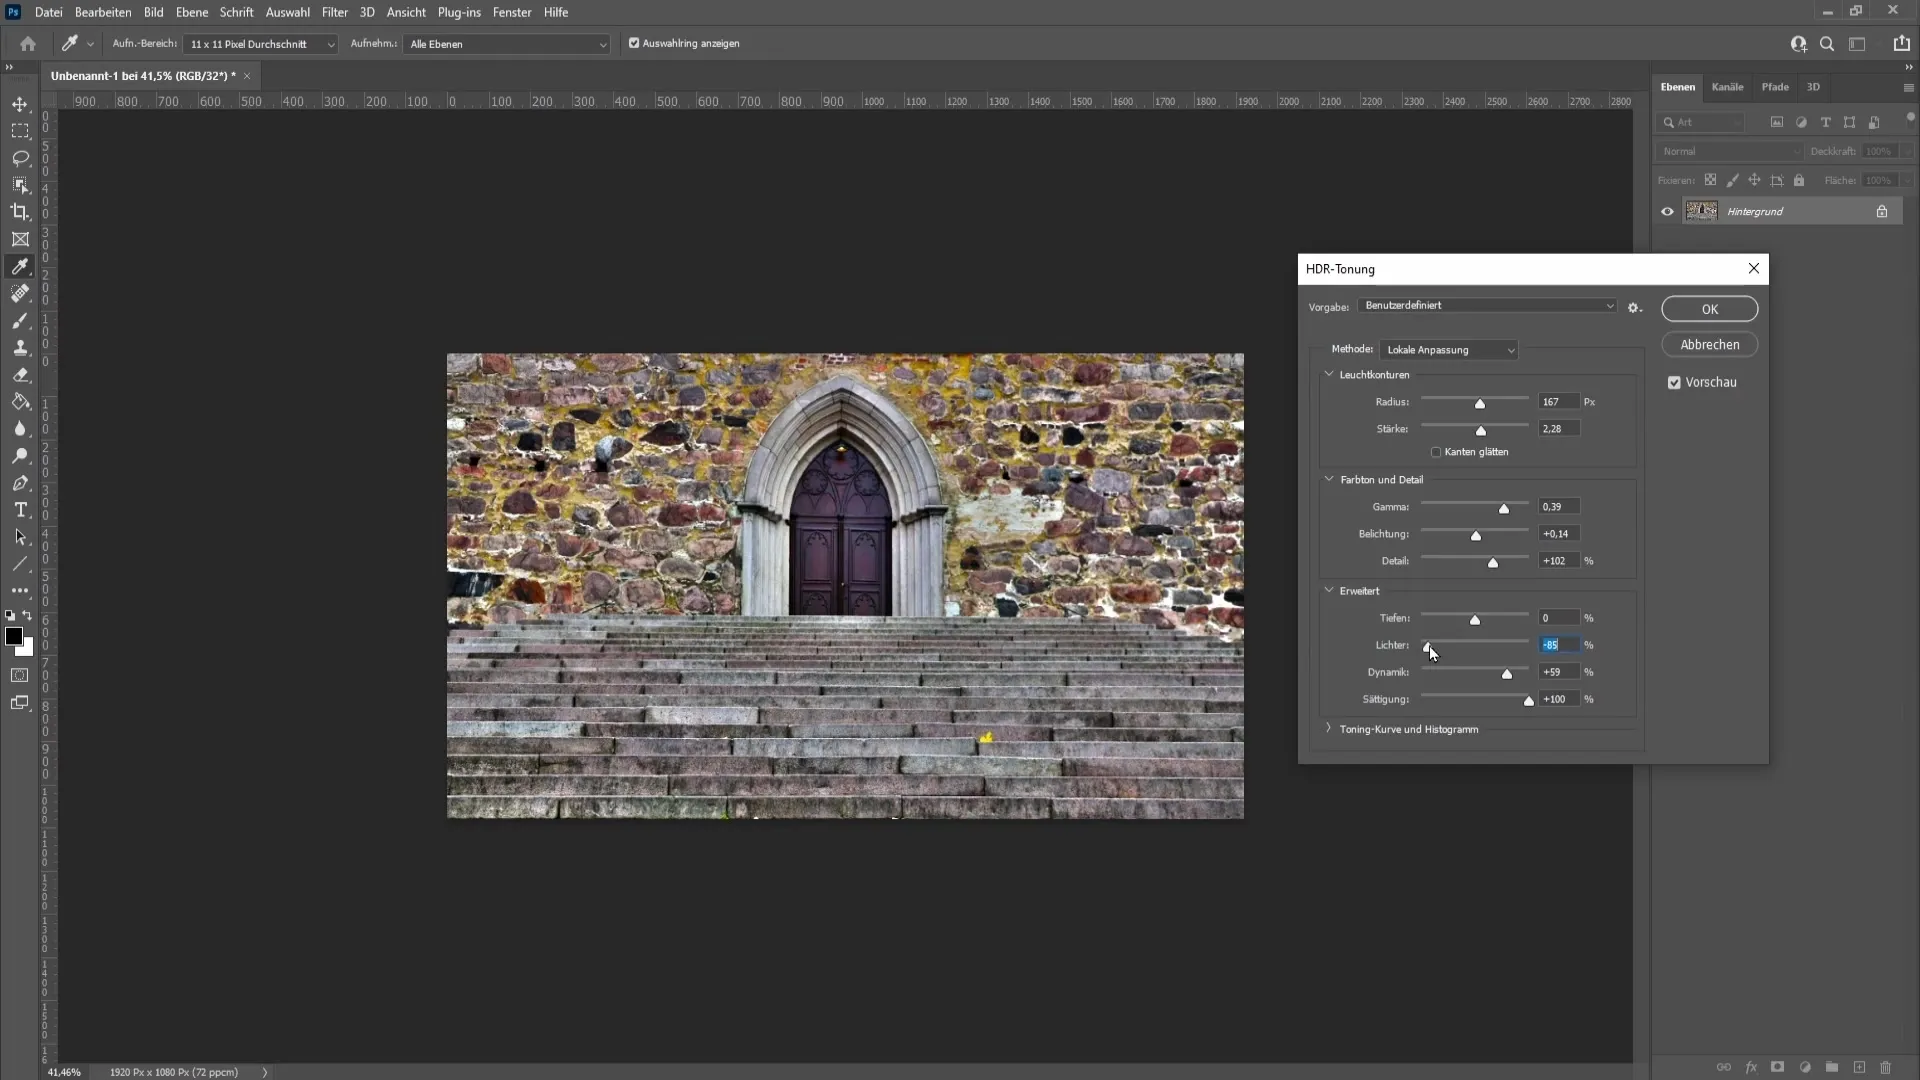
The "Highlights" slider can help you accentuate the brightest areas of the image. Make sure to proceed with caution here to avoid overexposure. With a value around +20%, you might find a good balance.
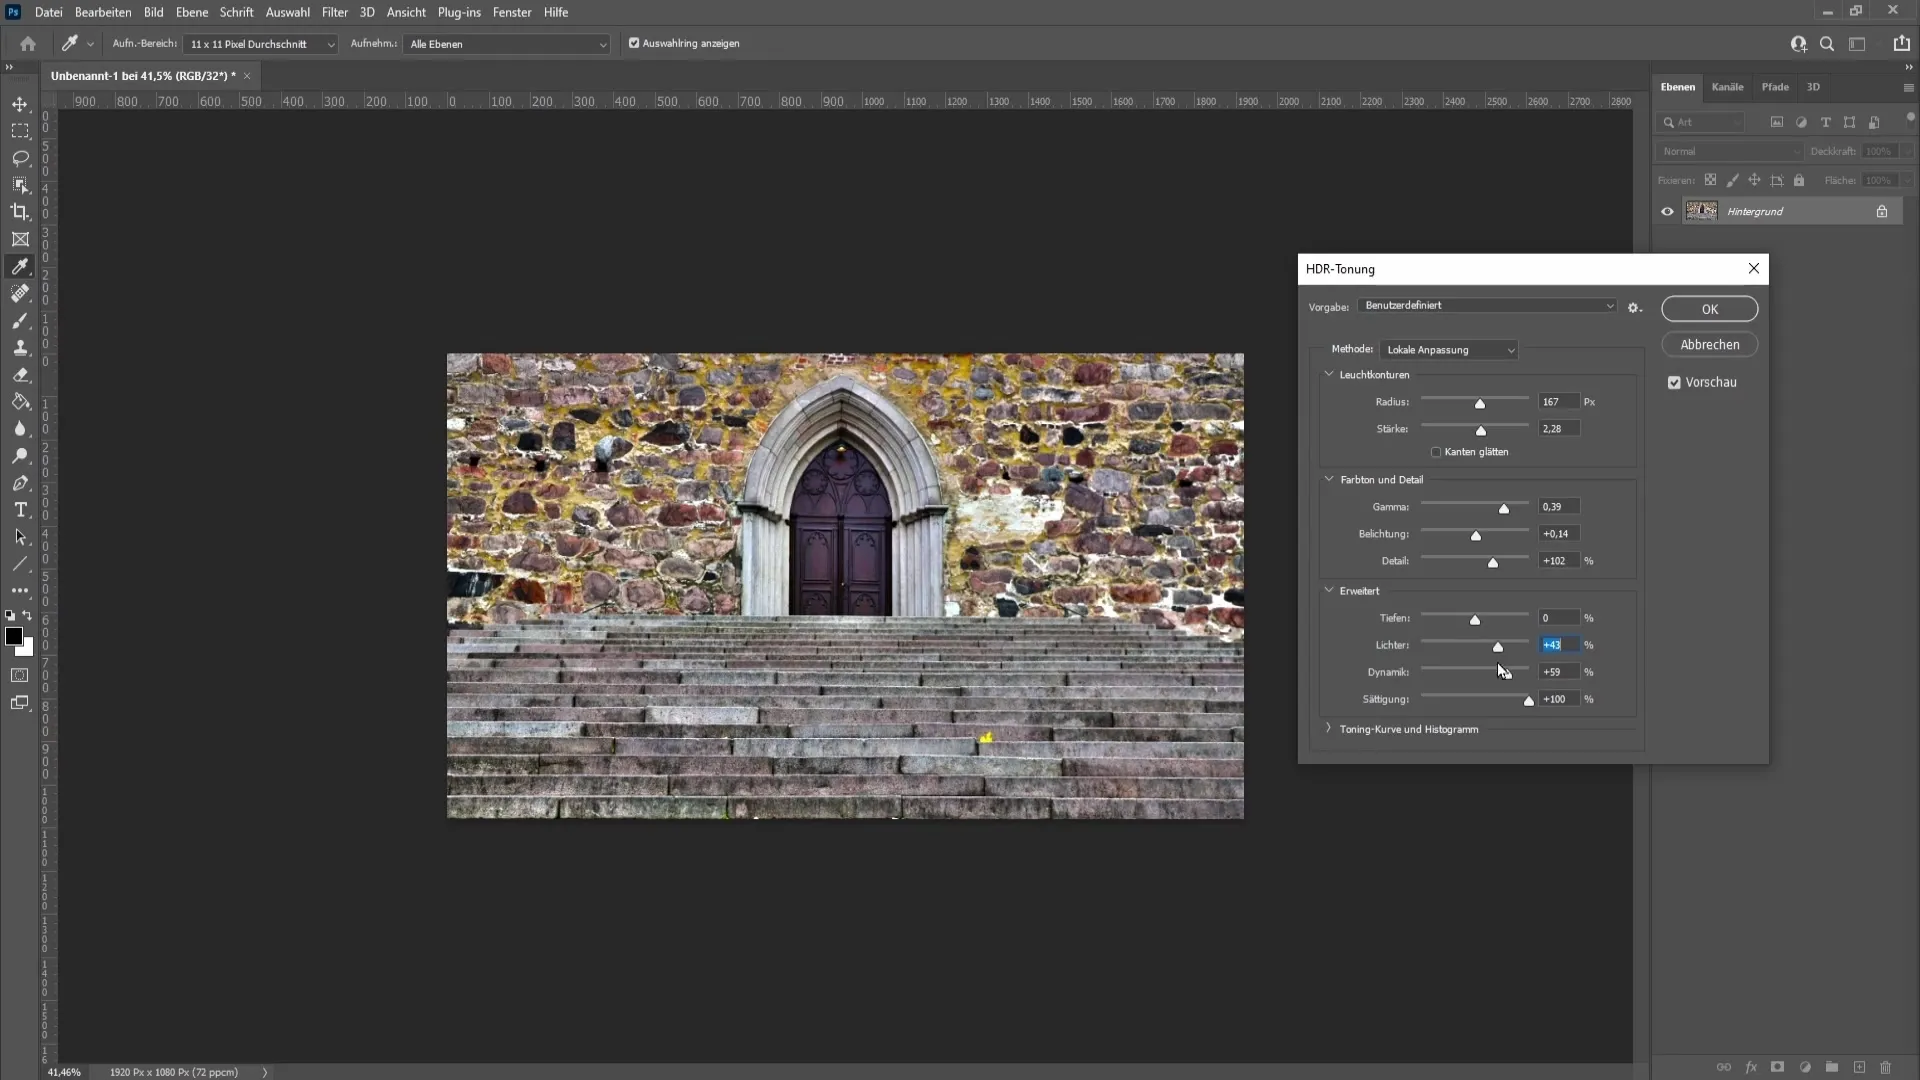
Additionally, there is a "Clarity" adjustment. A value of +59% might already be high, so consider if you want to reduce it slightly. Lower saturation often results in a more balanced color image. A reduction to +74% could be appropriate here.
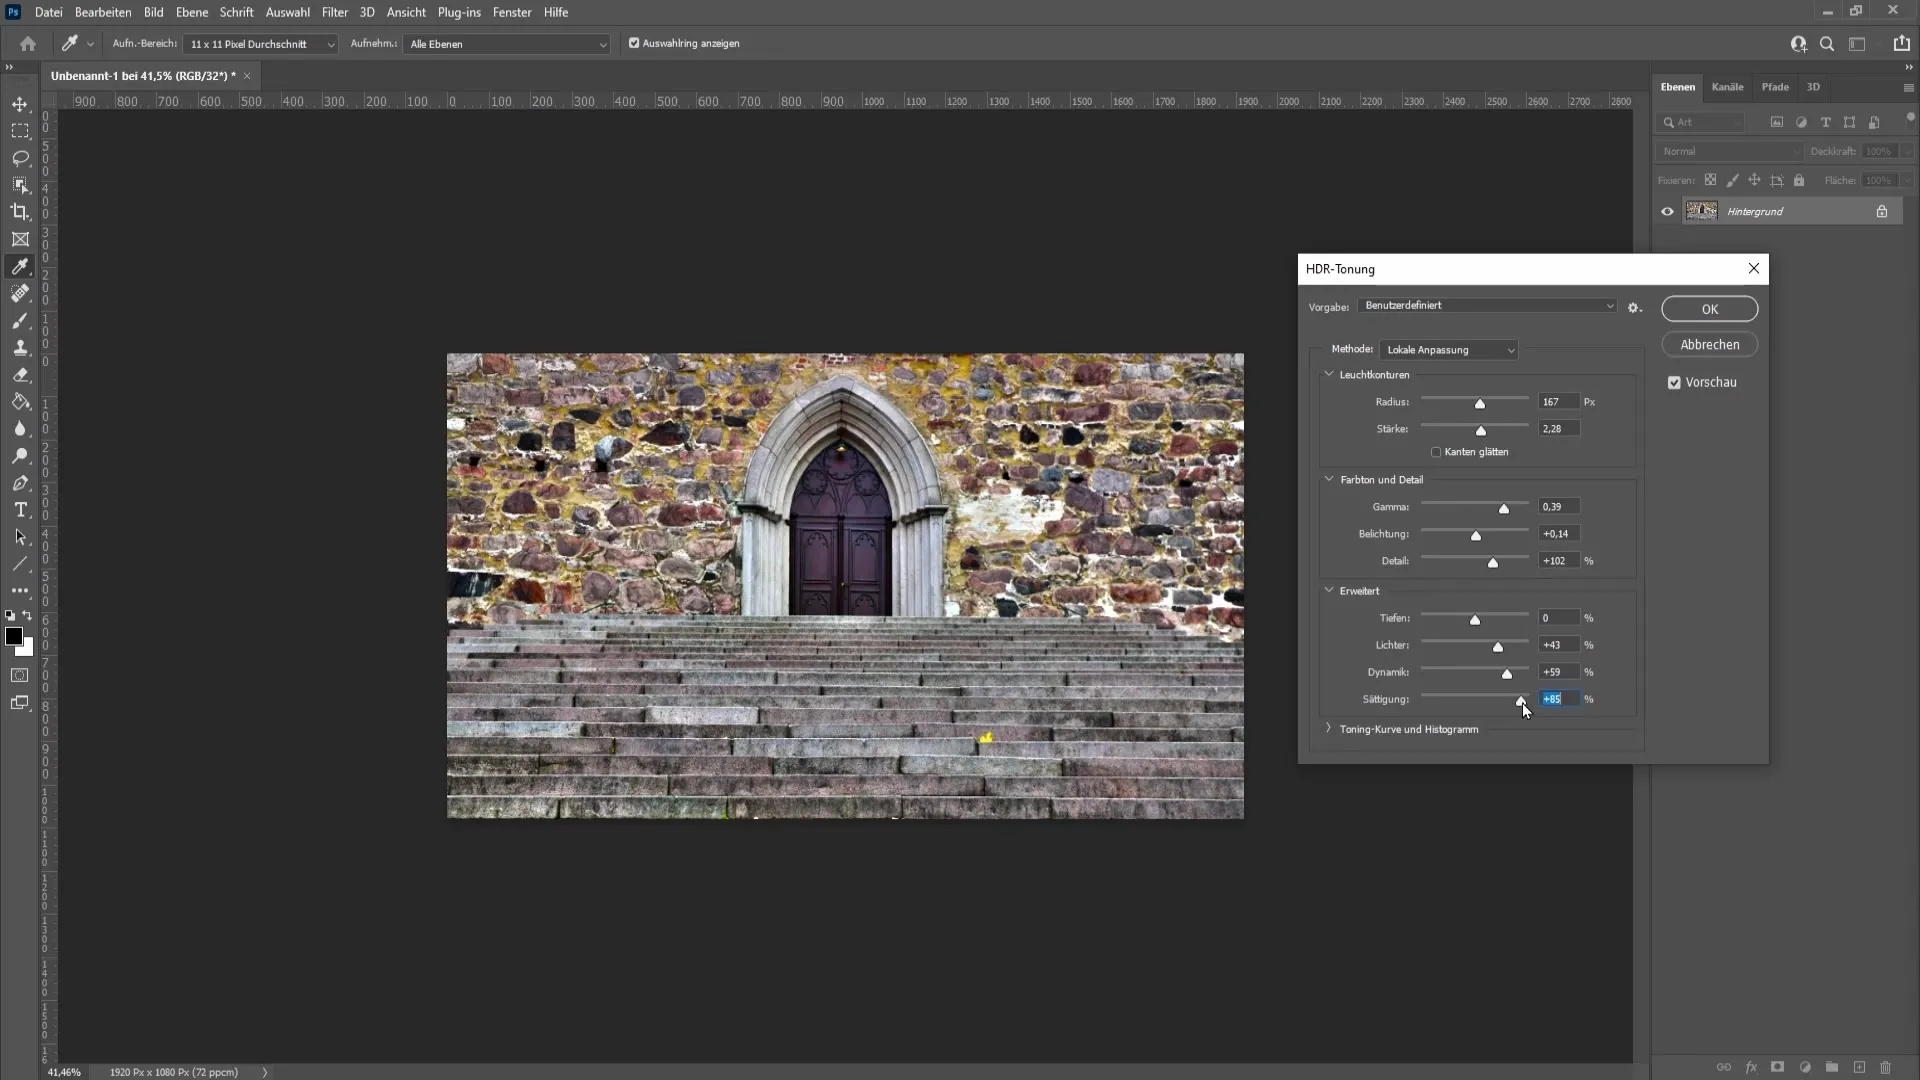
You can also experiment with the Tone Curve and see what you like with your image. Whether you want to take this step is up to you; sometimes less is more.
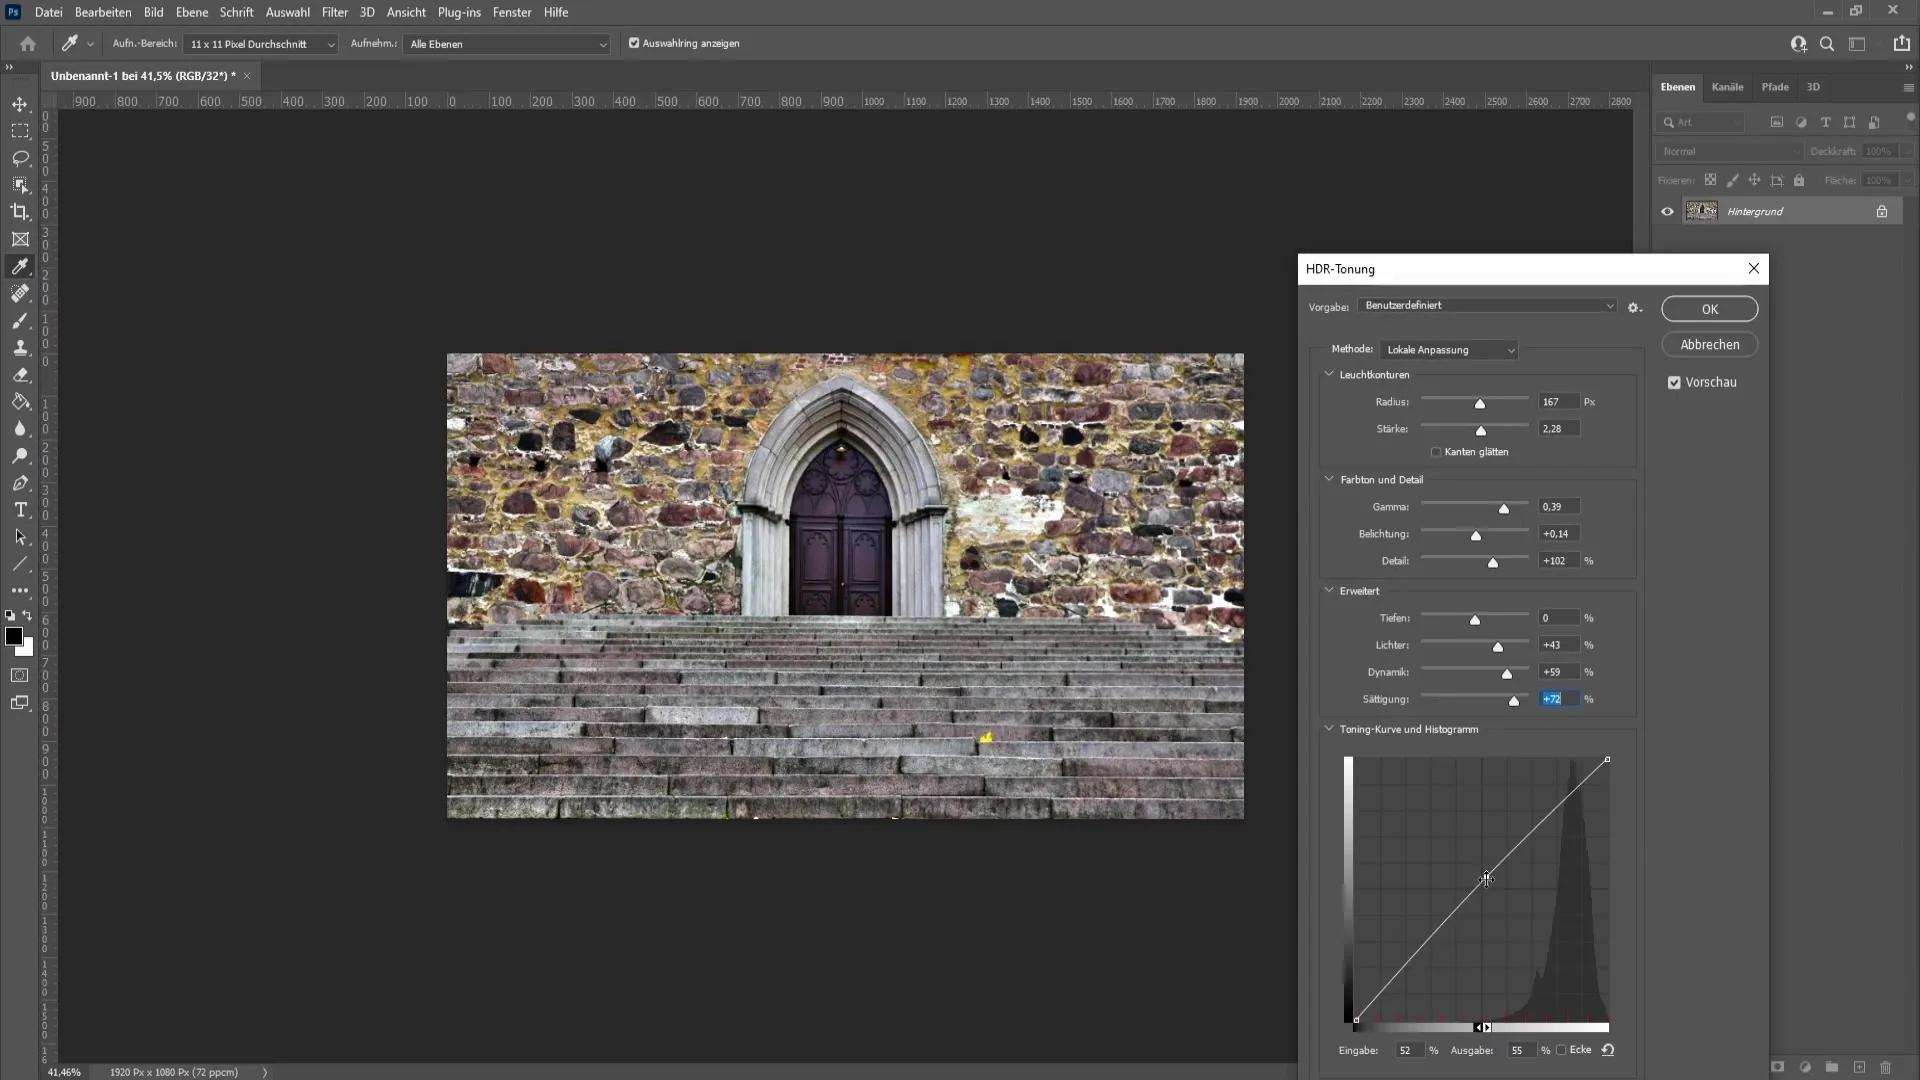
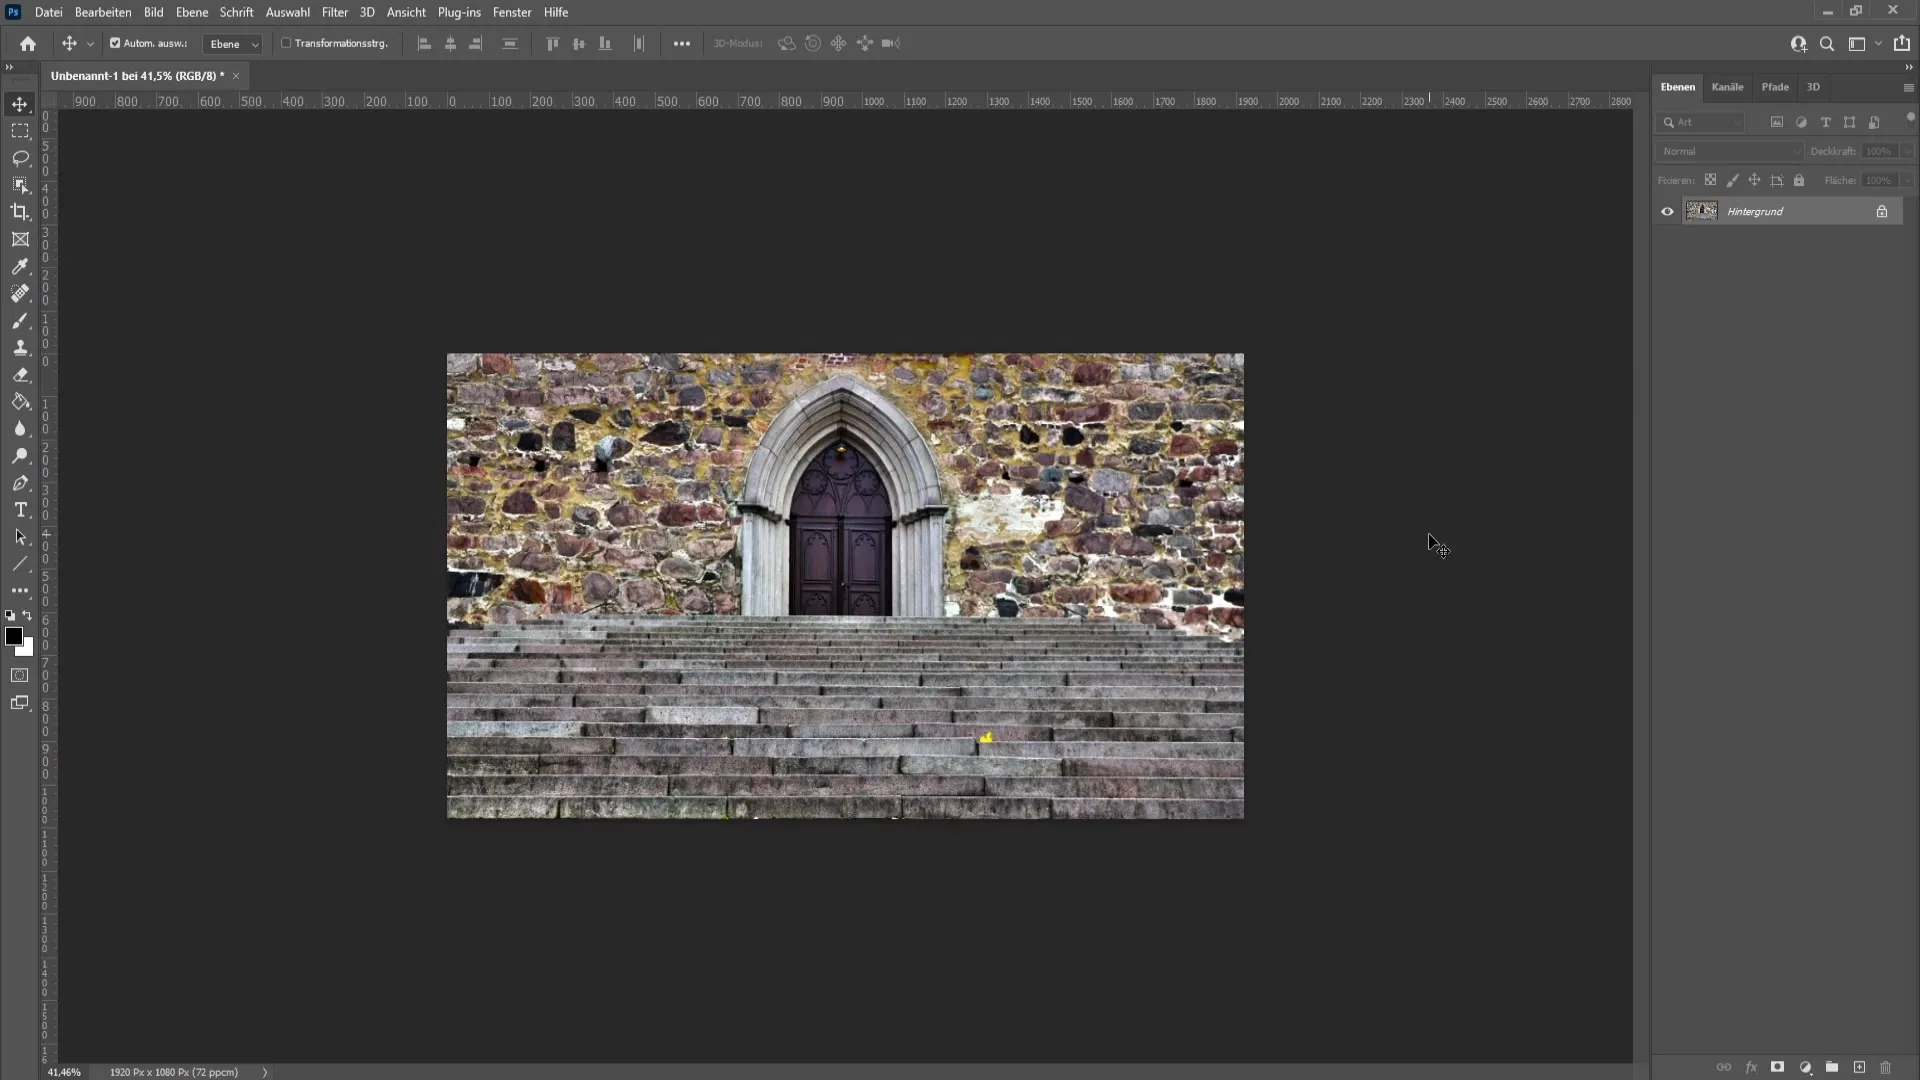
Once you are satisfied with the adjustments, simply click "OK". You have successfully applied HDR toning to your image, making it look more interesting and vibrant.
Summary
In this tutorial, you have learned how to apply HDR toning in Photoshop. From preparing your image to specific slider adjustments, each step has been detailed. Now you can enhance your images using this technique to achieve stunning results.
FAQ
How do I open my image in Photoshop?You can open your image in Photoshop by clicking on "File" and then selecting "Open" and choosing the desired image.
What is HDR toning?HDR toning is a technique to increase the dynamic range and color intensity of an image, resulting in more vibrant and contrasty photos.
How can I adjust HDR toning?You can adjust HDR toning by moving various sliders in the HDR toning window, such as Strength, Exposure, and Detail.
When should I use the Tone Curve adjustment?The Tone Curve adjustment can be used when you want to further optimize your image, especially to fine-tune contrasts and brightness.


