In this guide, you will learn how to create a realistic mockup for a picture frame as well as a mobile device using Photoshop. It's a great technique to give your design projects a professional look. Whether for portfolio presentations or social media, these steps will help you showcase your images effectively.
Key Takeaways
- Creating a mockup is an effective way to present designs in realistic situations.
- You will learn how to position images in frames and on mobile devices without distorting them.
- With appropriate tools and techniques, you can optimize and enhance your mockups.
Step-by-Step Guide
To create your mockup for the picture frame, follow these steps:
First, open Photoshop and load the image you want to insert into your picture frame. Click on the image and reduce the opacity to about 50% to make positioning easier. Now you can activate the transformation by pressing Ctrl + T (or Cmd + T on Mac). Here you can position your image to fit perfectly in the picture frame.
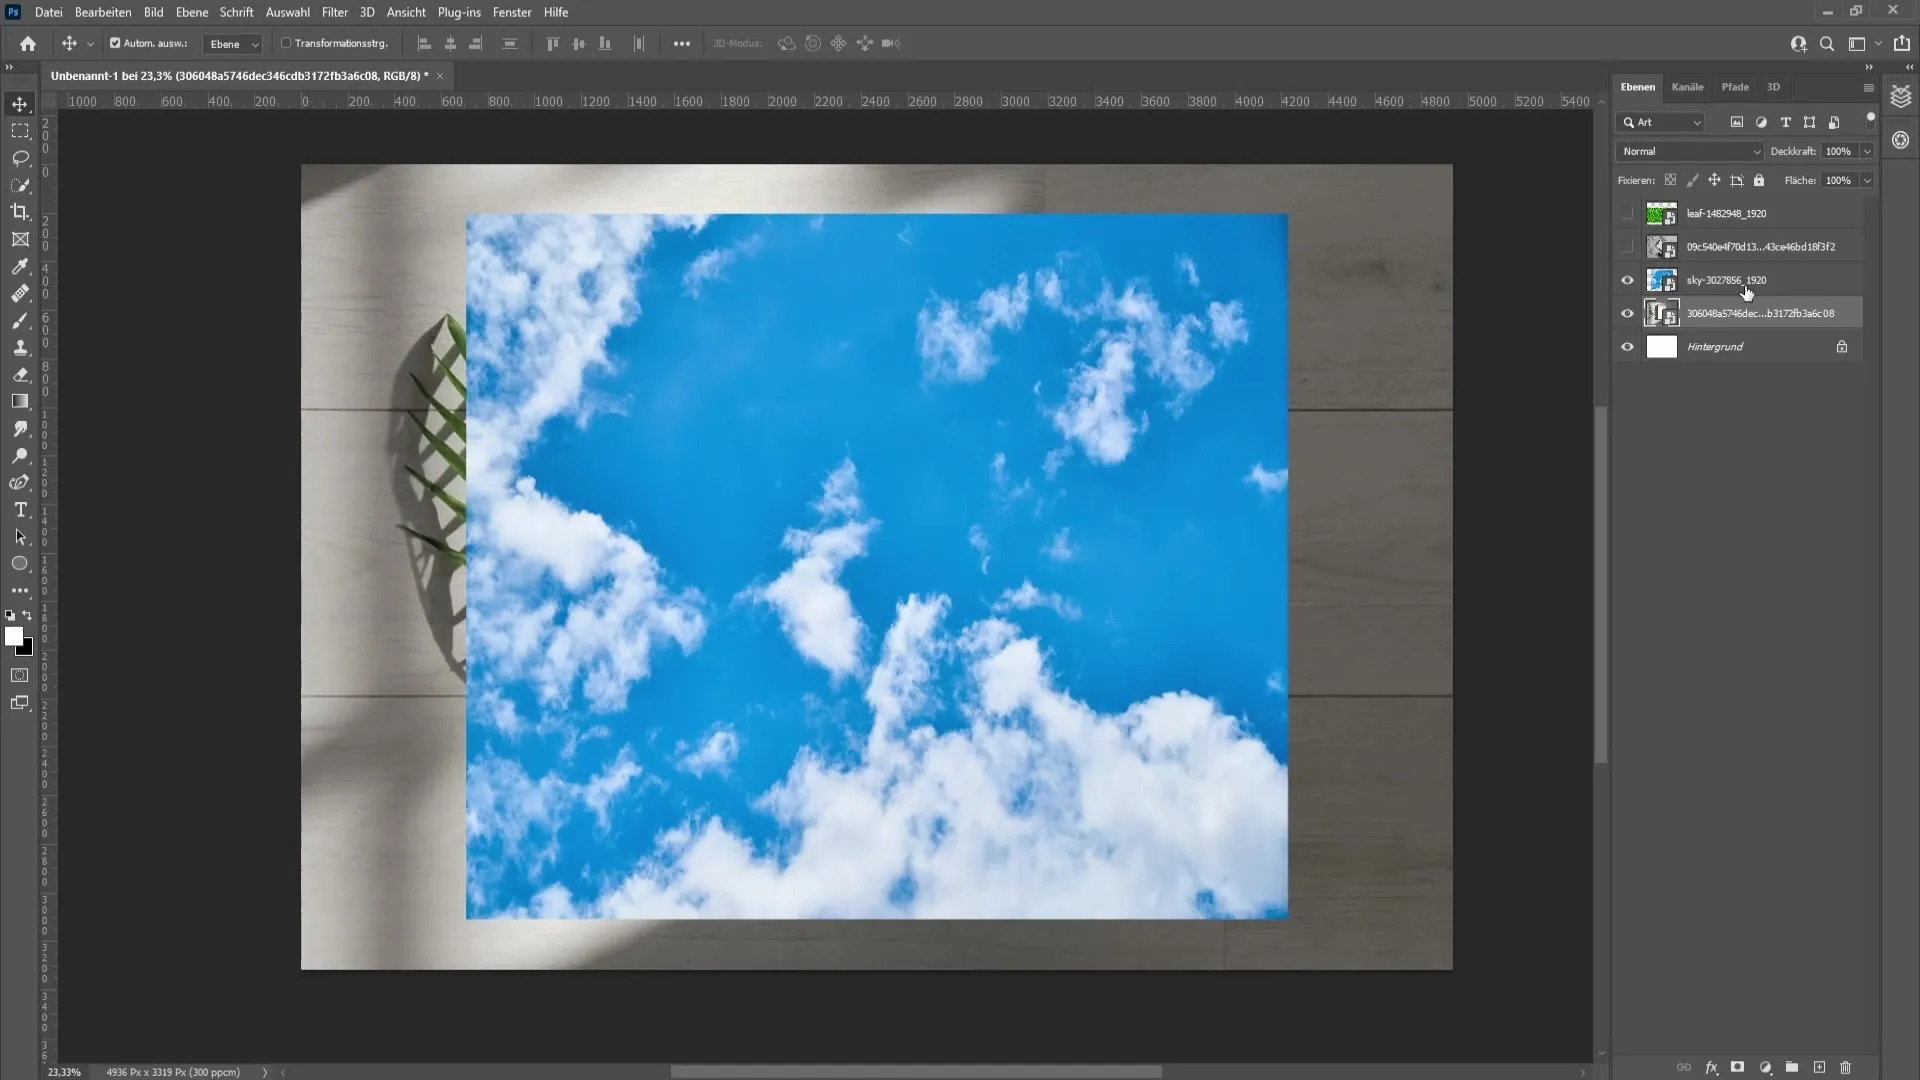
Once you are satisfied with the placement, press Enter to confirm the transformation and set the image opacity back to 100%. To further create the mockup, hide the image layer and select the rectangular selection tool on the left. Zoom in and draw a new rectangle that covers the entire area of the picture frame.
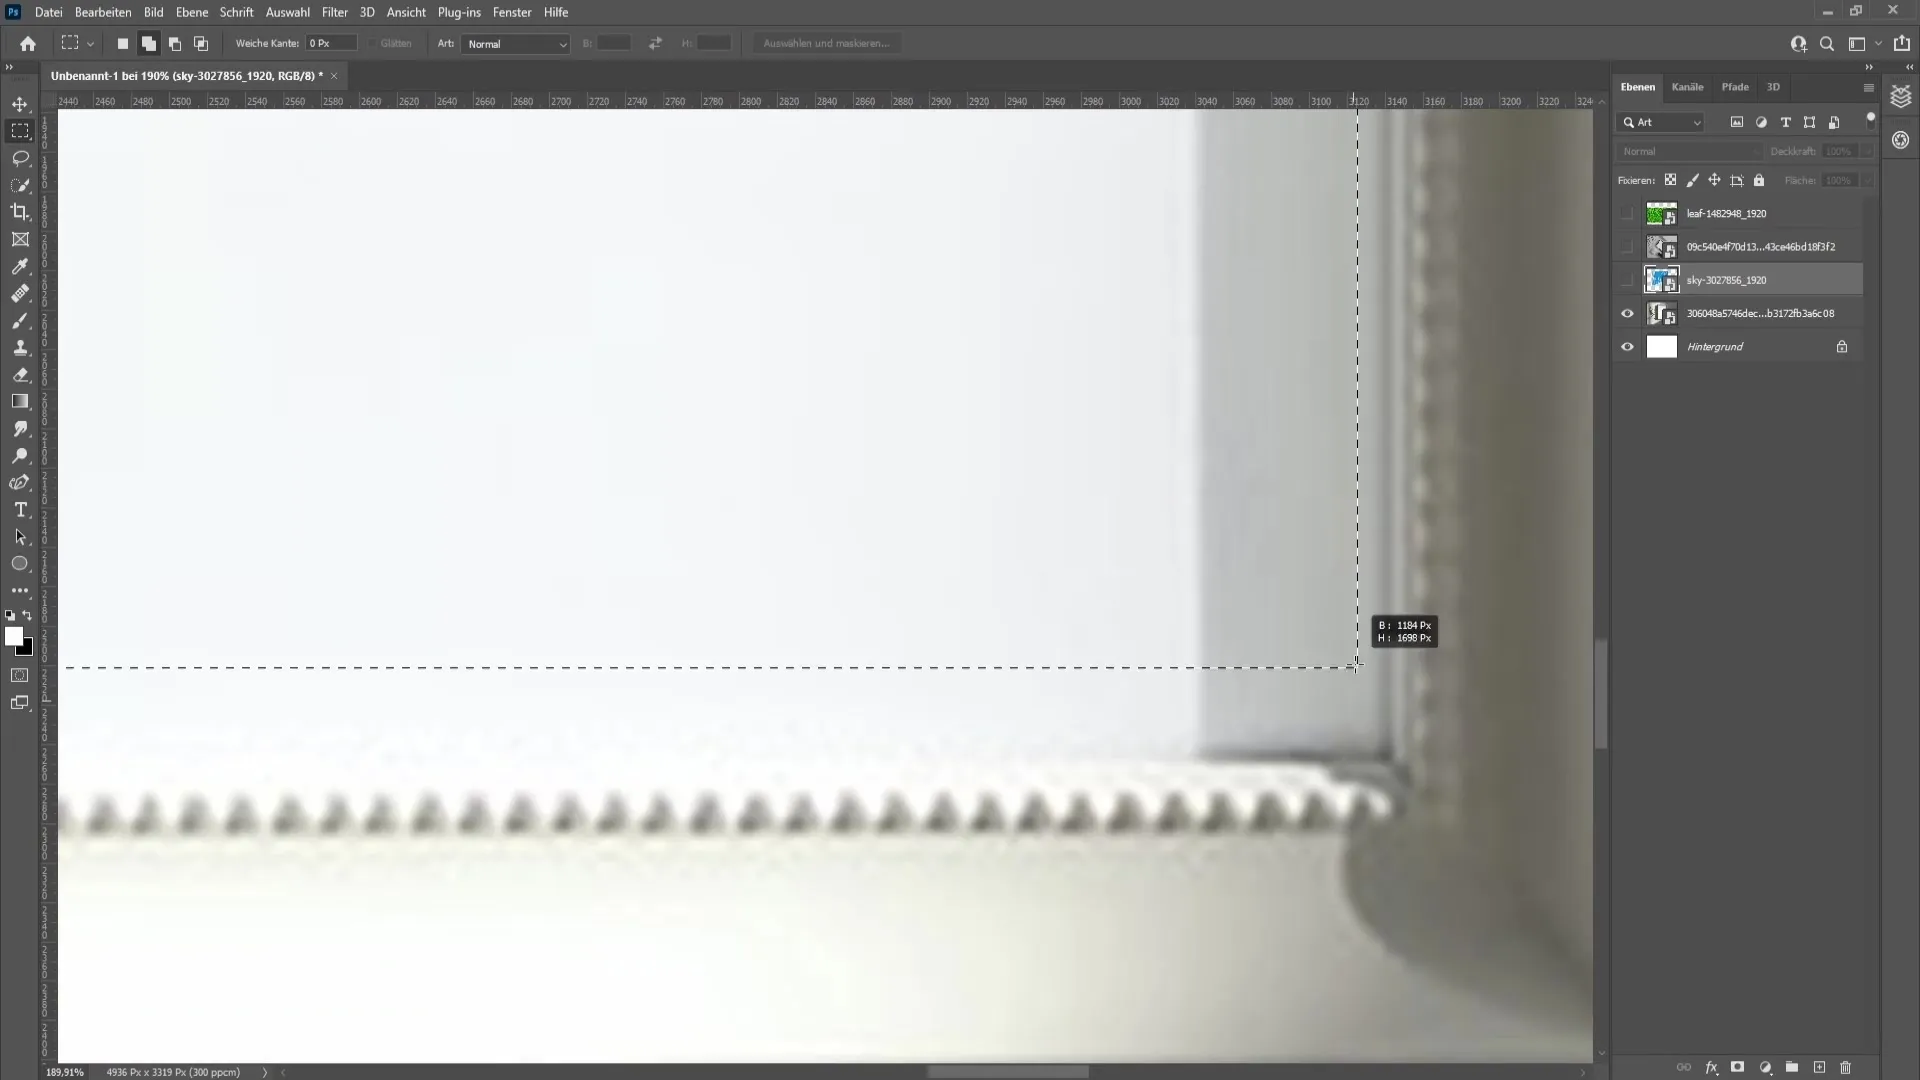
Once the rectangle is created, reveal the image again and click on the clipping mask symbol. This way, you will see the image cleanly displayed in the frame. Check carefully if the image is correctly positioned and adjust it if necessary using Ctrl + T.
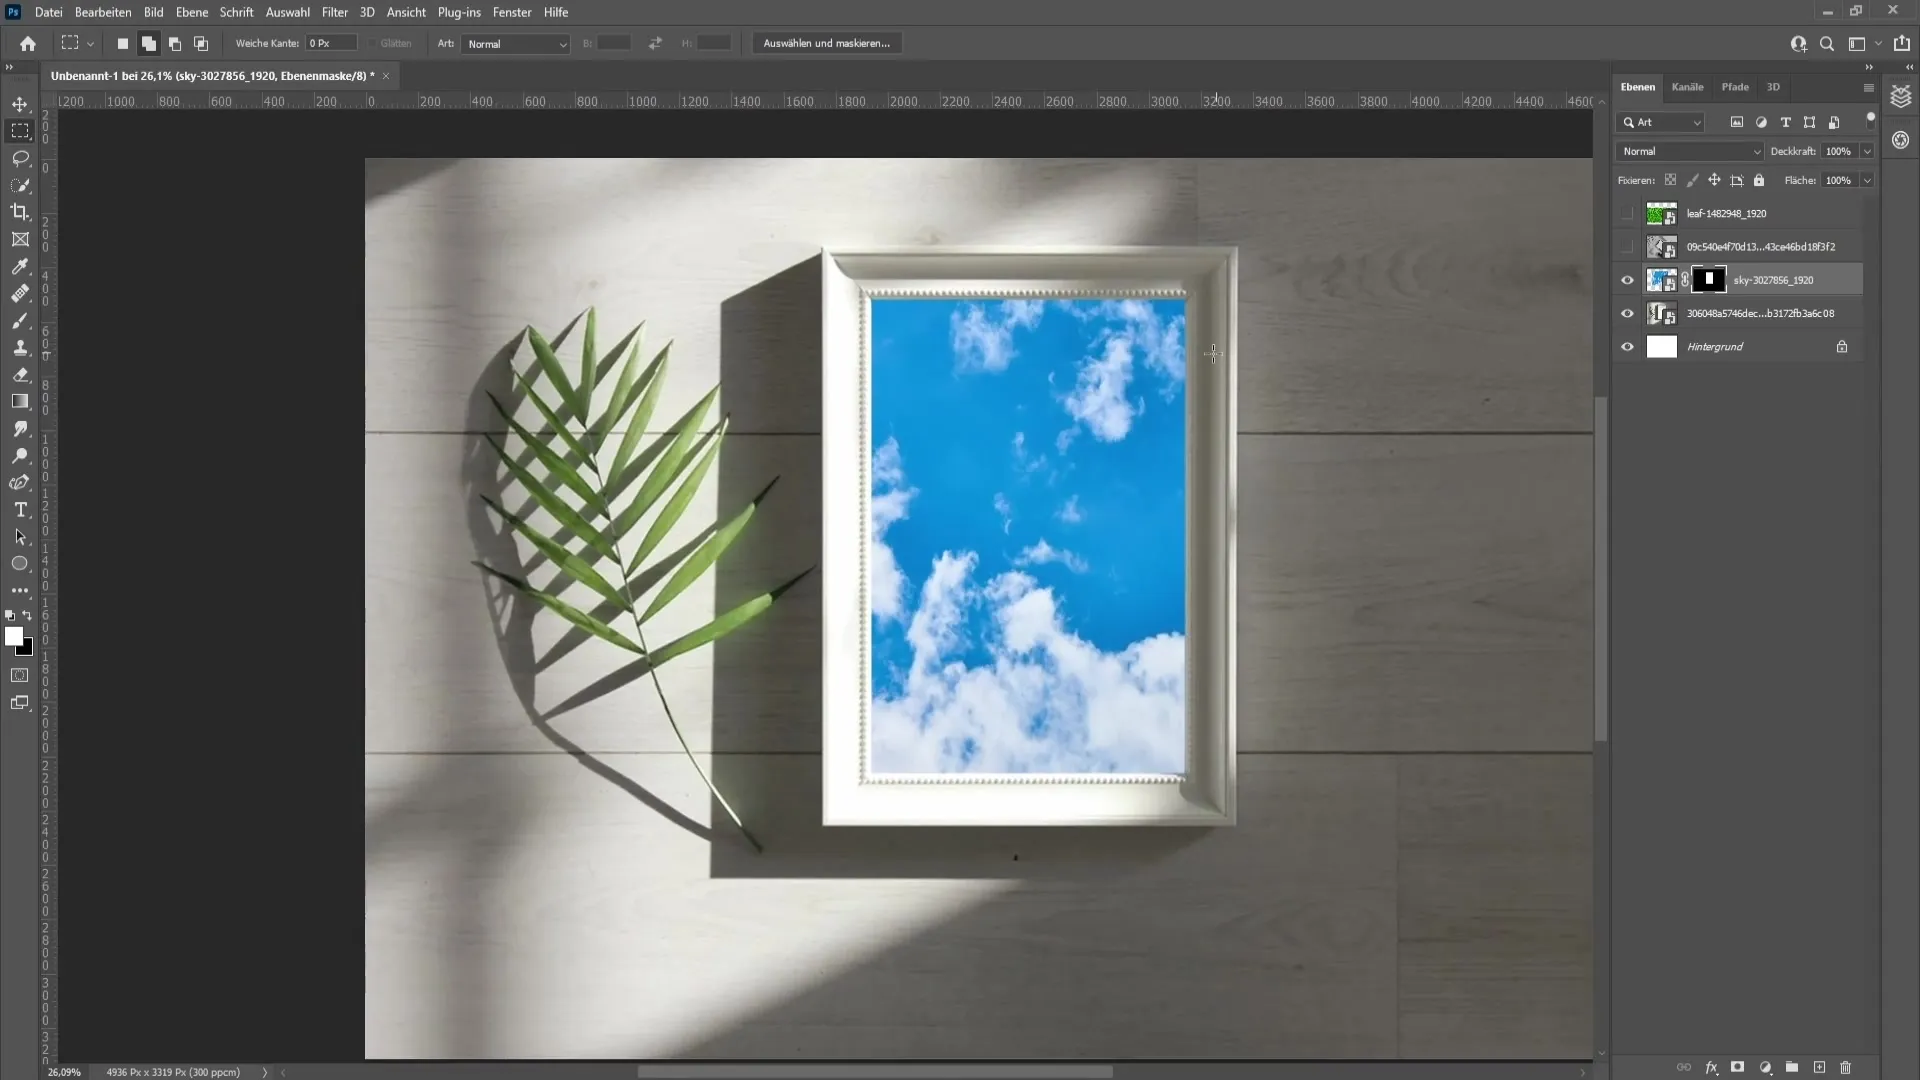
To create a realistic shadow, you need to set your image's fill option to "Multiply." This will make the natural shadow typically present in the picture frame visible. You can also adjust the opacity of this layer slightly to optimize the effect.
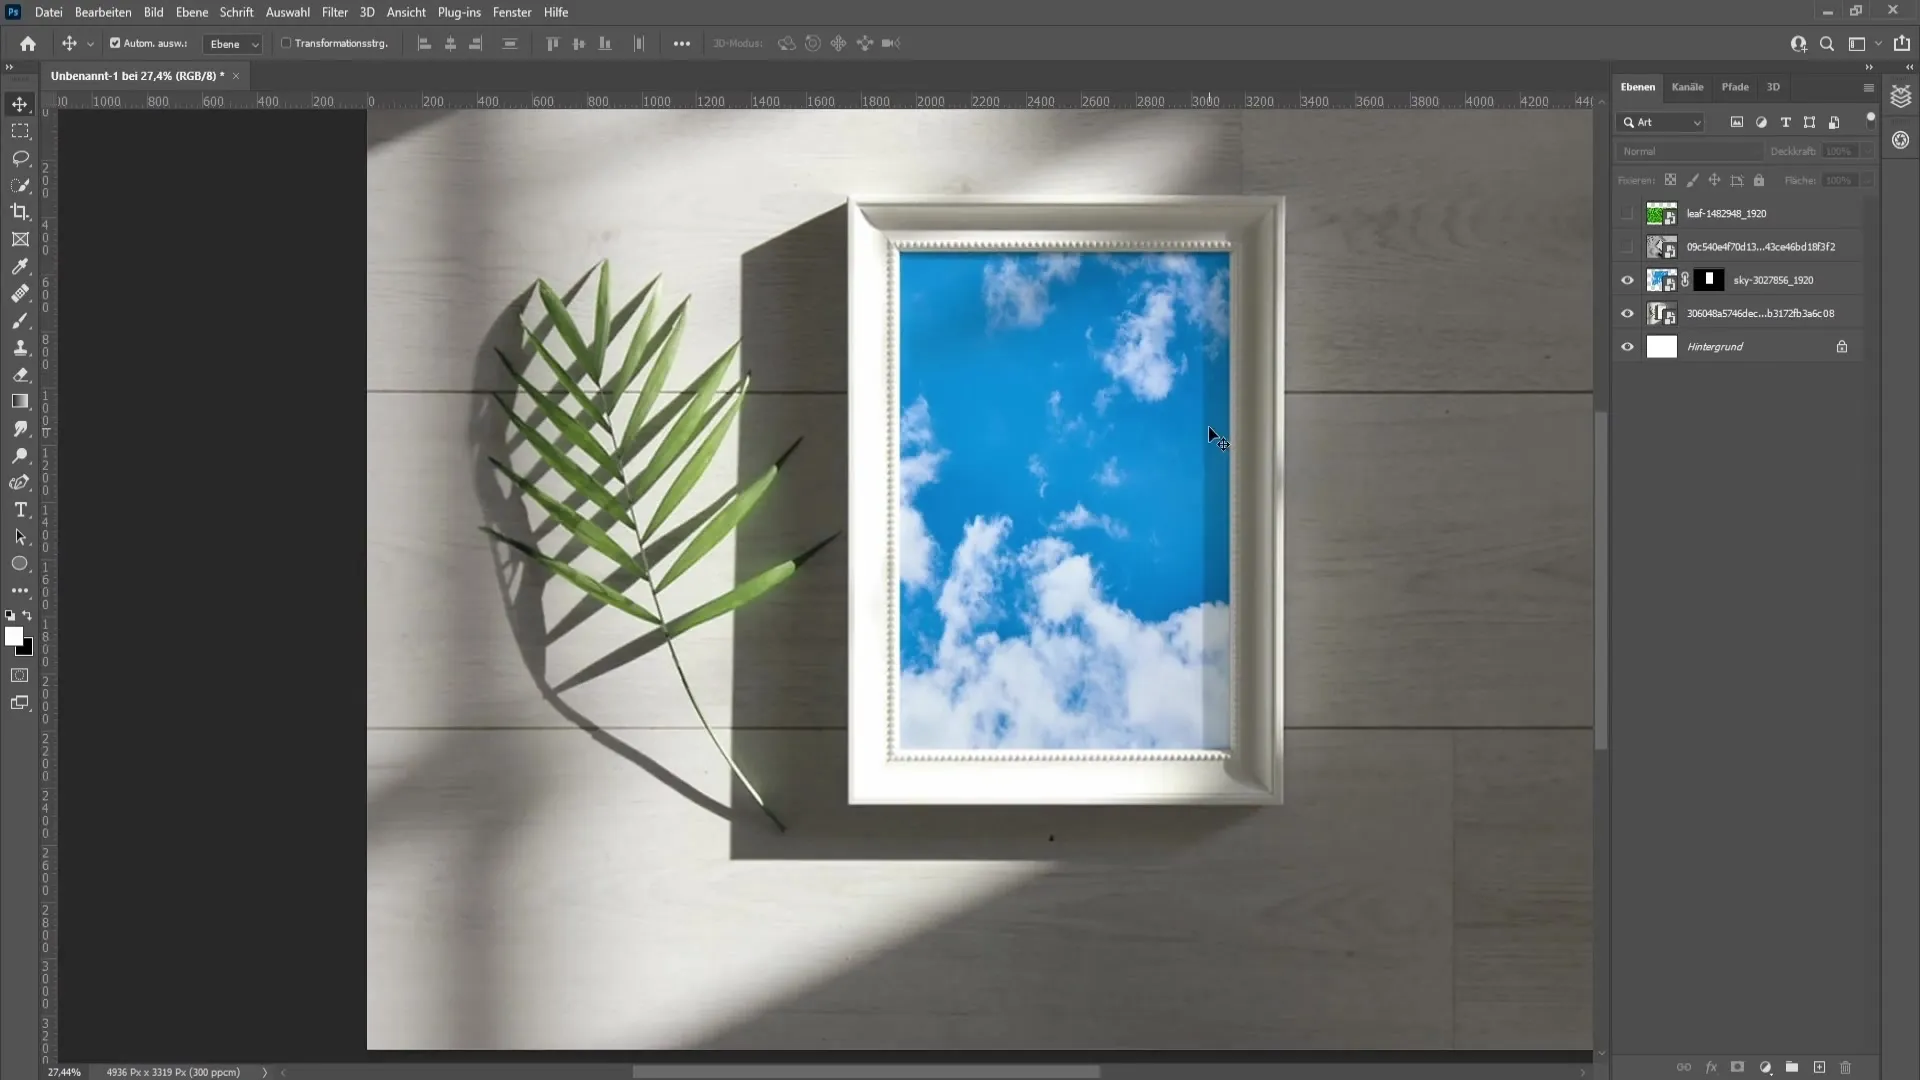
Once you have completed this step, the more complex example comes: the mockup for a mobile device. To place the image on the phone, go back to the image layer and press Ctrl + C (Cmd + C on Mac) to copy. Then create a new empty layer to use the vanishing point feature.
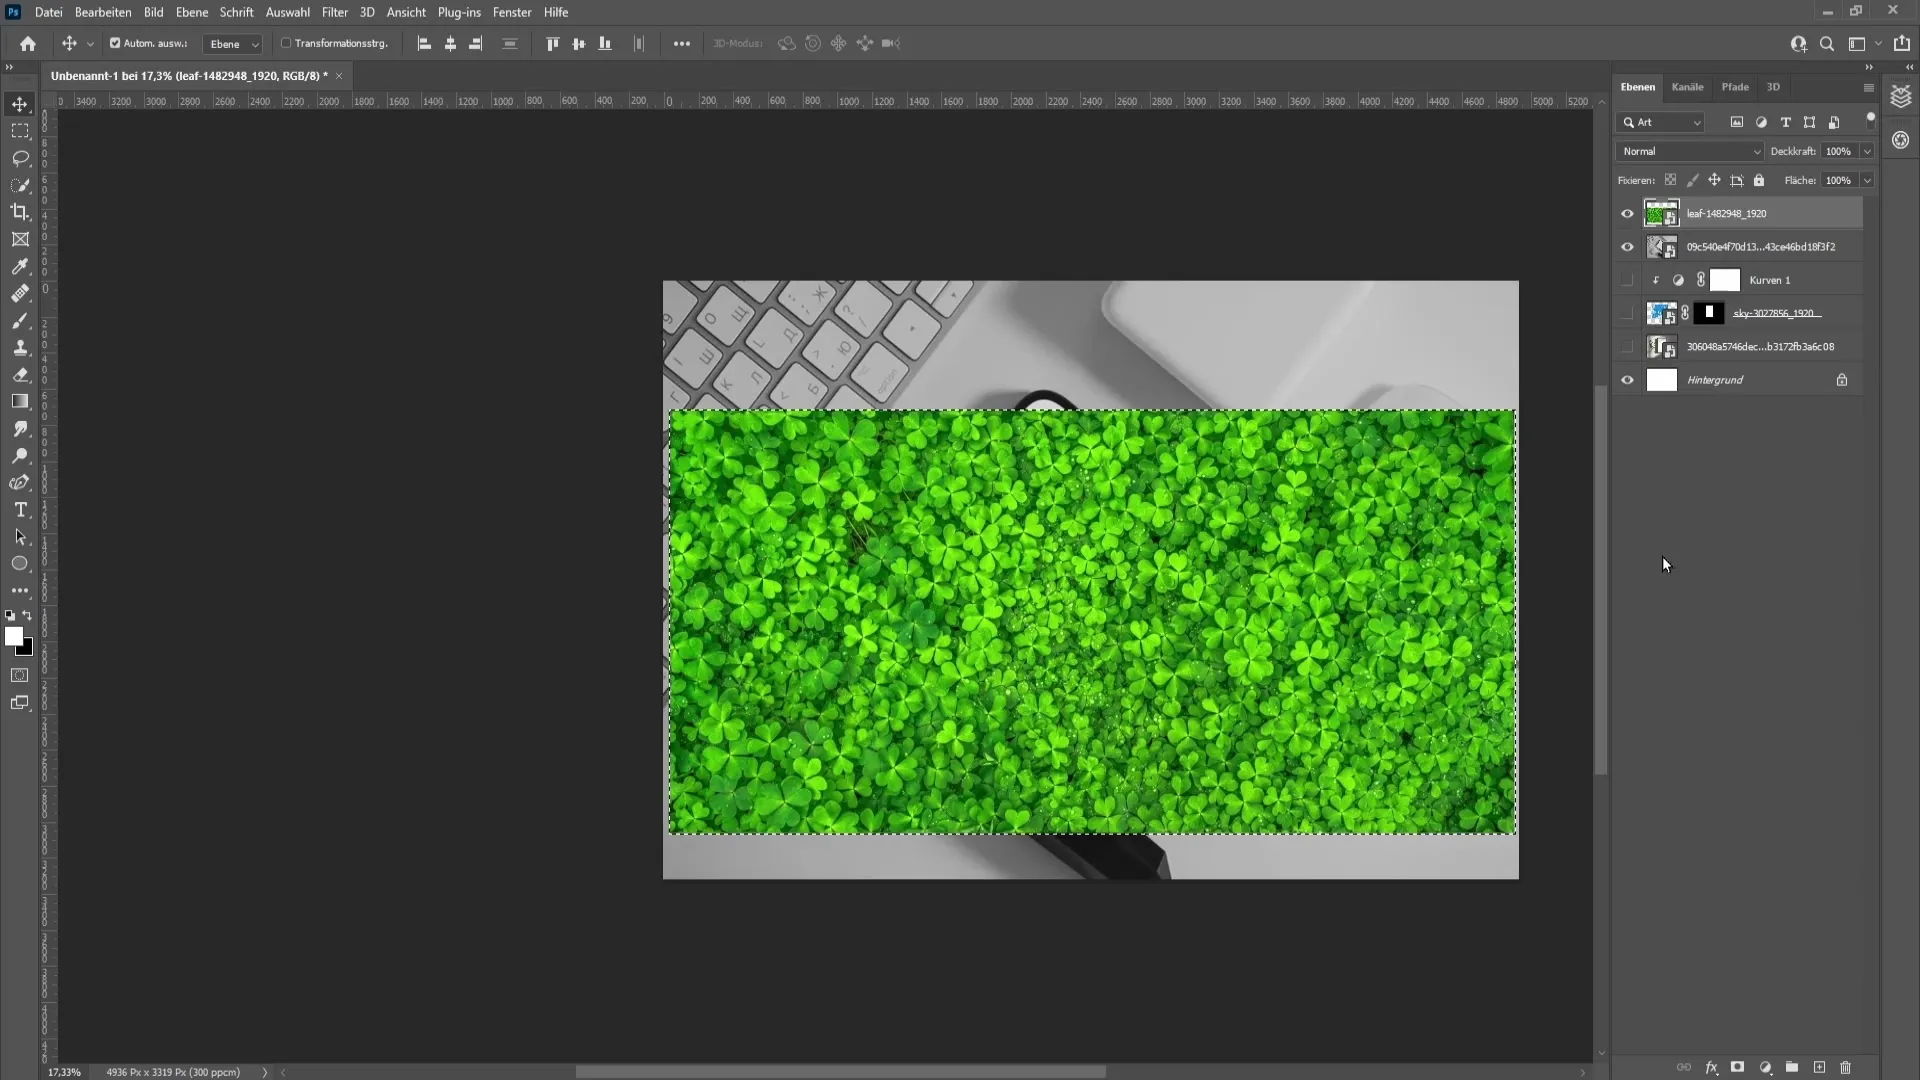
Set a few points to determine the alignment of your mobile device. These points must be set relative to the edges of your phone. It is helpful to ensure that the lines you draw are parallel to the edges of the mobile device.
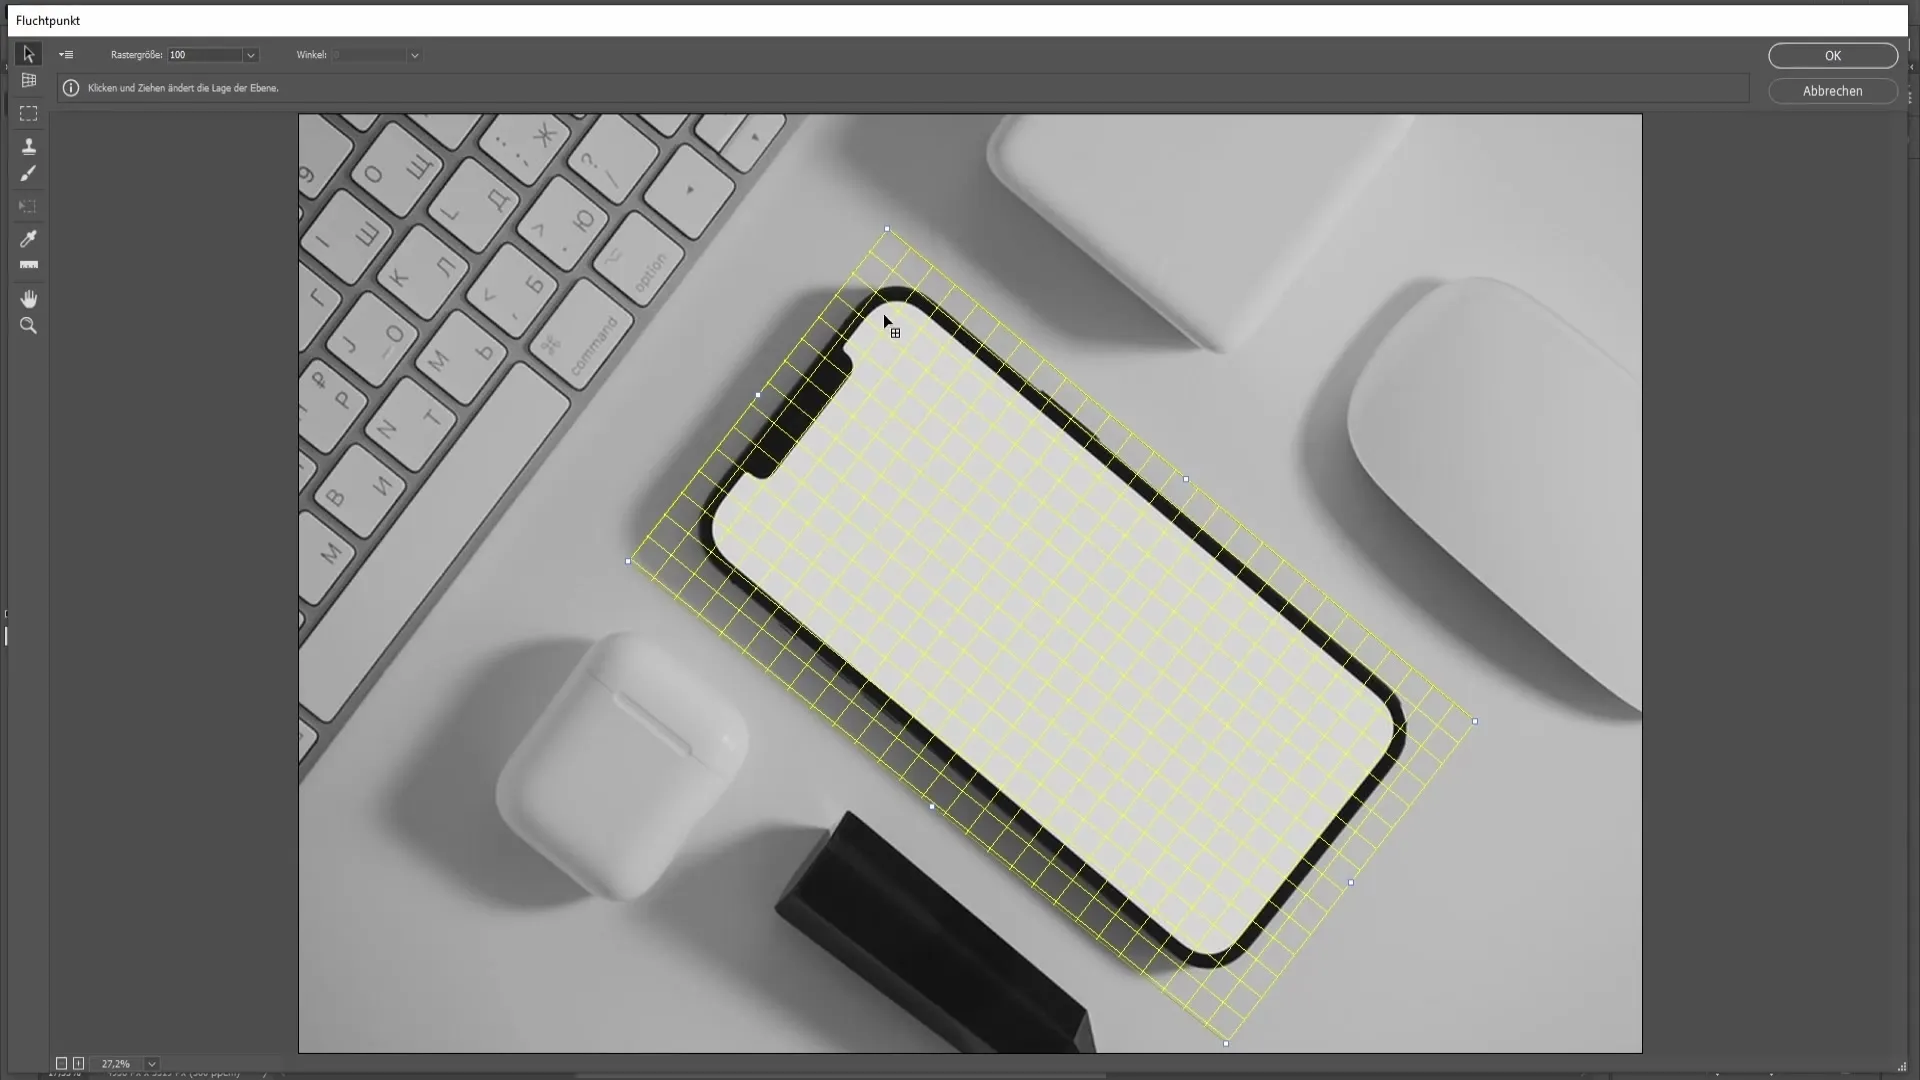
Once you are satisfied with the alignment, you can paste the image by pressing Ctrl + V (Cmd + V). Adjust the position by dragging it into the mobile frame. Now you need to create a selection around the edge of the phone to showcase the image perfectly.
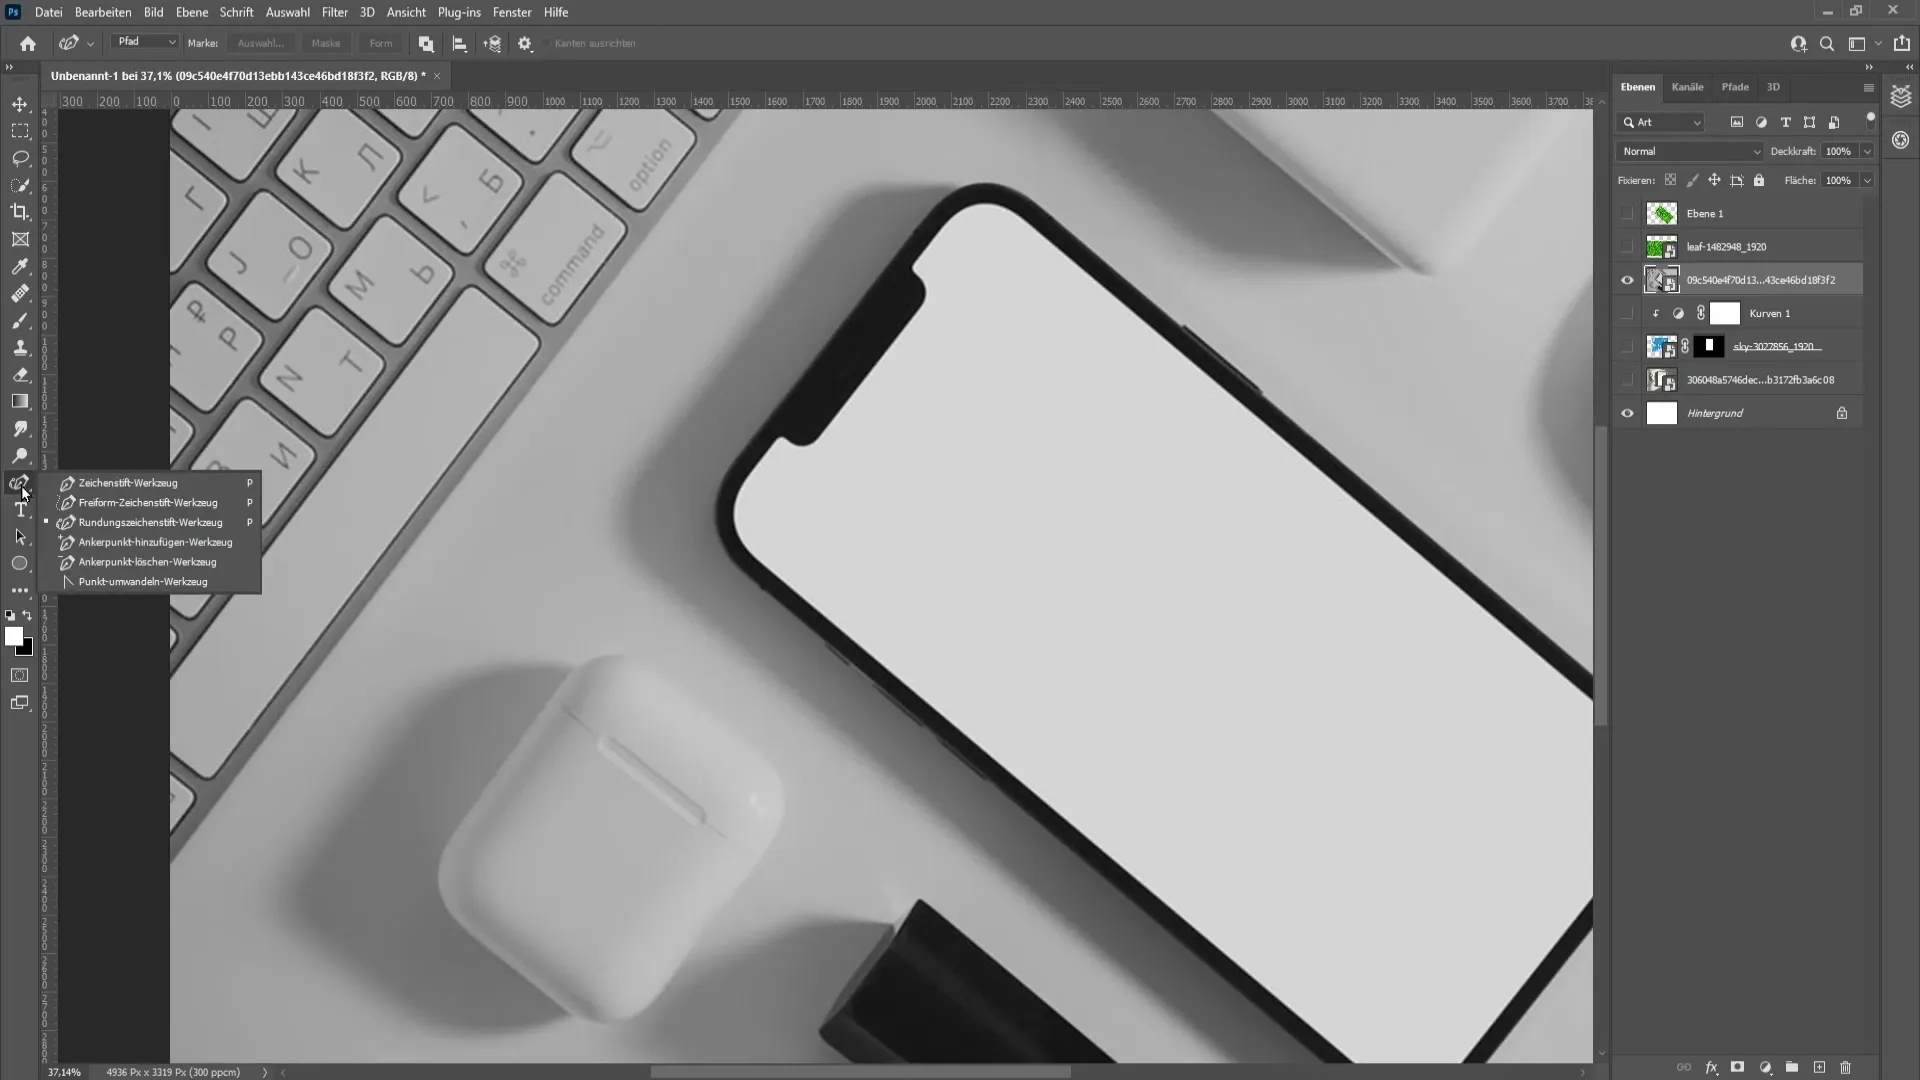
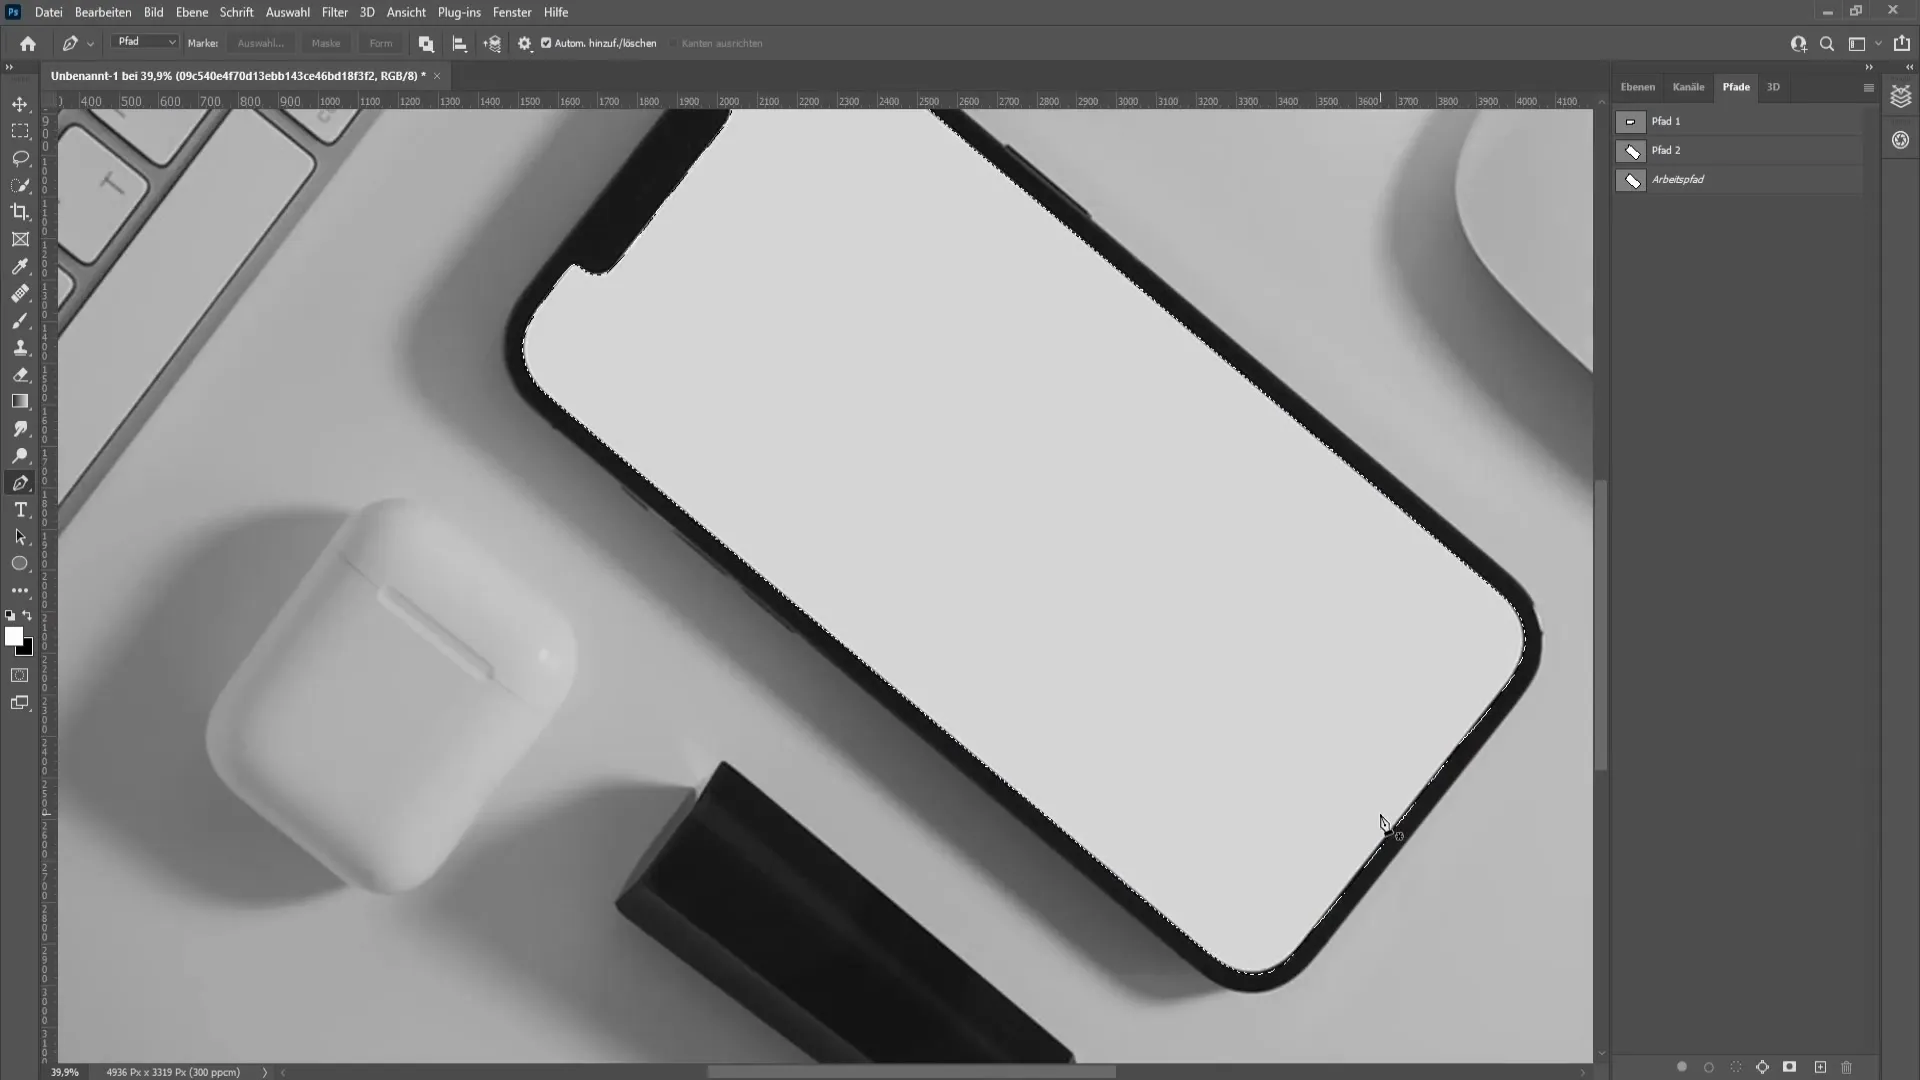
Use the pen tool to create a precise selection around the edges of the mobile device. Make sure the edges are well defined with as few white spots visible as possible. You can move these points afterward to achieve the best fit.
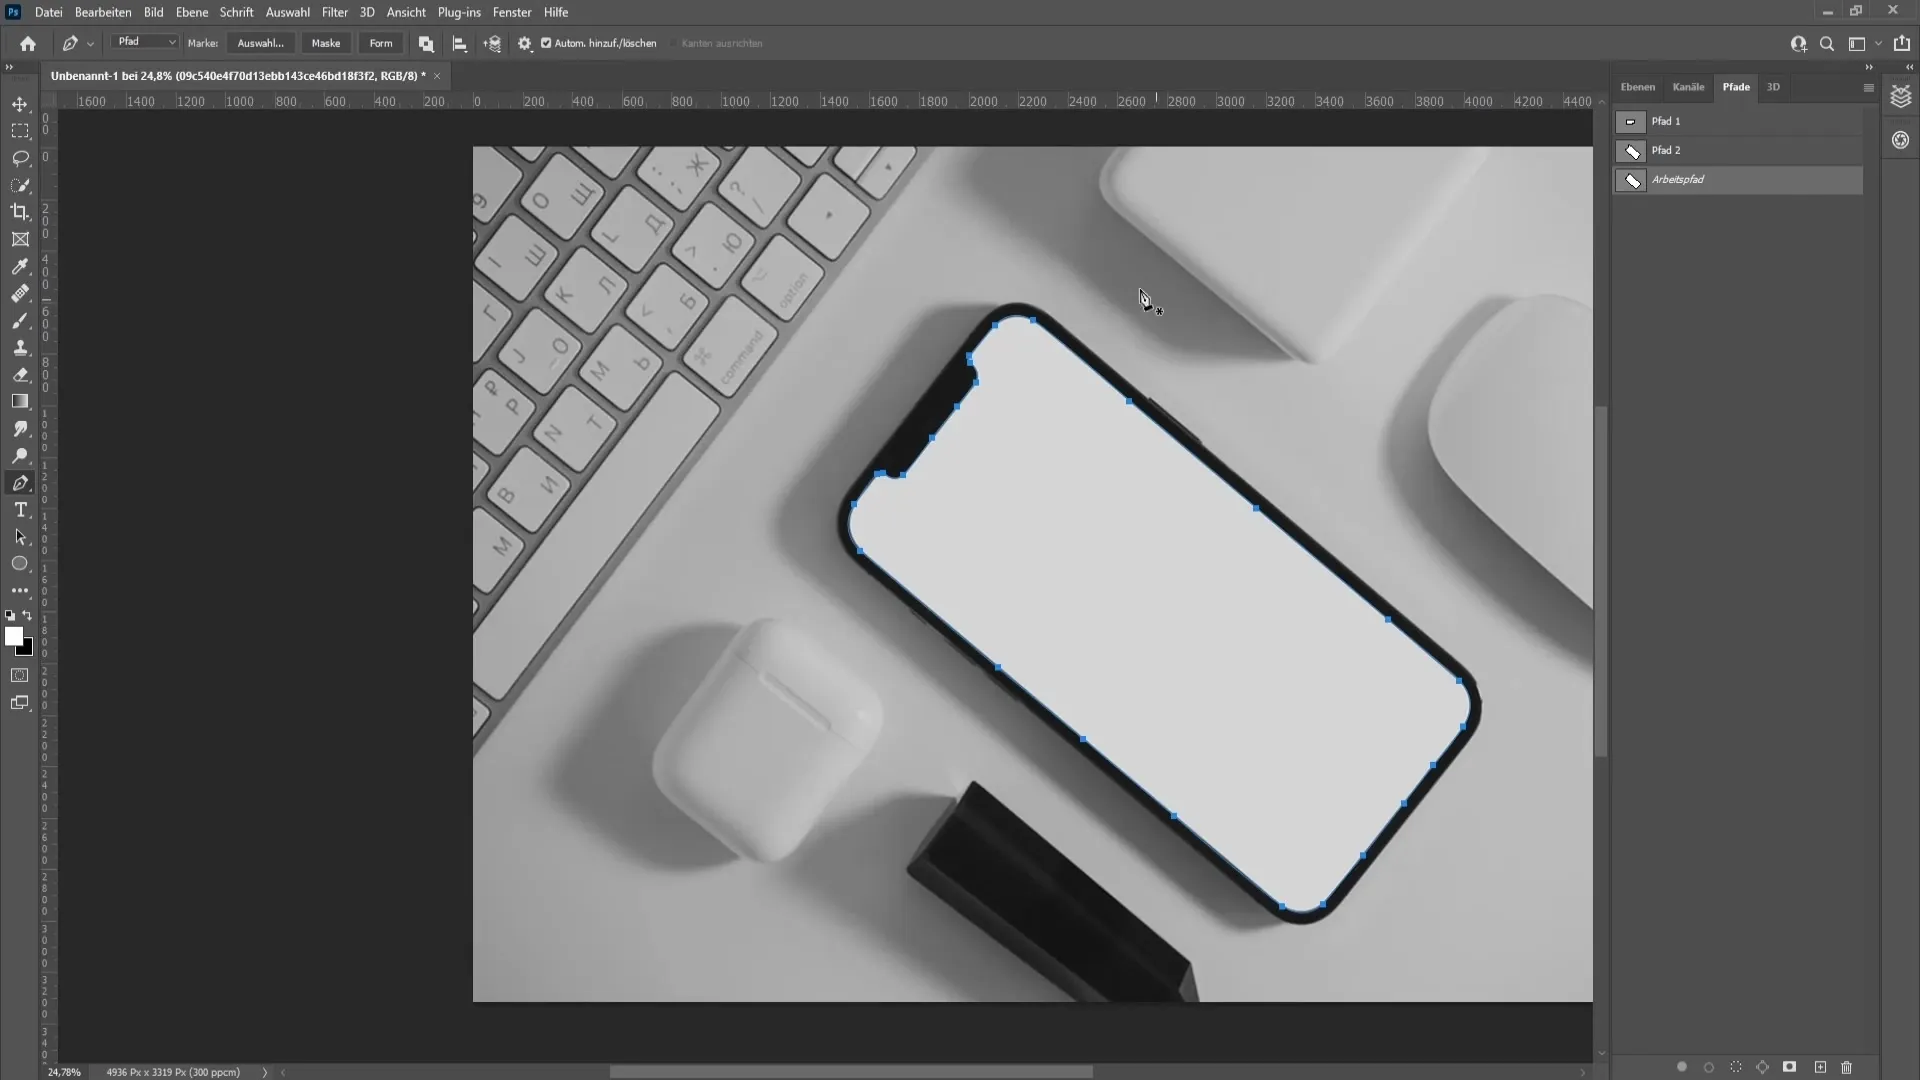
Once you have made the selection, go to the "Select" menu and choose "Create Selection". Make sure to choose a soft edge of zero pixels. Then click OK to confirm the selection.
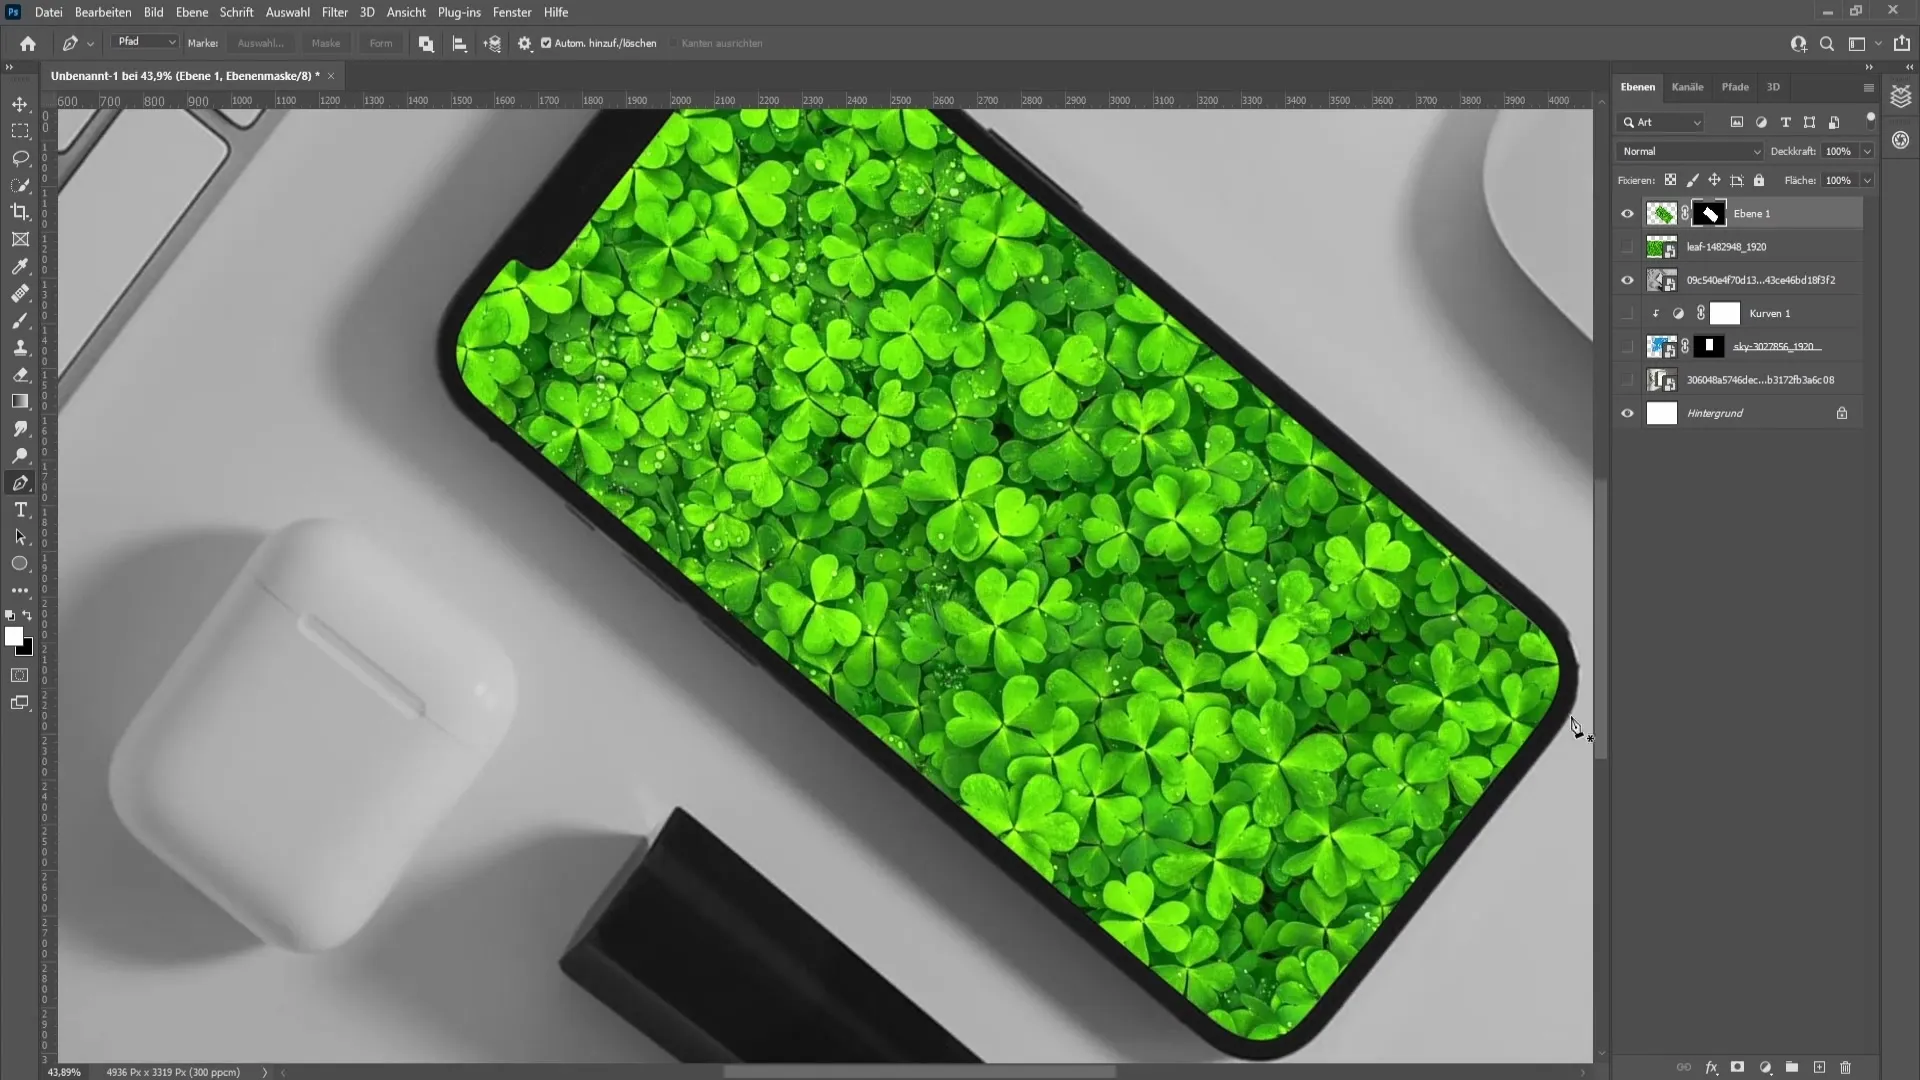
Reveal the image you want to use on the mobile device again, and then click on the layer mask icon. Make sure to check the correct position and improve the edges as needed.
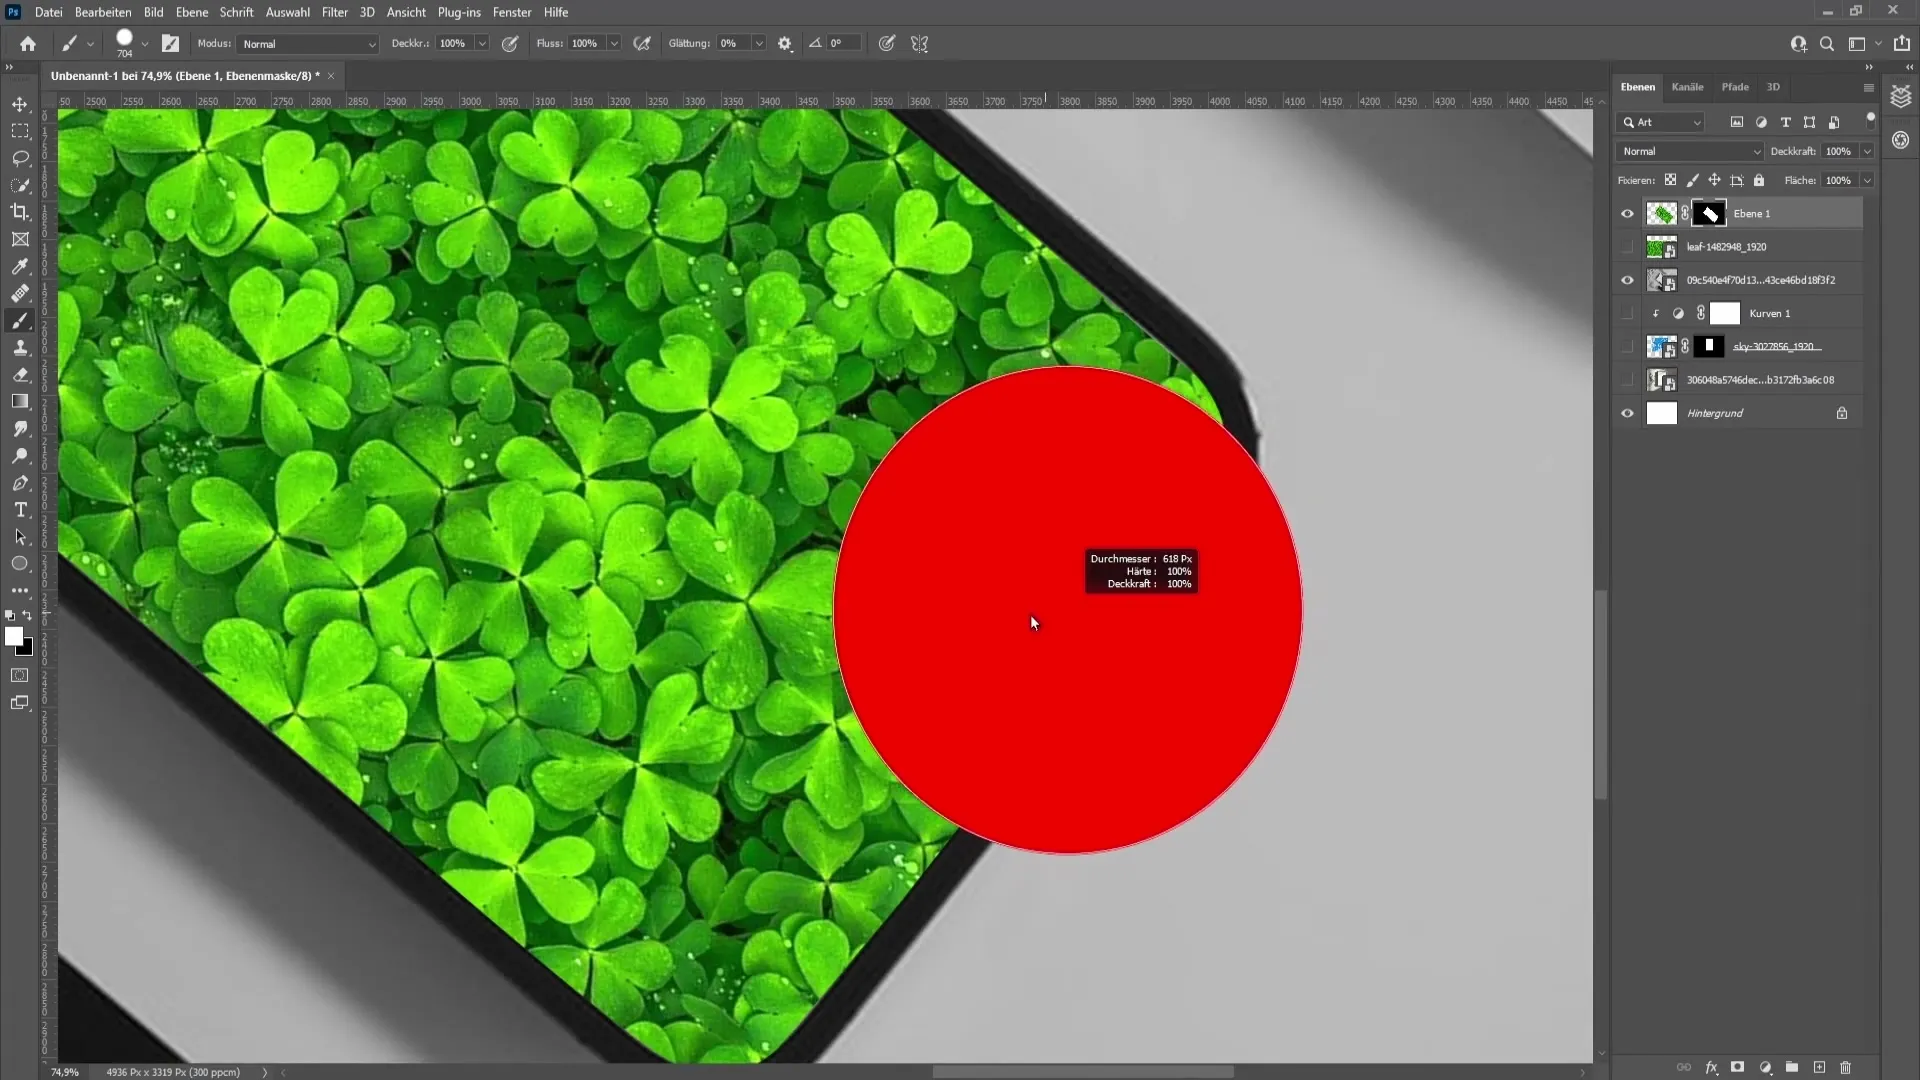
To further smooth out the edges, you can carefully cover the white areas with a brush. Adjust the opacity of the brush and use partial areas of the image to make it look as harmonious as possible.
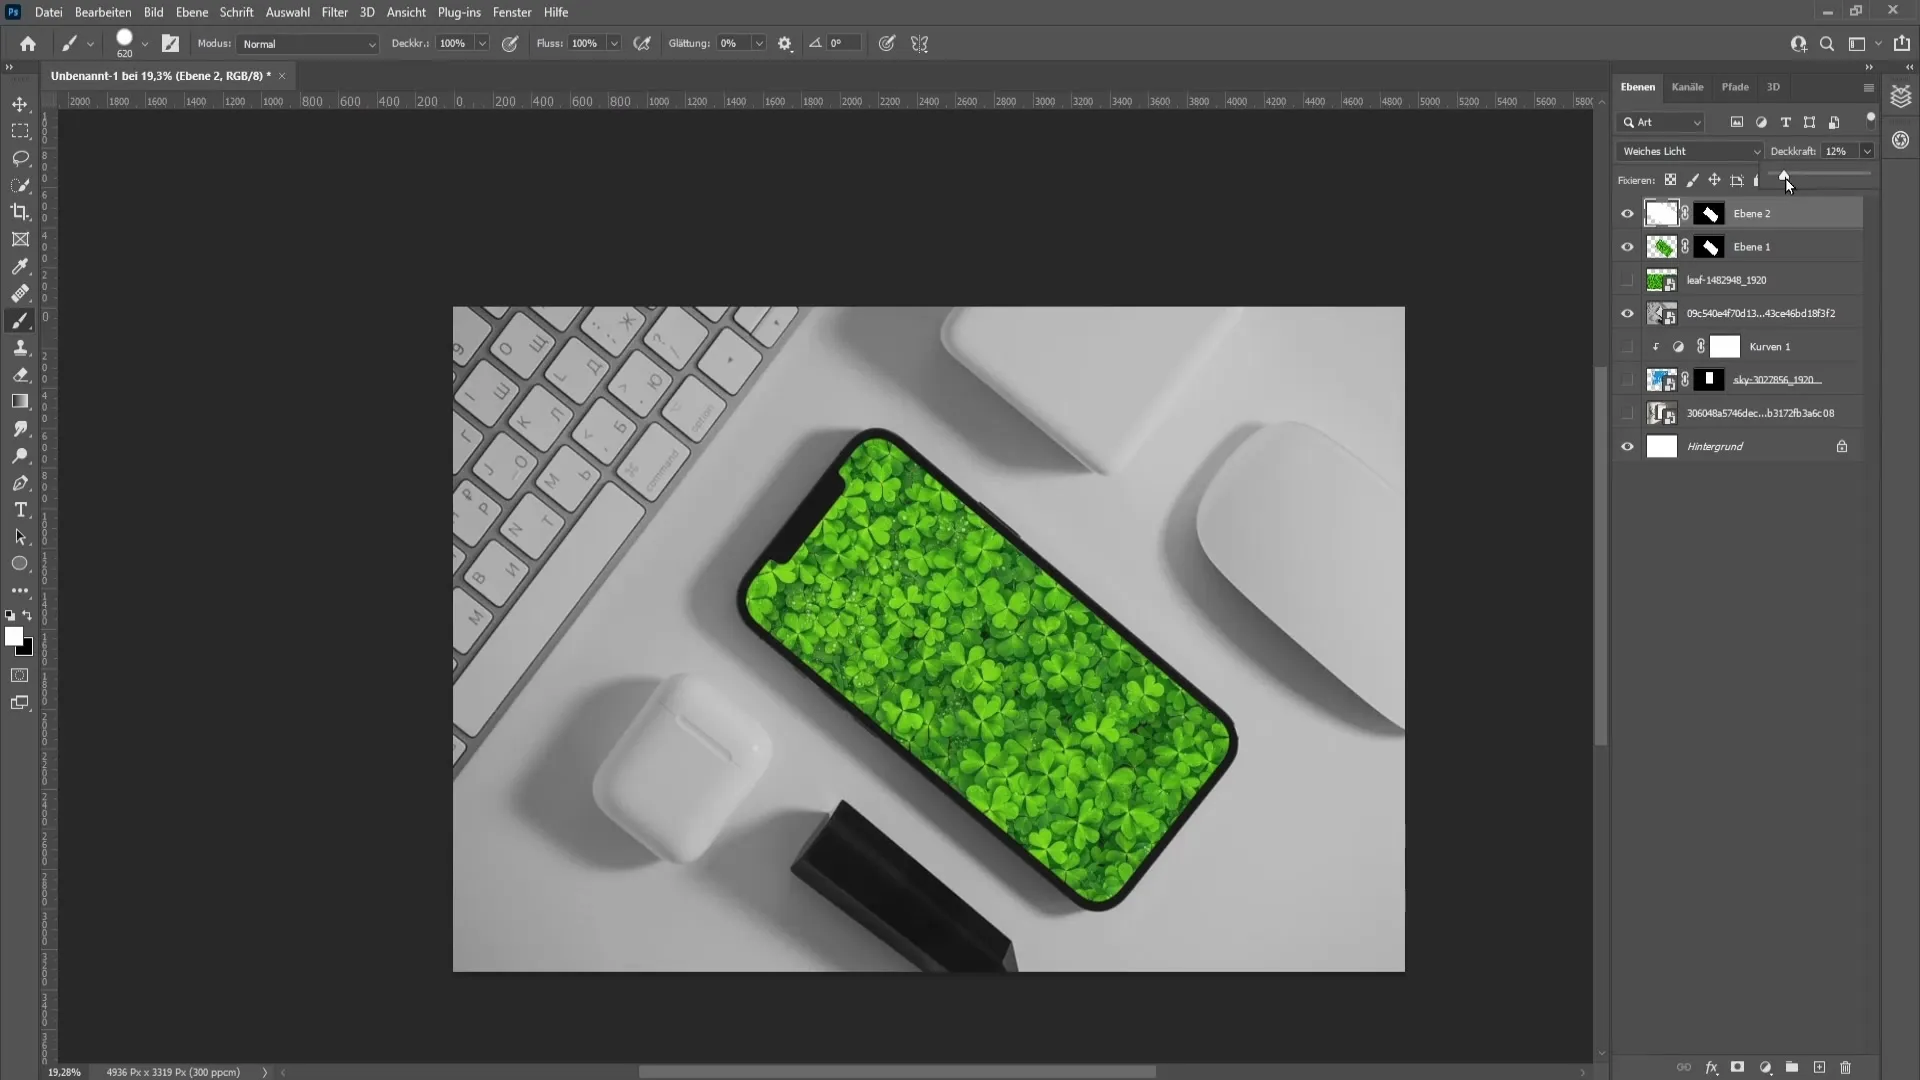
Finally, you can adjust the fill options of the image and experiment with further adjustments to the opacity to make the entire mockup look even more realistic. You decide how much the background should show through and whether you want to apply additional effects.
Summary
In this tutorial, you have learned how to create a mockup in Photoshop for both picture frames and mobile devices. You have gone through the steps of image placement, use of selection tools, and application of image corrections. By applying all these techniques, you can effectively present your design ideas.
Frequently Asked Questions
How can I adjust the opacity in Photoshop?You can adjust the opacity in the layer control panel on the right side.
What is a clipping mask?A clipping mask allows you to make an underlying layer visible only in the shape of the layer above it.
How can I adjust an image without distortion?Use the transformation function with the correct selection of anchor points to scale the image proportionally.
Can I create mockups in other shapes?Yes, you can use any shapes and objects to create your mockups as long as you apply the appropriate techniques.


