The use of AI voices and Deepfake technologies is gaining importance. One of the best alternatives to ElevenLabs is Murf.ai, a powerful tool that helps you create audio and video content quickly and easily. In this tutorial, I will explain to you step by step how to work with Murf.ai to achieve impressive results.
Main Takeaways
- Murf.ai allows for the quick creation of audio and video content using high-quality AI-generated voices.
- You have access to a variety of voices in different languages, can customize the voice of your choice, and even add videos and music.
- The user-friendly interface and flexible pricing models make it an attractive choice for many users.
Step-by-Step Guide
1. Sign Up and First Impression
To start with Murf.ai, sign up first. After registration, the platform interface looks like this:
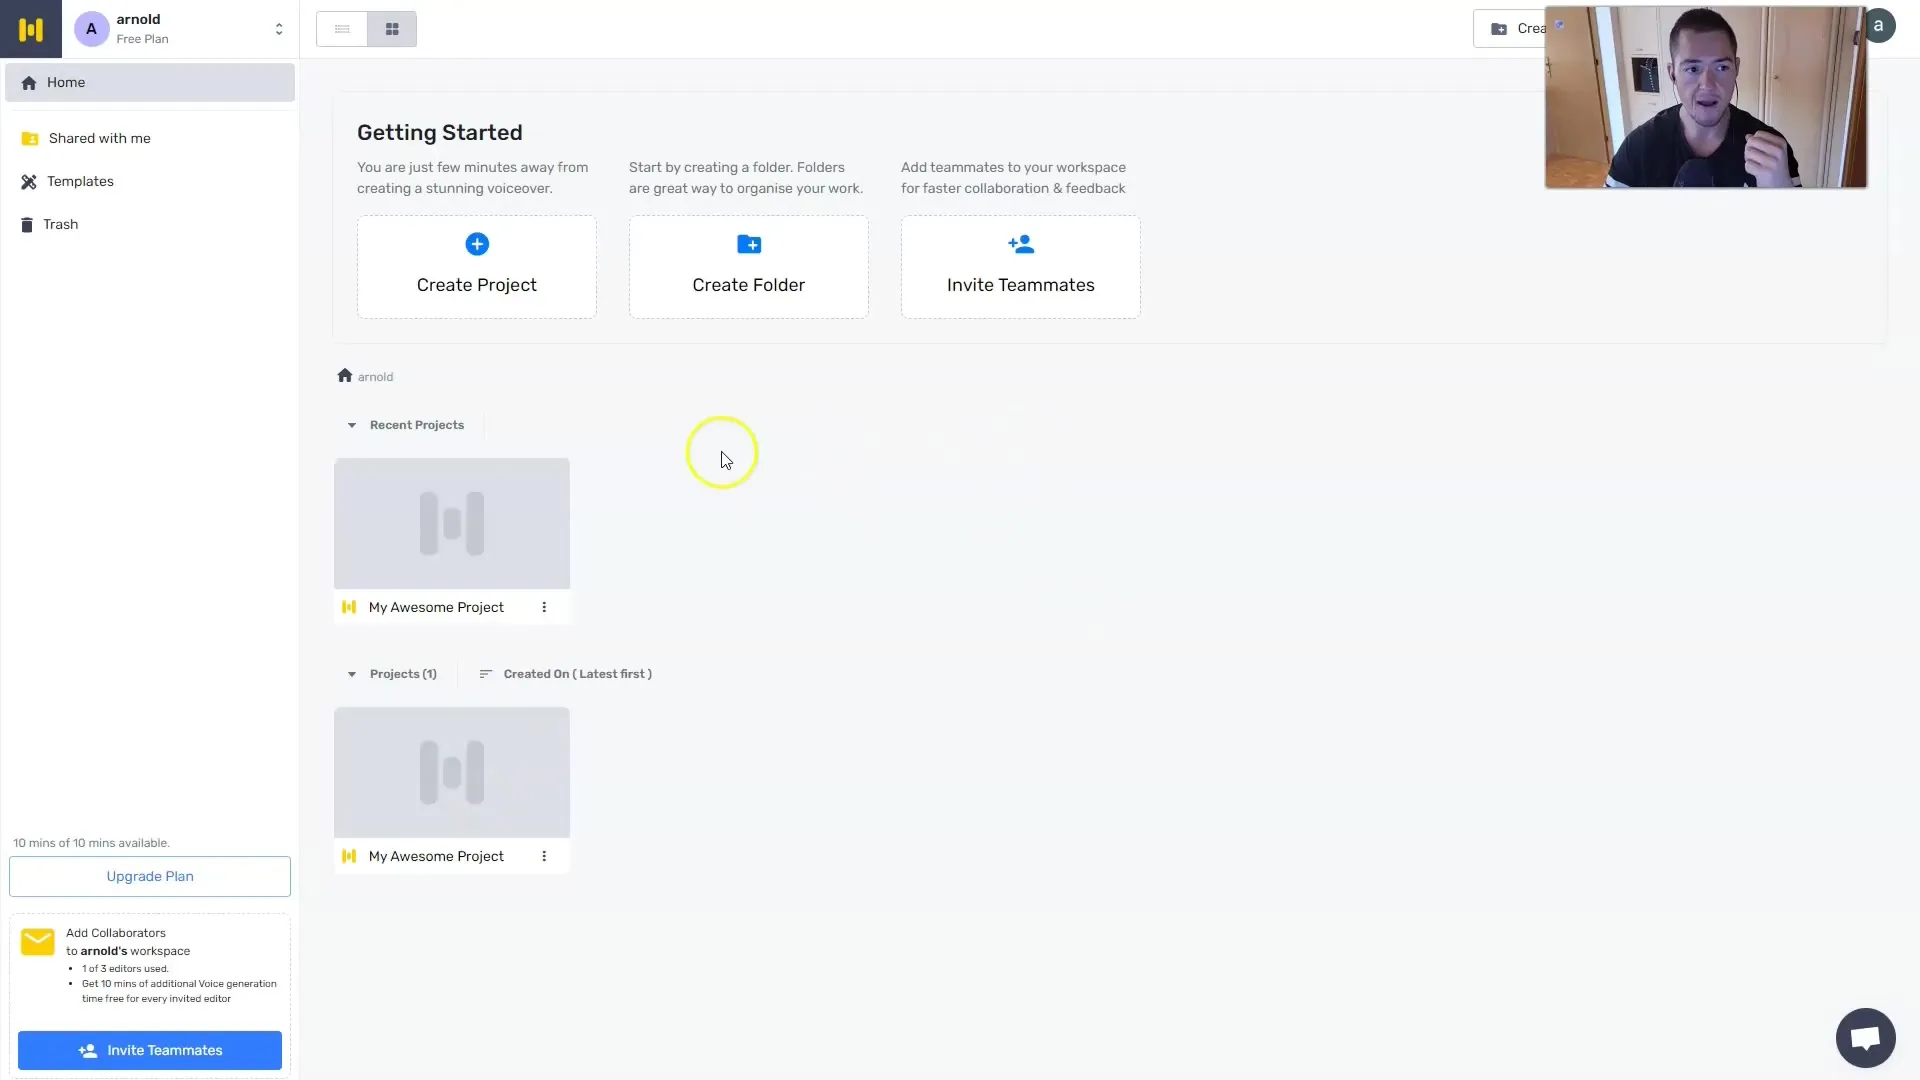
You can start creating your project immediately by clicking on "Create New Project".
Did you know that you can test Murf.ai for free for 10 minutes? This is a great opportunity to try out the features of the tool.
2. Plans and Pricing
In Murf.ai, there are different pricing plans. The free version does not allow downloads and has limited usage. However, you have the opportunity to listen to all voices and invite up to three users.
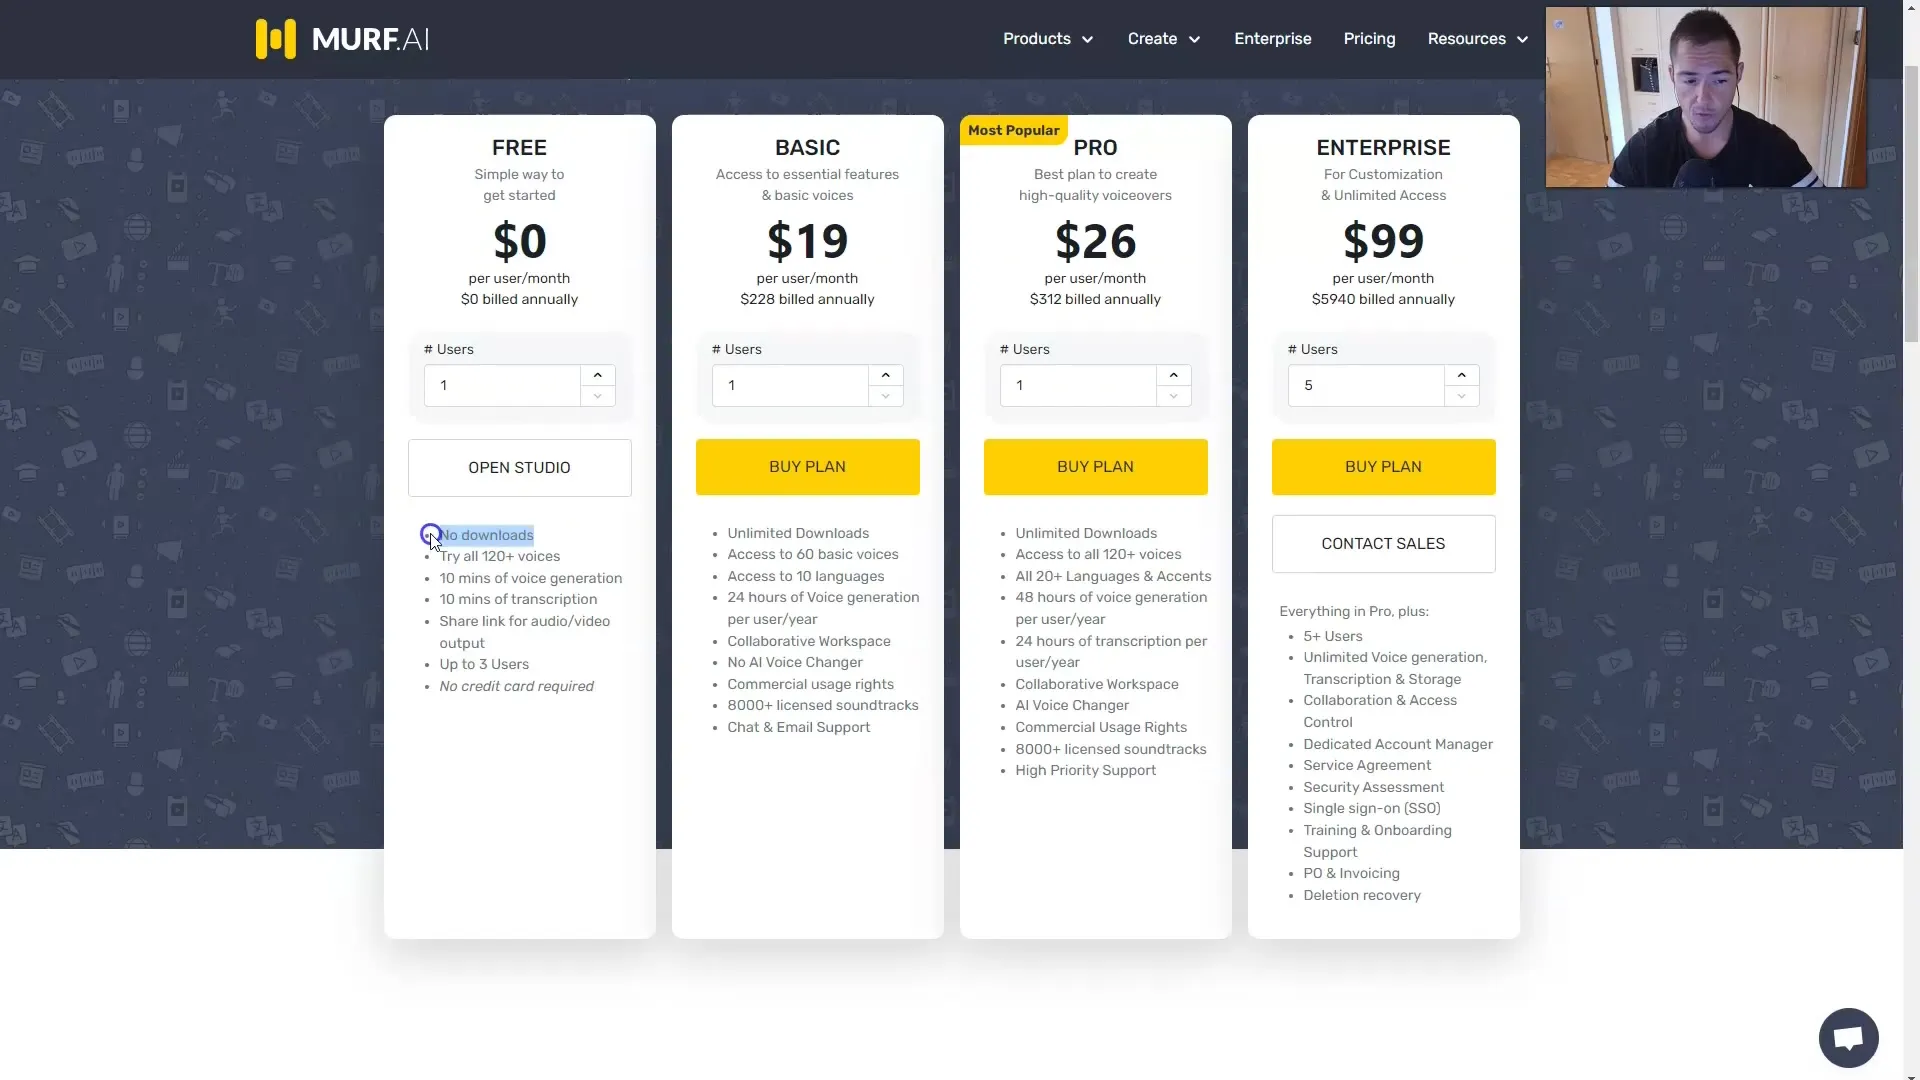
If you want to upgrade to the Basic plan, you will pay about $20 per month, totaling $228 per year. With this, you will have access to 60 voices in 10 languages and can create up to 24 hours of voice-over per year.
The Pro plan is particularly popular as it offers 120 voices in more than 20 languages. For large enterprises, there is the Enterprise plan, which allows for unlimited voice generations and special support for five or more users.
3. Create Project
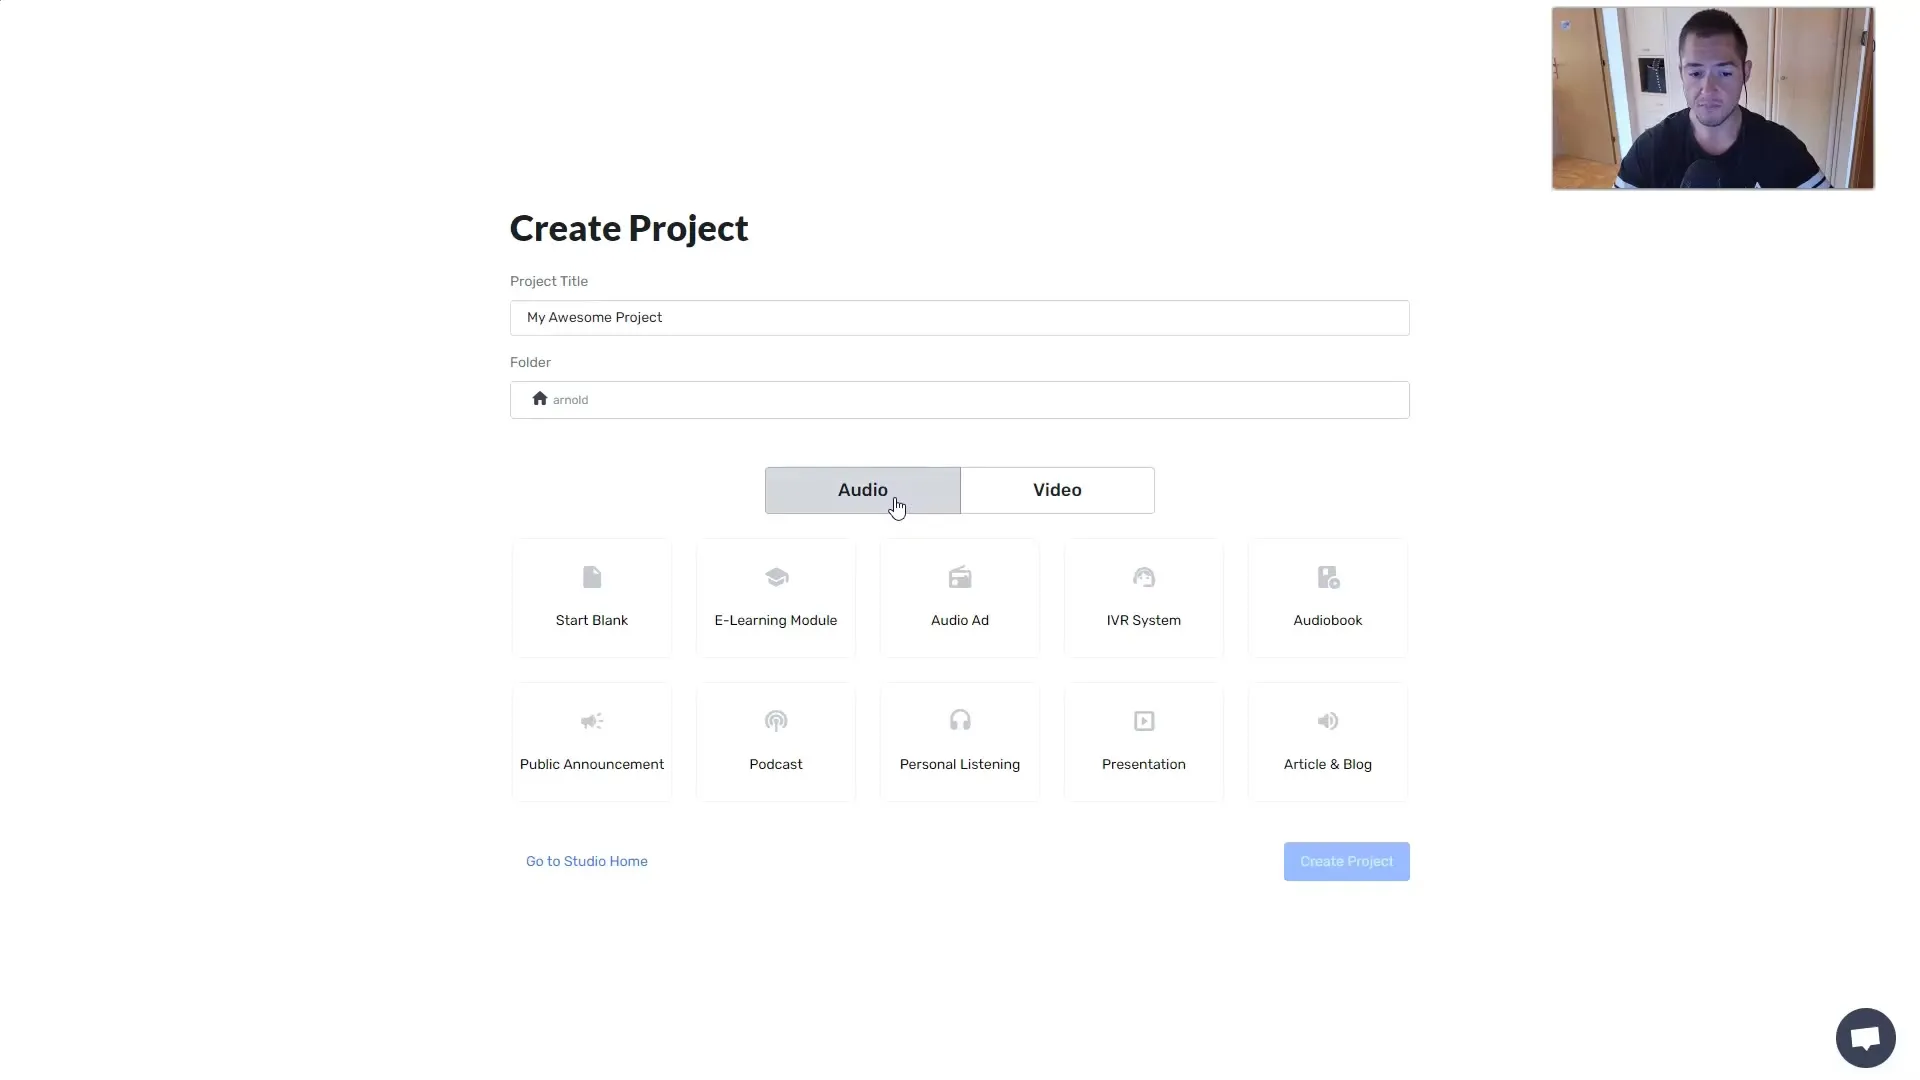
To create a new project, click on "Create Project" again. Give your project a title, for example, "My Cool Project".
You have the choice between audio and video formats. Here you can decide whether you want to create a podcast, an e-learning module, or a video.
4. Select Text and Voice
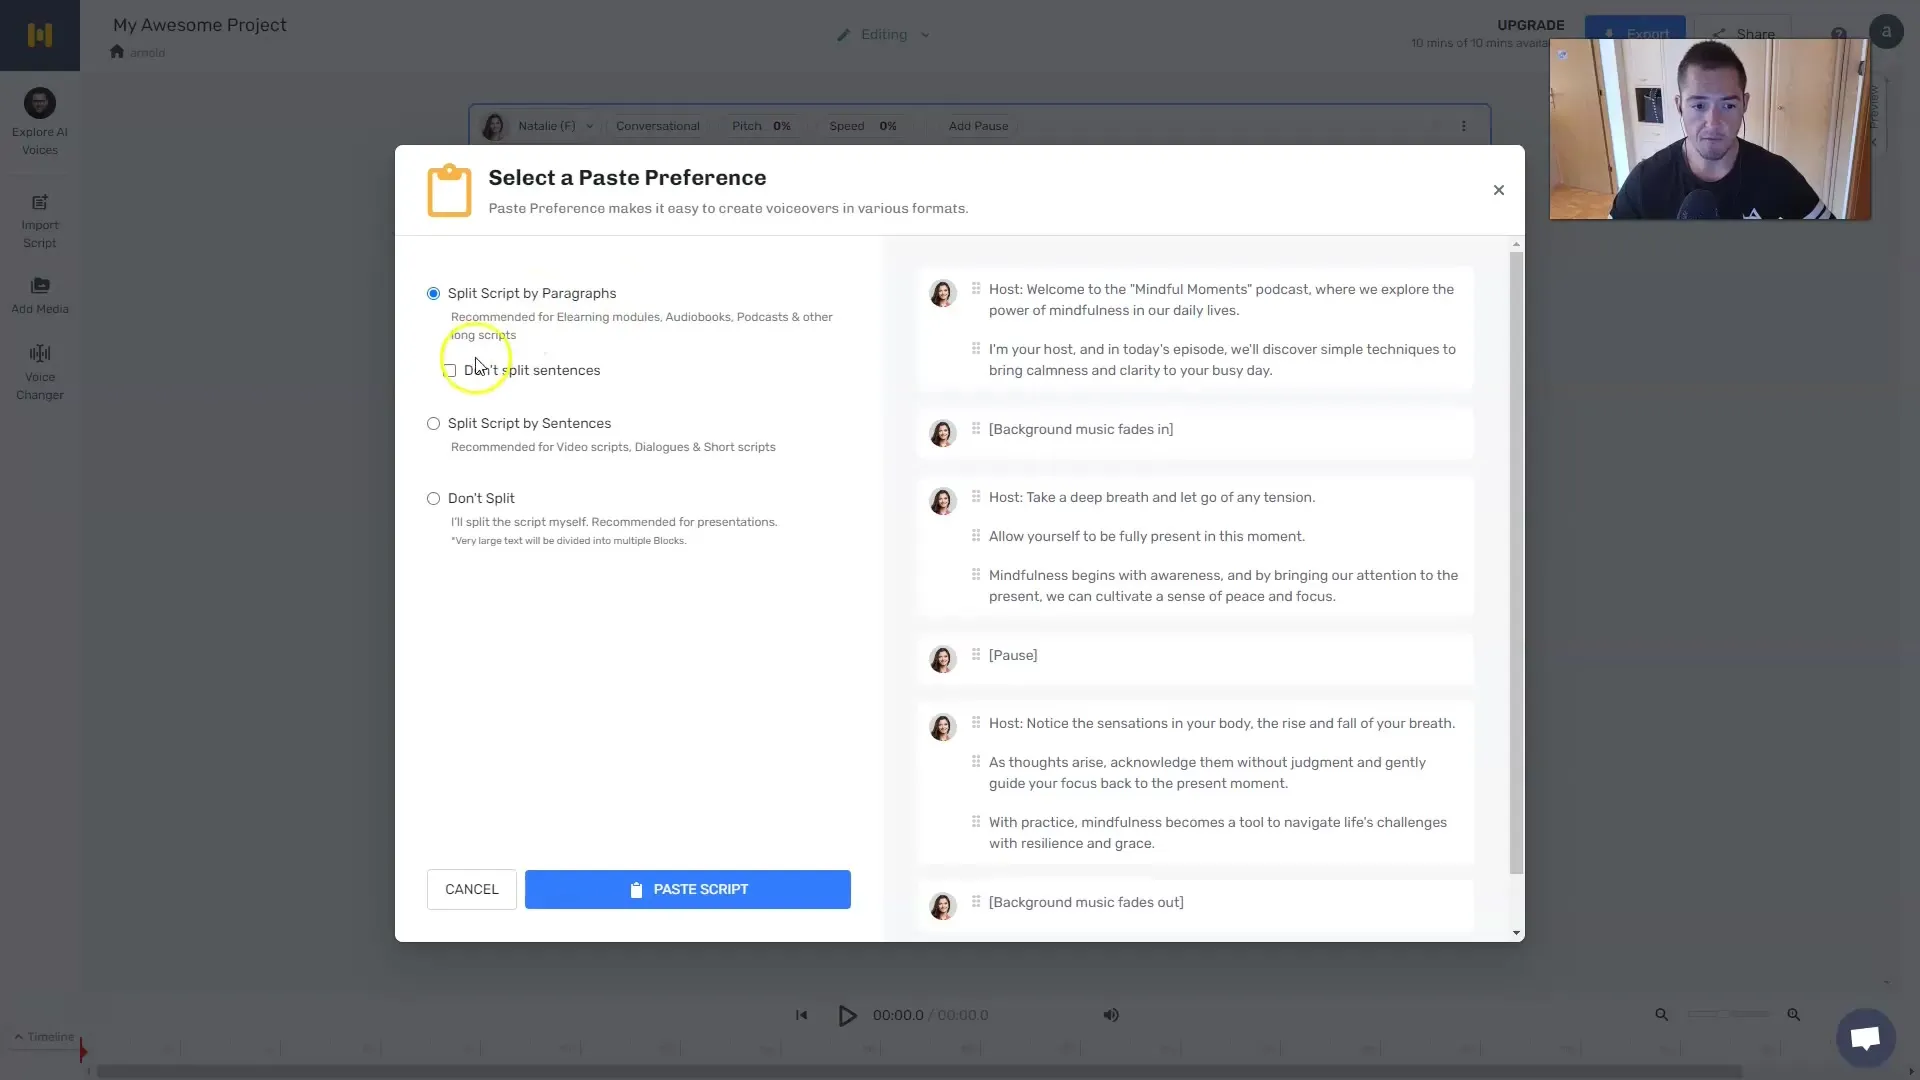
Once you are in your project, you can enter or copy the desired text. Choose a suitable voice to speak your text. Murf.ai offers a variety of voices, even children's voices.
After selecting your voice, you can specify how the text should be divided – either per paragraph or sentence.
5. Generate Audio
Once you have inserted the text and selected the voice, click on "Generate Audio". You can listen to the generated audio immediately.
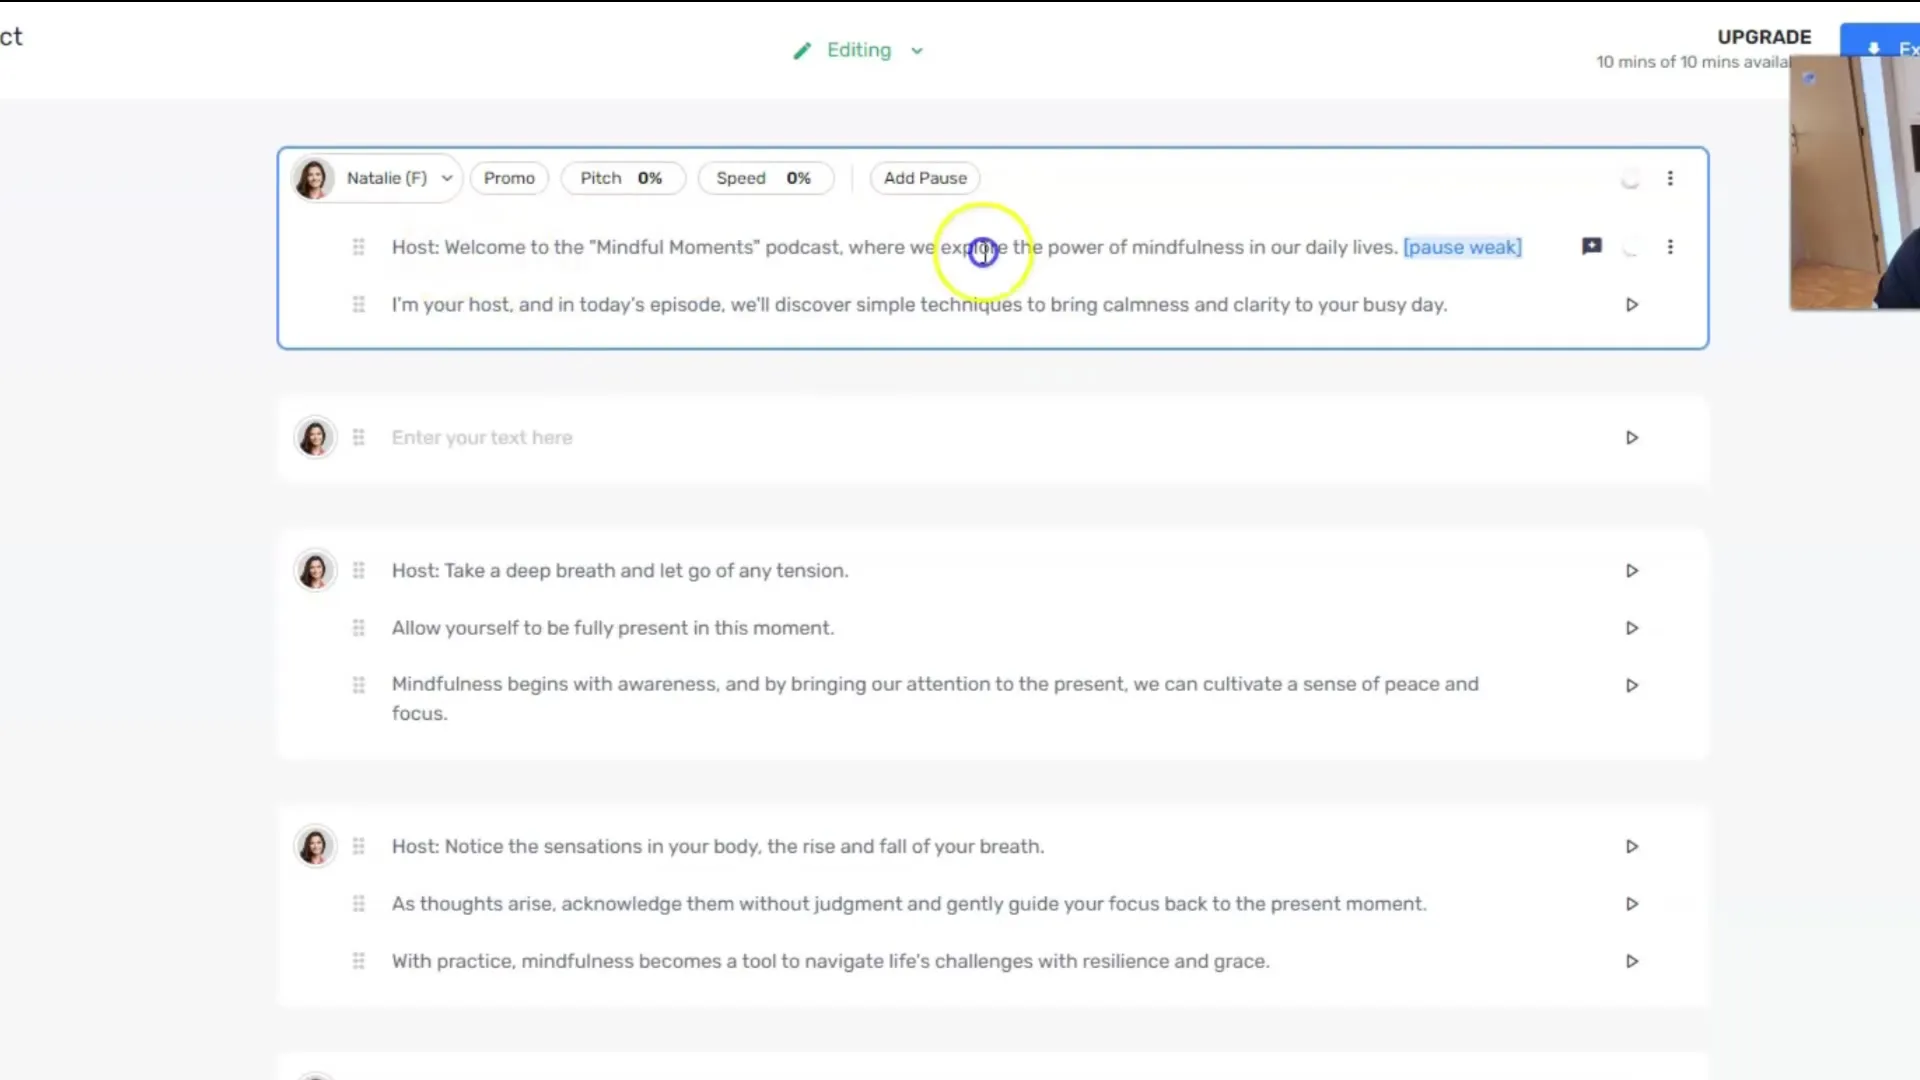
The sounds of these voices are convincing, and adjusting the speaking speed and pauses is also easy to handle.
6. Add Videos and Music
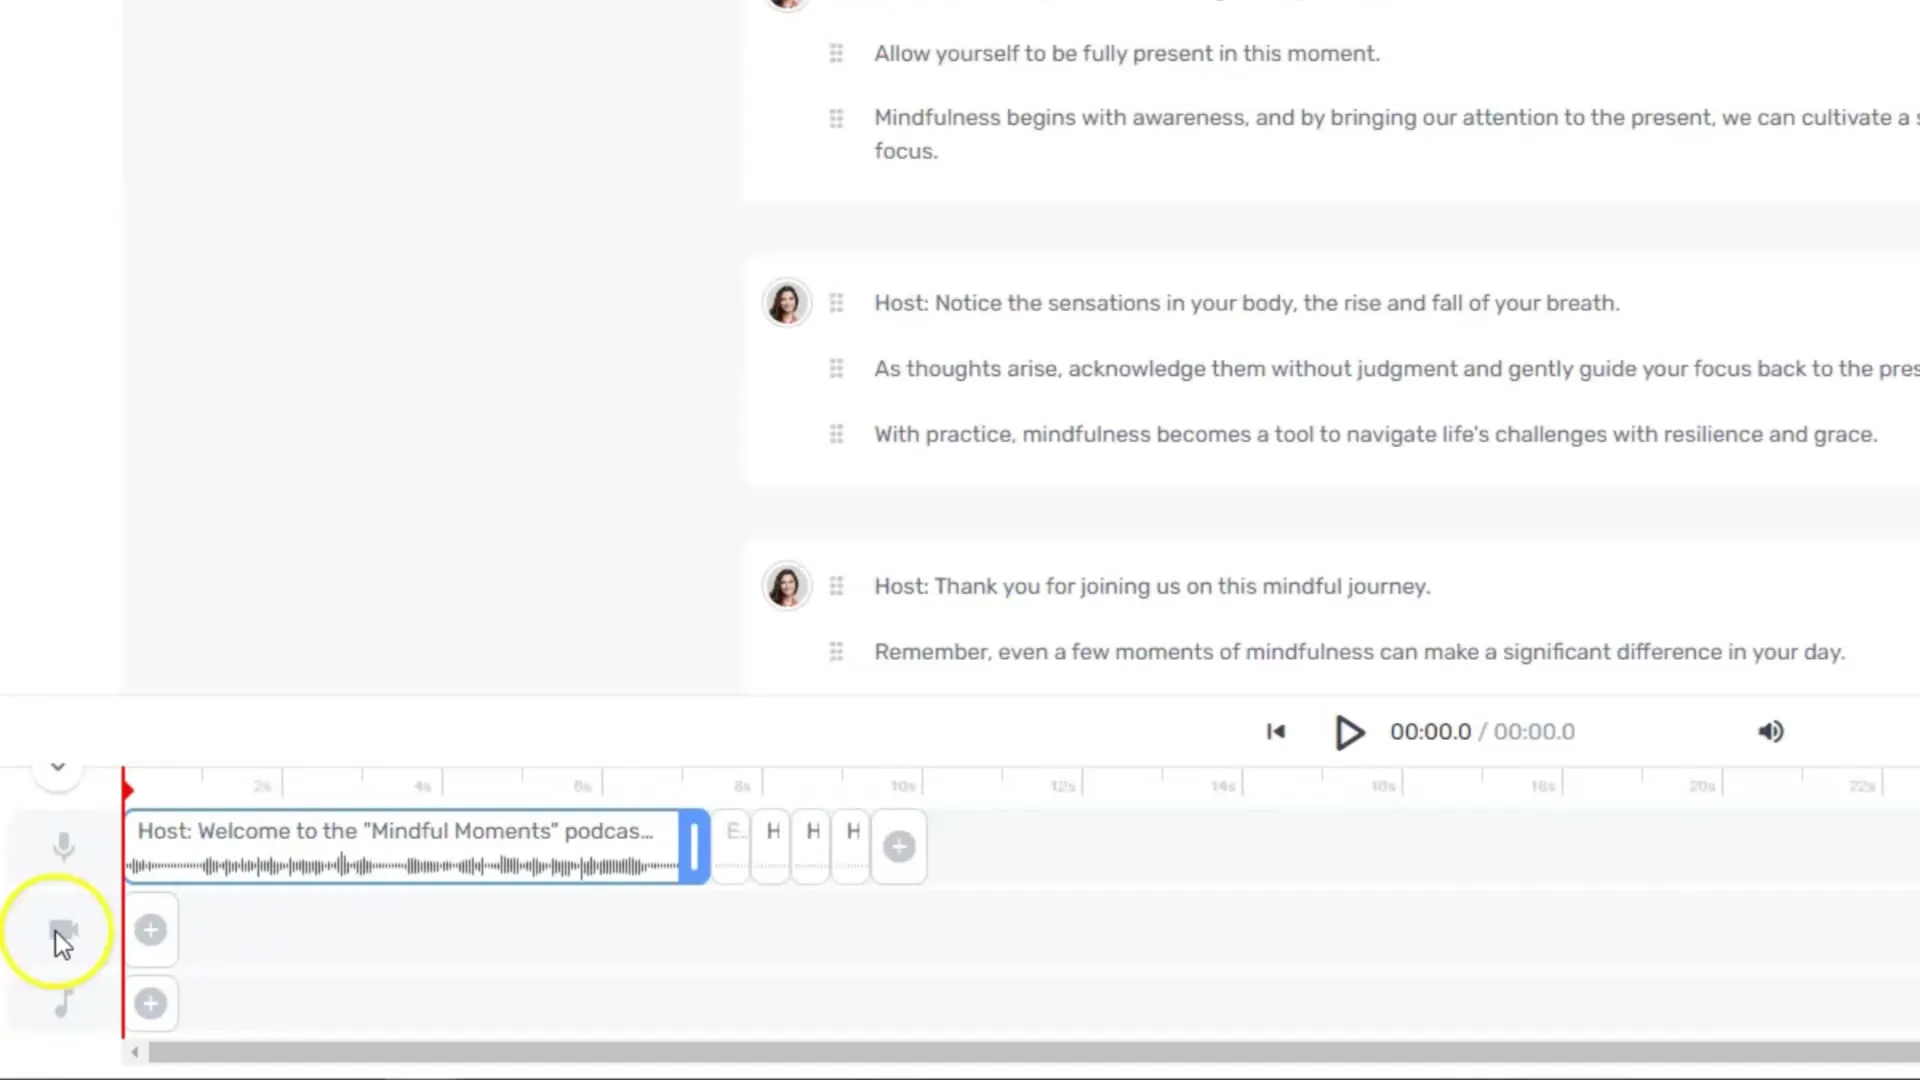
You also have the option to add videos to your audio file. Click on the plus symbol to upload videos from your hard drive or use stock videos.
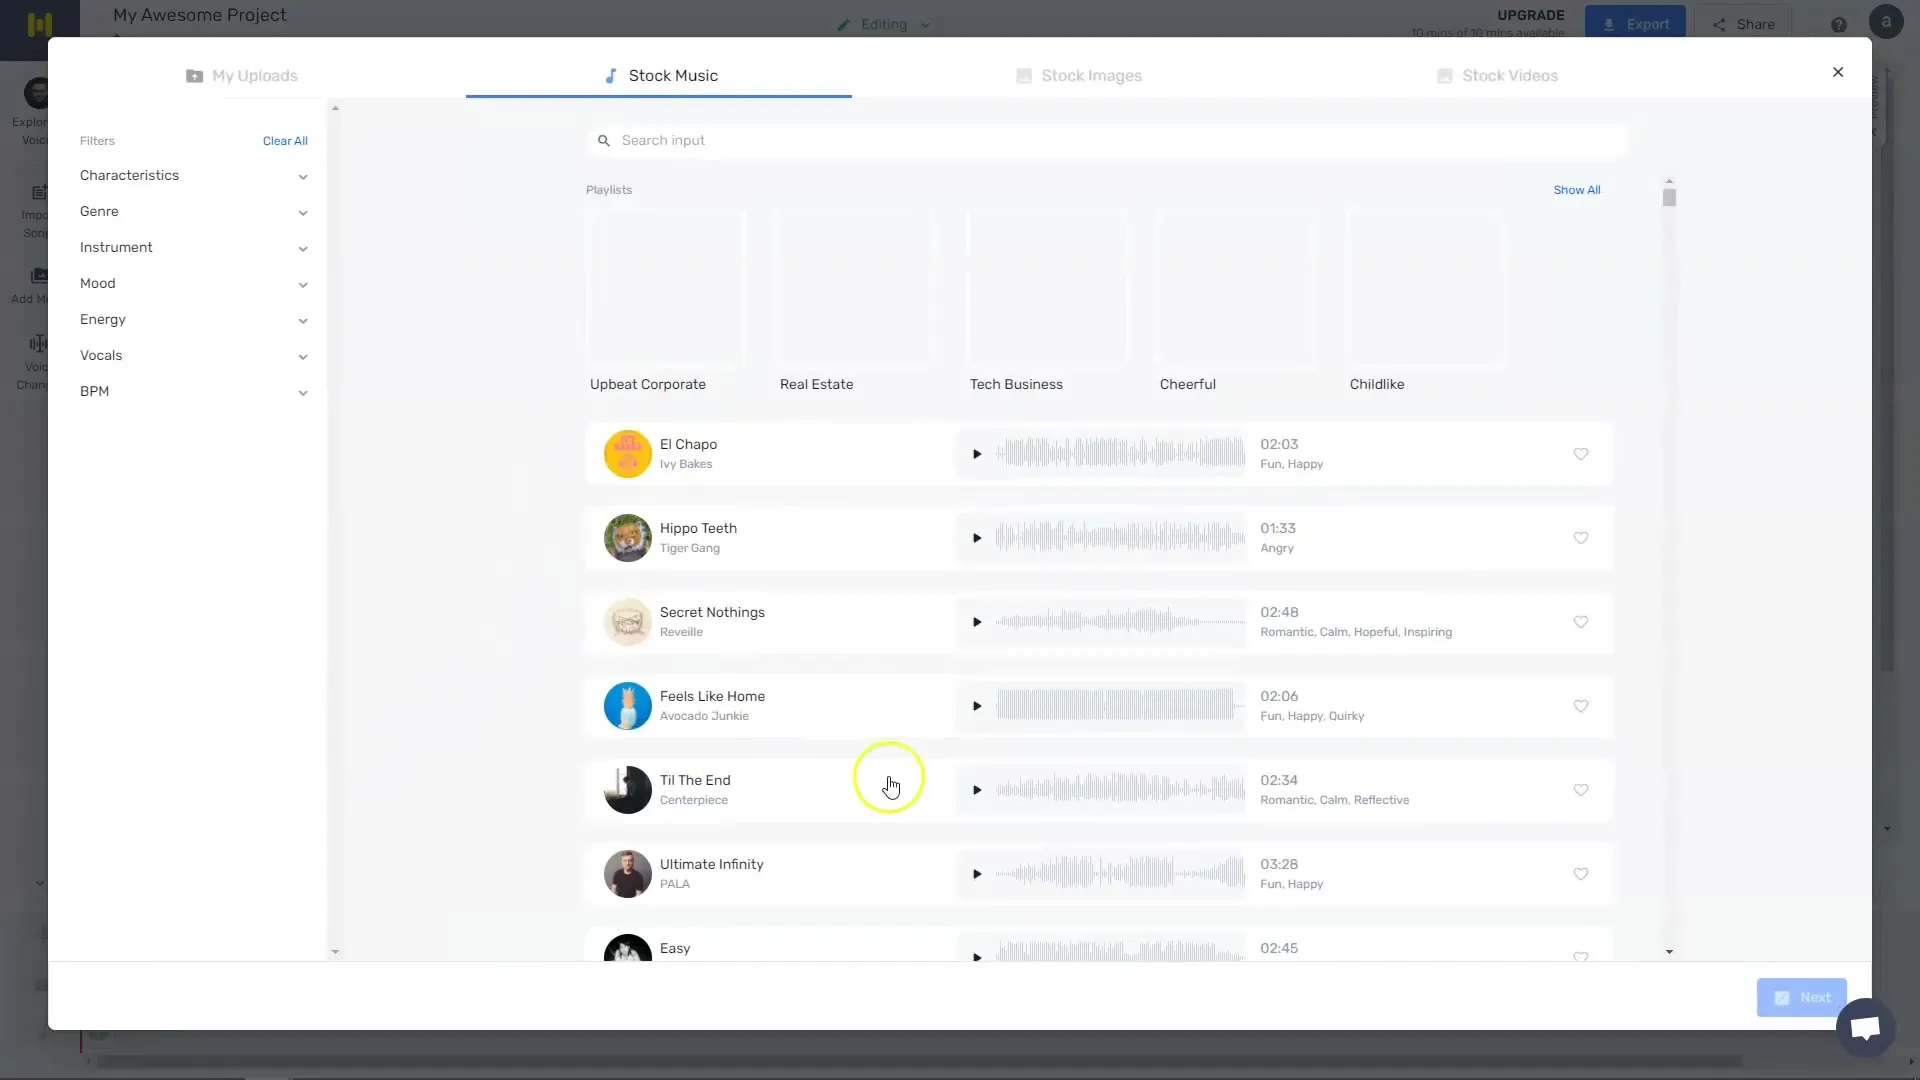
Adding music is equally straightforward. Simply choose a track from the music library or upload your own.
7. Export the File
If you are satisfied with the editing of your project, go to the video settings. Here you can choose the resolution in which your project should be exported.
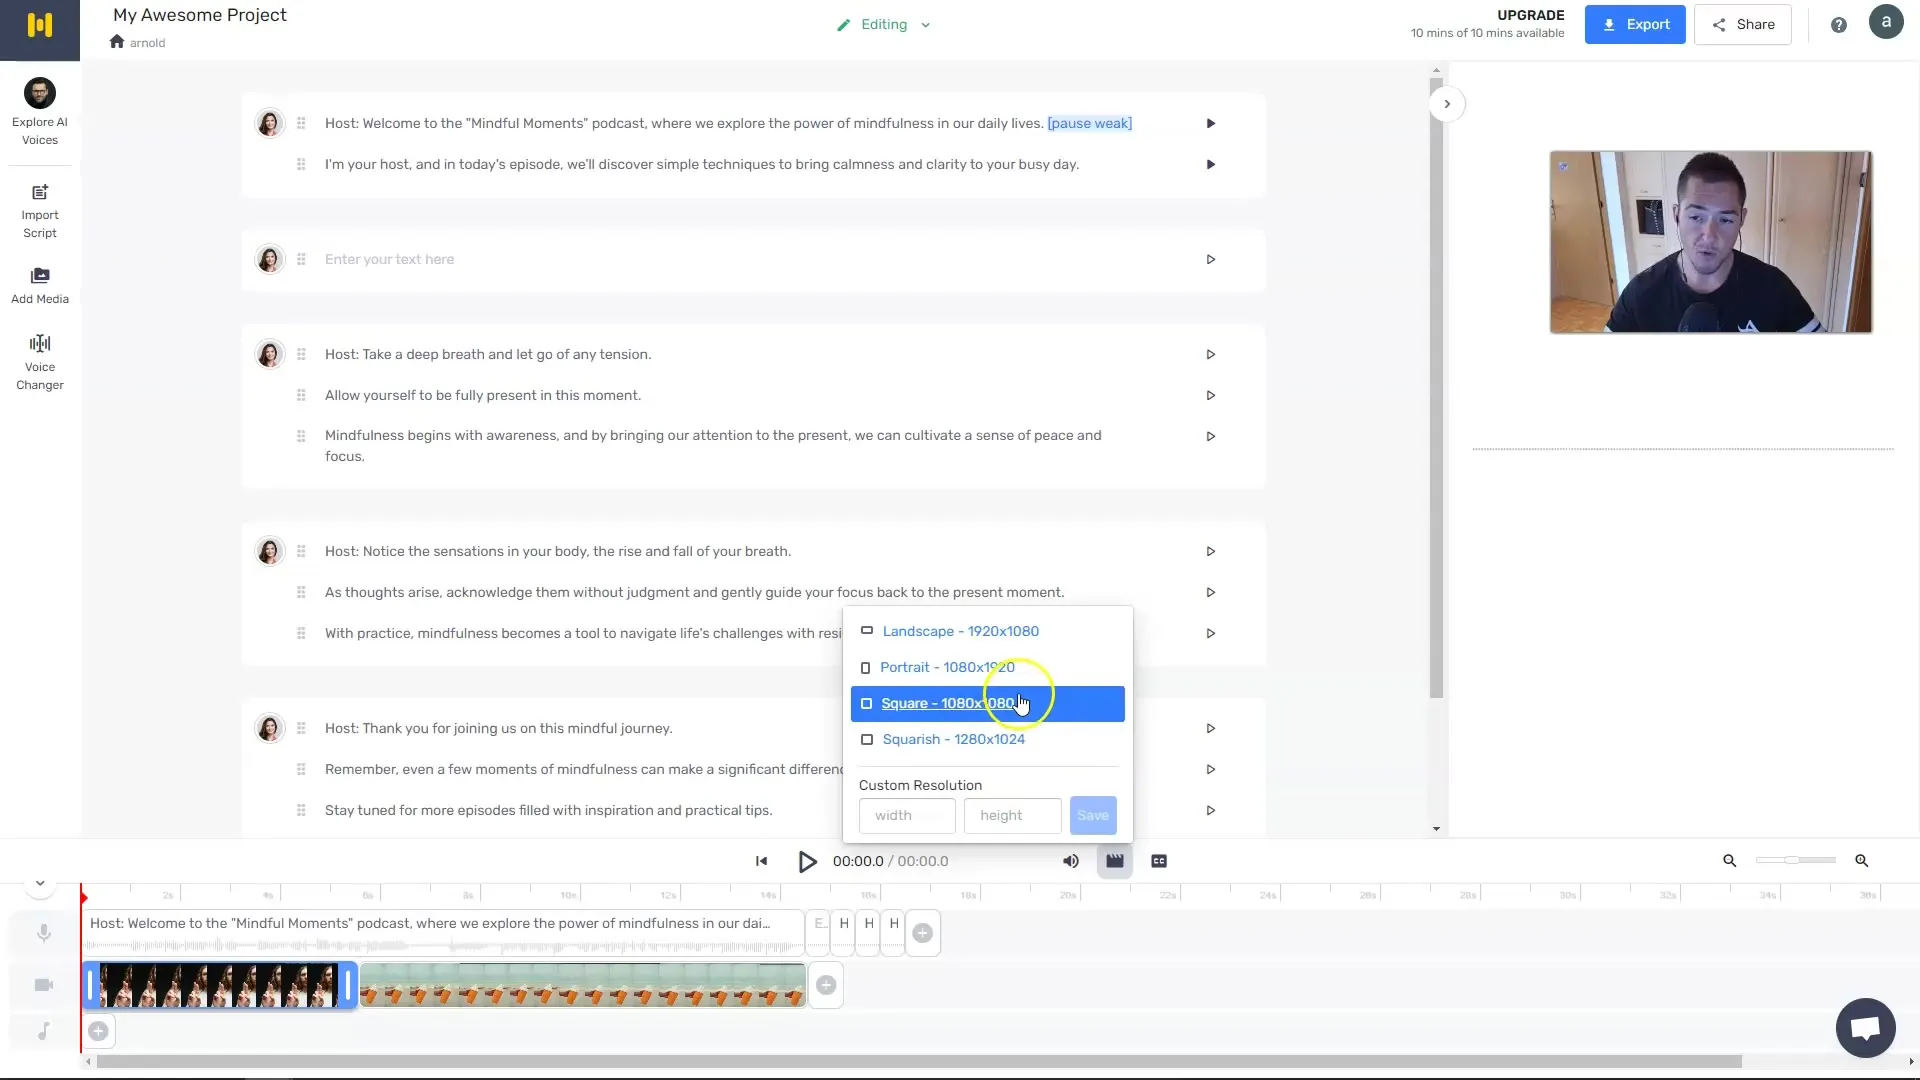
Now you can download your finished project and use it for social media or other purposes.
8. Using the Voice Changer
Another exciting feature in Murf.ai is the Voice Changer. You can upload a video of yourself, and Murf.ai will convert the video audio text into the chosen voice-over.
Summary
Murf.ai is an excellent solution for creating high-quality audio and video content quickly. With its versatile features and user-friendly interface, Murf.ai offers many advantages for both beginners and professionals.
Frequently Asked Questions
How do I sign up for Murf.ai?You can sign up for free on the official Murf.ai website.
Can I test Murf.ai for free?Yes, you can test Murf.ai for free for 10 minutes.
How many voices does Murf.ai offer?Murf.ai offers access to over 120 different voices in multiple languages.
Can I add music and videos to my project?Yes, you can easily integrate both music and videos into your project.
How can I download my finished project?After completing the editing, you can export and download your project in the video settings.


