Part 1: Introduction
Part 2: The right equipment
Cameras and lenses
Useful lighting equipment
Built-in flash and system flash units
Reflectors and diffusers
Studio flash system
What you should definitely look out for when buying a studio flash system
Battery-powered mobile flash units
Props
Part 3: The happy photo shoot
Part 4: From baby bump to teenager
Part 5: Taking photos indoors
Part 6: Outdoor photos
Part 7: Family life
Part 8: Tips and tricks (I)
Part 9: Tips and tricks (II)
Part 10: Archiving, editing and presenting children's photos
Text: Jens Brüggemann
Photos by: Jens Brüggemann (147), Leonie Ebbert (44), Elli Bezensek (61), Radmila Kerl (26), Ramona Prosch (5), Kay Johannsen (4)
Sketches: Jens Brüggemann (27)
Part 2: The right equipment
Photographing children is completely different from taking portraits of adults, for example. Children are either enthusiastic or they don't feel like it and then show this (to the photographer). Children should be given enough freedom to let off steam in front of the camera, because only then will they not lose the fun of this new "game" too quickly.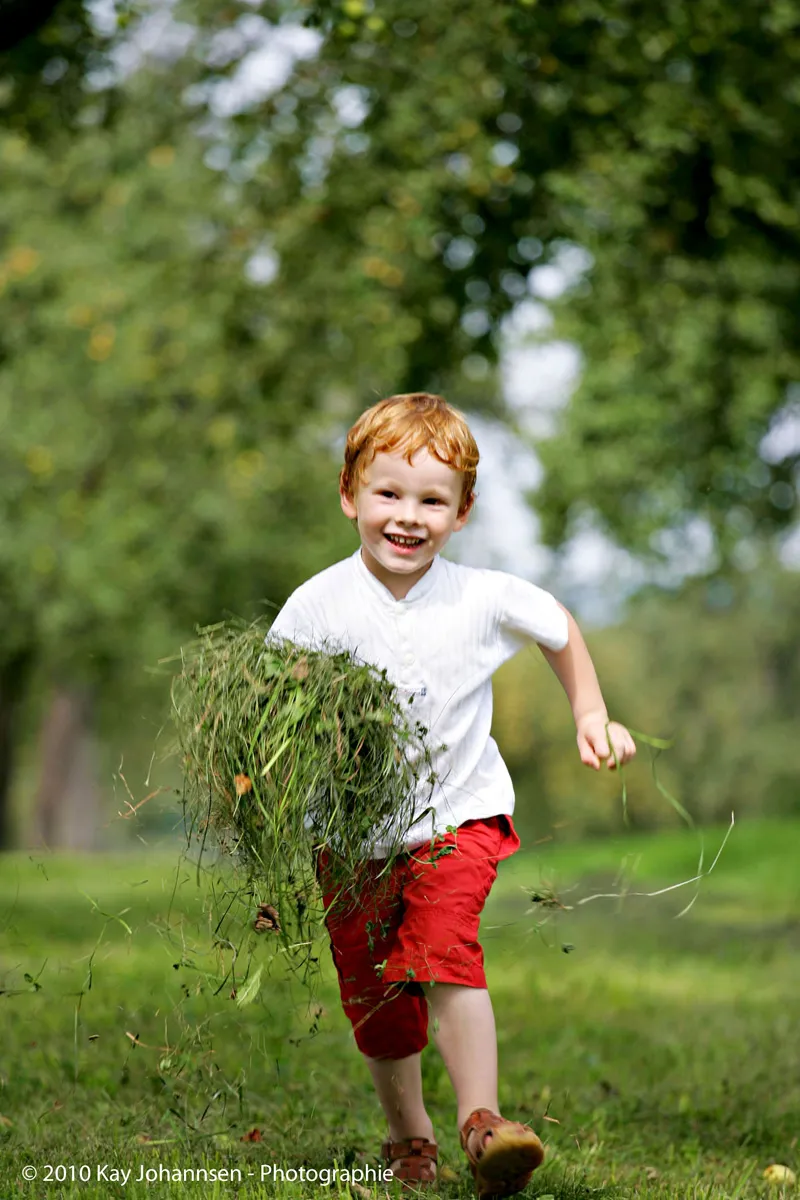
(Photo: Kay Johannsen)
Of course, this places very special demands on the photographer and his equipment. Photographing children means reacting quickly and flexibly, freezing movement (because children are ALWAYS on the move), but at the same time motivating and inspiring the young models. In short: qualifications are required that lie somewhere between sports and portrait photographer!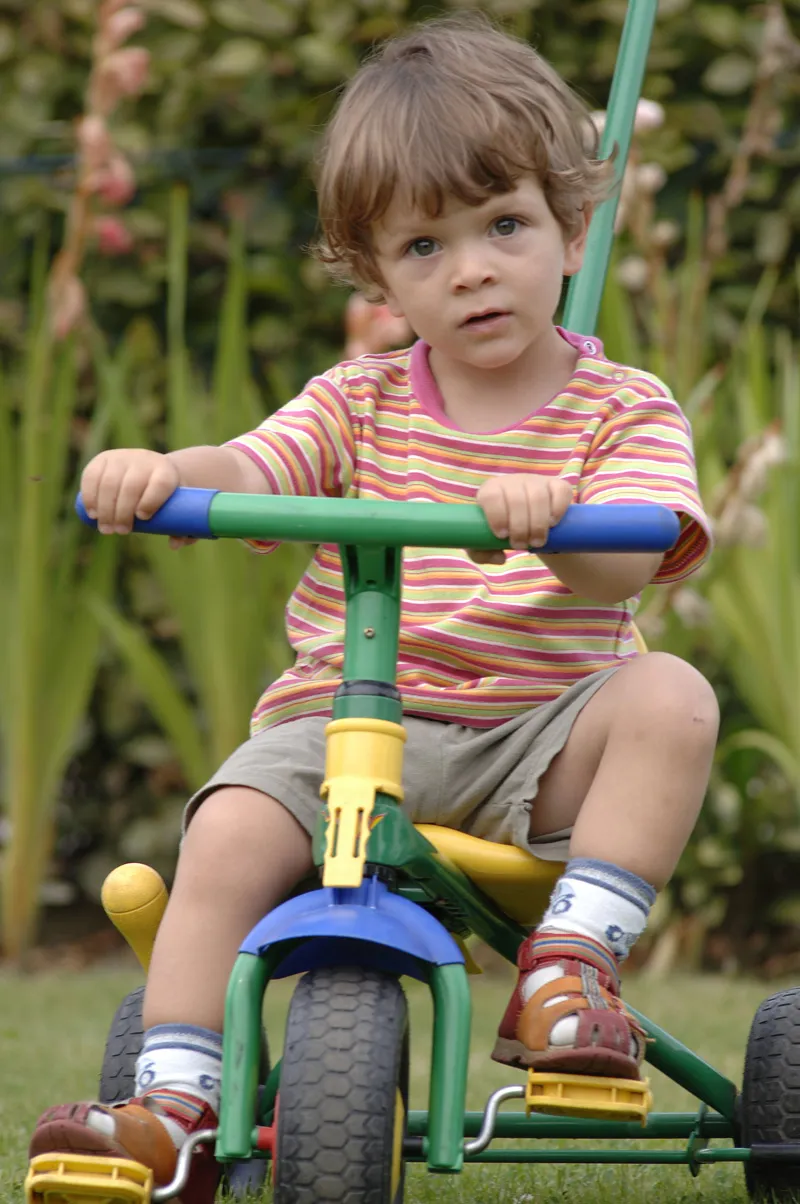
(Photo: Jens Brüggemann)
Cameras and lenses
Digital 35 mm SLR cameras are of course the first choice when it comes to purchasing suitable camera equipment. In contrast to medium format cameras, 35 mm DSLRs are much more flexible to use, you are more mobile with them, and they now have excellent features and fantastic image quality.
For example, frame rates of 7, 8 or 9 frames per second are possible with the top models, with image sizes between 12 and 24 megapixels, which is more than sufficient for the vast majority of applications!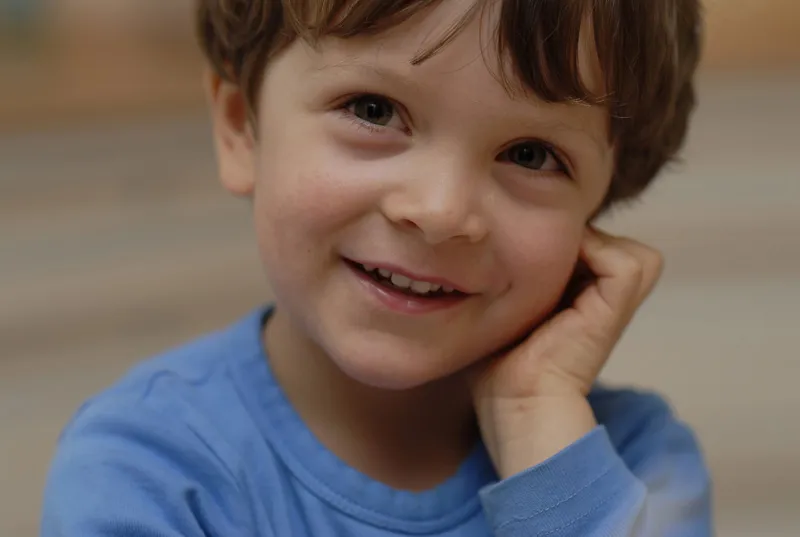
(Photo: Jens Brüggemann)
More important than "many megapixels" are criteria such as reliability, a wide range of accessories, outstanding imaging properties of the lenses, shortest shutter release delay, fast readiness after switching on, handiness, 100% viewfinder image, low image noise even at high ISO values, fast autofocus, etc. (Photo Jens Brügmann)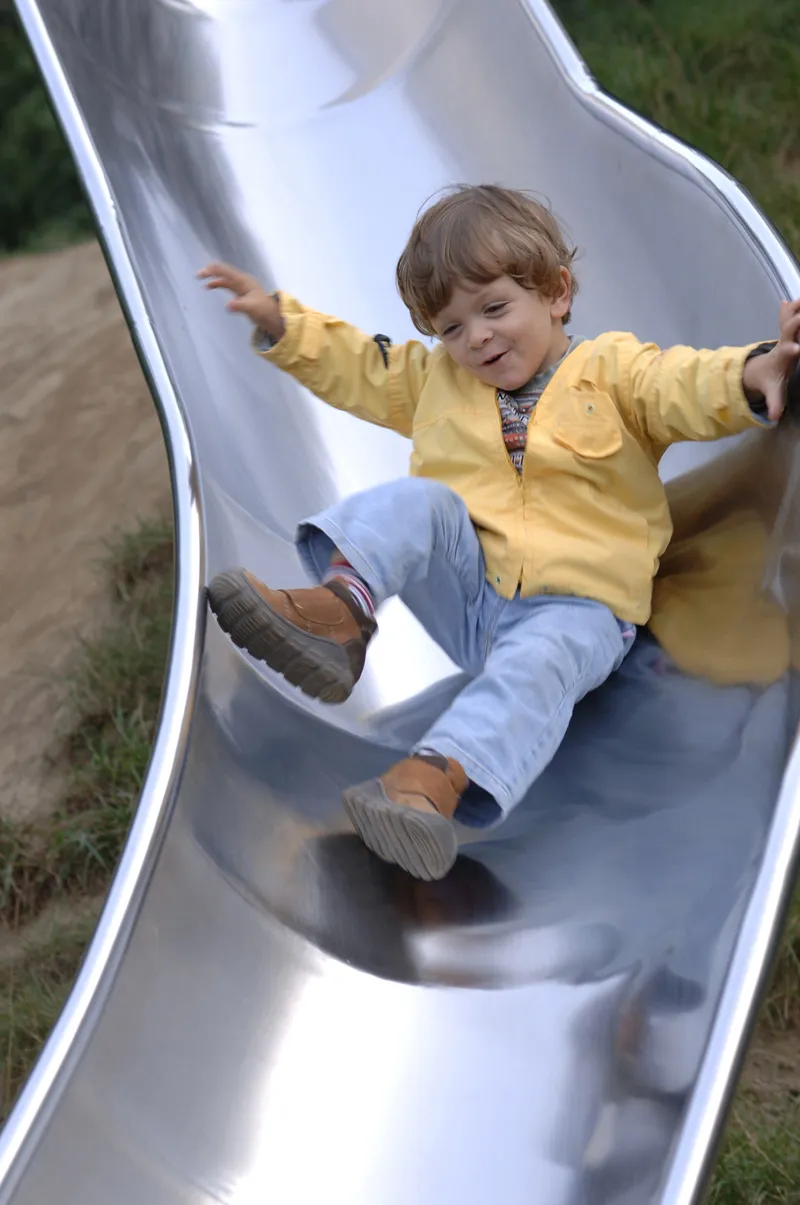
(Photo: Jens Brüggemann)
When two great models look into the camera as beautifully as in this photo, everyone quickly realizes how important it is to have a camera that is quickly "ready to shoot", because after a very short time even the most beautiful smile will die and only look cramped.
(Photo: Jens Brüggemann)
I have preferred cameras with a 100% viewfinder image for 26 years, and since then I have gotten into the habit of composing the image section so precisely that I don't have any cropping afterwards, i.e. that I keep the section as photographed (unless I want to use a different format, e.g. a square or panorama format).
The advantage is obvious: by using the entire size of the chip and thus all the (mega) pixels technically available to me, I achieve the maximum technical quality, and in the past even gallery owners with a supposedly expert eye have looked at my baryta prints (made from black and white 35mm negatives) and remarked approvingly that I must clearly be photographing with medium format, given the great quality ...! ;-)
(Photo: Jens Brüggemann)
Cameras with very good (i.e. low) noise performance at high ISO values are ideal for children's photography, as they can still produce technically good or at least acceptable images even in unfavorable lighting conditions (such as at dusk or indoors). The Nikon D3S is currently the leader in this field. For this photo of the mini soccer tournament I still used the predecessor model, the Nikon D3 at 1,600 ISO (1/250 sec., Blender 3.5, 105mm).
(Photo: Jens Brüggemann)
I also took this photo, which was taken in a "toy factory", without the aid of any lighting equipment, i.e. using only available light.
The low noise behavior at high ISO values of my Nikon D3 helped me to take a nice snapshot of my son climbing, in which only the atmospheric available light (daylight fell through the large skylight and through the open gate in the background) contributed to the lighting. If I had used a flash for this shot, it would inevitably have destroyed the beautiful atmosphere.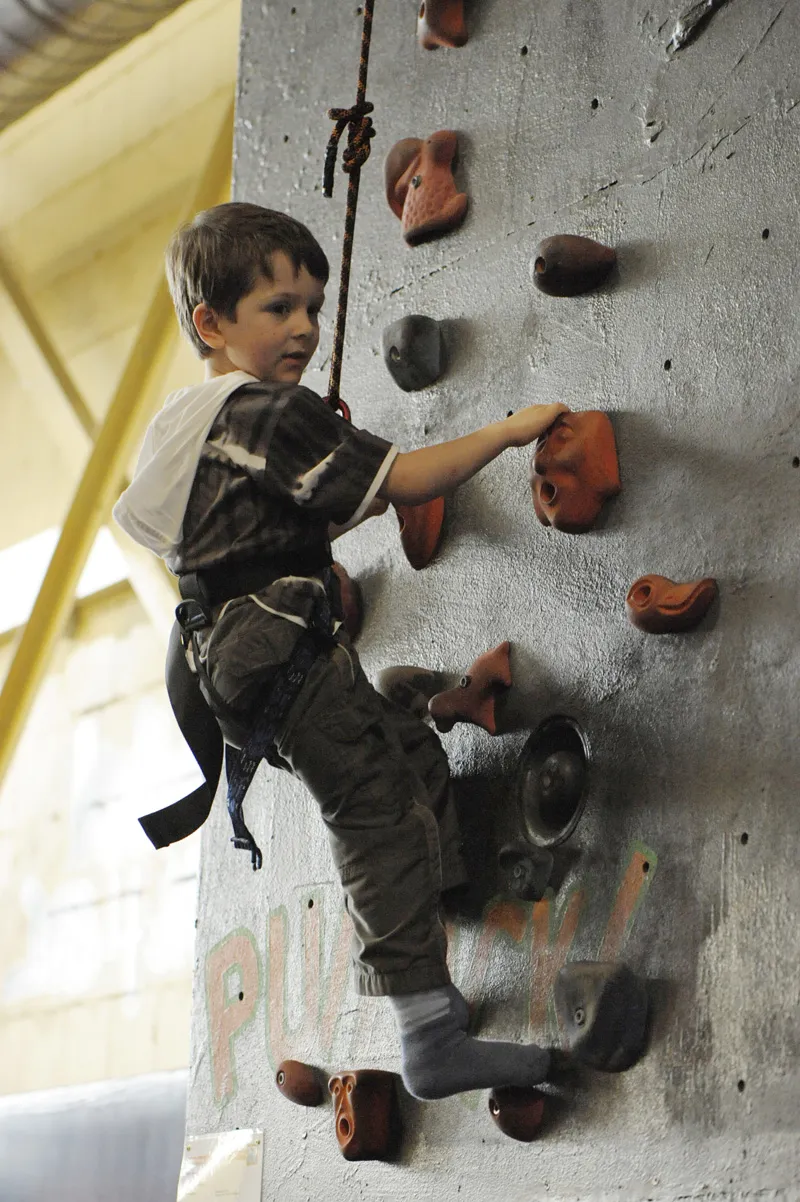
(Photo: Jens Brüggemann)
A good autofocus and a fast frame rate for continuous shooting help, as in sports photography, to catch the "right" moment. Children usually move so fast that you can't rely on seeing the "most spectacular" moment and then still managing to take the shot in time. A series of 5-6 pictures taken in quick succession, on the other hand, helps you not to miss the best moment.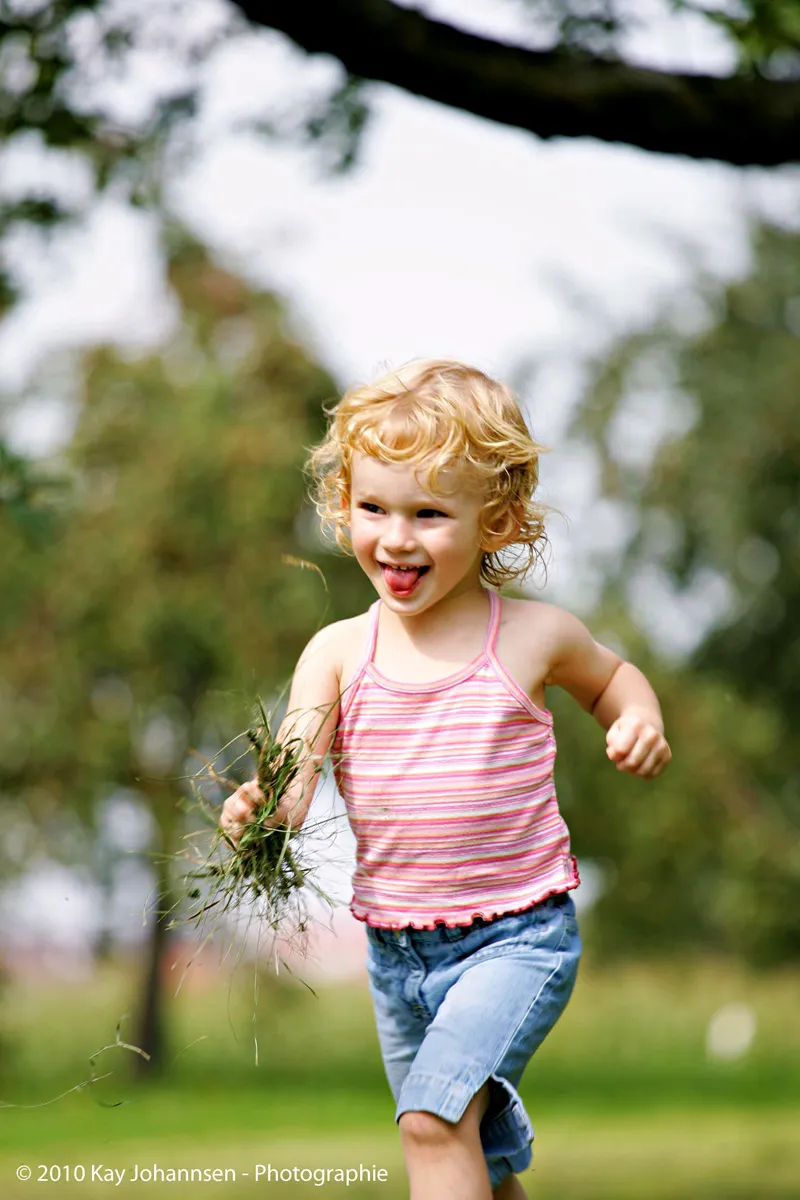
(Photo: Kay Johannsen)
But the best camera equipment is useless if you don't have it with you ... It's not uncommon to leave your DSLR and accessories at home (you always have at least the lens and system flash unit together in your photo backpack) because you're afraid to lug the (heavy and bulky) equipment with you for a weekend trip, a walk, a boat trip or sledging.
But even if it's just a short visit to the grandparents - it's always worth having a camera with you, and it's precisely for such purposes that I own a small digital compact camera with a built-in zoom lens in addition to my DSLRs (a few years ago it was the Leica Digilux 2 with the ingenious fold-out indirect swivel flash, then the robust Canon G9 with its many manual setting options, and today it's the successor model, the G11).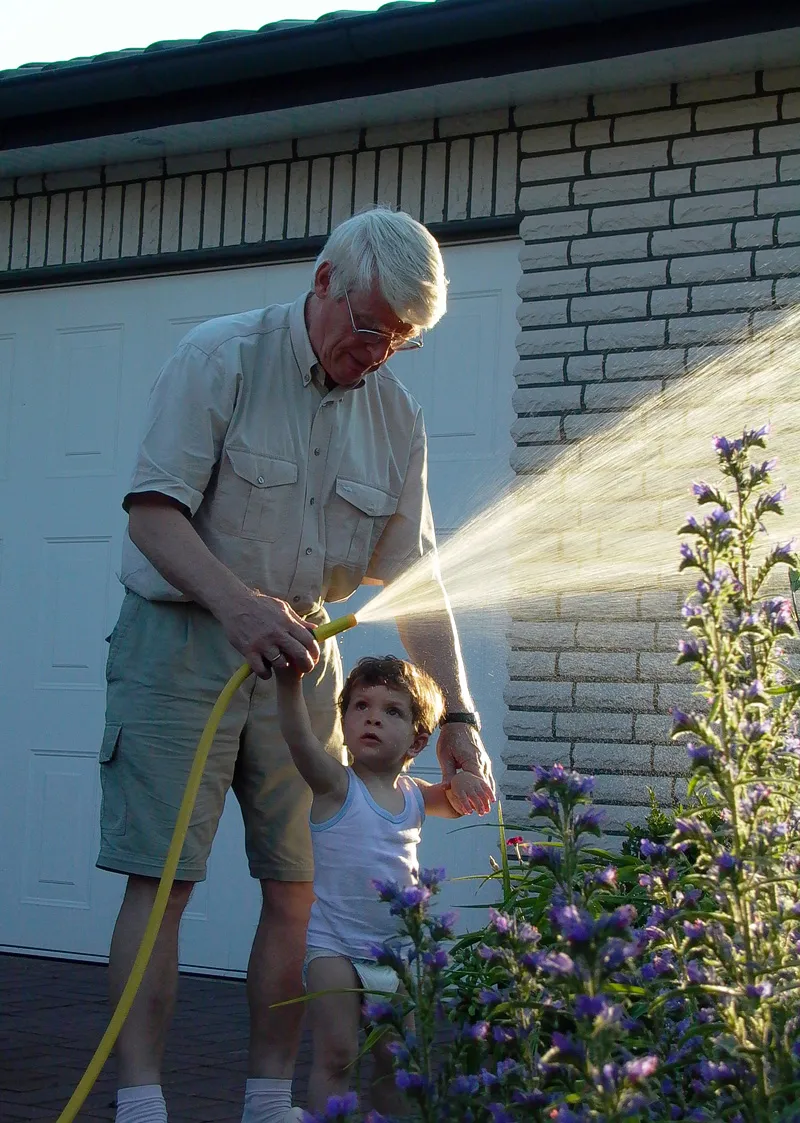
(Photo: Jens Brüggemann)
The compact camera as a second or third camera fits in every jacket pocket, and with it you don't miss out on the many irretrievable situations that you will never experience again, but which you would miss if you didn't have the DSLR with you for reasons of convenience and also don't own a compact camera.
Even if you only go shopping with the family (and I don't know anyone who takes their SLR equipment with them just for that!), memorable moments can happen that, if you have captured them with the help of the compact, will later make you think wistfully of the wonderful time when "Junior" was still small and took his first ride on the shopping center carousel.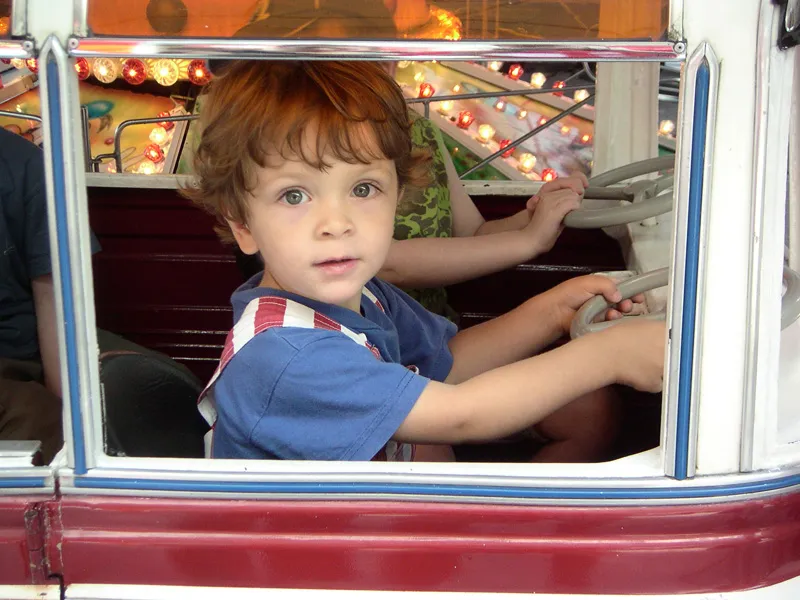
(Photo: Jens Brüggemann)
The lenses used are about as important as the camera, as they determine the image quality and shooting possibilities. Although I am actually a great friend of fixed focal lengths, because only they offer the maximum possible image quality and highest possible initial aperture (because every zoom lens, no matter how well constructed, is a compromise), I do recommend the use of zoom lenses for children's photography.
The simple reason for this is that our young models rarely follow directions. They don't stand still, but run around, jump, dance, romp, hop, do gymnastics and crawl; and at a speed that makes it impossible to change your fixed focal lengths in order to adapt to the new circumstances or to change your shooting position.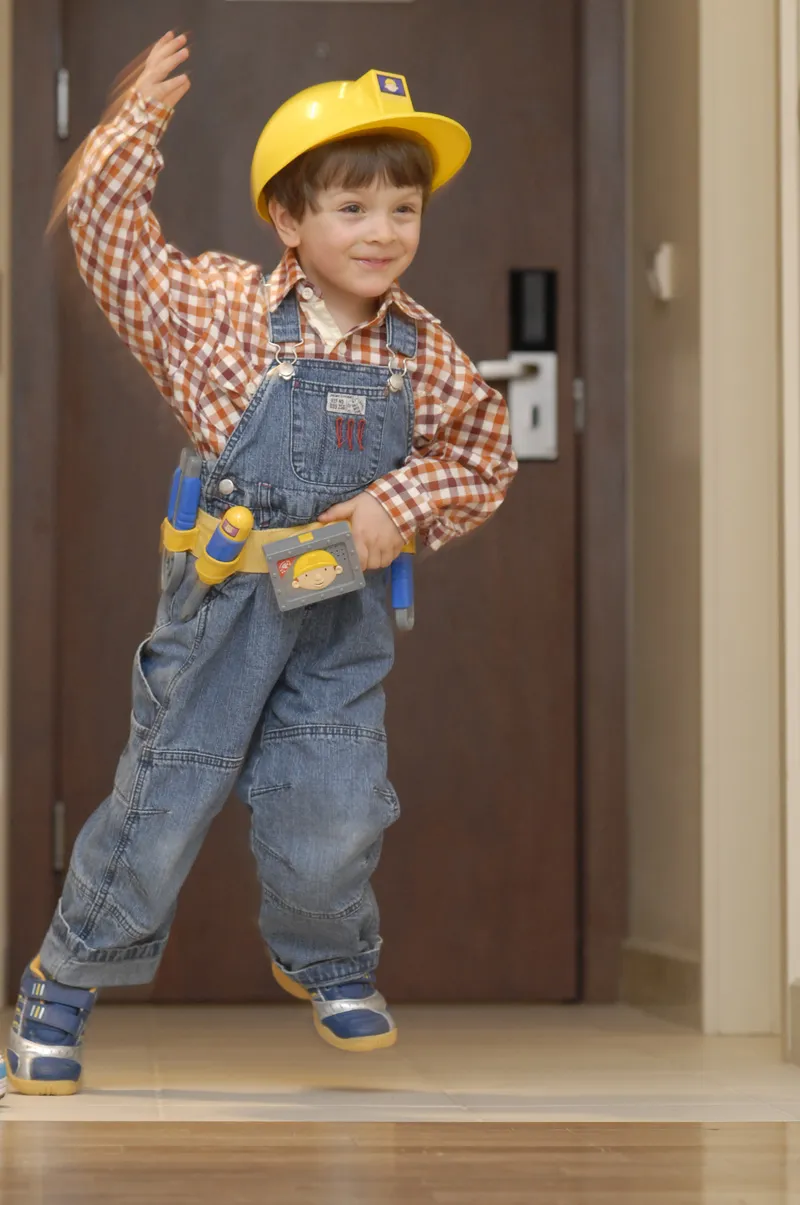
(Photo: Jens Brüggemann)
Zoom lenses, on the other hand, make it possible to quickly change the image section, and I often use the pan from the portrait section to the long shot to capture an overview of the action on the memory card for posterity.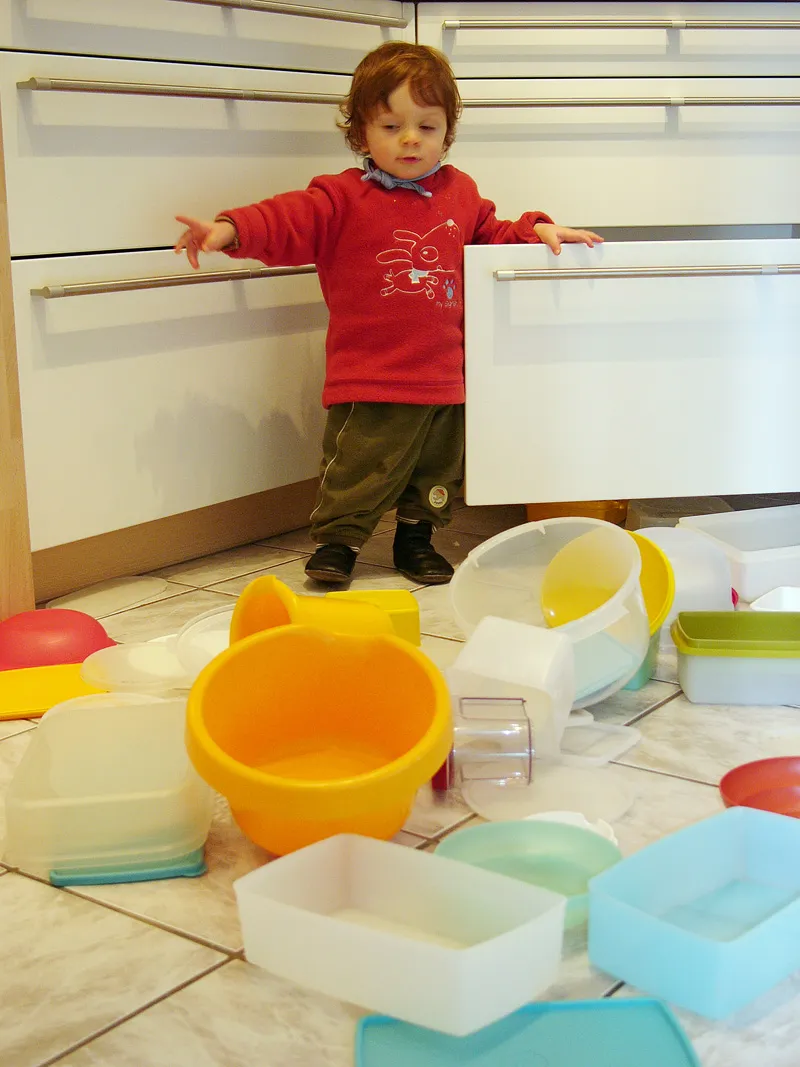
(Photo: Jens Brüggemann)
While wide-angle zoom lenses have the advantage that the situation virtually spreads out in front of the photographer, so that he or she finds themselves in the middle of the action (and thus also the viewer later!), which gives the shots a reportage-like credibility and consternation, shots with telephoto lenses appear somewhat more distanced, but at the same time also more "designed". The separation of the subject from the background (object in focus, background out of focus) when the shots are taken with the Blender almost open gives the photo the character of a professional advertising photo. Nikon D2X with Nikkor AF 2.8/300mm IF-ED. (Photo: Jens Brüggemann)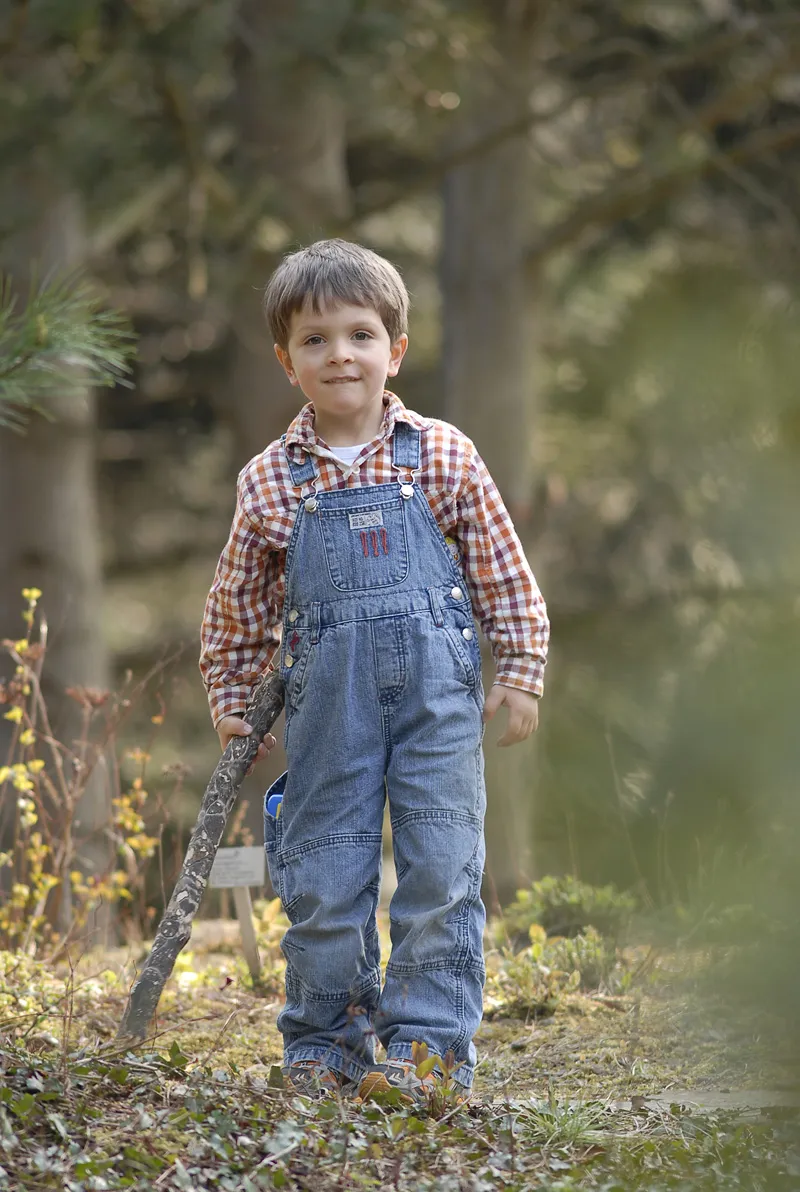
If you are thinking about buying one or more lenses in the near future, make sure that they are fast enough! I prefer models with an initial aperture of 2.8 (and then as wide an aperture as possible), even if I do photograph with zoom lenses as an exception.
Remember: the faster the lenses are, the fewer great moments you will miss in low light conditions. Or, just as important: the less often you have to "help out" the available light with the help of fill lights or system flash. And even if you have to use a flash, the amount of (unnatural) flash light will be less than if you use lenses with an aperture of 5.6, for example.
In short: Portraits of children look much more natural if - proportionally speaking - as little flash light as possible was used when the photo was taken.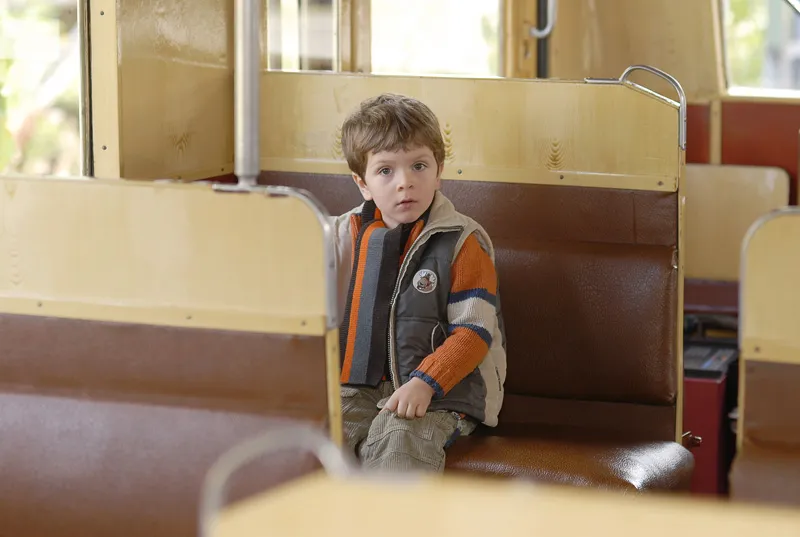
(Photo: Jens Brüggemann)
Another trick to make photos look as natural as possible is to use indirect flash against a white ceiling, over a white wall or against a reflector. But that belongs to the next chapter: "Useful lighting equipment".
Useful lighting equipment
Lighting technology for big and small budgets
There are many ways to create photos in available light, i.e. to avoid the use of lighting equipment: Using cameras with light-sensitive sensors (and reduced image noise), using lenses with the highest possible light intensity, using shake-reduction techniques (built into the camera or lens) and time-honored aids such as tripods or table stands.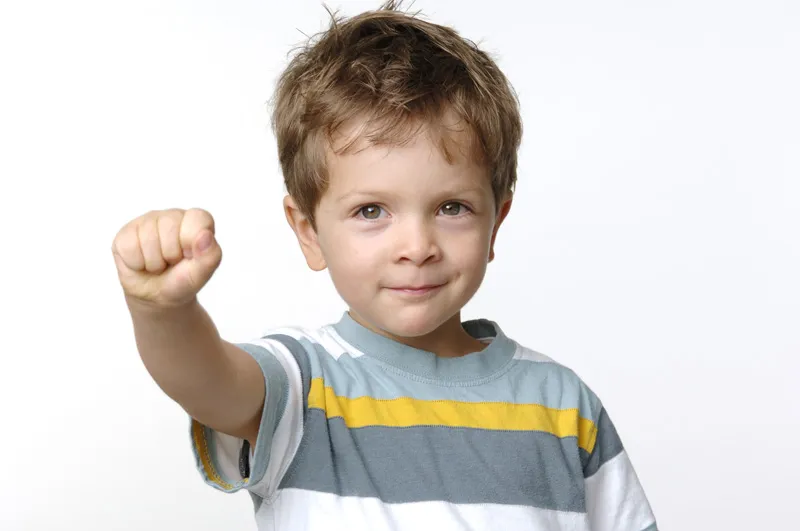
(Photo: Jens Brüggemann)
But at some point, the point is reached where you can no longer manage without additional lighting.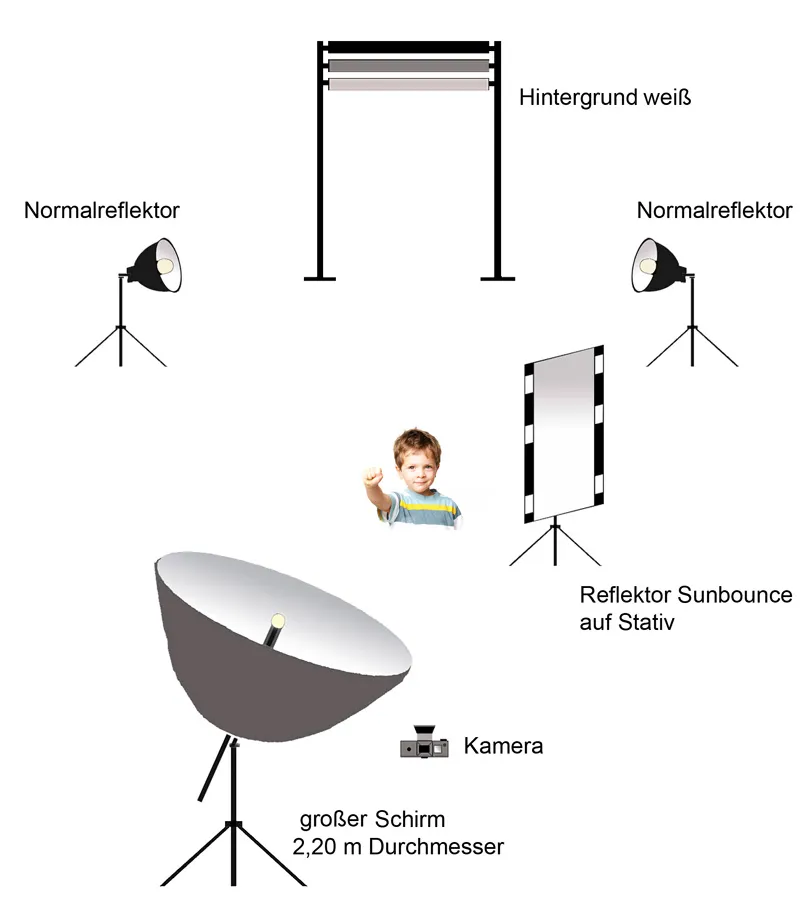
(Sketch: Jens Brüggemann)
Built-in flash and system flash units
Indoors with few and small windows or when it is already dark in the evening (or even late in the afternoon in winter), even the fastest lens, the best blur reduction and the lowest noise behavior at high ISO values are no longer of any help. At the latest then the time has come when you have to use a flash to brighten up the scene sufficiently.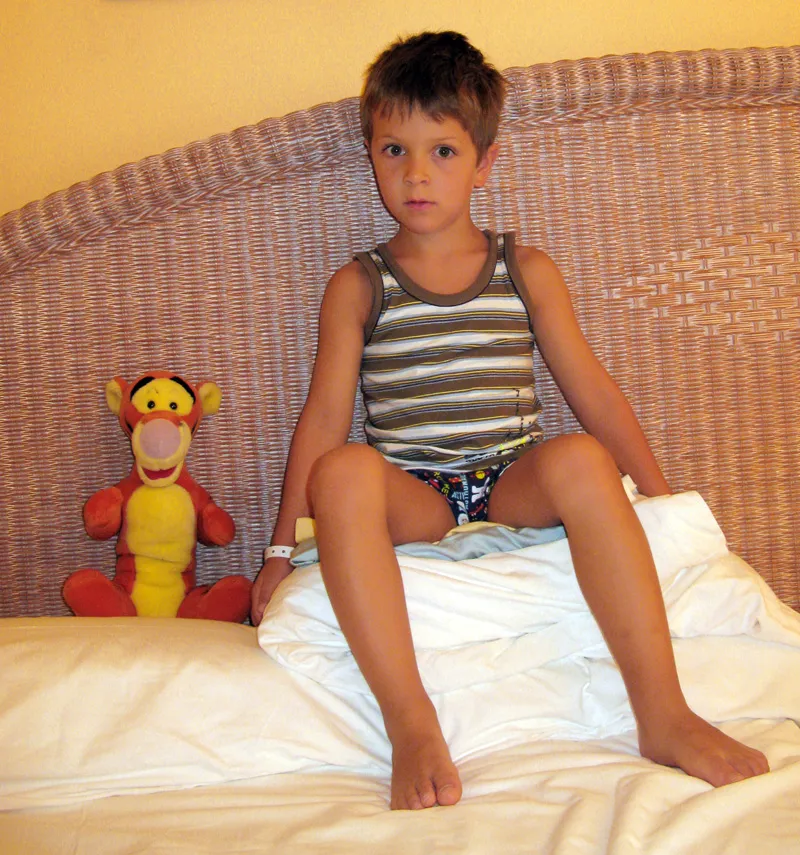
(Photo: Jens Brüggemann)
The disadvantage of a built-in flash in the camera is obvious (see photo above, taken with the Canon G9 with built-in flash): The hard light comes directly from the front, the shot therefore looks flat and there are unsightly shadows on the background, which are only so small because the boy is leaning directly against the background and I also tried to use as much of the available room lighting as possible with the help of a slow shutter speed and open aperture.
It is generally better to use an external system flash and to use it indirectly (!) over a white ceiling or against a white wall or reflector. For this beautiful portrait of a boy with his matchbox car, I used my Nikon SB800 system flash, which was directed indirectly - in the absence of a white ceiling or a white wall - against a large window pane (which was to the left of the model), which reflected the light back onto the model according to the formula angle of entry = angle of exit.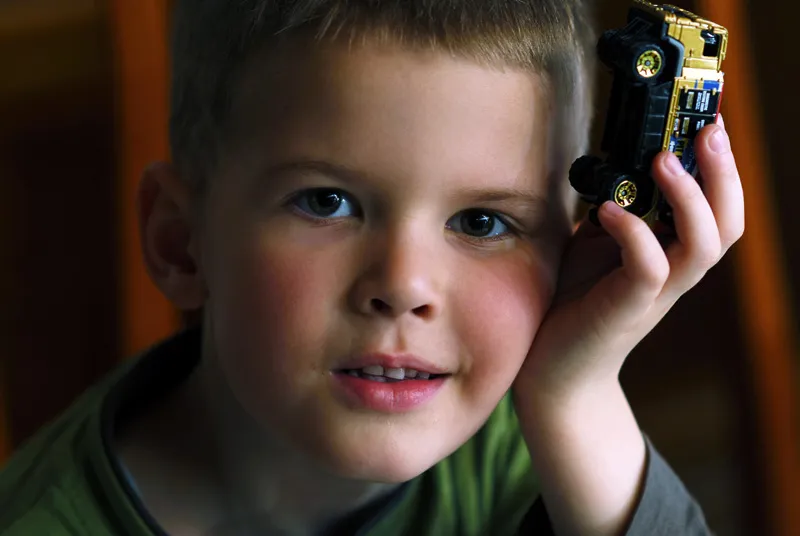
(Photo: Jens Brüggemann)
Another useful method of using system flashes skillfully is to use accessories that enable wireless, "unleashed" flash. The system flash is now set up where the photographer wants it for lighting design reasons - and no longer left on the camera.
The flash is triggered by a master flash or another trigger located on the hot shoe and the amount of light output is controlled (via the flash duration). In this photo of a brother and sister backlit by the sun, taken in the clearing of a forest lake, the photographer used a Canon Speedlite together with the ST-E (control unit for wireless E-TTL automatic flash) to brighten the foreground, the models. The result is a beautiful and balanced lighting mood.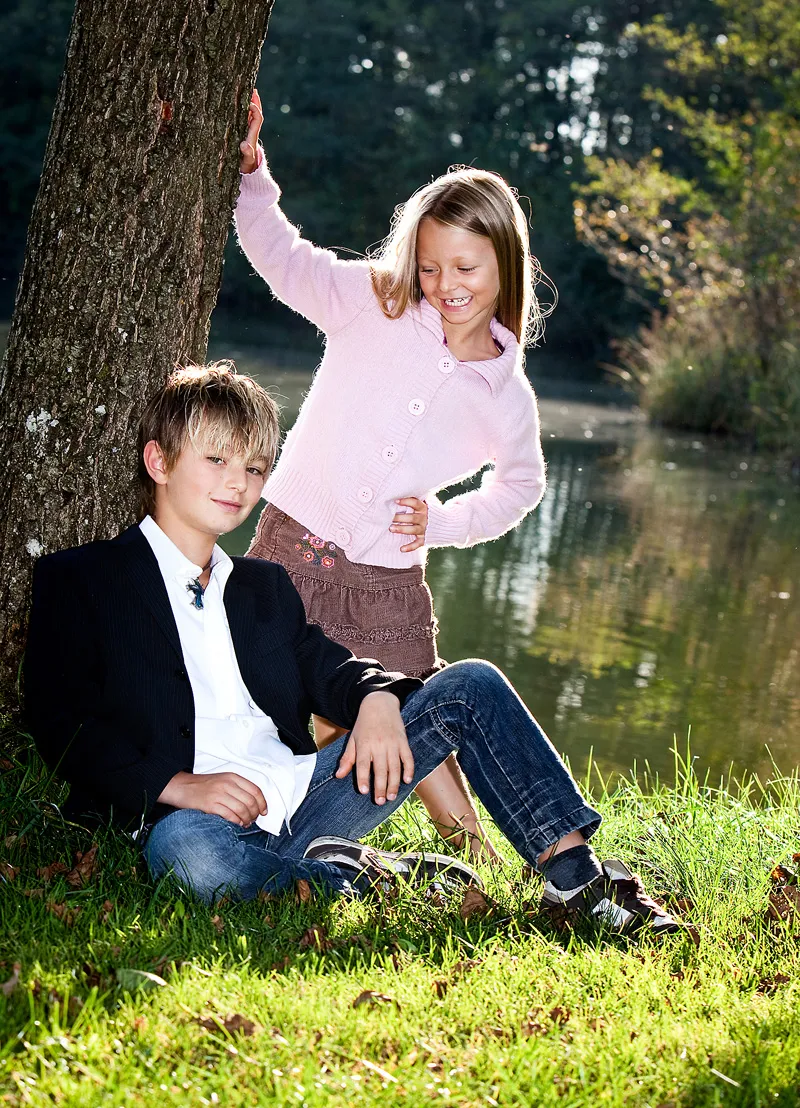
(Photo: Radmila Kerl)
If the photographer had not used any technical lighting aids, either the faces of the two children would have been too dark in the photo, or, if spot metering had been used on the faces beforehand, the grass in the foreground and the sunlit areas in the background would have been too bright (and possibly even "washed out").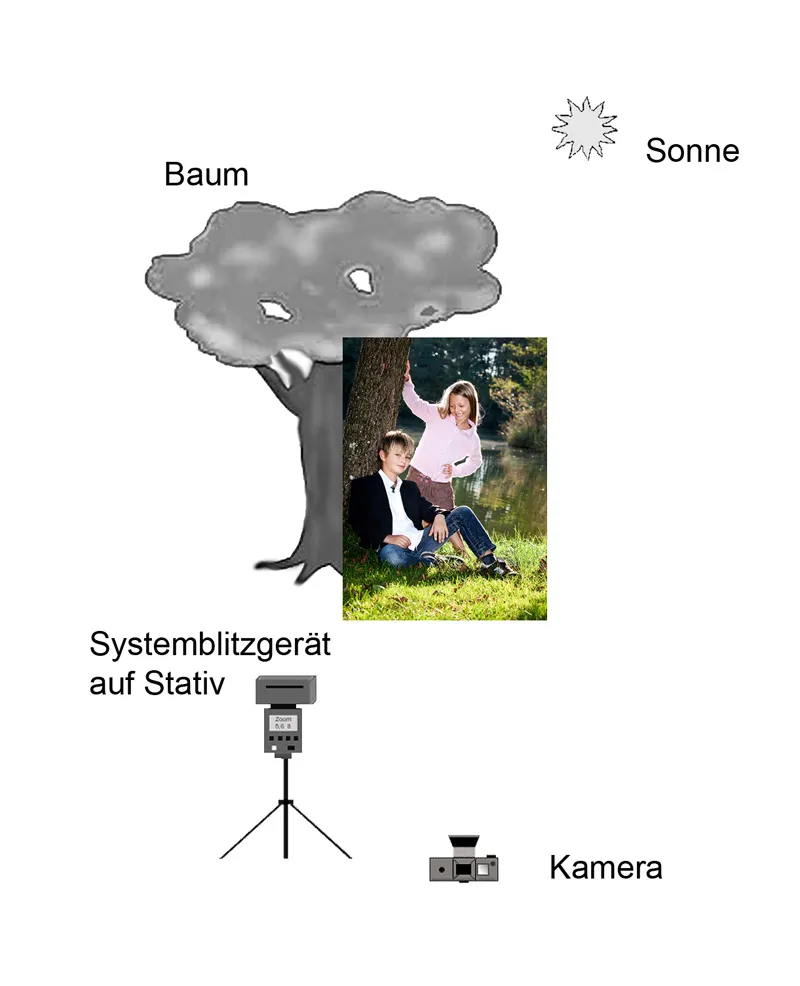
(Sketch: Radmila Kerl)
We therefore use lighting accessories not only "to make light", i.e. to make it bright, but often also for creative reasons.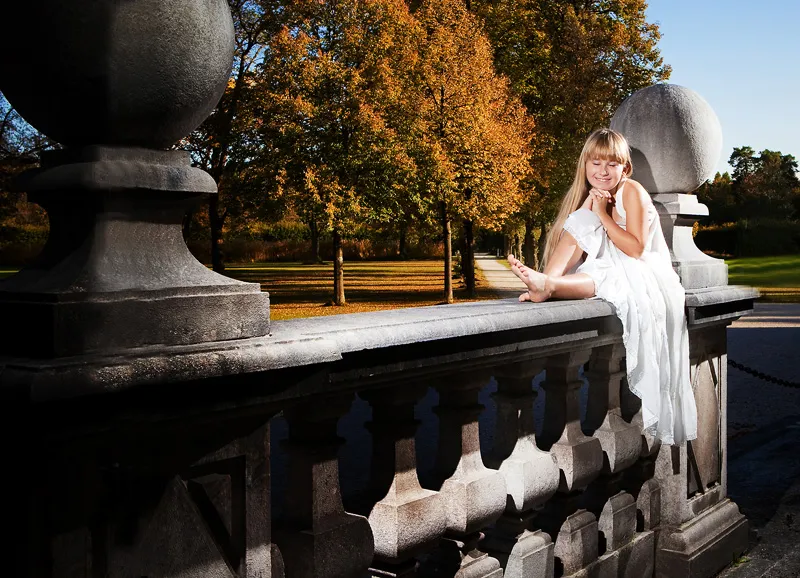
(Photo: Radmila Kerl)
In this photo, for example, the photographer used a powerful wireless system flash (elevated to the left of the shooting position, mounted on a tripod) to put the model in a more "dramatic" light, but also to emphasize the model and her white dress.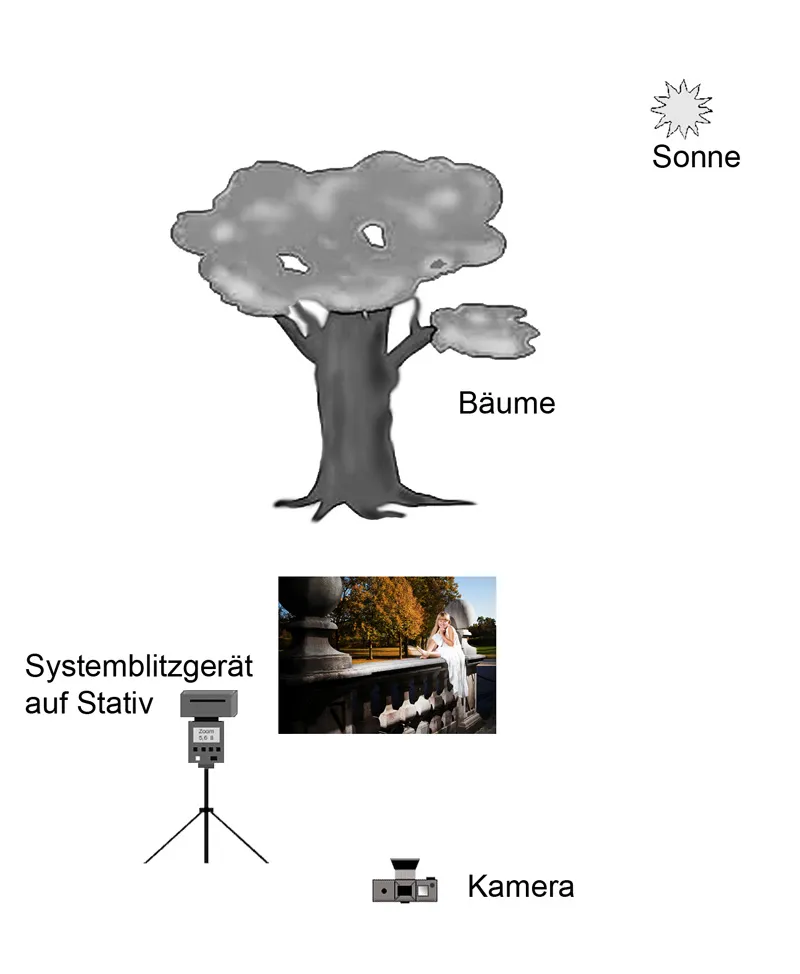
(Sketch: Radmila Kerl)
The third important reason for using lighting technology ( in addition to insufficient brightness and creative design with light) is to soften contrasts (especially in backlit shots).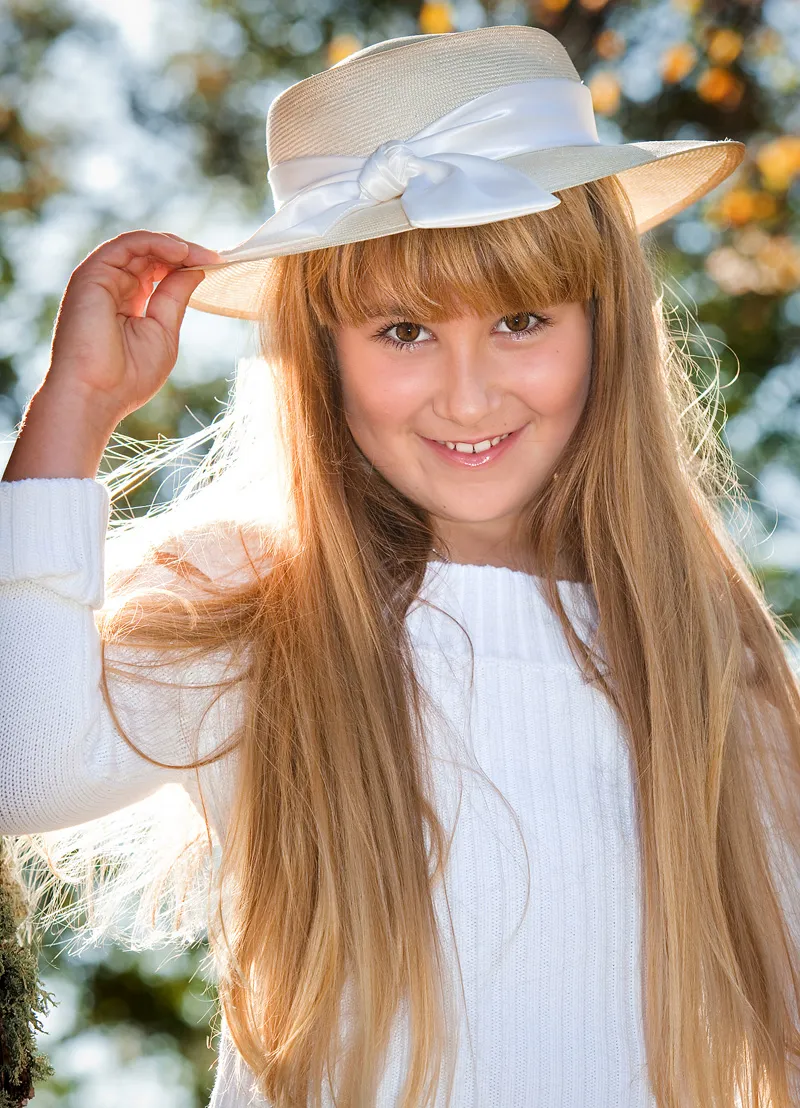
(Photo: Radmila Kerl)
This was also the reason for using the flash on the camera for this photo: when taking backlit photos, if you want to take technically perfect photos, in most cases you only have the option of brightening the foreground using a flash or reflector in order to make the model appear sufficiently bright in the photo and at the same time prevent the lights in the background from "eroding" (i.e. without drawing).
Reflectors and diffusers
Reflectors are available in many different designs, sizes, qualities and surfaces. The most common are the so-called "pop-up" reflectors, which are folded up and made handy for transportation and storage and automatically unfold when unpacked, thus assuming their actual (working) size.
When folded, pop-up reflectors have the advantage of being easy to transport and are also very light. The disadvantage, however, is that they are very susceptible to wind, as even the slightest gust of wind can cause unstable light reflection due to their flexible design.
In short: even the slightest gust of wind means that these reflectors can no longer illuminate the model consistently.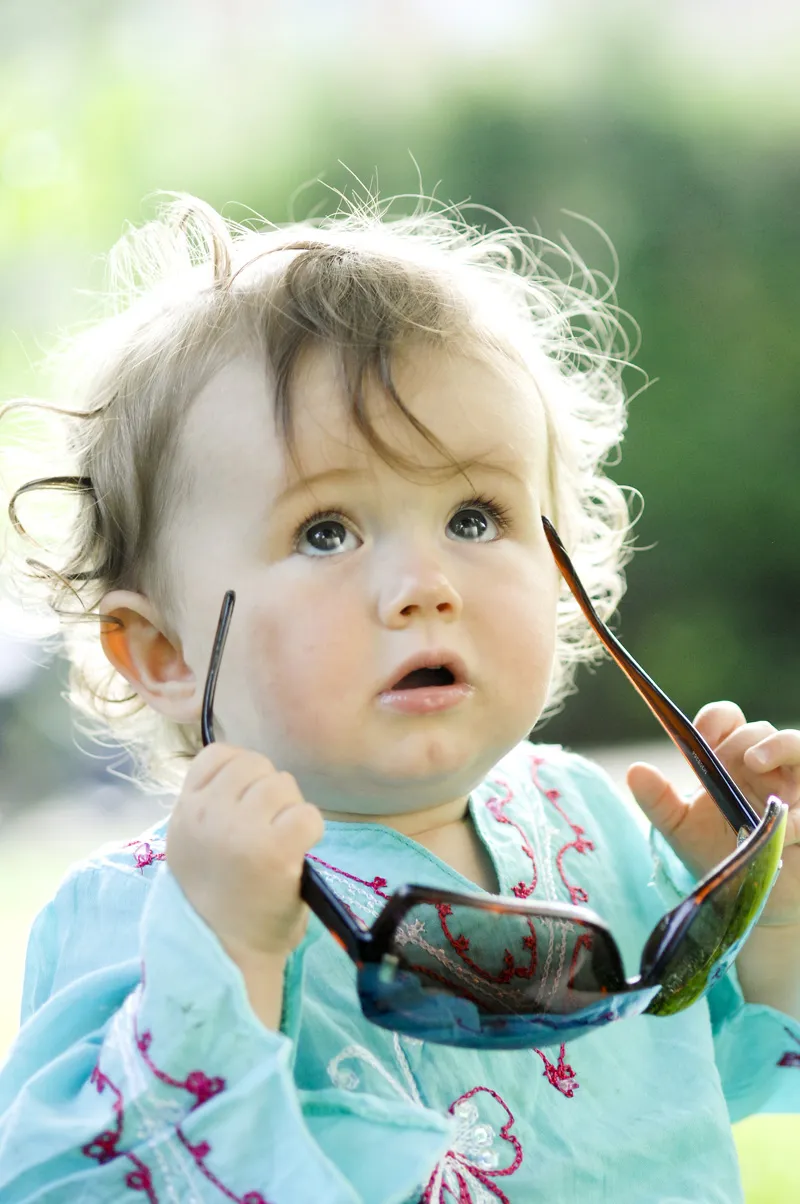
(Photo: Elli Bezensek)
This obvious disadvantage led to the further development of the reflectors by California Sunbounce and thus to a construction with a stable aluminum frame, which tensions the reflector fabric and provides good support even in strong gusts of wind, thus enabling uninterrupted reflection, which is why this lighting accessory has become indispensable in professional photography.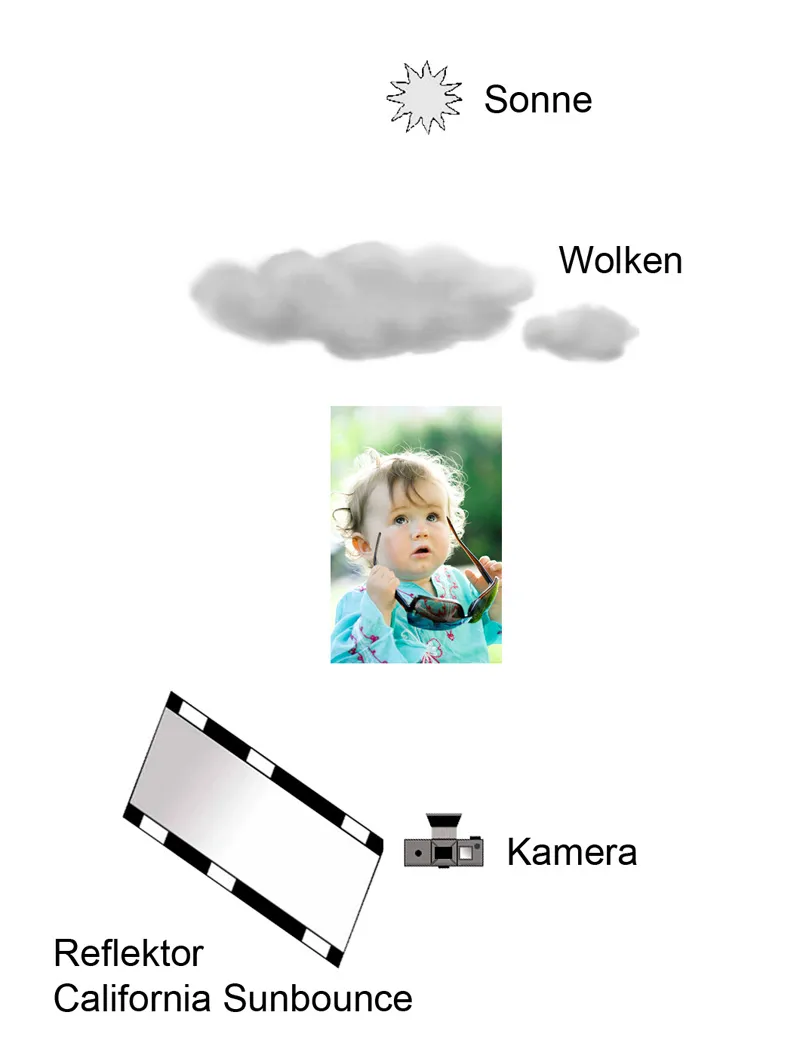
(Sketch: Elli Bezensek)
If you take photos under a cloudless sky, especially with backlighting, it often happens that the model's hair and shoulders are rendered far too brightly, and often "blown out", by the sun shining from behind, despite brighteners.
In this case, a diffuser, i.e. a white, partially translucent thin fabric that is held over the model, would provide a remedy. Here too, there are different designs, from pop-up diffusers from various manufacturers to the Sun-Swatter from California Sunbounce.
The Sun-Swatter is very light, yet stable, and can be held by the ace on a long tripod arm. The purpose of the tripod arm is to ensure that the person holding it over the model does not appear distracting in the picture (and neither does their shadow).
However, it is not always possible to go to such lengths: Either you don't have the diffuser or the second assistant to hold it over the model's head.
Sometimes you can help yourself by placing the models under a "natural" diffuser, for example under the foliage of a tree. This also ensures that the models get out of the hard light and instead receive a diffuse, soft light.
But be careful: the light filtered through the leaves has a clear green cast, so either use a filter (such as a skylight filter), correct the camera or use an image editing program to filter out the color cast afterwards!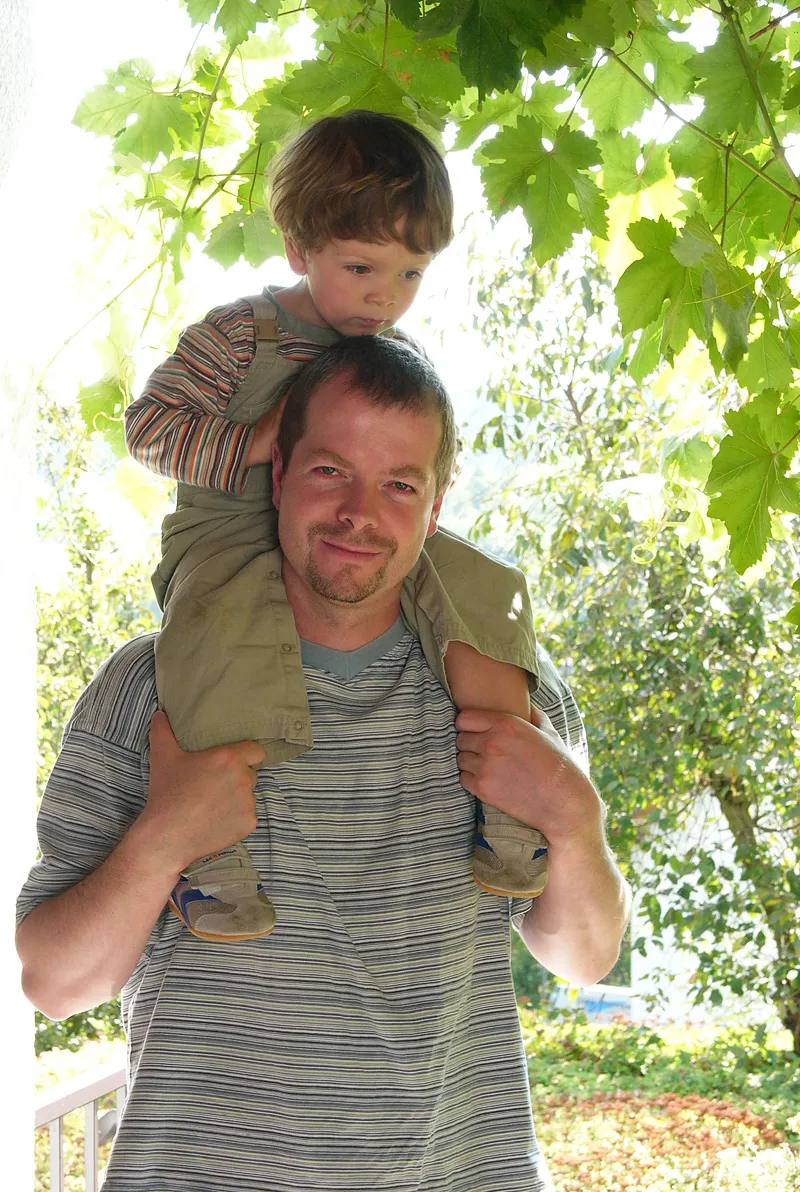
(Photo: Jens Brüggemann)
Studio flash system
Anyone who has ever really worked with a studio flash system is then infected by the "virus" and never wants to do without it again; I see this time and again at the workshops I organize on the subject of lighting technology!
Contrary to what many people believe, working with a studio flash system is much easier than you think, you just have to get the principle explained properly once. Once you have understood the principle and how it works, you can concentrate fully on the young models during the shoot and make full use of all the advantages of the flash system.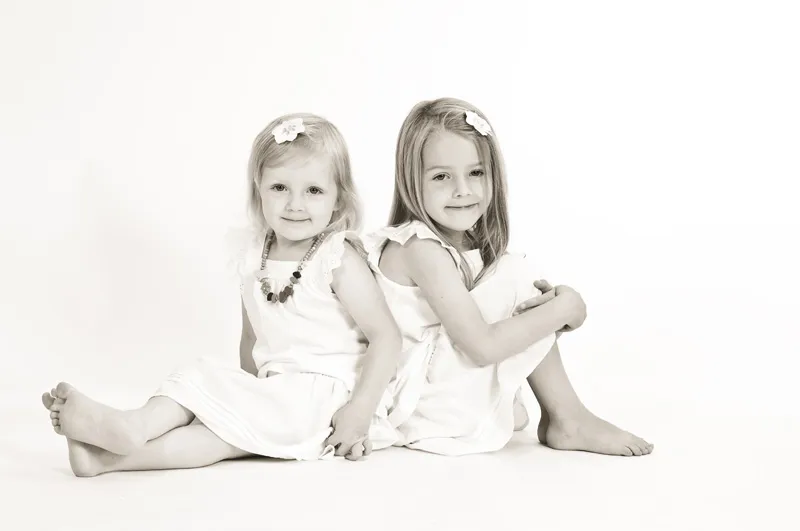
(Photo: Elli Bezensek)
The big advantage over system flash units is the available modeling light. With its help, the lighting can be set precisely with good studio flash systems and the lighting can be controlled almost 100 % before the shot is taken.
(Photo: Elli Bezensek)
However, this only works if the modeling light is proportional to the flash light, which is only the case with good systems, and if there is no - non-adjustable - ambient light (i.e. if the photo is taken in a darkened room).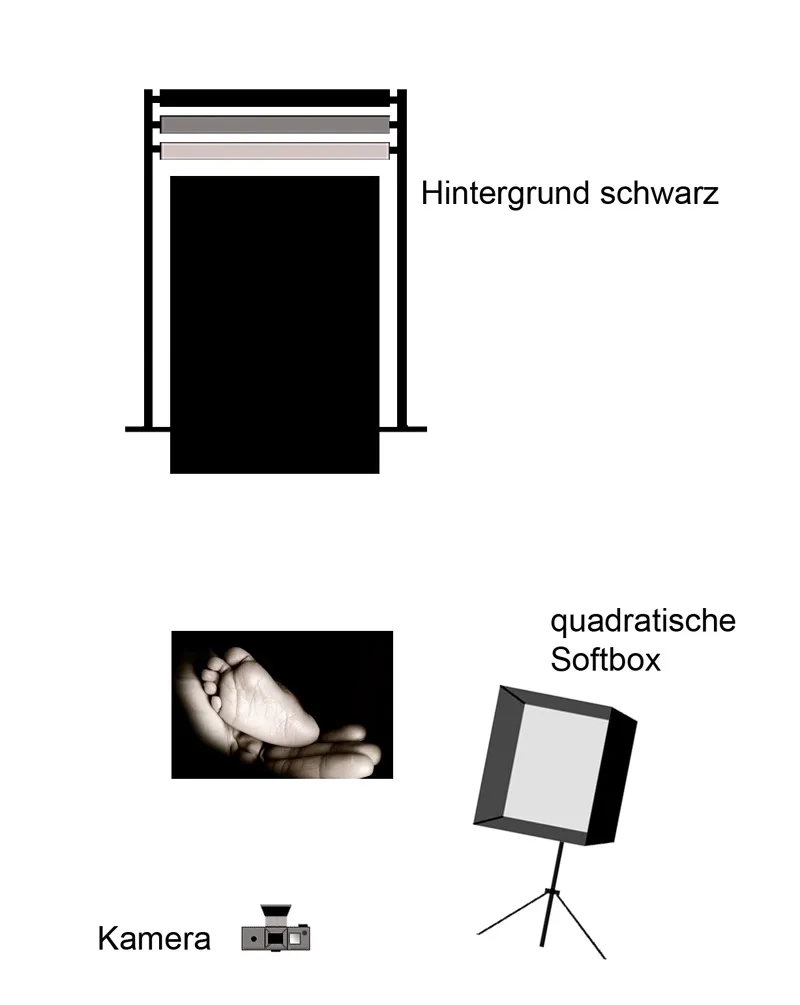
(Sketch by Elli Bezensek)
This point is extremely important and is also underestimated by many professional photographers, because only when the modeling light is proportional to the flash light can you really work creatively and set the light according to your ideas ("what you see is what you get"!).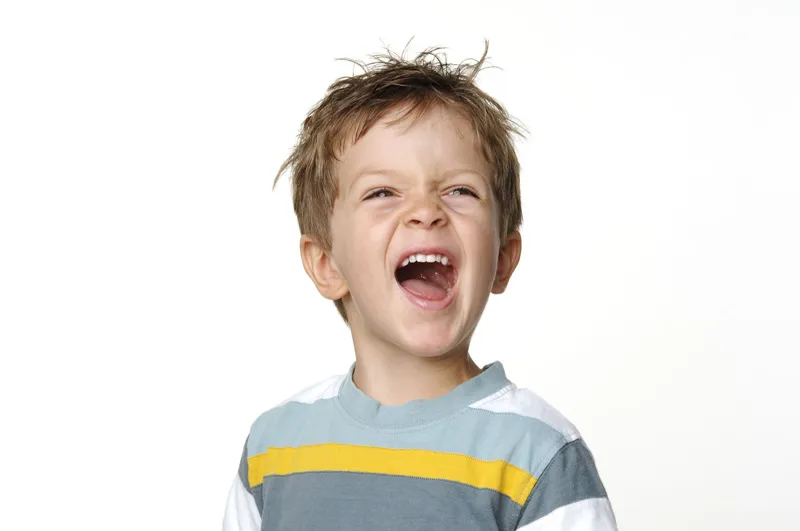
(Photo: Jens Brüggemann)
Another major advantage of studio flash systems is the wide range of accessories, especially the variety of different light shapers. Light shapers, as the name suggests, "shape" the light according to the photographer's taste and the task at hand. There are light shapers that produce very soft, flat light.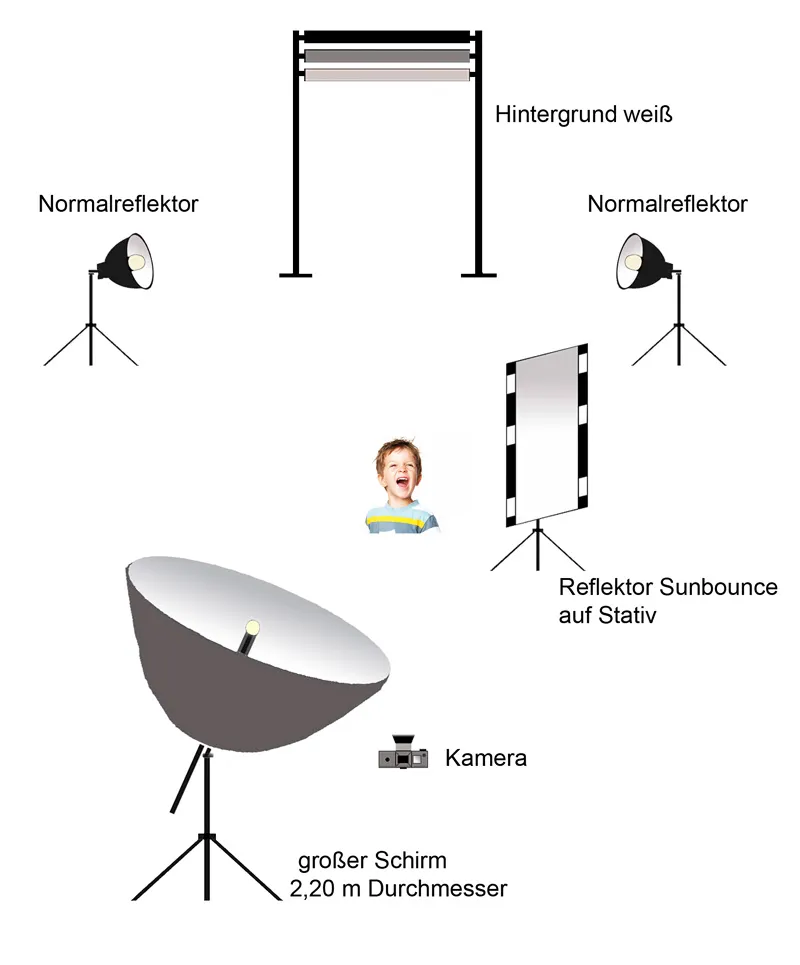
(Sketch: Jens Brüggemann)
Then there are others that provide very hard, focused light. And there is a lot in between, as well as a number of special models for special applications. In short, there is something for almost every taste and every task, so that you can give free rein to your creativity.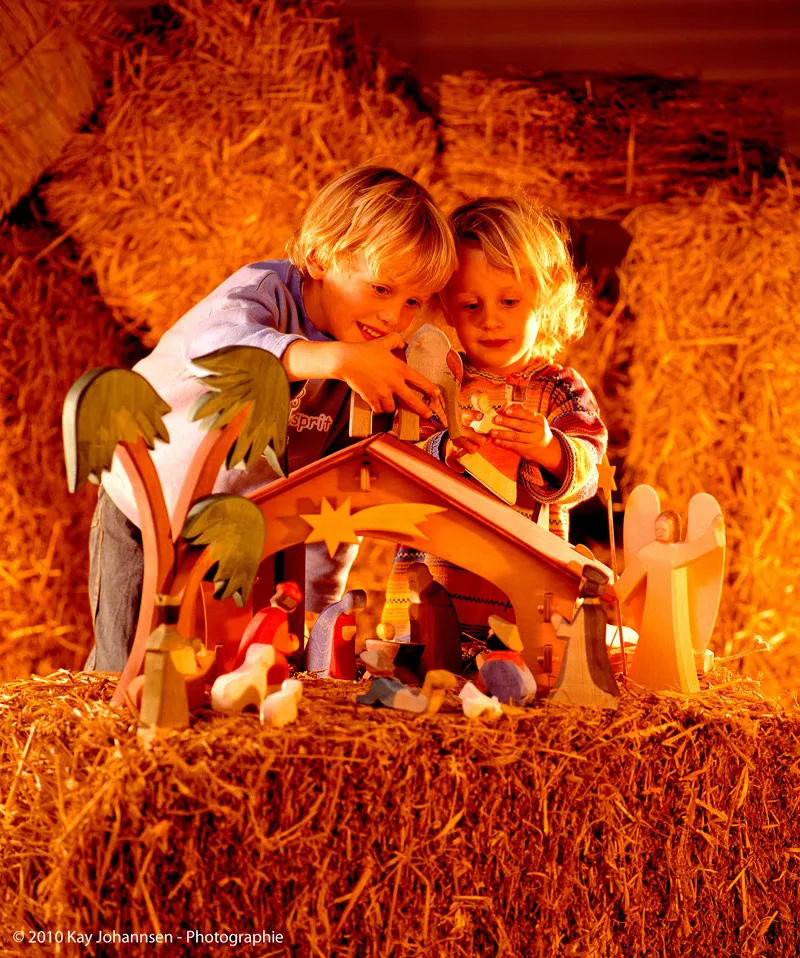
(Photo: Kay Johannsen)
There are two different types of studio flash systems: systems with a generator and lamp heads and systems consisting of several compact flash units. In the system consisting of a generator and several lamp heads, cables run from each lamp head to the generator, via which each lamp head is supplied with power from the generator.
Only the generator itself is connected to the mains supply. It also contains the necessary technology. The lamp heads, on the other hand, essentially consist of a flash tube, modeling lamp and cooling fan; nothing more. In a system consisting of several compact flash units, a cable runs from each unit to the socket; this means that each individual compact flash unit can be used separately and the technology for this is located in each unit.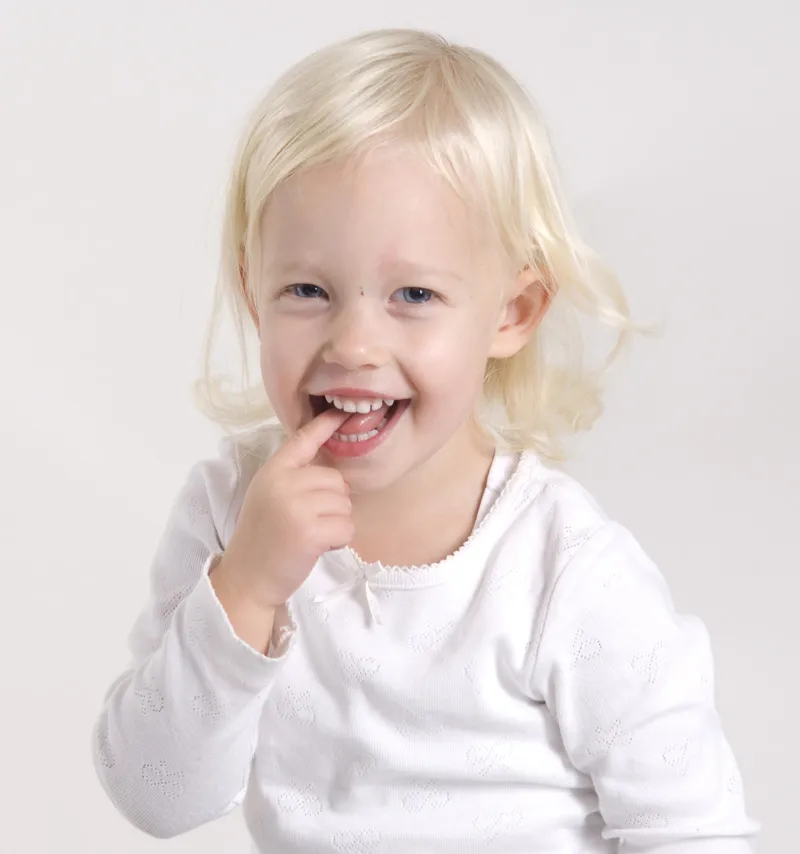
(Photo: Elli Bezensek)
The advantages of generator-based studio flash units are higher performance, quicker flash recycle times (important for fast-moving children so as not to miss the decisive moment!), brighter modeling light and a wider range of functions.
In addition, several lamp heads can normally be controlled individually ("asymmetrically") centrally on the generator, which should ideally be positioned at the photographer's feet. Modern generators have a control range of ten f-stops. This means that the power can be regulated over 10 full Blenders (in 9 whole steps).
Logically, the control of the individual units of a studio flash system consisting of several compact flash units is also asymmetrical: each unit can be set individually.
As a rule, compact flash unit systems have a smaller control range, weaker modeling light and less (total) power, but are smaller and lighter overall than generator systems, i.e. more compact.
This and the lower purchase price (for approx. 2,000 euros net you can get a good set of 3 units including accessories in a case) are the reasons for their greater popularity, especially among dedicated amateur photographers, while large photo studios continue to rely on generator-based systems, but not without also having a compact flash unit set available for shooting "on location".
Ultimately, it doesn't matter which solution you choose. Whether you use a studio flash system with a generator and lamp heads or several compact flash units - you won't be able to tell from the finished photo.
The decision as to which system to use therefore has no influence on the quality of light, but there are differences in terms of ease of use and range of functions.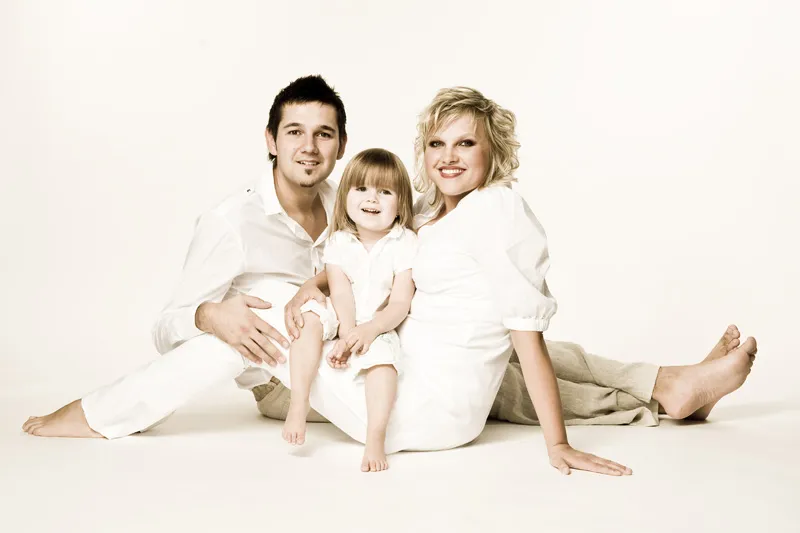
(Photo: Elli Bezensek)
What you should definitely look out for when buying a studio flash system
- Quality and reliability have their price, a system with three heads including accessories cannot cost less than 1,000 euros, even as a compact flash system version, unless savings have been made in crucial areas, for example in terms of processing quality, reliability or - even worse - safety.
You wouldn't trust a 320 hp car that only costs 800 euros! So you'd rather spend a few hundred euros more and have the good feeling of having bought a system of lasting value, which also has the advantage of not latently threatening you with misdirected power surges into nirvana ... - No one would buy a car based solely on the criterion of "performance" (i.e. number of horsepower). Safety, driving comfort, consumption, charging options, design, etc. are also important reasons for making a purchase decision. In the case of studio flash units, however, this is exactly what many salespeople do: they compare different units solely on the basis of the criterion of "performance", measured here in watt seconds (joules).
However, other points are much more important than a high light output: fast charging time, large control range, strong modeling light, asymmetry of the modeling light to the flash, etc. For me, the point "power" would only come at the very end as a purchase criterion, because in people photography in general and in children's photography in particular, people like to shoot with large Blenders (apertures) in order to separate the model from the background (i.e. model in focus, background out of focus); and very little light output is required for this.
However, if you buy a system with (too) much power (e.g. 3 compact flash units with 750 watts each), and then in the worst case with only a small control range (e.g. only over 4 Blenders) for cost reasons, then you clearly have "too much light" for portraits - even at the lowest flash power setting - to be able to take photos with an open aperture. Especially as many cameras no longer start at ISO 100, but have ISO 200 as the standard value.
- Quality and reliability are everything! The best flash system is useless if it doesn't work on the photo job. However, it is often the many "small" accessories that are "decisive in the war". For example, I strongly recommend spending a few extra euros on air-cushioned lamp stands, because if the lamp head accidentally crashes down with force when adjusting, the flash tube can quickly shatter - resulting in an expense of several hundred euros. Another small but not insignificant detail is the quality of the wheels on the transport bags.
It goes without saying that no bags for photo accessories are bought without wheels, but the quality and size of the wheels also play an important role, because only stable wheels of skater size or larger can be pulled over uneven ground (and I include German sidewalks in this). Not all photo locations have such smoothly ironed floors as you find in the photo stores, where every bag (padded only with light filling material) is easy to pull! - Mobility is everything these days. I fly around the world with my flash unit, regularly pay for excess baggage, lug it from one location to the next, load it into the station wagon and take it out again hours later, and often use it in places that are difficult to access. I am therefore happy about every gram of weight saved, because the many individual pieces of equipment add up noticeably. It is therefore essential to pay attention to the weight and mobility of the system when buying, which is why a battery-operated mobile flash system should be considered as a real alternative.
Battery-operated mobile flash systems
An alternative to studio flash systems that has become increasingly popular in recent years are mobile flash systems that can be operated anywhere and independently of the power grid, i.e. mainly outdoors, with the help of rechargeable batteries.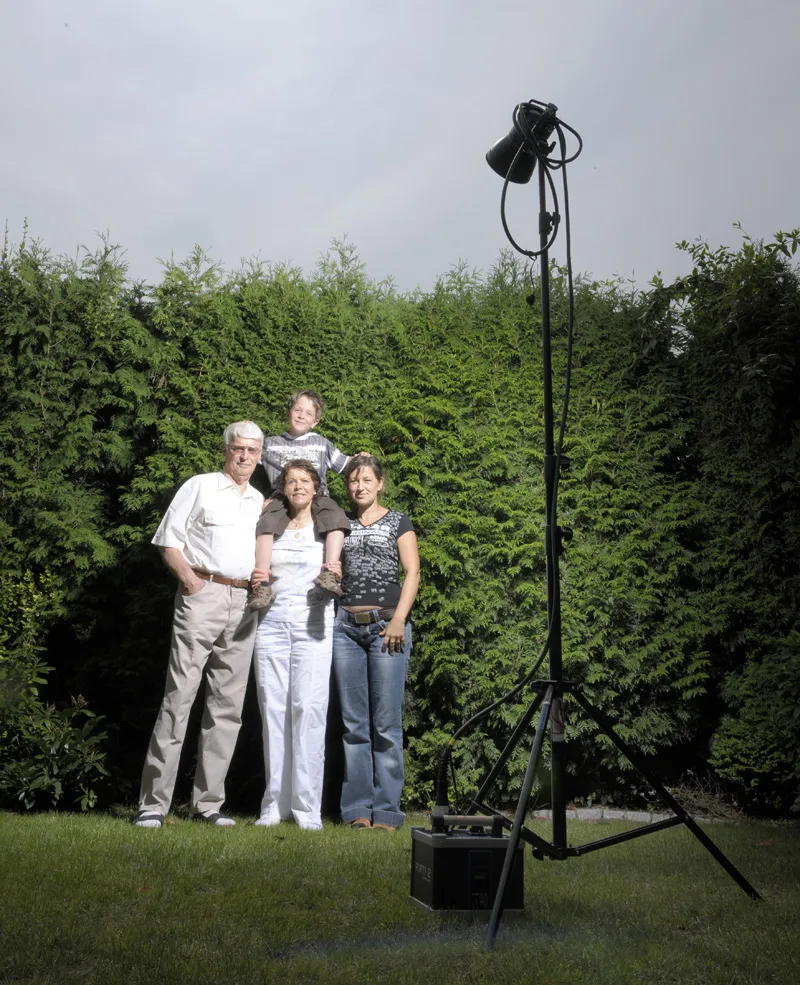
(Photo: Jens Brüggemann)
Battery-powered generators are most commonly used, to which (usually two) lamp heads can be connected and controlled separately.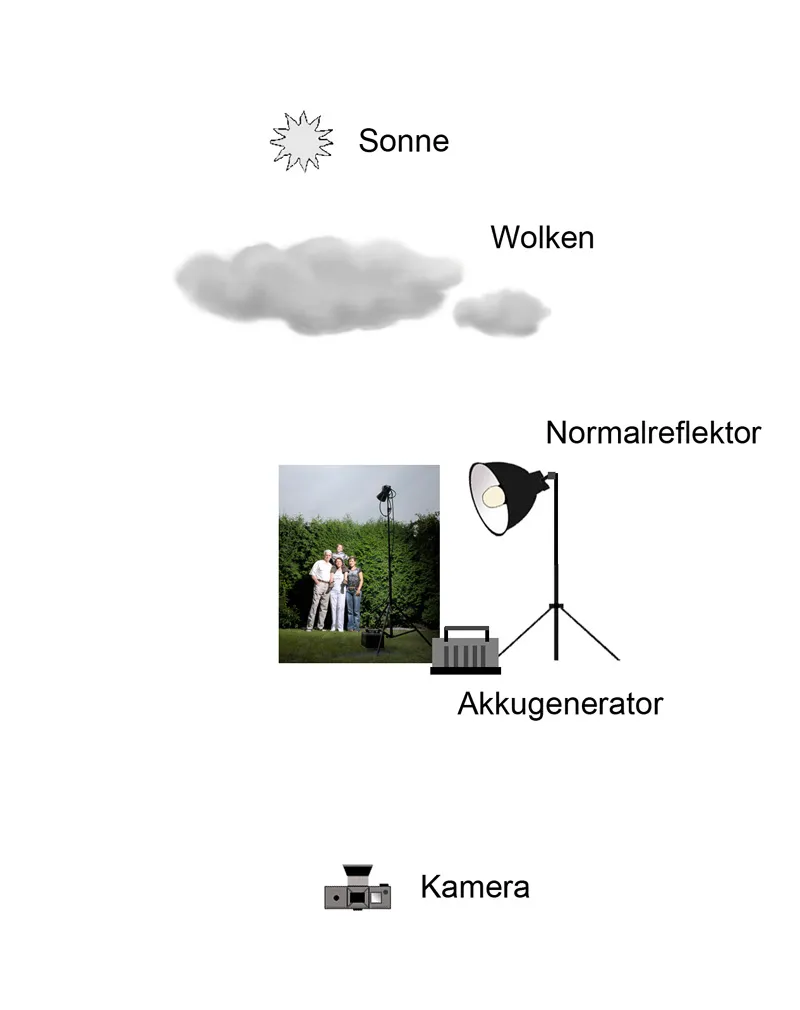
(Sketch: Jens Brüggemann)
However, there are also so-called "travel packs" with which individual compact flash units can be operated outdoors, although this solution has not yet established itself on the market in large numbers.
I now own three different battery generators (with different "qualities"), which shows how valuable I consider the lighting possibilities that these mobile flash units offer the photographer.
In order to be flexible, which is very important in child photography, I recommend generators between 600 and 1200 WS power (with smaller dimensions and less weight than generators with more "power").
Make sure that you buy a system that can be converted into a studio-grade generator without too much effort, for example by replacing the battery with a power supply unit.
This will kill two birds with one stone. And you'll see: It's great fun to use a flash system and "play" with light and then also be independent of the power socket!
This makes it possible to take pictures "on location" far away from any power socket, like here in the play corner of a large furniture store!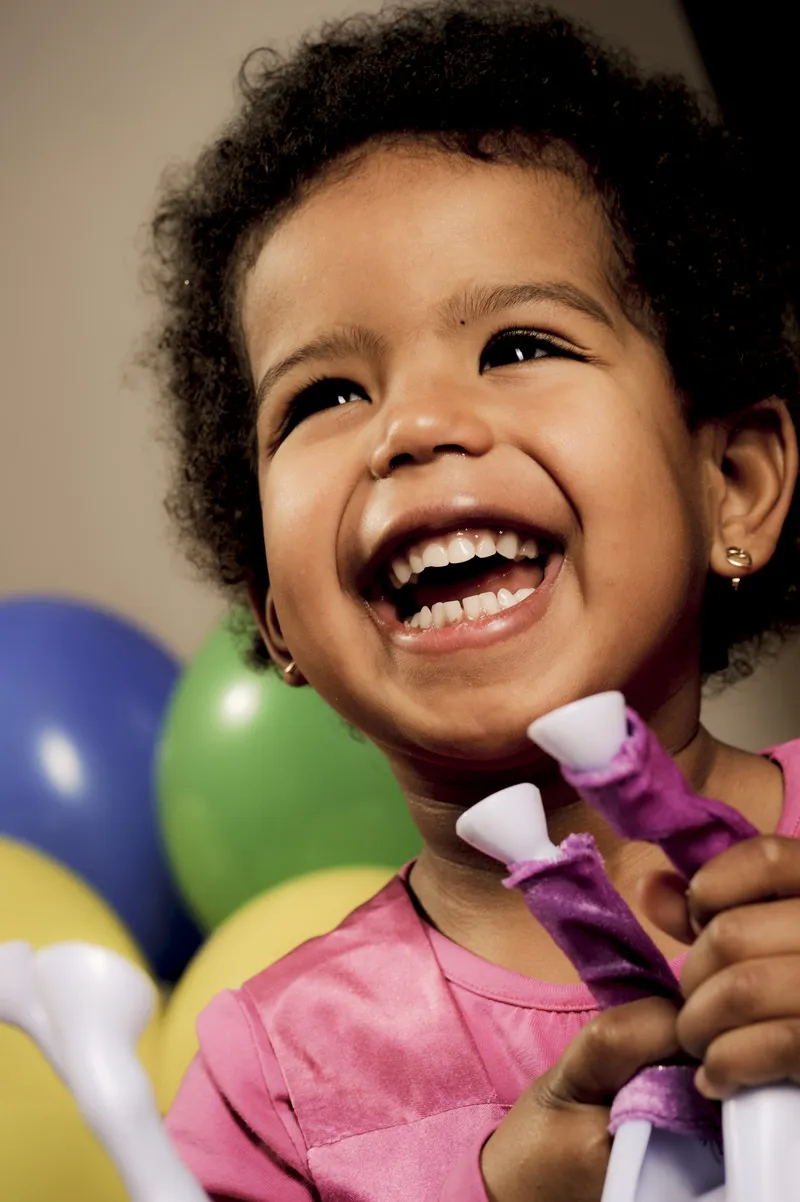
(Photo: Elli Bezensek)
Props
"Props are just unimportant accessories, irrelevant for a good photo." That's what most photographers say. "Props are the salt in the soup, the icing on the cake." I say.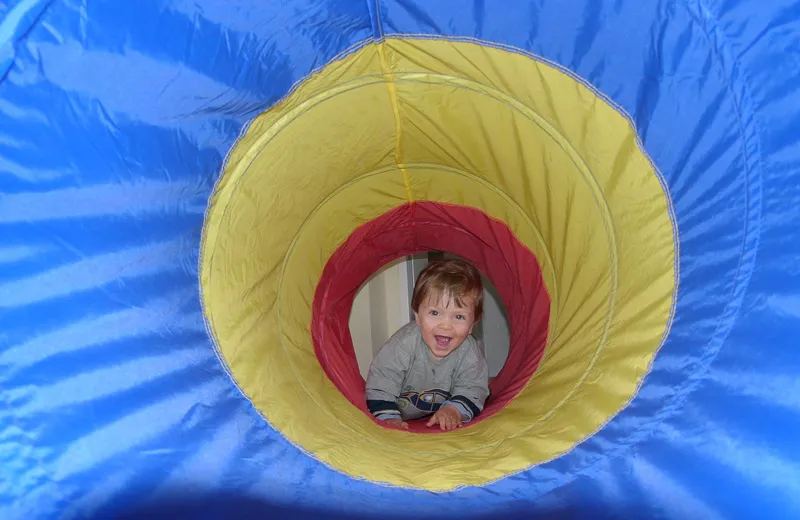
(Photo: Jens Brüggemann)
The fact is that the use of props, also known as "accessories", can help the photographer to "give" a meaningless photo an image idea.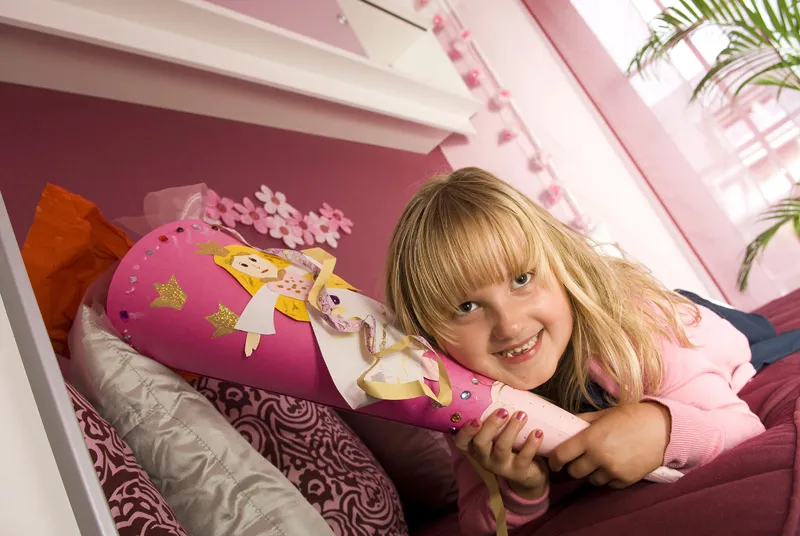
(Photo: Elli Bezensek)
A beautiful portrait often lacks something, it is "just" a portrait. With the help of props, the photo is given a visual statement, tells a story.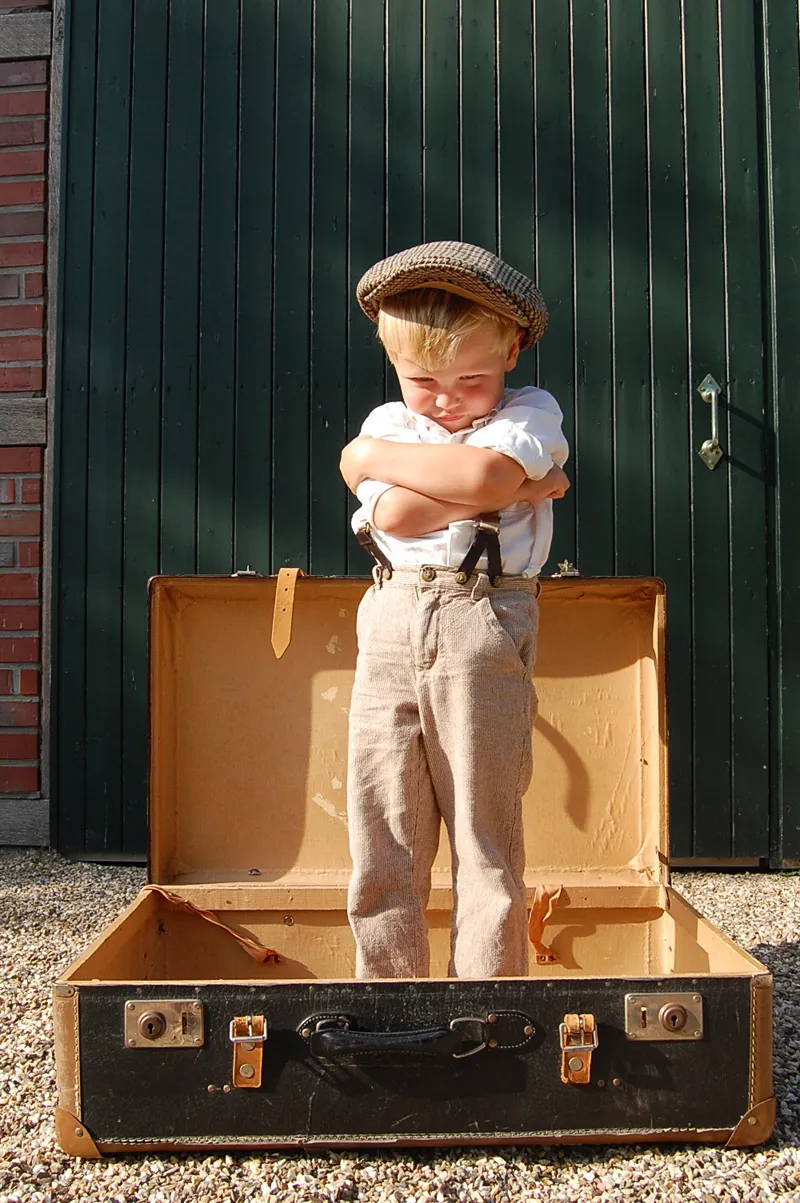
(Photo: Leonie Ebbert)
Often the photographer doesn't even have to worry about getting the props themselves, because many are simply "already there", you just have to "see" them - and use them. In this photo, which was taken by the photographer in Uganda, it quickly becomes clear that props - whether procured by the photographer herself or simply "discovered" - influence the message of the picture and may even give the later viewer a little story to smile about along the way.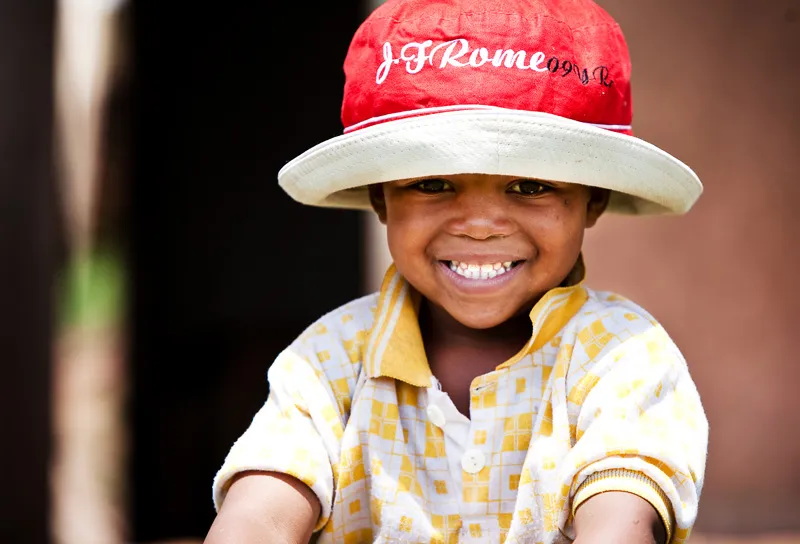
(Photo: Radmila Kerl)
If you observe and photograph children playing outdoors, it doesn't take long for them to drag along some "interesting" object (which thus becomes a prop for the photo): a dead frog, a living cross spider, a soggy New Year's Eve firecracker that has been left lying around, a smooth stone, a discarded glove, a broken branch, etc. (Photo: Jens Brüggemann).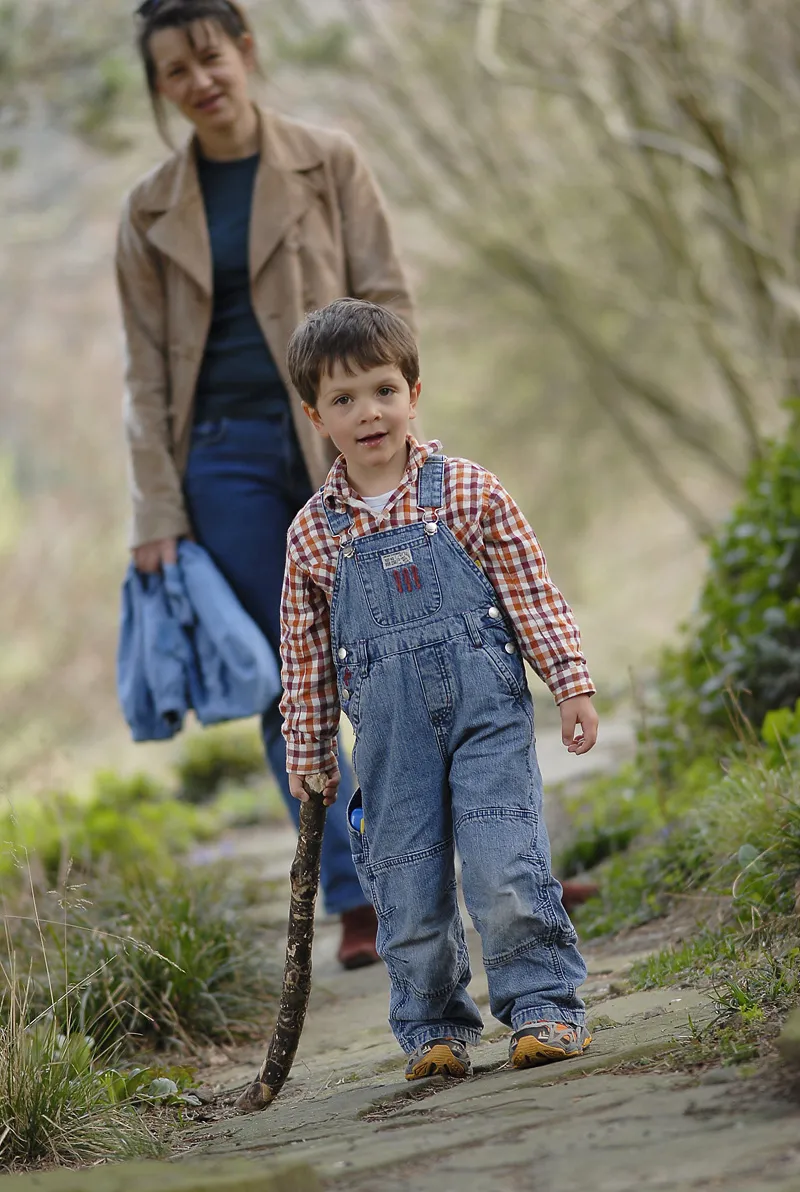
(Photo: Jens Brüggemann)
When photographing children, the question of what props should be brought along for the photo shoot hardly ever arises. Every child brings their (current) favorite toy with them when they come to the photographer, but also when they visit relatives or meet up with playmates.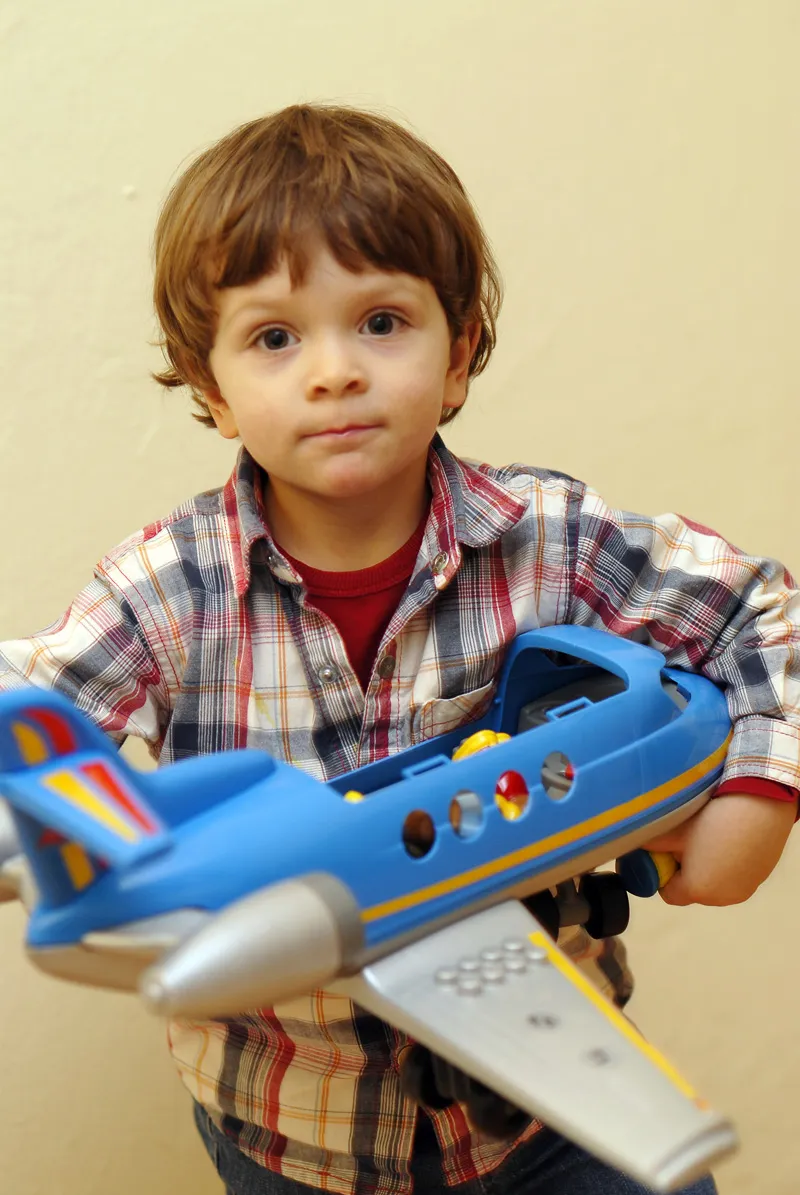
(Photo: Jens Brüggemann)
Nevertheless, if you want to photograph a child, it can be a good idea to have a few little things to play with in your studio. Although children love their favorite toys dearly, they are always very happy when they are allowed to play with new toys that they don't have at home for a change.
Then they quickly throw their own favorite toy "into the corner" and spend hours playing with the new toy. Ideal for the photographer to "shoot" beautiful and intense portraits of the playing child, almost unnoticed and in any case tolerated.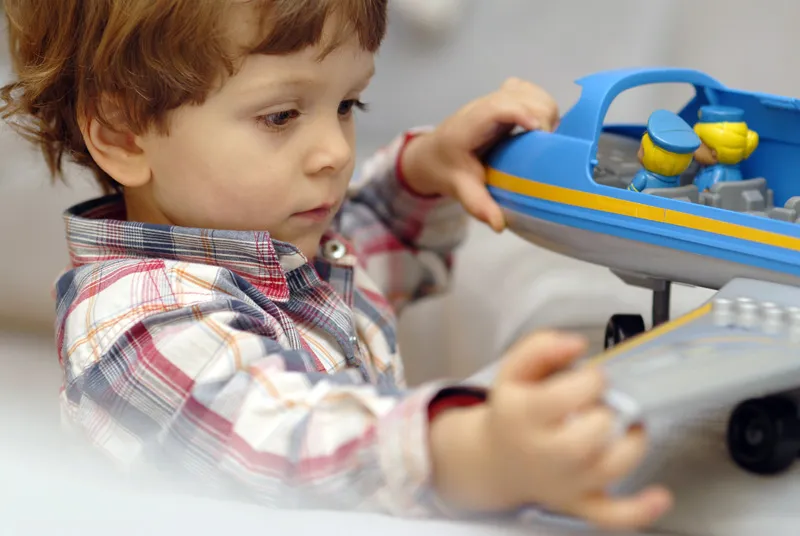
(Photo: Jens Brüggemann)
Not only toys can be used as accessories; in the end, anything that is recognizable in the photo and somehow influences the image statement and has not been removed by the photographer (or moved into the picture especially for the photo) is suitable as an accessory. Even though you shouldn't - normally - take photos of people eating, I got such cute "grimaces" while eating chips during a trip to Dortmund Zoo with my son that I couldn't resist taking a photo here.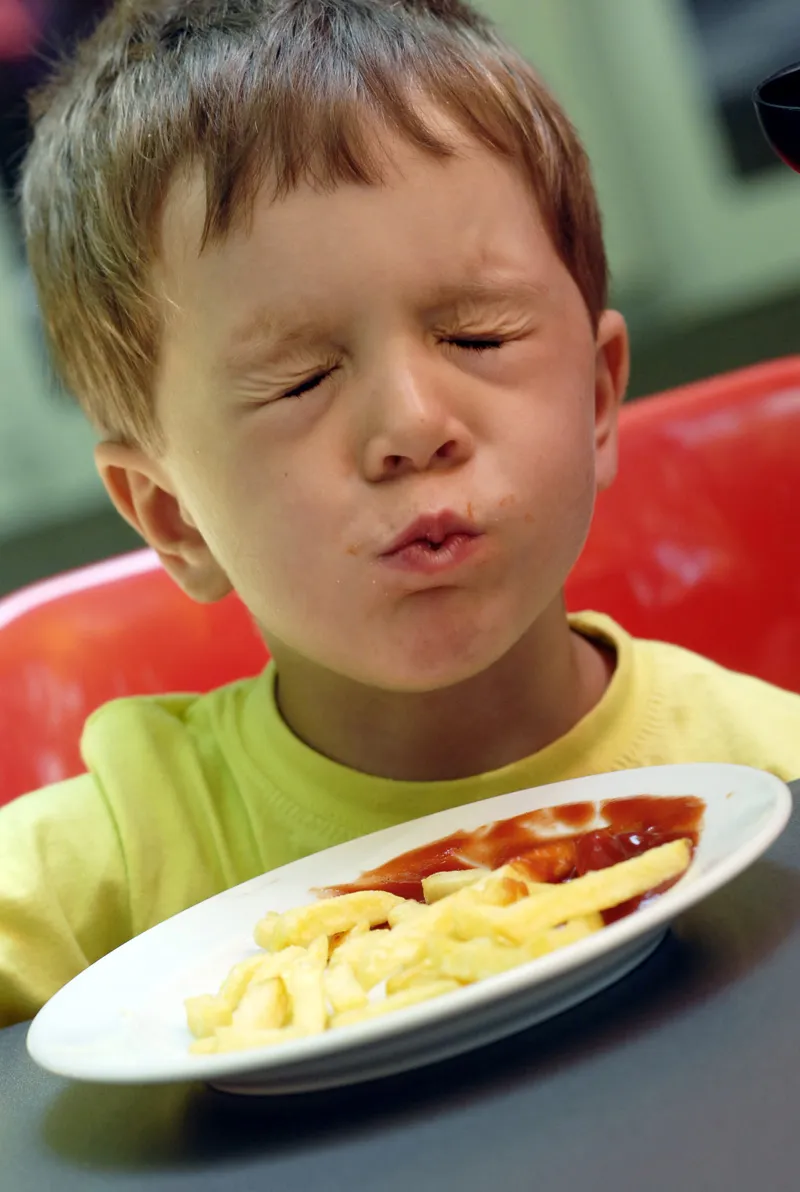
(Photo: Jens Brüggemann)
By the way, almost every child will lose their shyness towards the photographer and will happily pose for the photo (at least for a brief moment) if you ask them to pose with their favorite teddy bear (or rabbit, tiger, duck, mouse, ...).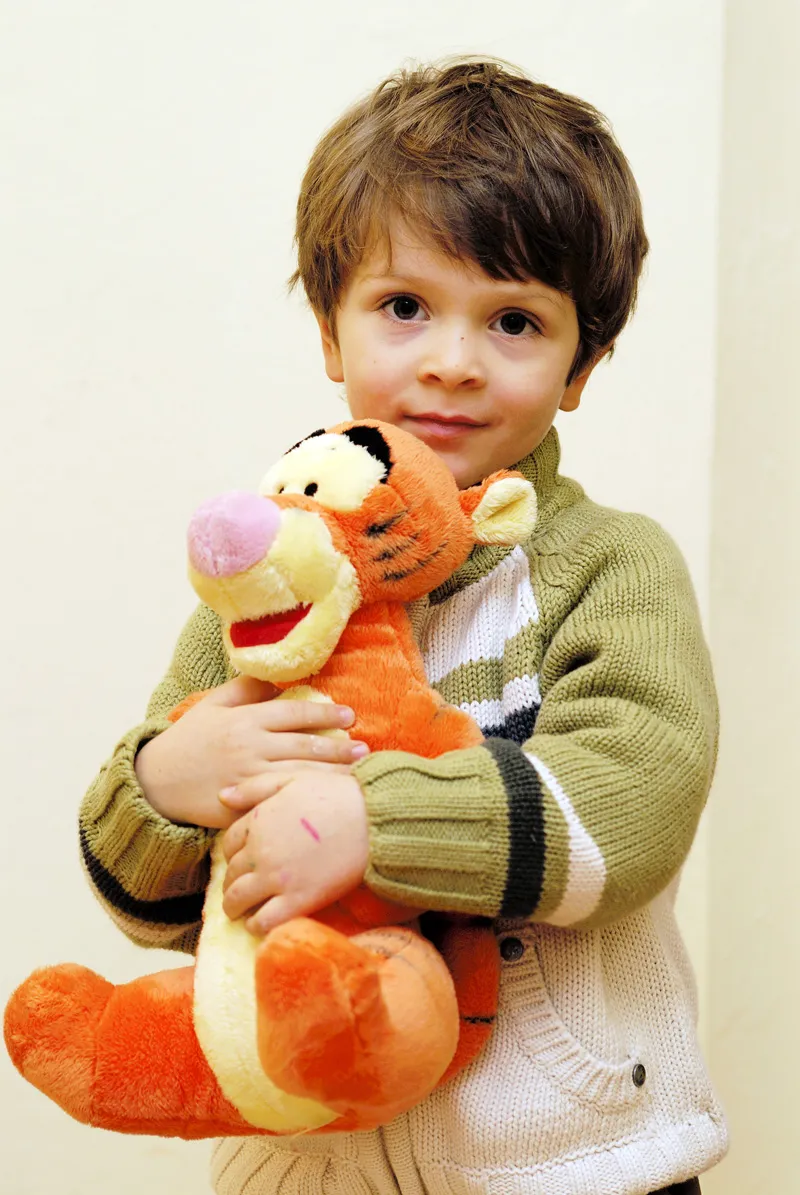
(Photo: Jens Brüggemann)
If you then take advantage of the child's directness, honesty and naivety and try to "bribe" the young model with the prospect of a small gift (as a thank you for the photo shoot), the child will certainly pose more or less patiently in front of the camera for a short time! But not without constantly "pestering" you as to what kind of gift it is ...
