In this tutorial, I will show you how to create an impressive comic effect in Photoshop from any photo. We will create both a black and white version and a color version of the effect, and you will be able to follow the steps step by step. Whether you are a beginner or an experienced user, with this guide, you will receive valuable tips to transform your images into a comic style.
Main Findings
- To create a comic effect in Photoshop, you will process images using various filters.
- Working with smart objects allows for easy post-processing.
- Creating a black and white comic effect requires adjustments in image corrections and the filter gallery.
- The effect can be enhanced by combining different filters such as oil and art filters.
Step-by-Step Guide
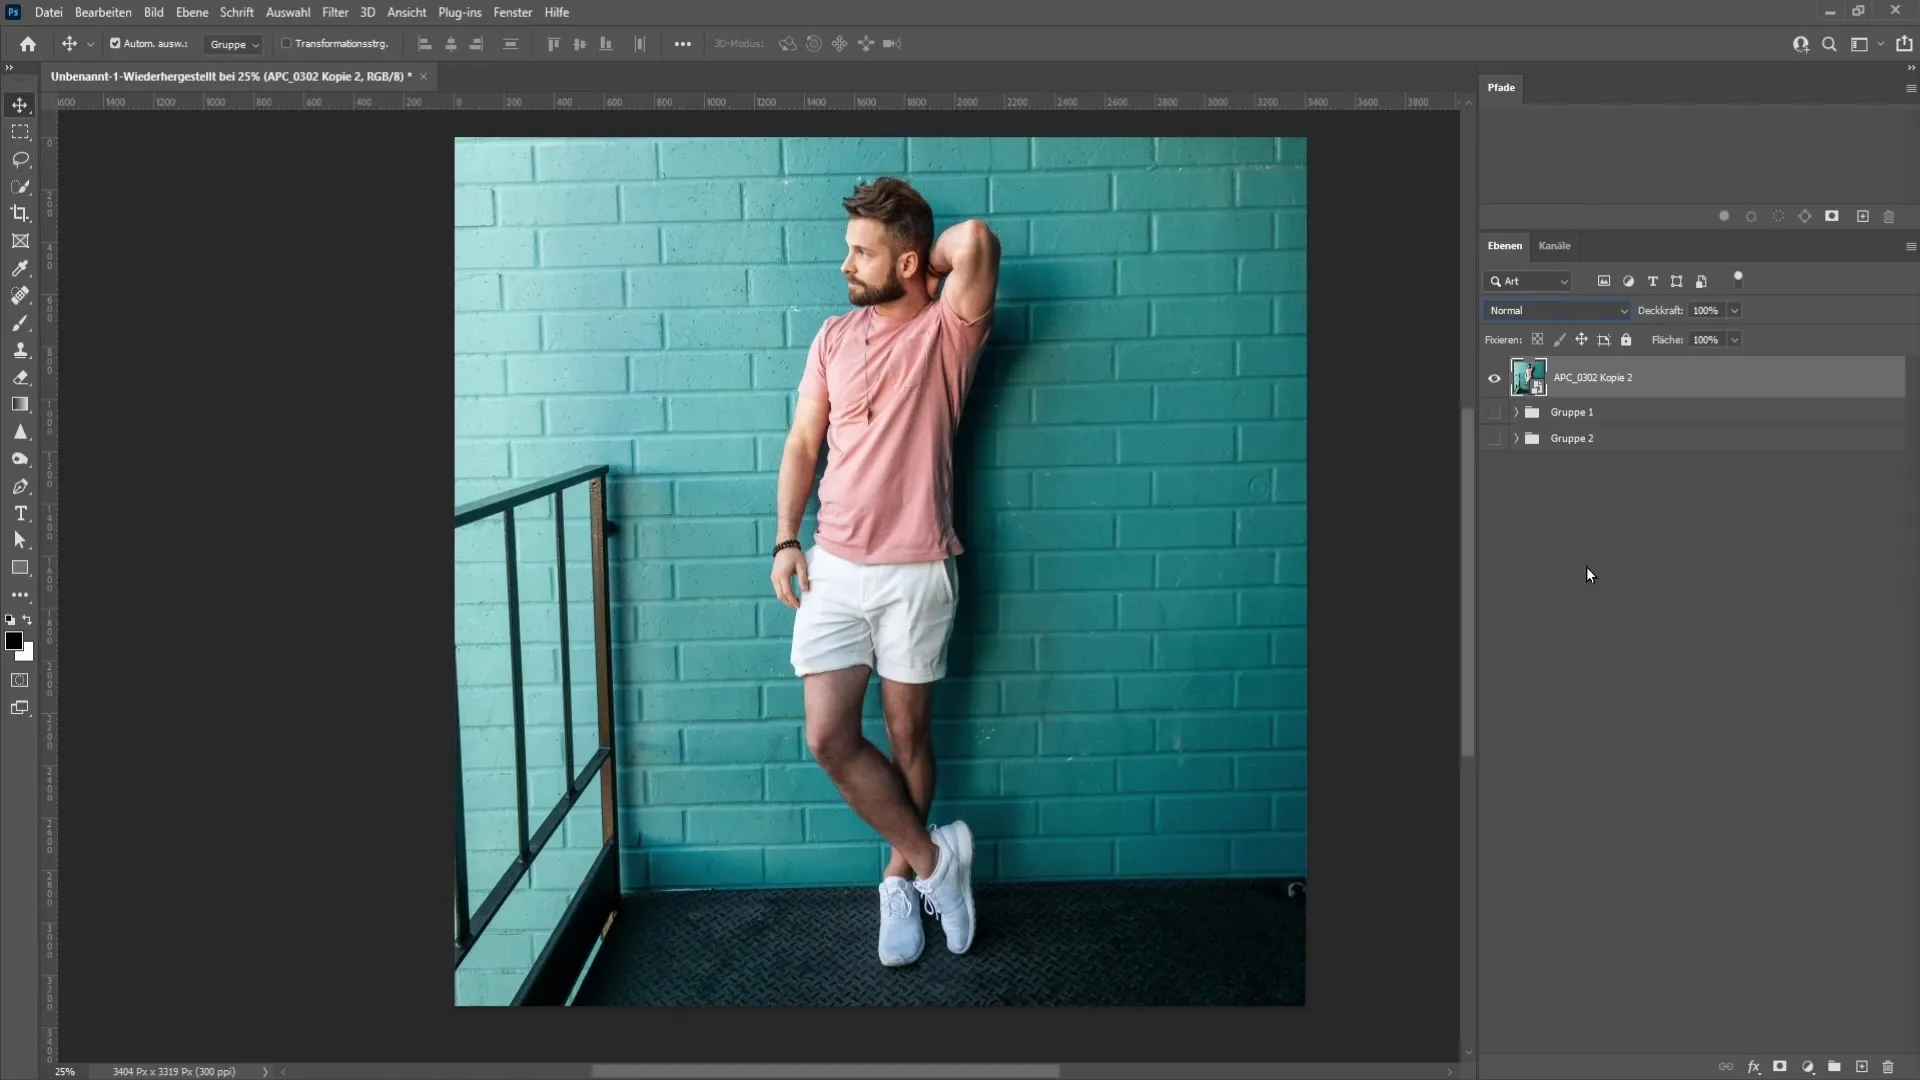
To start, you should open Photoshop and load the image you want to edit into the program. You can use any image, but it is recommended to choose one with clear contours and colors to showcase the comic effect optimally.
To ensure you can adjust the changes afterwards, you should convert the image into a smart object. Right-click on the image and choose "Convert to Smart Object." This step allows you to modify the filters at any time if needed.
Now it's time to apply the first filter. In the menu, select "Filter" and then "Filter Gallery." Once in the gallery, choose "Graphic Pen" and "Poster Edges" under the Artistic filters. Play around with the zoom setting, set it to about 25%, to get a better overview of your image.
Once you have adjusted the settings to your liking, click "OK." You should now already get a first comic-like impression of your image.
To further enhance the effect, you will apply the black and white representation. Go to "Image," choose "Adjustments," and then "Threshold." Here, you can experiment with the slider until you achieve the best result for your image. Make sure the structure of the image remains recognizable.
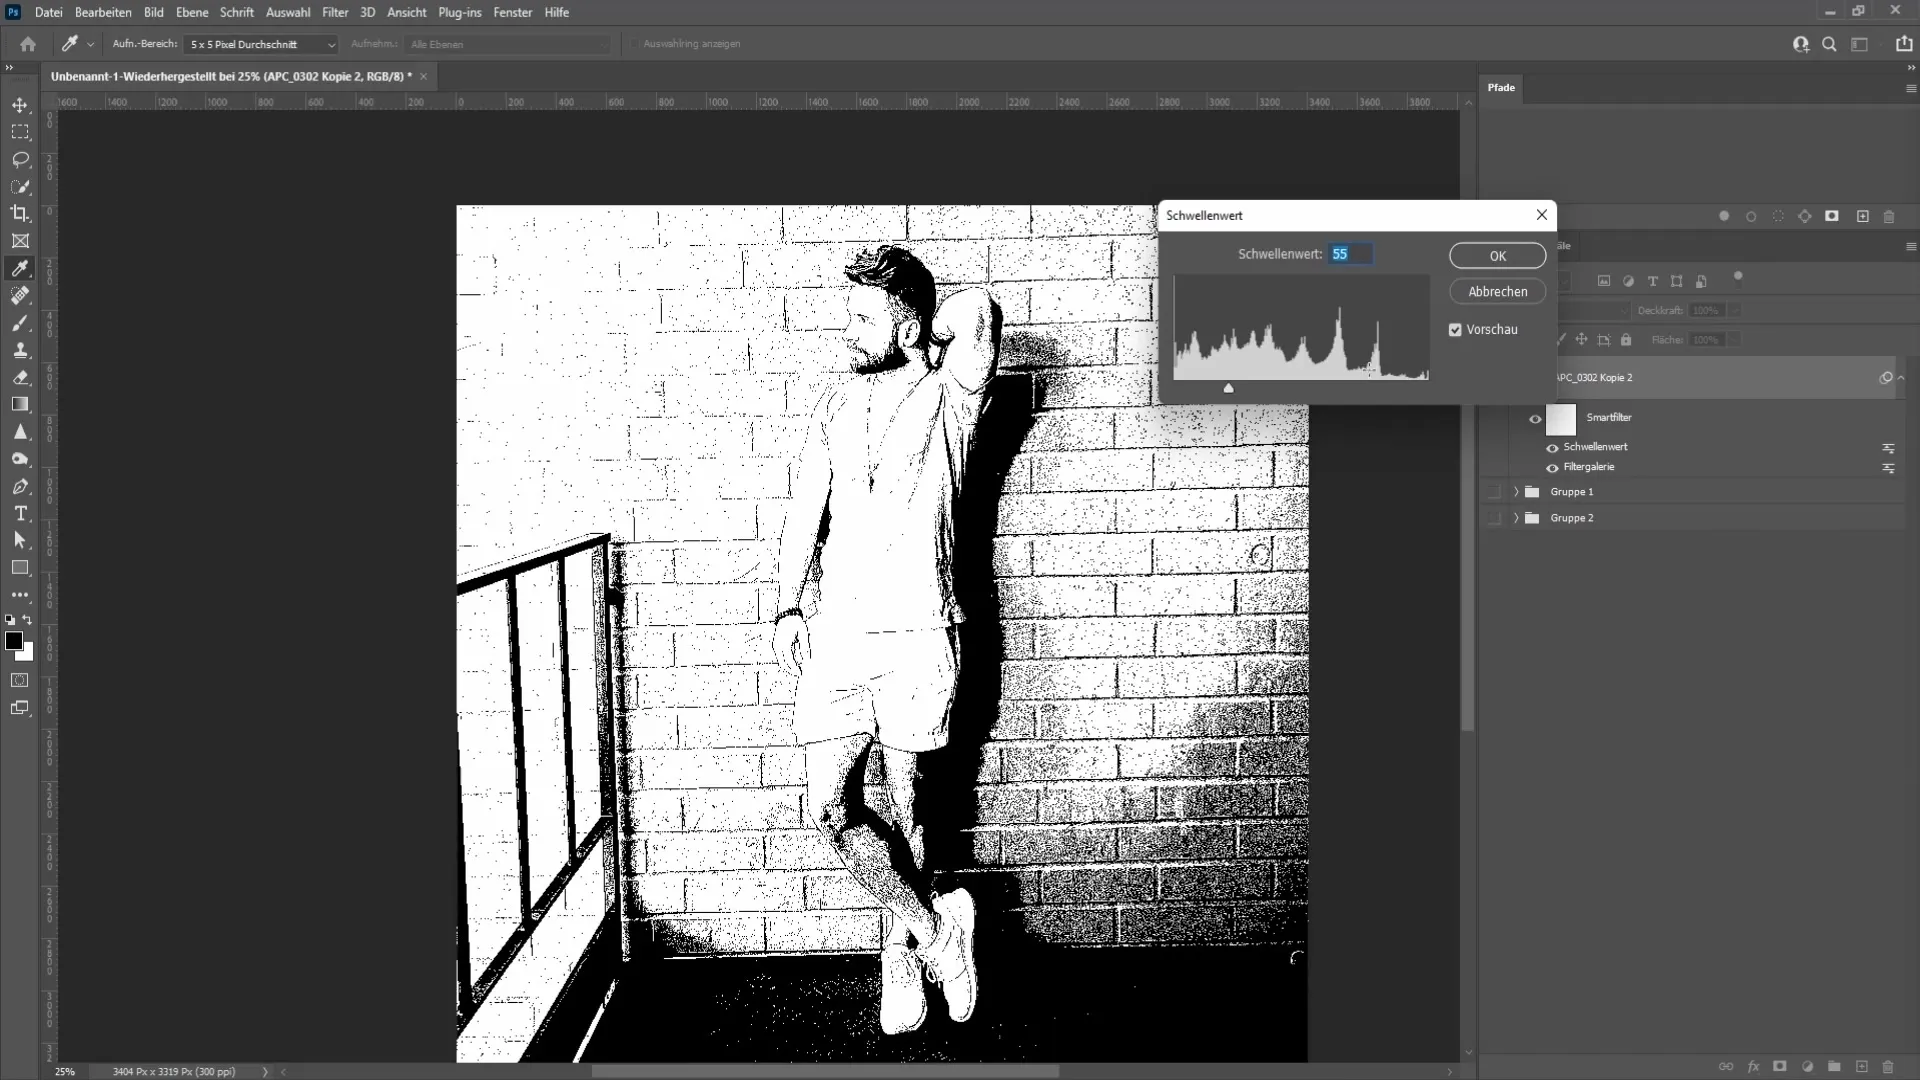
Once you have adjusted the threshold and are satisfied, confirm the settings with "OK." We have now obtained a partially black and white representation.
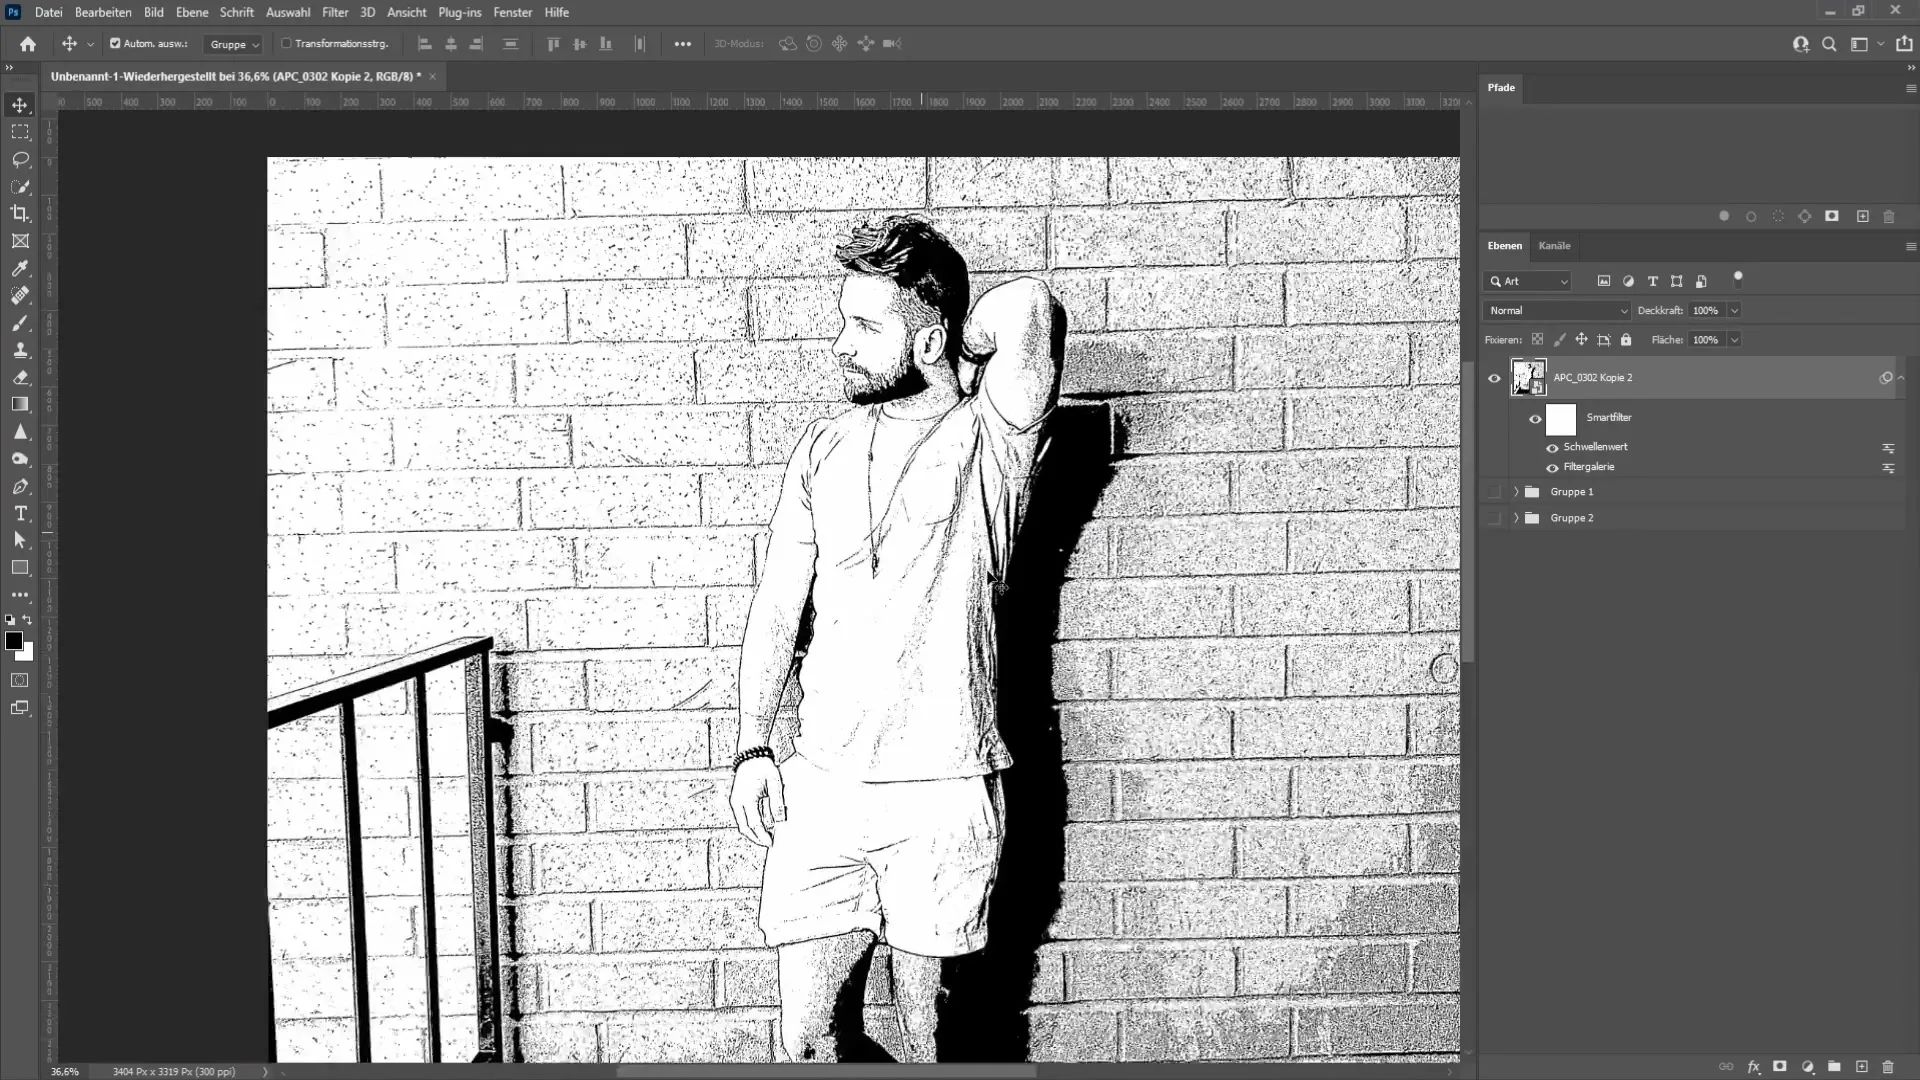
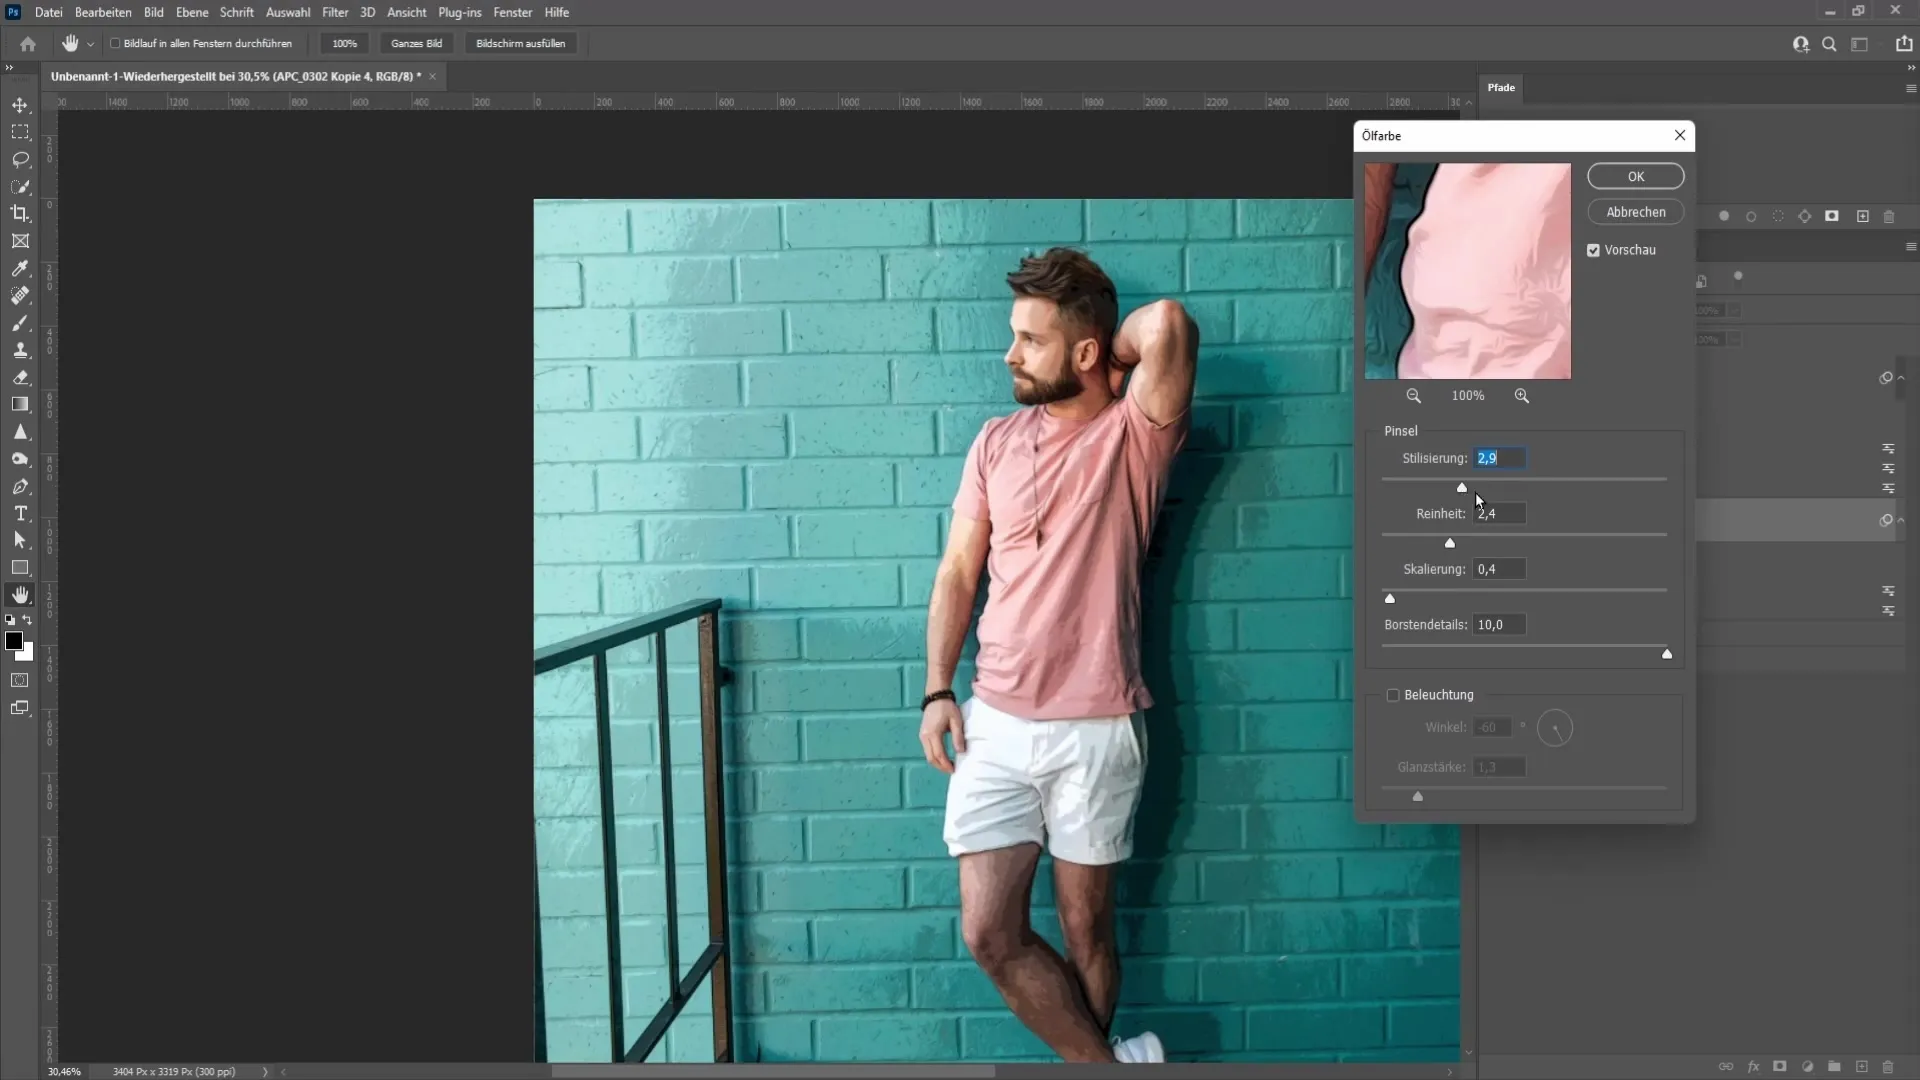
To give the image more depth, we will now apply an oil filter. Go to "Filter" again, then "Stylize," and choose "Oil Paint." Turn off the lighting by deselecting the corresponding option to remove unwanted light streaks.
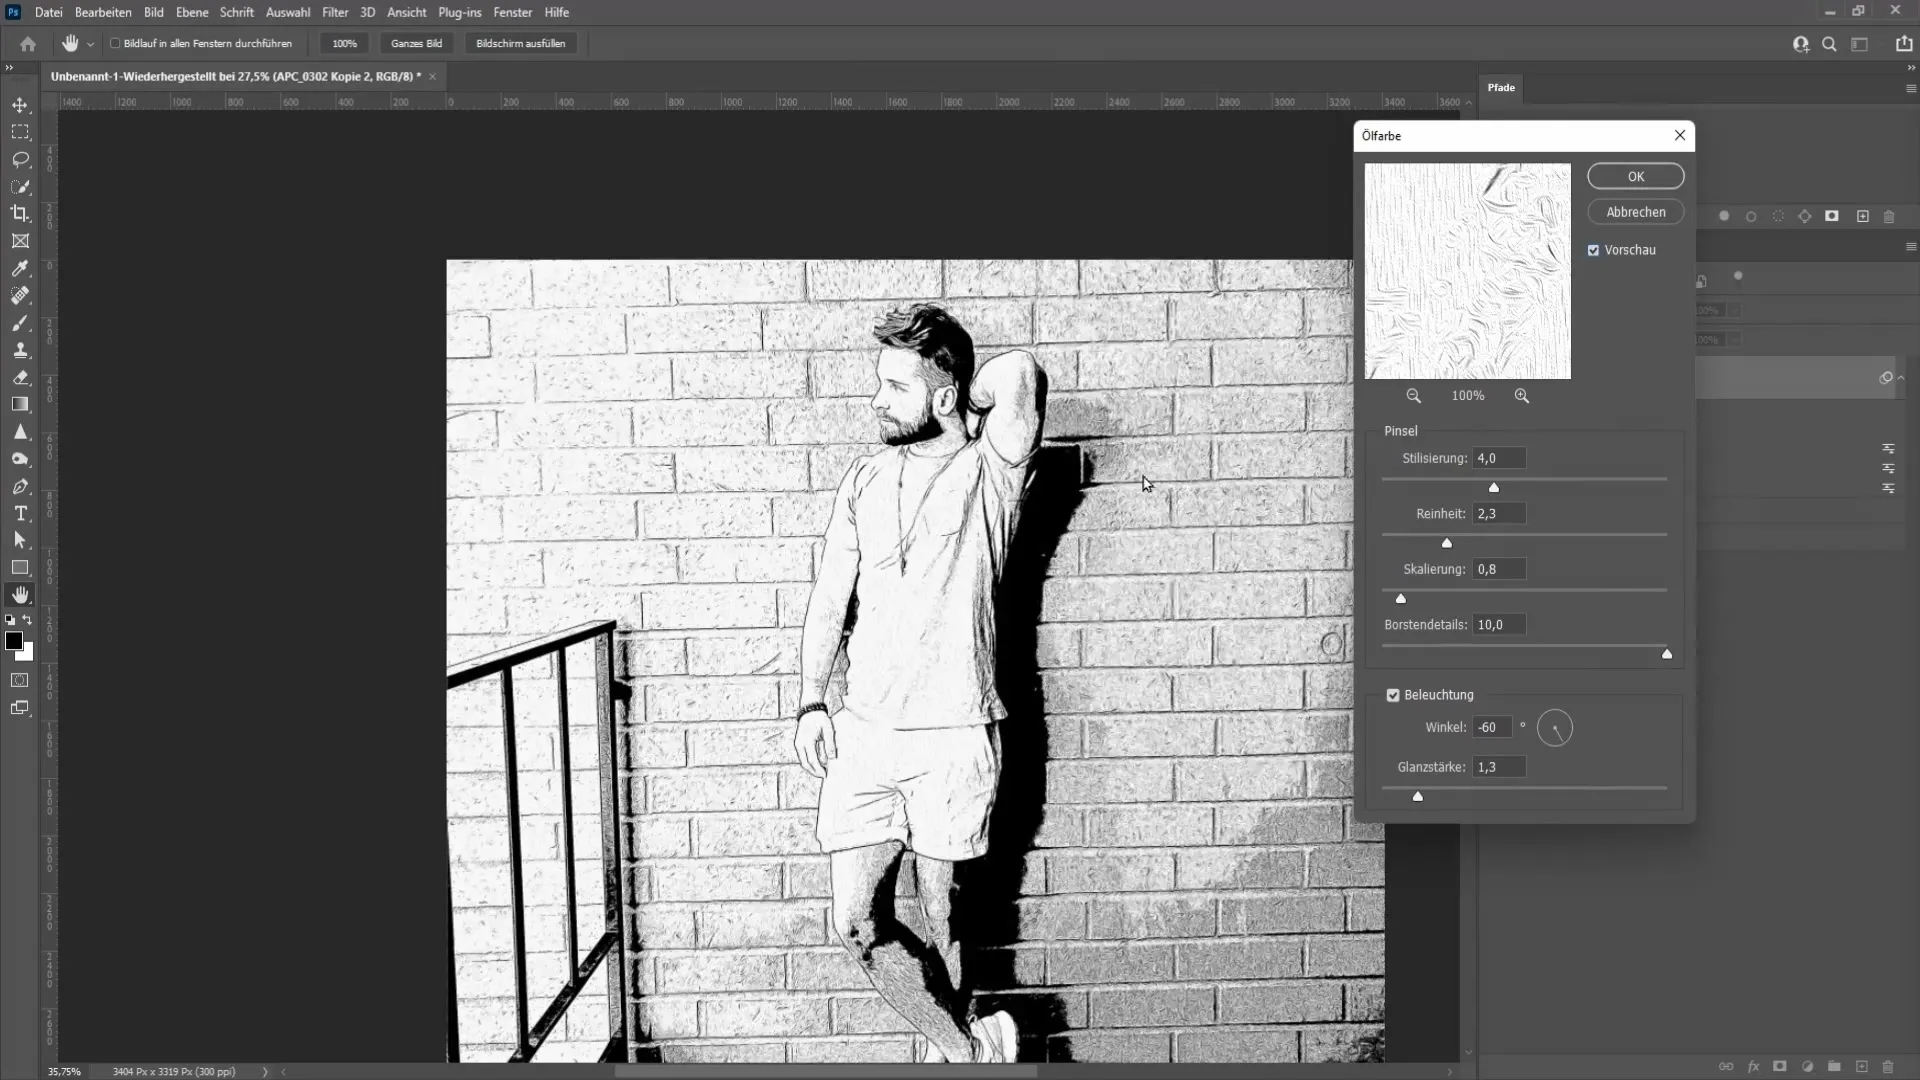
Now you can adjust the sliders for details, stylization, and cleanliness. Experiment with these values while zooming in and out to view the overall picture. Set the scaling to about 0.4.
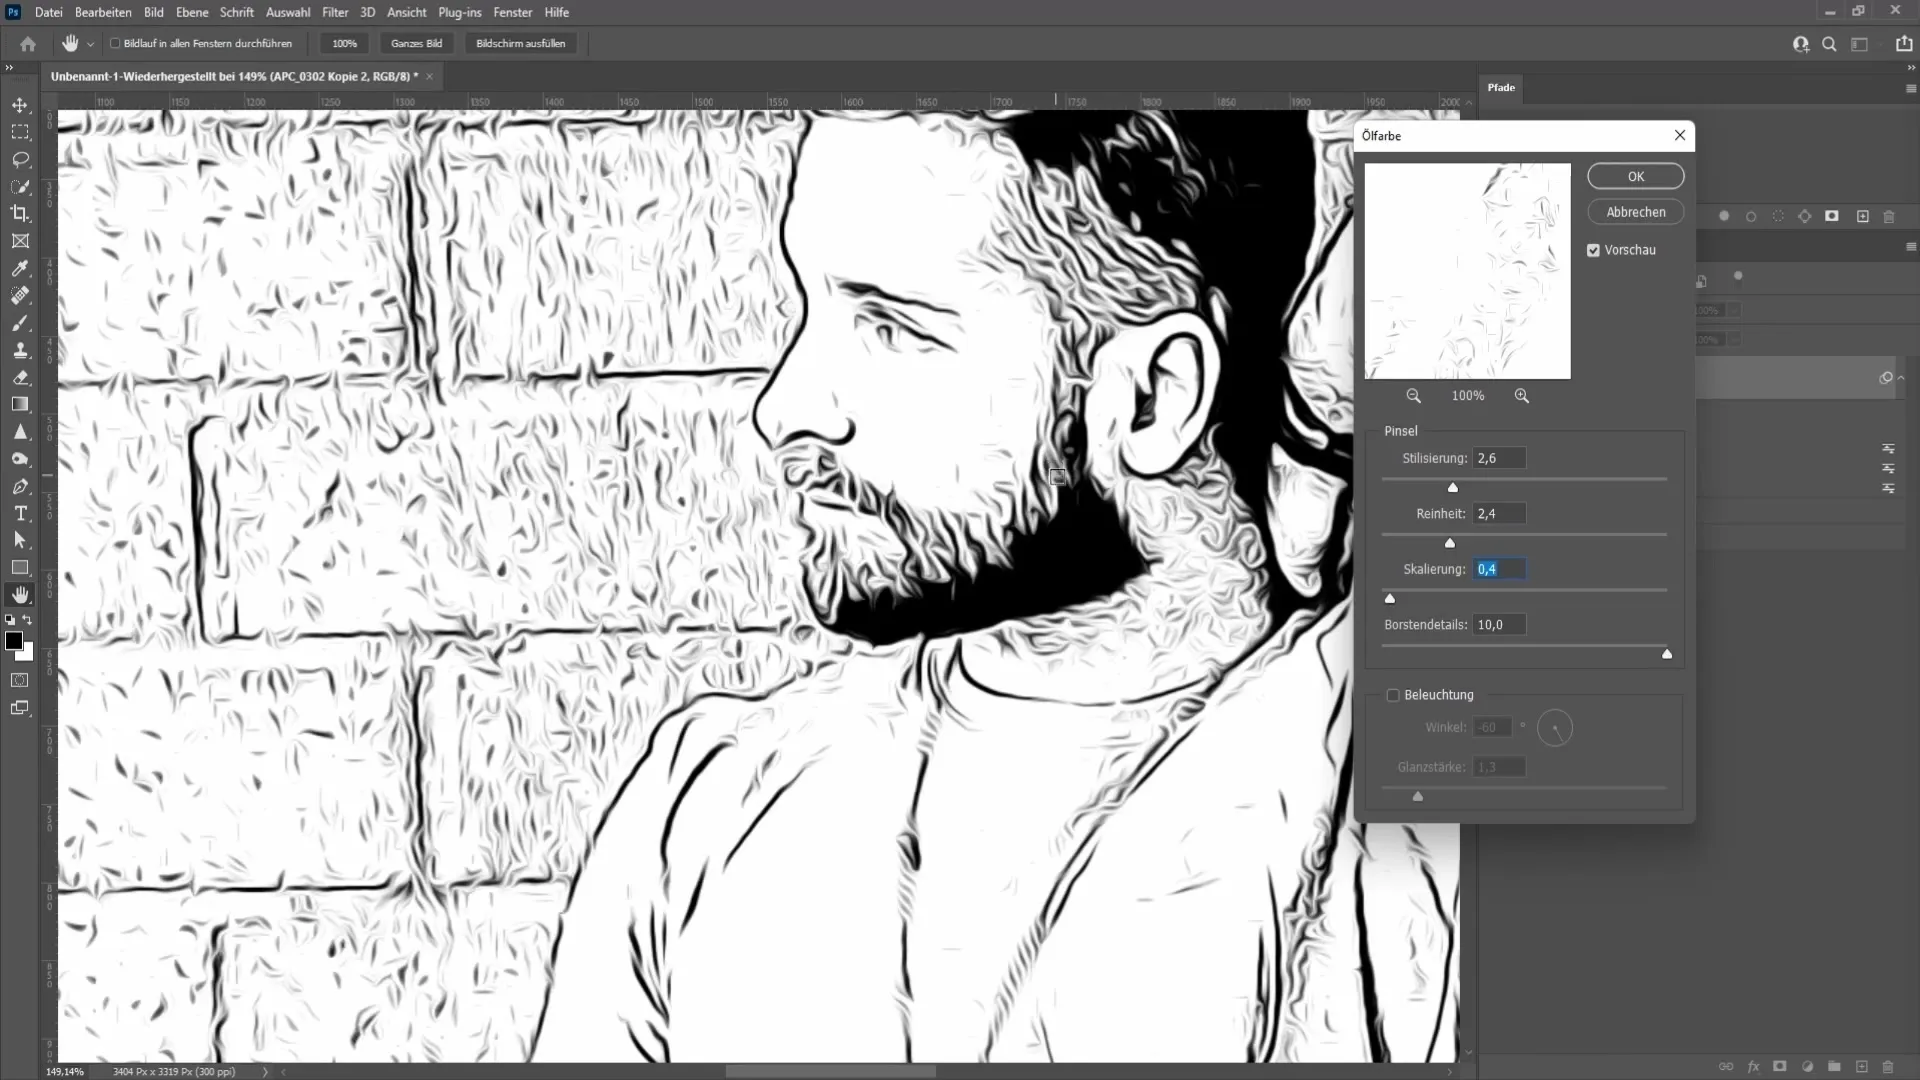
Once you are satisfied with the adjustments, click "OK." Congratulations! This is already your first black and white comic image.
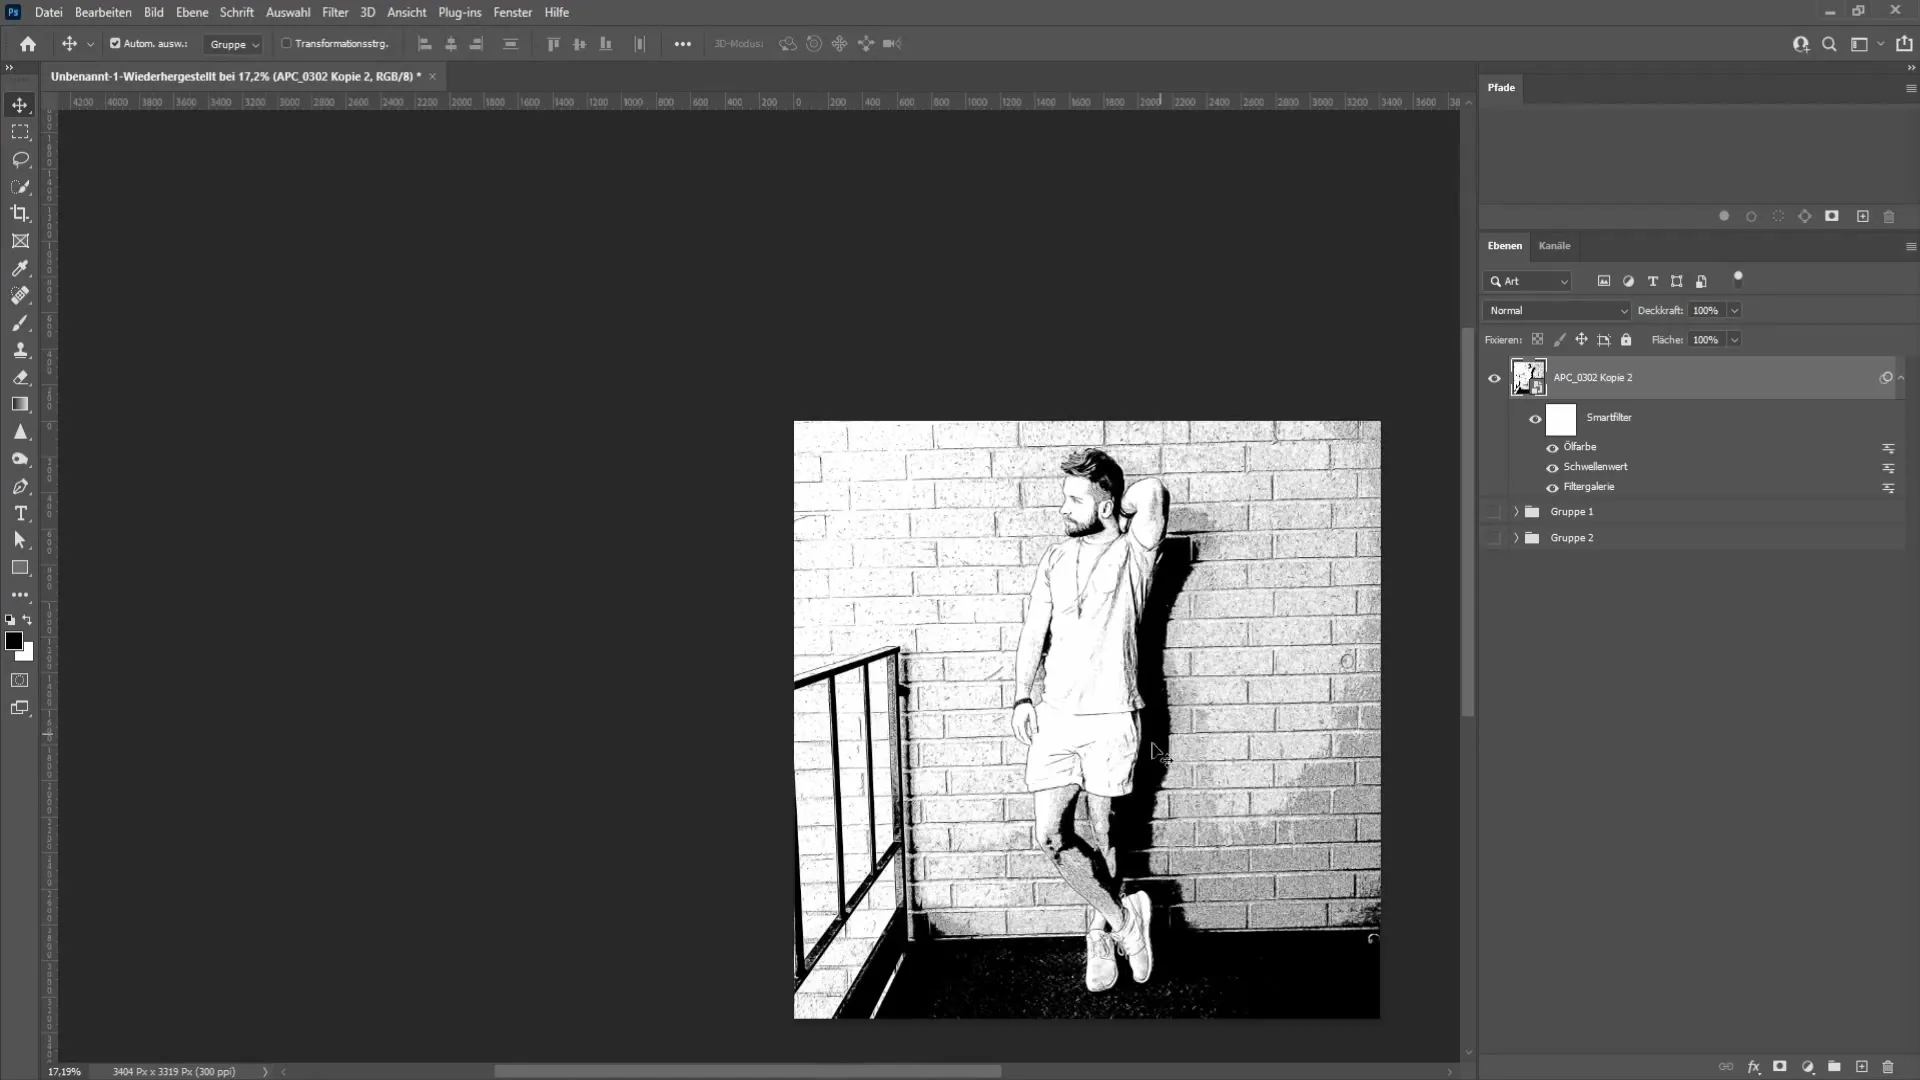
Now you can continue working on your image. You have the option to return to the filters and make adjustments by double-clicking. In the next step, we will show you how to colorize the image. To do this, create a copy of the layer.
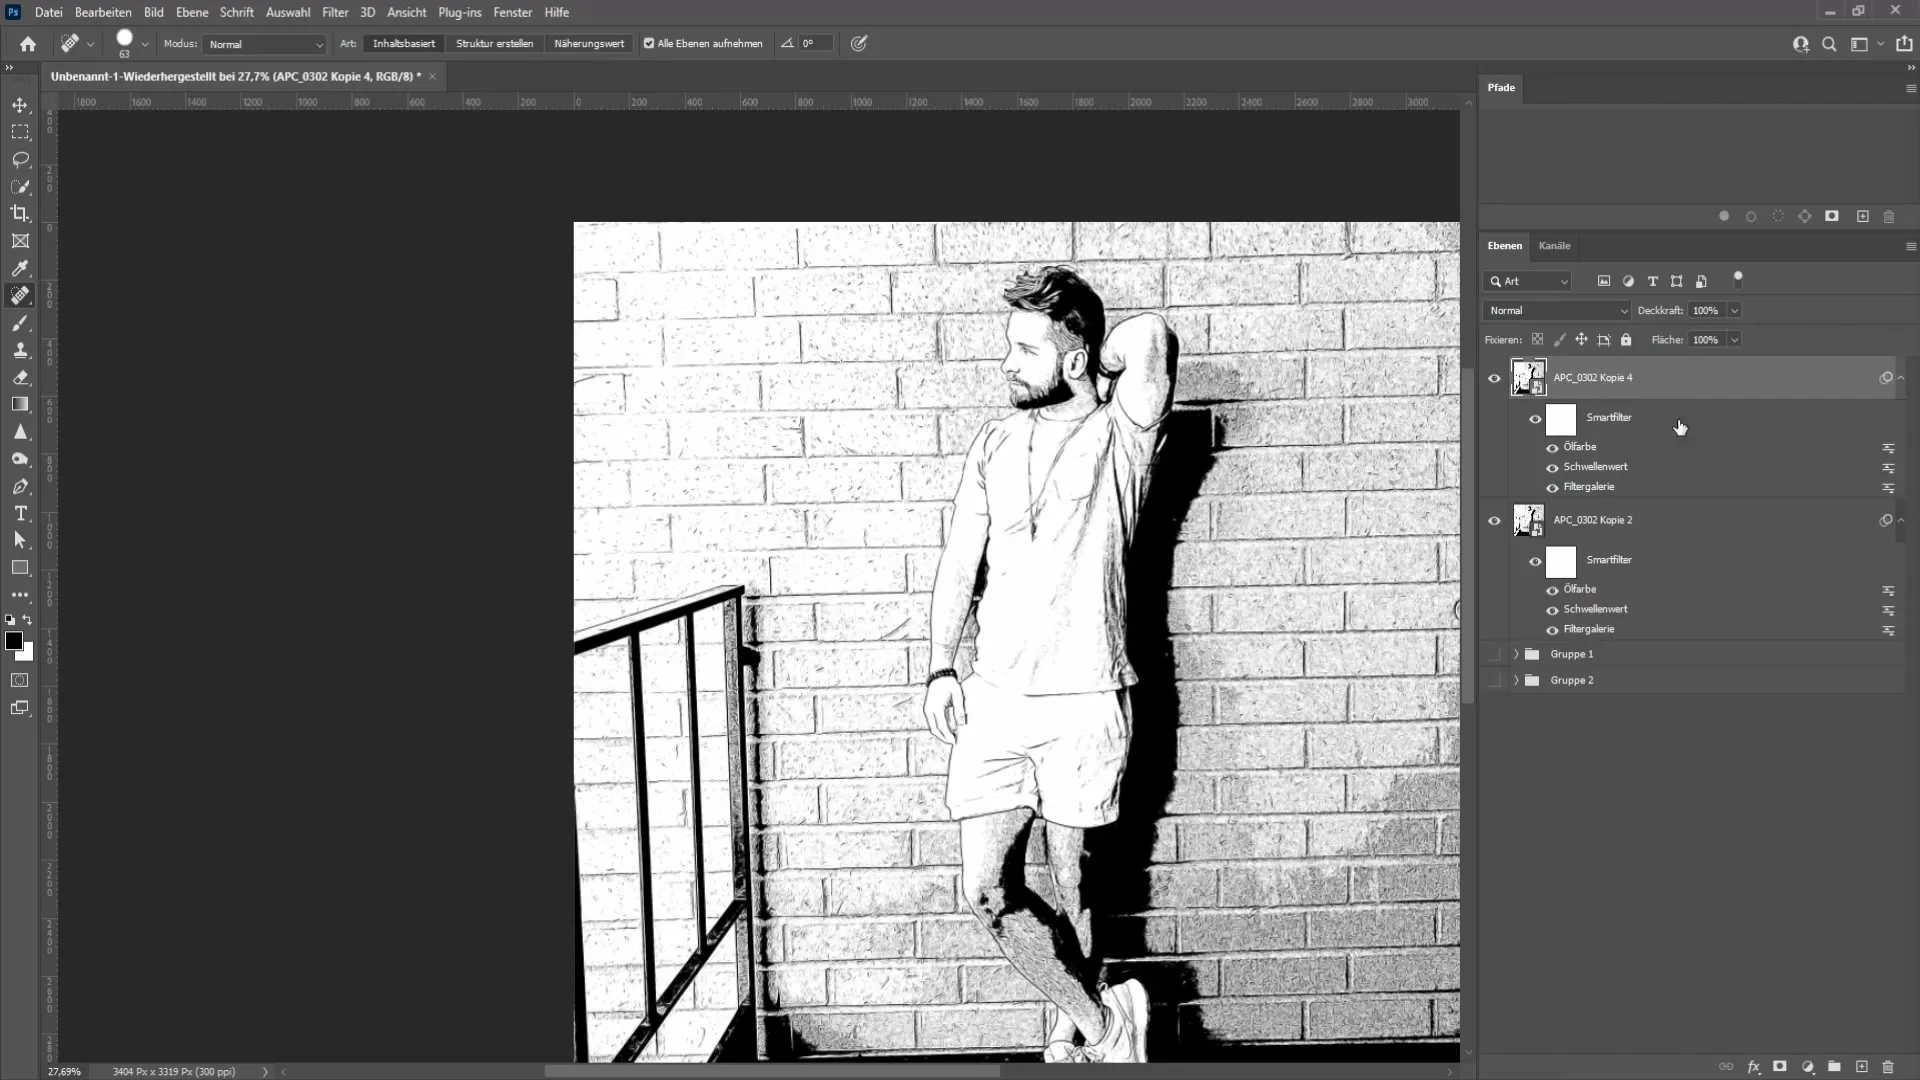
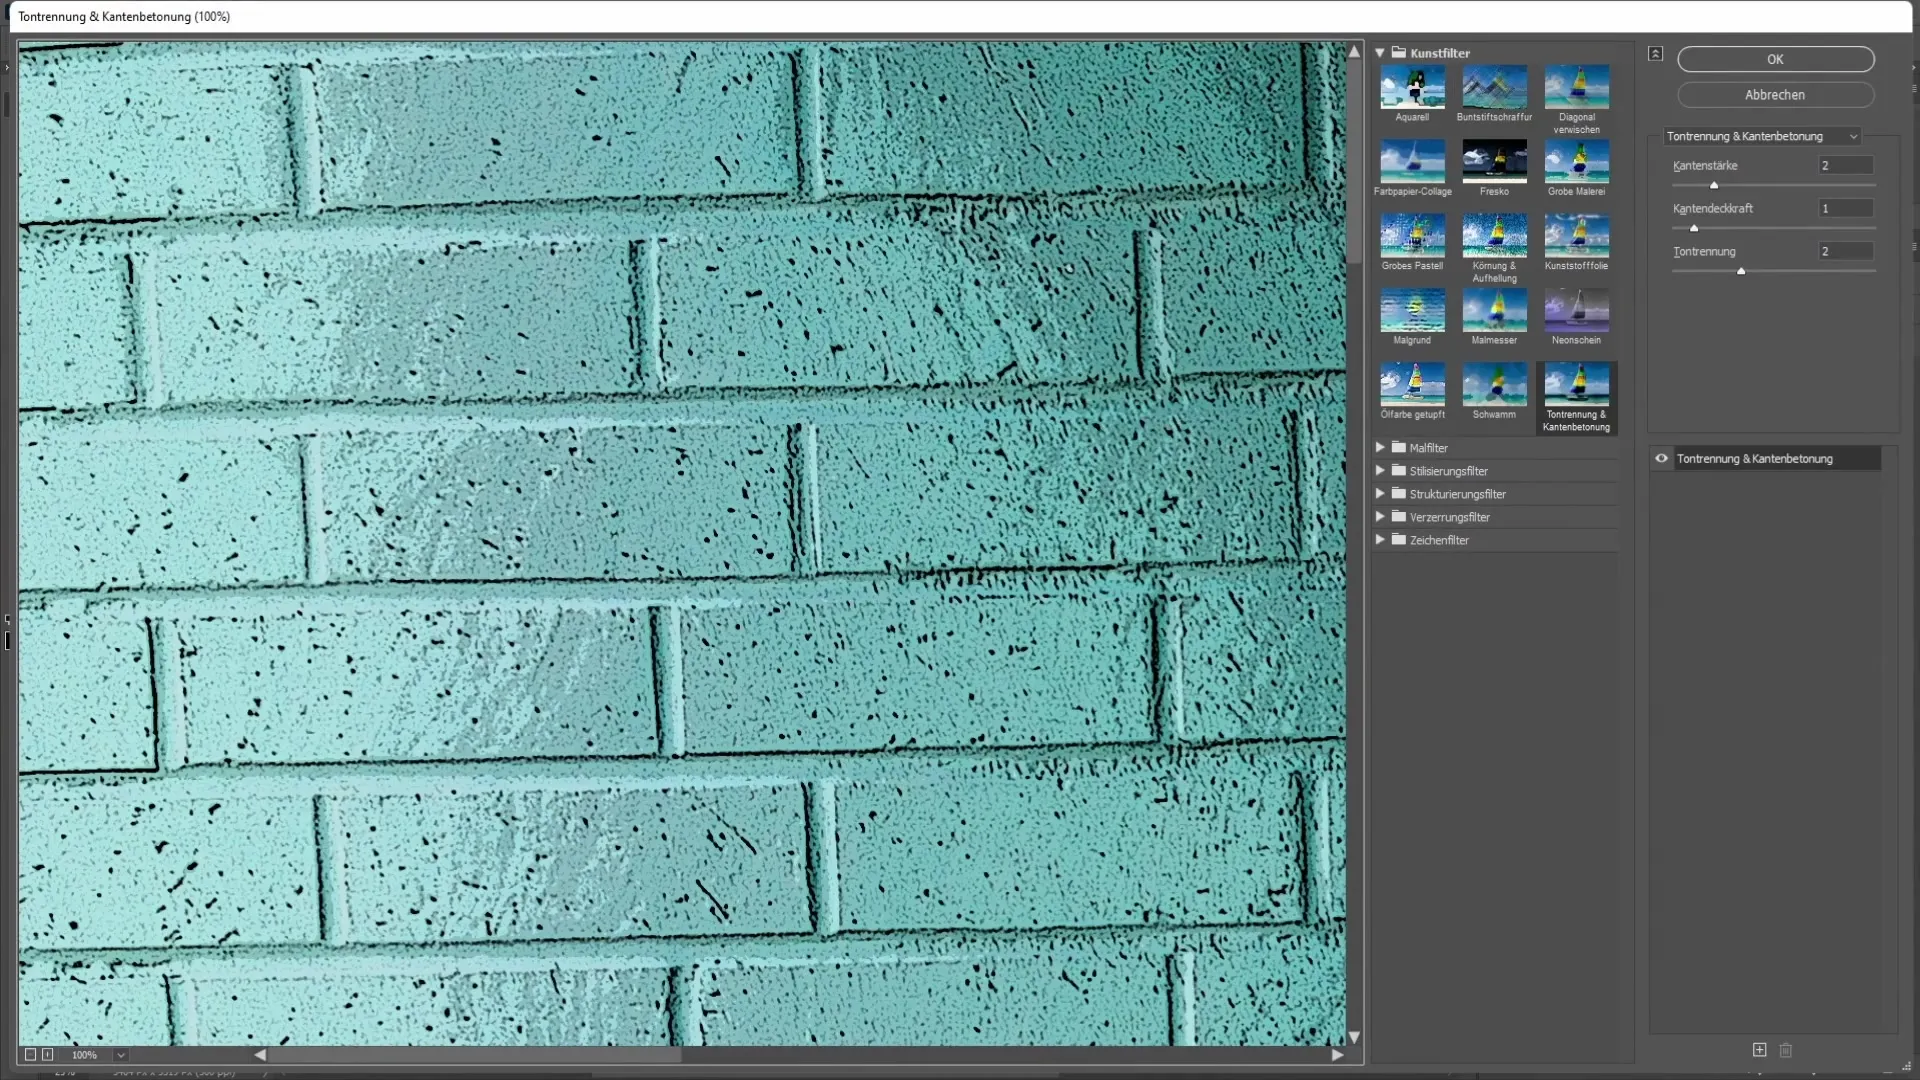
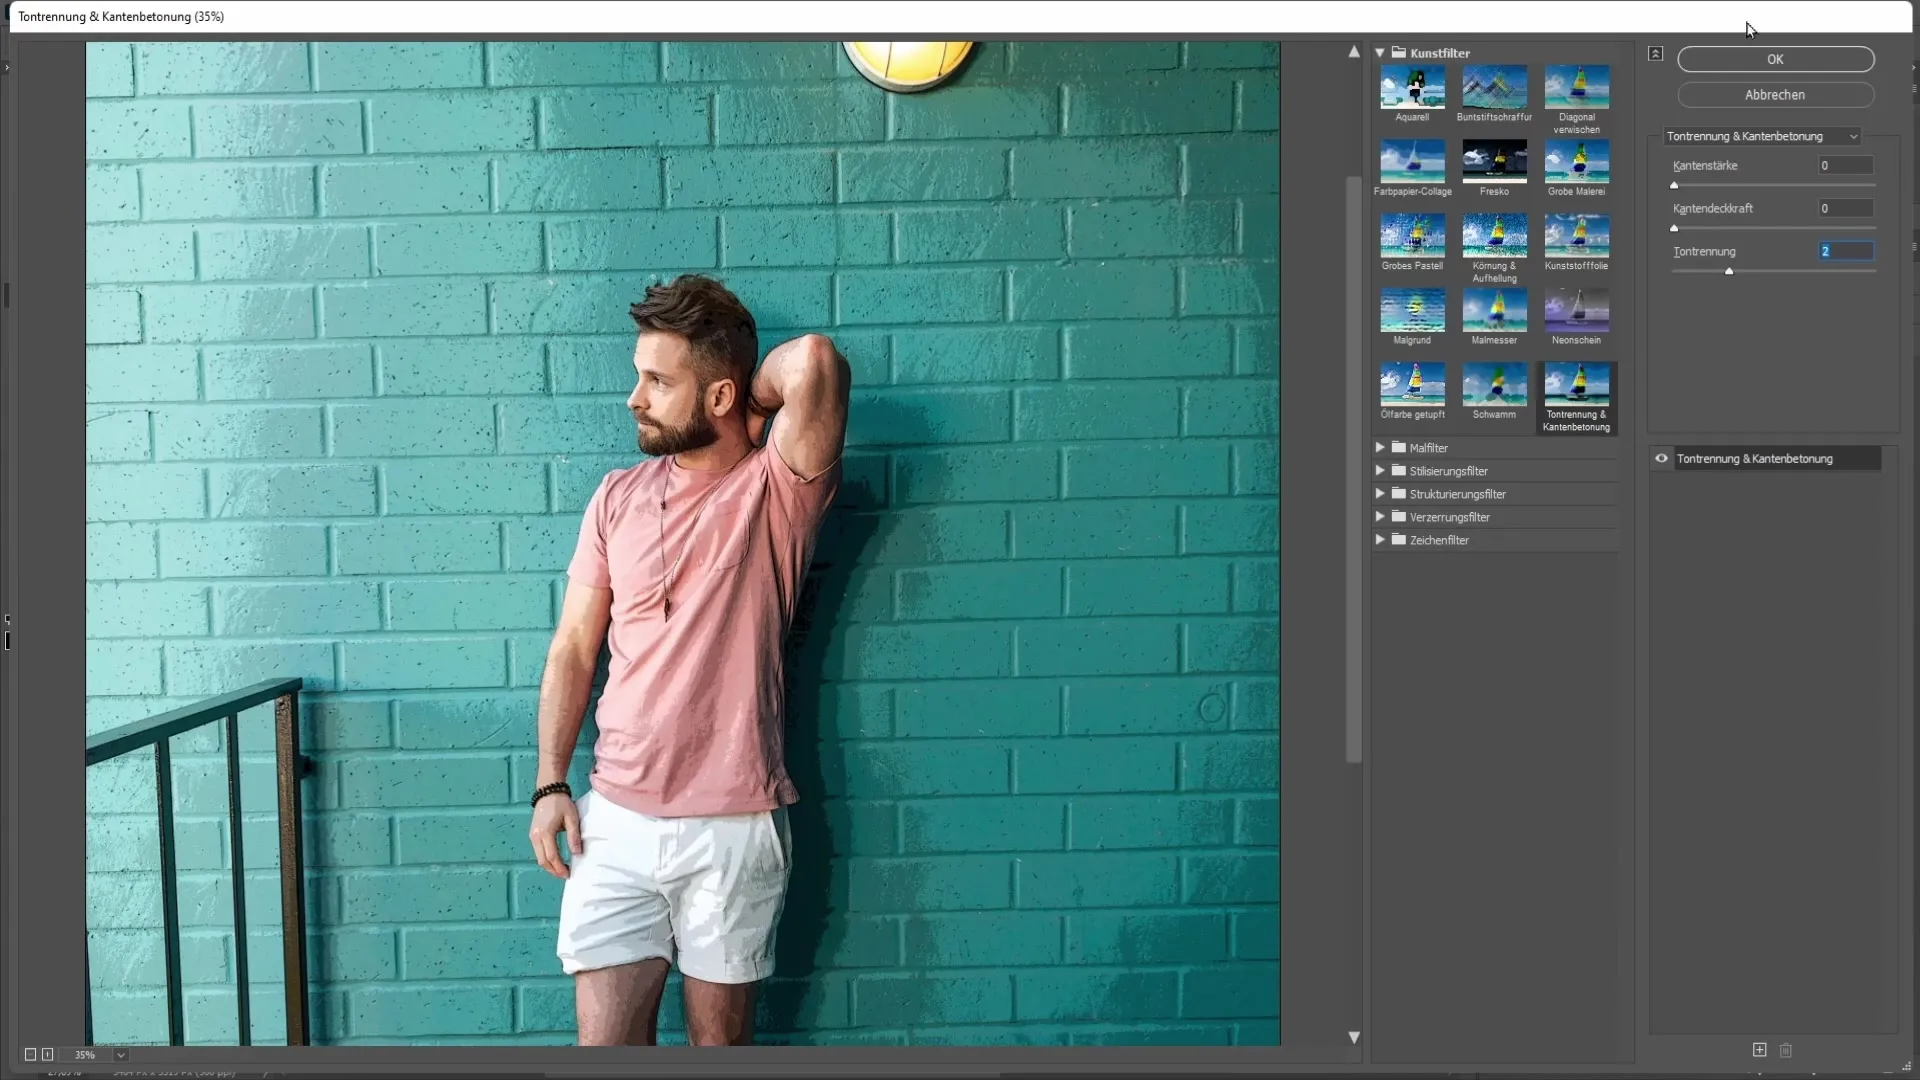
Right-click on the copy and delete all smart filters. Now drag the image below your black and white comic graphic and hide it. Go back to the "Filter Gallery" to reapply the same filter, but this time you need to adjust the settings. Set the edge thickness and edge opacity to zero each, as you only want the color without black lines in this case.
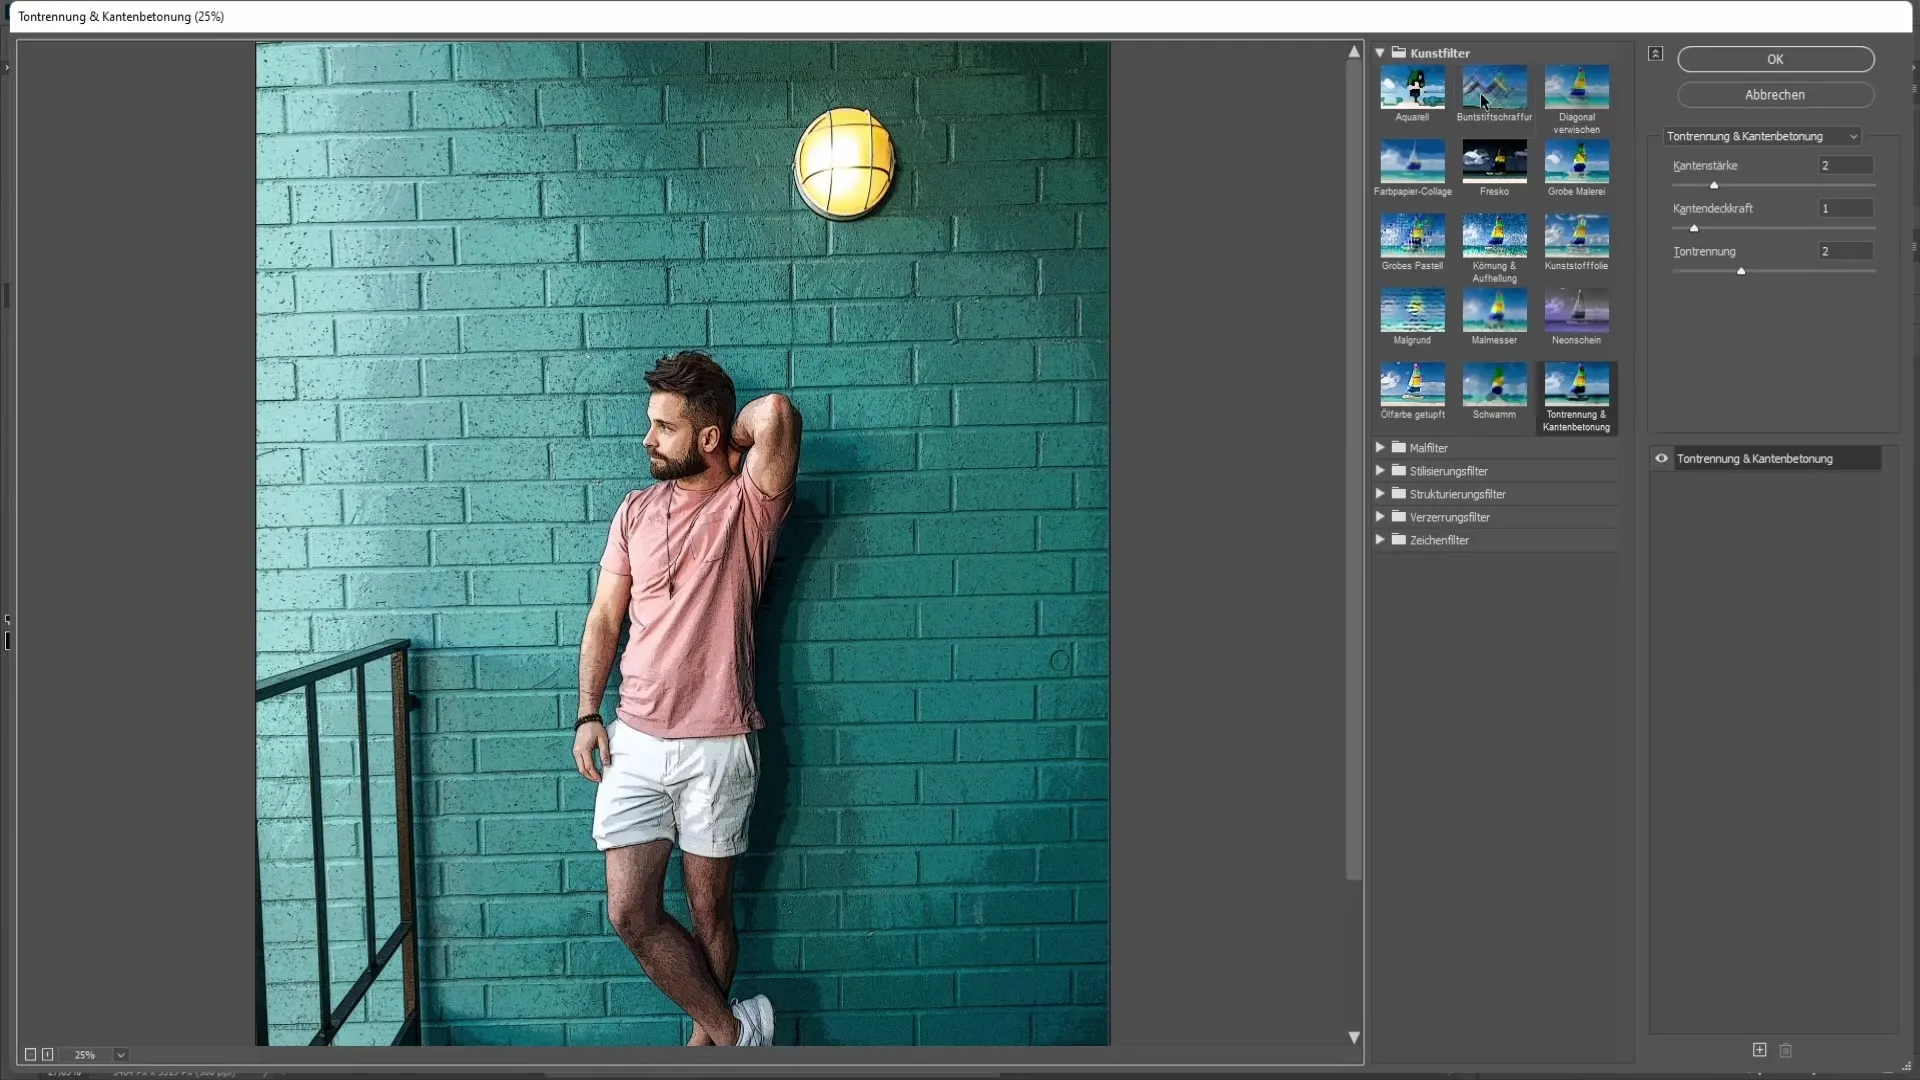
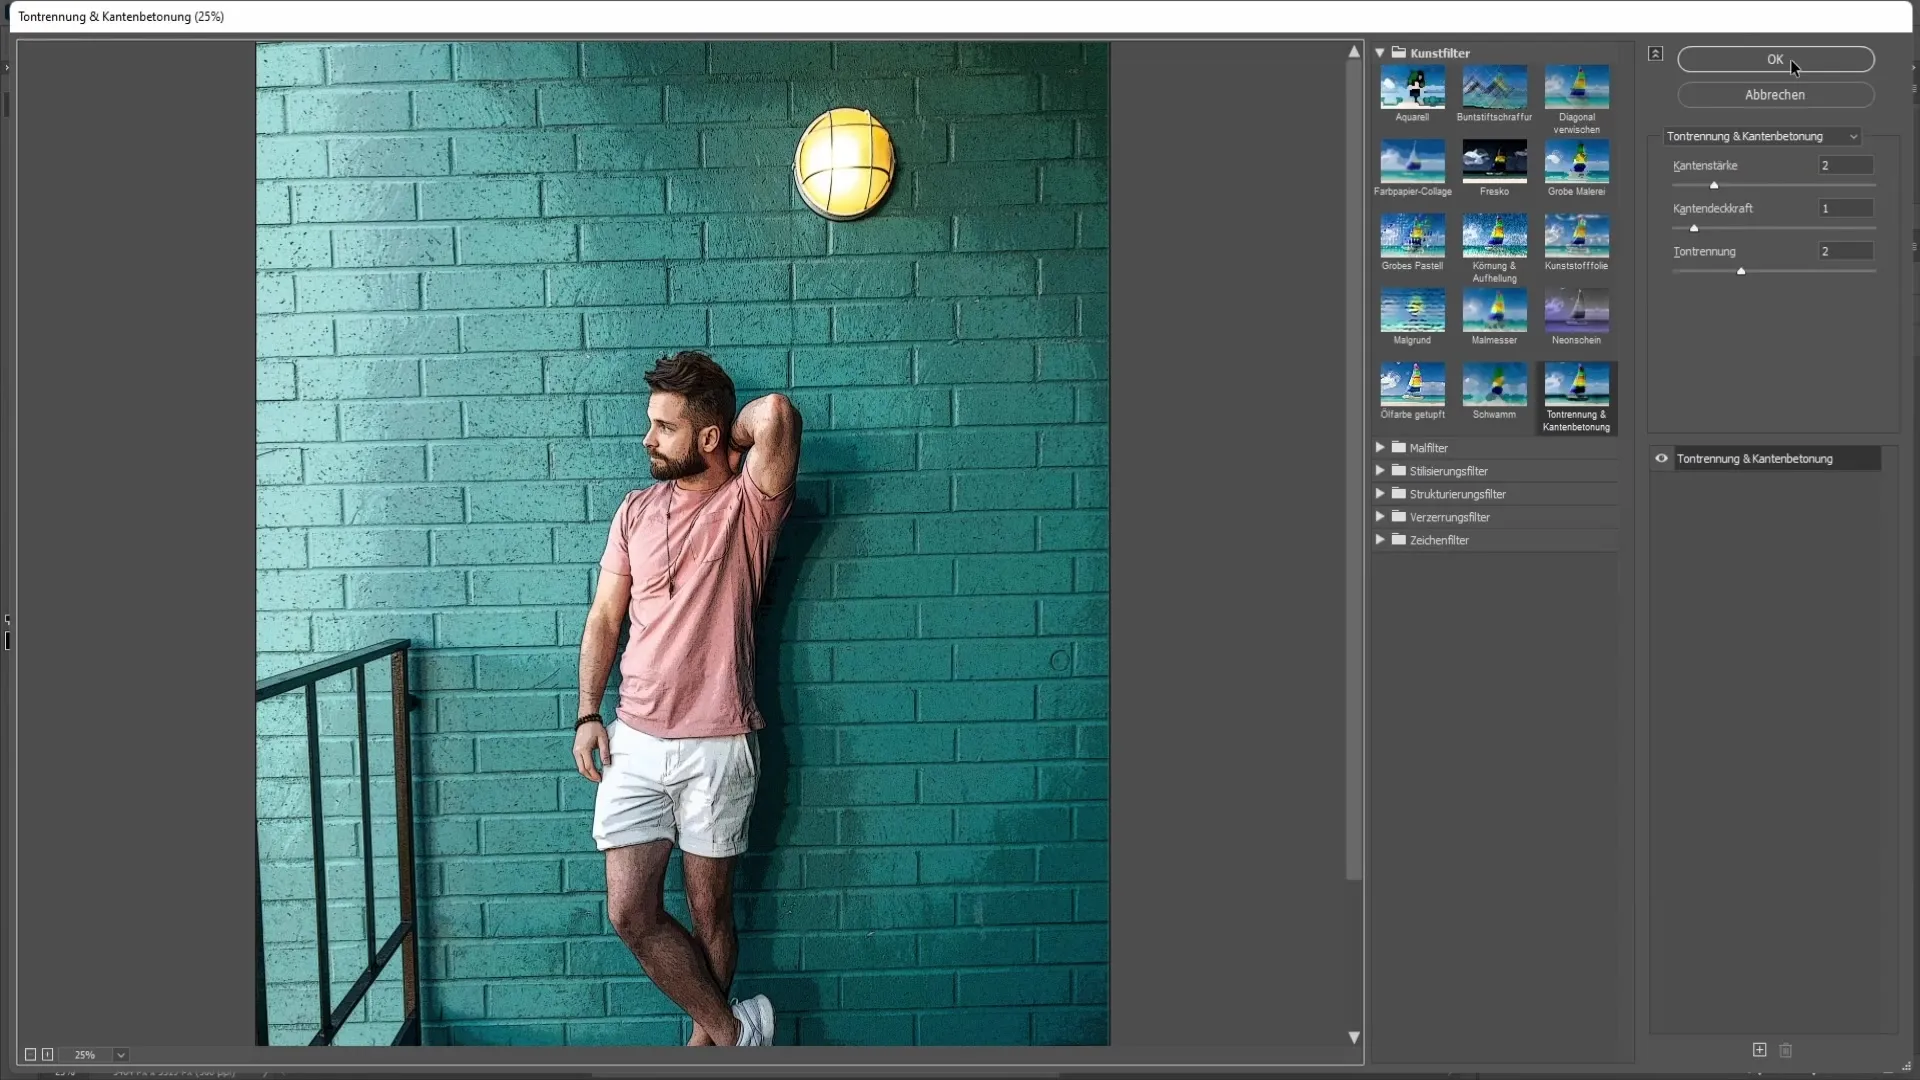
Play around with the tonal separation and find the appropriate value. In my case, I chose a value of two, which gives a good result. Confirm your selection with "OK".
To give the image more realism, I recommend applying the oil filter again. Remember to turn off the lighting. Leave the Bosten details at ten and experiment with the other sliders.
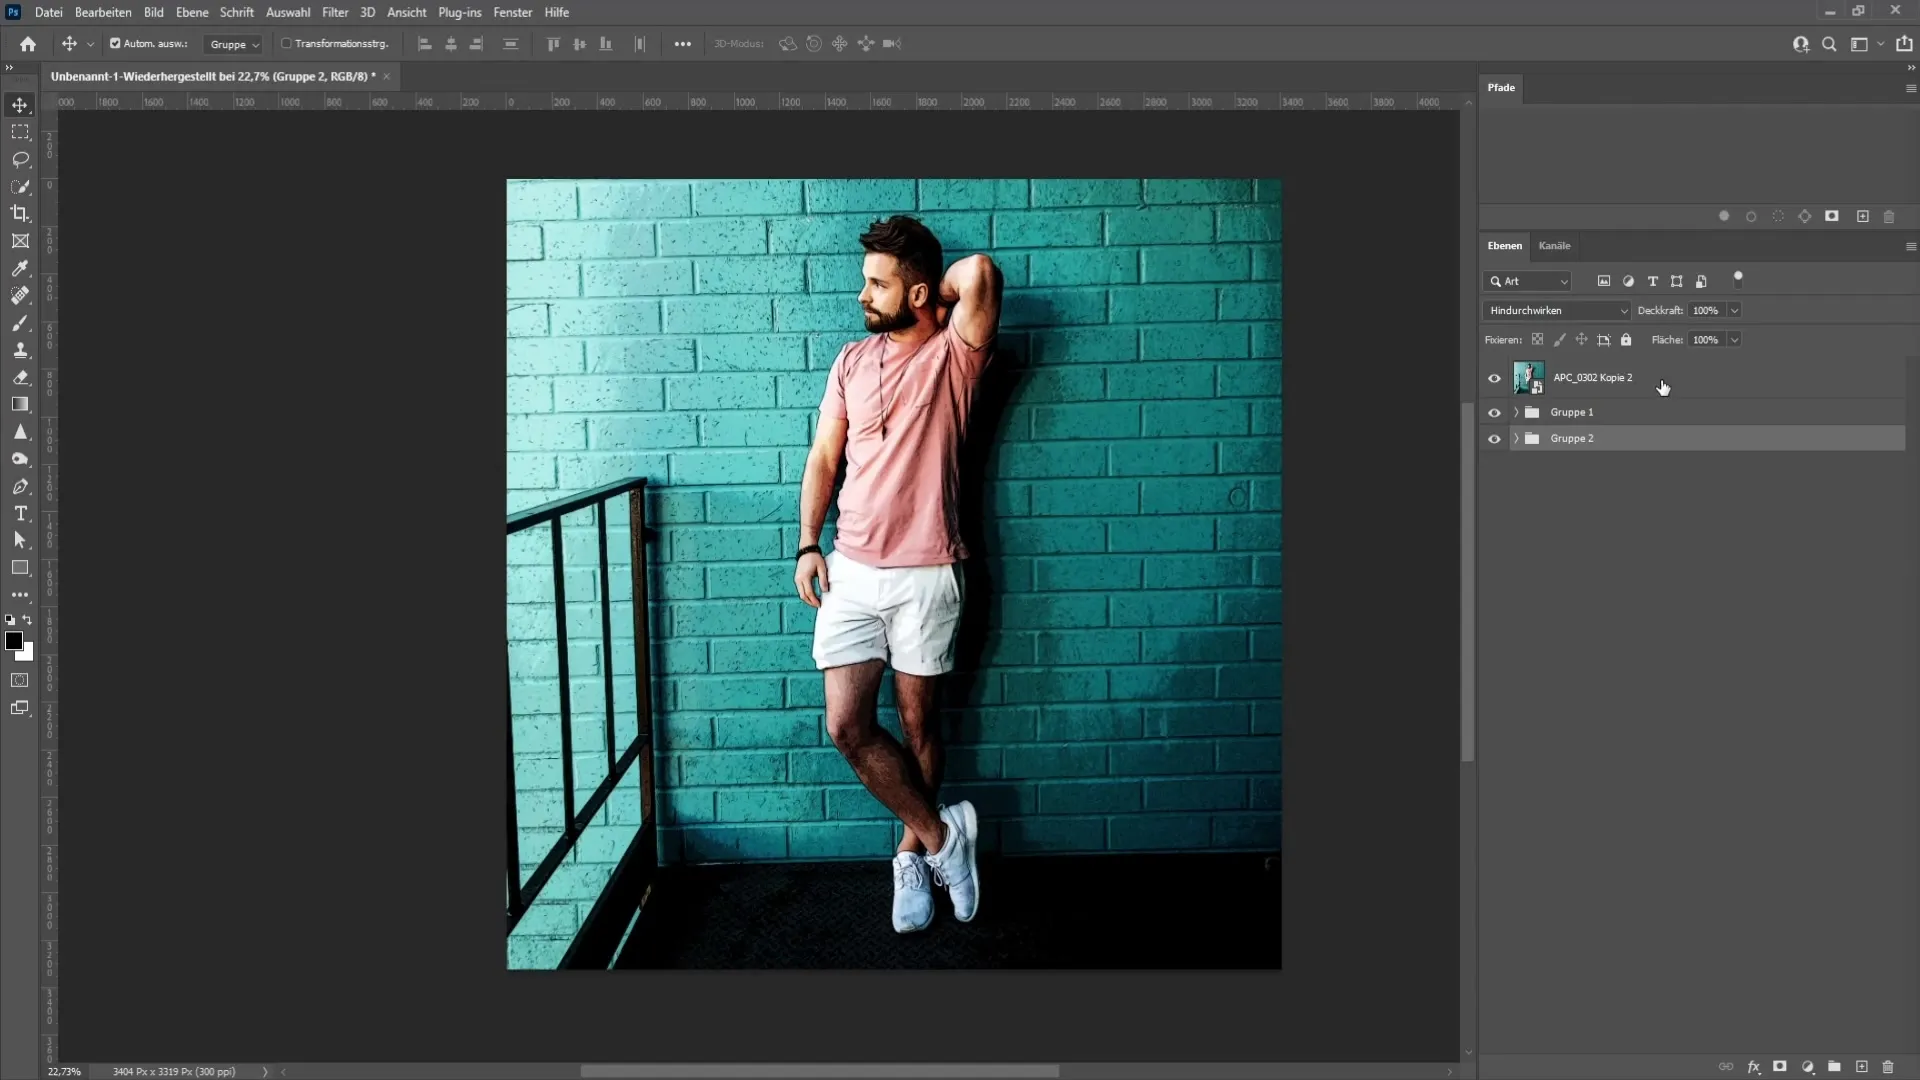
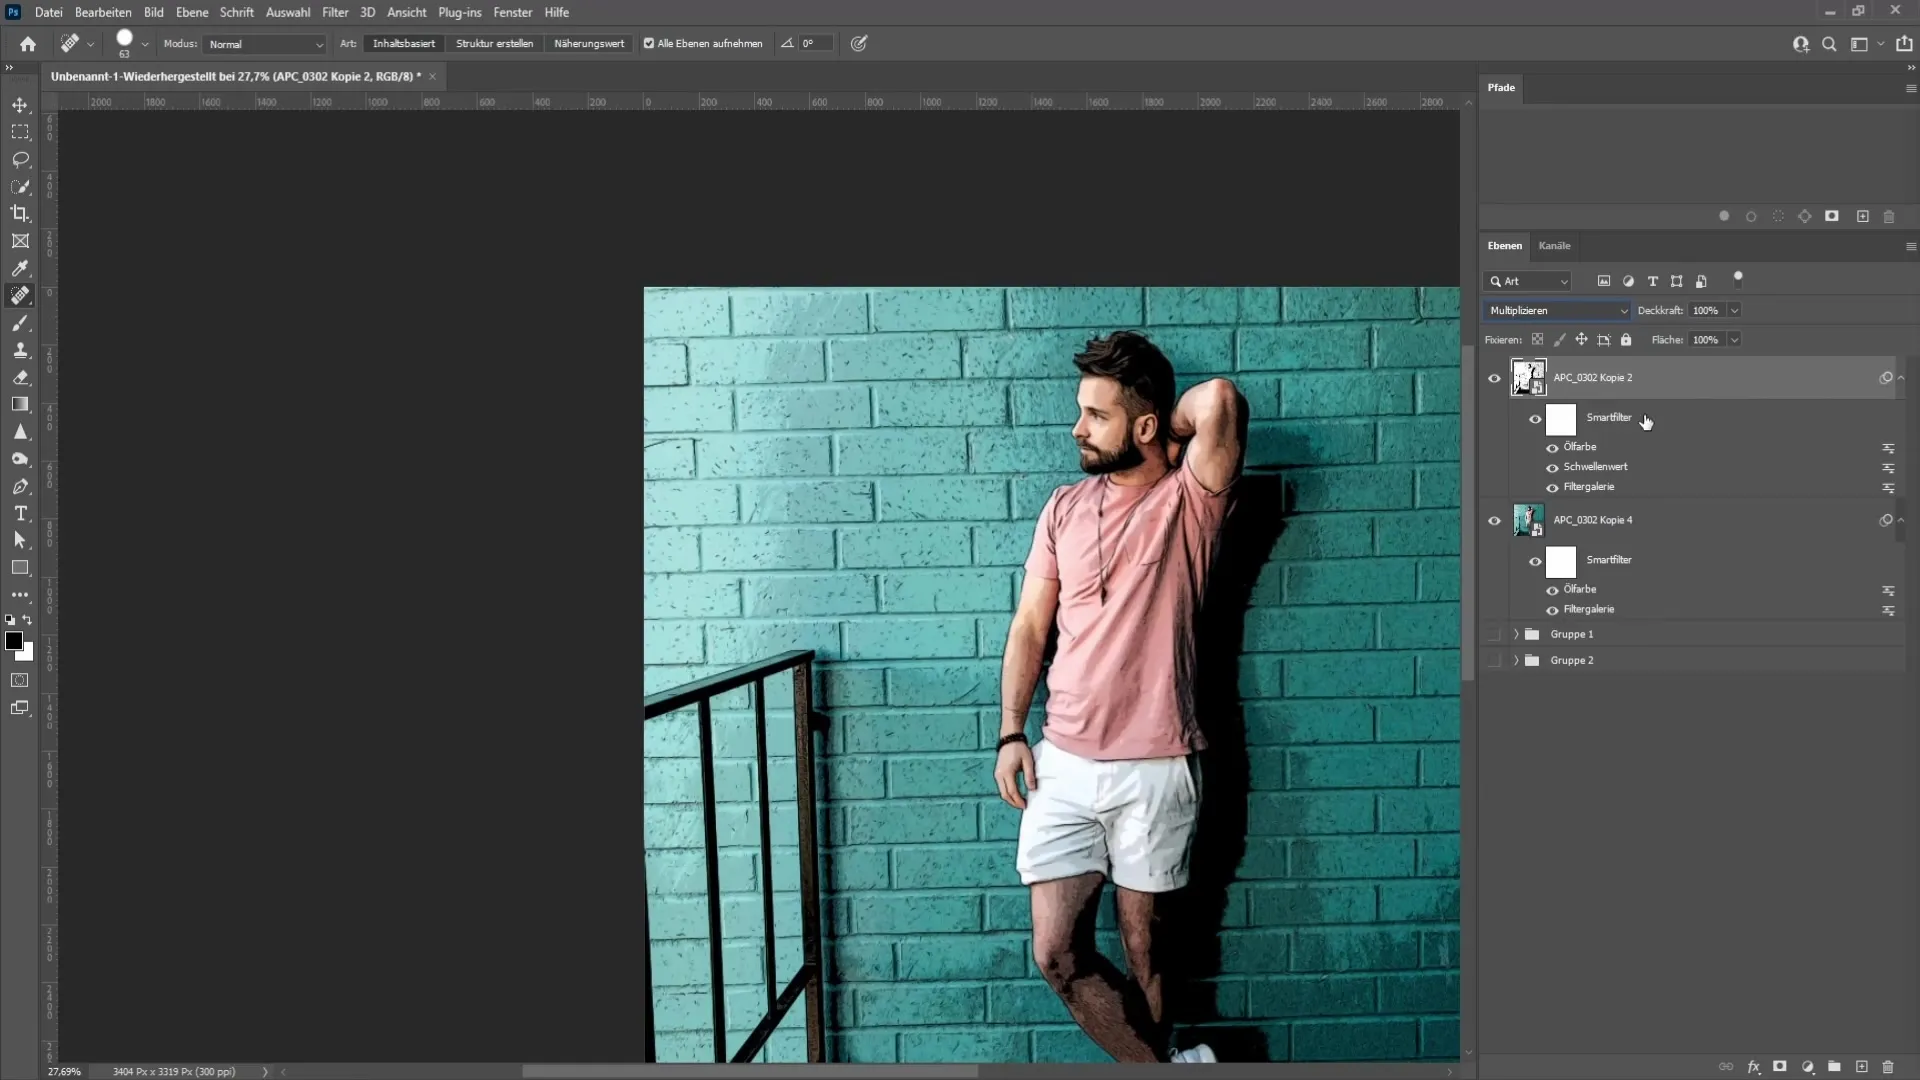
If you are satisfied with the result, you can display the black and white layer. We will now choose the "Multiply" blending mode. This will give you a more intense and appealing comic image.
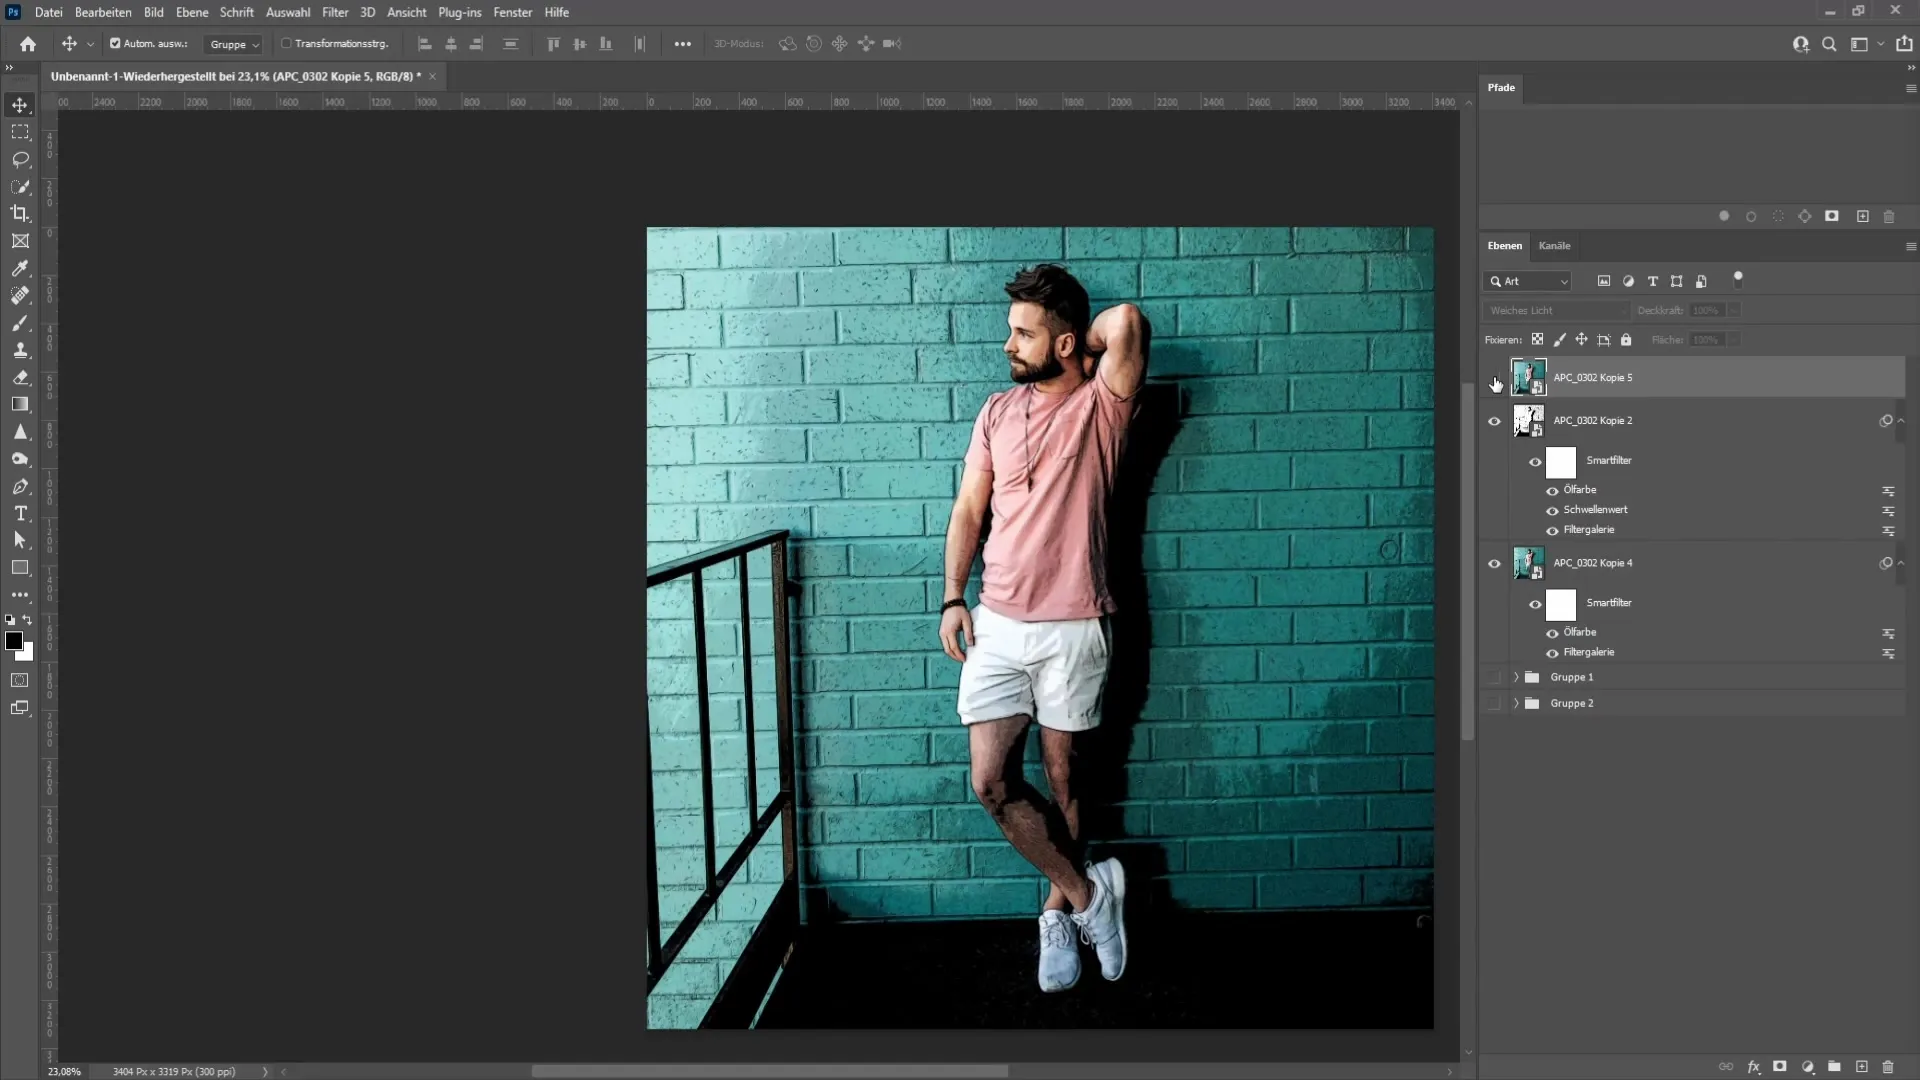
If the color intensity is still not sufficient, you can create a copy again, delete the smart filters, and set the mode to "soft light". This will give your image even more depth and expression.
Summary
In this tutorial, you have learned how to create an impressive comic effect in Photoshop using various filters and adjustments, both in black and white and in color. By working with smart objects and the filter gallery, you have the freedom to edit your results afterwards. Experiment with settings to achieve the perfect comic look for you.
Frequently Asked Questions
How do I convert an image into a smart object?Right-click on the image and choose "Convert to Smart Object".
Can I adjust the filters afterwards?Yes, by using smart objects, you can change the filters at any time.
What is the difference between black and white and color in comic effects?The black and white effect only highlights the contrasts and structures, while the color version offers more vibrancy.
How can I adjust the intensity of colors?You can change the blending mode or the layer opacity to make the colors more intense.


