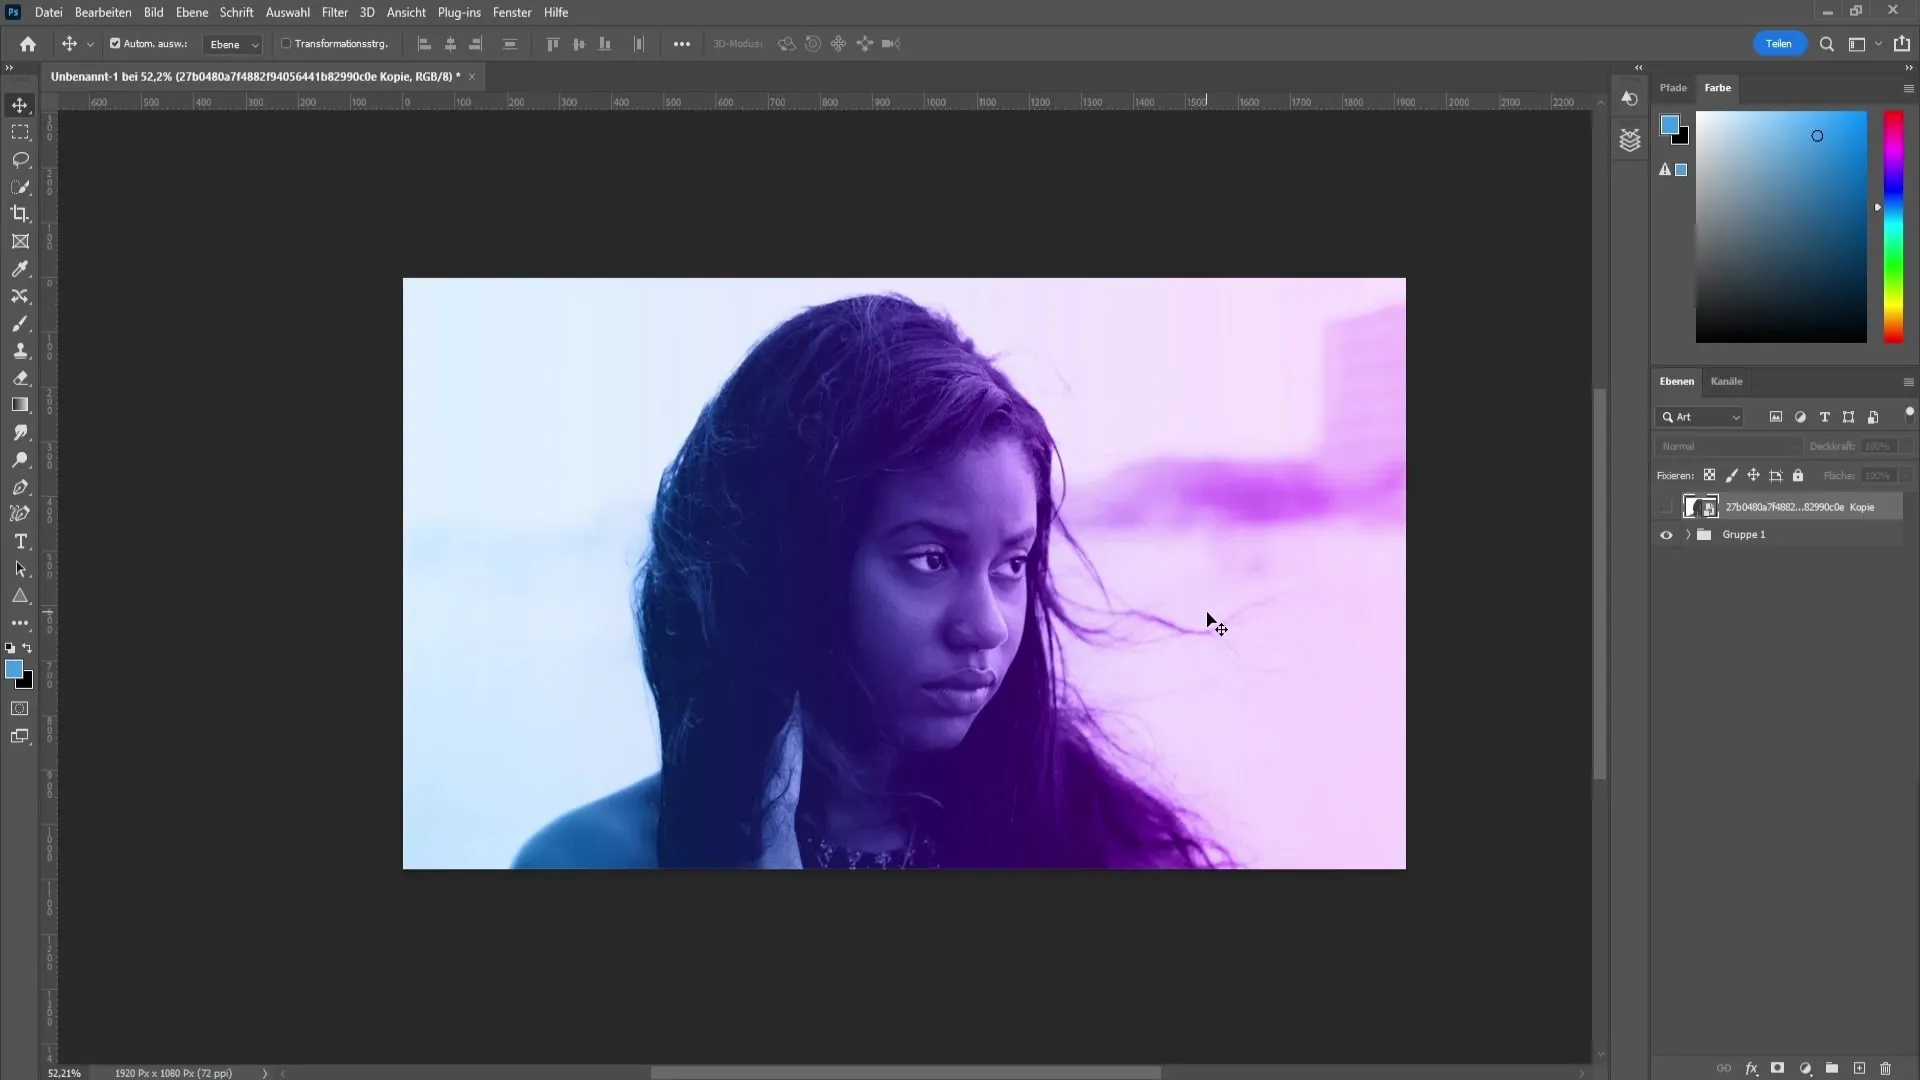
In this tutorial, I will show you how to easily and quickly create a dual-tone effect in Photoshop. You will learn how to convert an image to black and white, work with colors, and make various adjustments to achieve the desired look. Whether you are editing a portrait, a landscape, or another subject - the dual-tone effect can bring a fresh, creative touch to your image.
Key Takeaways
• The dual-tone effect allows you to introduce two colors into an image, creating an appealing contrast.
• It is important to understand and experiment with blending modes to achieve the best result for your image.
• Adjustments such as levels corrections can be used to optimize the overall image.
Step-by-Step Guide
First, open your image in Photoshop. You can use any image, it does not have to be black and white. However, a black and white image can provide interesting results.
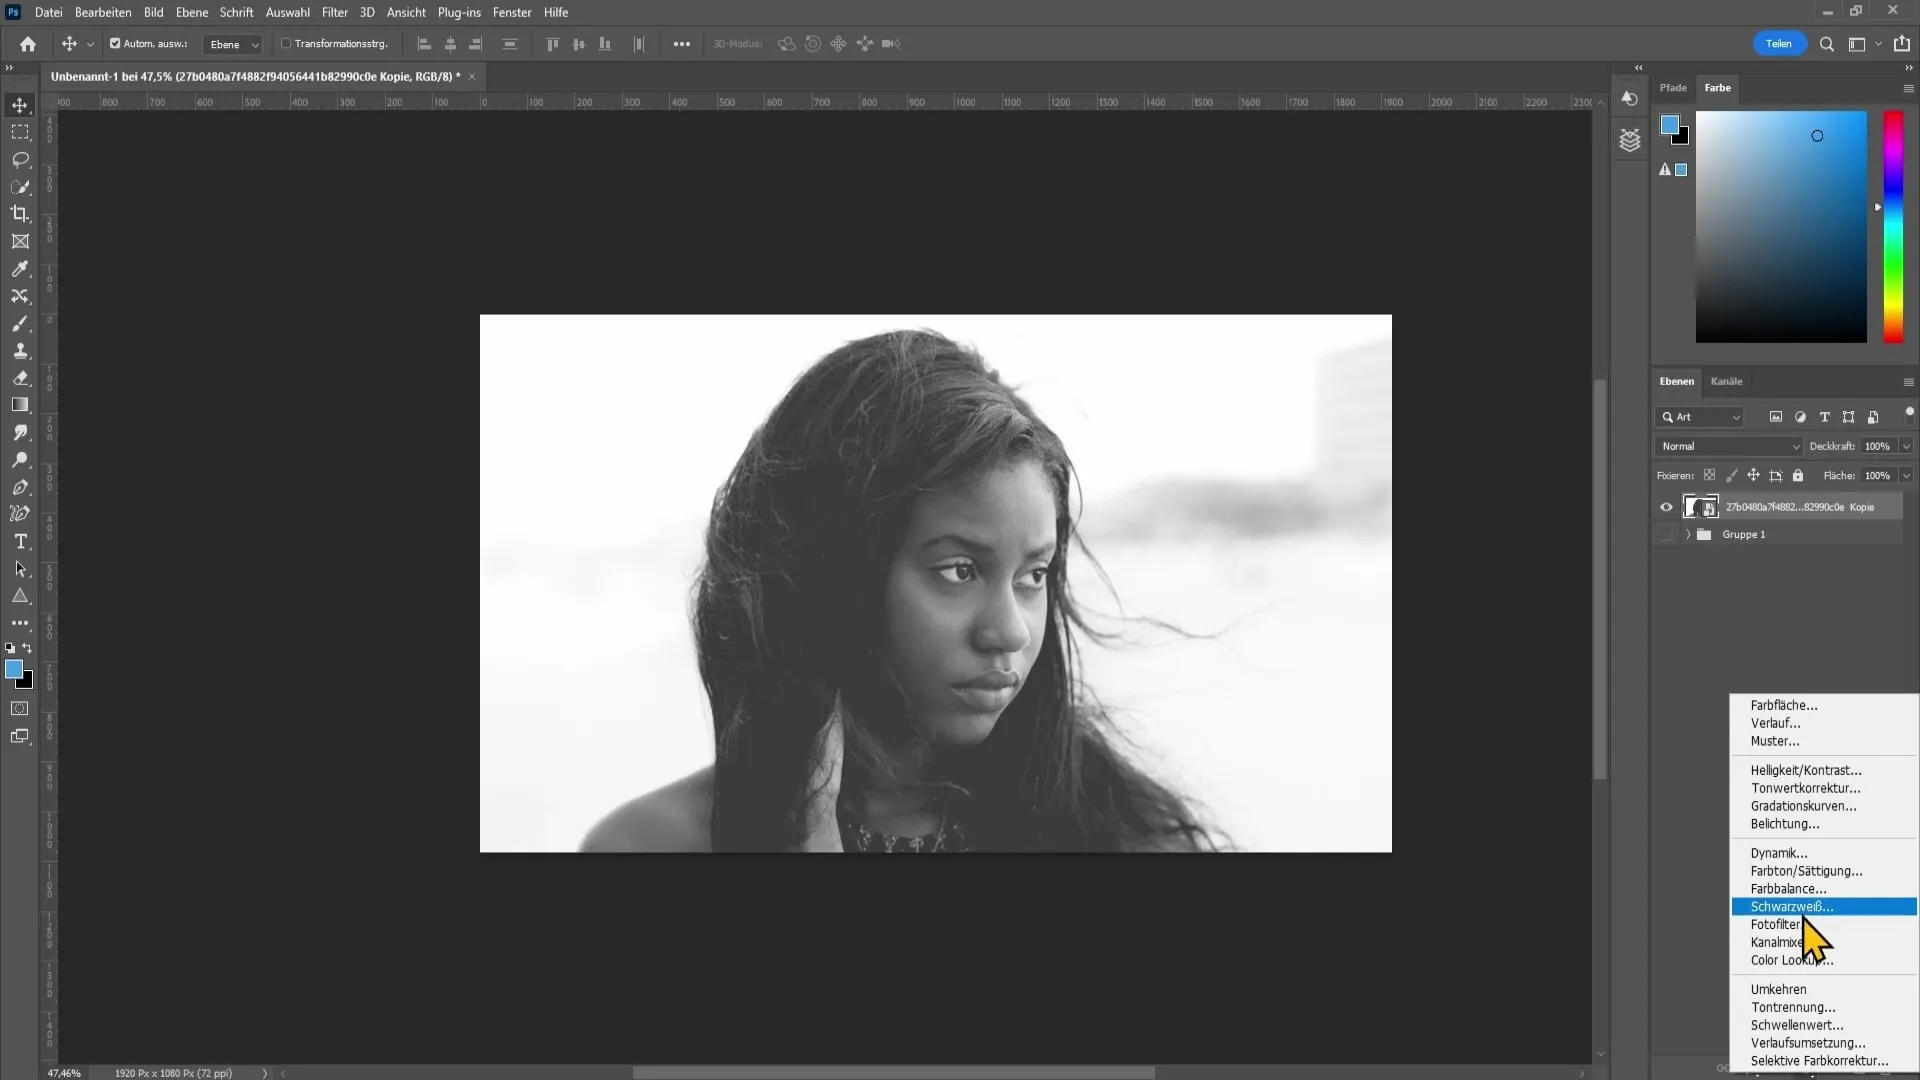
To convert your image to black and white, go to adjustments. There, select the "Black & White" option. This will make your image colorless, forming the basis for the dual-tone effect.
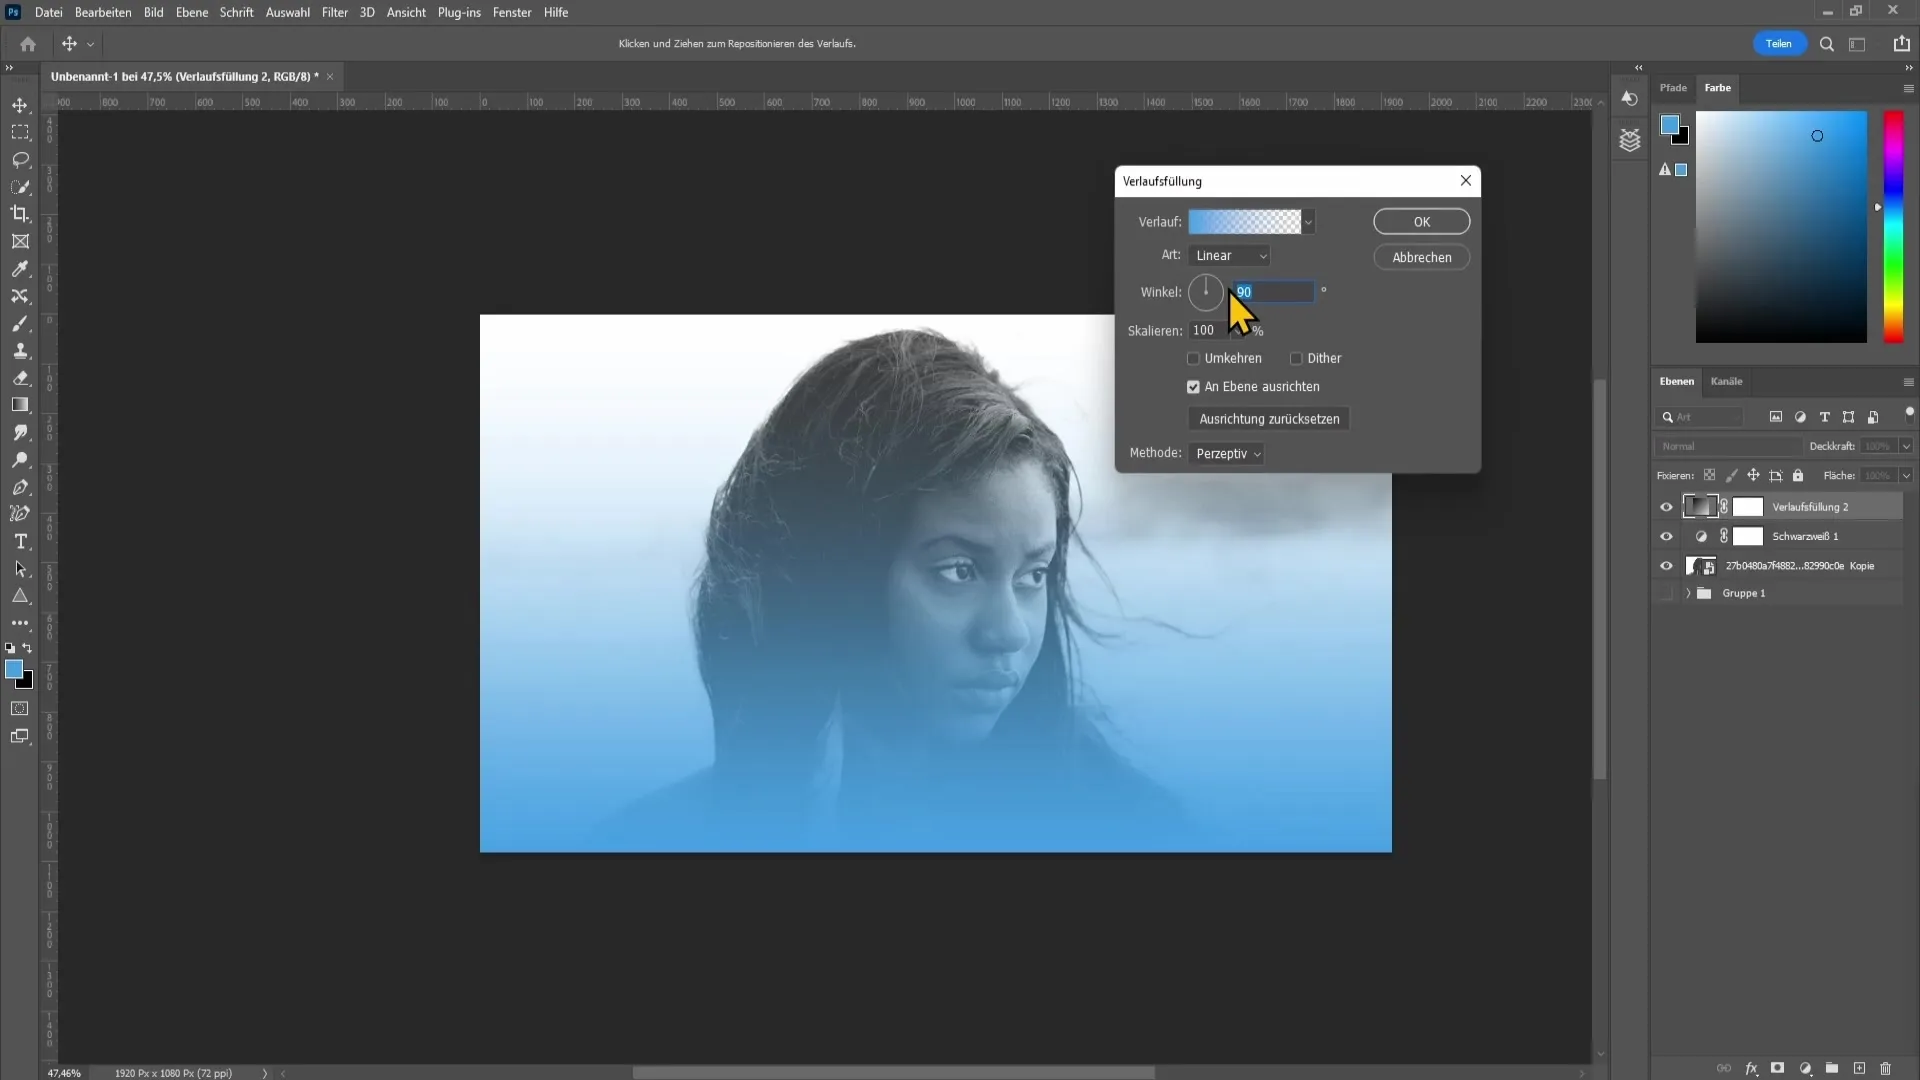
The next step is to apply a gradient. Click on the circle in the layers palette and select the gradient. Set the angle to 0 degrees to position the colors correctly. Then choose the color you want on the left side of the gradient. A light blue hue works well for this, but you can choose any color you like.
Click "OK" to confirm the gradient.
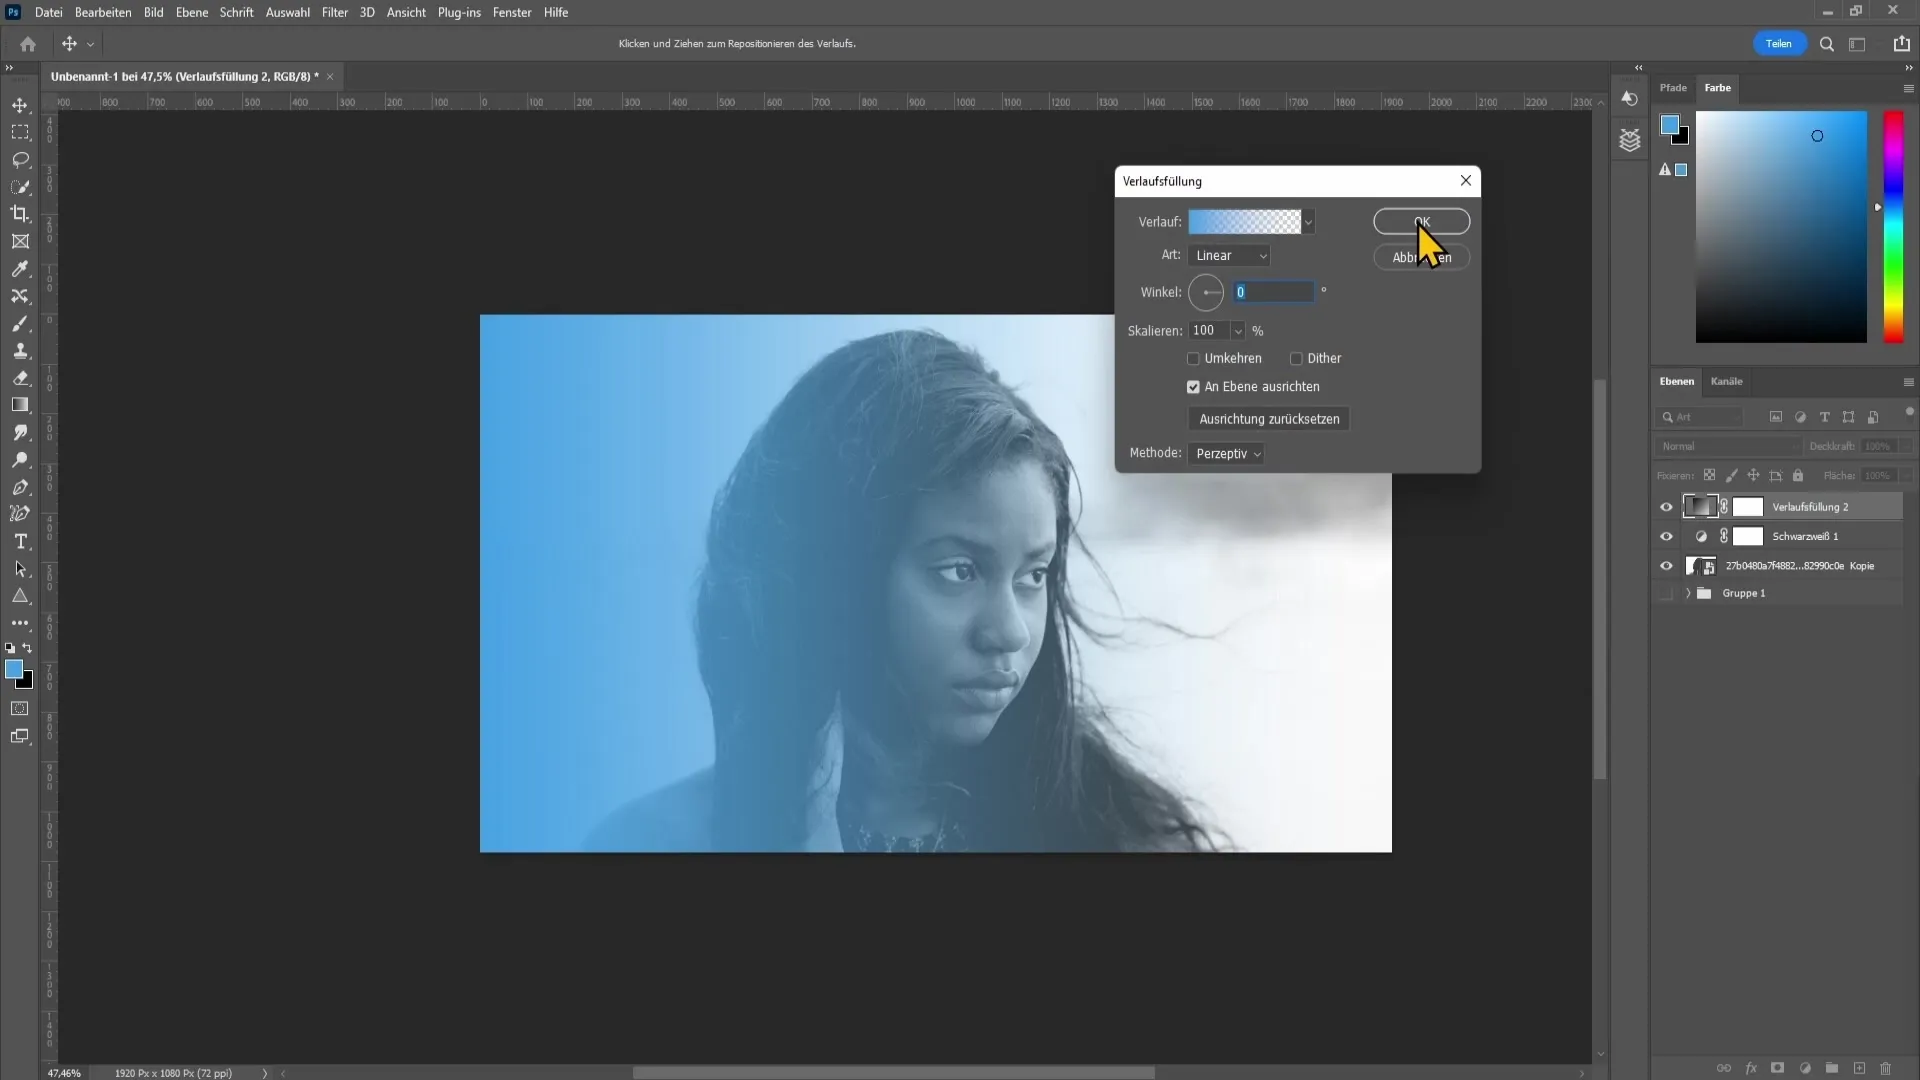
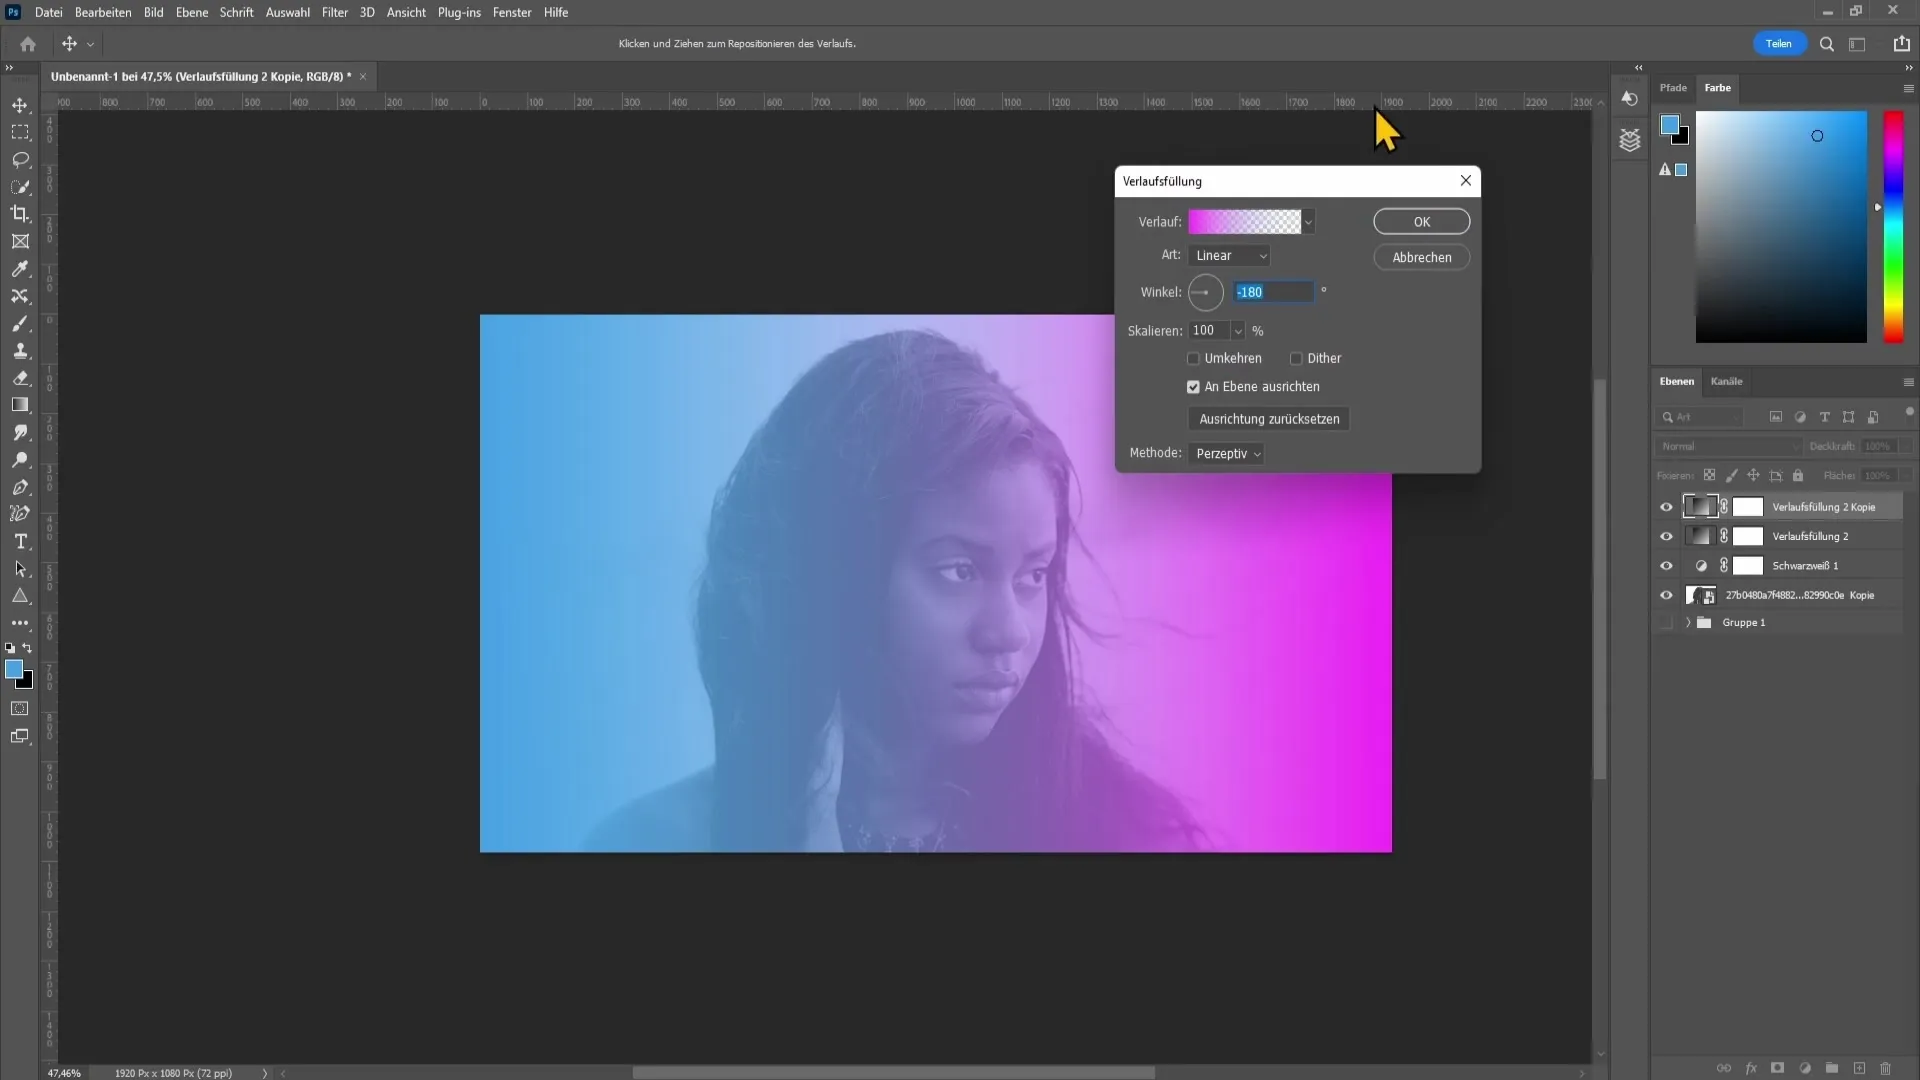
Now, repeat the process to create a gradient for the other side. Make a copy of the existing gradient fill by pressing the Ctrl + J keys. Open the copy in the properties panel and change the angle to -180 so the second color is displayed on the opposite side.
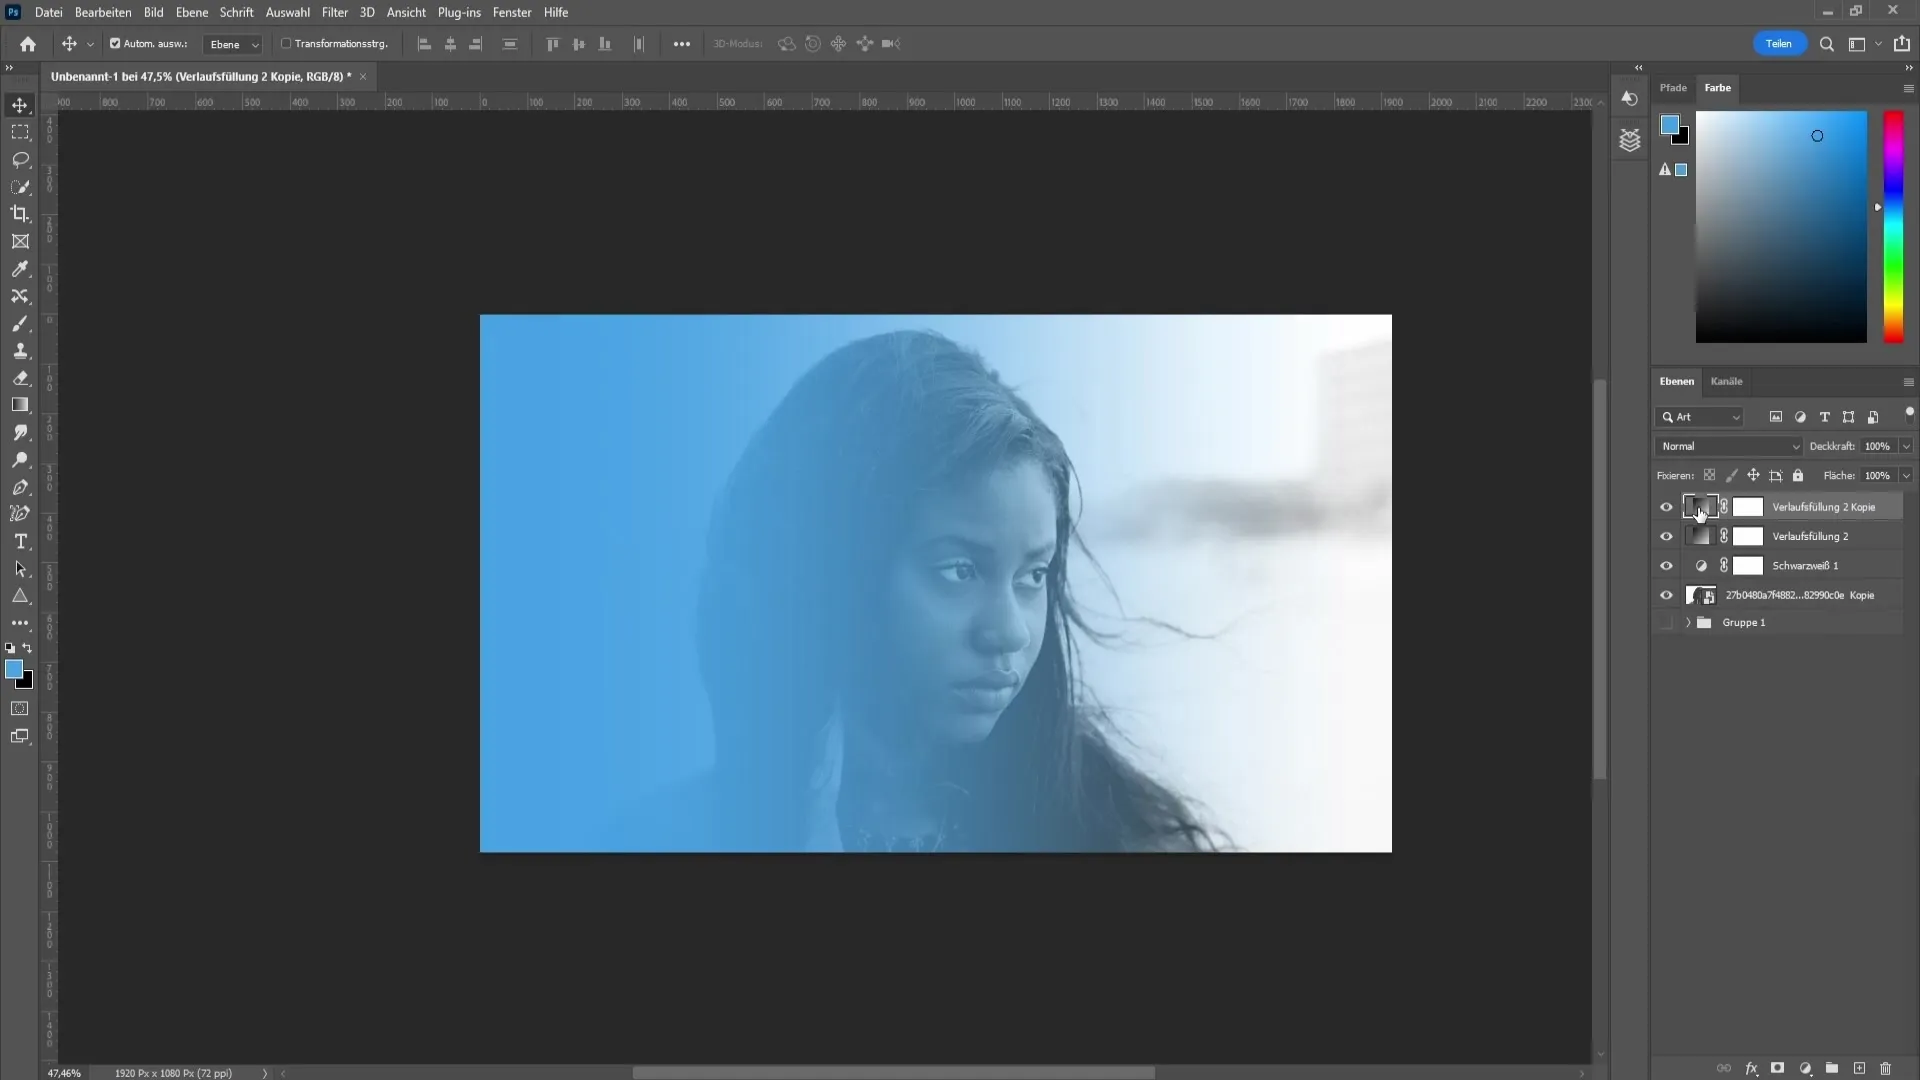
For the second color, you can choose a pink hue. Experiment with different shades here as well until you find a combination you like. Confirm the setting with "OK".
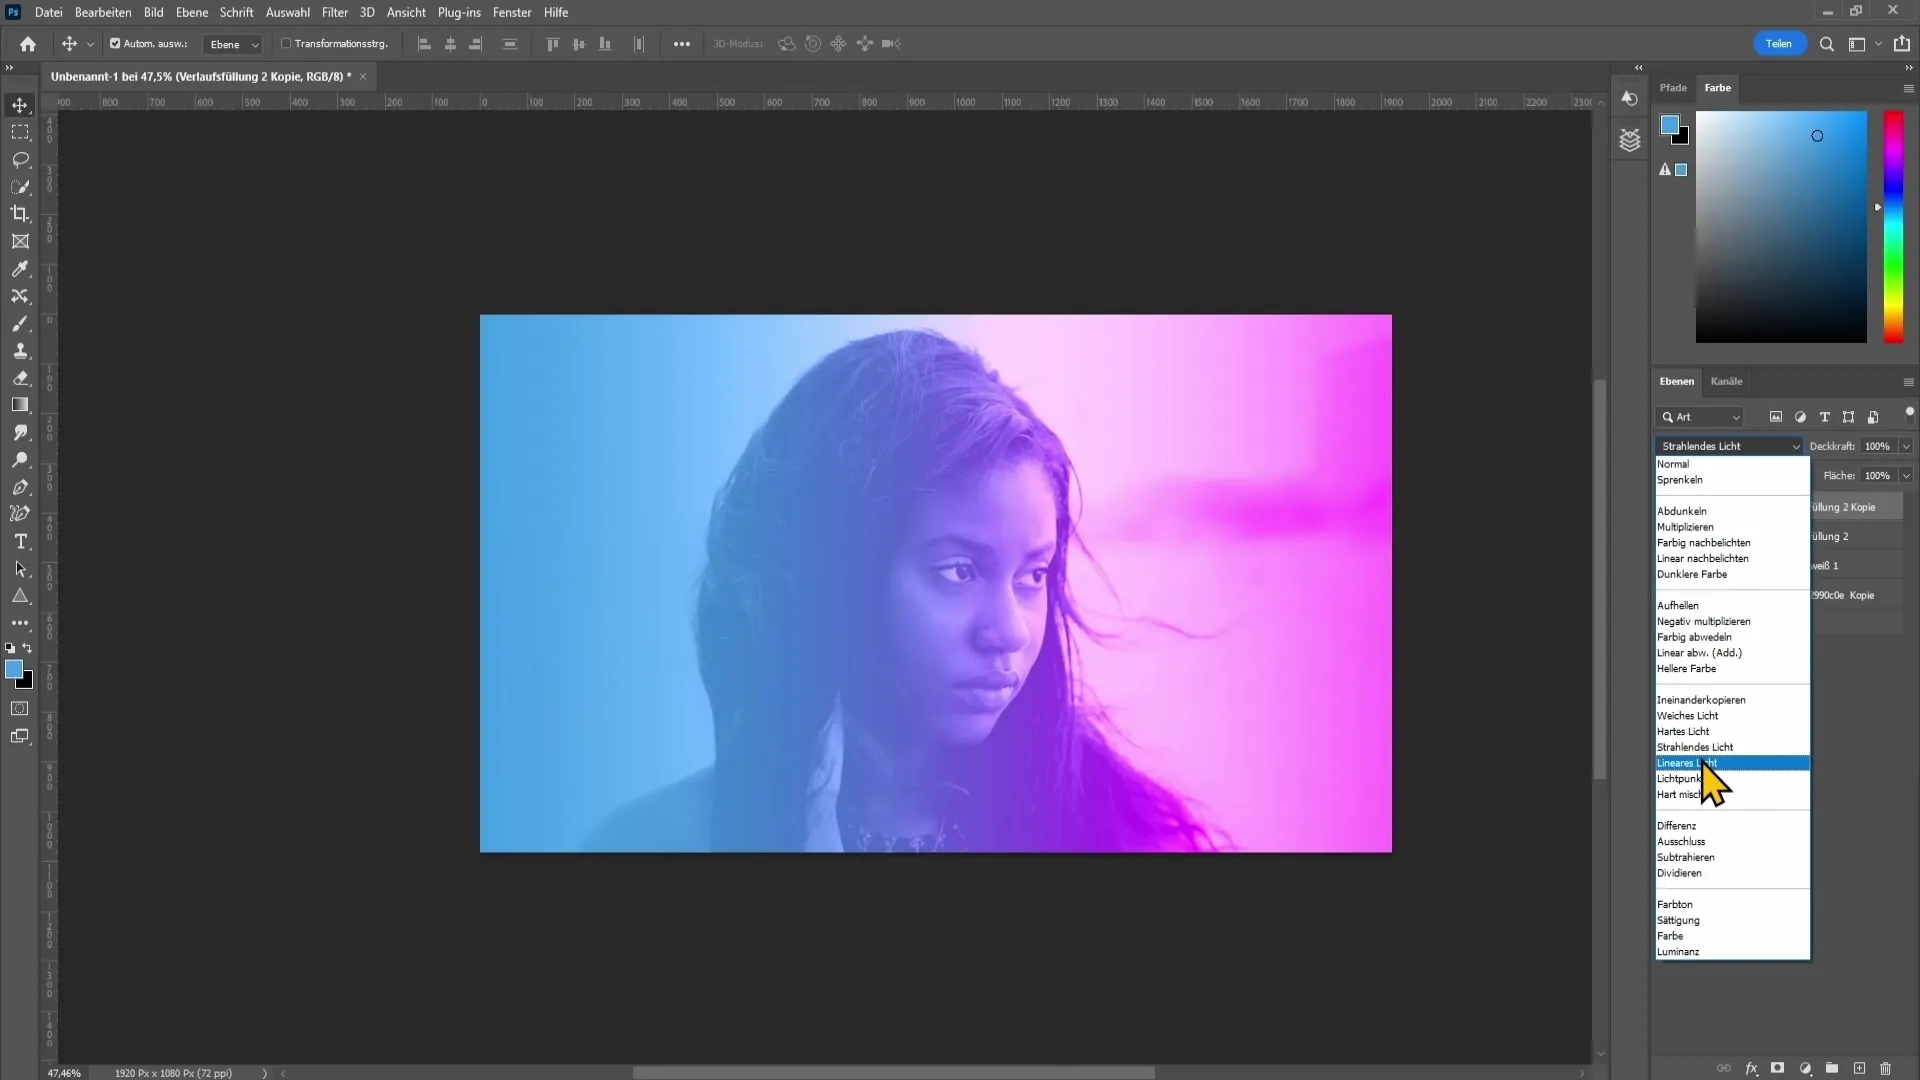
After creating the gradients, your image might look somewhat unrealistic. To achieve the desired effect, you need to work with blending modes. Go through the different blending modes and choose the one that best fits your image. I recommend trying the "Hard Light" or "Multiply" modes. In my case, I chose the "Multiply" mode.
Now that the tones have been added, the background may appear too bright. To darken the background slightly, go to your last layer and look for the levels adjustment option. Drag the white tones slider to the left to adjust the brightness of the background.
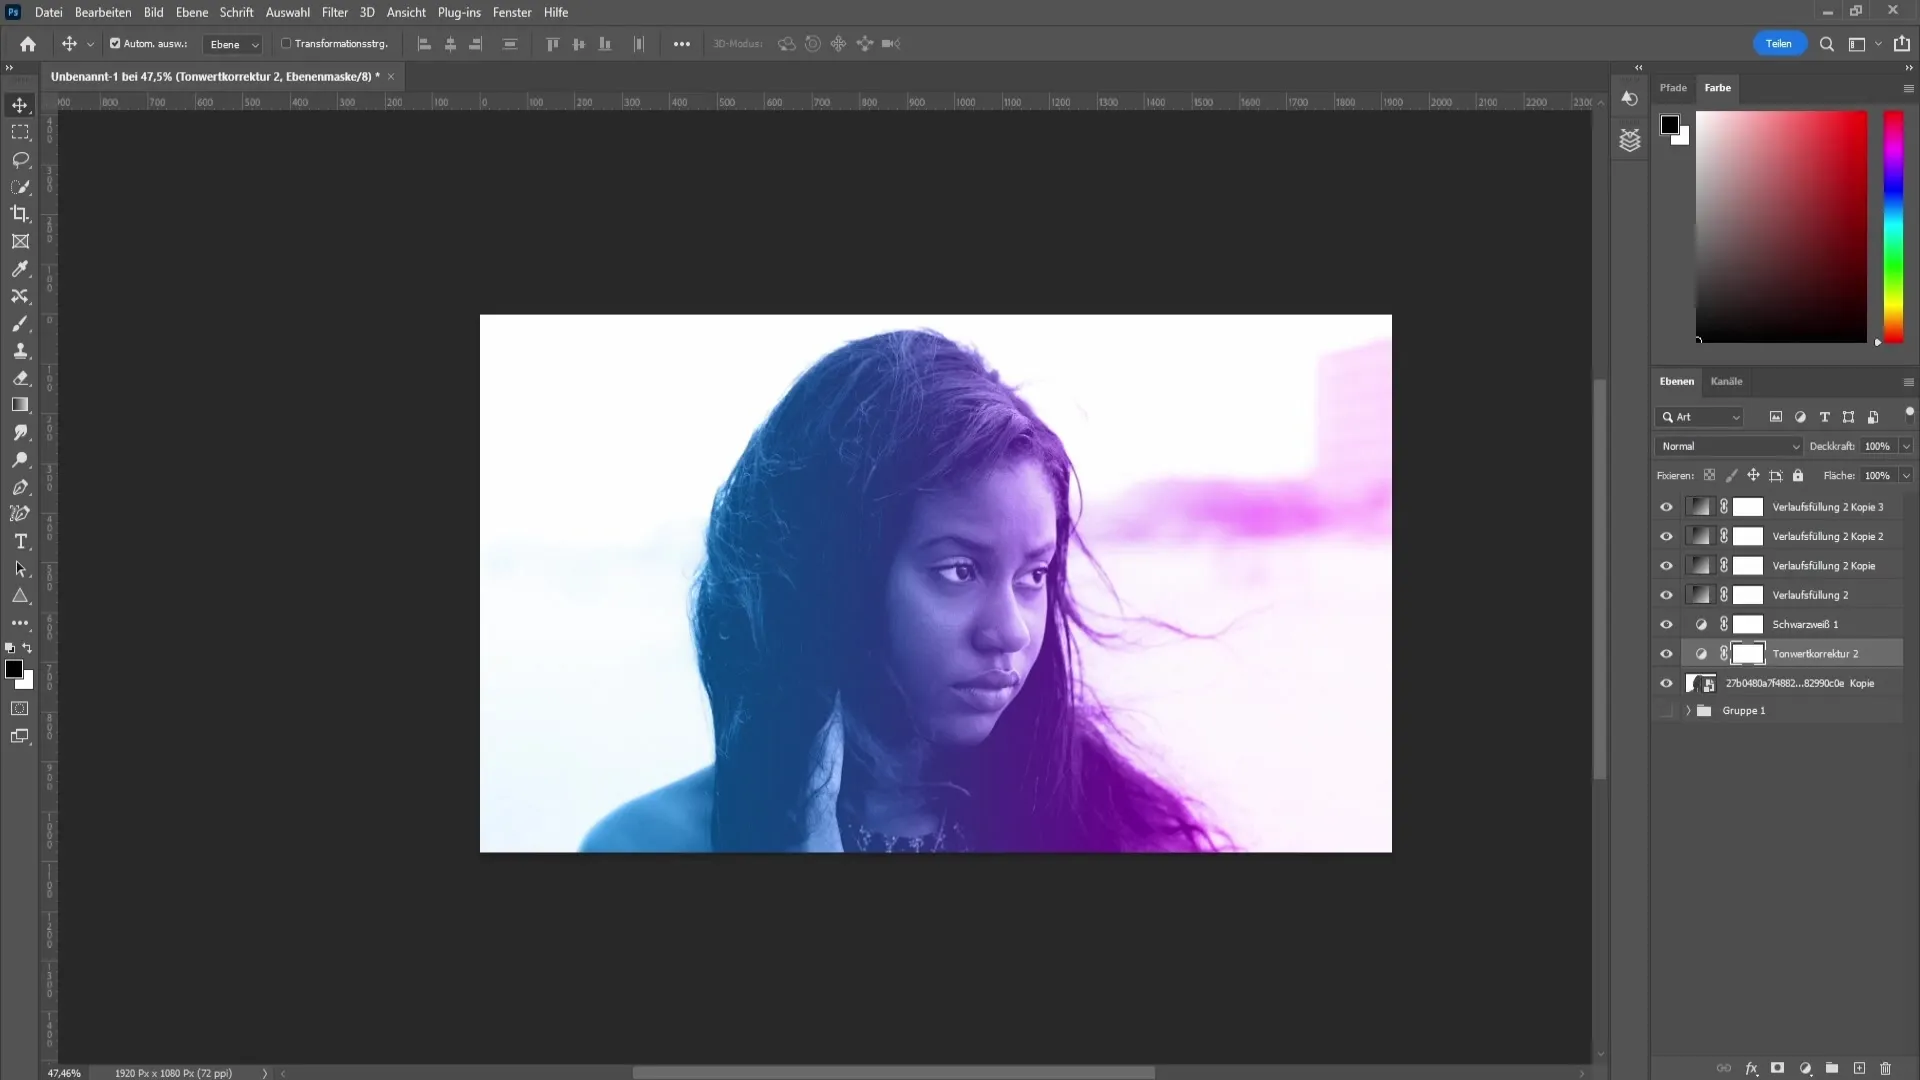
You can also experiment with the other sliders to highlight the person in the image. Use the left slider to emphasize the dark tones and use the middle slider to lighten or darken the overall image.
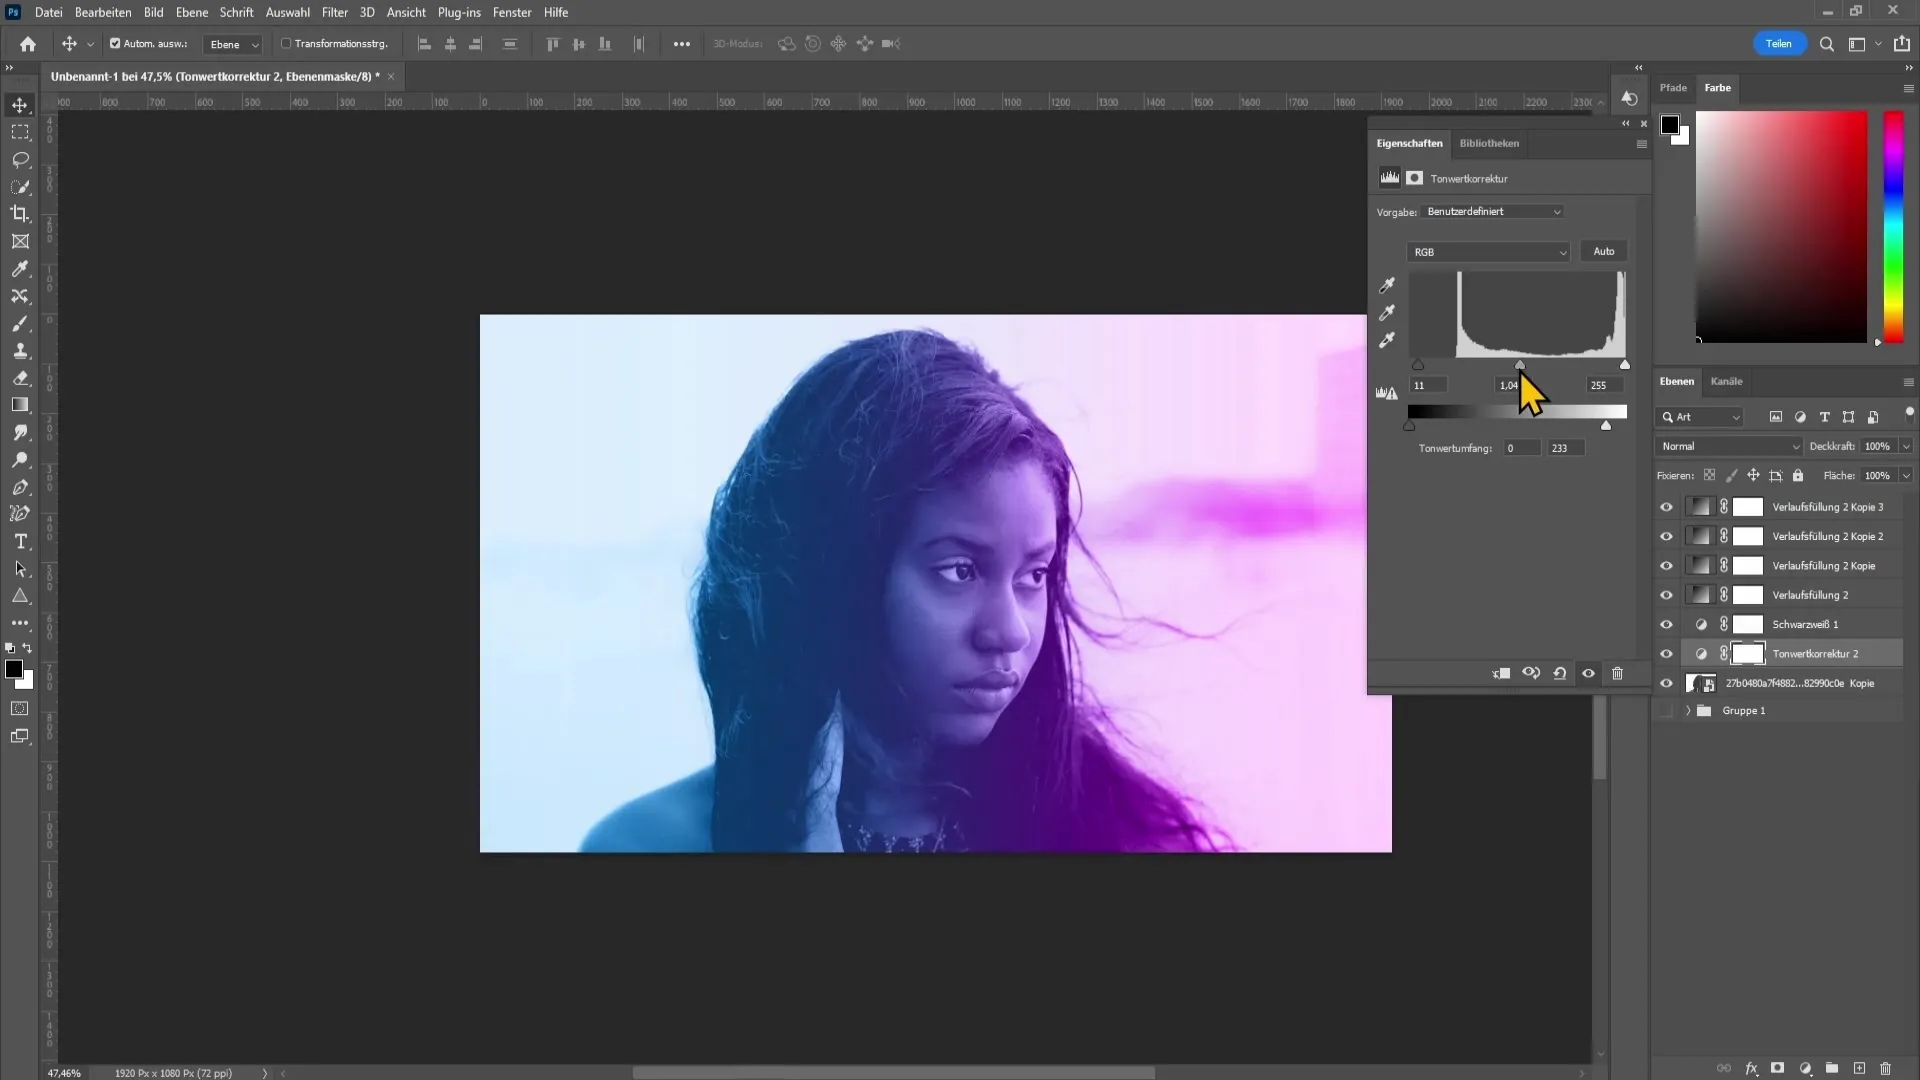
The dual-tone effect is easy to achieve and gives your image a fresh, creative touch. You can experiment with different color tones and shades to achieve the perfect result for your project.
Summary
In this tutorial, you have learned how to create a dual-tone effect in Photoshop. You have discovered various techniques to convert your image to black and white, add color gradients, adjust blending modes, and optimize the brightness of the background. This effect will give your image a new dimension.
Frequently Asked Questions
How can I apply the dual-tone effect to a colored image?You can also apply the effect to a colored image by simply converting it to black and white, and then applying the color gradients.
How can I change the colors in my gradient?You can change the colors by double-clicking on the gradient and selecting the desired colors.
What should I do if the colors appear too pale?Experiment with the blending modes or use the Levels adjustment to enhance the colors.


