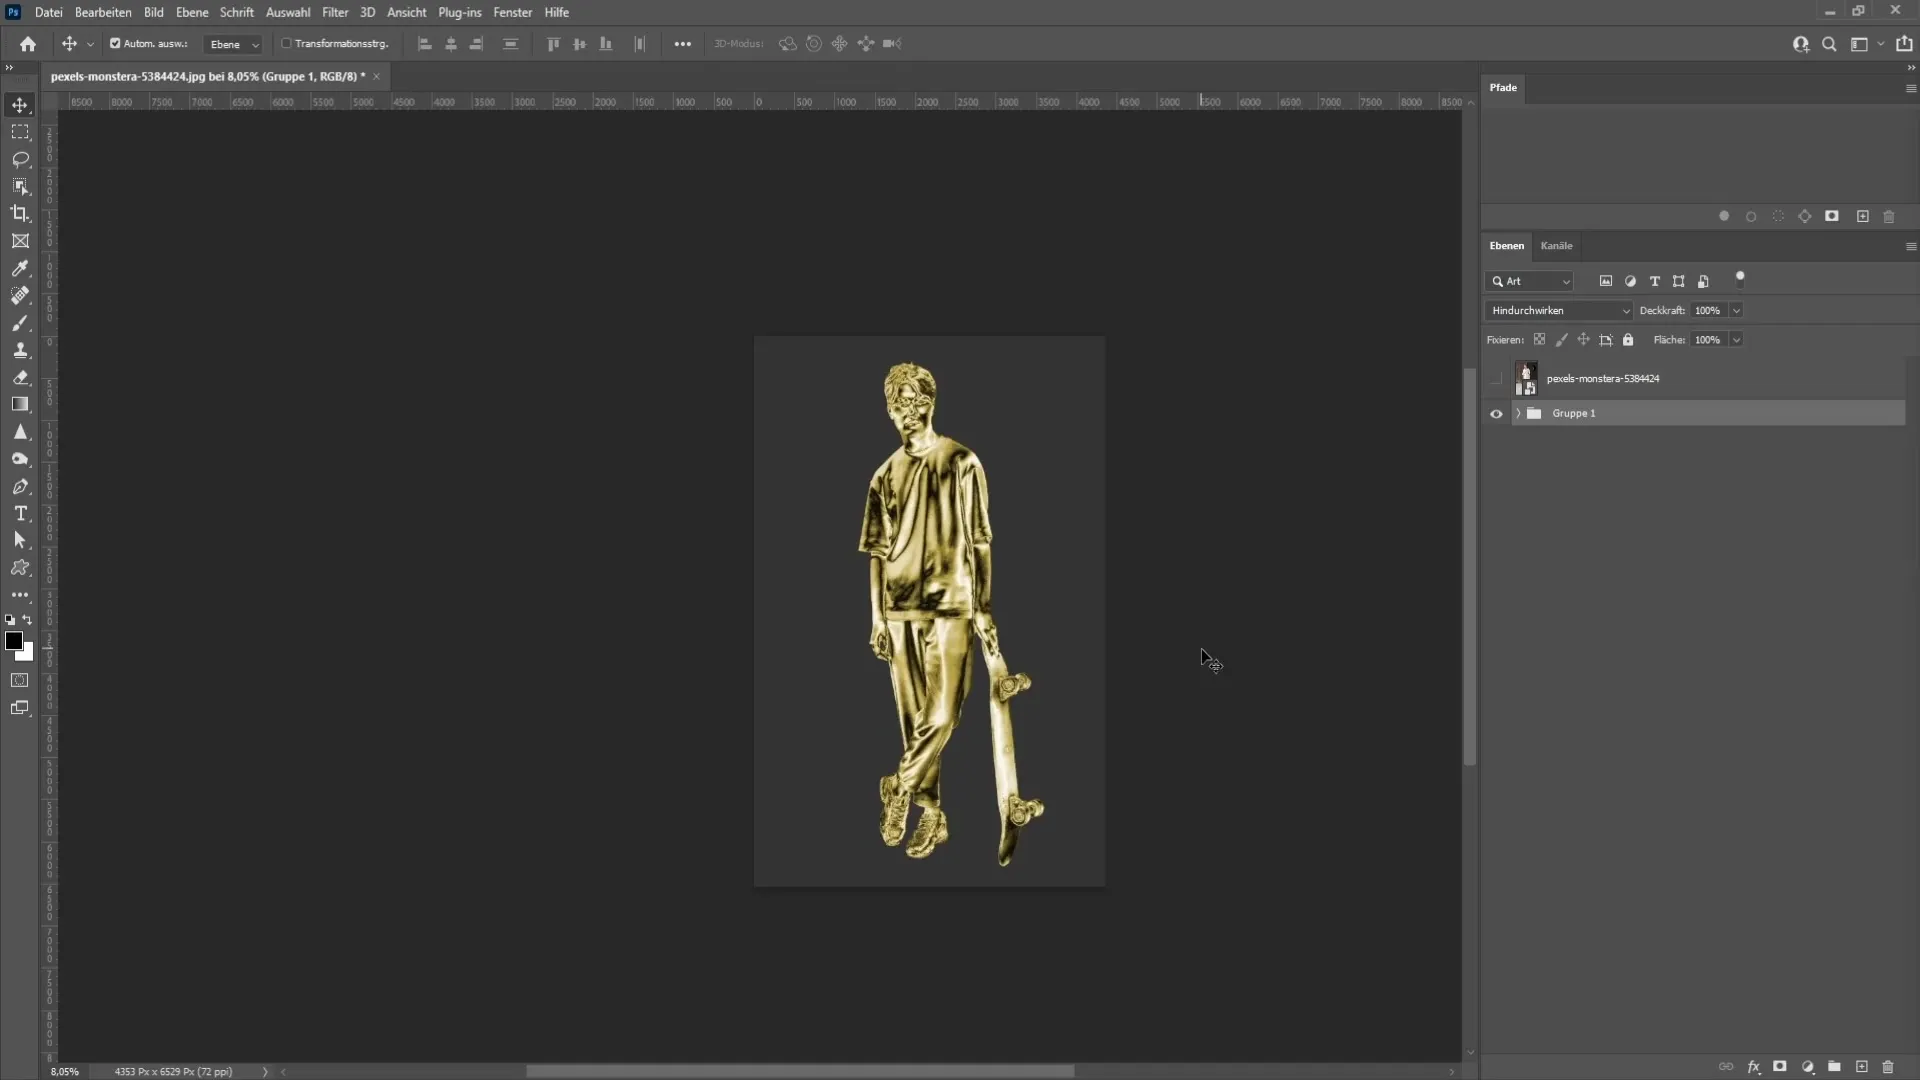
Do you want to create a realistic golden statue from an object or a person? In this tutorial, I'll show you how to work simply and effectively with Photoshop to achieve this impressive effect. Whether you're a beginner or already experienced with Photoshop, with the right steps and techniques, you too can create a golden statue. Let's get started!
Step-by-step guide
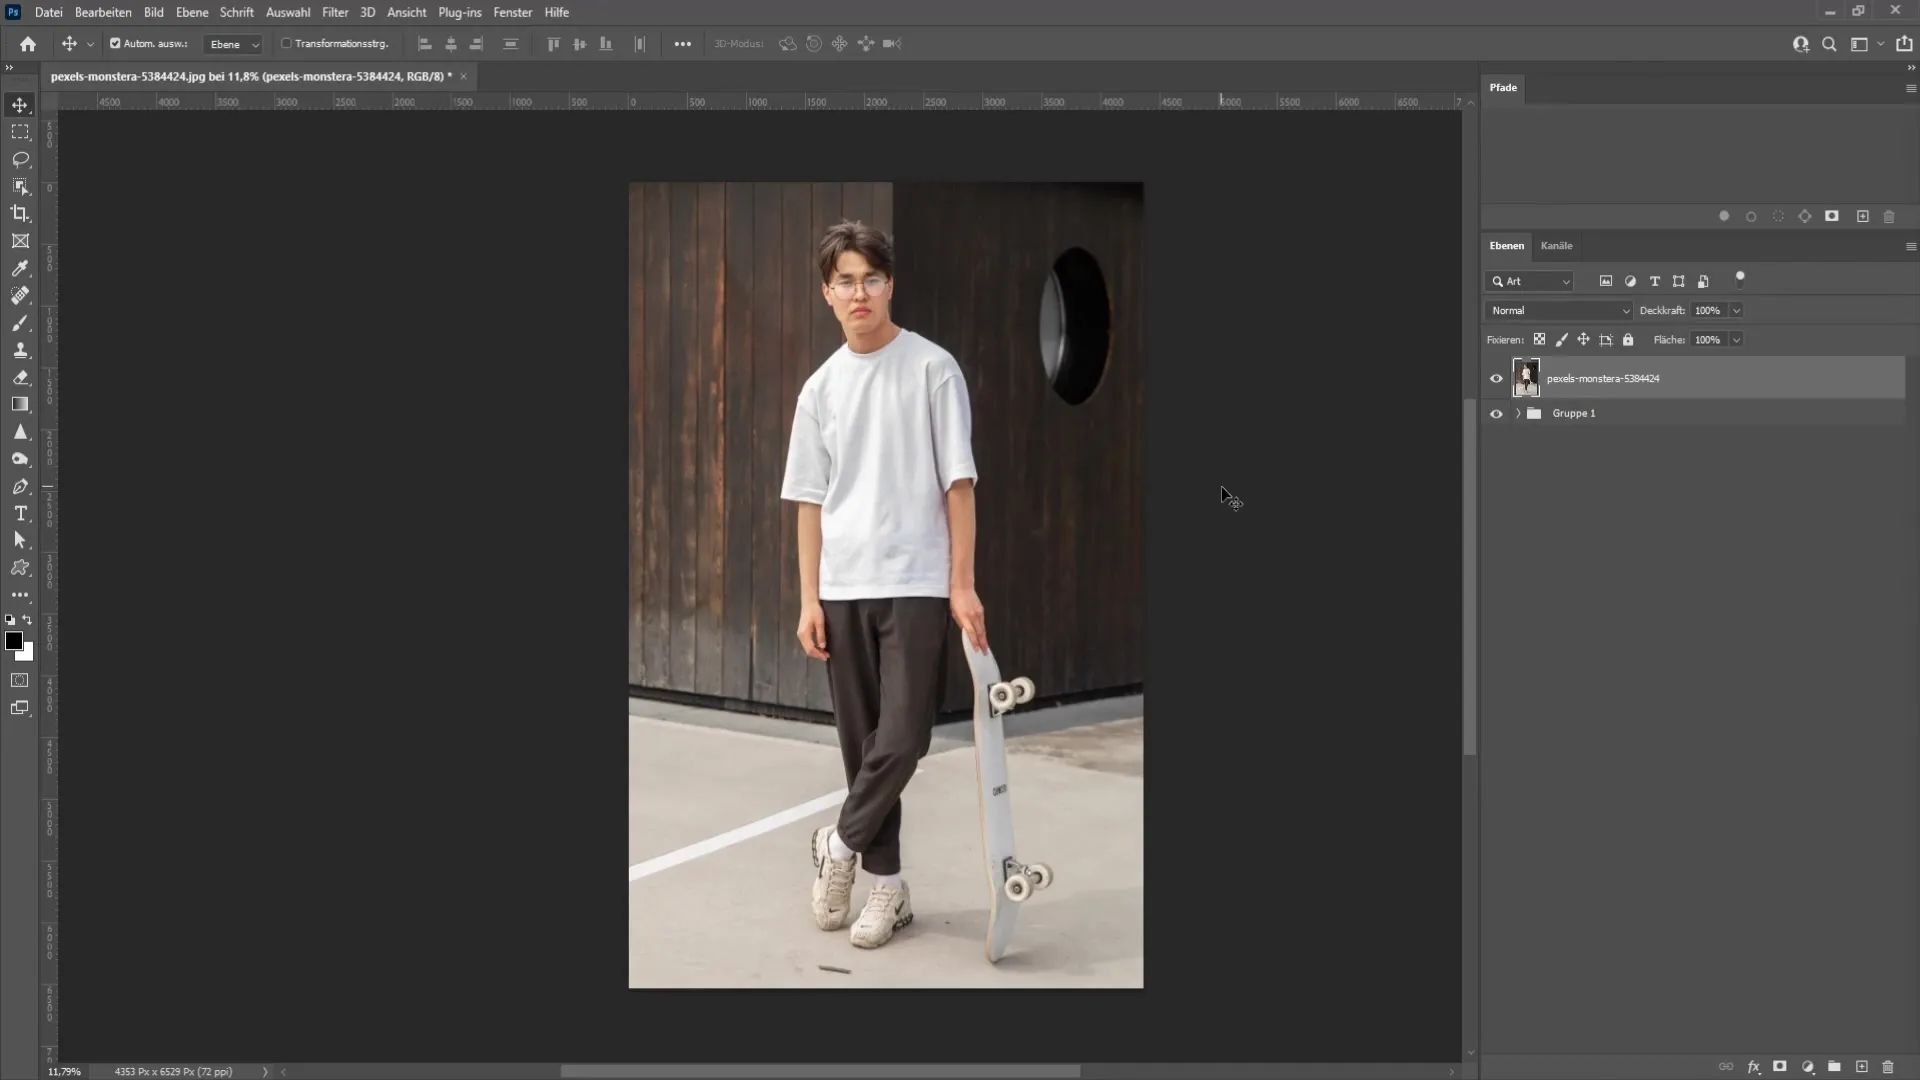
First, you need to open the image from which you want to create a golden statue. In this example, I'm working with an image of a person.
The first step in this process is to create a selection of the object. I start by rasterizing the layer with a right click. This is necessary to facilitate the final editing.
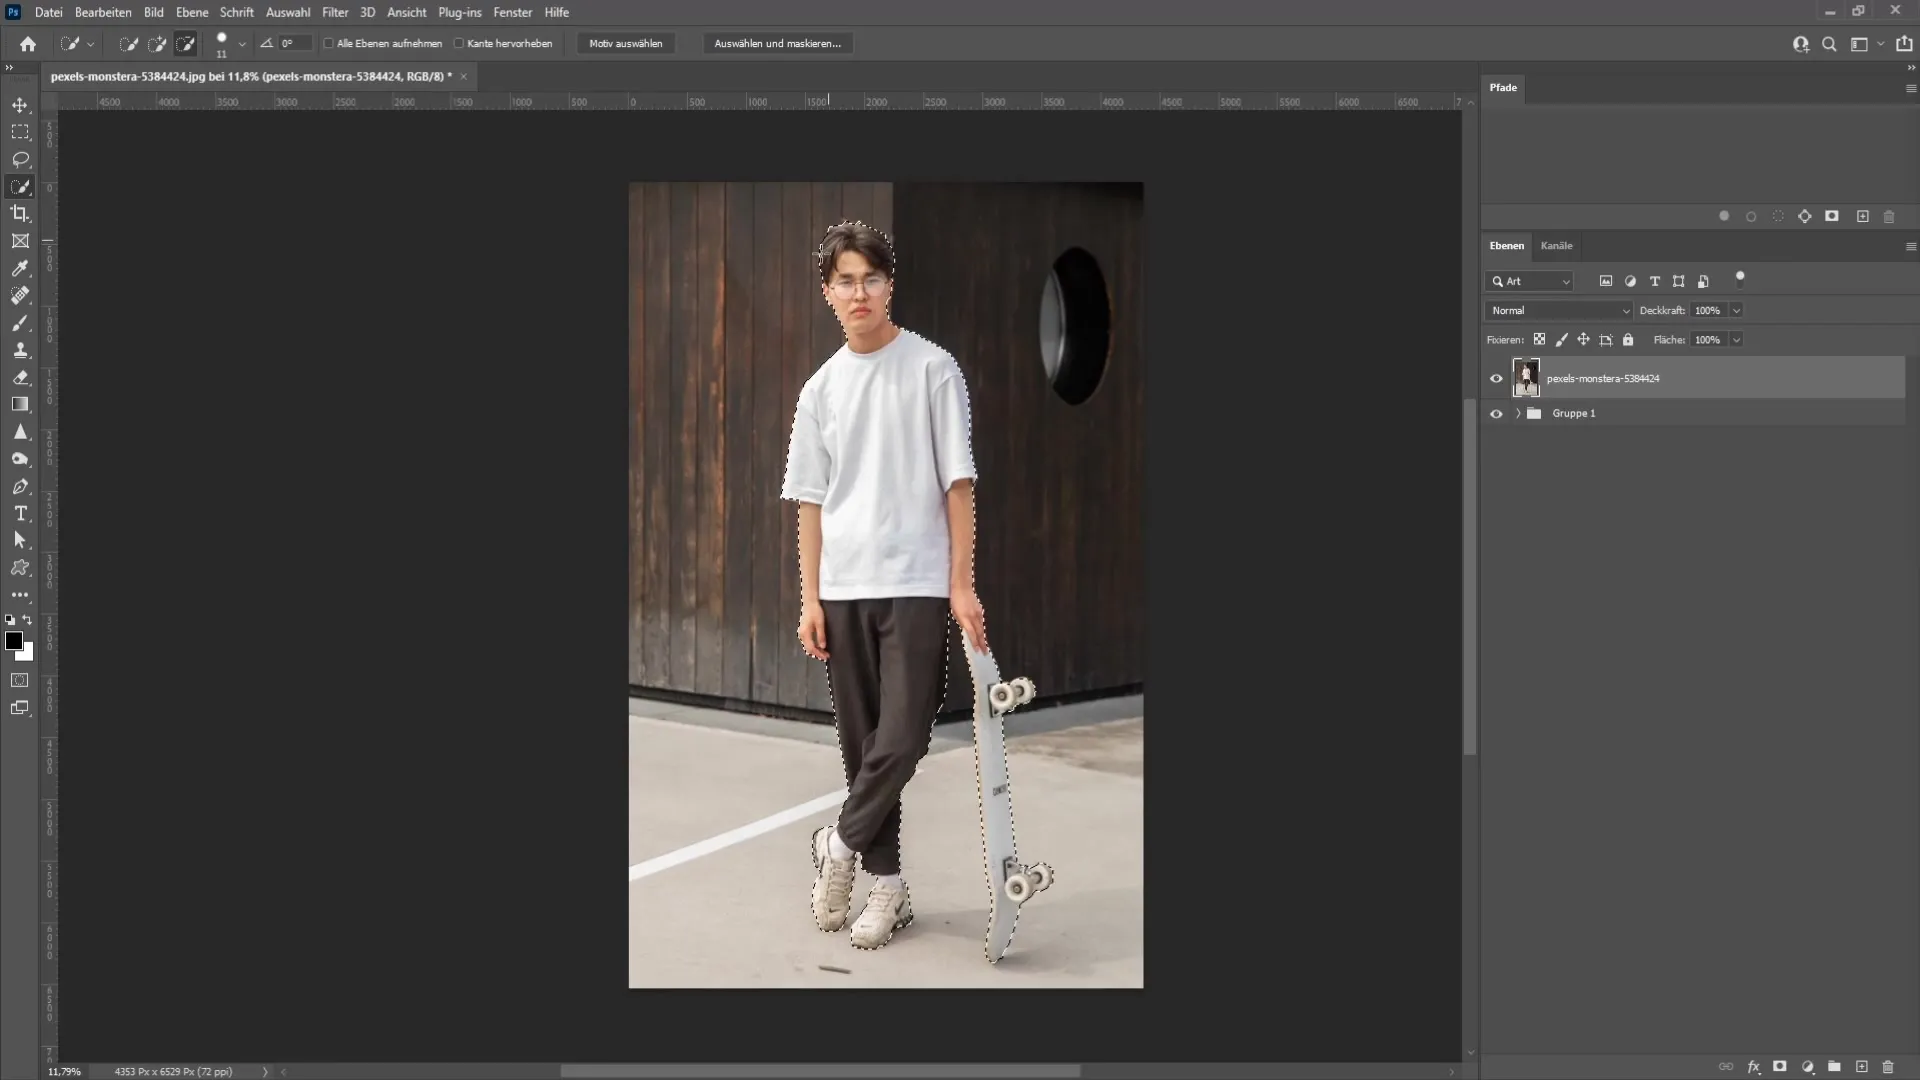
Now, you can use either the Quick Selection Tool or the "Select Subject" function to make the selection. In this tutorial, I will be using the "Select Subject" method. By clicking on this function, Photoshop will automatically create a selection of your person.
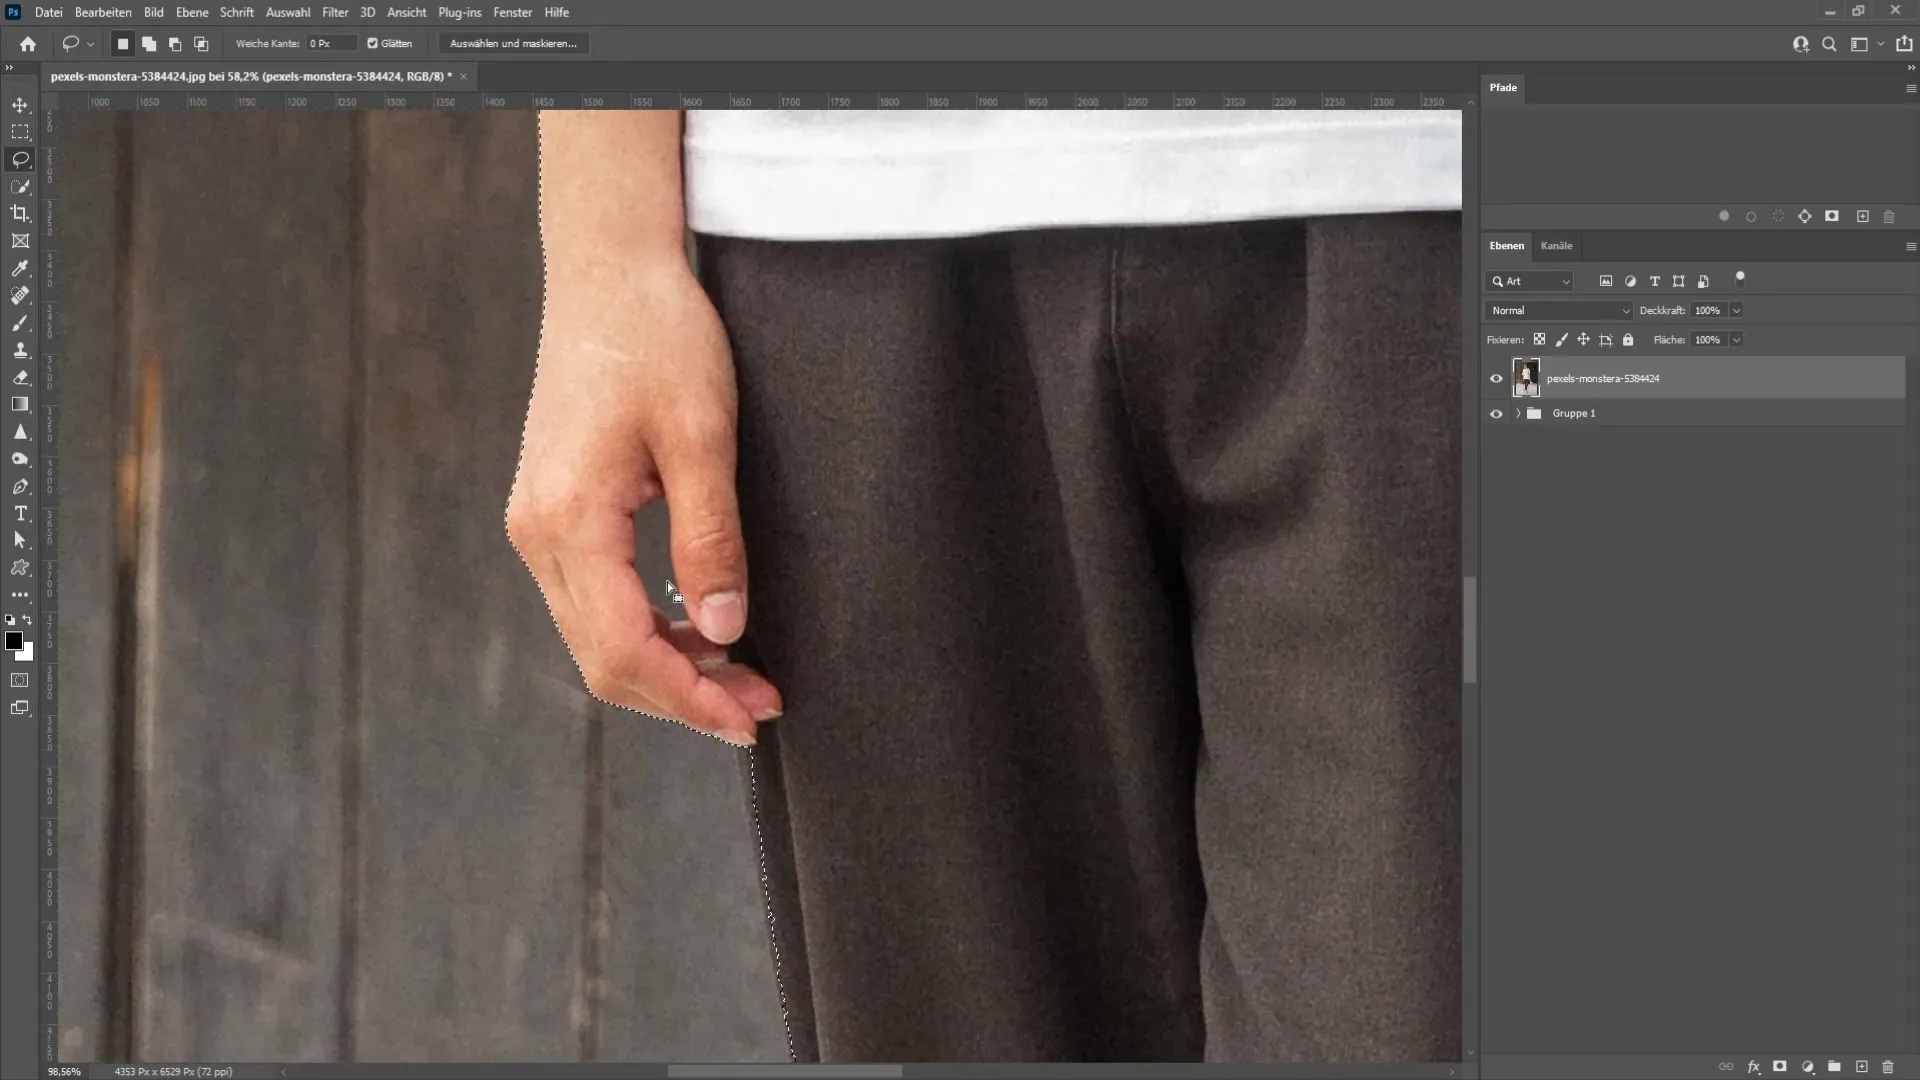
However, the initial selection may not be perfect, so it is important to review and adjust it if necessary. I will use the Lasso Tool to manually correct areas that were not selected perfectly. By holding down the Alt key, I can remove areas from the selection.
Once you are satisfied with the selection process, you can invert the selection by choosing the clipping mask icon at the bottom right of the Layers panel. This way, you ensure that only the person is selected and the rest of the background is hidden.
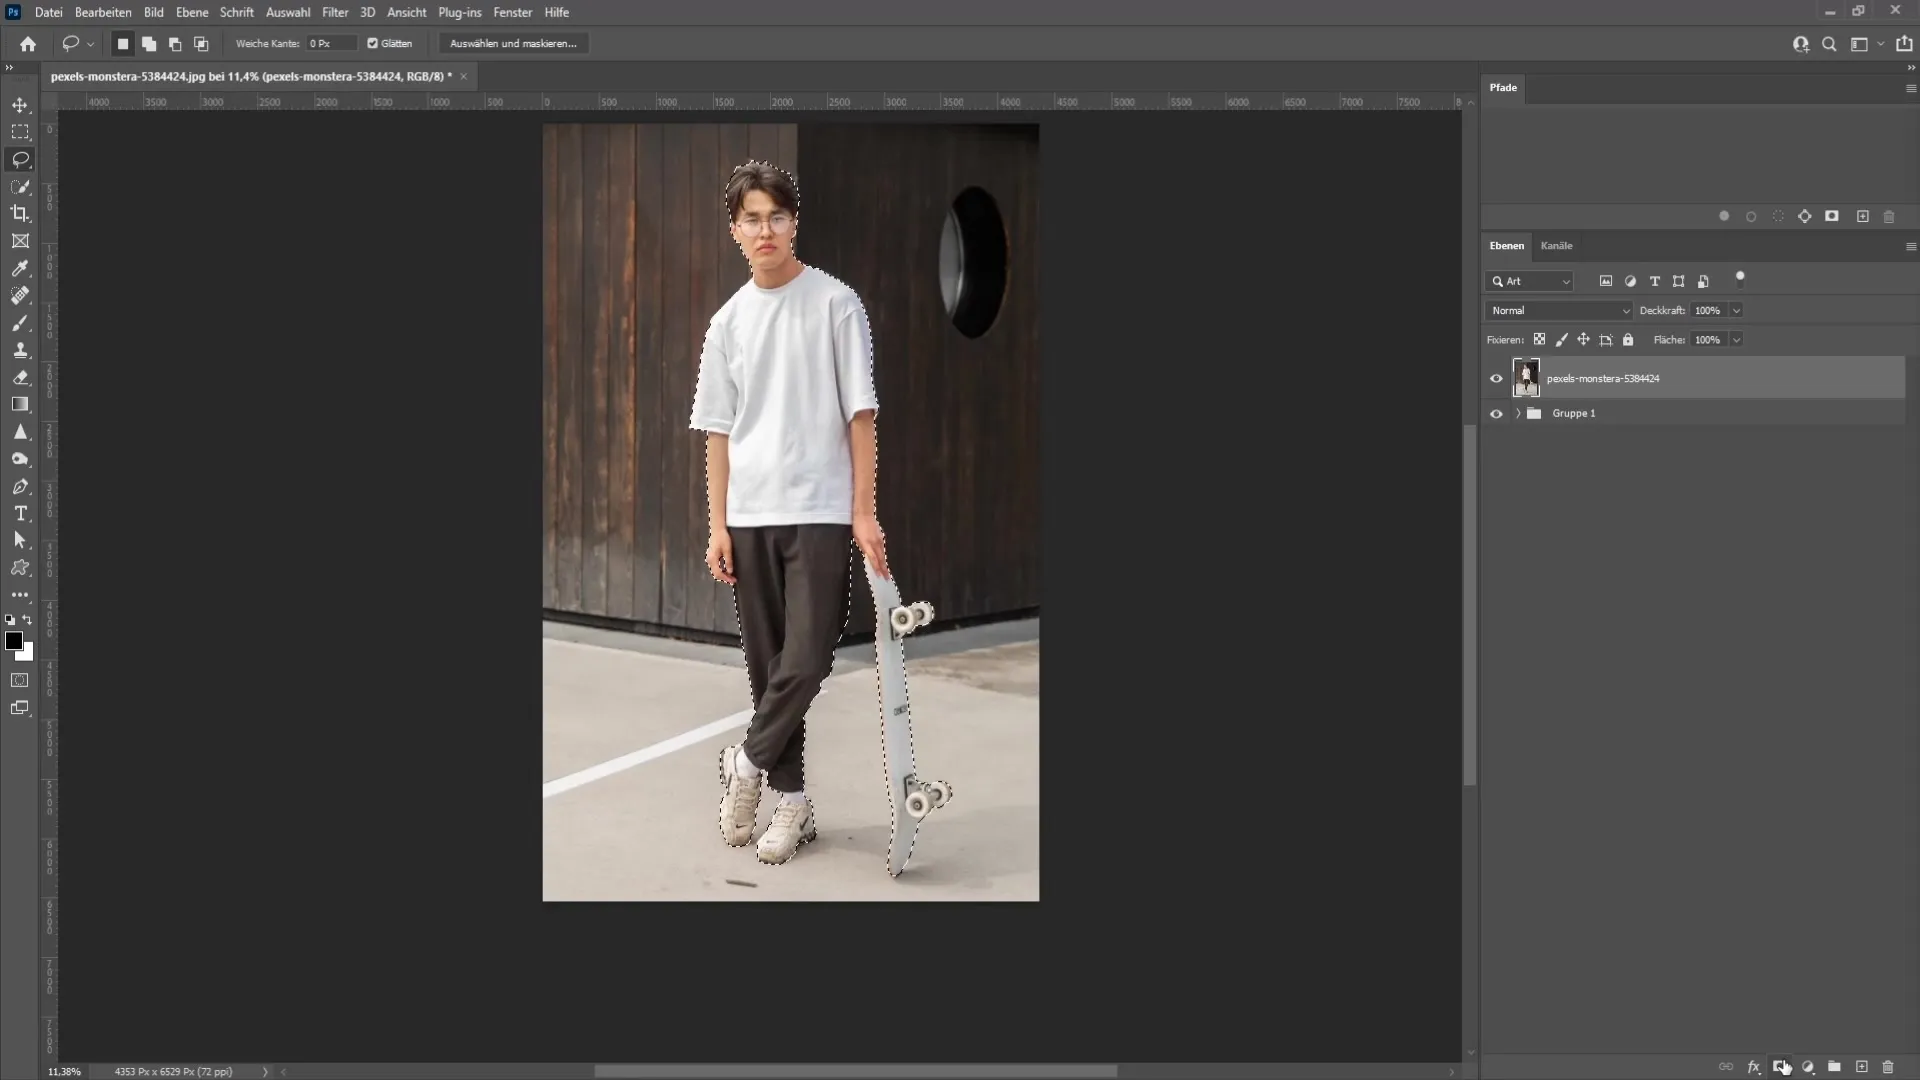
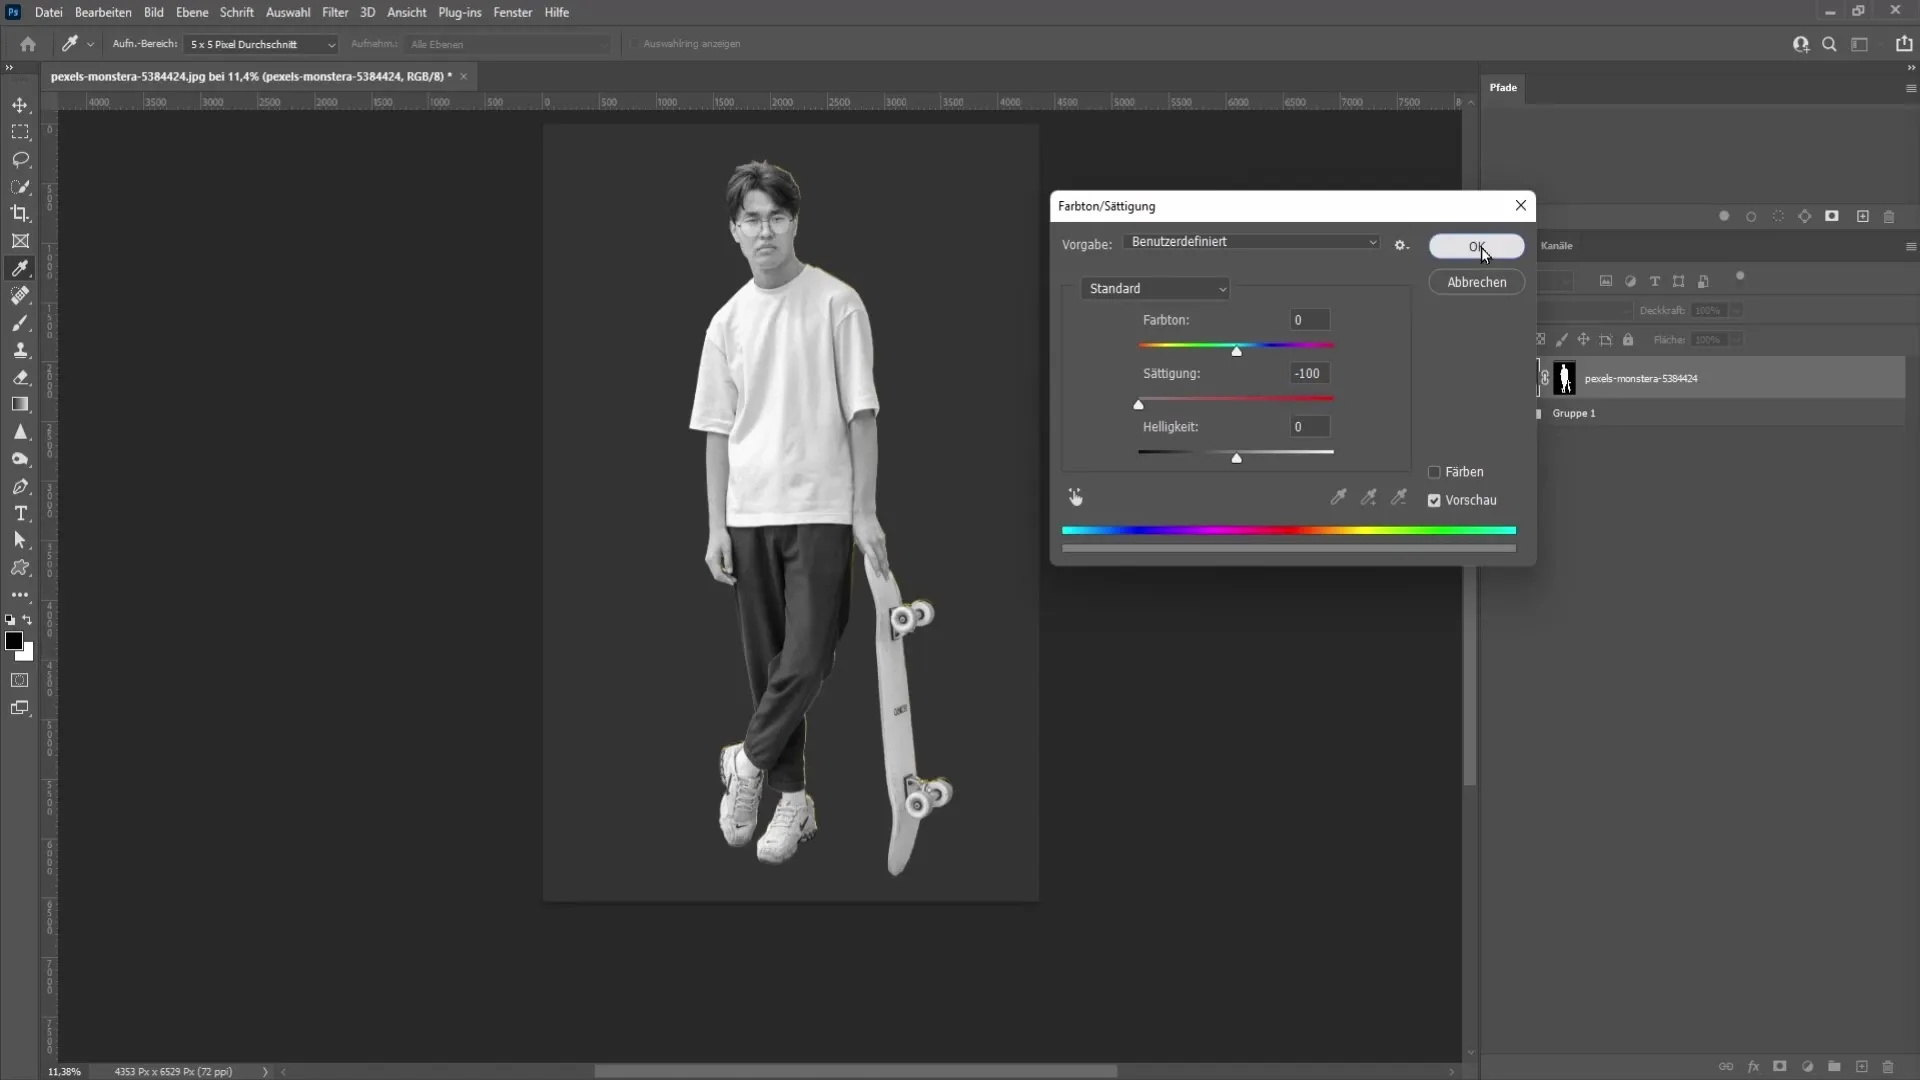
Now it's time to remove the colors from the image to lay the foundation for the golden statue. To do this, click on "Image" at the top and select "Adjustments," followed by "Hue/Saturation." Drag the saturation slider all the way to the left to remove all colors.
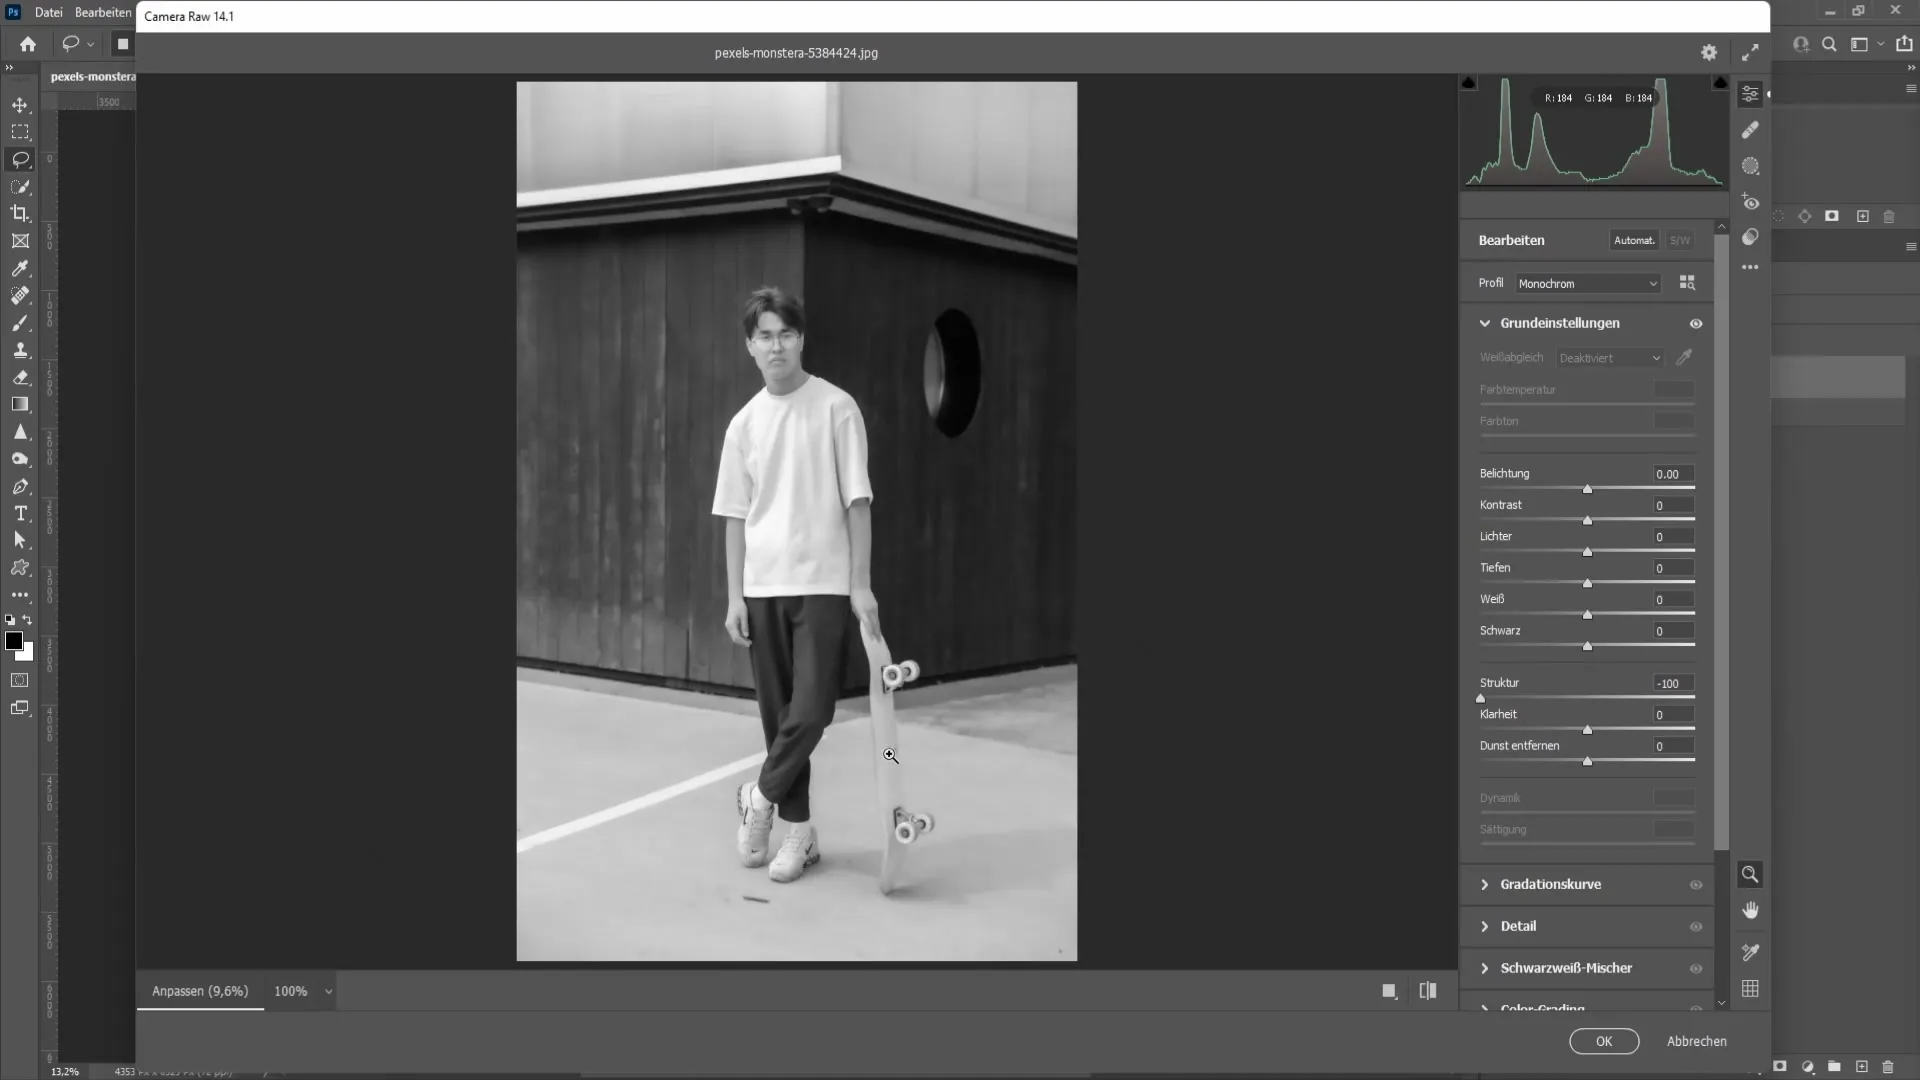
Next, we focus on the details of your image. For this, we will use the Camera Raw Filter. Go to "Filter" again and choose "Camera Raw Filter." In the subsequent window, drag the structure slider all the way to the left to smooth out the details and remove the textures.
After removing the structure, click "OK" and then go back to "Image" and choose "Calculations." Make sure the option "Merged Layer" is selected and the channel is set to RGB. Activate the "Invert" option and choose the "Difference" blending mode.
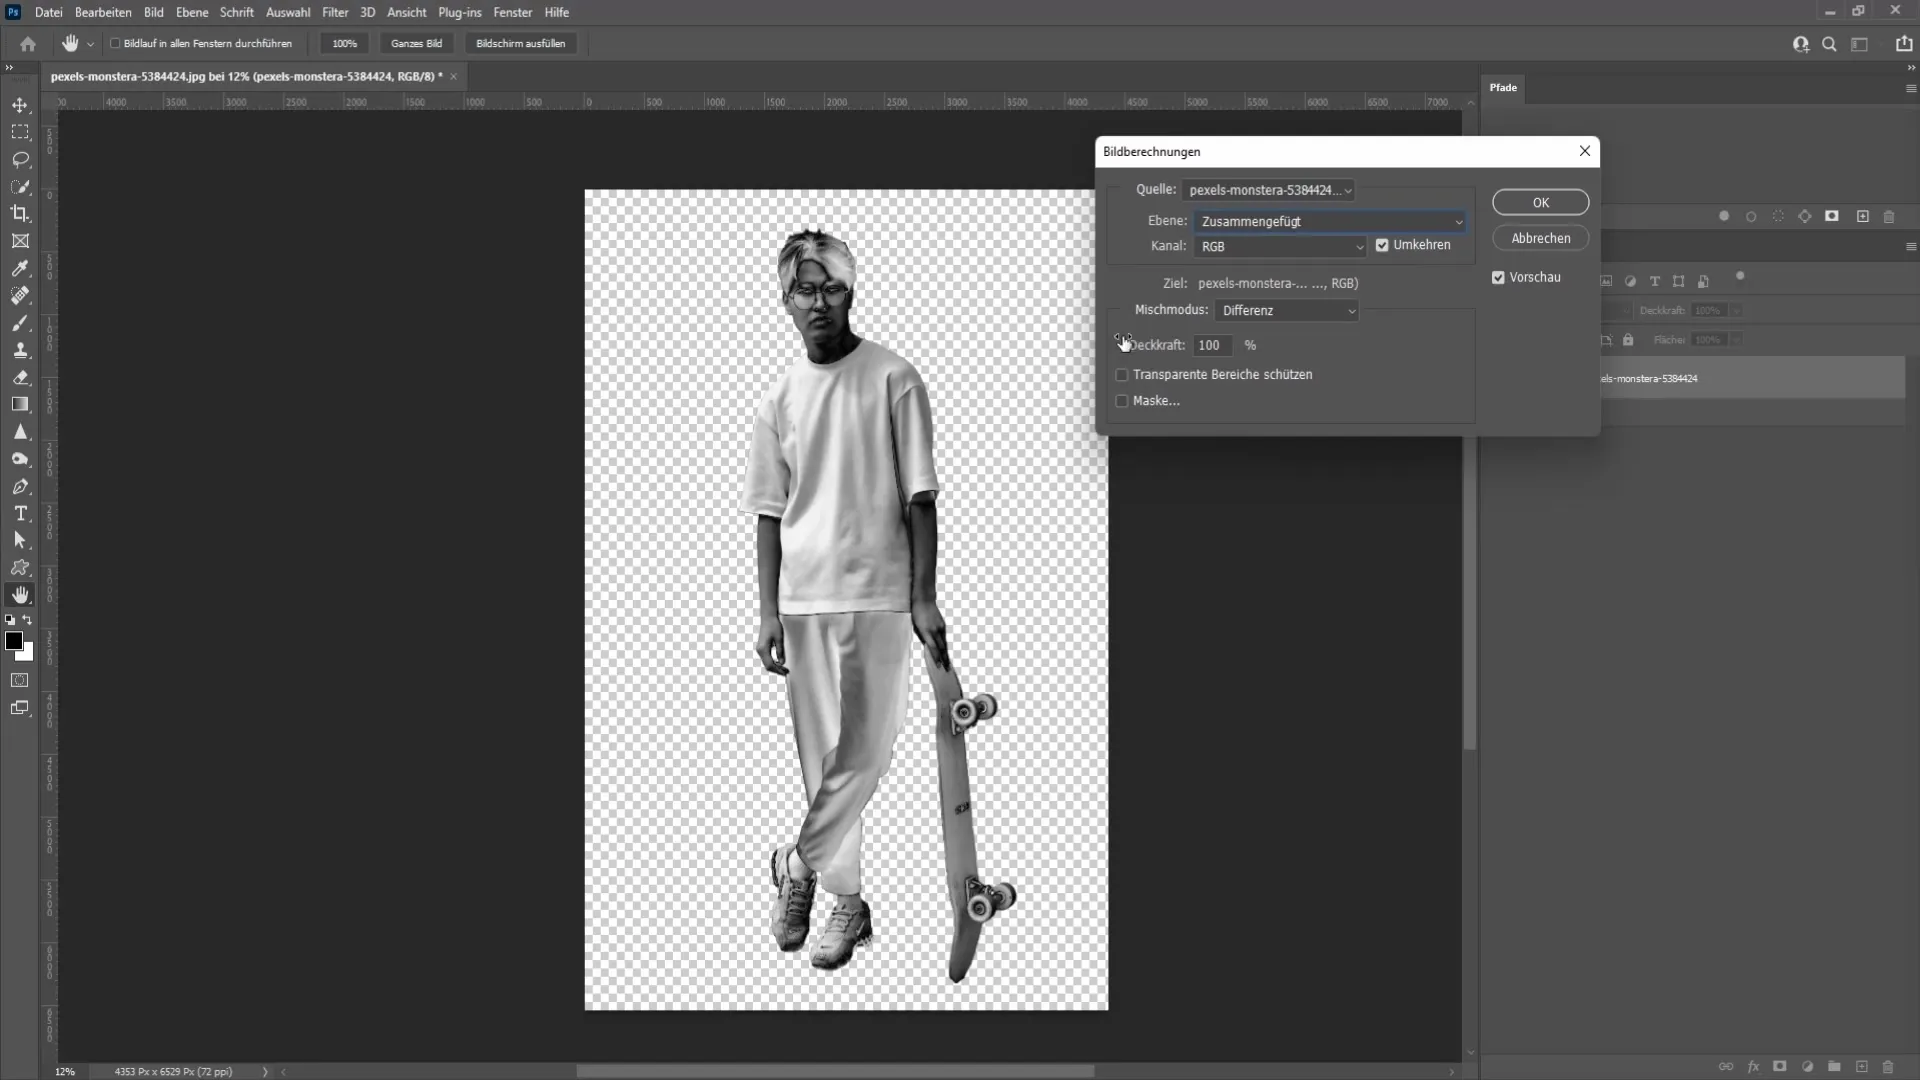
Click "OK" again to confirm the changes. If the image still doesn't look convincing, you can repeat this step to enhance the effects.
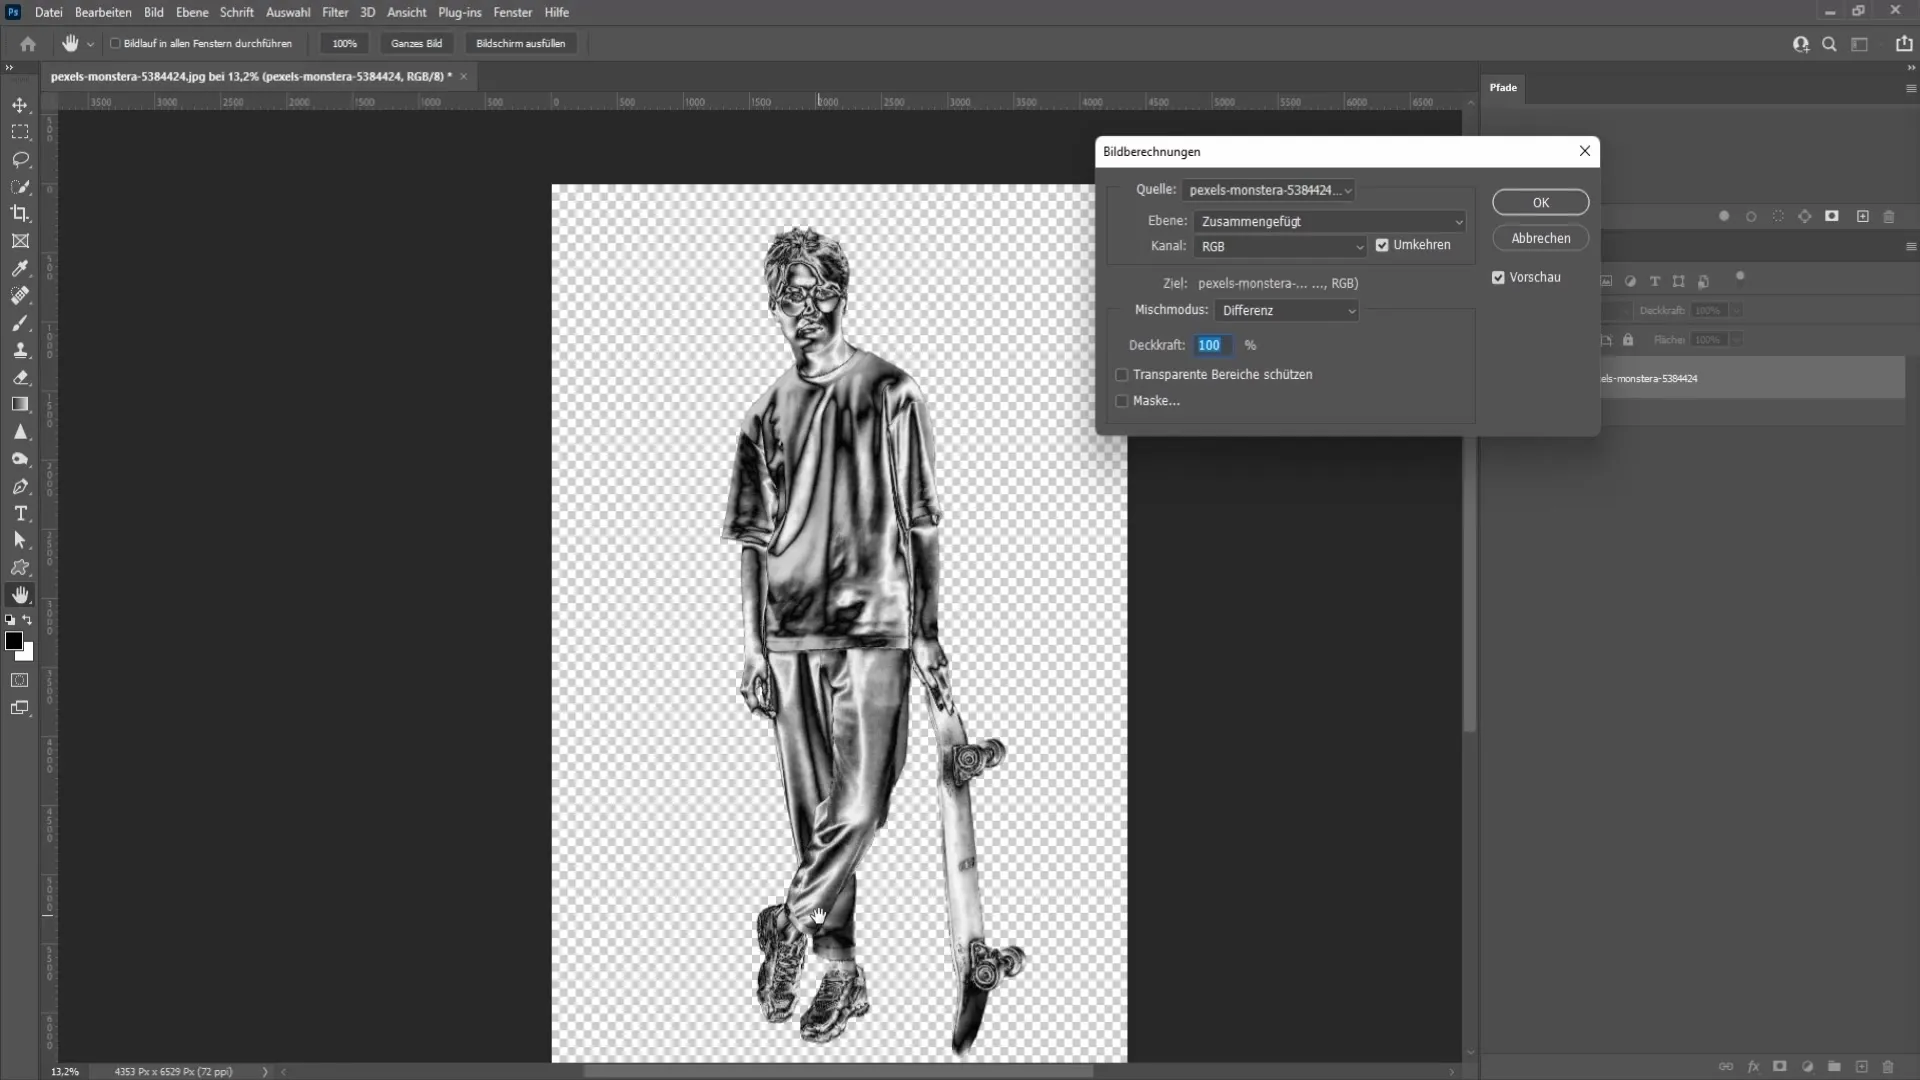
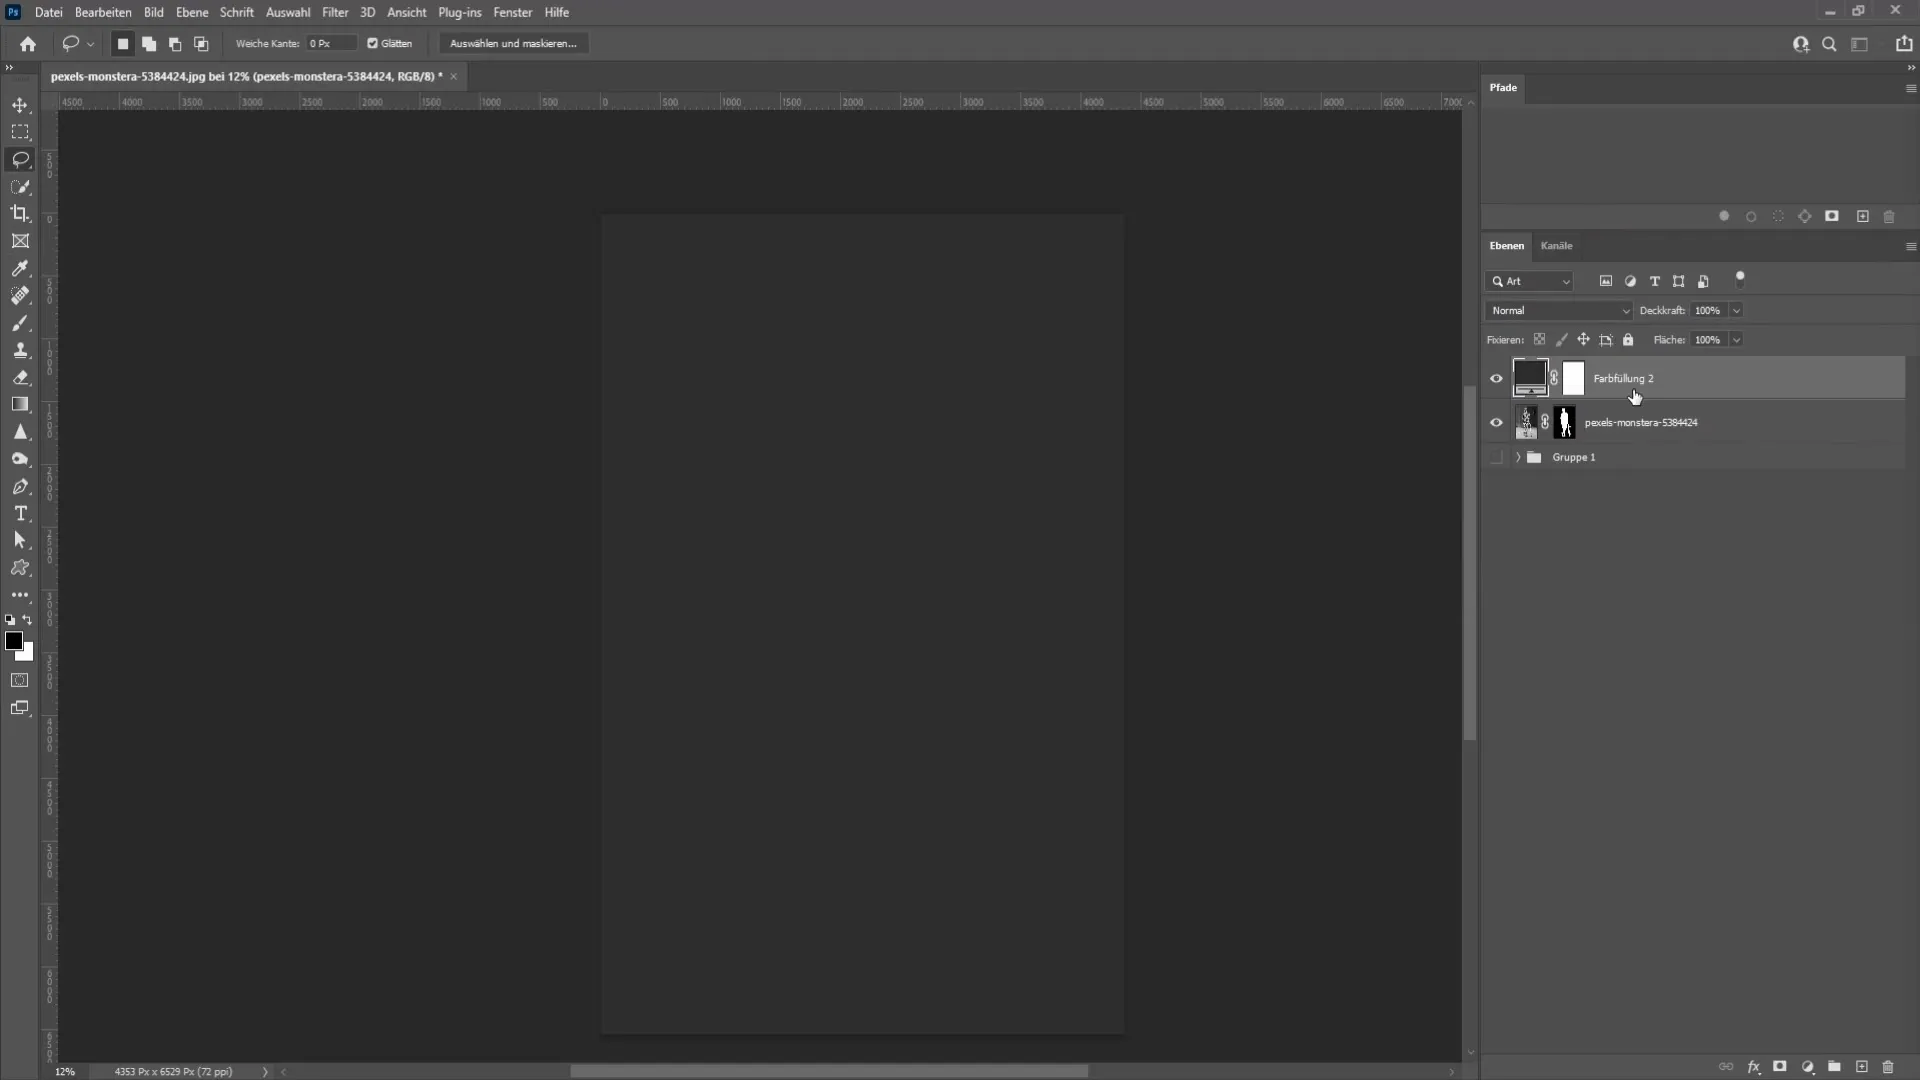
After these adjustments, you have now transformed the previous original image content into a statue. But to present the statue better, add a background. Go to Adjustments and choose a solid color. I recommend a dark gray shade to create a strong contrast with the statue.
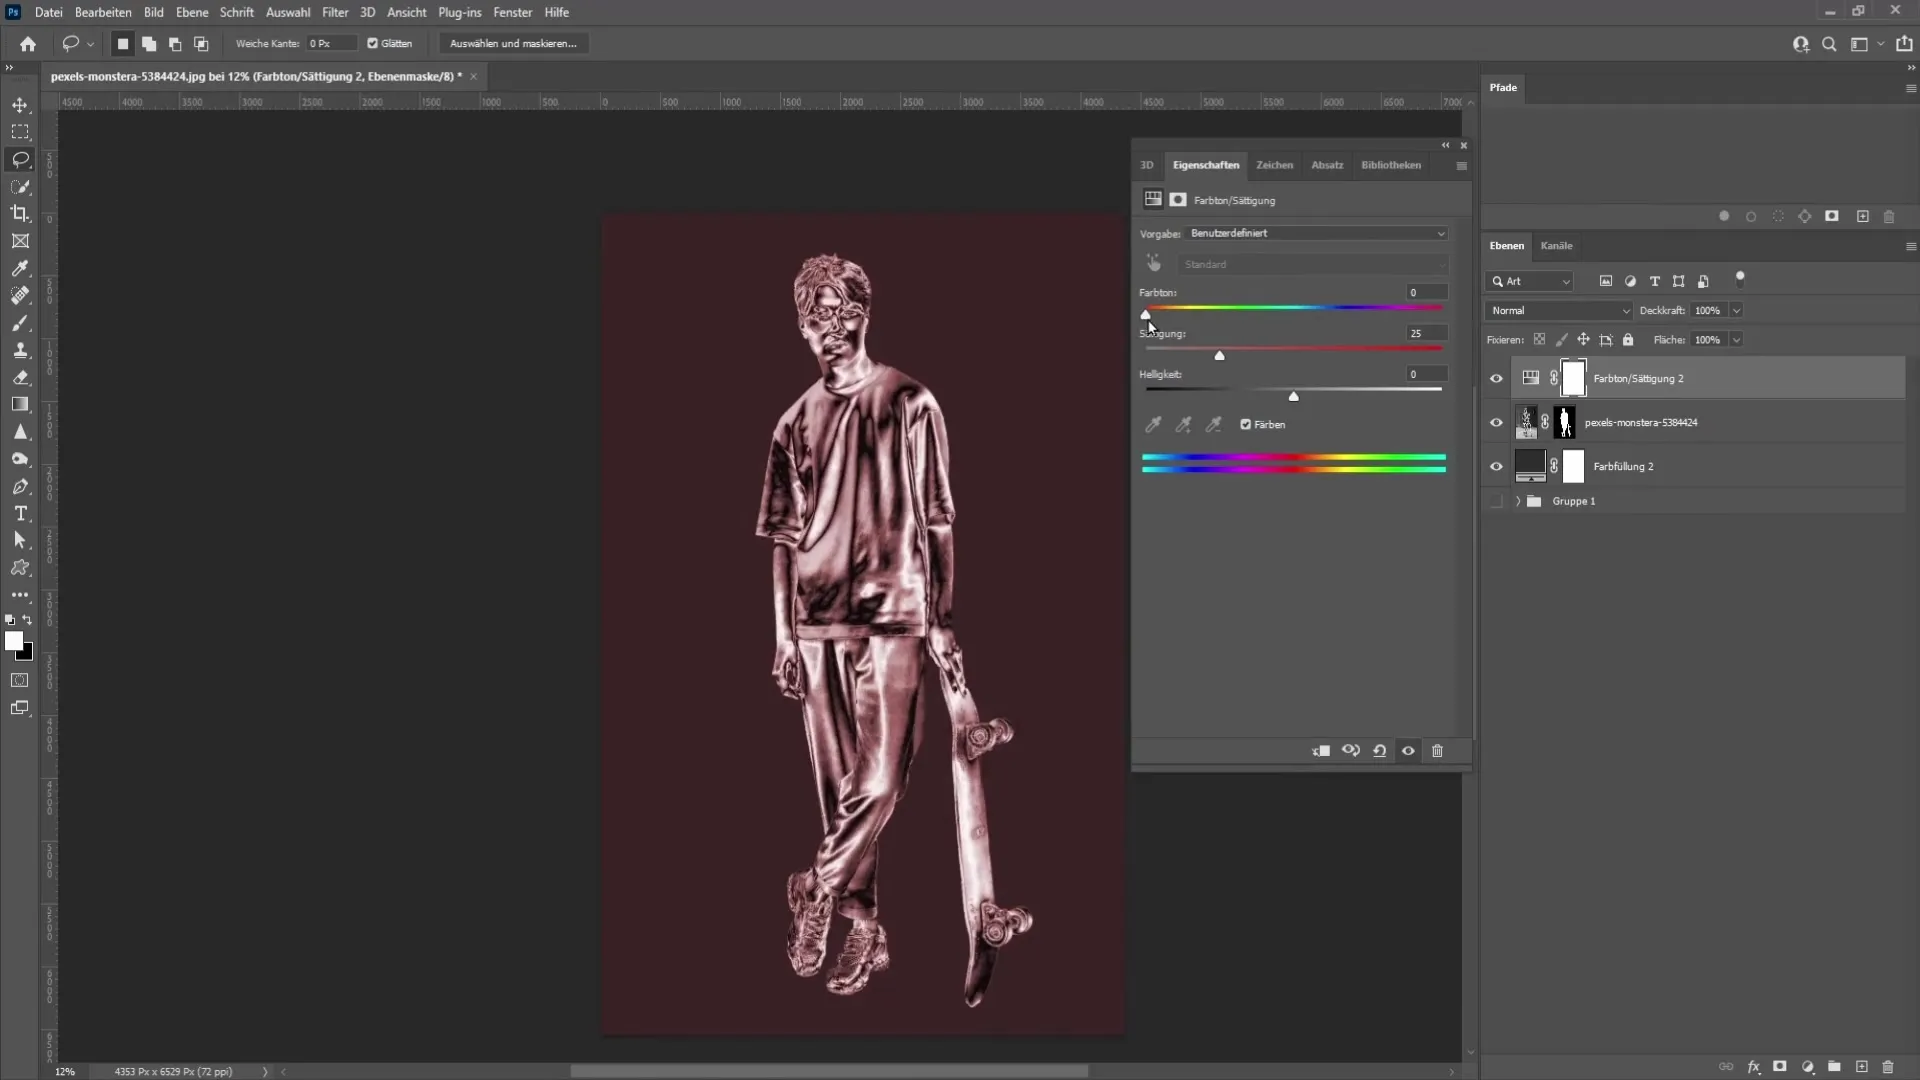
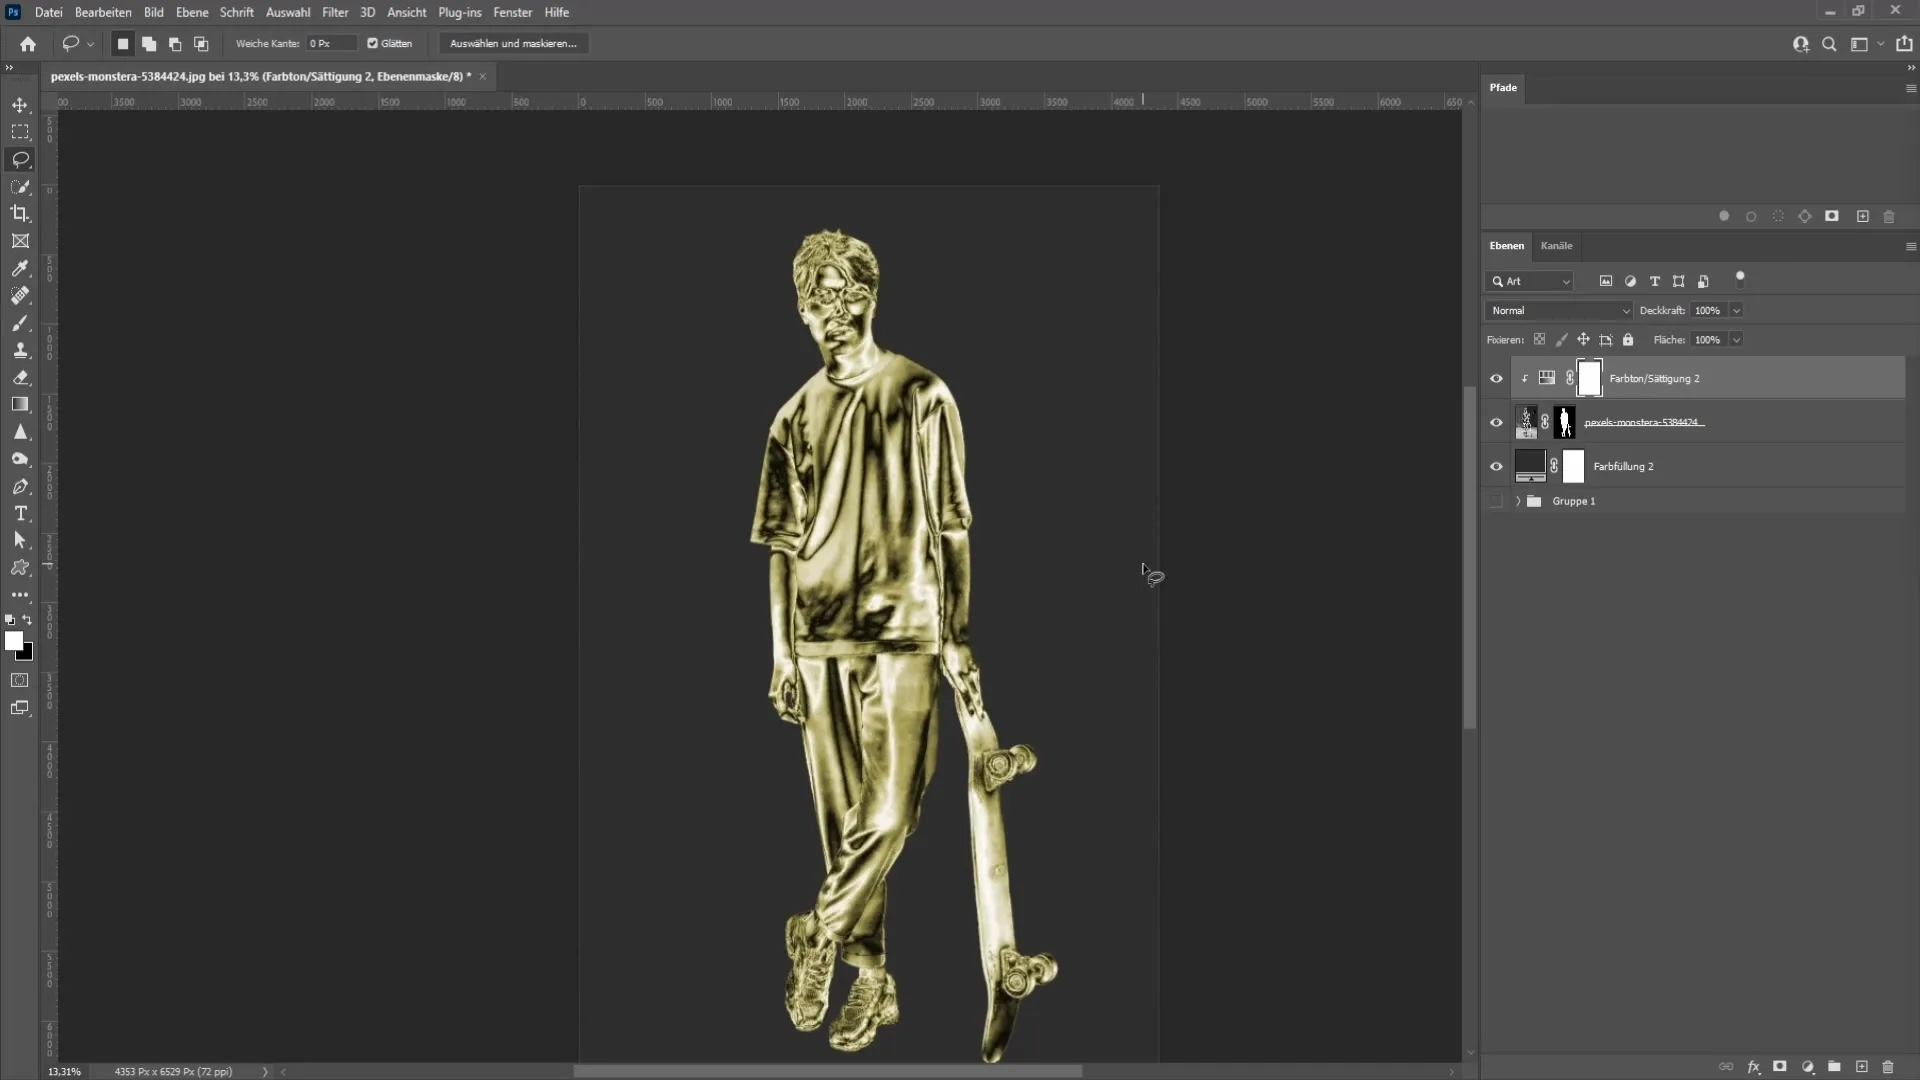
Now comes the most exciting part: adding color to the image. Go back to "Adjustments" and select "Hue/Saturation" again. Activate the "Colorize" option and choose a yellow hue by moving the slider to the right.
Finally, you can increase the saturation until the desired golden look is achieved. You should also make sure that the clipping mask is activated so that the color changes are applied only to the underlying statue.
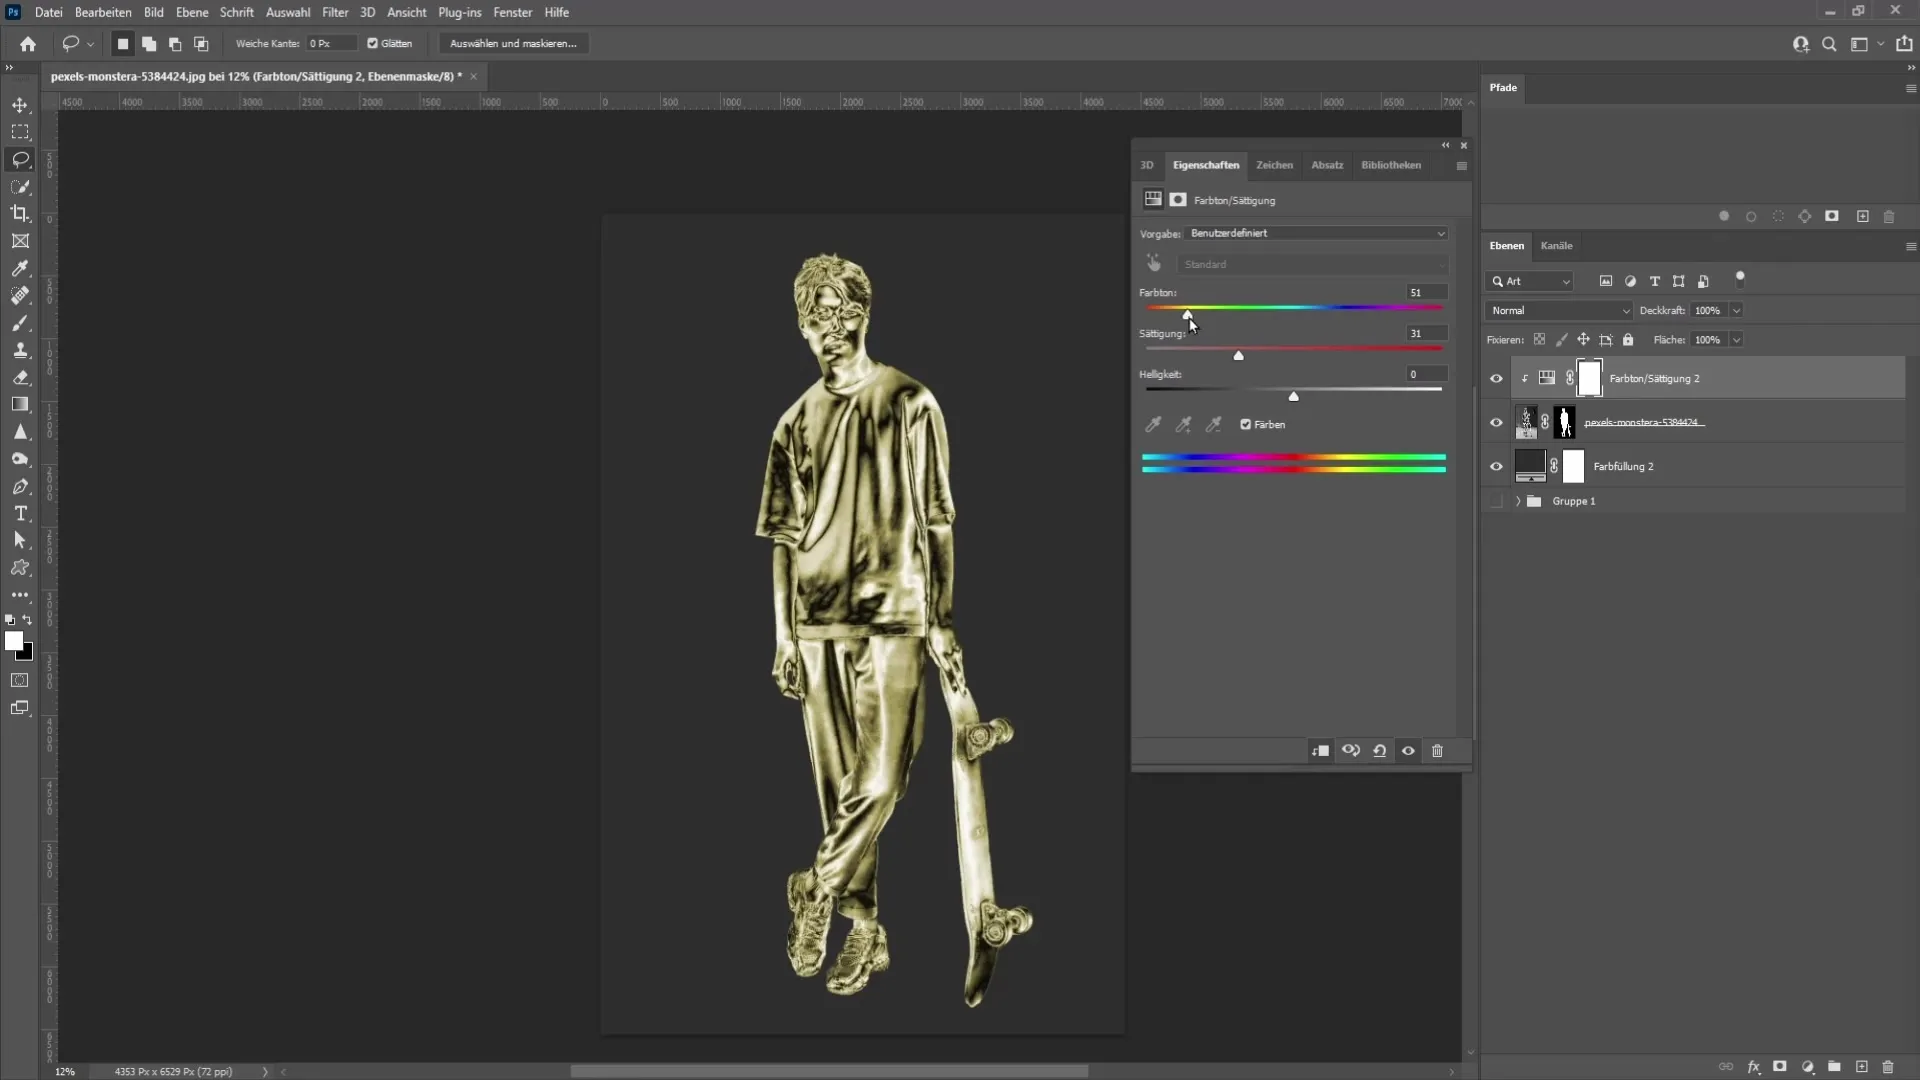
You are now ready to save your golden statue! However, keep in mind that the lighting conditions in your original image are crucial. Good lighting makes it easier to achieve a realistic result.
Summary
In this tutorial, you have learned how to create a golden statue from an image using Photoshop. You have gone through the steps from selection to coloring to achieve an impressive effect. Make sure to optimize the lighting in your image to get the best results.
Frequently Asked Questions
How long does it take to create a golden statue in Photoshop?The entire editing process can take between 30 minutes and an hour depending on practice and image editing experience.
Which version of Photoshop do I need for this technique?This technique can be easily applied with Photoshop Version CC and higher.
Can I use other colors as well?Yes, you can customize the technique and use other colors to achieve different statue effects.
How important are the lighting conditions in my image?Good lighting conditions are crucial to achieve a realistic result. Make sure shadows and highlights are clearly visible.


