Welcome to this comprehensive tutorial on the Media Page in DaVinci Resolve! If you are active in video editing and often work on large projects, you will quickly realize how important well-organized media management is. In this tutorial, you will learn step by step how to effectively use the Media Page to manage and organize your media.
Key Insights
- The Media Page is crucial for managing large projects in DaVinci Resolve.
- Here, you can efficiently import, organize, view important metadata, and easily manage your clips.
- By creating folders and using Smart Bins, you can increase visibility and work more efficiently.
Step-by-Step Guide
Accessing the Media Page
To access the Media Page, open DaVinci Resolve and click on the icon at the bottom left of the window or press the shortcut "Shift + 2". Here begins your journey into the world of media management.
Displaying Media Storage
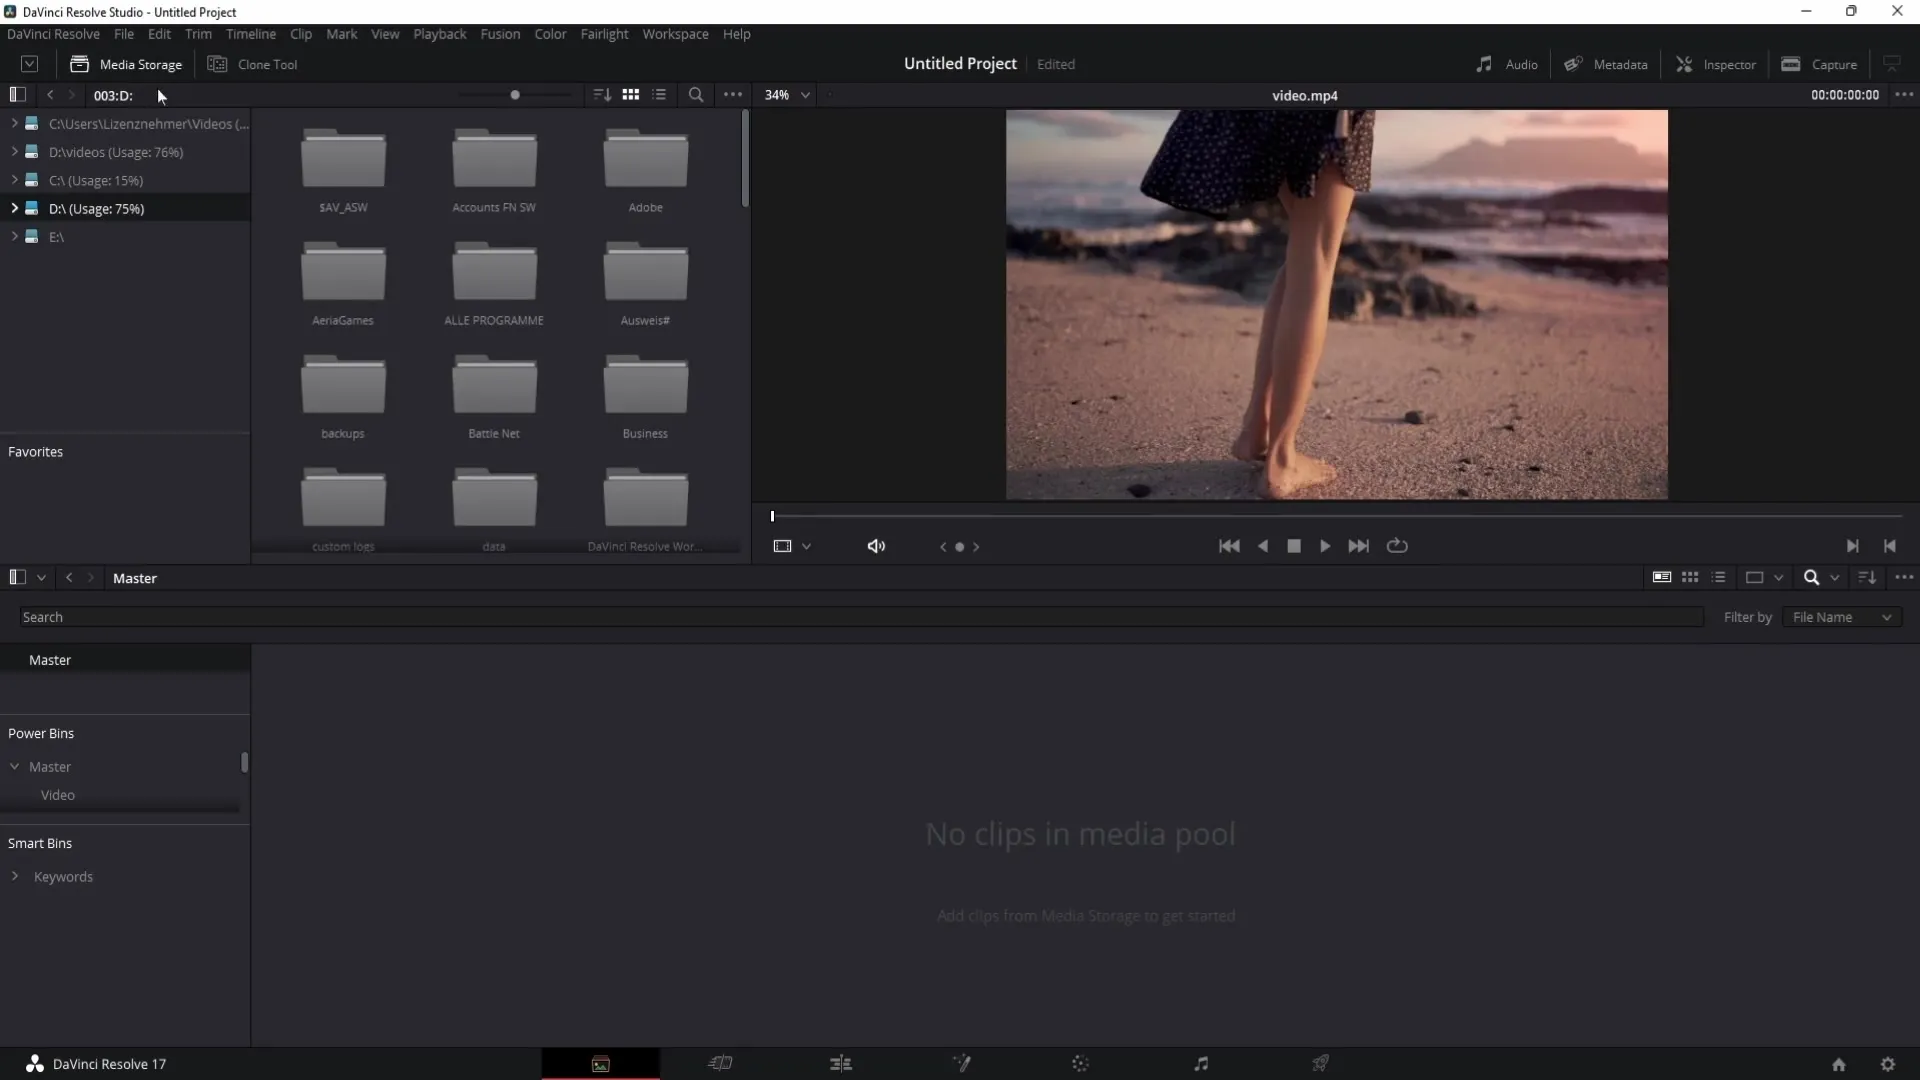
In the top left corner of the Media Page, you will find the "Media Storage" option. You can show or hide it. Here, you will find all the hard drives and folders available to you. This function helps you locate your files and quickly drag them into your Media Pool.
Using the Media Pool
The large area at the bottom of the Media Page is your Media Pool. Here, you can display and manage the media you import in an organized manner. To drag files into the Media Pool, simply navigate to the desired folder in the Media Storage and drag the files into the Media Pool.
Audio Insights
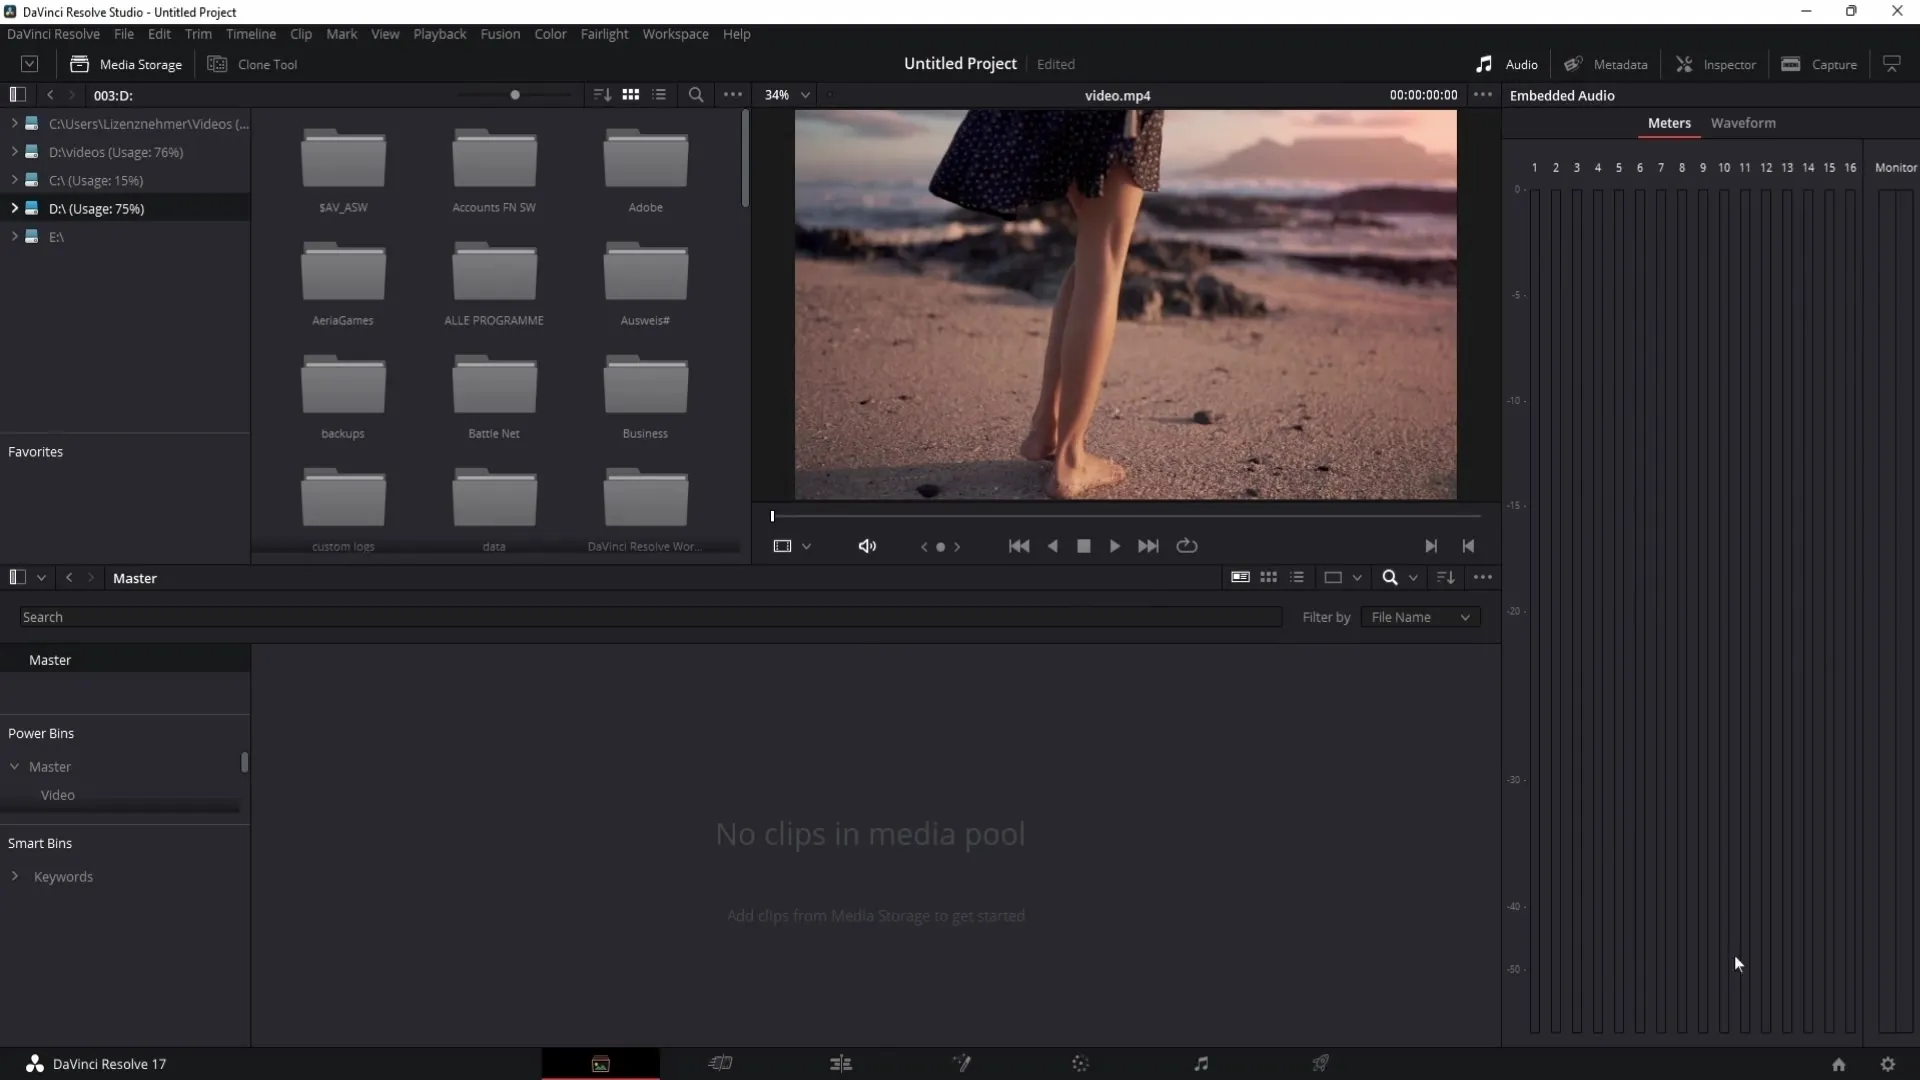
To the right of the Media Storage, you will find the Audio Tool. Clicking on it will display a meter showing whether your clip has stereo or mono audio. It indicates how many audio channels are active, allowing you to optimize your clip's audio settings.
Viewing Metadata
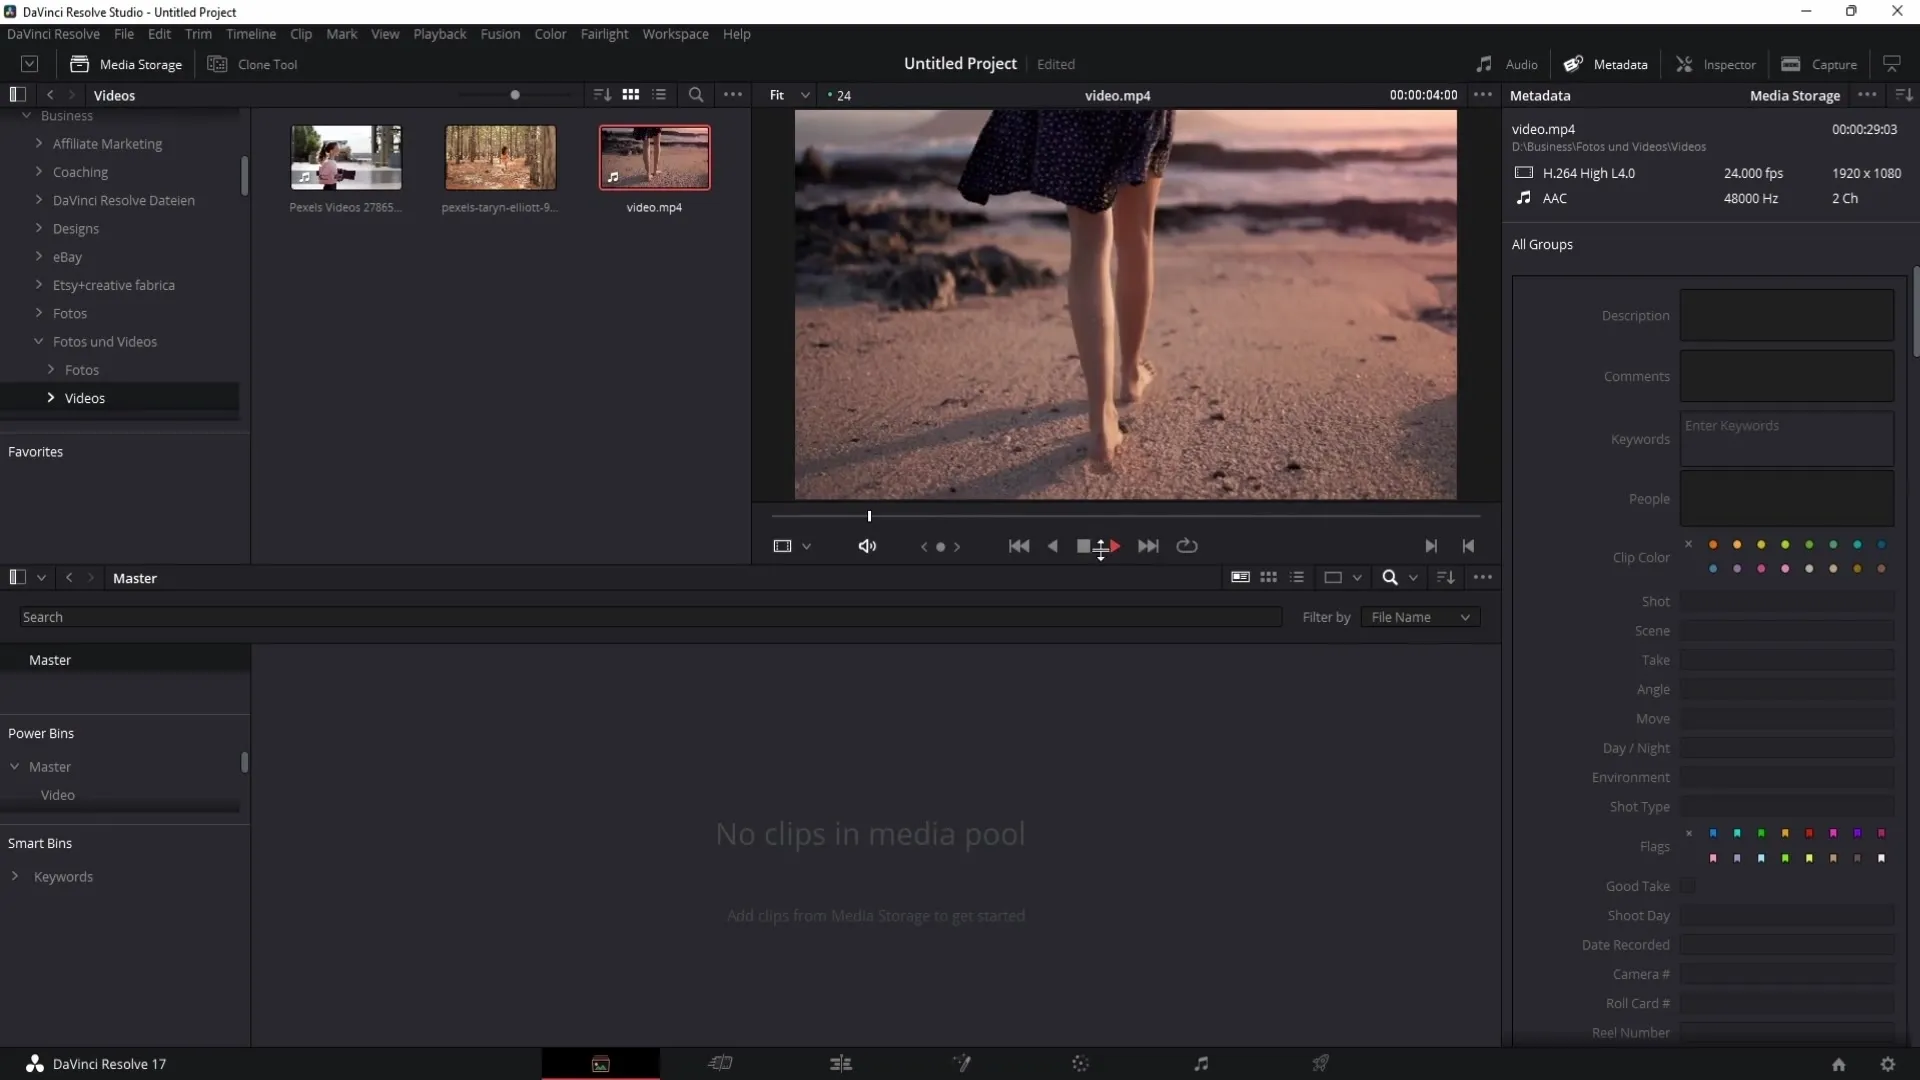
To view the metadata of a clip, select a clip from your Media Pool. Metadata provides information about the clip, such as audio format, duration, and resolution. This information is essential for efficient work, especially when managing many clips.
Previewing Clips
When selecting a clip, you can view it in the preview field on the right side. Here, you can play, pause, and control playback of the clip. Additionally, you have the option to loop the clip, which is useful if you want to view a short clip multiple times.
Setting In and Out Points
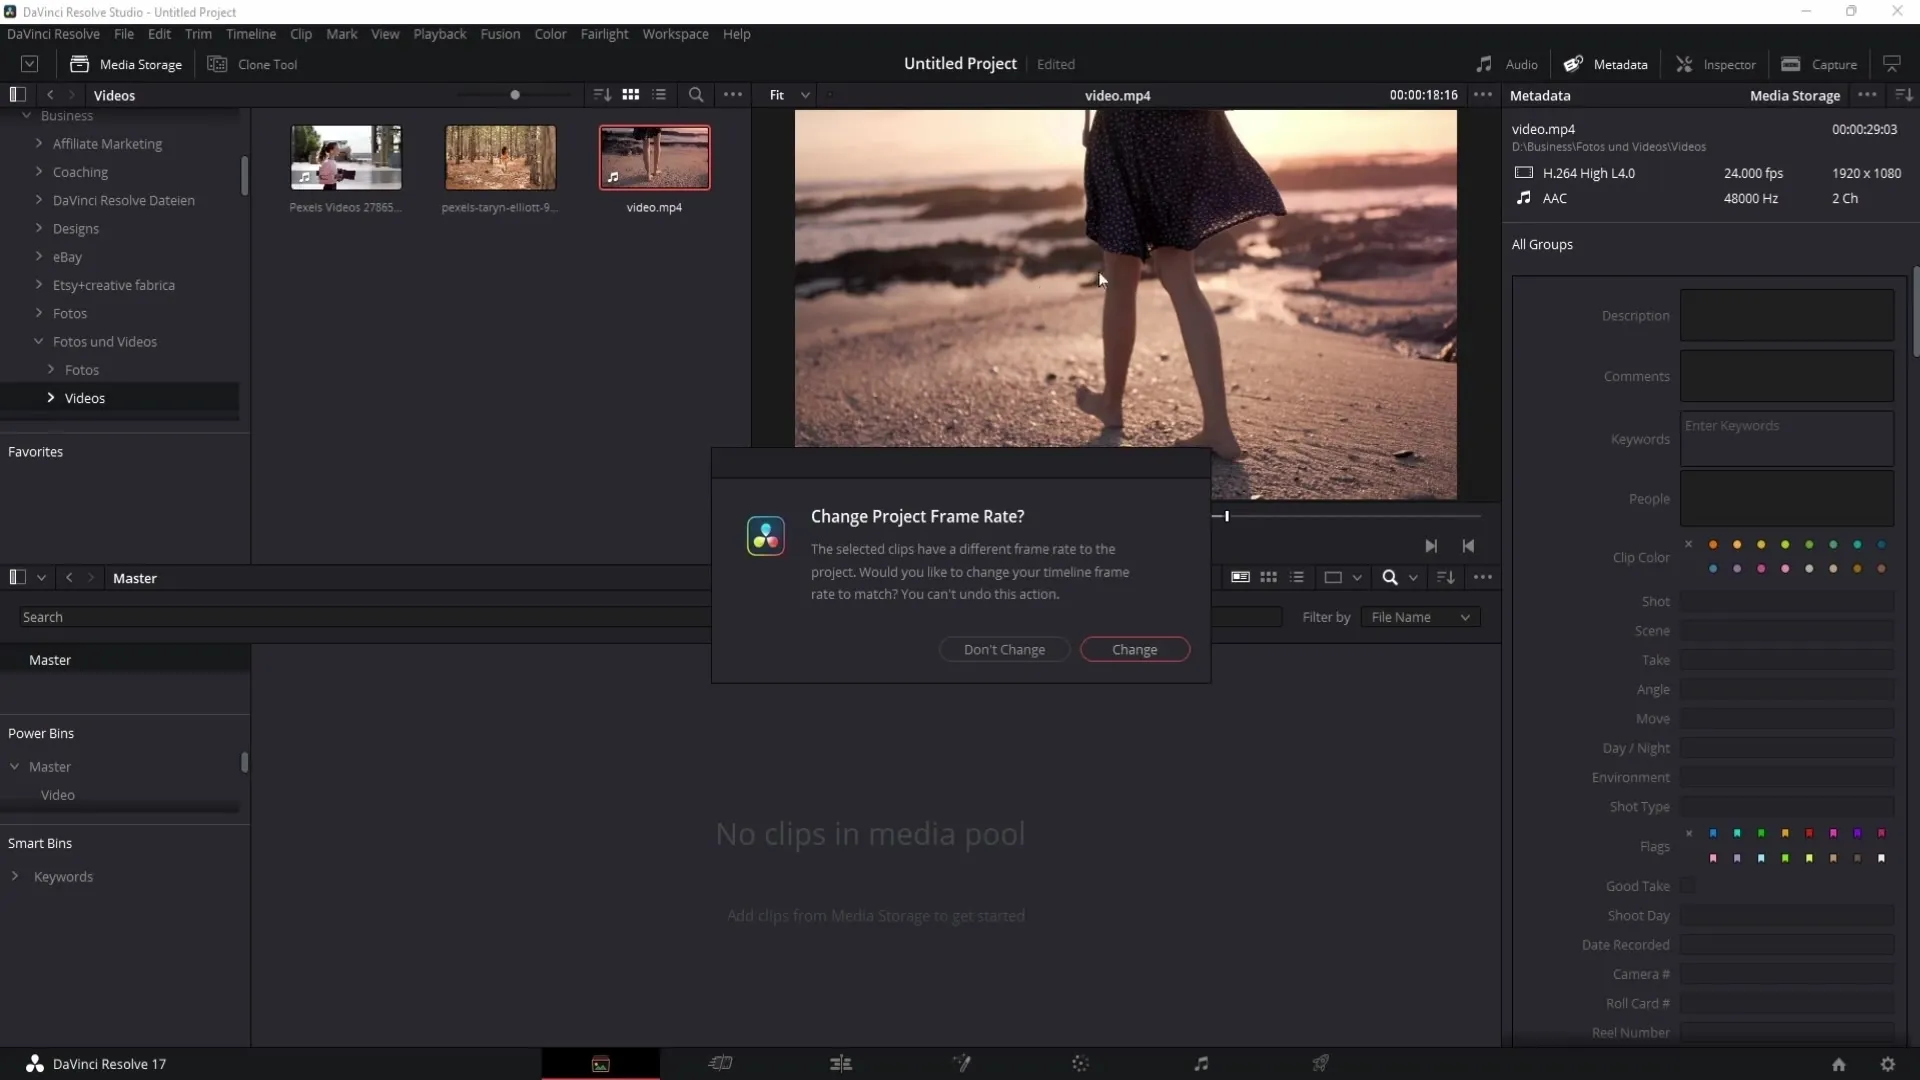
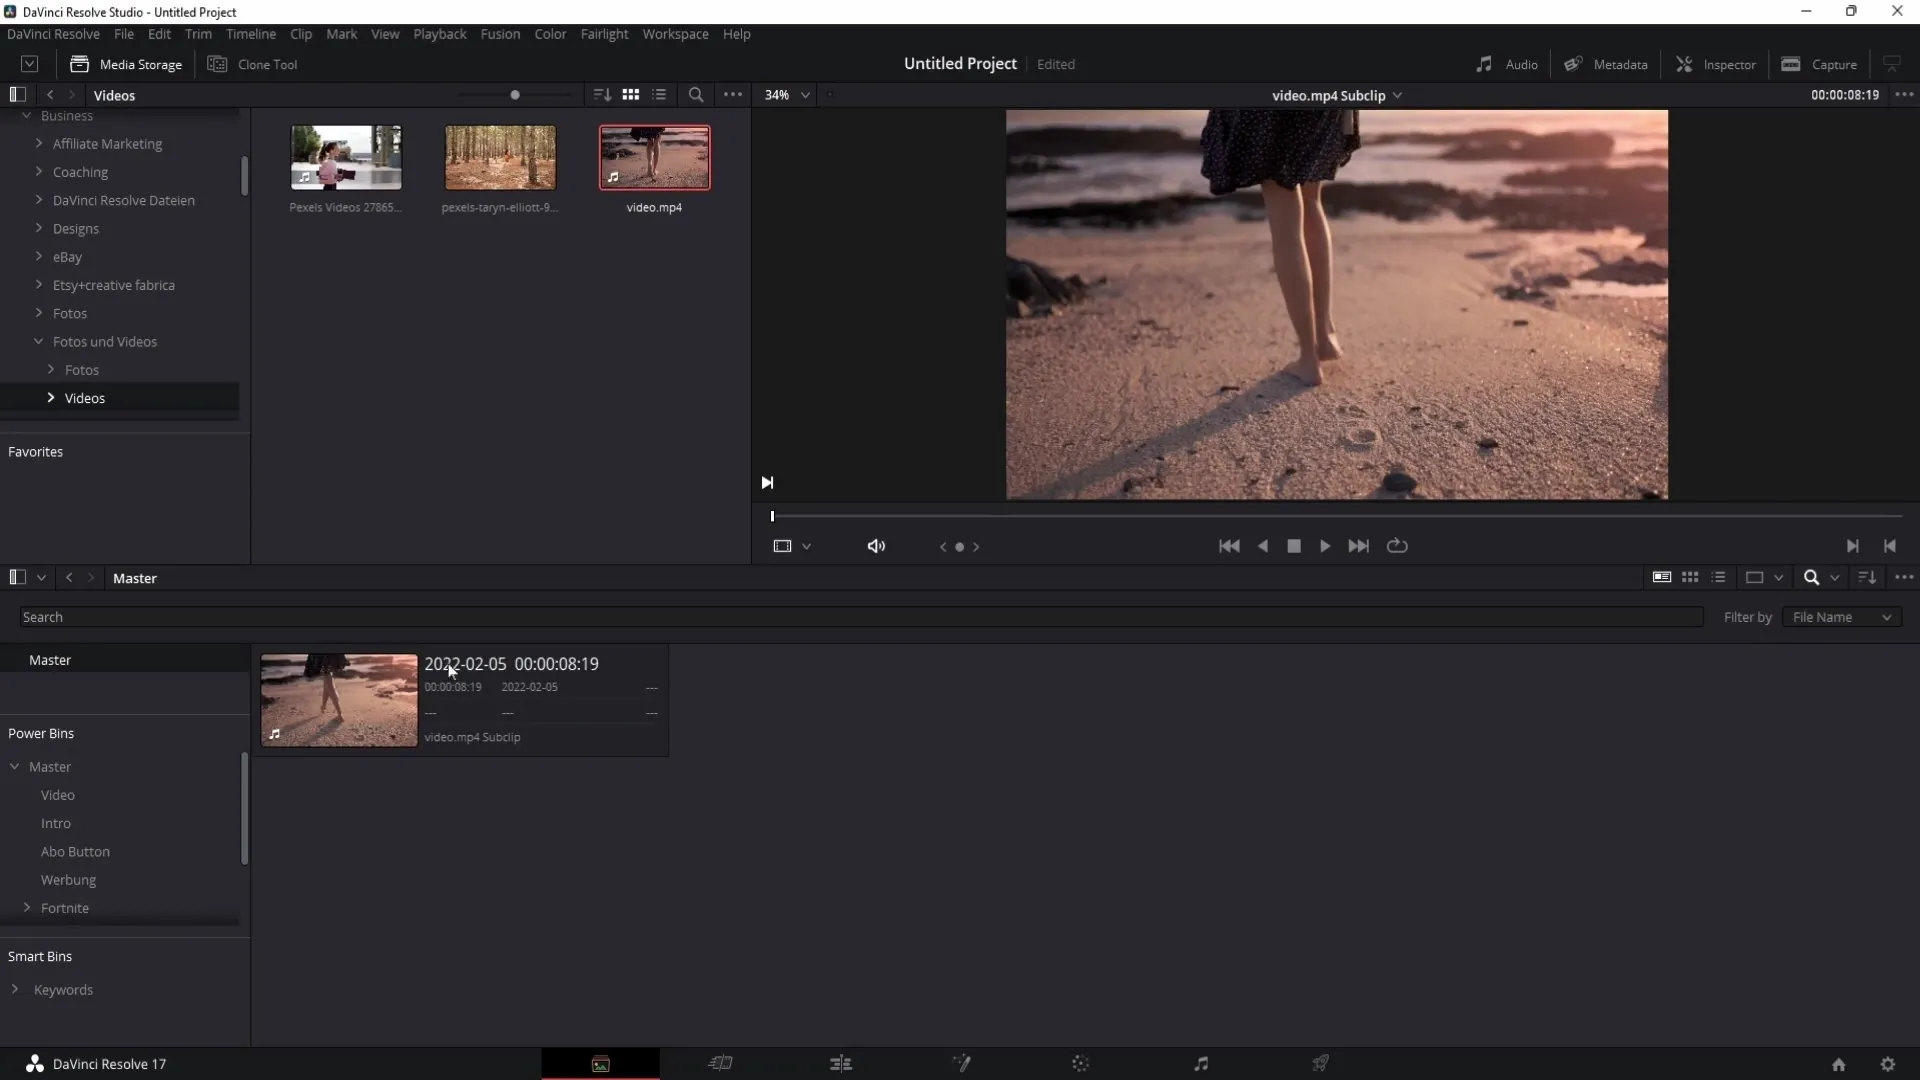
If you only wish to use a specific section of a clip, you can set In and Out points. Simply click on the arrows to set the start and end points. This helps you drag only the required clip portion into the Media Pool.
Copying Clips
After setting In and Out points, you can drag this clip into your Media Pool and give it a name. Make sure not to adjust the frame rate if it is already correctly set.
Using Power Bins and Smart Bins
You can store long-term reusable clips, such as intros or frequently used shots, with Power Bins. These are always available and do not need to be imported. Smart Bins, on the other hand, assist you in organizing by filtering specific clips according to predefined criteria.
Setting Favorites
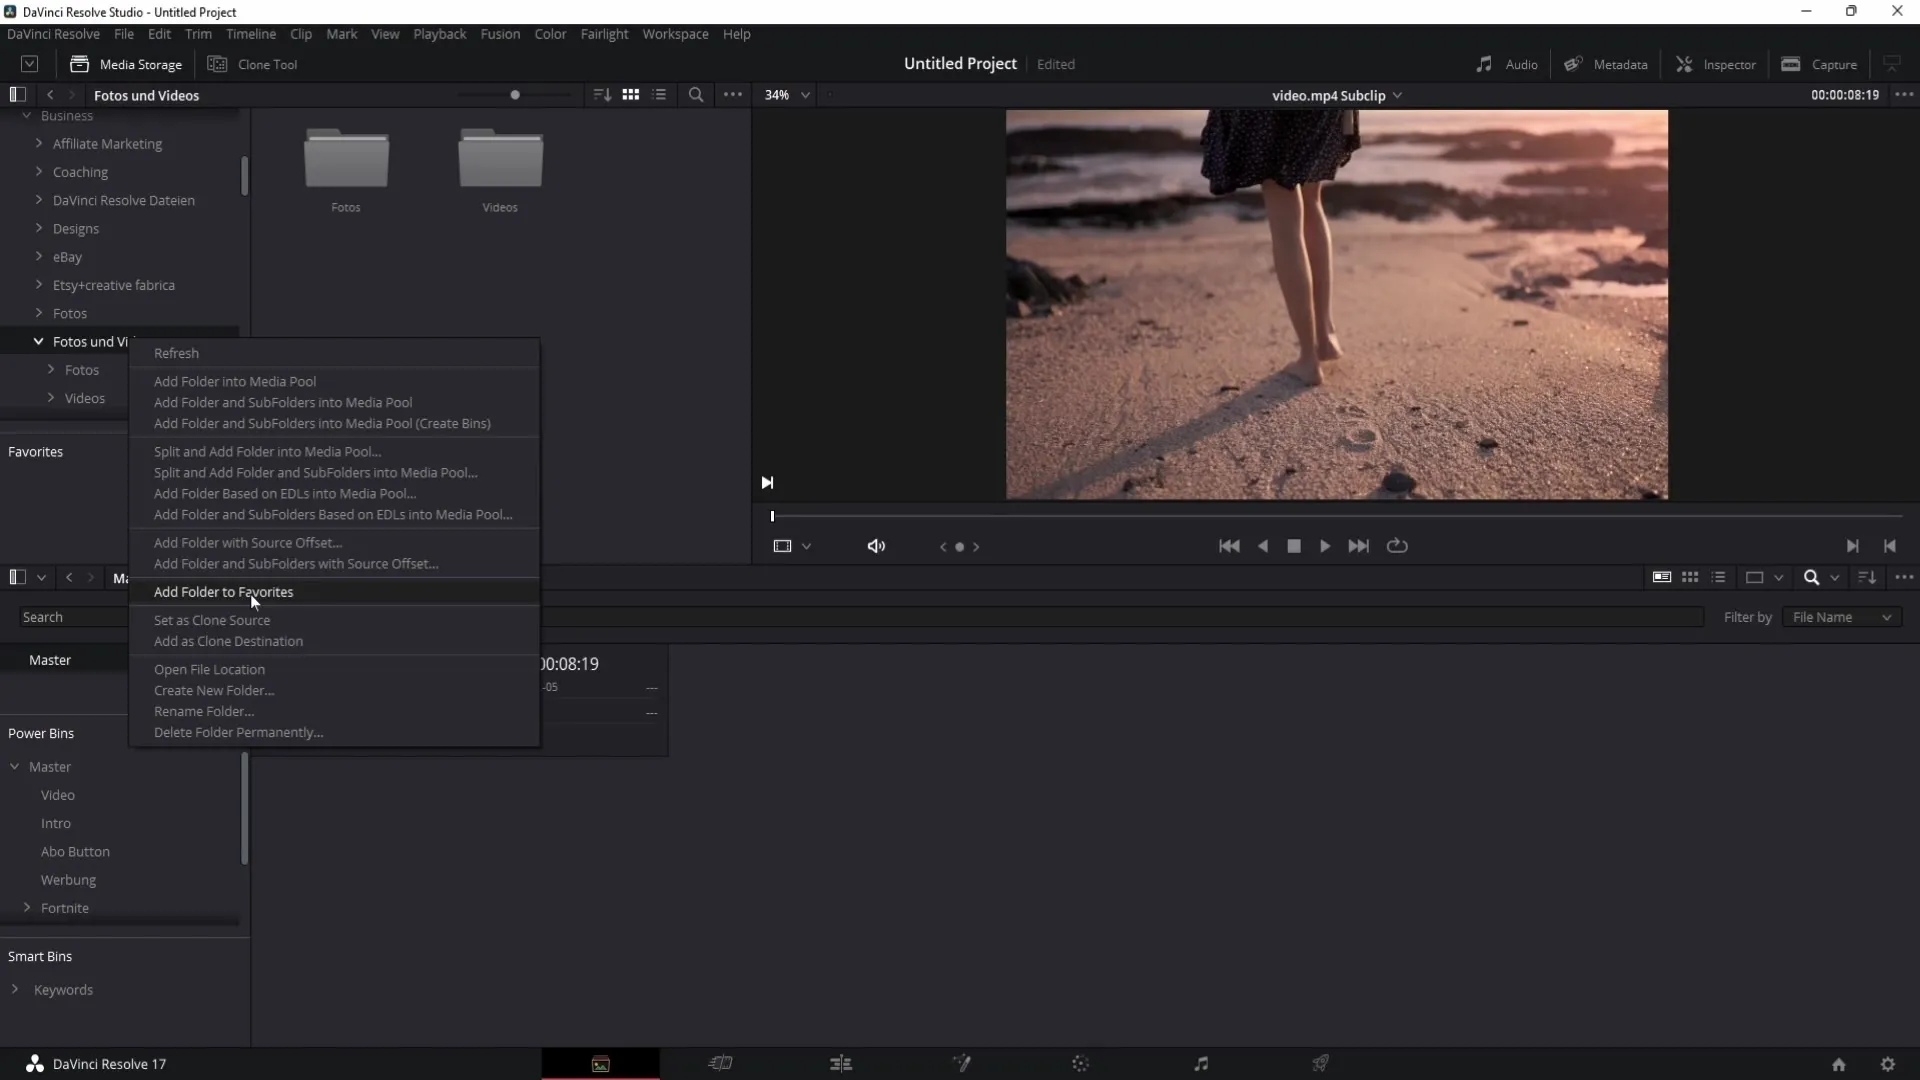
If you need frequent access to a folder, you can save it as a favorite. A right click on the folder and selecting "Add Folder to Favorites" makes it easier for you to quickly access specific media.
Importing and Organizing Clips
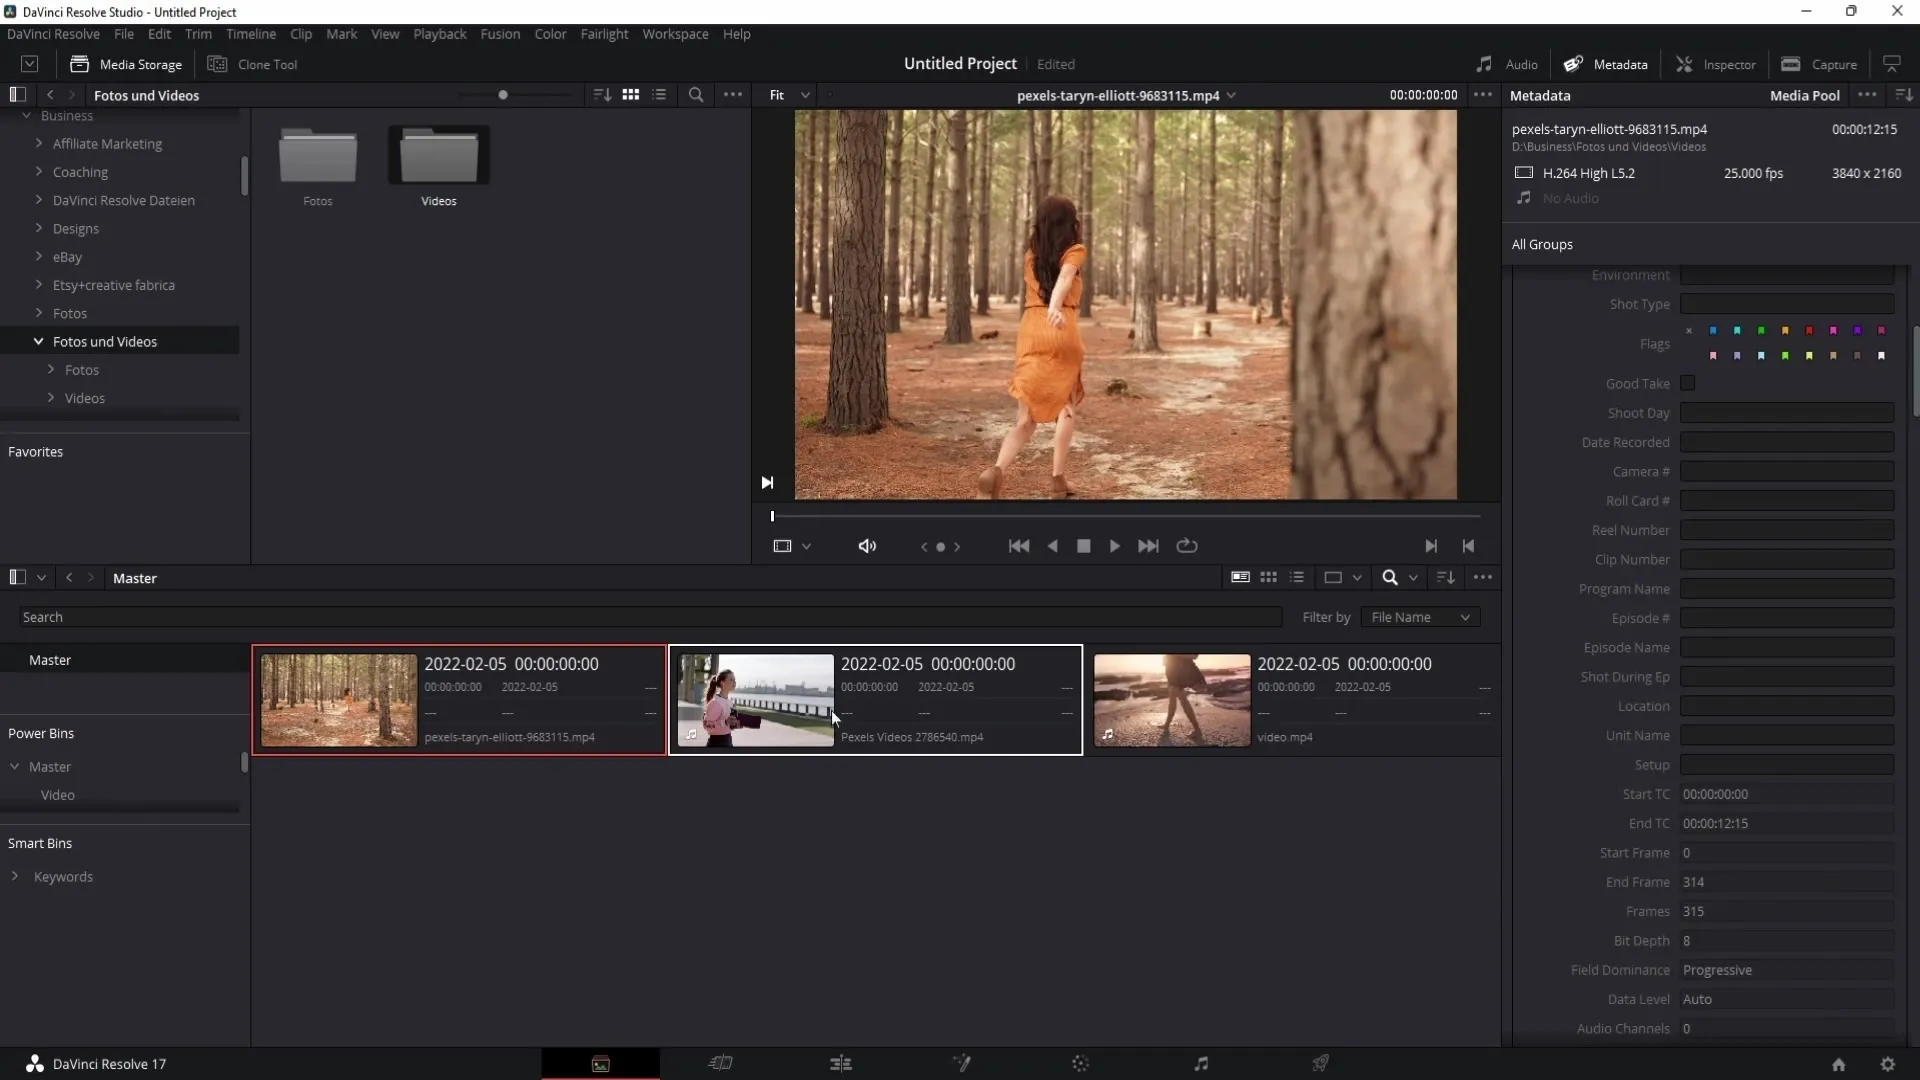
To import clips into the media pool, you can either do so via drag-and-drop or using the standard import commands. Using the control key, you can select multiple clips simultaneously, making importing easier for larger projects.
Efficiently Utilizing Metadata
To further organize your clips, you can add metadata such as keywords. These help you filter clips into smart bins, greatly simplifying the search and use of content.
Creating Smart Bins
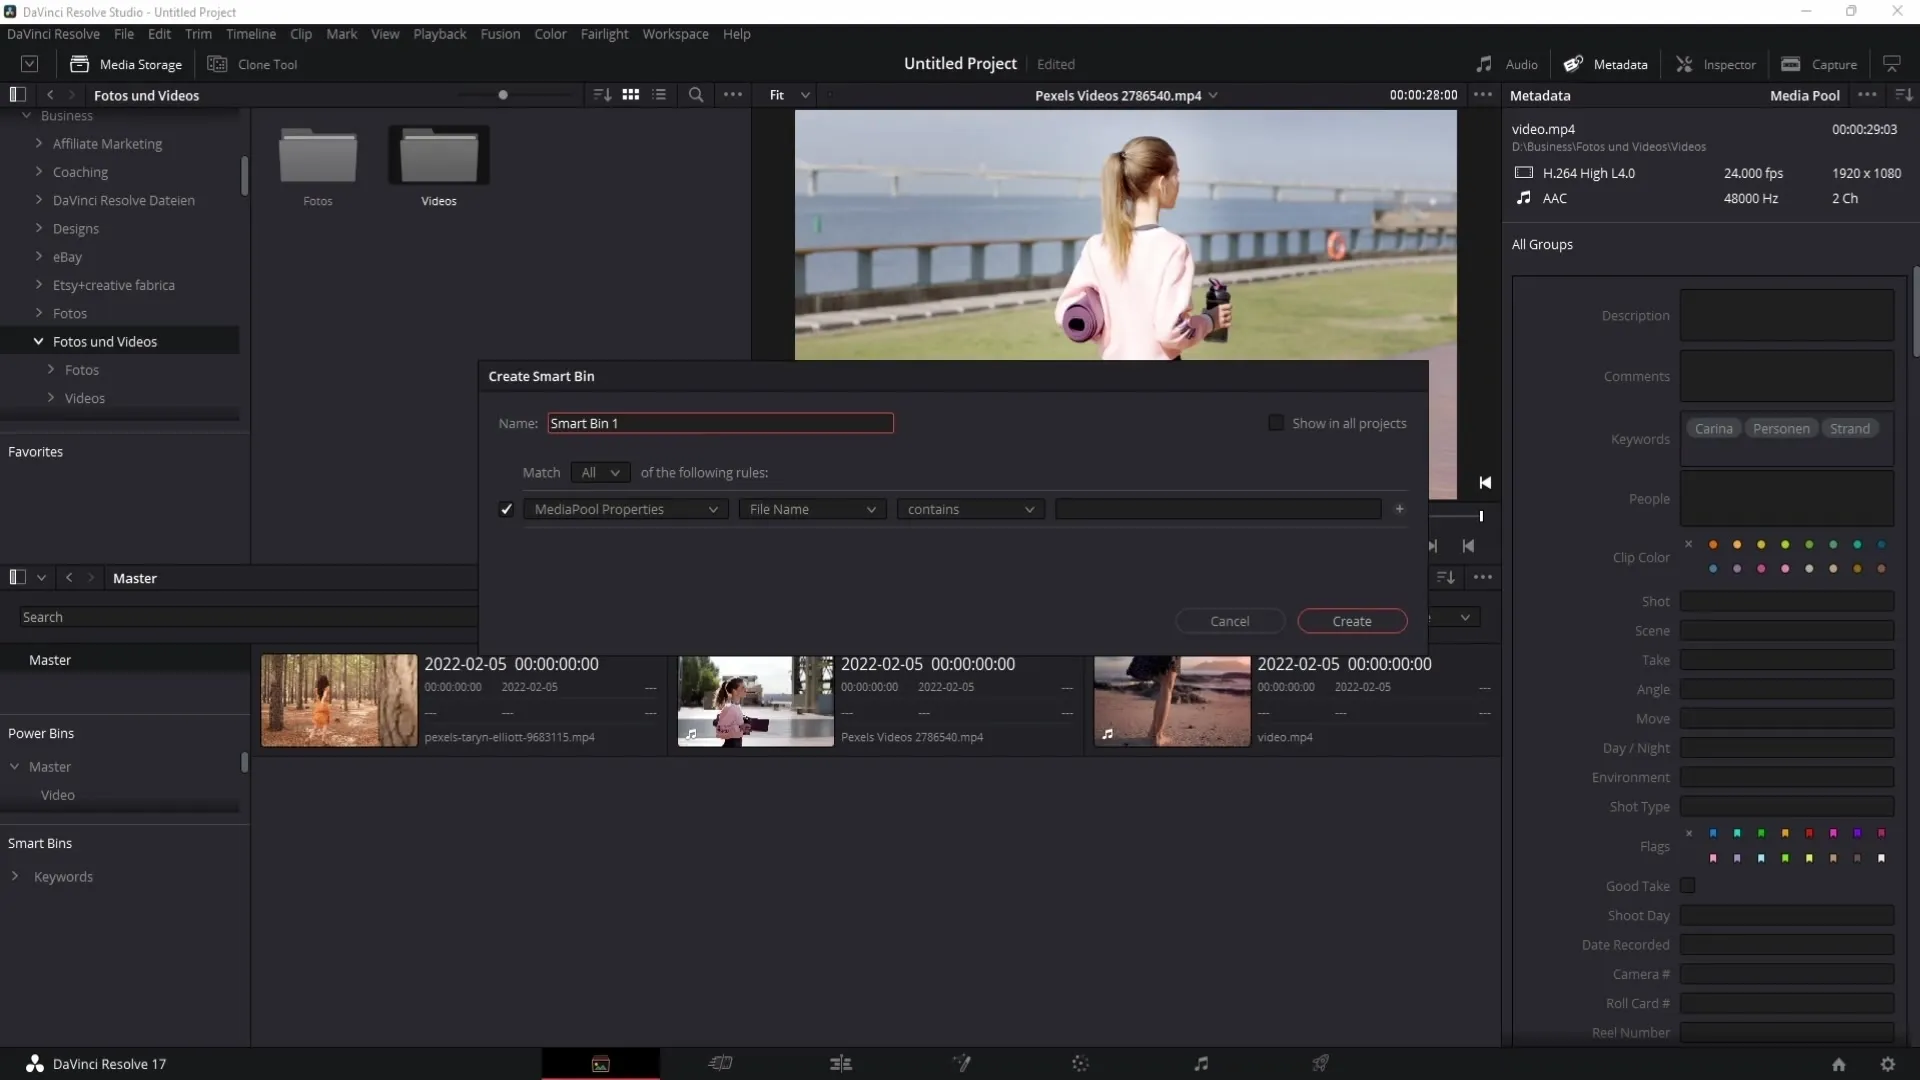
To create a smart bin, right-click in the smart bins area and select "Add Smart Bin." You can then define the criteria by which the clips should be filtered, such as by keywords. This helps you quickly access the clips you need.
Summary
The Media Page in DaVinci Resolve offers robust features for effective media management. From selection and import to organizing your clips with power bins and smart bins, it significantly facilitates work on large projects. Use the tips and tricks from this tutorial to efficiently manage your media data and better organize your projects.
FAQ
What is the Media Page in DaVinci Resolve?The Media Page is the area in DaVinci Resolve where users can import, organize, and manage media.
How can I access the Media Page?You can access the Media Page by clicking the icon in the bottom left of the window or pressing "Shift + 2."
What are Smart Bins?Smart Bins are special folders that automatically filter clips based on defined criteria.
What are Power Bins?Power Bins are permanent storage locations for frequently used clips, so you don't have to import them every time.
How can I add metadata to my clips?Select a clip and add information like keywords and descriptions in the metadata fields.


