In this tutorial, you will learn how to effectively use Power Bins and Smart Bins in DaVinci Resolve. These two features are extremely useful for organizing your projects and increasing efficiency in your workflow. Whether you want to collect frequently used clips, audio files, or specific video technical properties, Power Bins and Smart Bins offer solutions to help you save time and better manage your projects.
Key Takeaways
- Power Bins allow you to save and organize frequently used clips for quick reuse.
- Smart Bins help to automatically filter files based on specific criteria like resolution or frame rate.
- Properly organizing your media in these bins can significantly streamline the entire workflow in DaVinci Resolve.
Step-by-Step Guide
Activate and Use Power Bins
To activate Power Bins in DaVinci Resolve, you must ensure that the Media Pool is selected at the top of the screen. If this is the case, you will find the necessary options in the menu.
Go to "View" and scroll all the way down. Here you should see the options "Show Smart Bins" and "Show Power Bins." Check both to open the corresponding windows in your Media Pool.
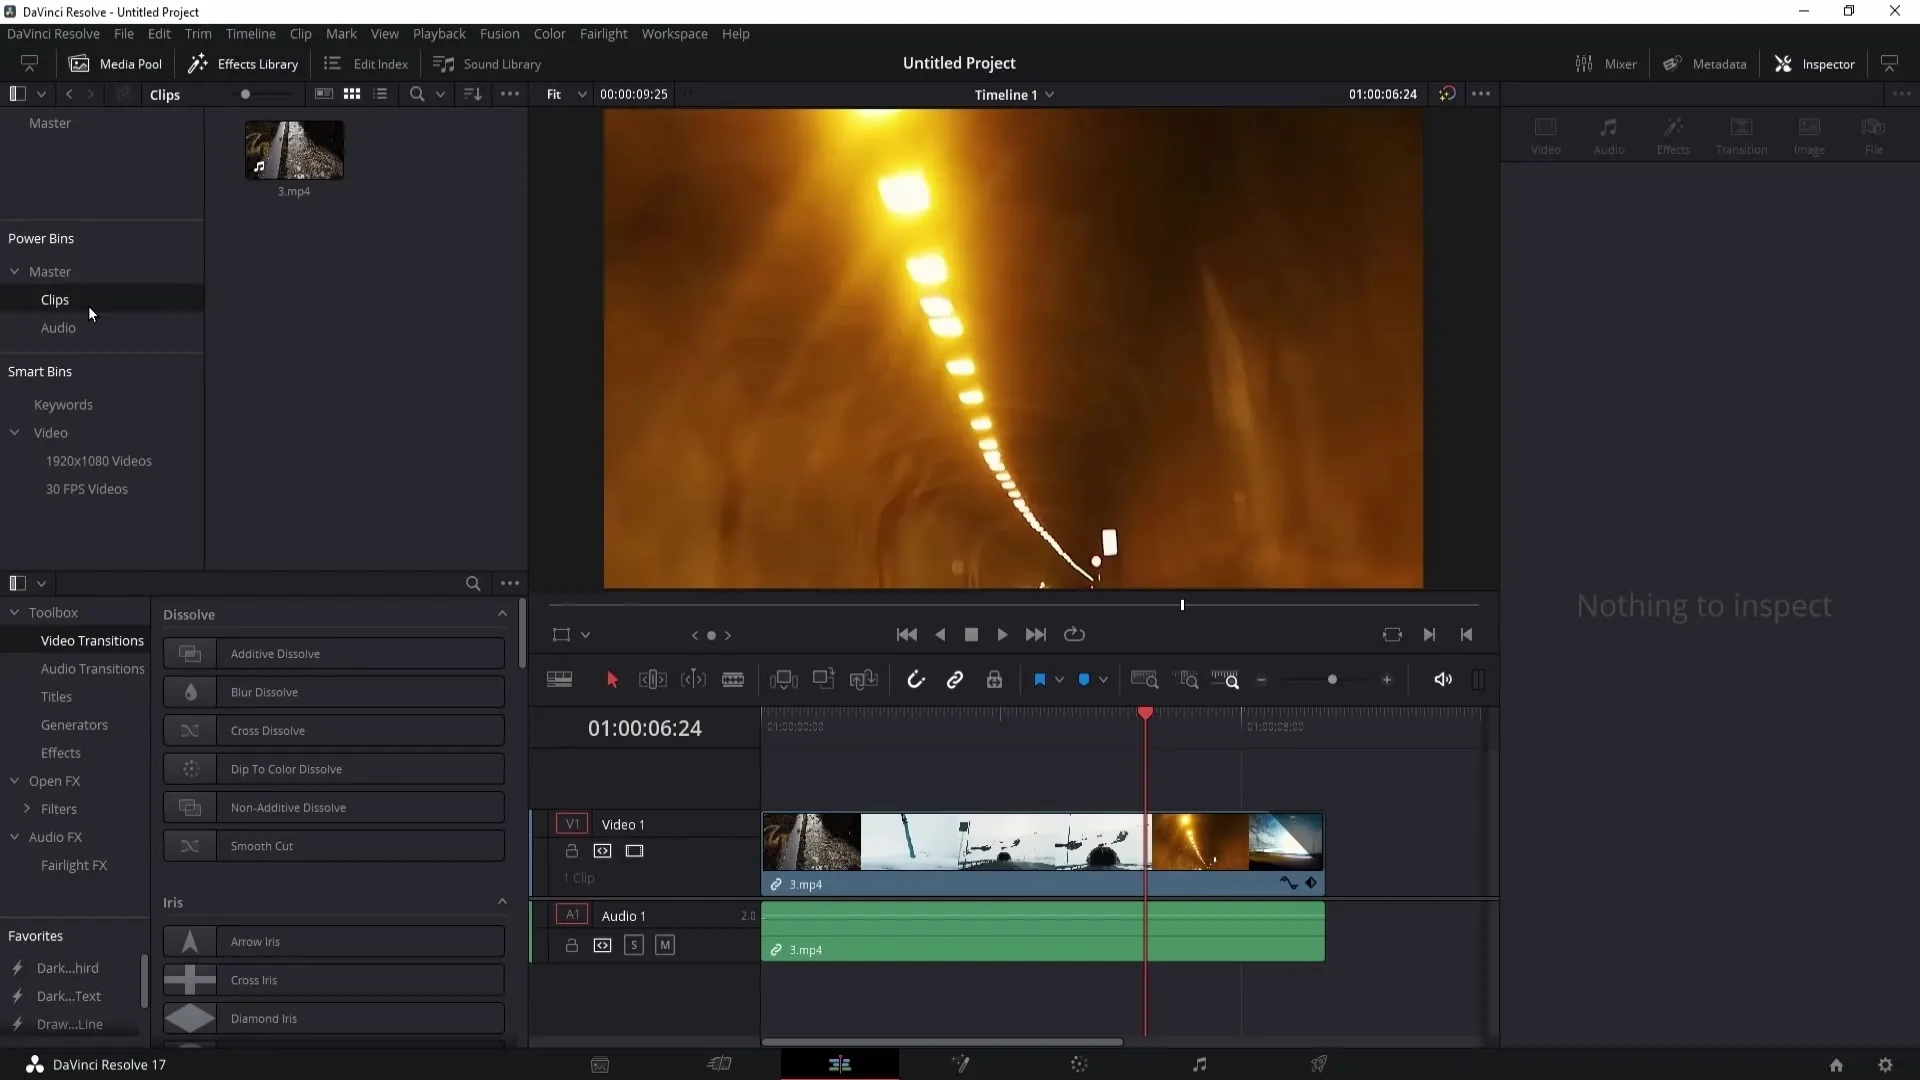
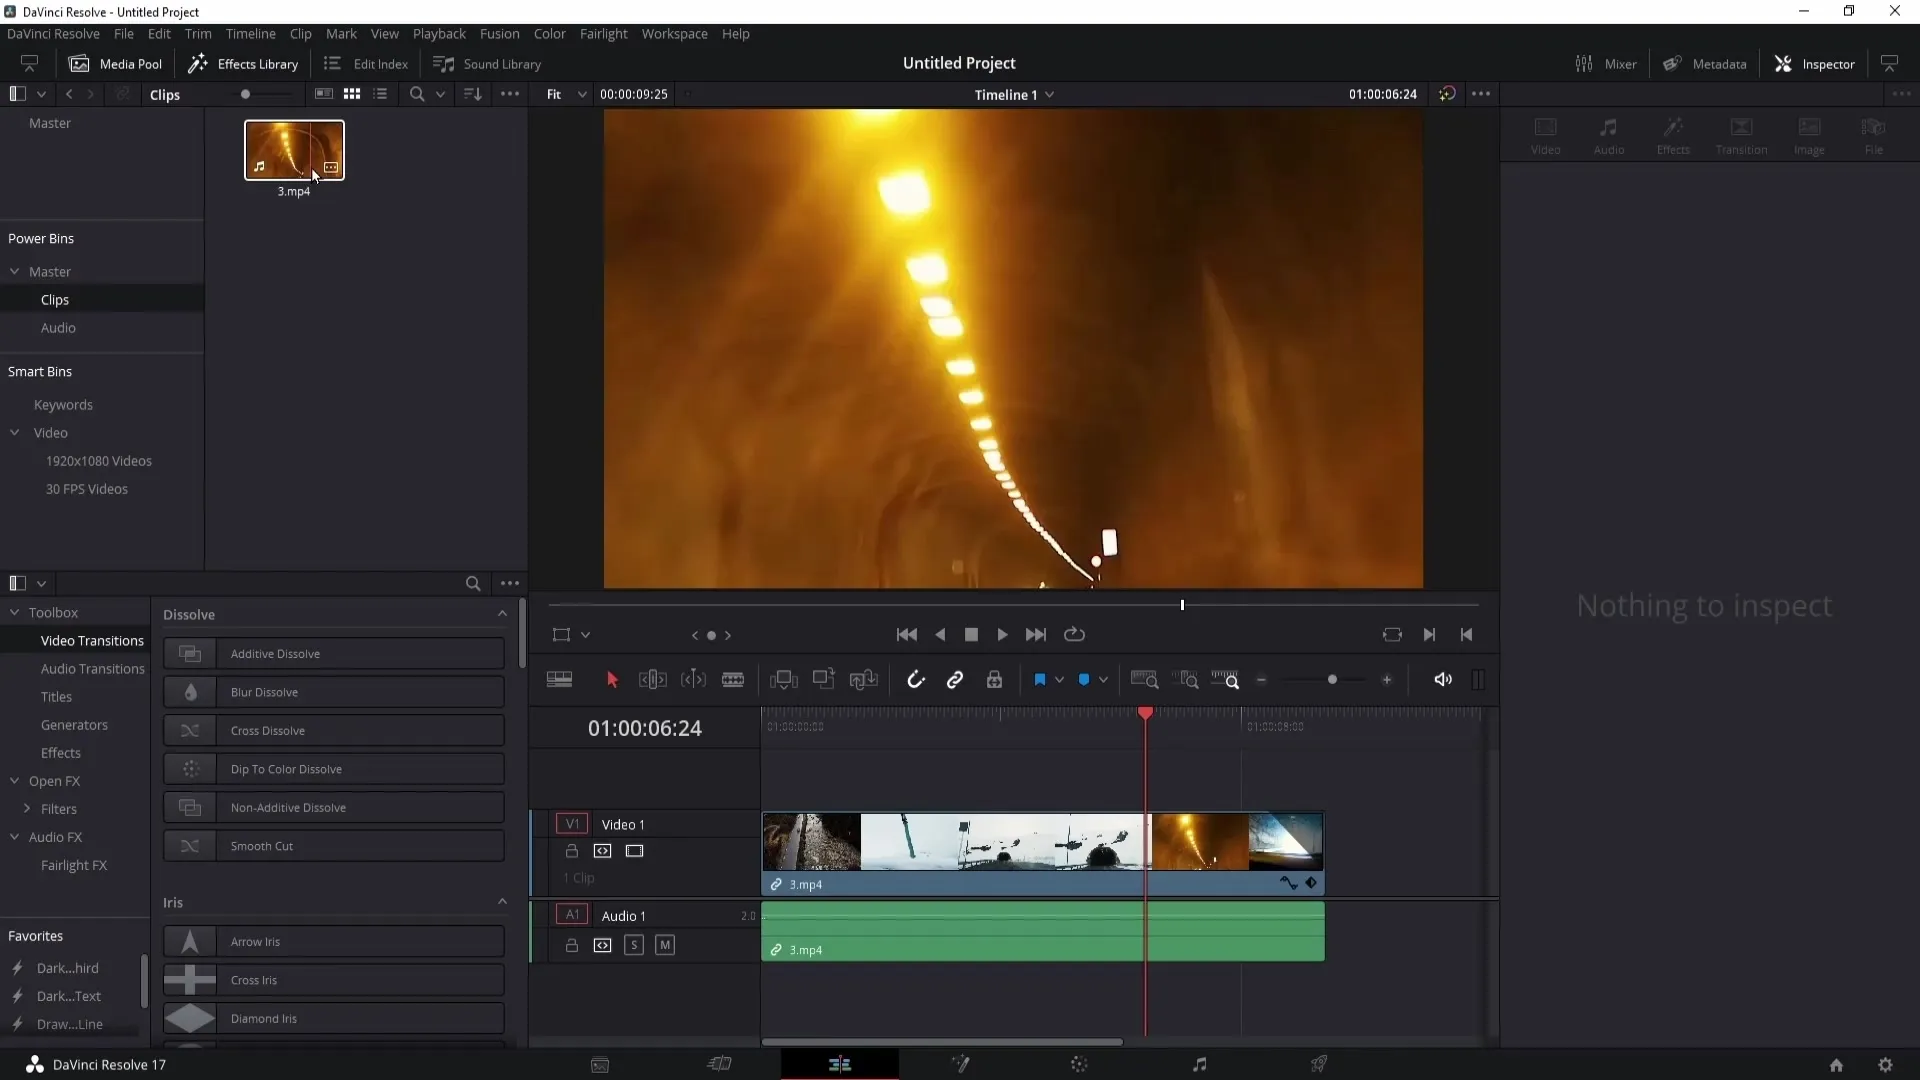
Now after activating, you should see both Power Bins and Smart Bins on the left side of your Media Pool. Let's start with Power Bins.
Power Bins are ideal for things you often need, whether it's an intro clip, an end card, or special animations like text effects. You can simply drag the clips into the Power Bins to make them available for future projects.
To do this, go to your Media Pool and navigate to the Master folder. Simply drag and drop a video here and edit it to your liking – you can add transitions and effects.
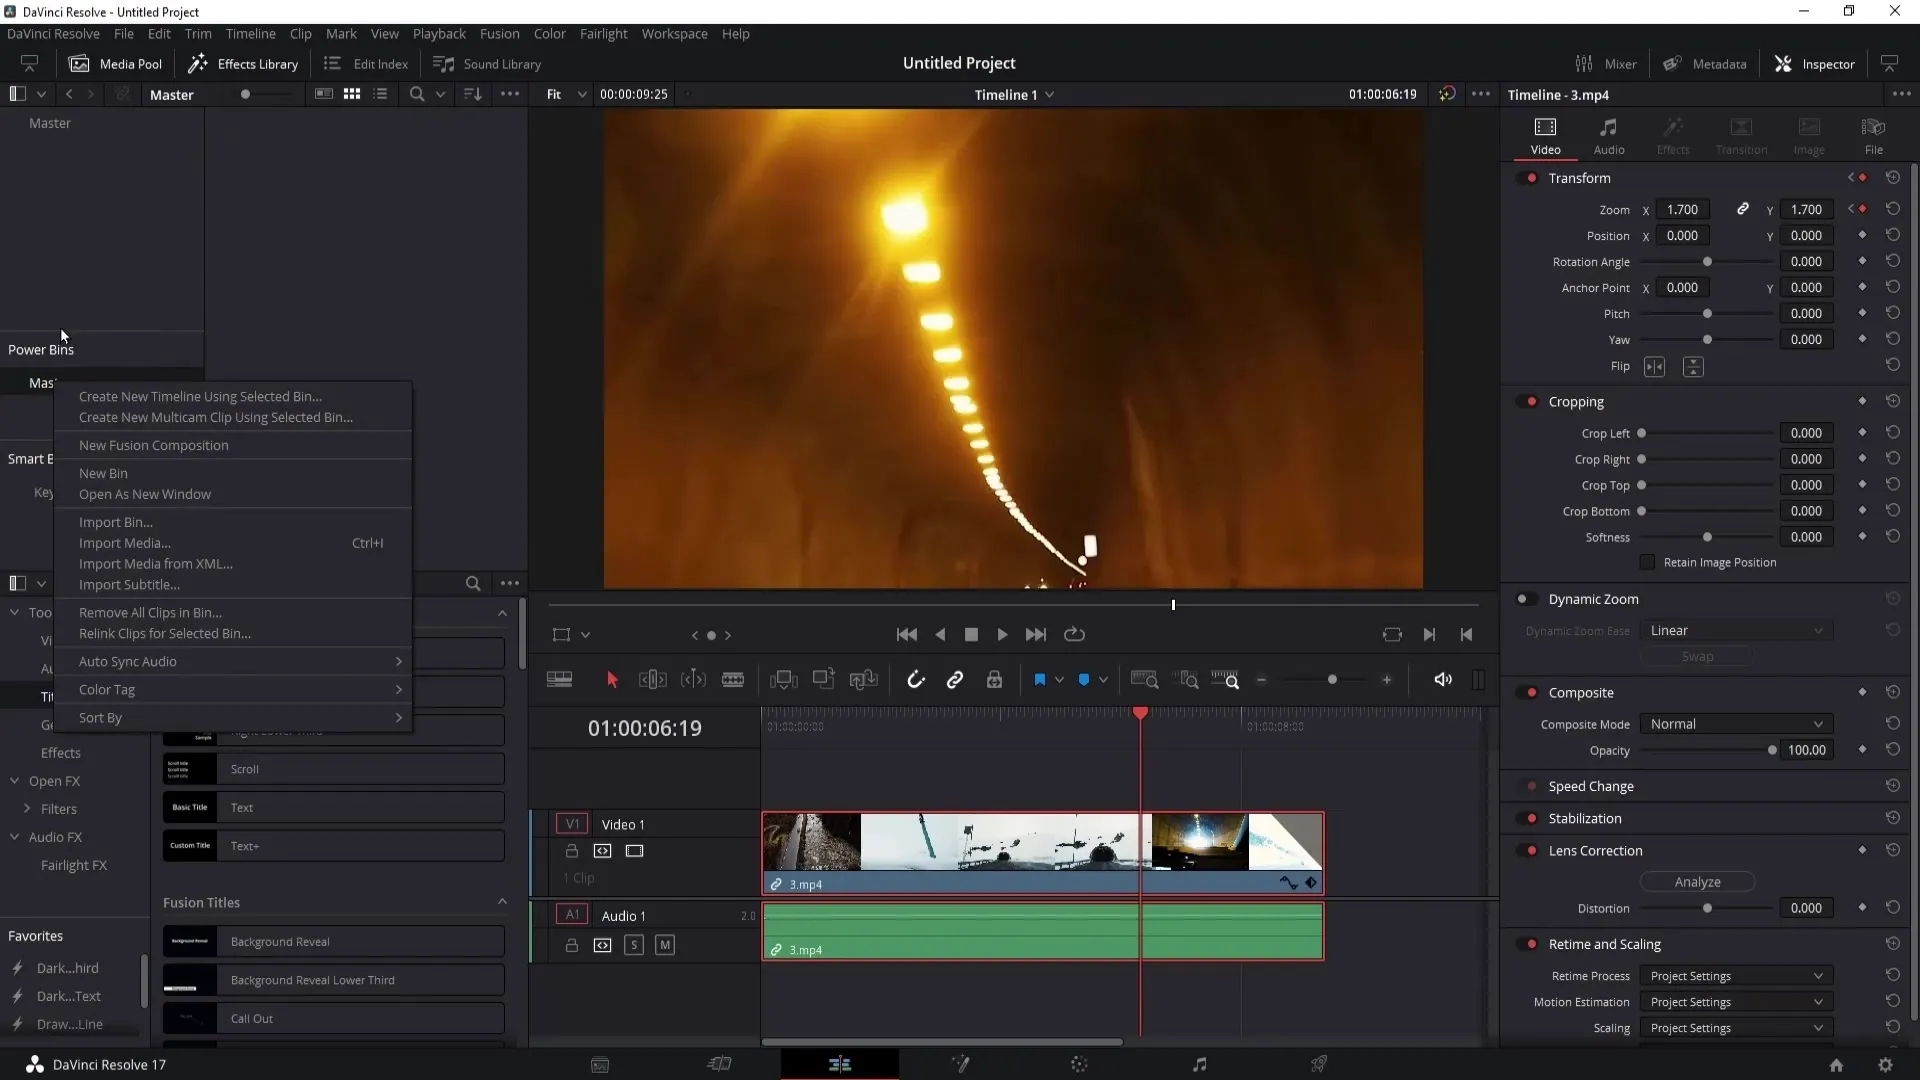
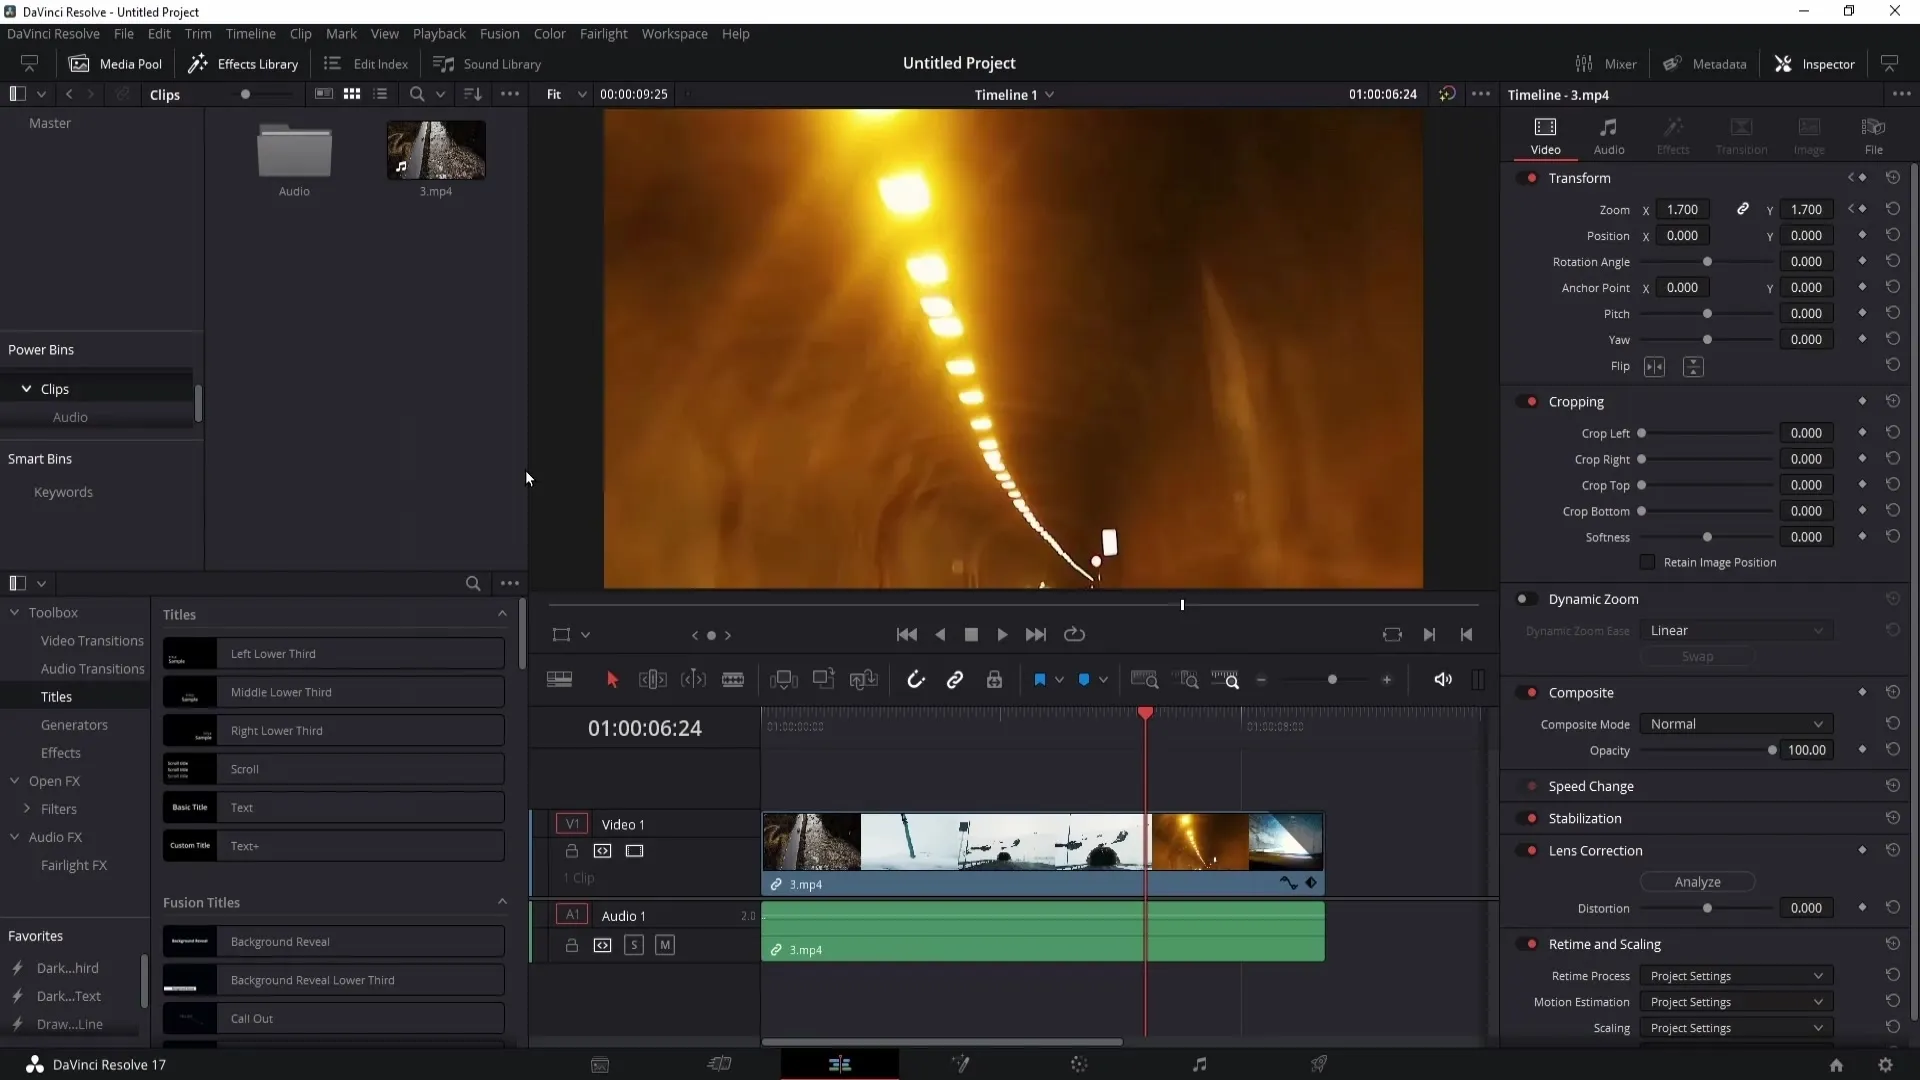
After editing, simply drag your clip with the left mouse button held down into the Power Bin. To create a new folder within the Power Bins, right-click in the Power Bin and choose "New Bin." Assign a name, for example, "Clips," to save your frequently used clips there.
If you delete a clip from the timeline, you can always drag it back from the Power Bin. This saves you a lot of time, especially if you frequently need the same elements in various projects.
Another useful function in Power Bins is that you can rename or remove folders at any time. Right-clicking on a Bin gives you the option to "Rename Bin" or "Remove Bin."
You can also easily create new folders that contain audio files or other categories. Think about what you frequently use in your projects and create the corresponding folders.
Create and Manage Smart Bins
Now let's talk about Smart Bins. These allow you to filter and automatically collect your files based on specific criteria.
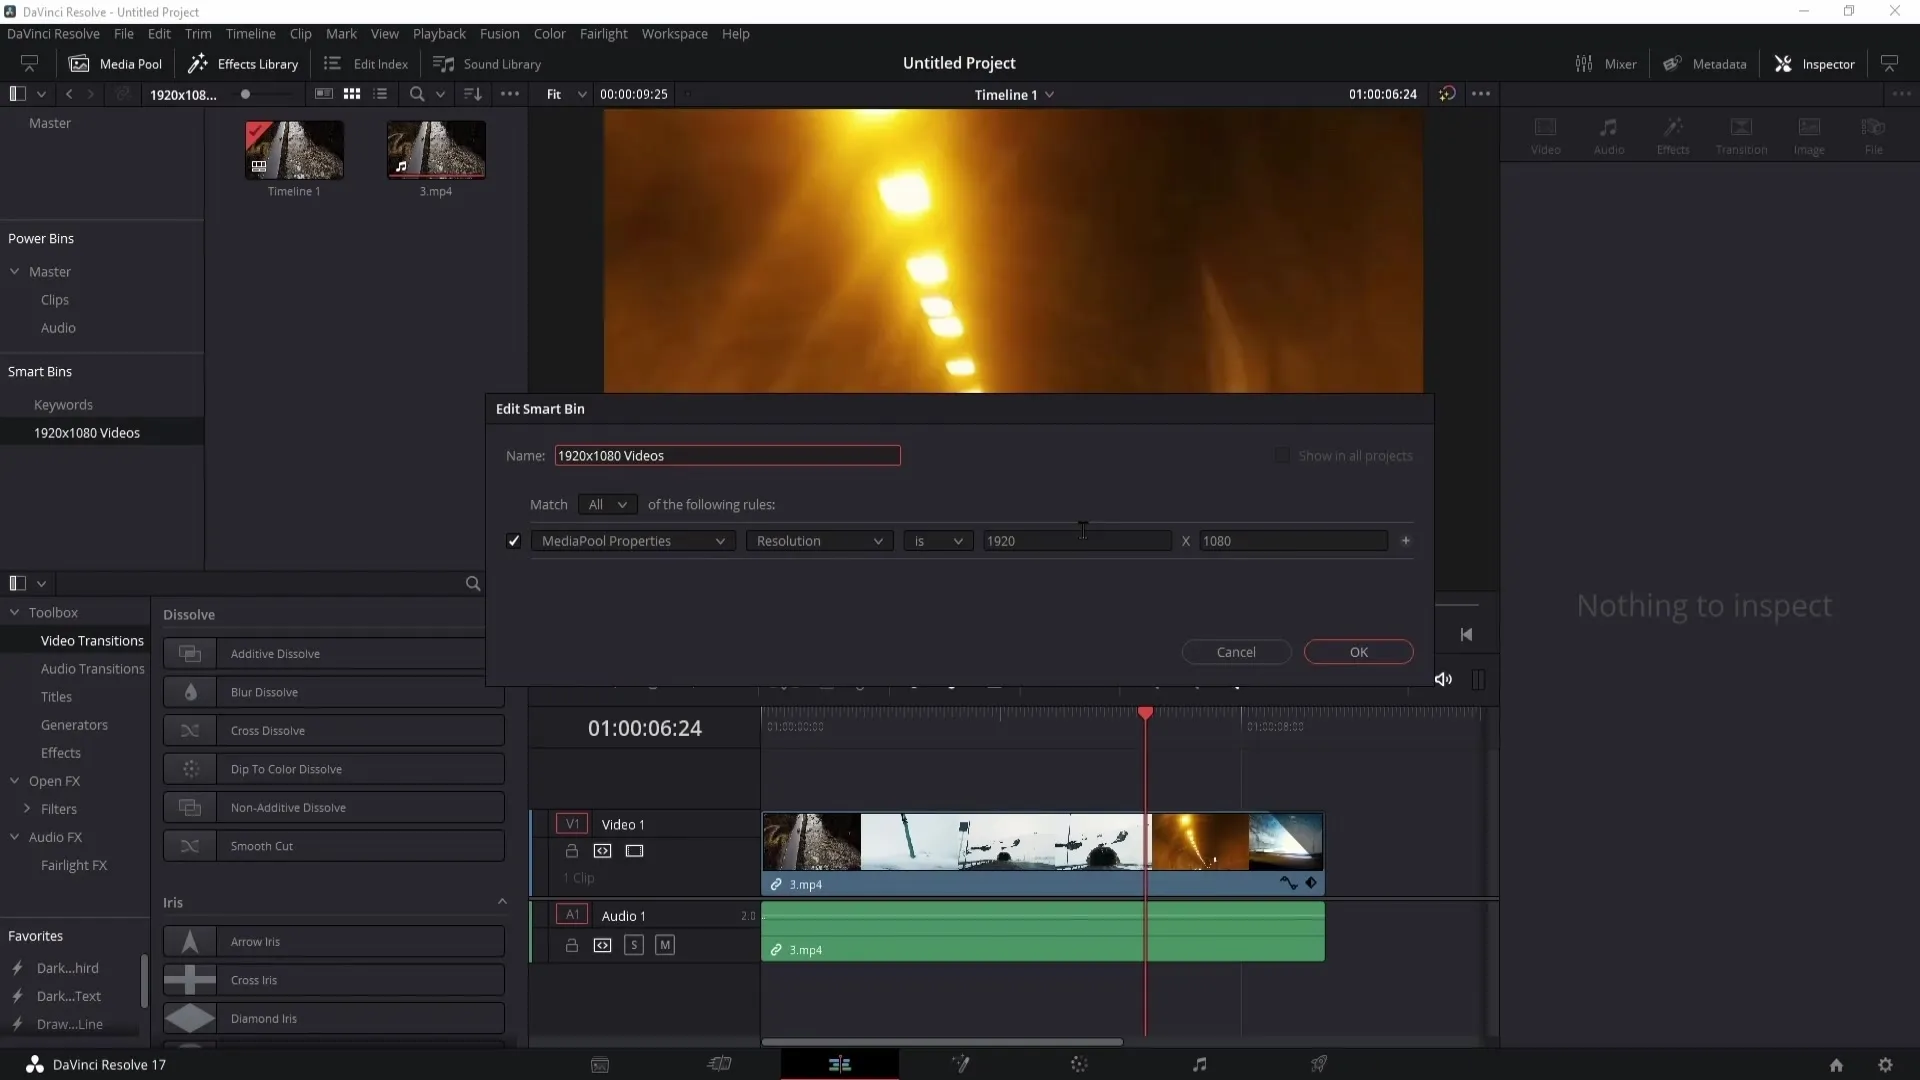
To create a Smart Bin, right-click in the Media Pool and choose "Add Smart Bin." You can give the Smart Bin a name, such as "1920x1080 Videos," to collect all your clips with that resolution.
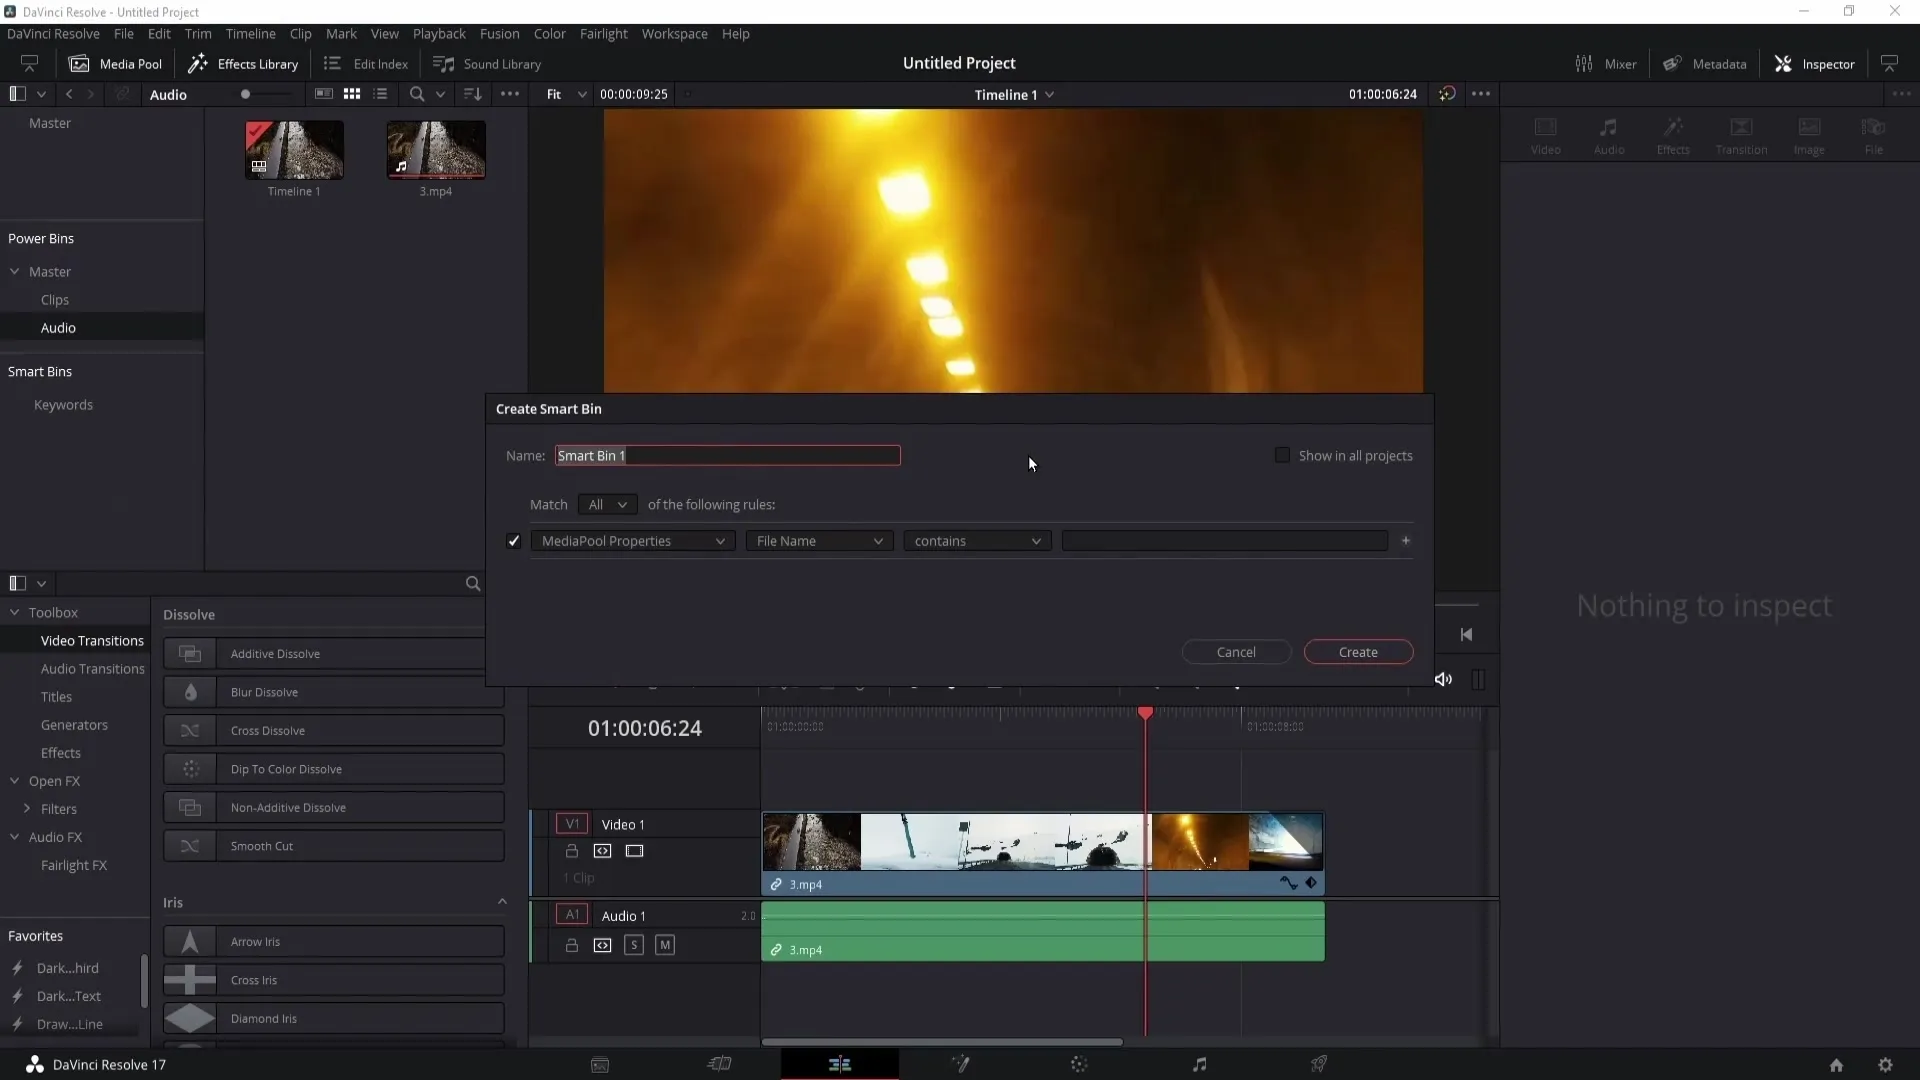
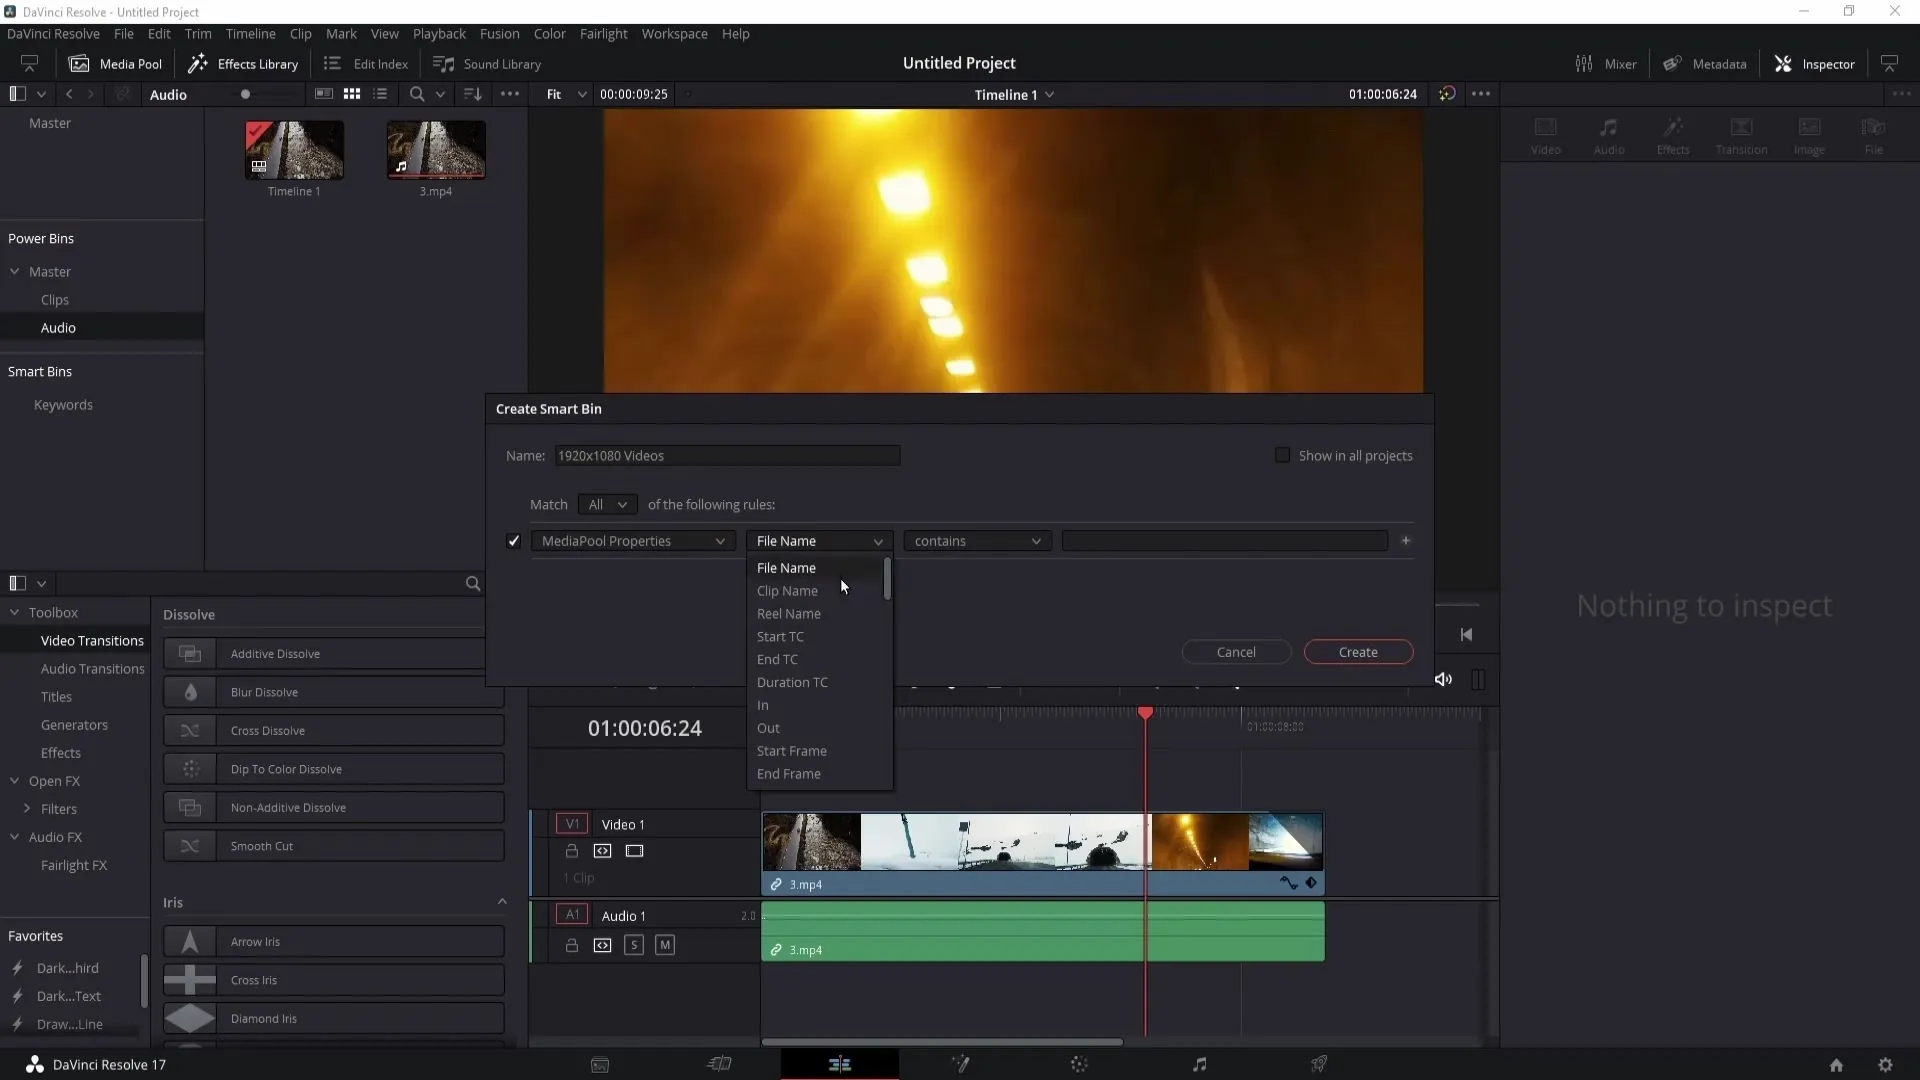
In the "Media Pool Properties," you can specify criteria by which the clips will be filtered. In this example, select "Is" and enter "1920x1080" to show only such videos.
After clicking "Create," the Smart Bin will be created. All videos that meet the criteria will be automatically collected in this Bin.
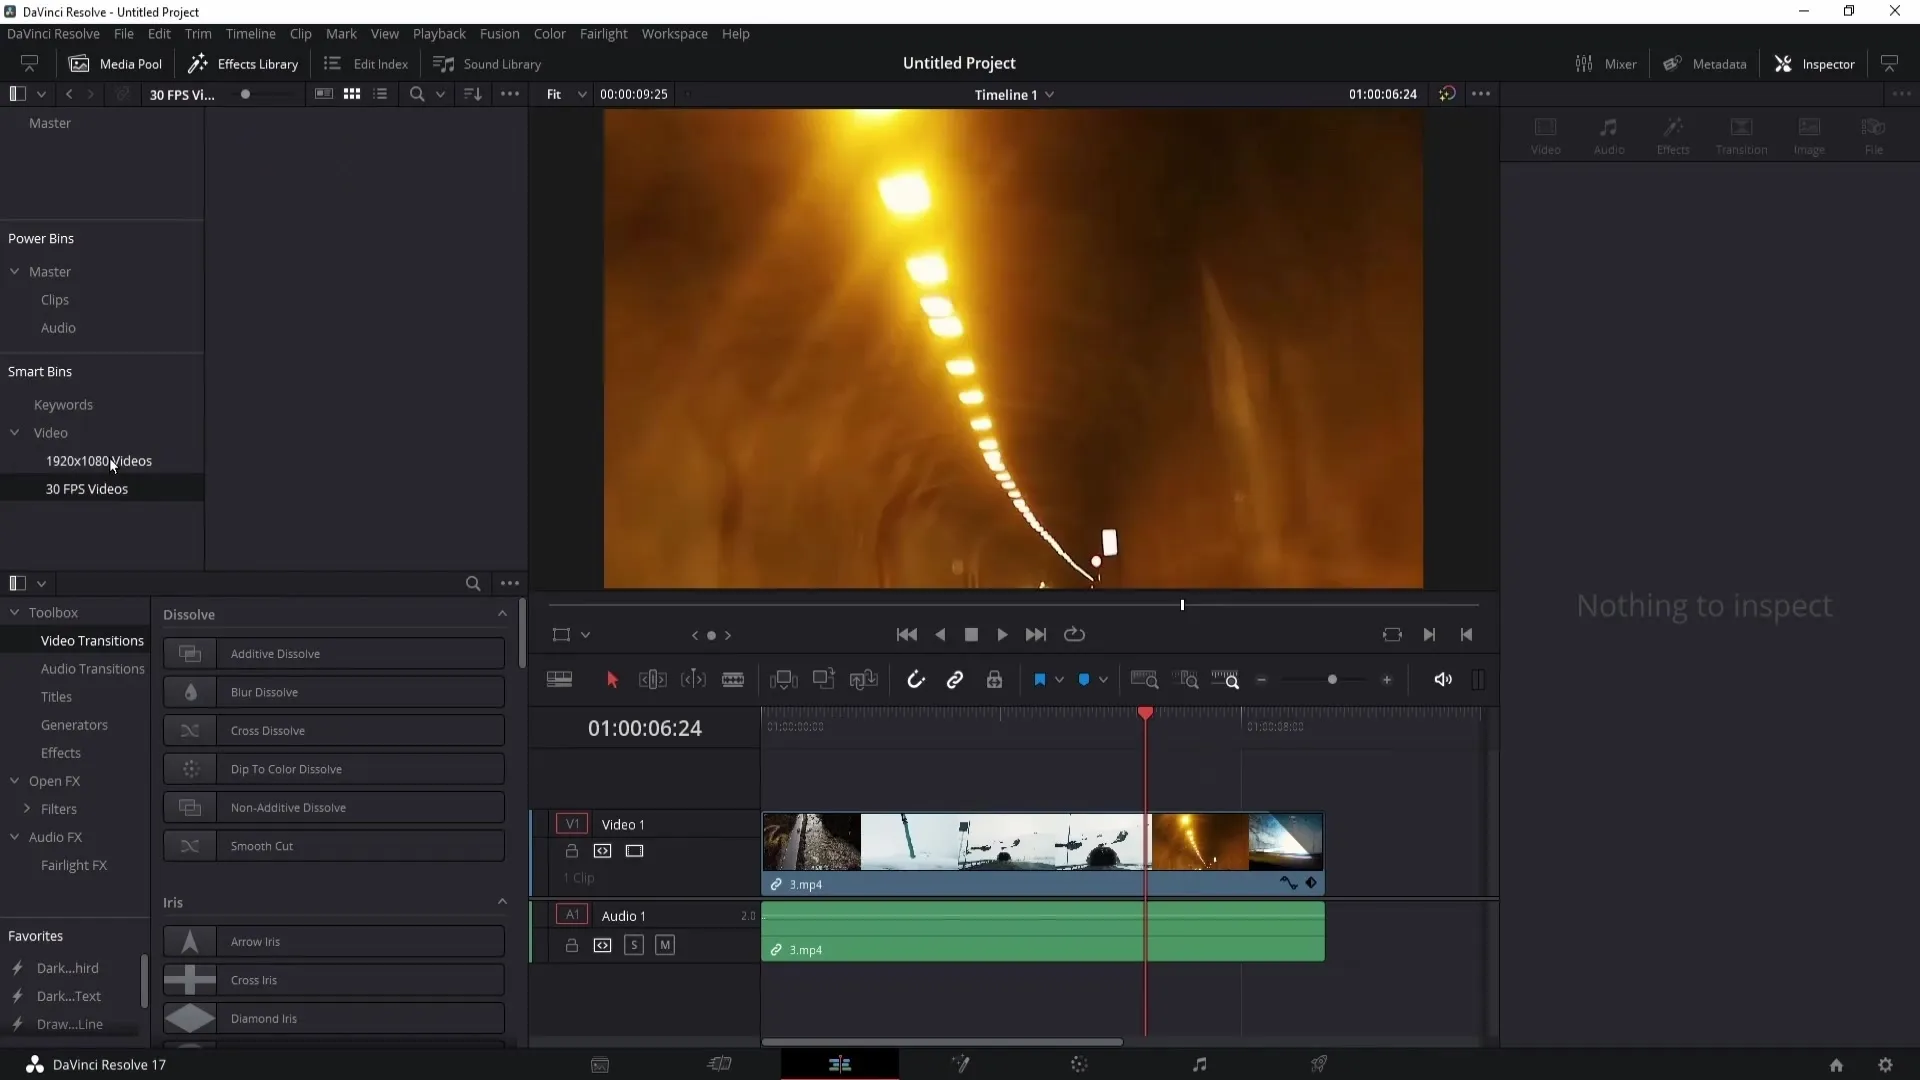
You can also create folders within the Smart Bins and organize them by categories, such as "Audio" or "Video." This helps to keep track when you have many Smart Bins.
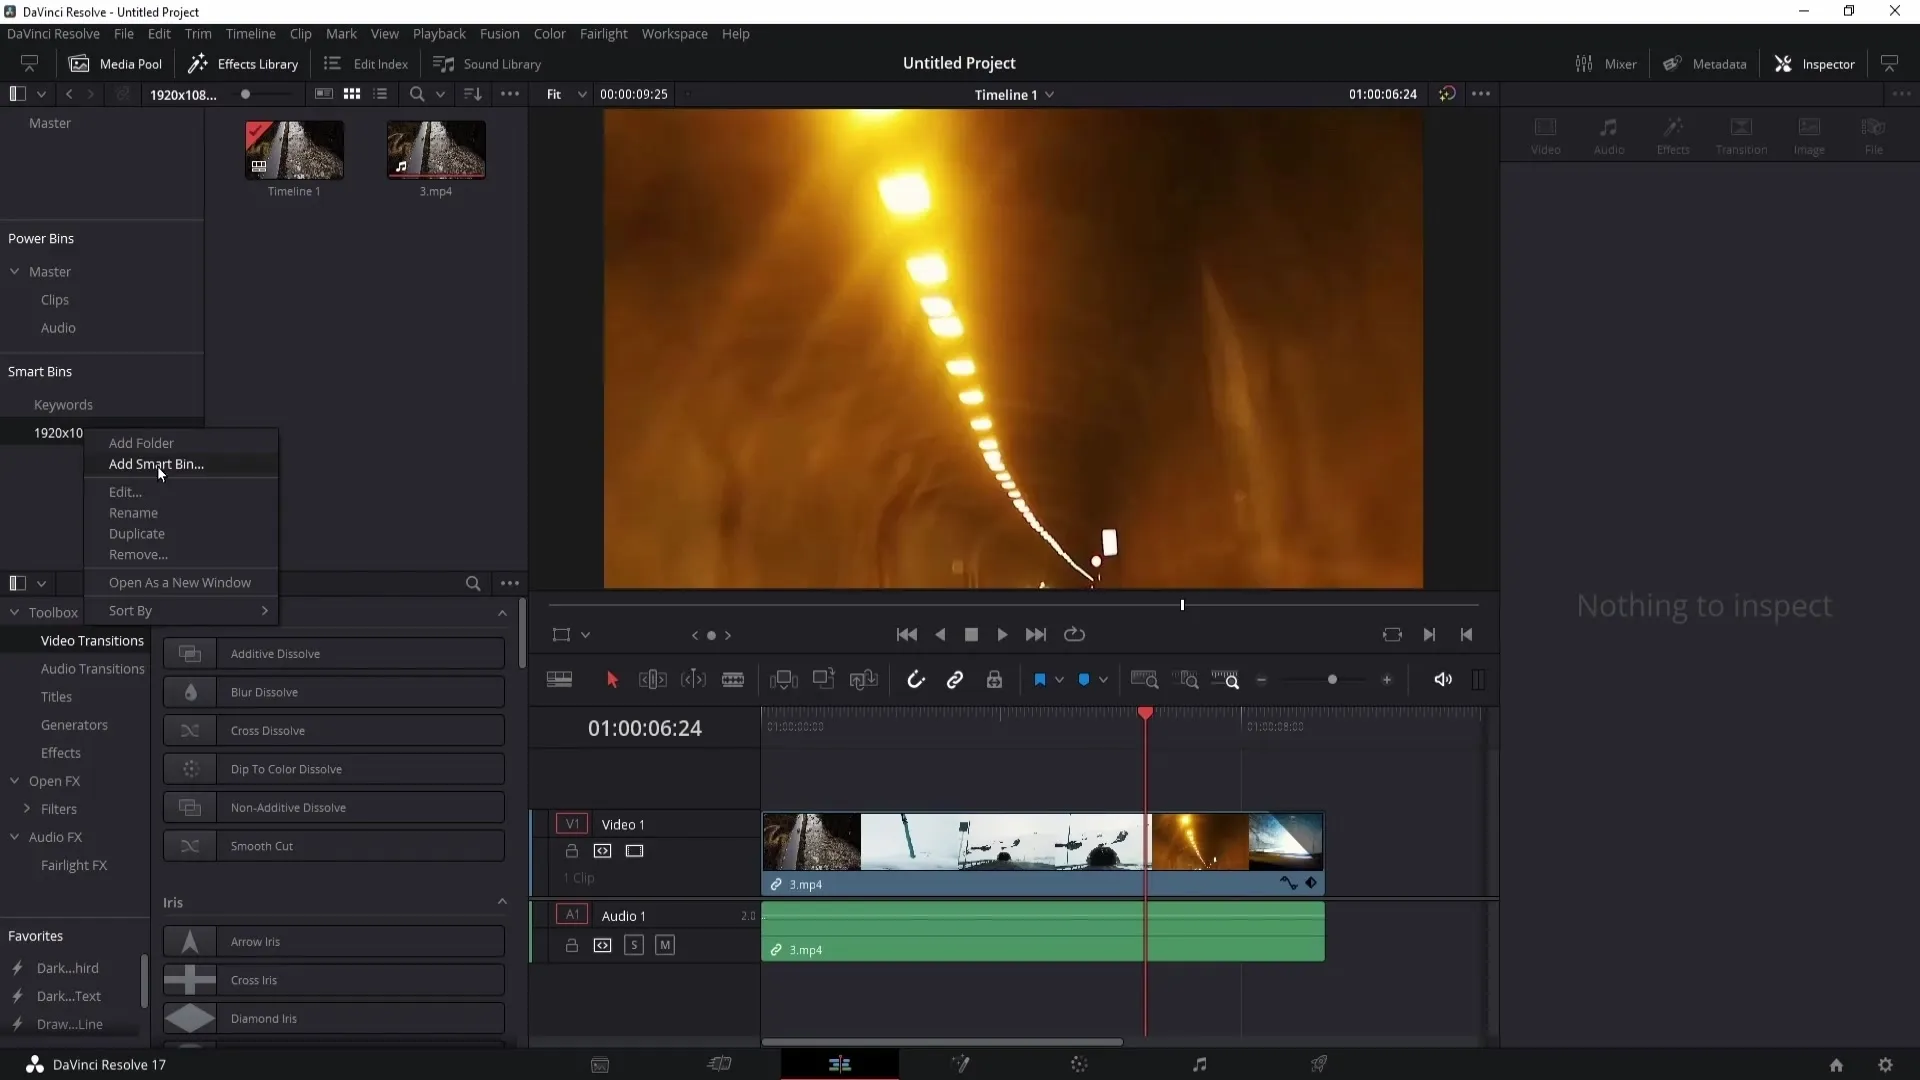
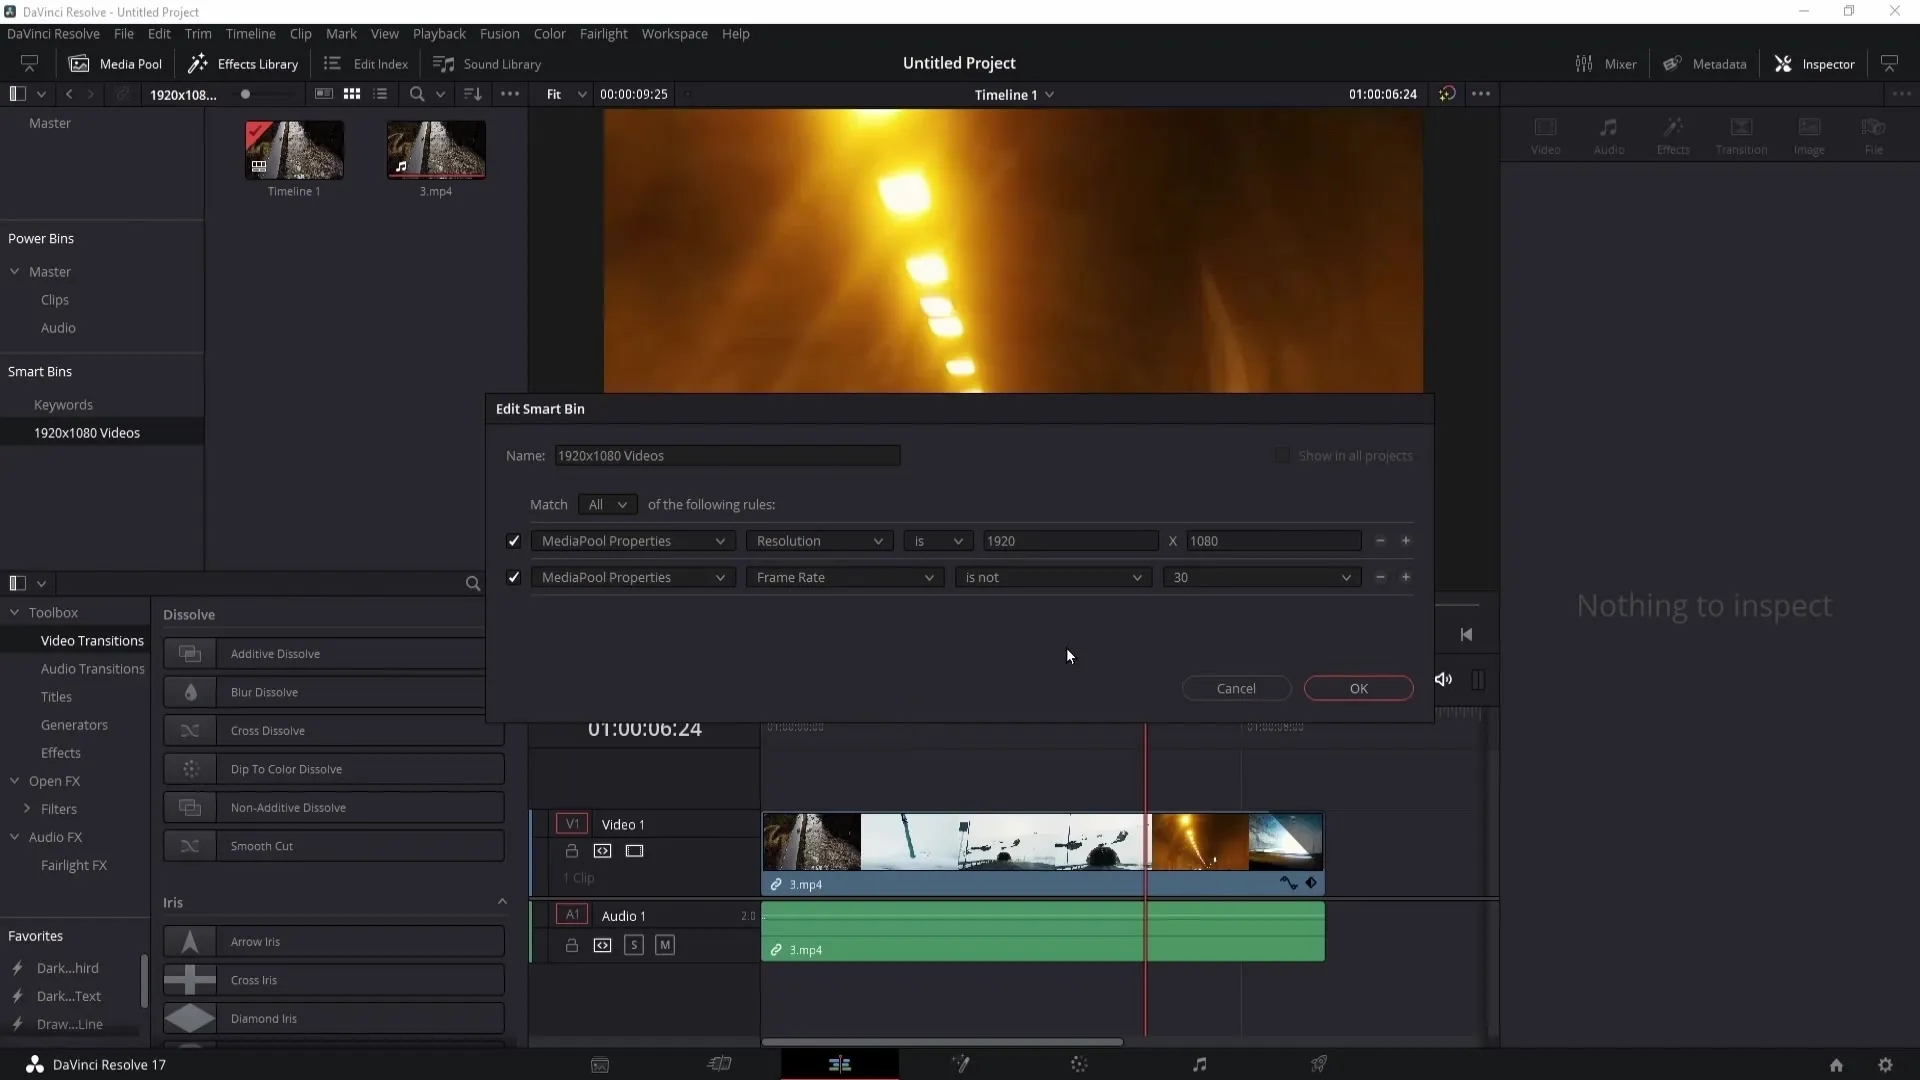
Do you want to customize your Smart Bins? Click on the Smart Bin and you can edit it. Here you can also add new filter criteria, such as the frame rate.
You can easily save all changes, and your Smart Bins will update automatically.
If needed, you can also duplicate or delete the Smart Bins by right-clicking on the desired bin.
Keeping Your Mediapool Organized
Now that you know how to use Power Bins and Smart Bins, it's important to maintain a clean structure in your Mediapool. You can create new folders to organize your Smart Bins, such as with specific categories for videos or audio.
Create a new folder like "Videos" and drag your Smart Bins in to systematically organize them and expand or collapse as needed. This will give you a better overview of your entire media library.
One important note you should keep in mind: when importing clips from your PC into DaVinci Resolve, make sure not to move them. If the software can no longer find the files, it will display them as "Media Offline."
To avoid issues, create your folders in advance and drag the necessary clips and audio files into them before starting your editing process.
Summary
In this tutorial, you learned how to use Power Bins and Smart Bins in DaVinci Resolve to make your projects more efficient. The possibilities offered by these features will save you a lot of time and simplify the organization of your media.
Frequently Asked Questions
What are Power Bins?Power Bins are special folders in DaVinci Resolve that store frequently used clips to facilitate faster work.
How do I create a Smart Bin?Right-click in the Mediapool, select "Add Smart Bin," and define the criteria by which your clips should be filtered.
Can I edit Power Bins later?Yes, you can rename, delete, or create new folders within the Power Bins.
What happens if my clips show "Media Offline"?This happens when the original files are moved to another location. Make sure to keep the files in their original folders.
How can I improve the overview of my Smart Bins?Create subfolders for different categories like "Video" and "Audio" to keep your Smart Bins organized.


