In this tutorial, you will learn the basic functions of keyframes in DaVinci Resolve. Keyframes are essential tools for animating effects and give you the ability to precisely control movements and changes of images or texts. Whether you want to edit a simple image, text, or even a video, applying keyframes can add that extra touch to your projects.
Key Insights
- Keyframes enable the animation of effects over time.
- You can control settings for zoom, position, and rotation through keyframes.
- Working with keyframes requires patience and experimentation.
Step-by-Step Guide
Opening the Inspector and Keyframe Area
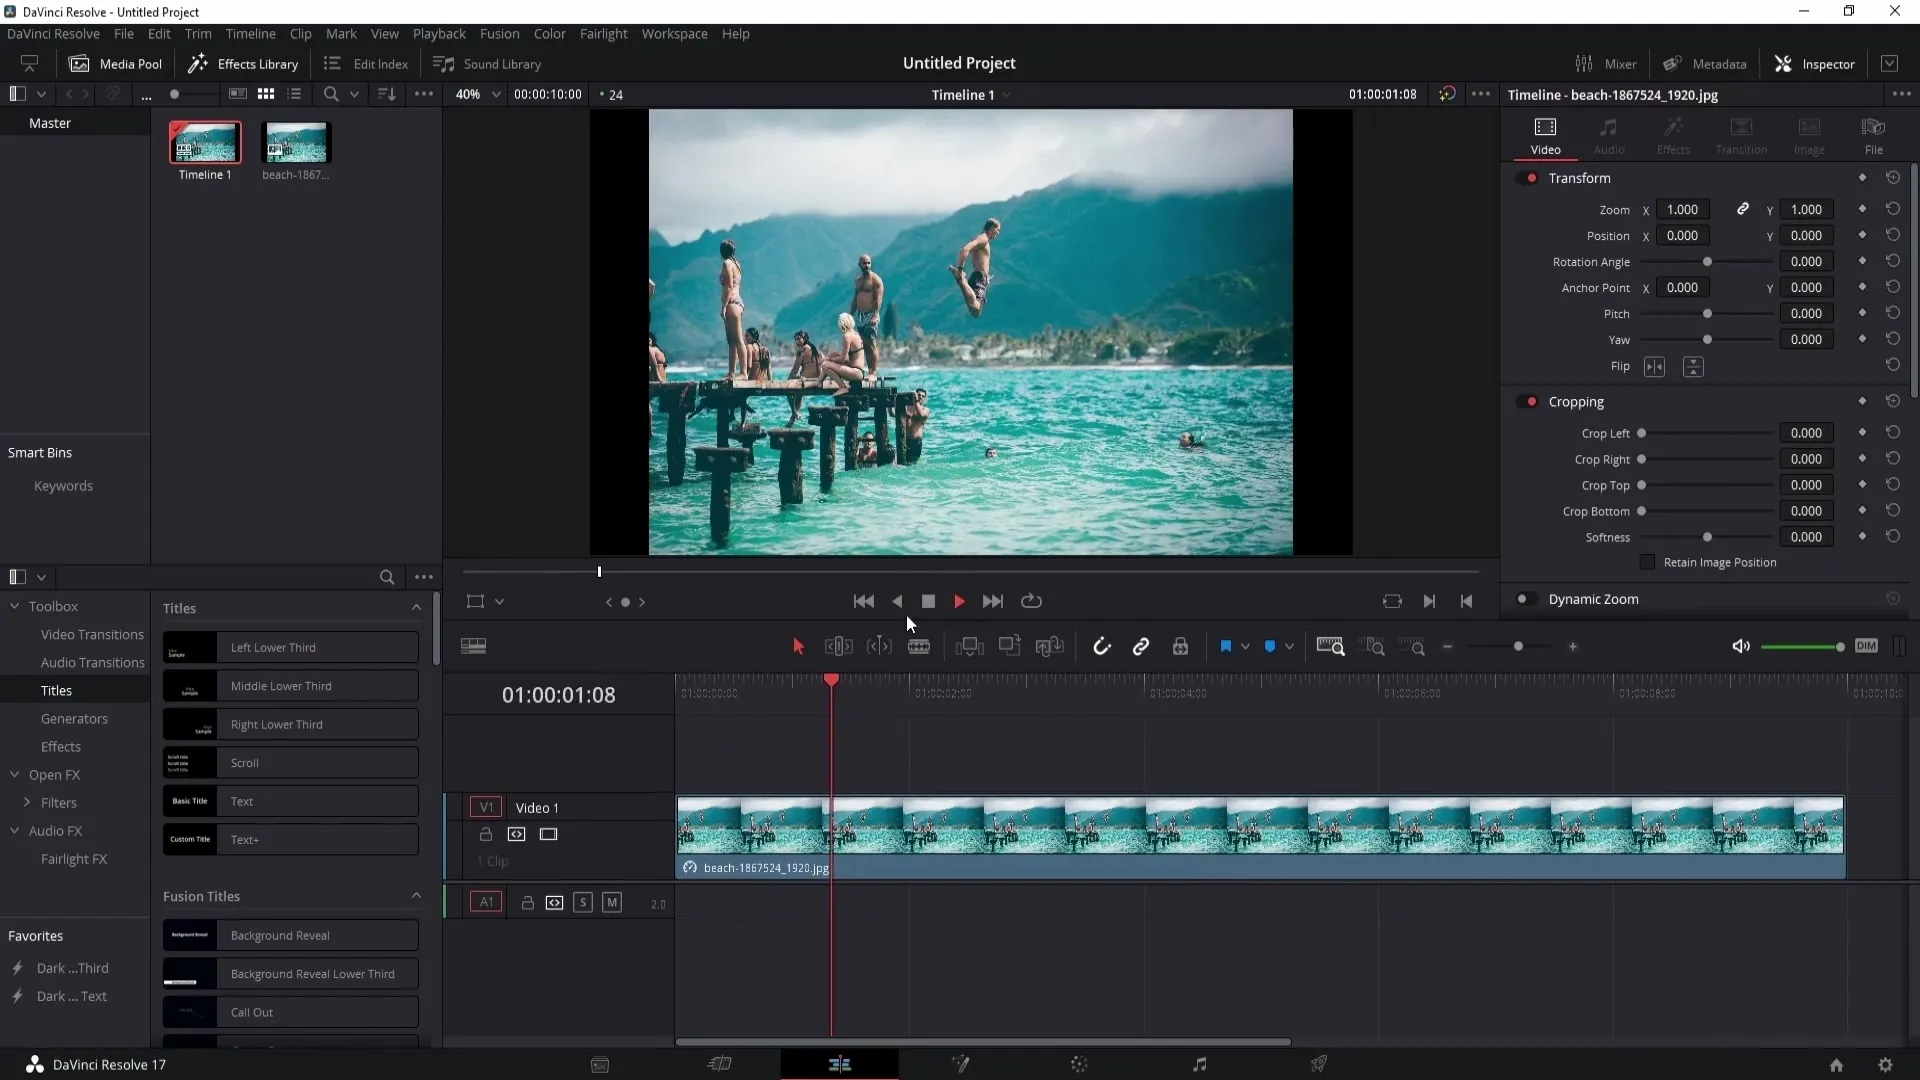
To use keyframes, start by opening the Inspector in DaVinci Resolve. If the Inspector window is not visible, you can display it by clicking on "Inspector" in the right area of the window.

Choosing a Simple Image or Video
Start by selecting an image or video that you want to animate. In this example, we are working with a regular image, but the techniques can also be applied to videos and texts.
Setting a Keyframe and Defining the Effect
Go to the point where you want the effect to start, for example, at the beginning of the clip. Click on the keyframe symbol next to the effect you want to adjust. In this case, we want to use a zoom effect. Set the initial zoom value to 1.0.
Setting a Keyframe for the Final Effect
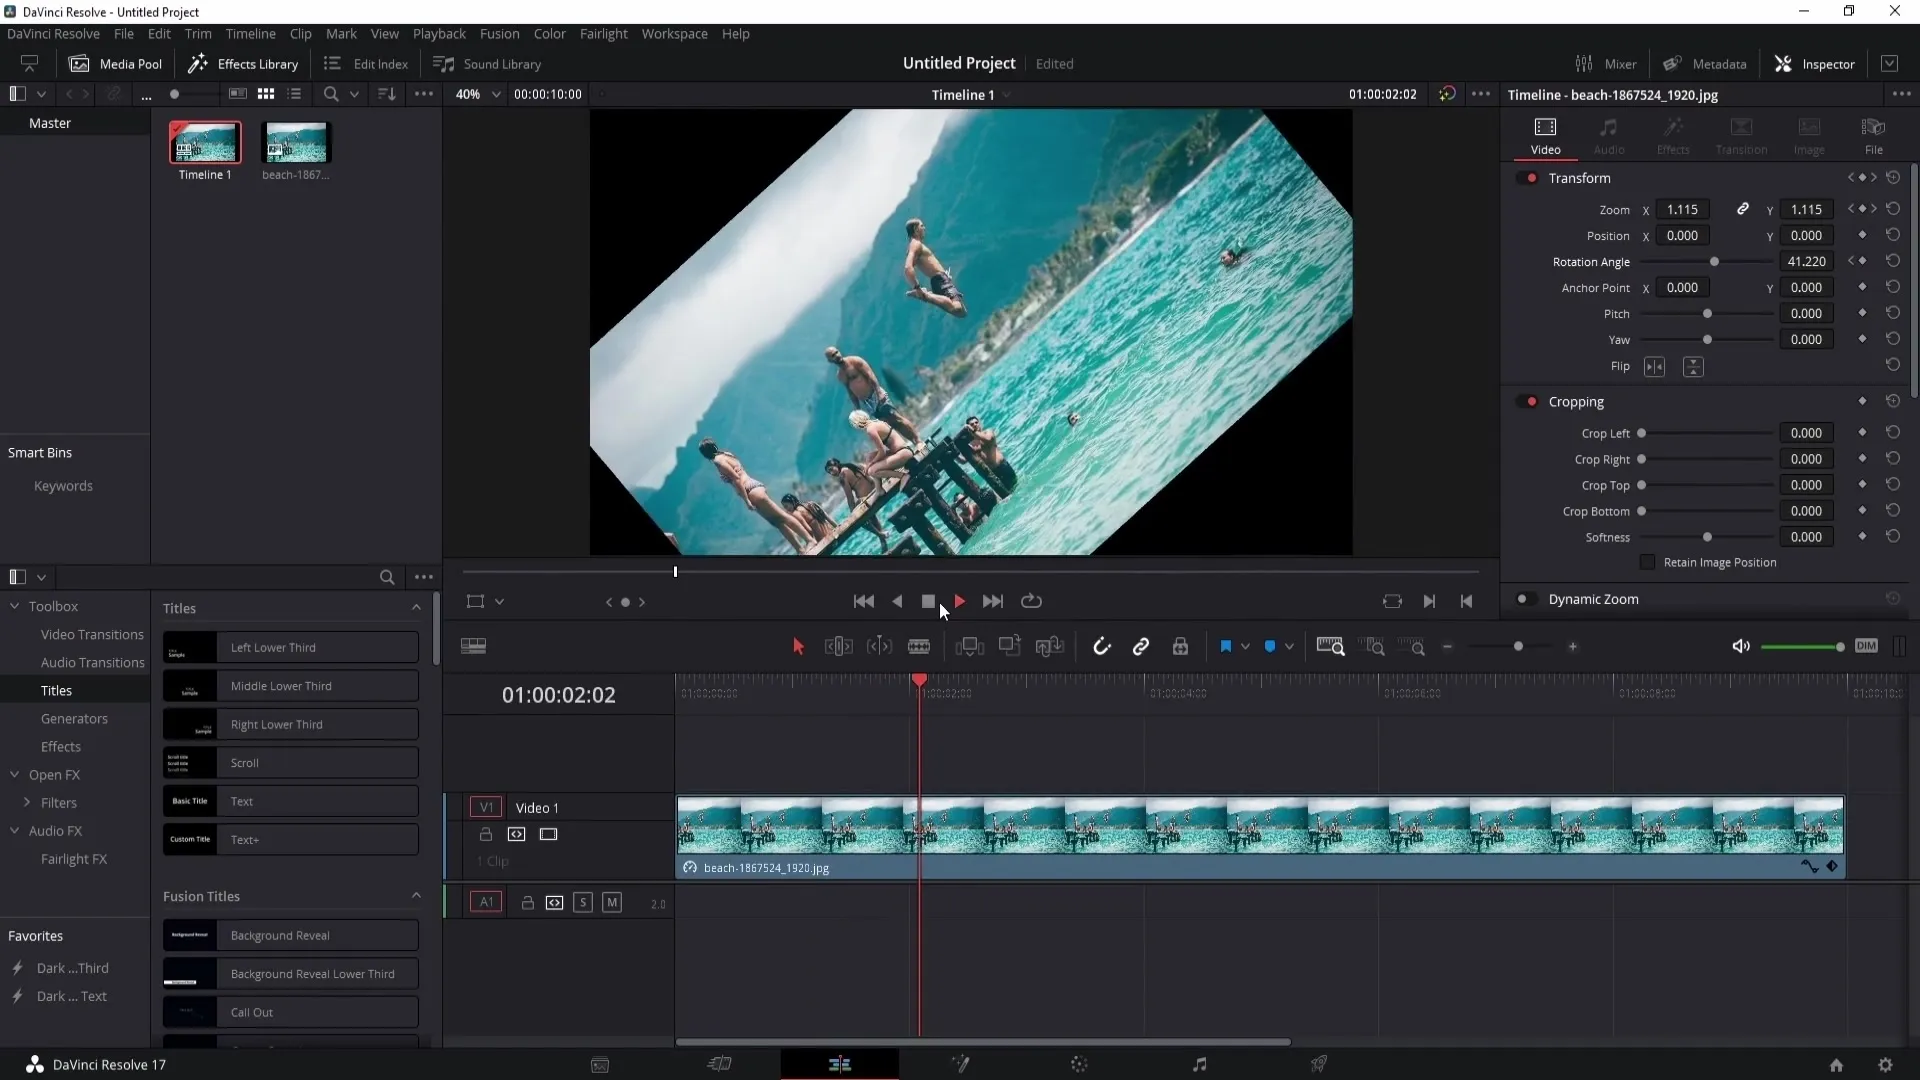
Now you can move the playhead to a later time, for example, to 3 seconds, and increase the zoom value to 1.41. This will zoom into the image until that point in time.
Editing and Adjusting Keyframes
If you want to make a change to an already set keyframe, you can do so by moving the playhead to that specific keyframe and adjusting the value. You can also reset the effect or modify the values again to achieve your desired effect.
Setting Multiple Keyframes
To create a continuous zoom effect, you can set another keyframe at a new point, for example, at 5 seconds, to zoom out the image again. This allows for a dynamic effect that viewers will enjoy.
Resetting the Starting Position
If you are unsatisfied with your example or want to reset something, you can delete all keyframes for the zoom by using the corresponding options in the Inspector.
Advanced Keyframe Techniques
Once you have mastered the basics, you can experiment with more complex animations. For example, you could change the zoom from 0 to a higher value and then rotate the image simultaneously. Set keyframes for zoom and rotation and adjust them accordingly.
Playing and Checking the Overall Animation
Play your project to see how the keyframes you have set work together. Make sure to check if the transitions are smooth and if the animation meets your expectations.

Summary
Using keyframes in DaVinci Resolve opens up many creative possibilities. Experiment with different effects and timing to make your videos and images more engaging. Remember that patience and practice are key to success when working with these tools.
Frequently Asked Questions
What are Keyframes in DaVinci Resolve?Keyframes are markers that help you create animations over time by setting effect values at different points.
How do I set a keyframe?Position the playhead at the desired point and click on the keyframe symbol in the Inspector.
Can I edit keyframes later?Yes, you can return to a keyframe at any time and adjust its values.
How many keyframes can I set?There is no fixed limit, you can set as many keyframes as your project requires.
What can I animate with keyframes?You can animate zoom, position, rotation, and many other effects with keyframes.


