In this tutorial, I will show you how to create J and L cuts in DaVinci Resolve. These editing techniques are particularly useful to enhance the flow of dialogues and conversations in your videos. A J-cut allows you to insert the audio of a clip before the visual transition, while an L-cut keeps the audio playing even after the visual transition has taken place. Let's dive right in and see how you can master these techniques!
Key Takeaways
- J-cuts pull the audio from a subsequent clip into a current clip, bringing the next voice closer to the viewer before the visual transition occurs.
- L-cuts allow the audio of the current clip to continue while the image switches to the next clip, often used in dialogues.
- Both techniques increase tension and dynamics in conversations or scenes.
Step-by-Step Guide
Create a J-Cut
To create a J-cut in DaVinci Resolve, you first need to ensure that the audio of the clips is separated.
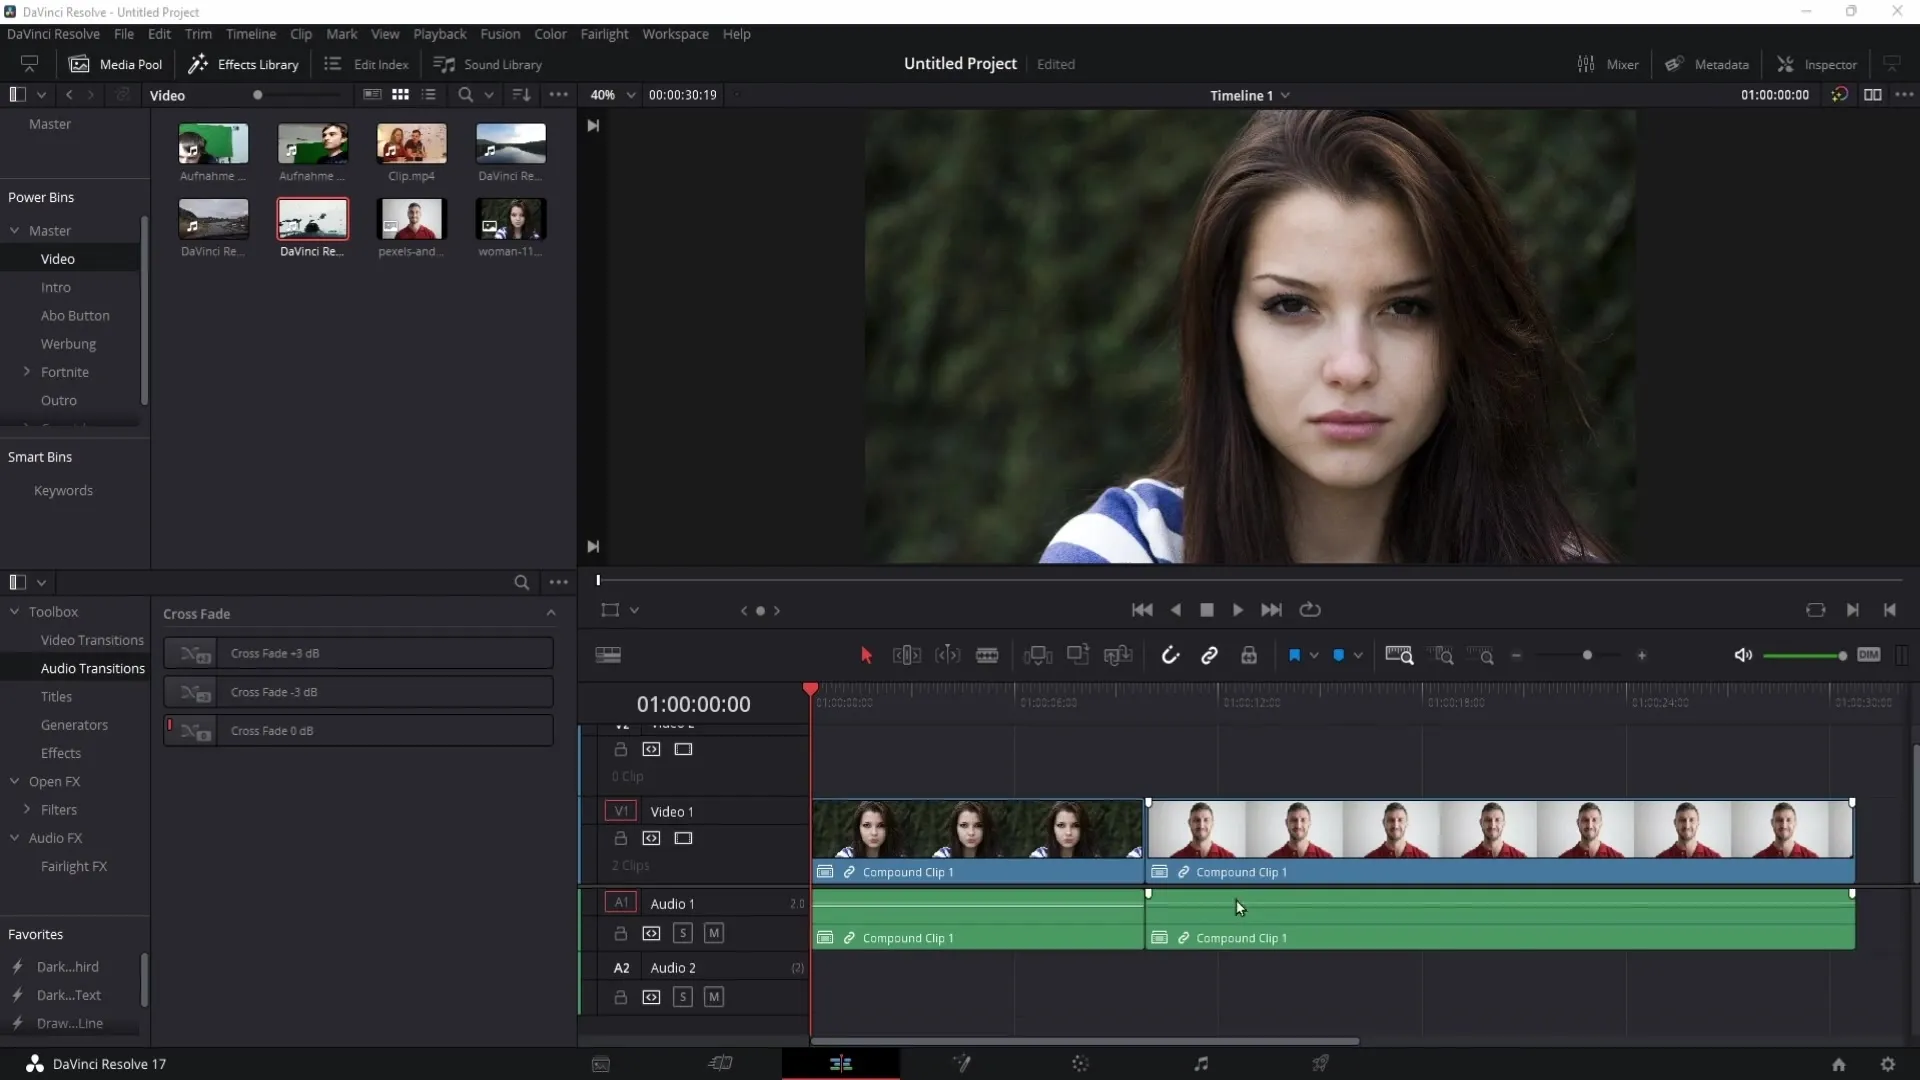
First, select the two clips in the timeline that you want to edit. Then click on the chain icons to separate the audio and video tracks.
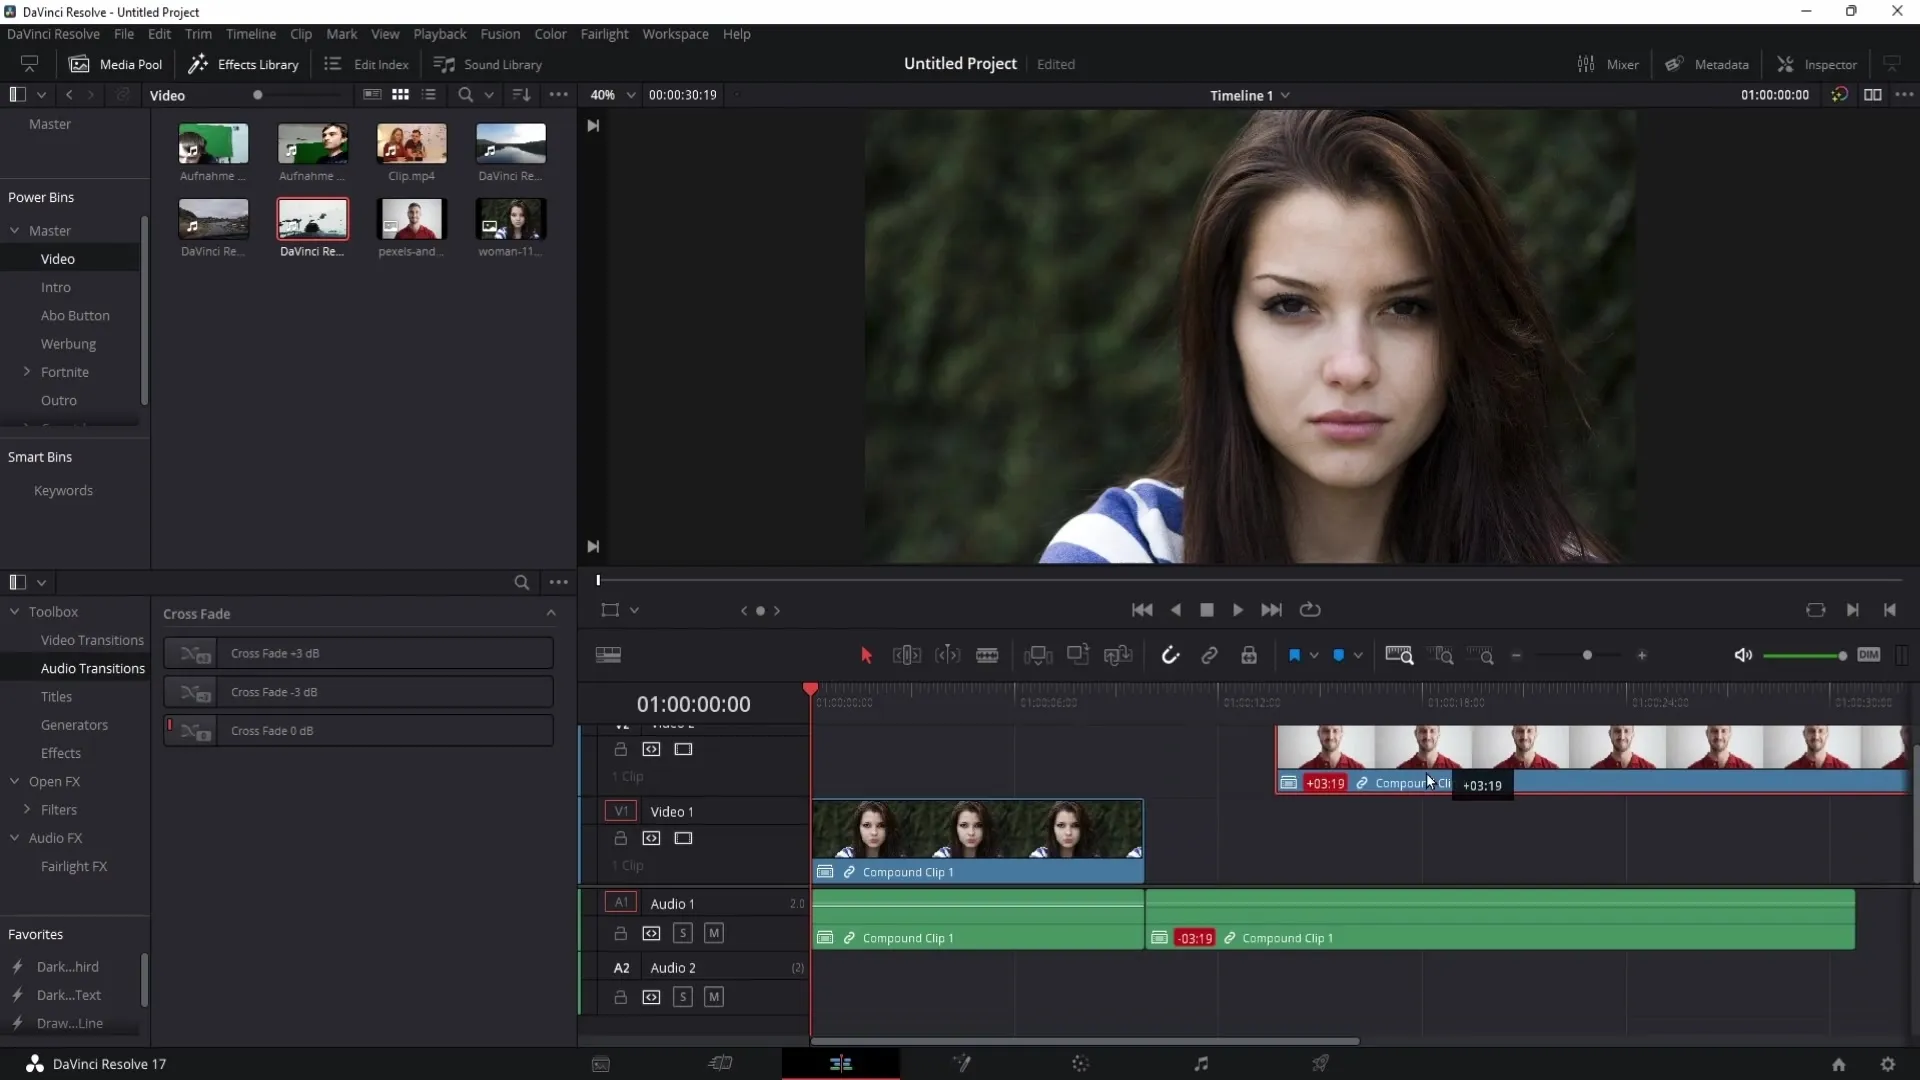
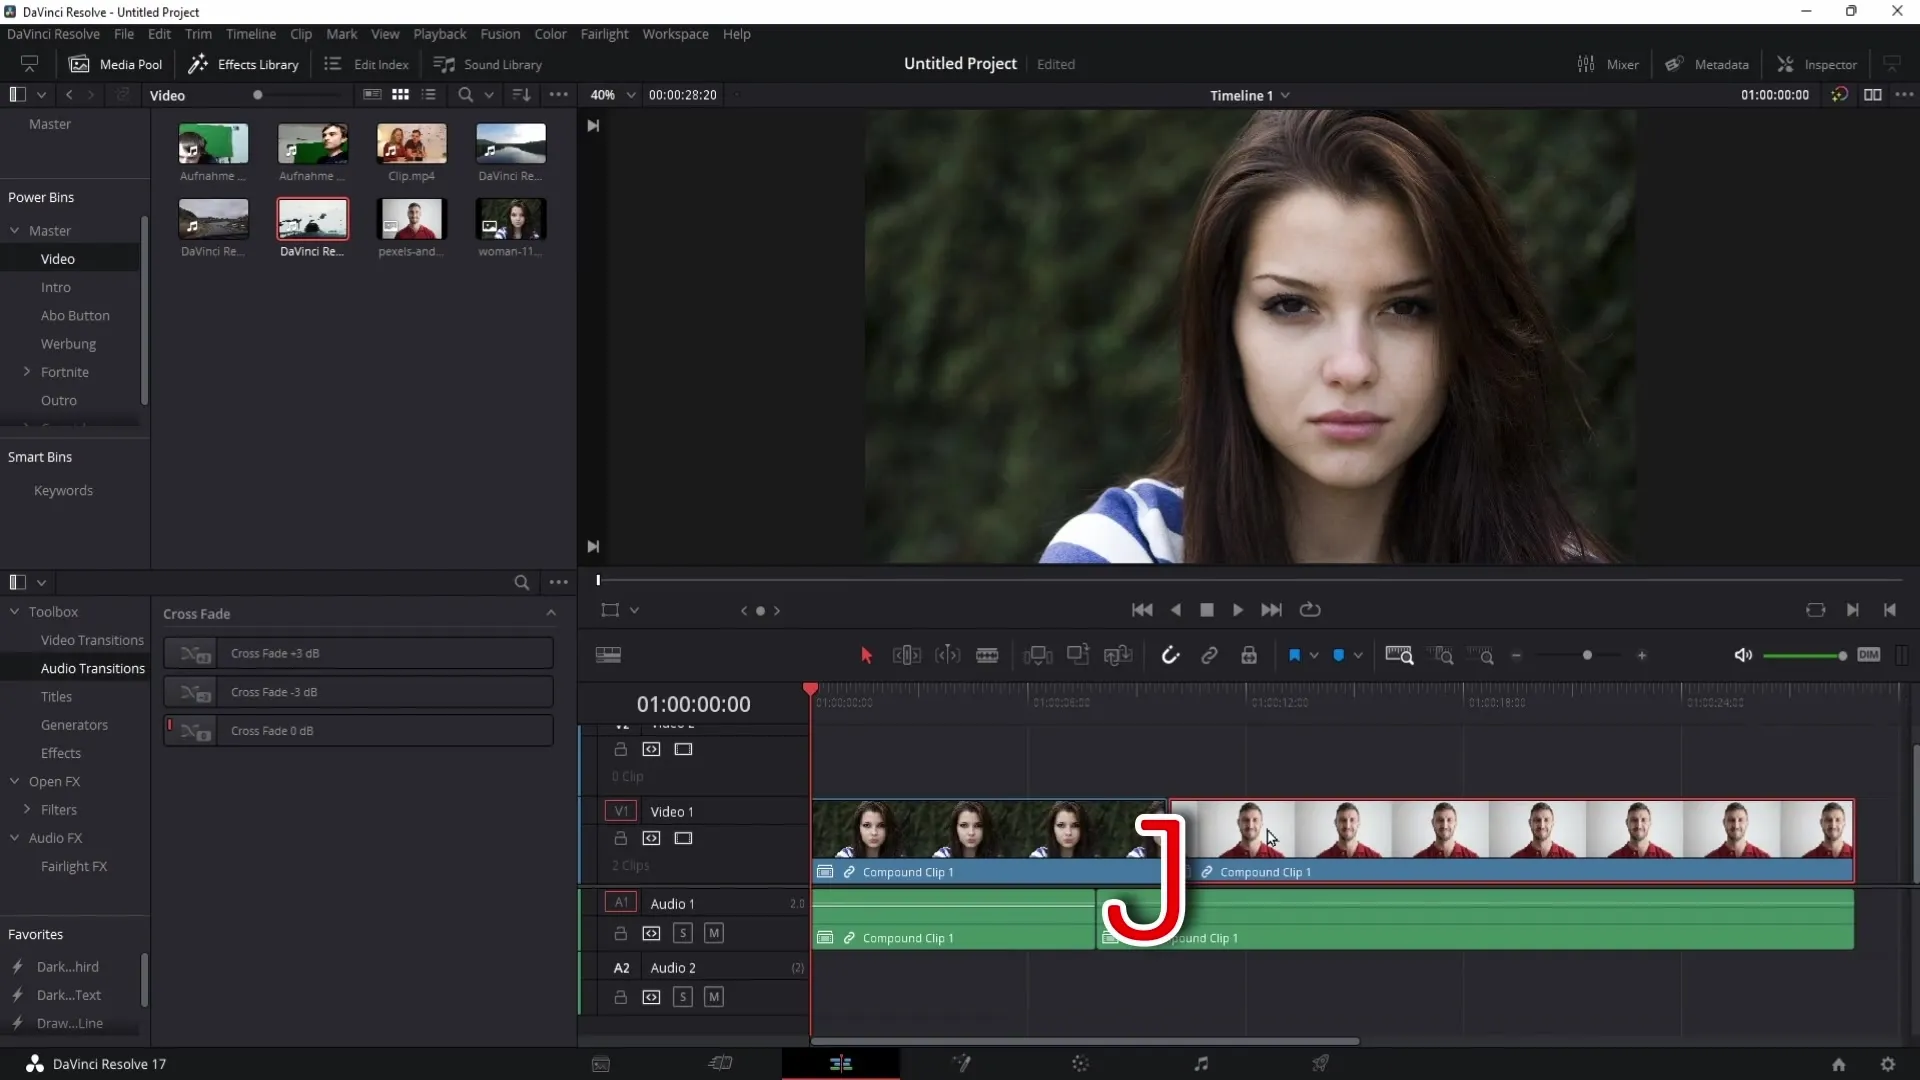
Now, you can drag the audio of the second clip into the first clip by pushing it a bit further in. This makes the audio from clip two audible while clip one is still being displayed.
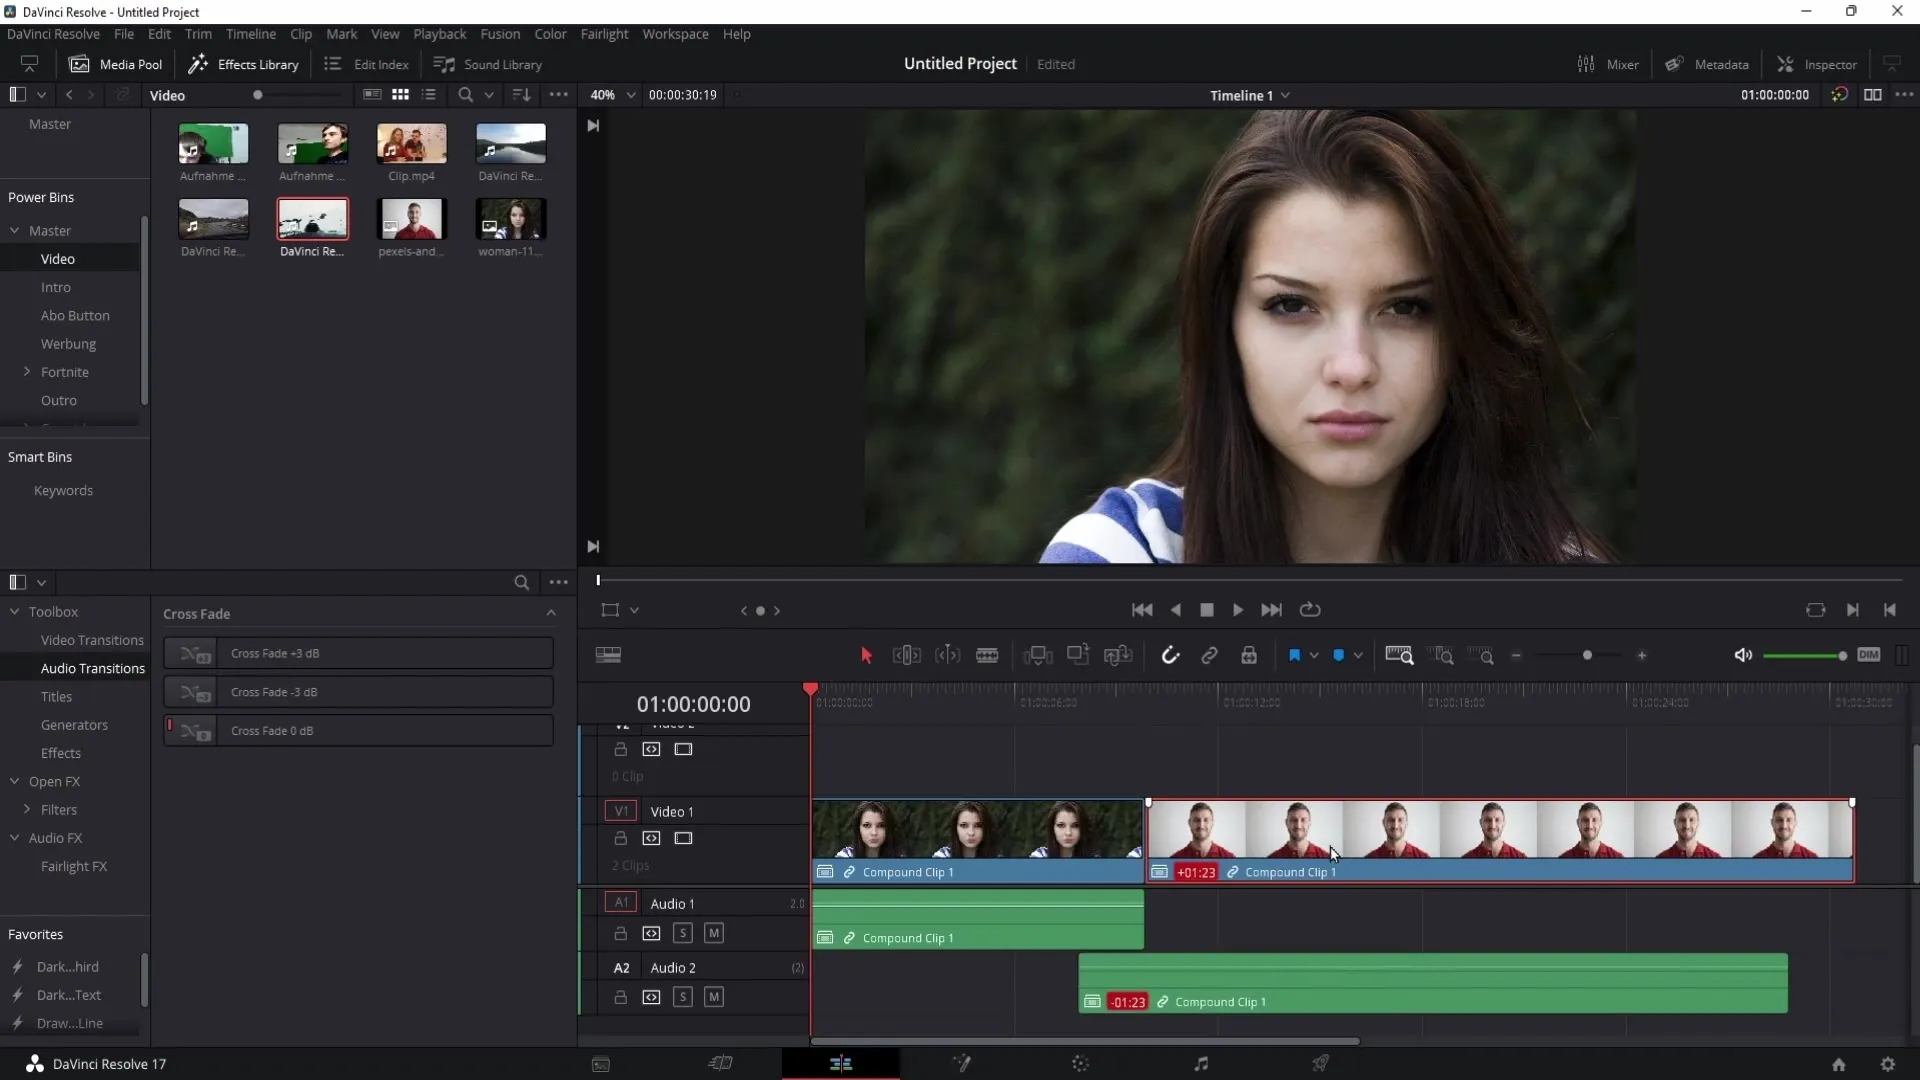
Next, you should also shorten the second clip slightly to create a seamless visibility. It is important to pull the audio of clip one further in as well to ensure a harmonious transition.
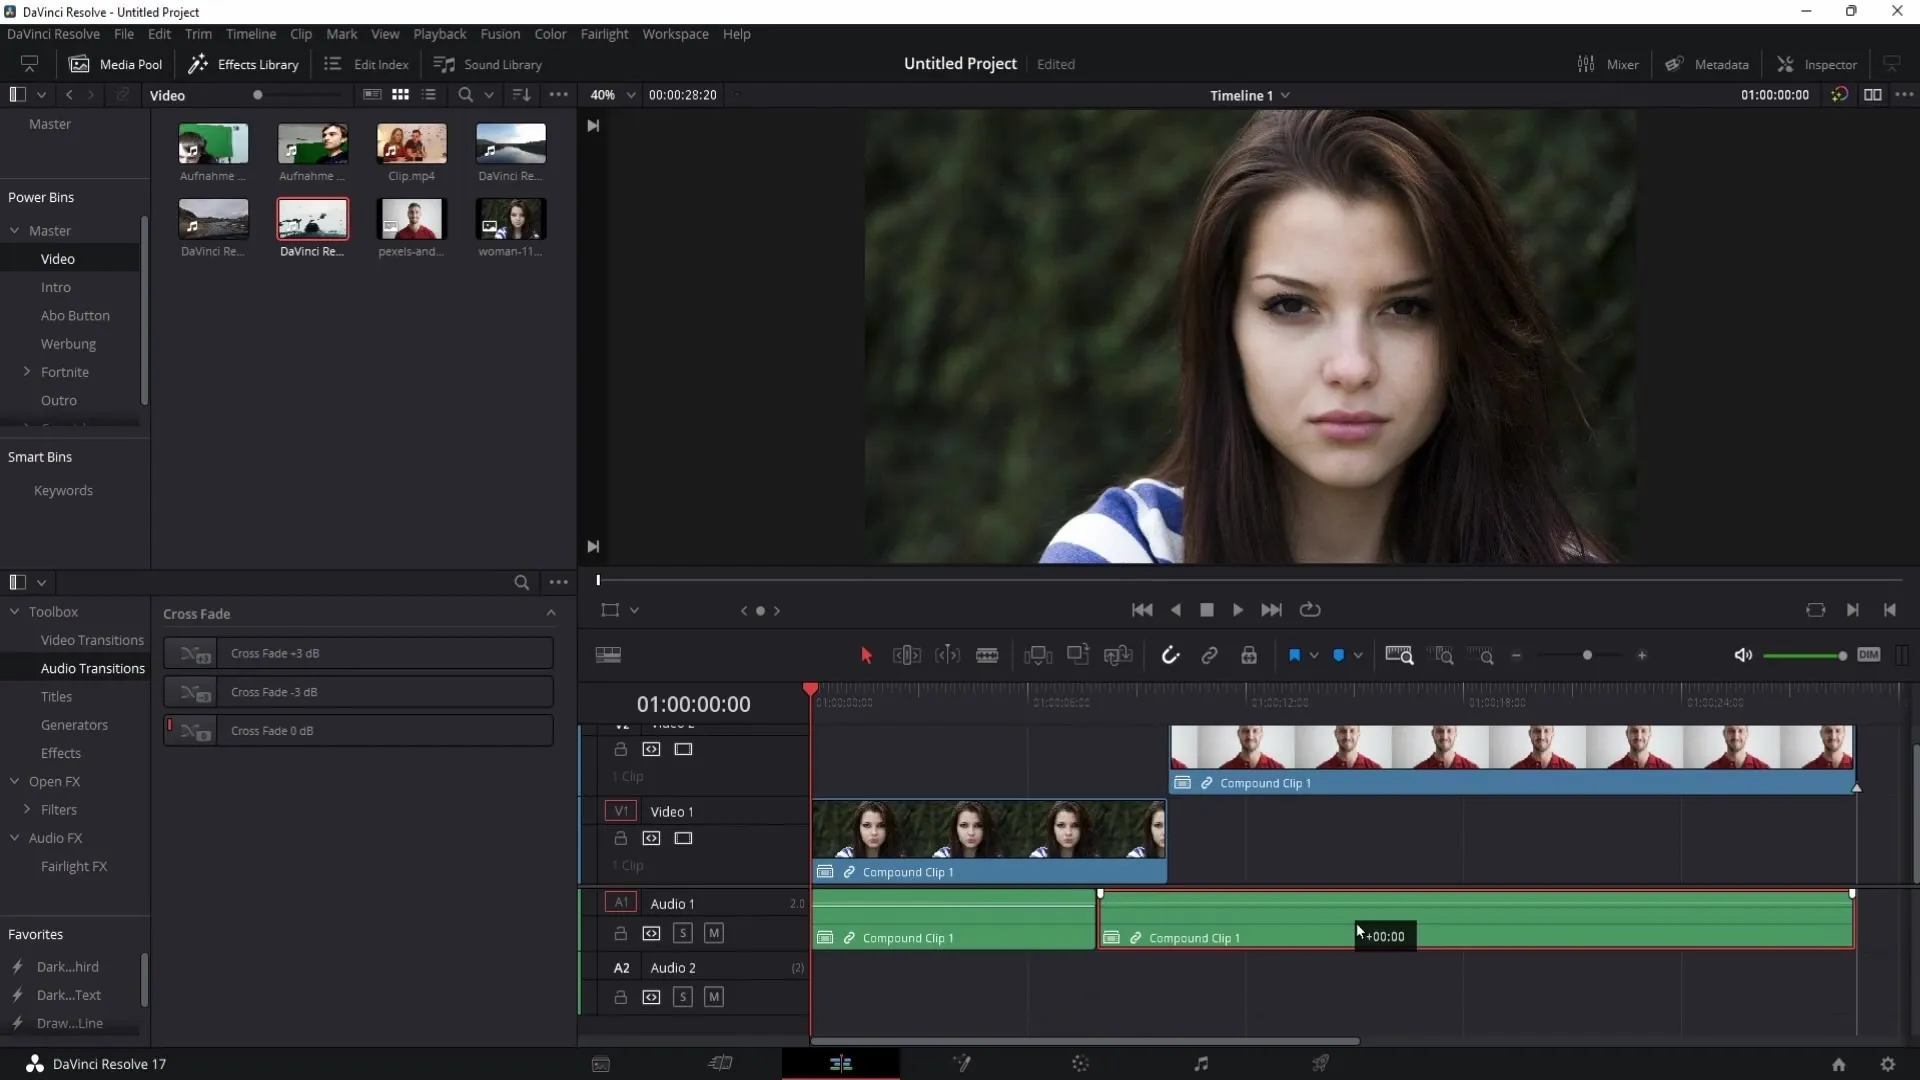
Once you bring the audio back to the desired audio track and align everything neatly, you have created your J-cut.
Create an L-Cut
Now that you have created a J-cut, let's implement an L-cut. Make sure that both the first and second clips are still present in the timeline.
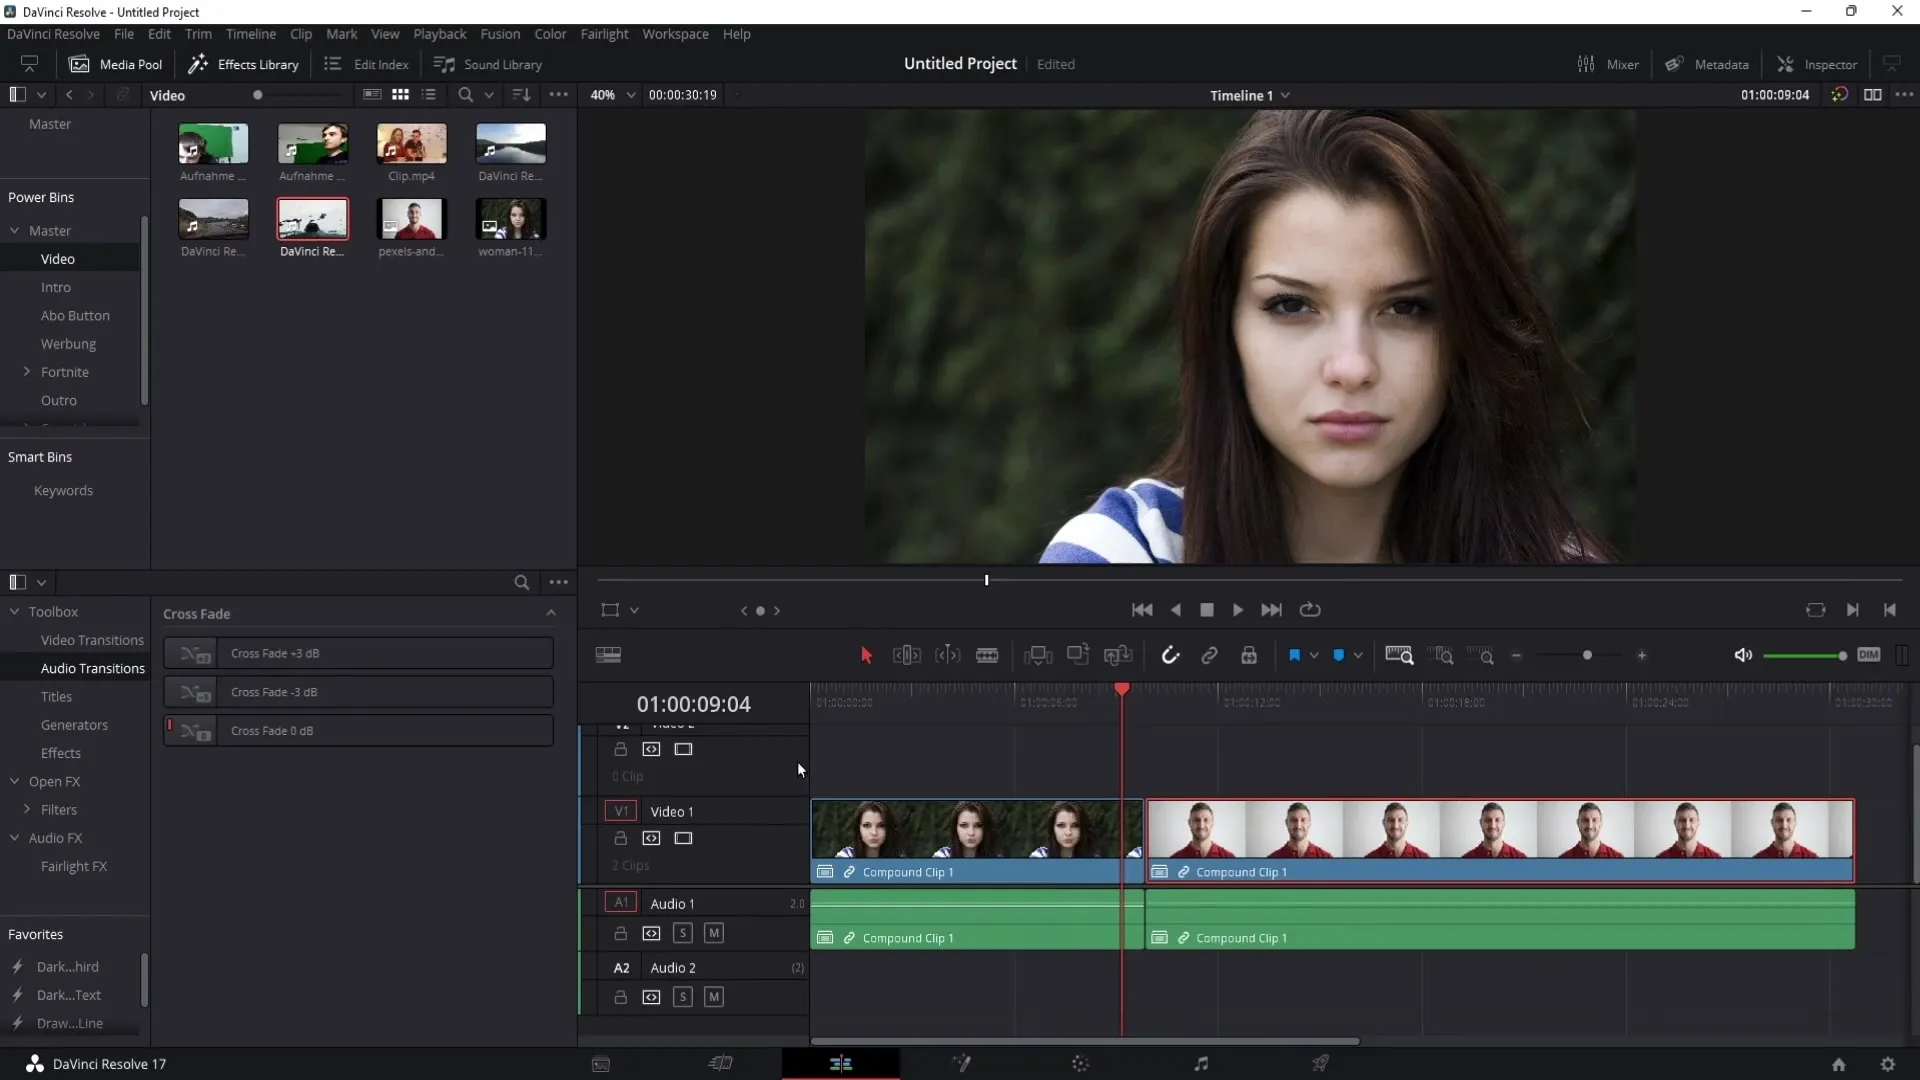
For the L-cut, you drag the audio of the first clip into the visual material of the second clip. It is important for the transition to be smooth, and the image should already appear in clip two while the audio from clip one continues to play.
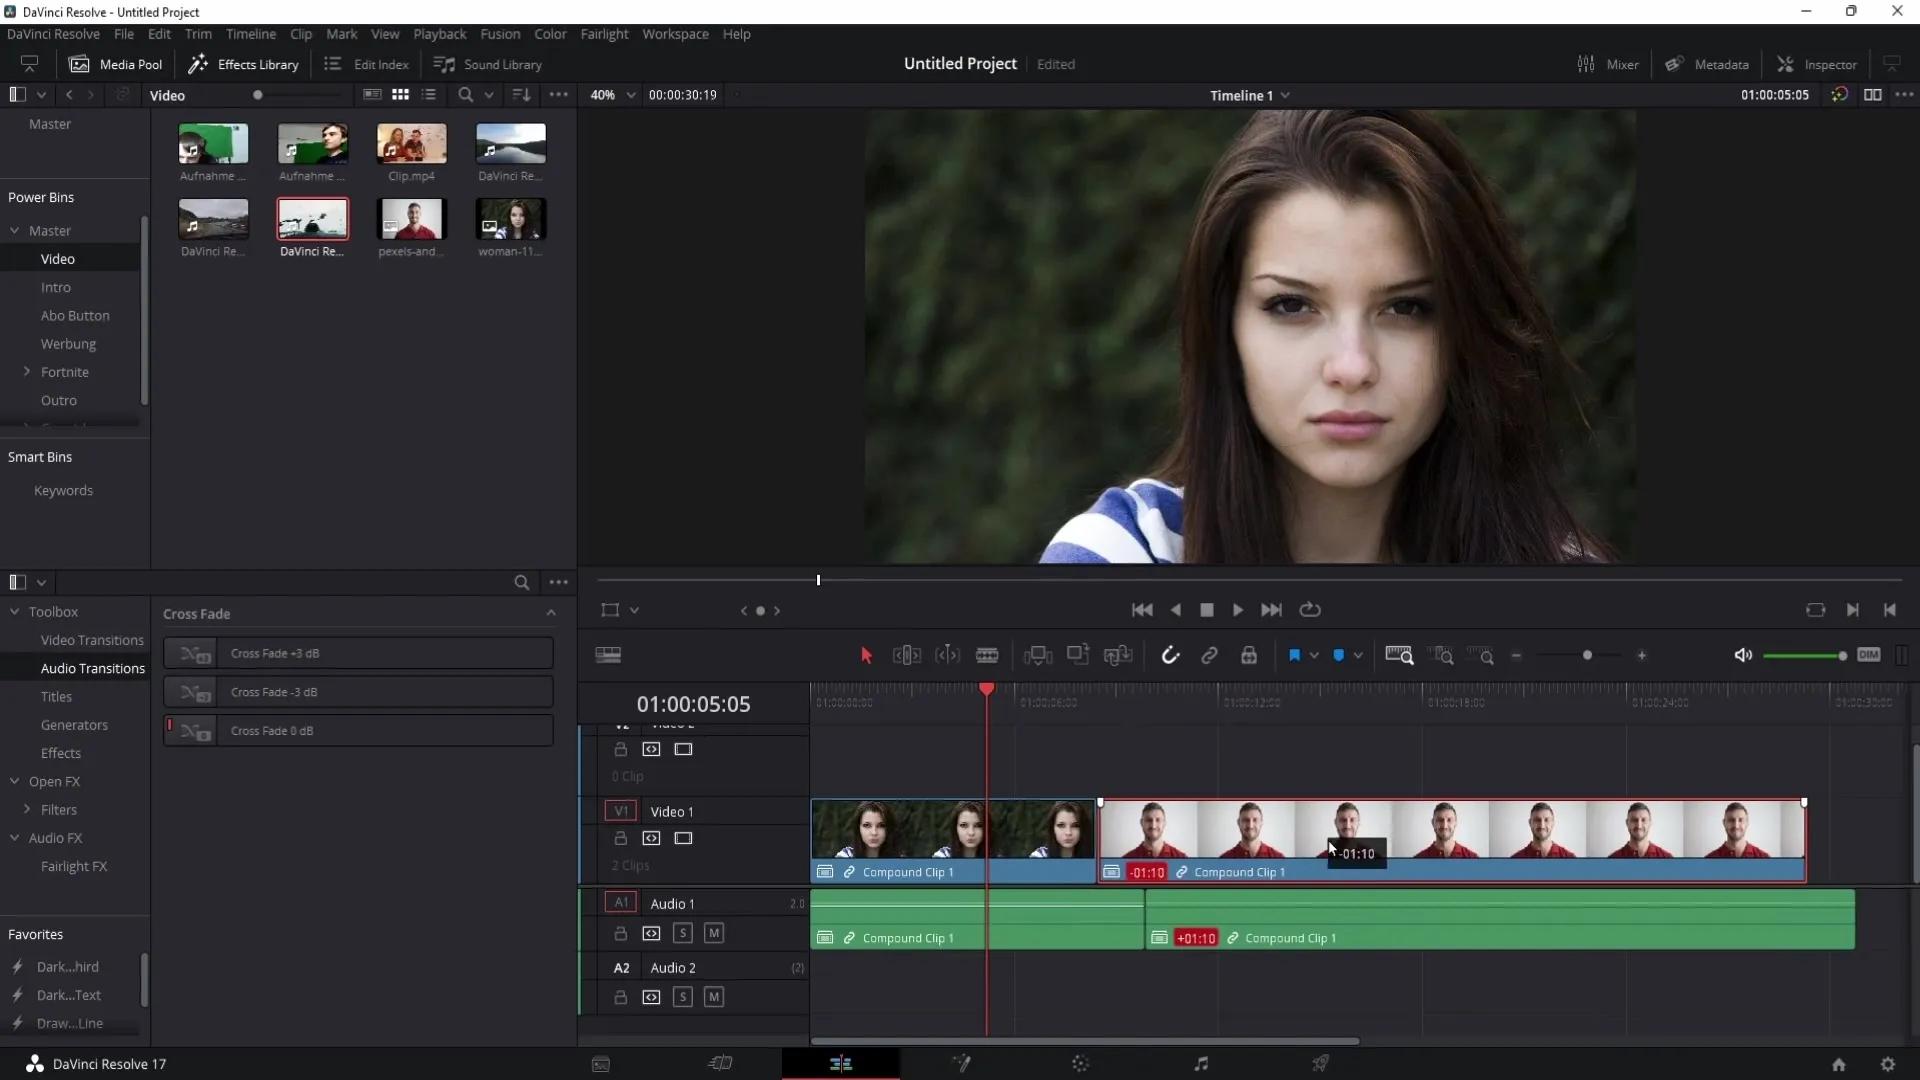
After that, you minimize the audio track of the second clip to ensure that the transition to the audio from clip one works seamlessly.
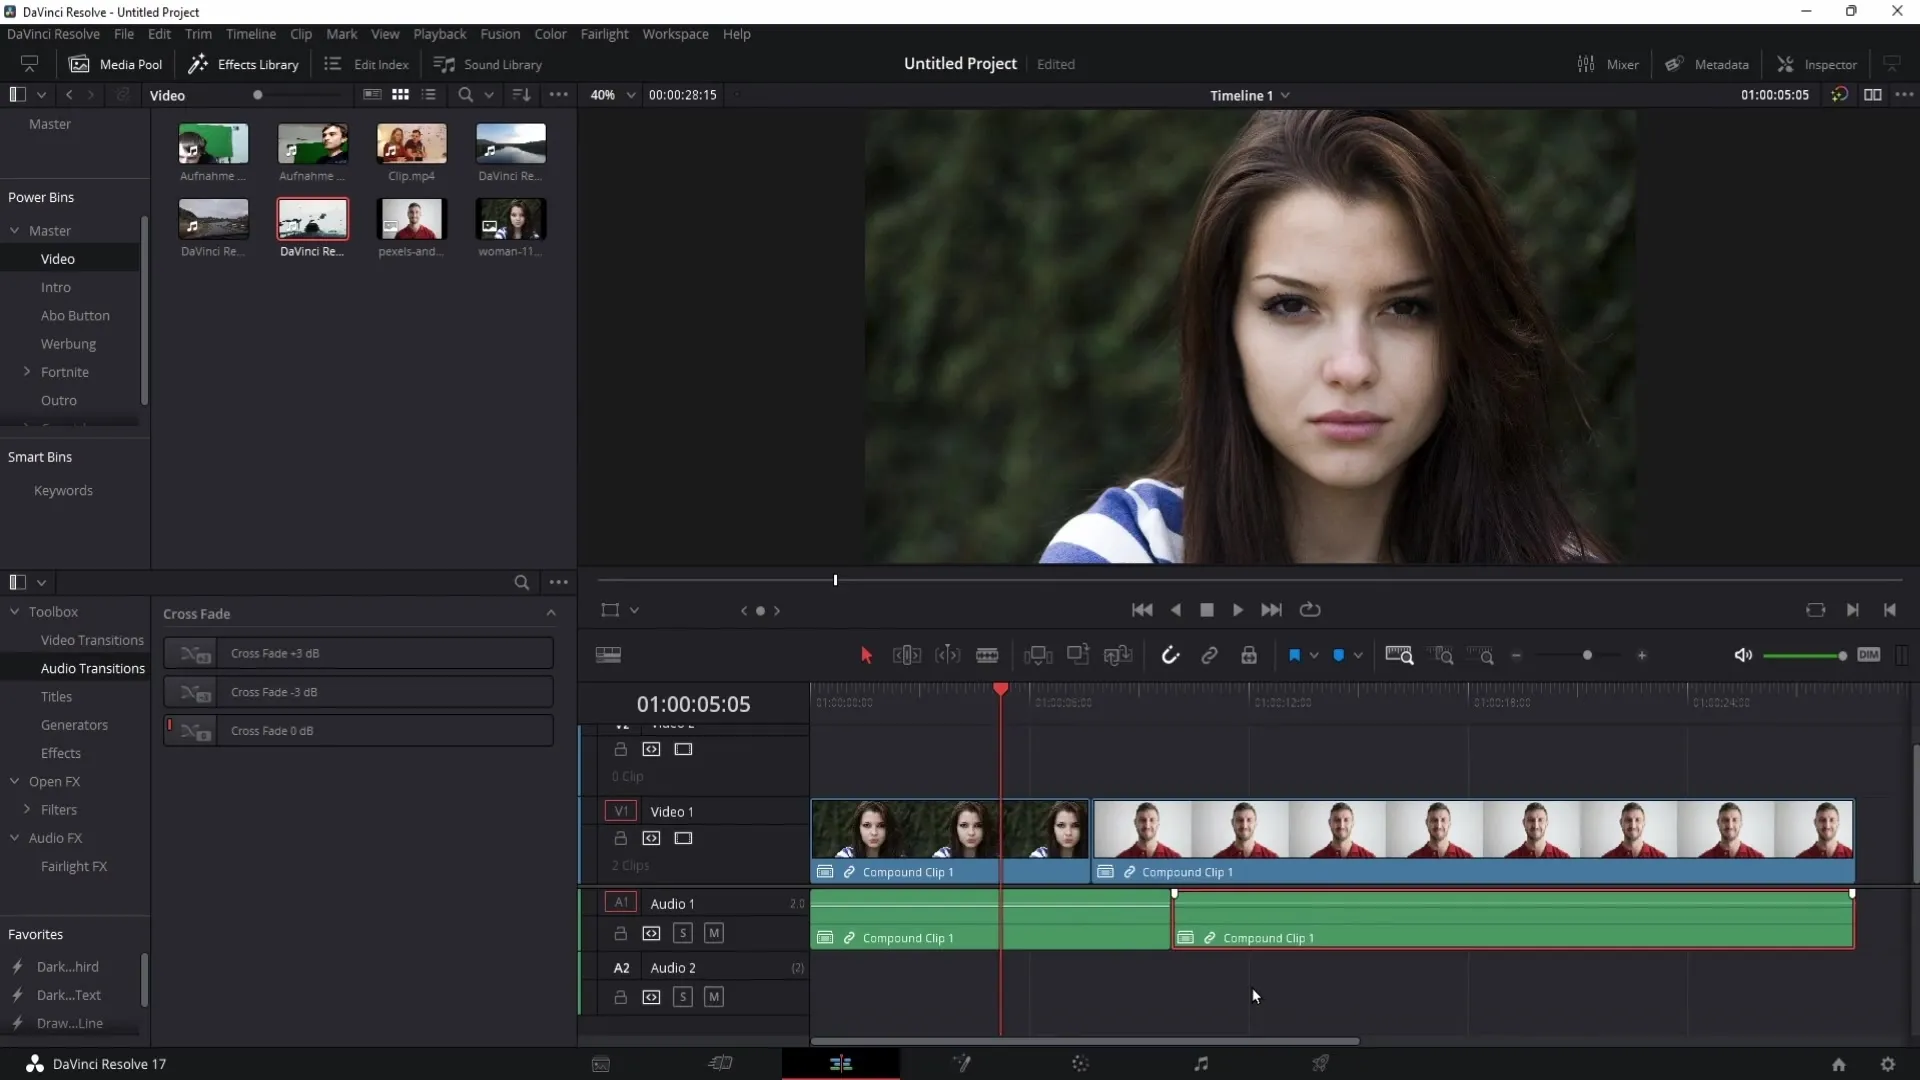
Now, you can move the audio track back up, allowing the audio from the first clip to continue playing while visually transitioning to the second clip.
Applying the Techniques
To effectively apply these two editing techniques, consider the impact on viewers. An L-cut increases tension as you continue the action. Pay attention to the characters' movements and reactions during conversations. This can be crucial in creating emotional moments and captivating the audience.
On the other hand, a J-cut can be used to prepare an intense dialogue while the visuals still focus on another character.
Remember:
The audio tracks are crucial for the technical implementation of J and L cuts. Orient yourself to the direction of the audio tracks: the audio goes left for J-cuts and right for L-cuts.
Summary
In this tutorial, you have learned what J- and L-Cuts are, and how to create them in DaVinci Resolve. With these techniques, you can enhance your videos both in terms of content and visuals.
Frequently Asked Questions
What is the difference between a J-Cut and an L-Cut?A J-Cut plays the audio of a following clip before the image changes. An L-Cut, on the other hand, allows the audio of the current clip to continue while the image changes.
How can I ensure that my cuts are smooth?Make sure to carefully separate and align the audio tracks so that the transitions in the cut appear seamless.
Are J- and L-Cuts applicable to all videos?Yes, they are versatile, especially in composite dialogues and interviews, to create tension and dynamics.
Can I adjust the audio tracks afterwards?Yes, you can adjust the audio tracks at any time to optimize the desired flow and emotions.
How can I improve the timing for these cuts?Practice timing with different clips to get a sense of when the ideal moment for the cut is and how viewers will react.


