In this guide, you will learn how to change the speed of a clip in DaVinci Resolve, whether you want to play it faster or slower. This is a common request in video editing to increase effectiveness or make creative decisions. You will also find out how adjustments to clip speed can affect audio playback and how you can possibly work around this. Let's get started!
Key Takeaways
- You can easily adjust the speed of a clip.
- It is possible to adjust audio and video independently.
- When speeds are different, it can lead to asynchronous playback.
Step-by-Step Guide
To adjust the speed of a clip, first identify the segment you want to edit.
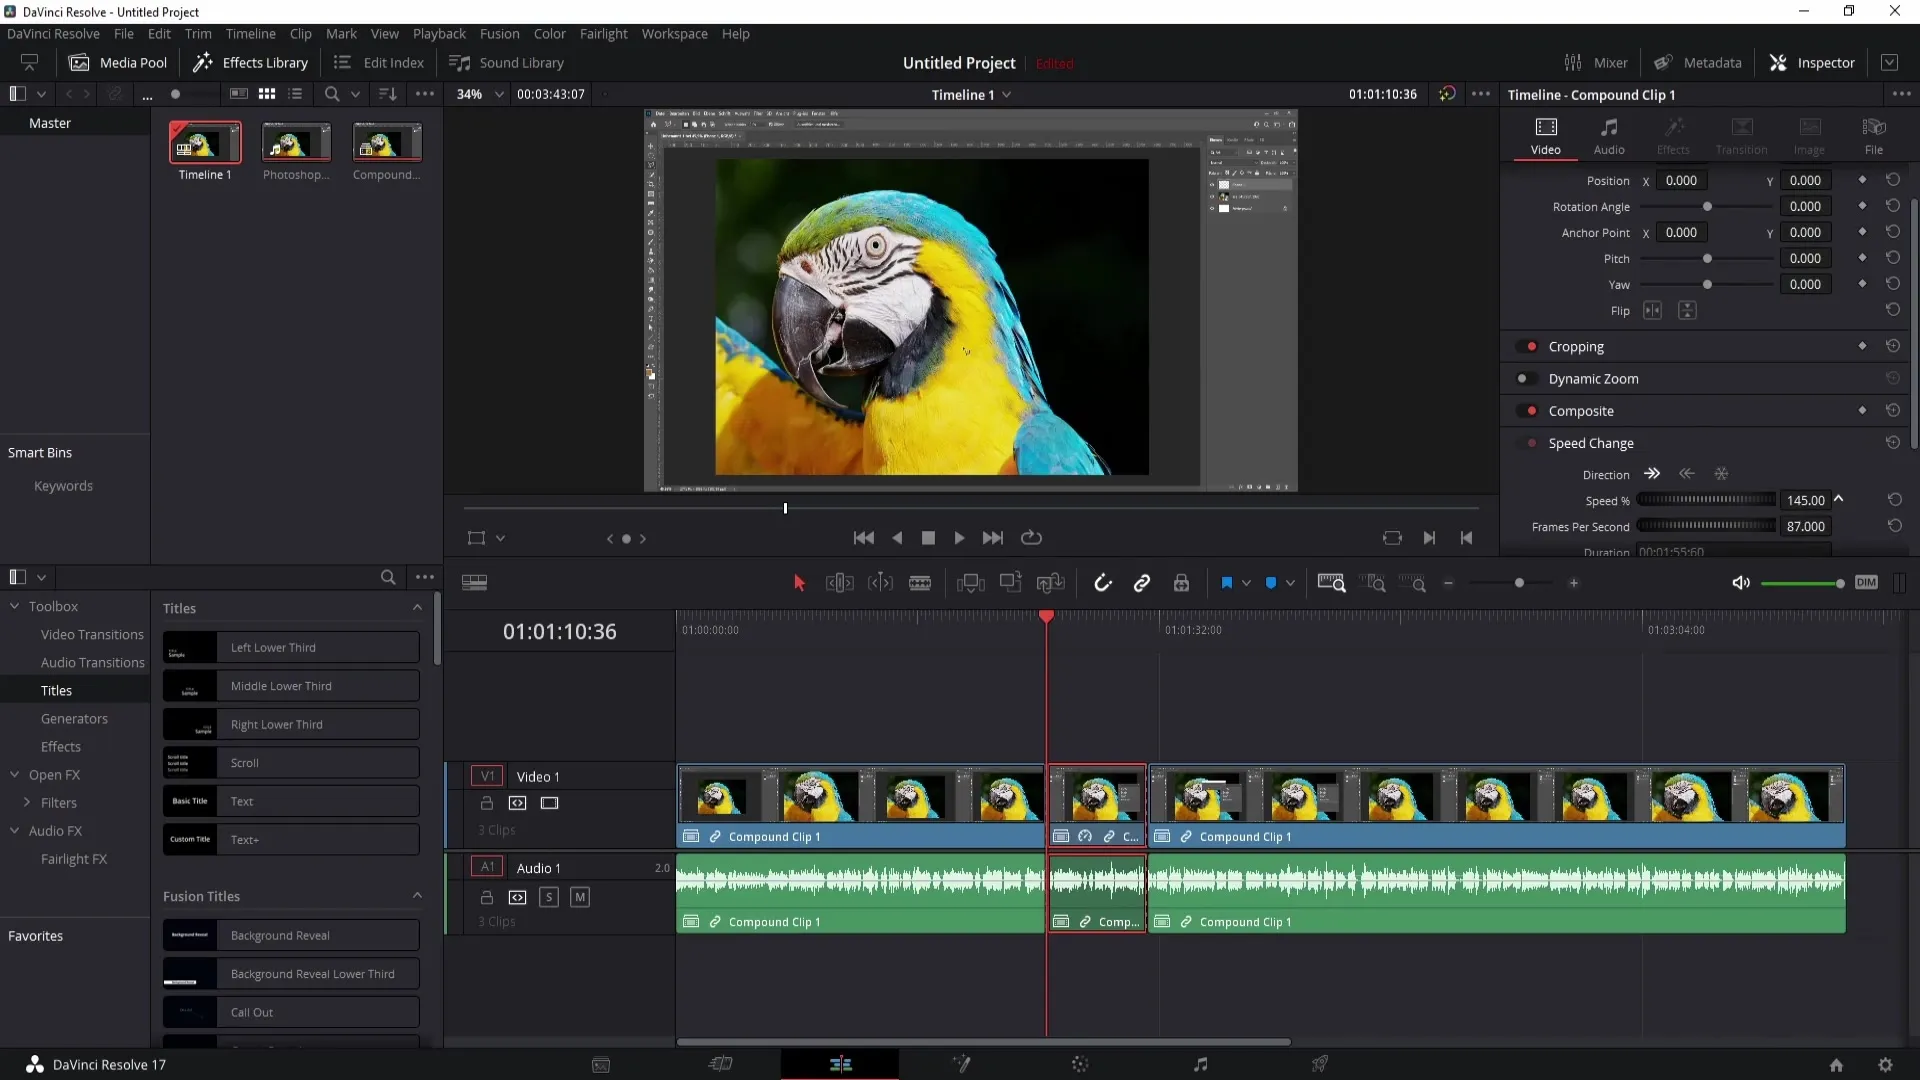
Start by navigating to the point in the clip where you want to play faster or slower. Use the razor tool to select the desired portion of the clip. Here, we can now select a clip that we want to edit.
Once you have trimmed the desired portion, click on the clip to listen to it and make sure you have the desired balance between speed and audio. Play the clip to get a initial impression.
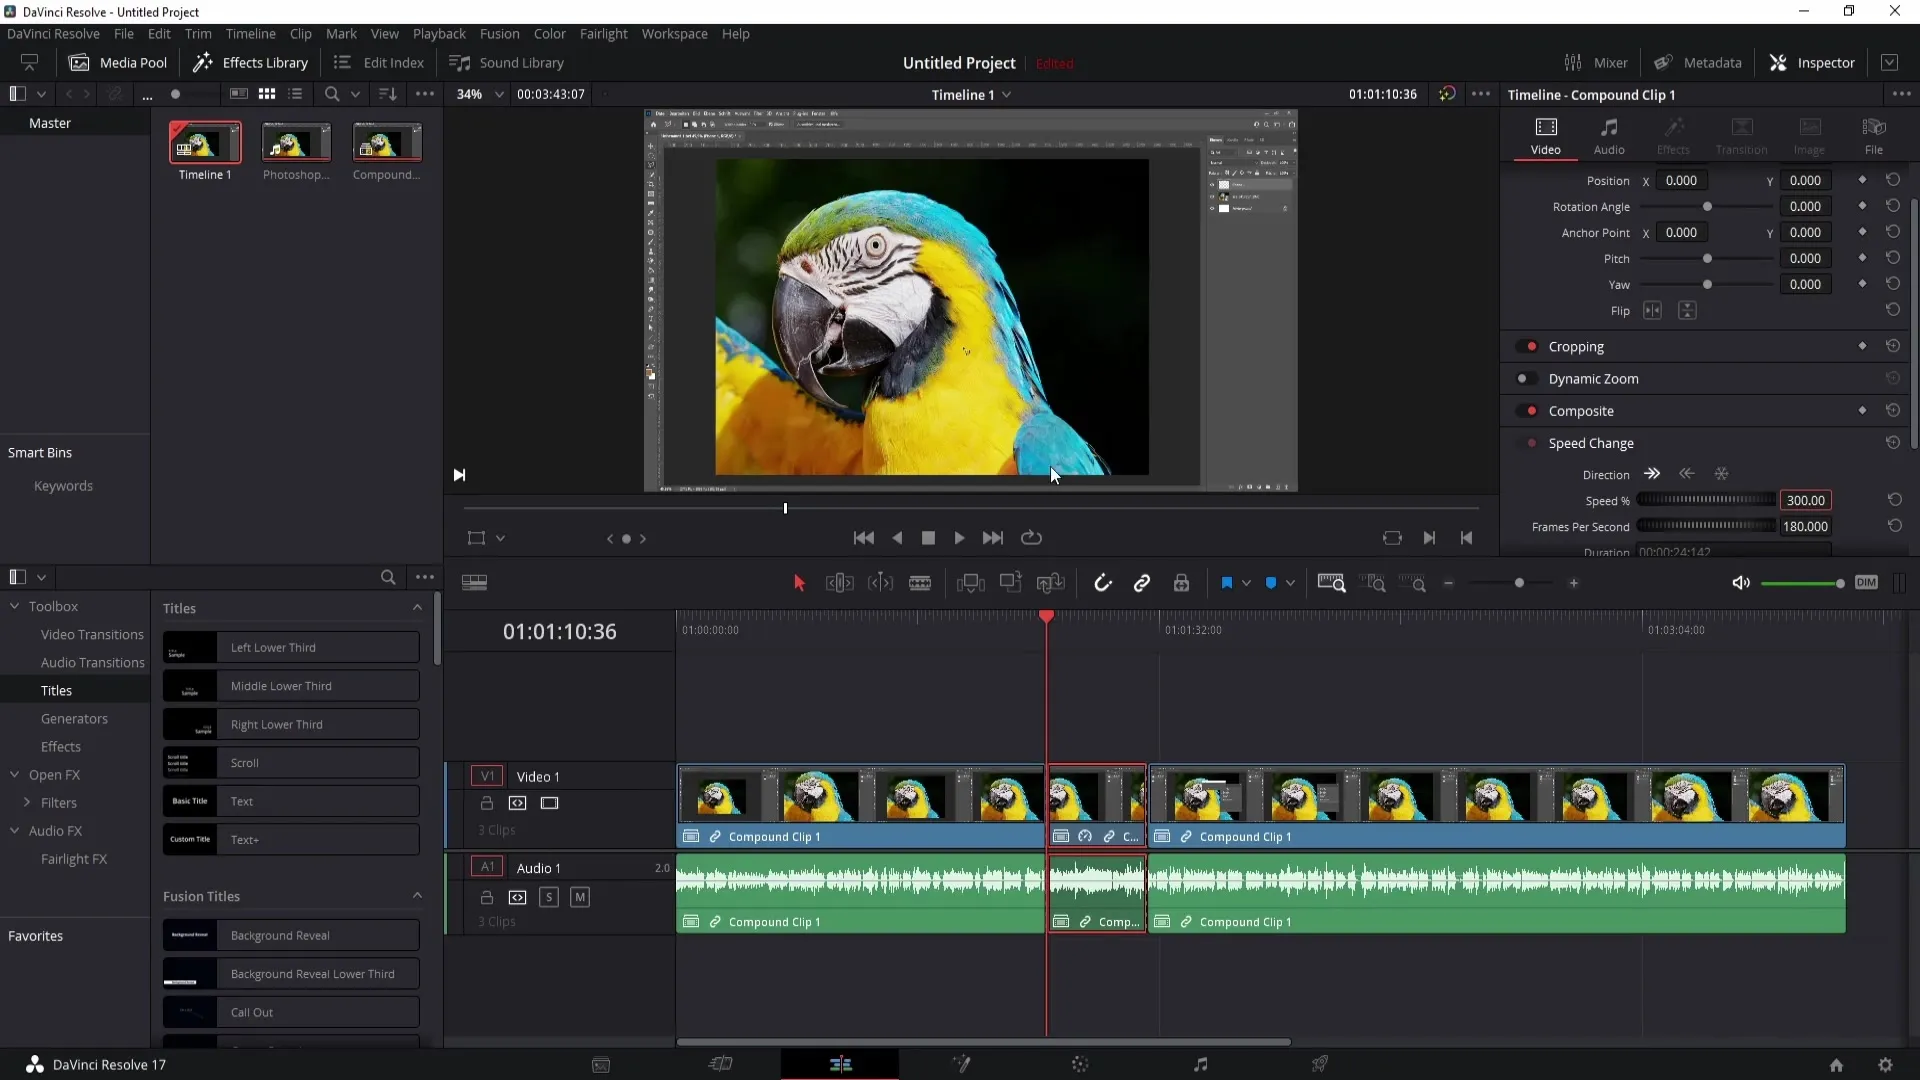
To adjust the speed, go to the video options on the right side. Look for the "Speed Change" option. Here, you can adjust the percentage speed of the clip. If you want to increase the speed, you can set it to 200% or even higher values if desired.

There are various ways to change the speed. For example, you can simply input the number directly. Double-clicking the speed field allows you to enter a number without moving the mouse. This allows you to make the adjustment very precise and quickly. Setting it to 300%, for example, clearly shows the speed difference.

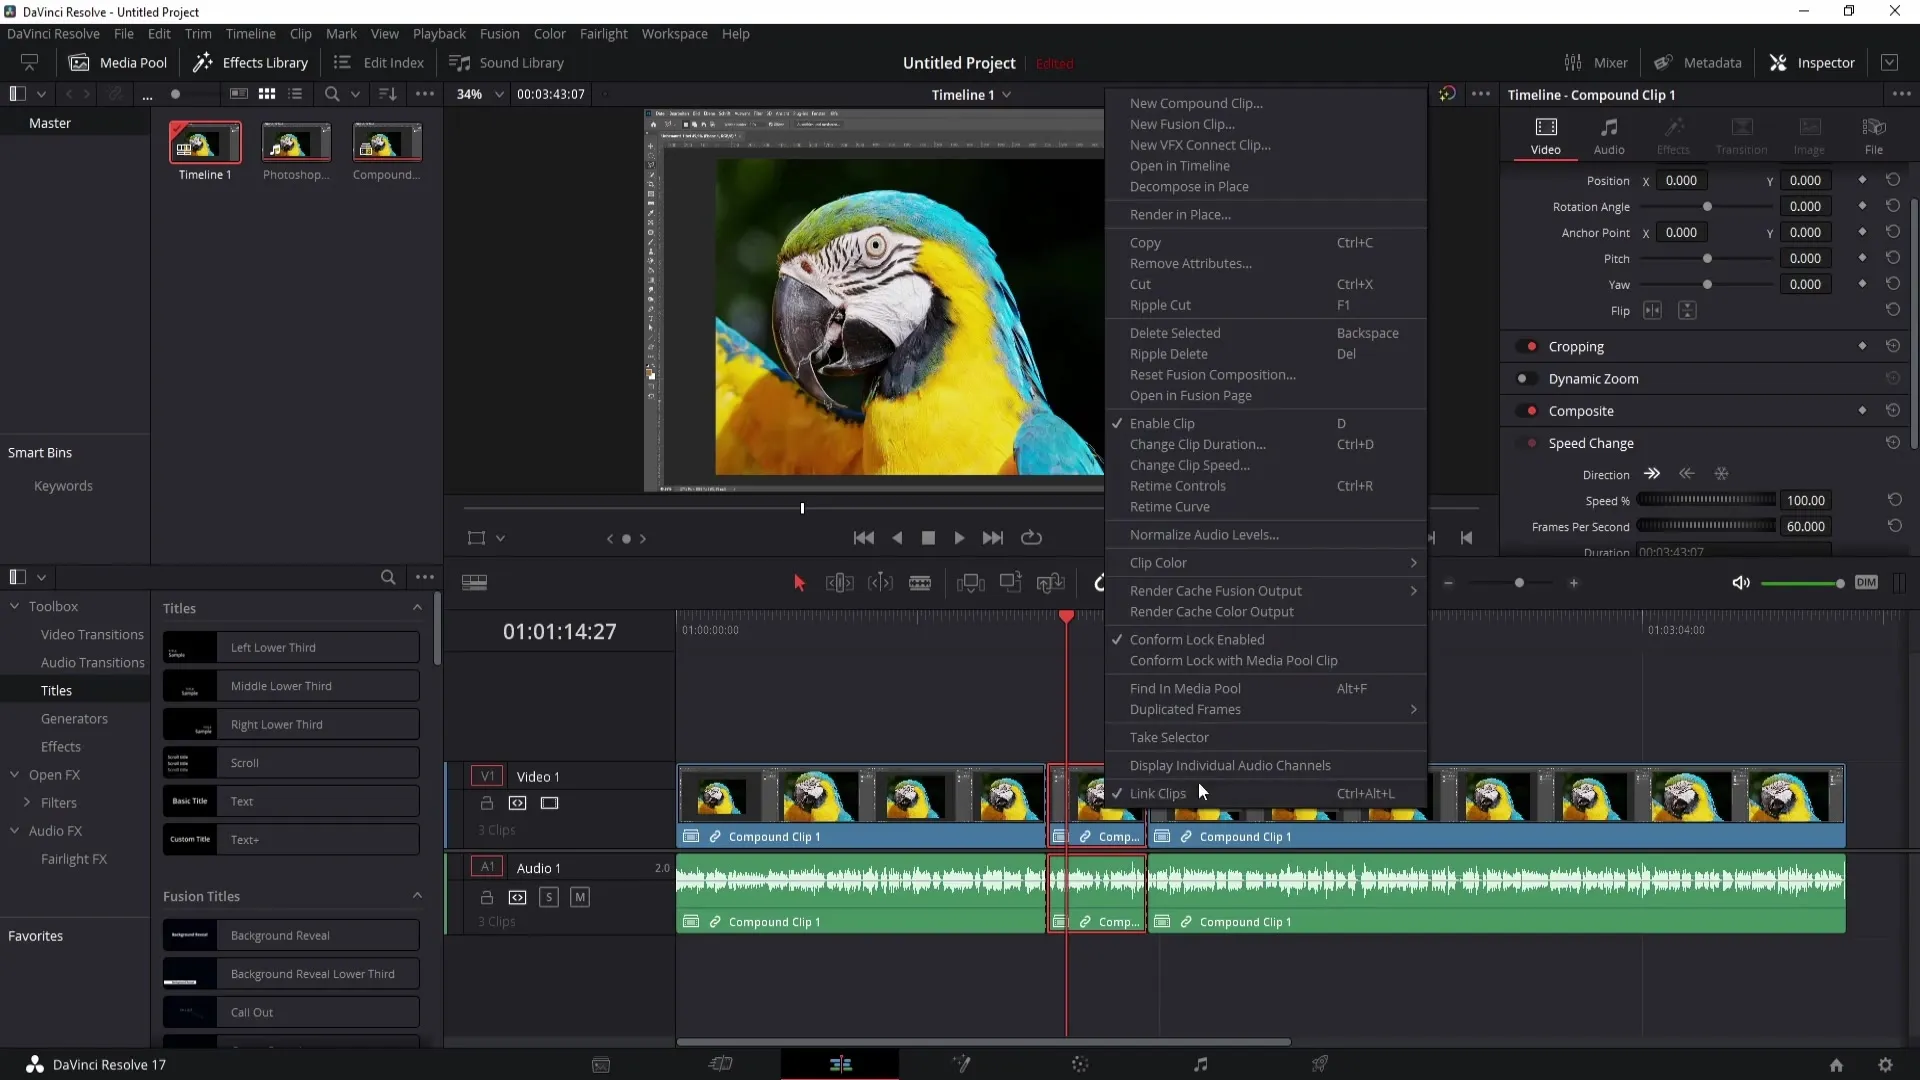
However, if you do not want to affect the audio of the clip, you can now check this with a step back. Return to the original speed (100%) and right-click on the clip. Then select the option "Unlink Clips" to be able to edit the audio and video separately.

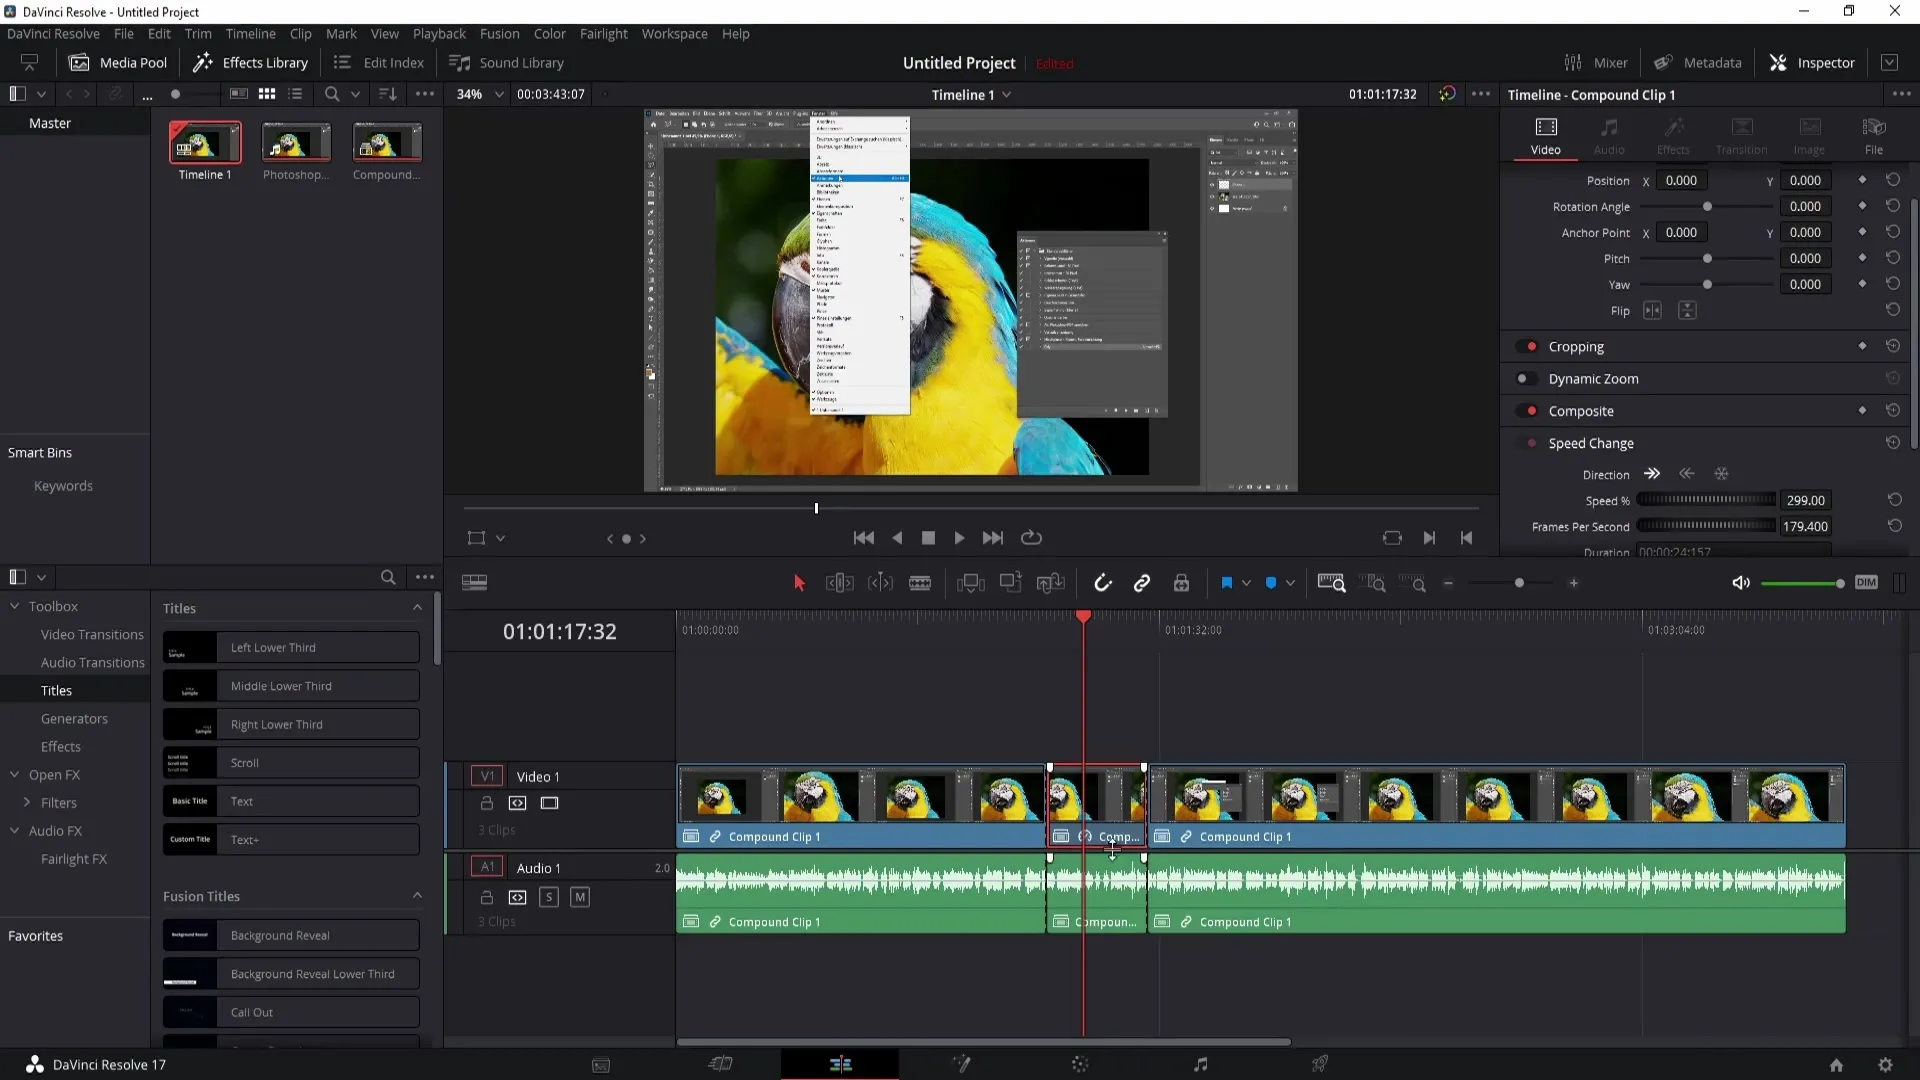
Now select only the top clip, in this case the video, and readjust the speed. Increase it to around 300% and play your clip again. You should now notice that the voices are faster, while the voice remains asynchronous to the video speed.

Keep in mind that the audio track remains at 100% speed while the clip is set to 300%. This can be useful if you want to achieve dramatic effects, but consider the possible synchronization problems that may arise.
Summary
In this guide, you have learned how to change the speed of a clip in DaVinci Resolve. You can make clips faster or slower, and adjust the audio track independently. Remember to keep an eye on the synchronization between video and audio to achieve optimal results.
Frequently Asked Questions
How can I increase the speed of a clip in DaVinci Resolve?Select the clip, go to the video options, and adjust the "Speed Change" by entering a higher number.
Can I adjust the audio speed independently from the video?Yes, by unlinking clips, you can edit audio and video independently.
What happens if the audio and video speeds are different?This leads to asynchronous playback, meaning that the audio and video tracks are no longer in sync.
What values can I use for the speed setting?You can set the speed in percentages from 0 to over 300%, depending on the change you want to achieve.


