In this guide, I will show you how to adjust the playback speed of video clips using the Retime Controls in DaVinci Resolve. This feature is particularly useful for highlighting specific scenes by playing them slower or faster. Let's go through the process step by step so you can effectively utilize this technique.
Key Takeaways
- The Retime Controls allow you to adjust the playback speed of clips.
- You can precisely set speed changes using speed points.
- Various settings like "Freeze Frame" or "Speed Ramp" enhance the creative possibilities.
Step-by-Step Guide
To use the Retime Controls in DaVinci Resolve, follow these steps:
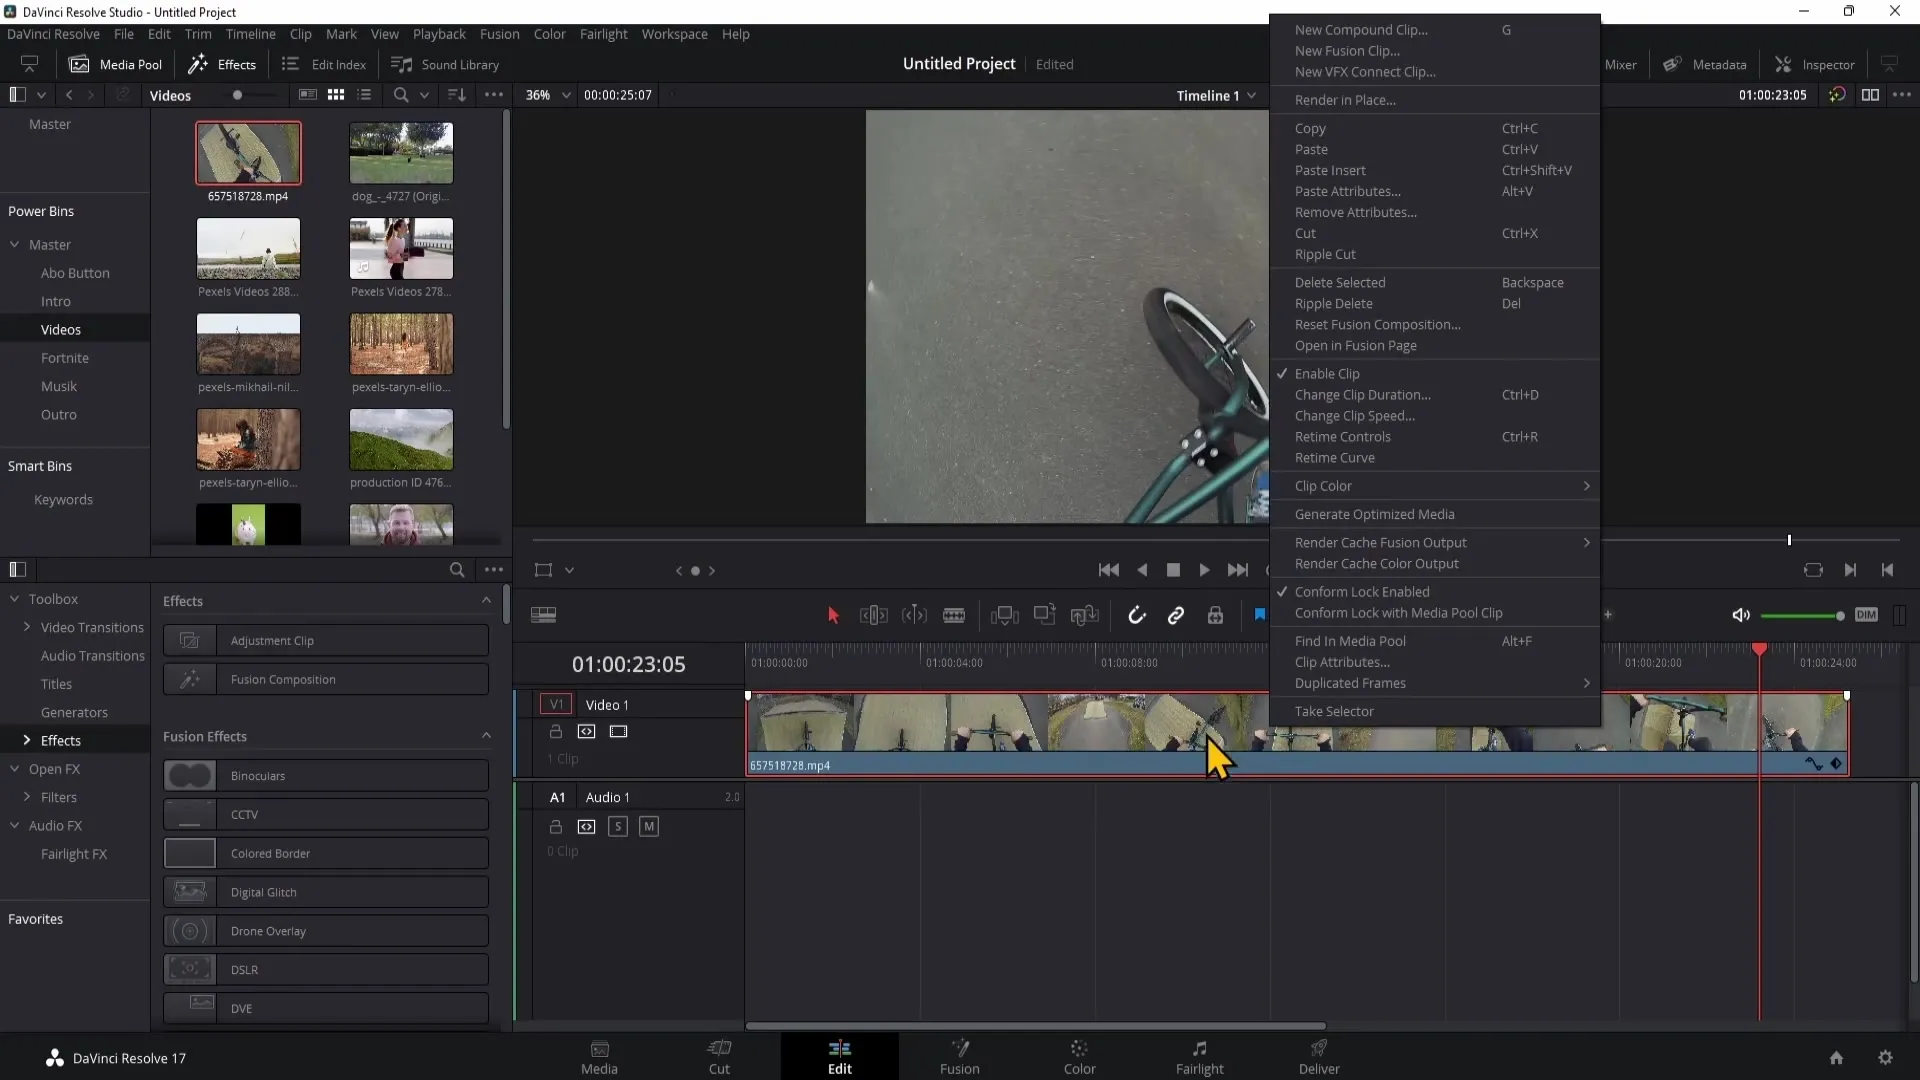
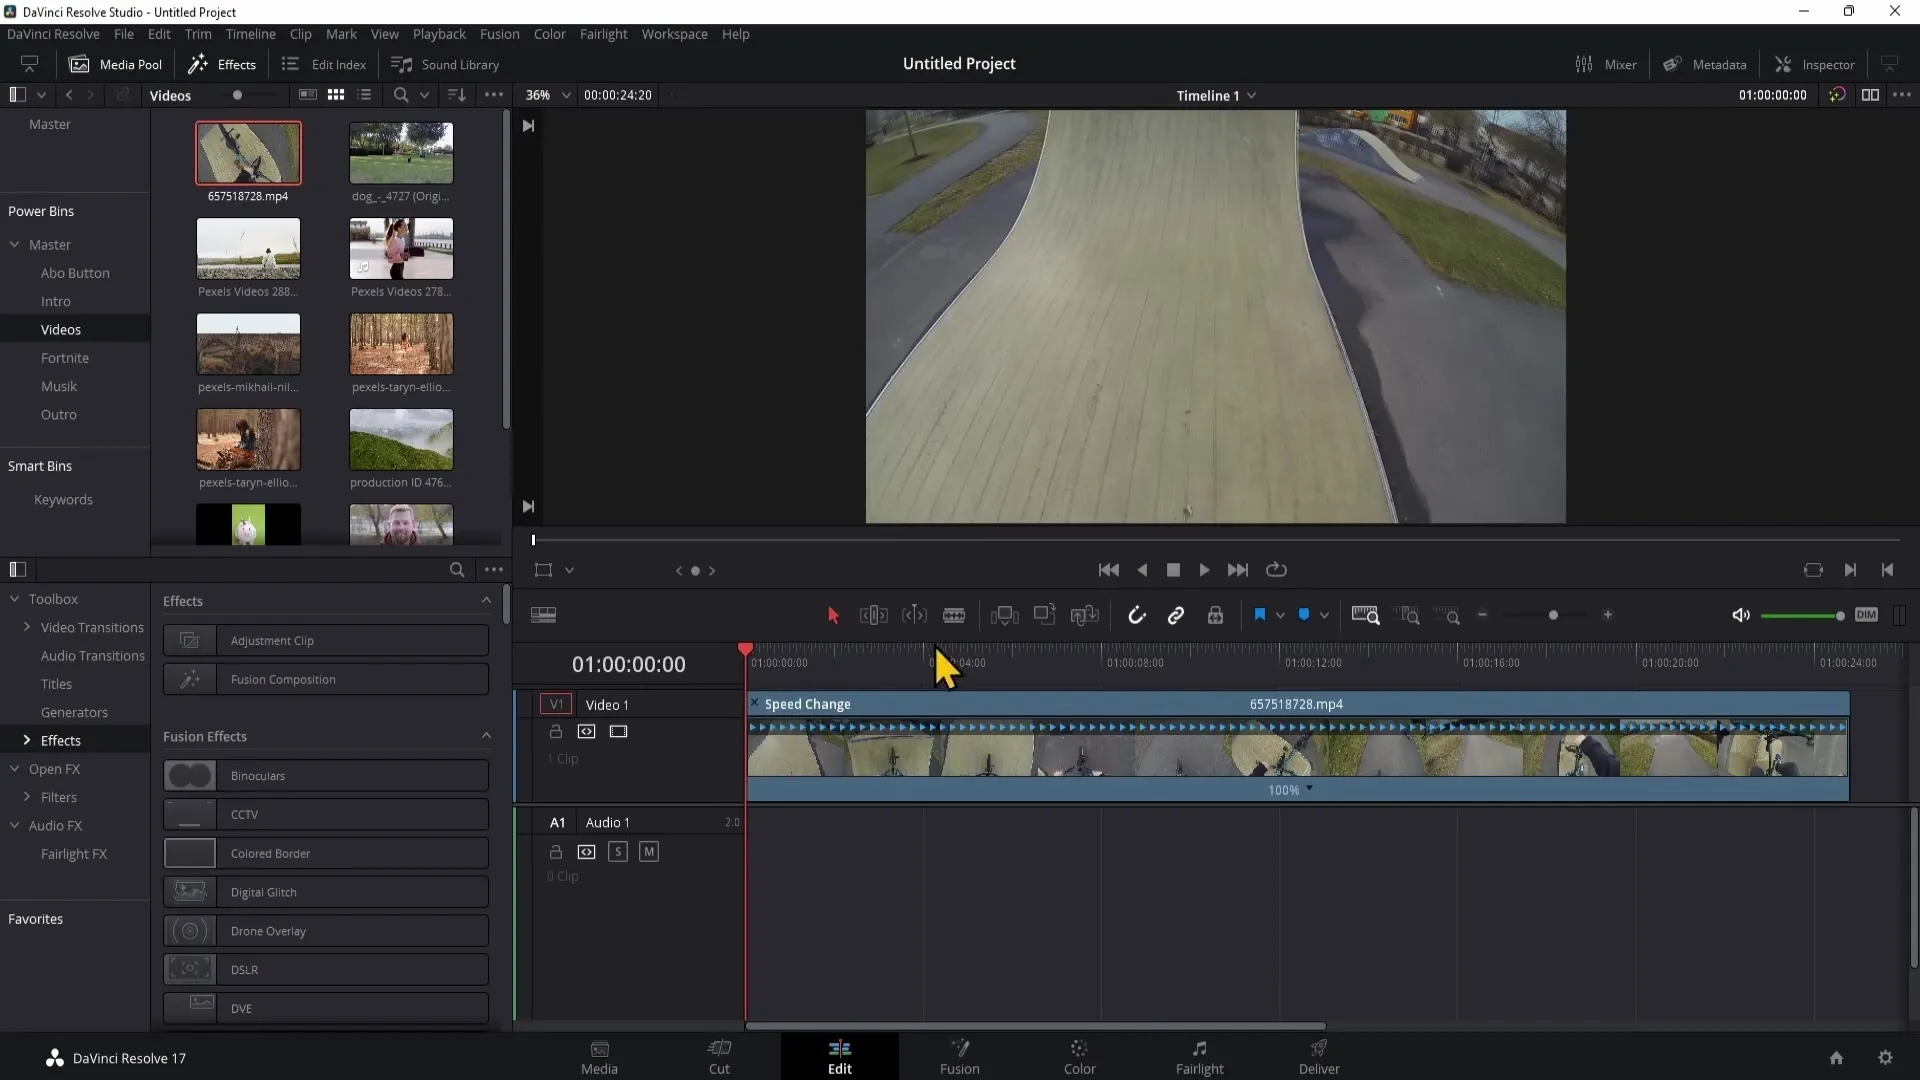
First, drag your clip into the timeline of DaVinci Resolve. To open the Retime Controls, right-click on the clip and select "Retime Controls" from the context menu. This process is shown in the video at second 39.
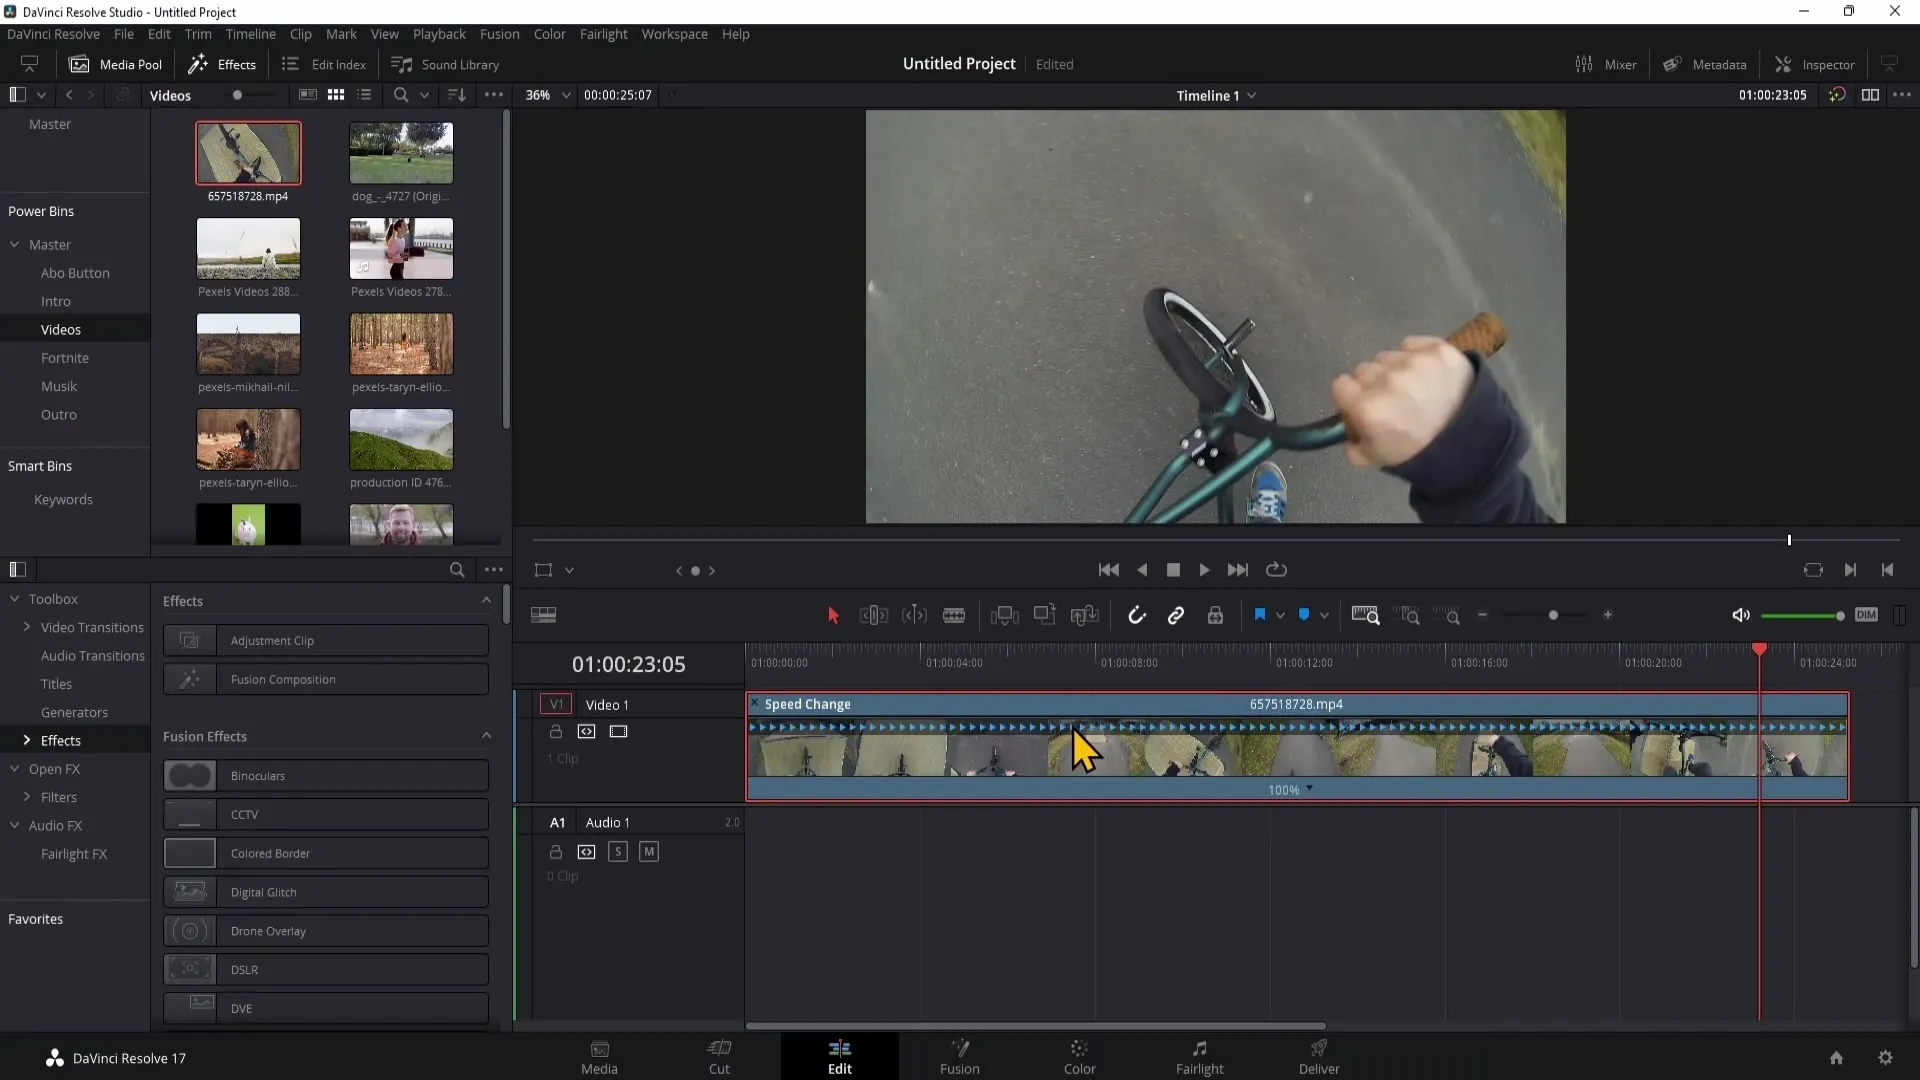
Once the Retime Controls are open, you will see an icon in the top bar indicating that your clip is playing forward. When the icon points backward, the clip plays in reverse. You will also find the current playback speed of 100% displayed. These features are explained in the video at second 49.
To create a speed change, you need to set specific points in the clip. Locate the beginning of the scene you want to slow down or speed up. Pause at the starting mark of the scene and then click on the 100% display to add a "speed point." To do this, first click on the downward arrow and select "Add Speedpoint." This is explained in the video at second 117.
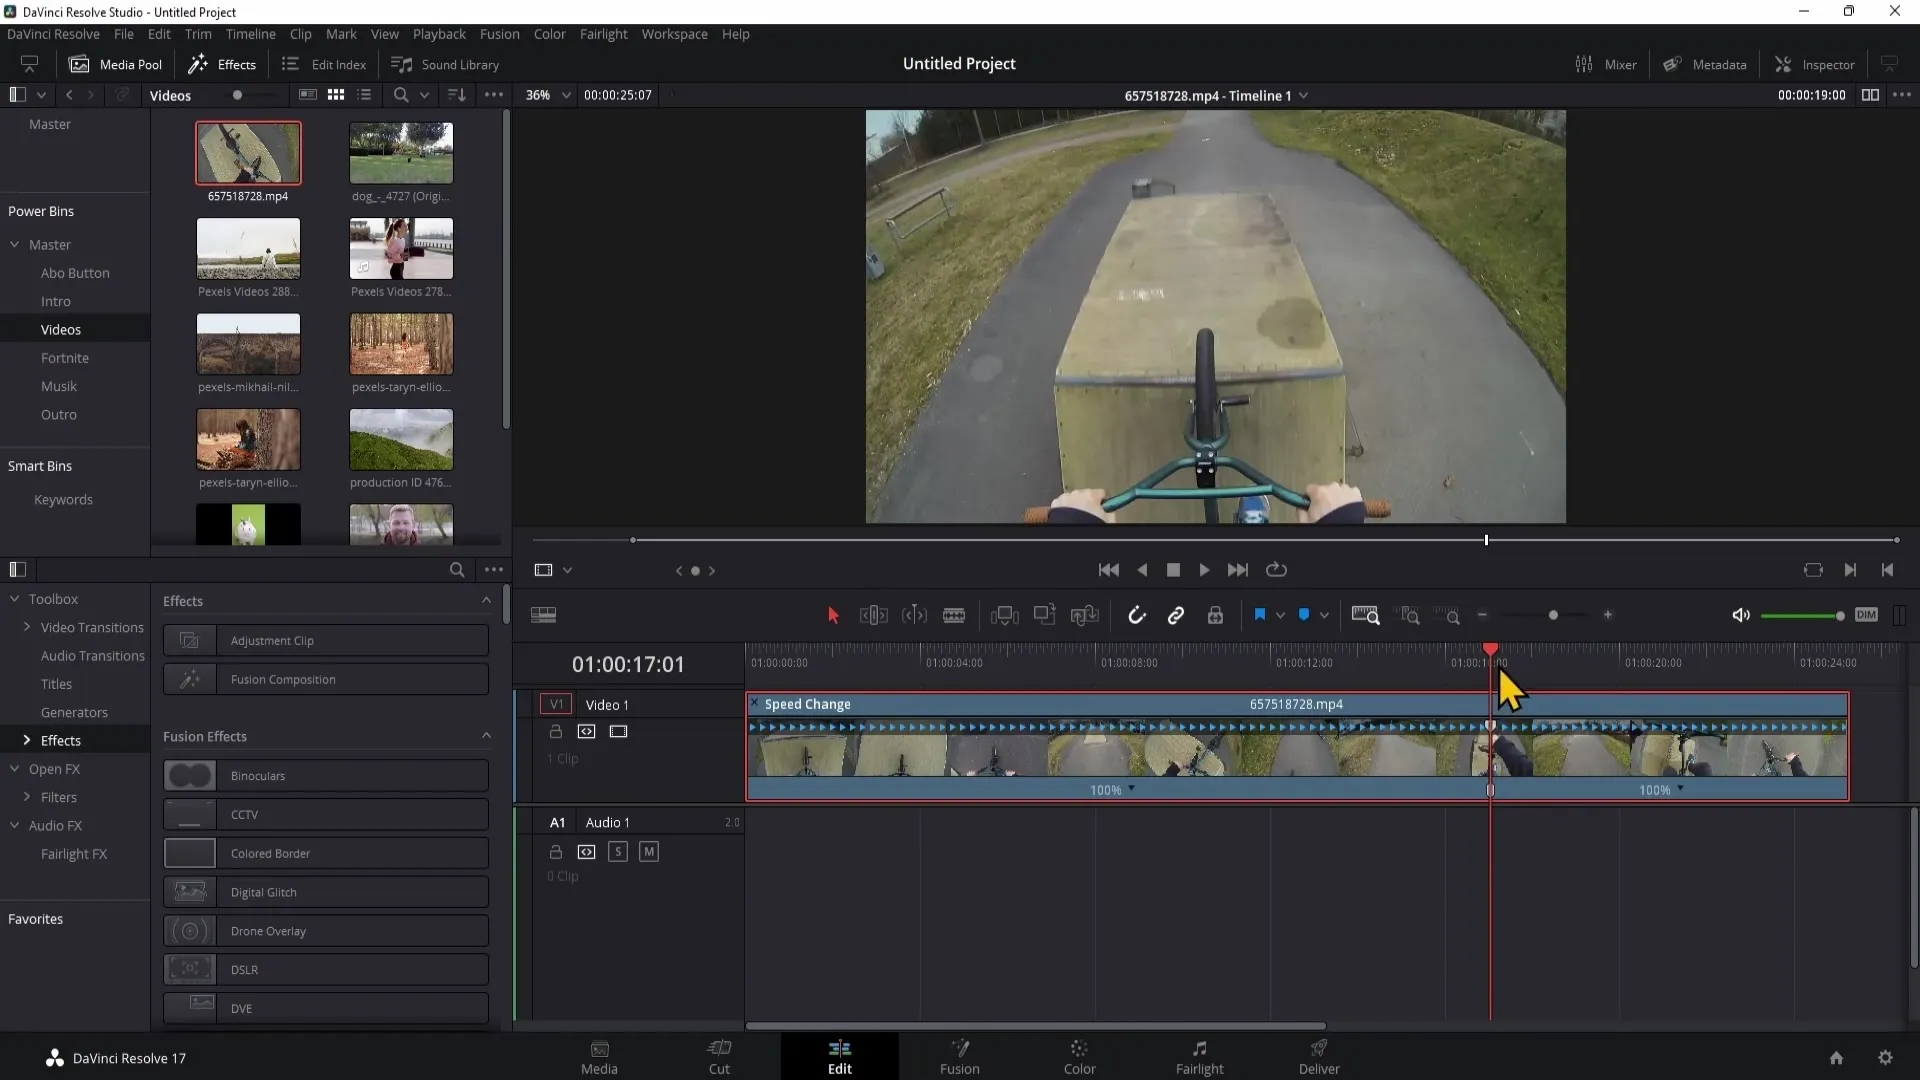
Now, you need to find the endpoint of the speed change. Play the clip to identify the significant point where the effect should end. Pause at this point and add another speed point by clicking again on the 100% display and selecting "Add Speedpoint." This is shown in the video at second 139.
You have now set two speed points. To play the area between these points slower or faster, drag the right speed point further to the right. If you drag it to the left, the playback will be faster. In this example, we want to slow down the playback, so drag the speed point to the right as shown in the video at second 158.
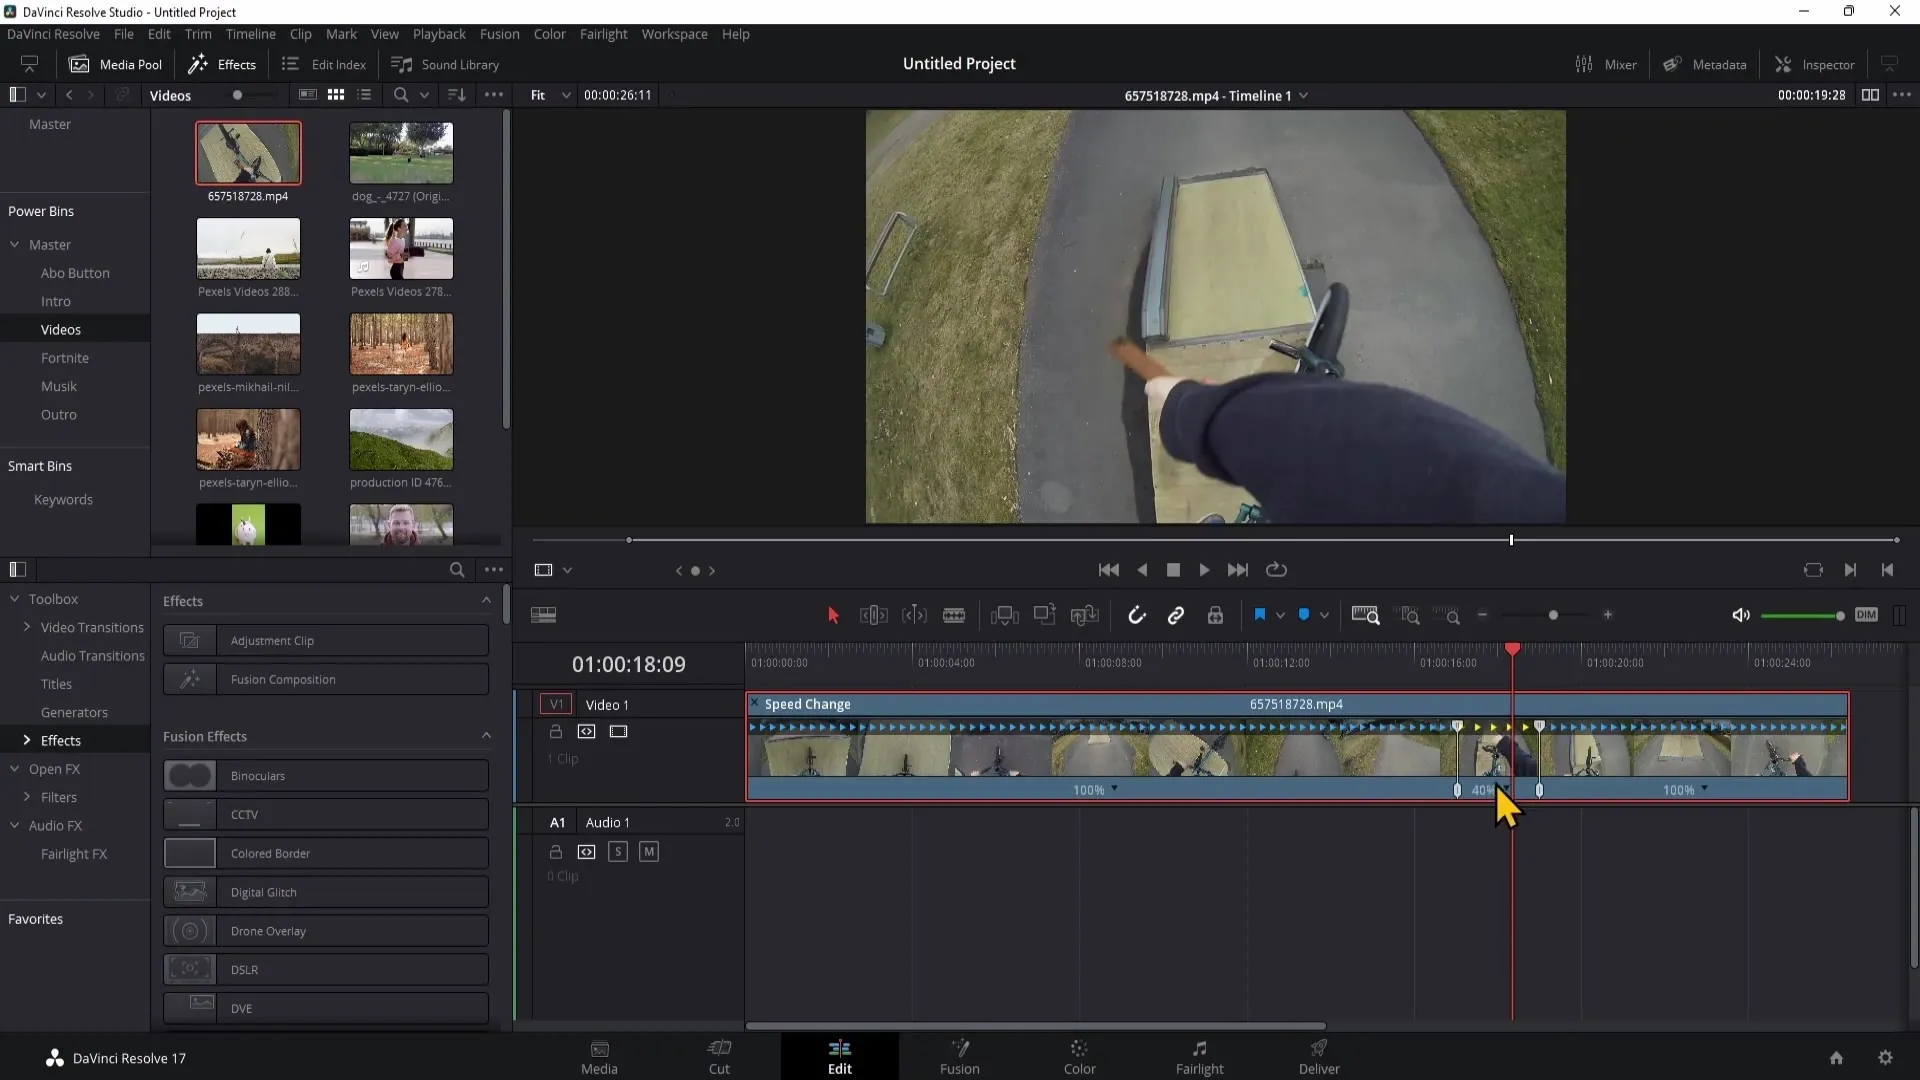
When you play the clip now, you will notice that the section between the two speed points is played slower. From the point you reset the speed, the normal playback speed is restored. This feature is explained in the video at second 192.
If you have added multiple speed points and want to remove one, simply click on the downward arrow and select "Clear Speedpoint" to remove the desired speed point. This is illustrated in second 204 of the video.
If you want to reset all speed points, click again on the downward arrow and select "Reset Clip." This will undo all adjustments and start back at 100%. This feature is covered at second 220.
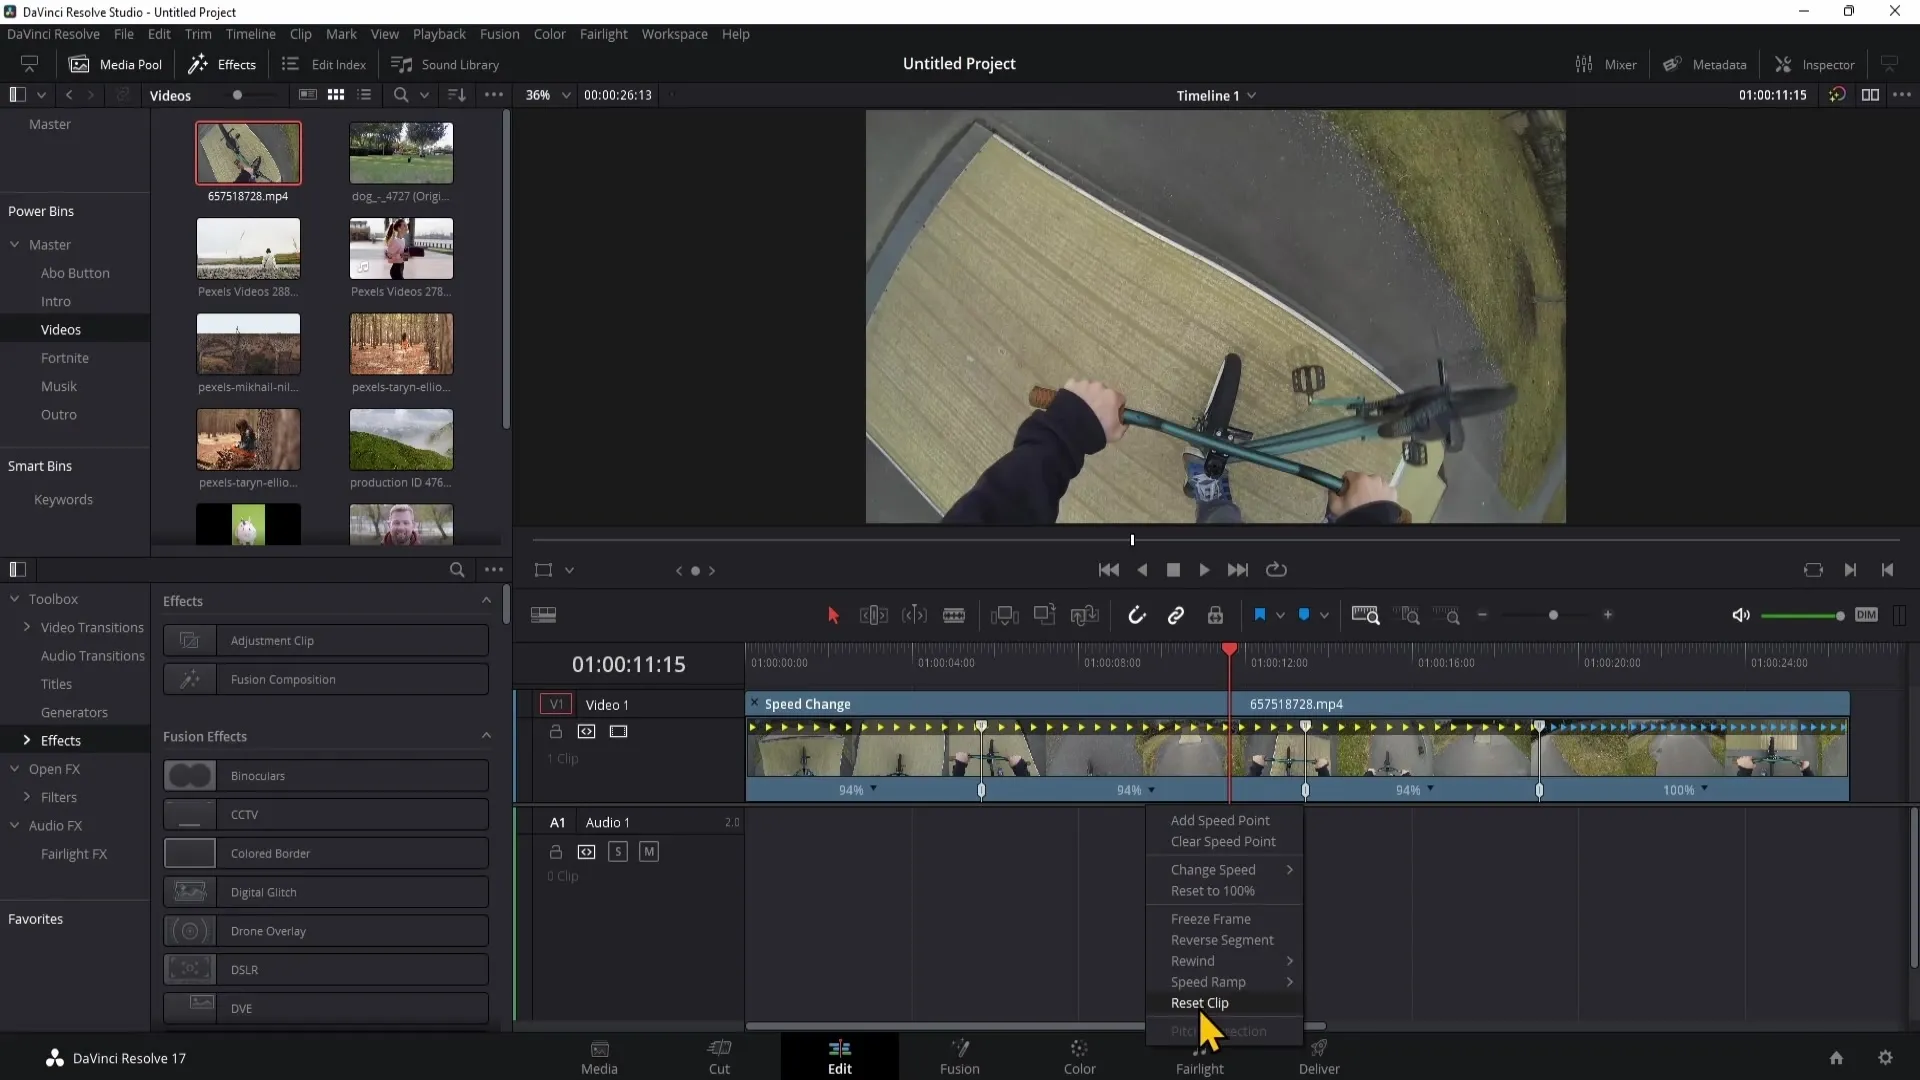
A useful function is "Reset to 100%." If you want to slow down a specific section, simply click on the arrow and select the "Reset to 100%" option to reset the section to the original speed. This is explained in the video at second 257.
Setting a freeze frame is also a useful technique. You can select a point in the clip and then hold it as a still frame. To do this, select the desired point and click on the downward arrow and then "Freeze Frame." This function is demonstrated at second 281.
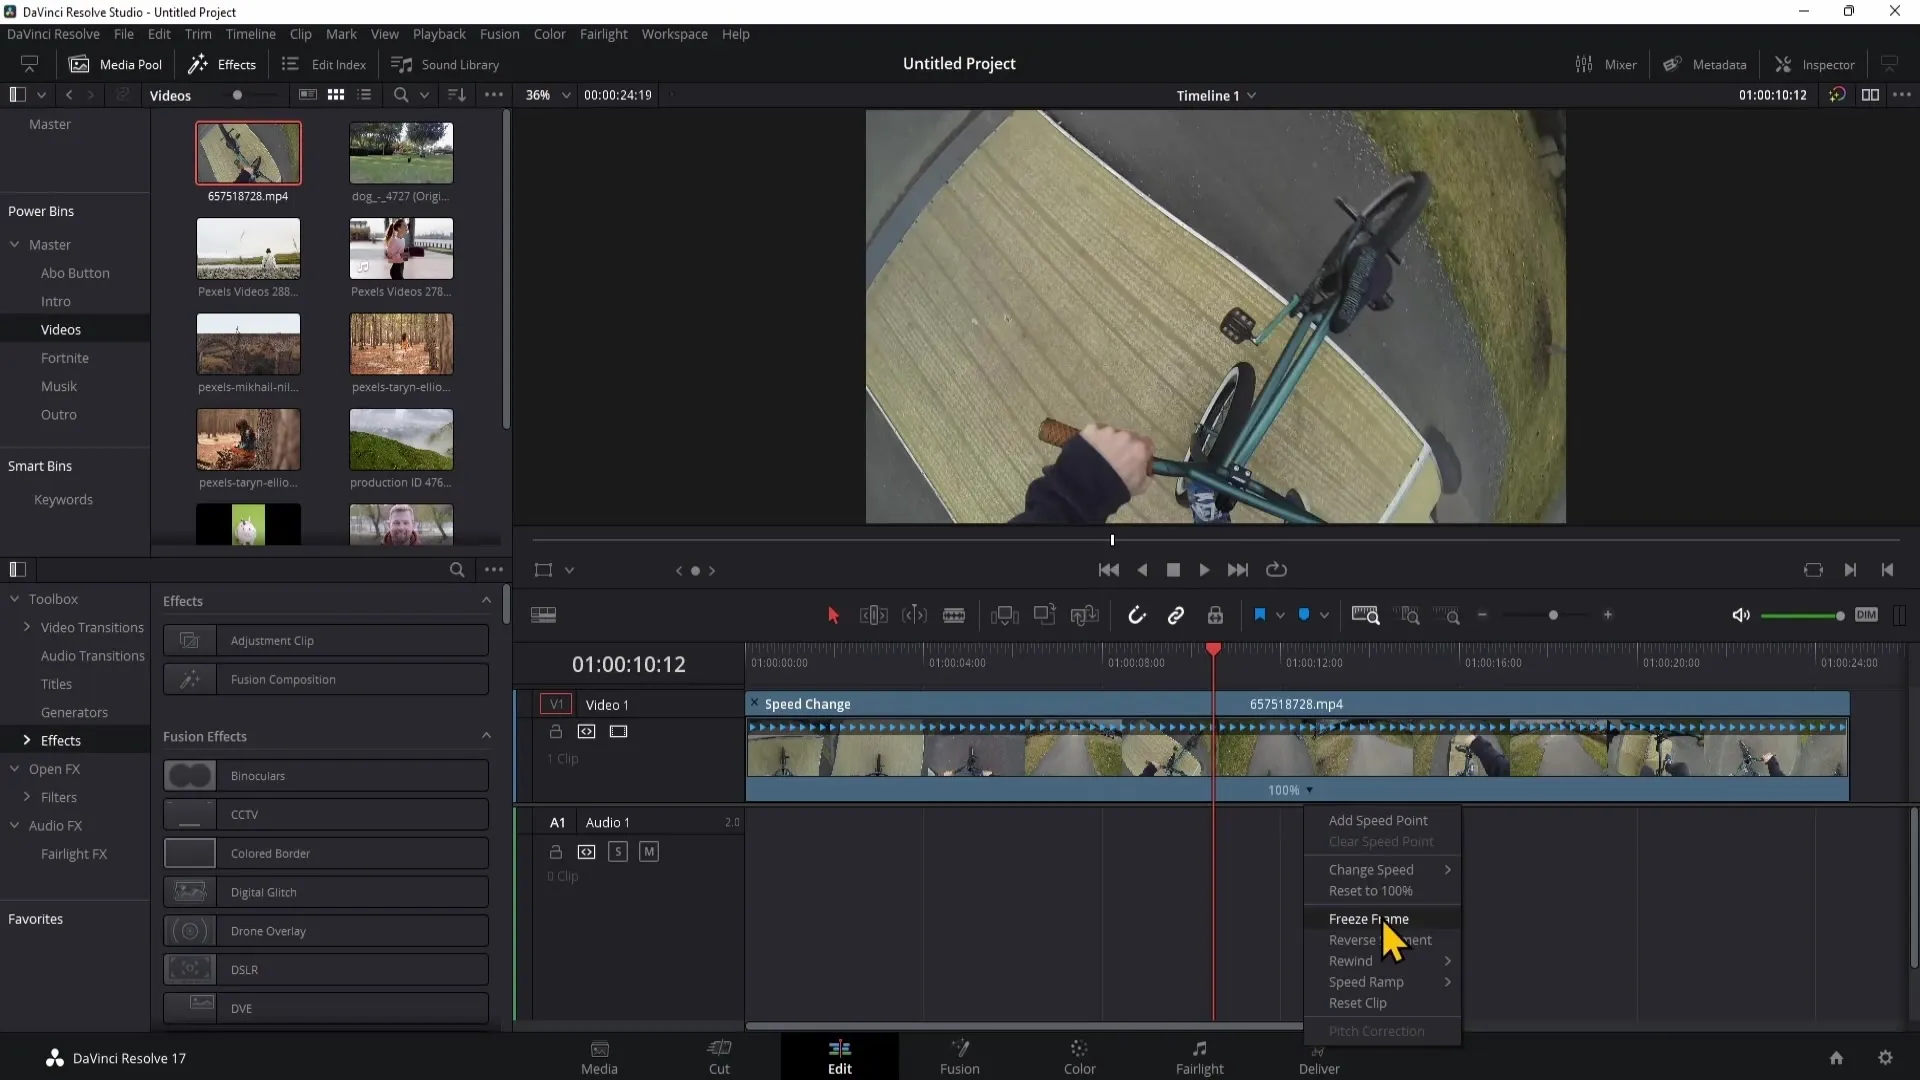
You can extend a freeze frame by dragging the right speed point further to the right. This way, the still frame can be displayed longer. This is explained in the video at second 296.
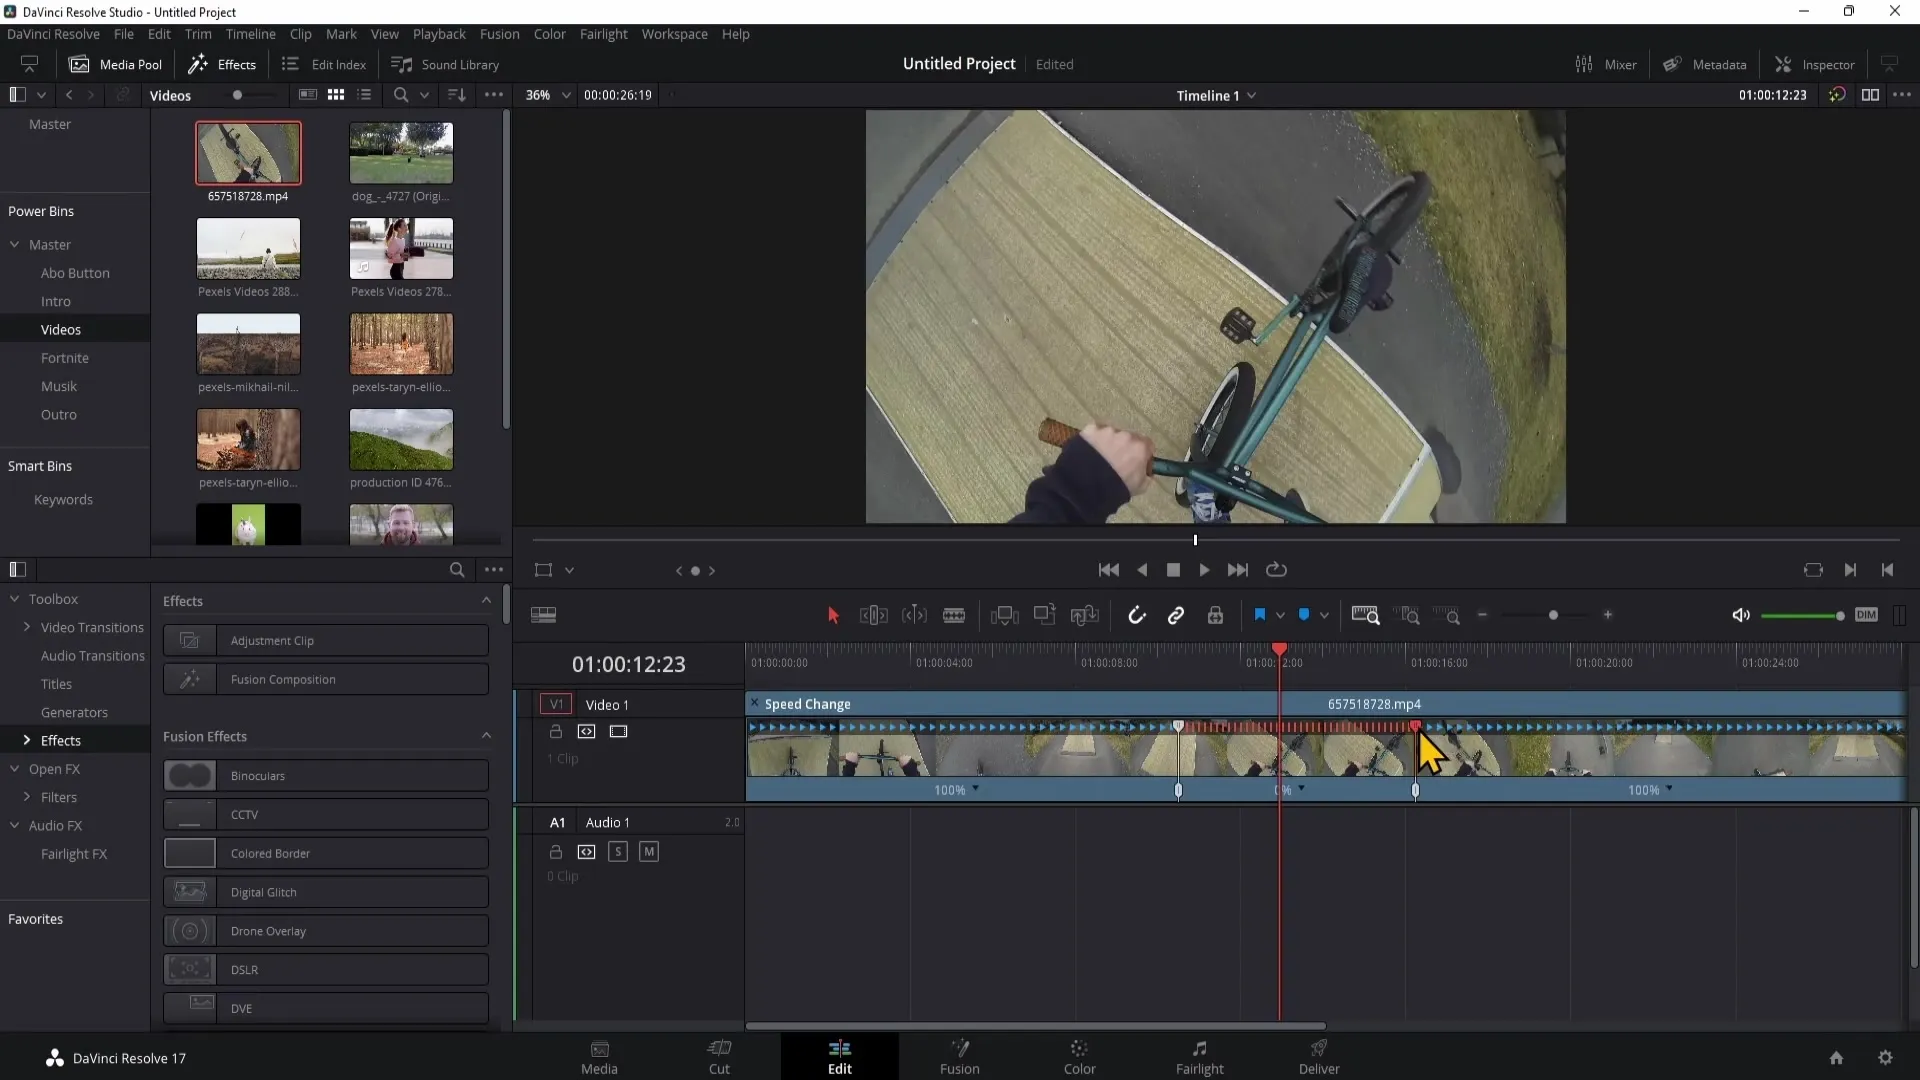
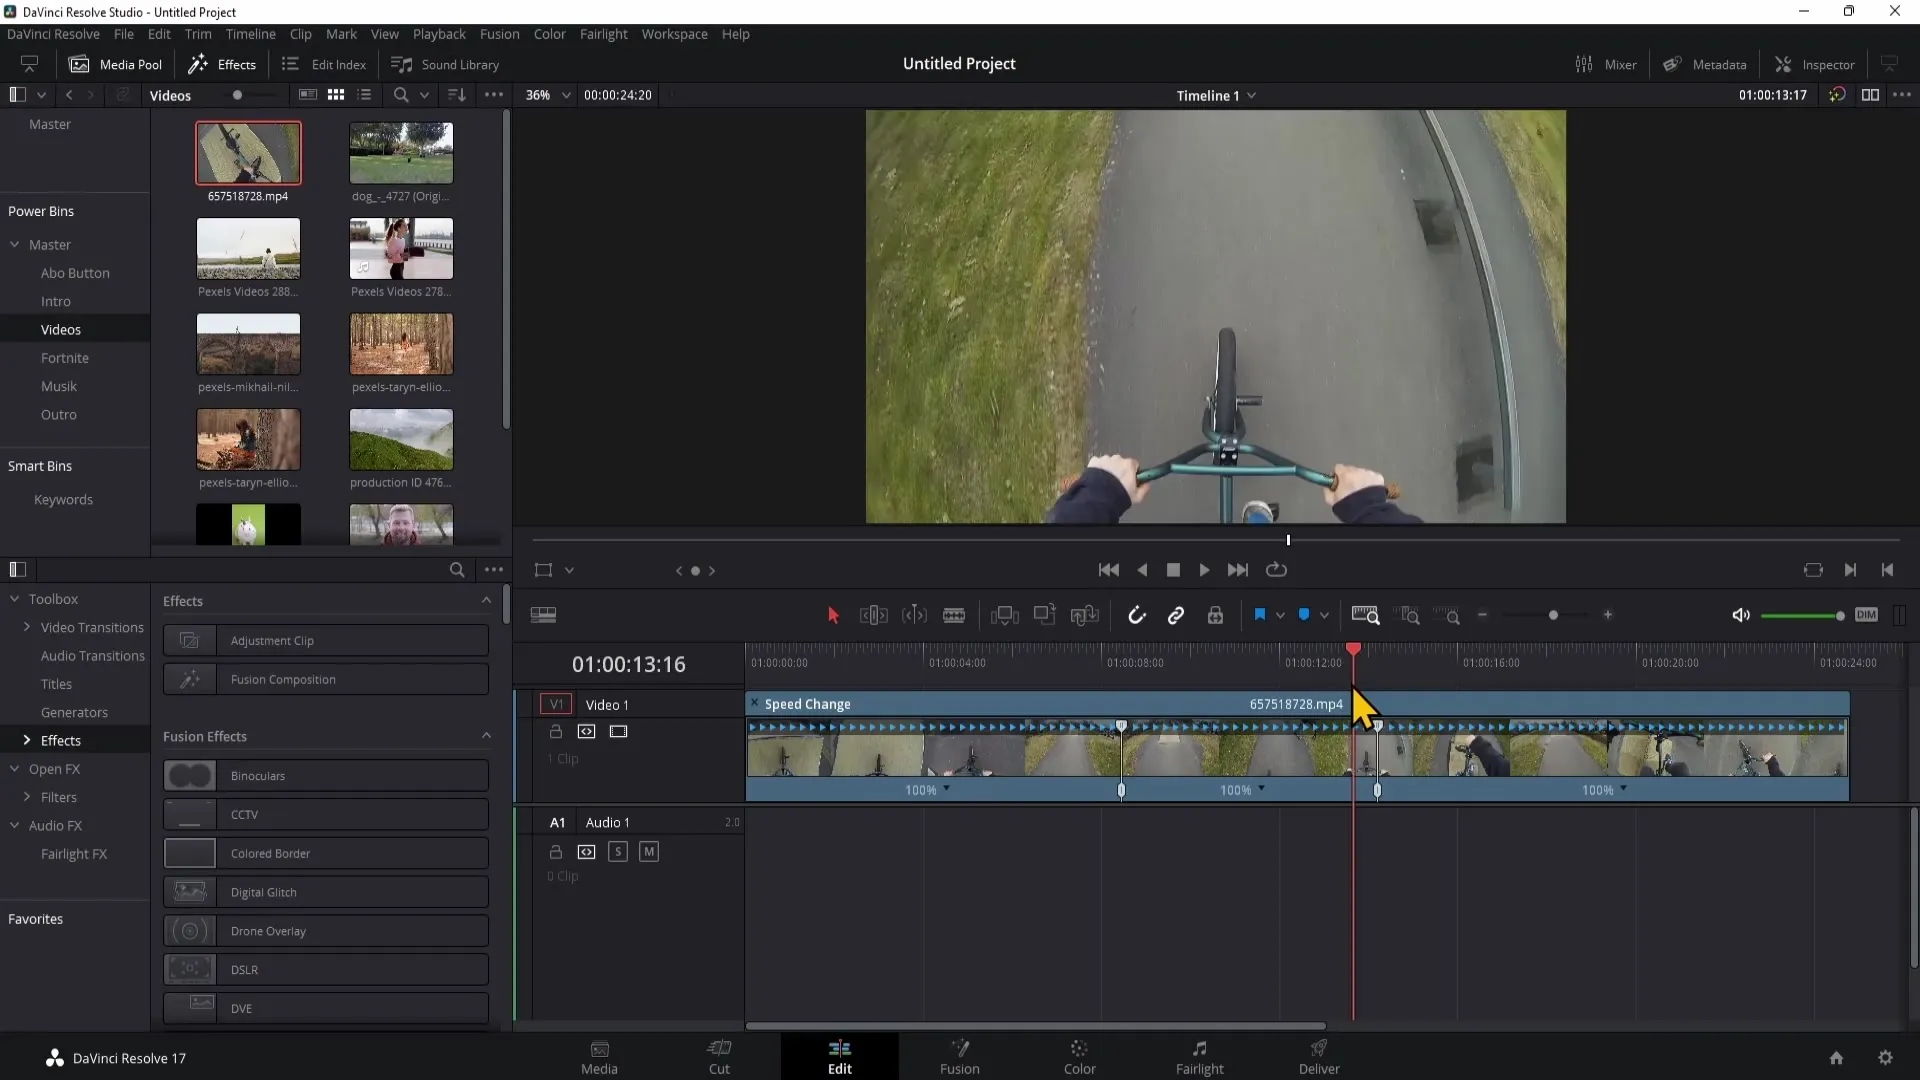
In addition, you can move Speedpoints afterwards. If you have set a Speedpoint and placed it incorrectly, you can simply drag it to the desired position with the mouse without changing the speed. You can find the instructions in the video at second 316.
Another function is "Reverse Segment". With this option, you can choose to play a part of your clip backwards. Select the clip and click on the downward arrow to activate the effect. This is presented in the video at second 341.
If you want to be creative, you can also use the "Rewind" effect to play a clip backwards at a certain speed. You select the starting point and determine that the clip will be played backwards at a speed of e.g. 800% from that point. This is explained at second 355.
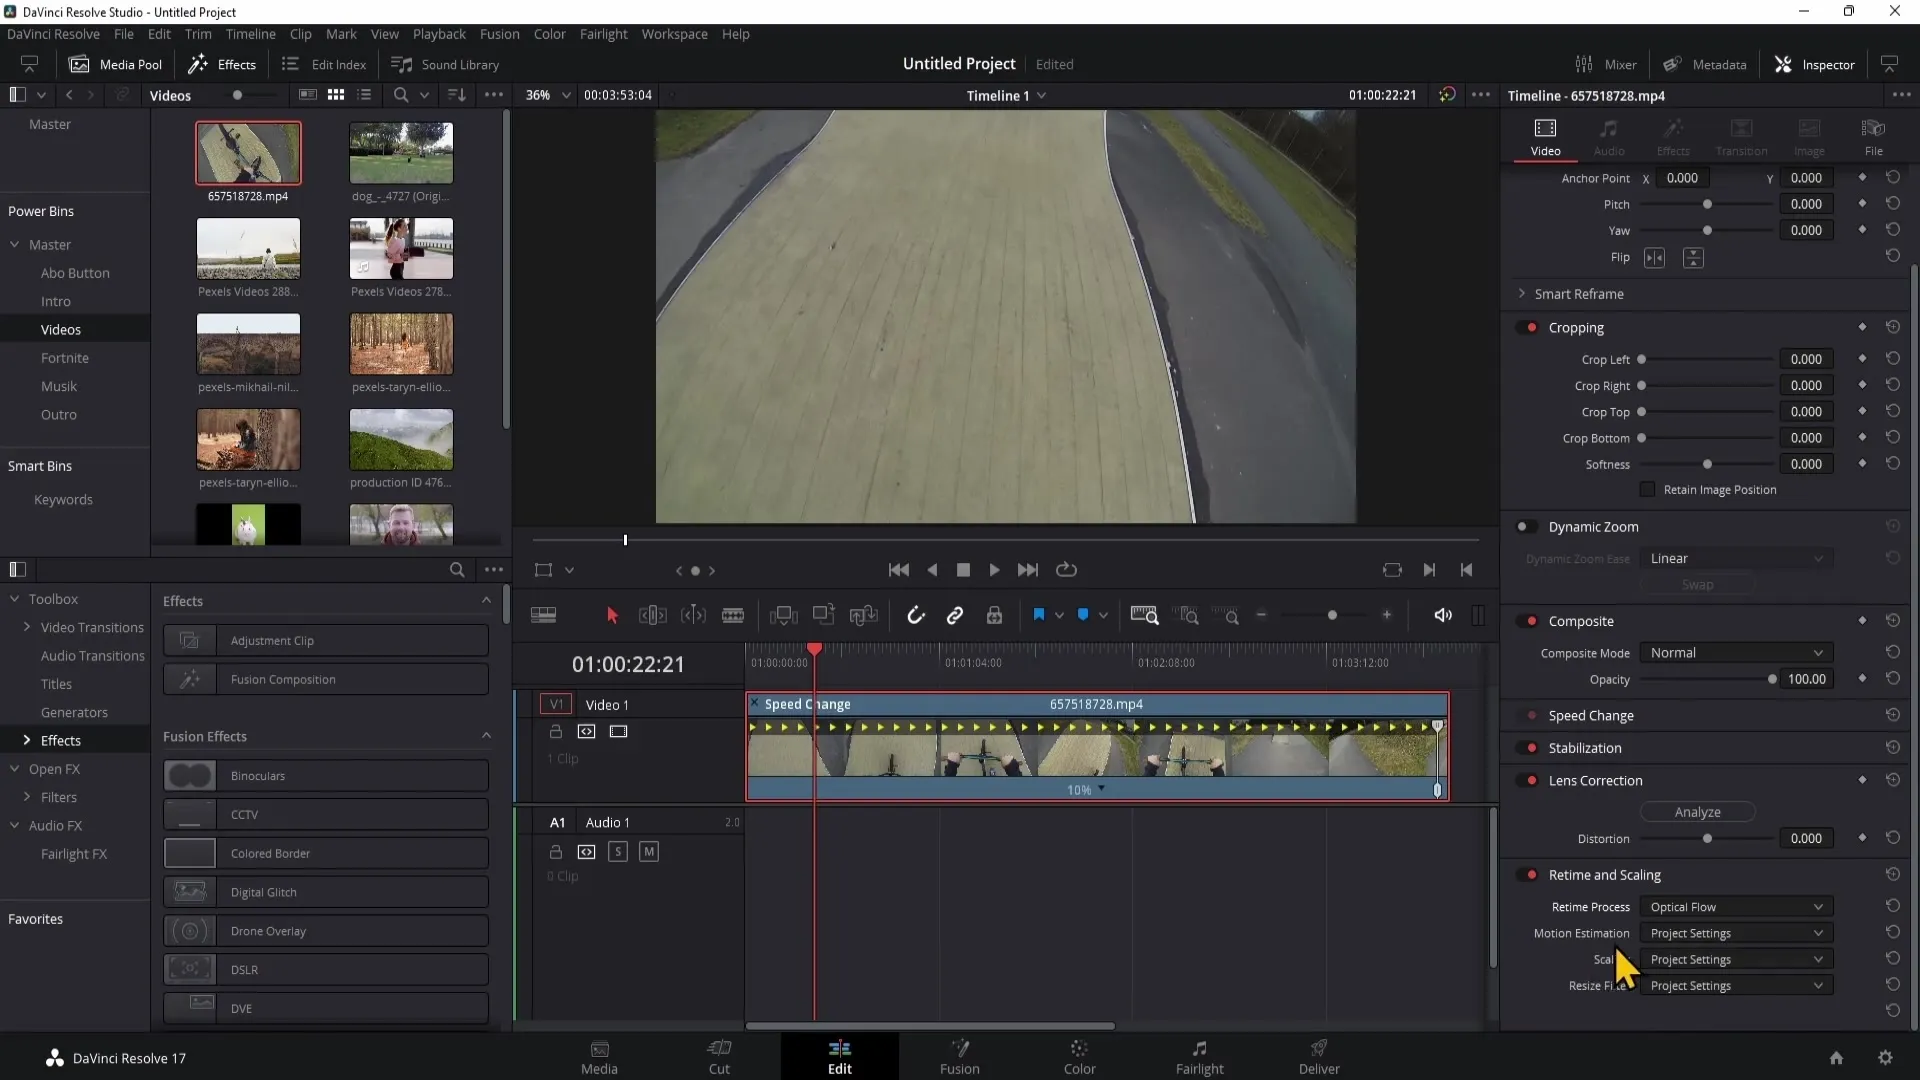
Lastly, if you play a clip at a very slow speed, it may appear jerky. To fix this, select the clip and go to the Inspector to adjust the "Retime Scaling" settings. I recommend choosing the "Optical Flow" process, which makes the playback smoother. This important information is explained at second 520.
Summary
In this guide, you have learned how to use the Retime Controls of DaVinci Resolve to adjust the playback speed of your video clips. You have learned to set Speedpoints and efficiently change the speed of your clips. Additionally, you have the opportunity to explore various creative techniques such as Freeze Frames or Speed Ramps.
Frequently Asked Questions
What are Speedpoints in DaVinci Resolve?Speedpoints are markers that allow you to specify sections of a clip for speed changes.
How can I remove a Speedpoint?Click on the downward arrow in the Retime Controls and select "Clear Speedpoint".
Can I revert the speed changes?Yes, you can reset all adjustments by selecting "Reset Clip".
How can I make the playback speed smoother?Use the "Retime Scaling" function in the Inspector and select "Optical Flow".
What does the "Speed Ramp" function do?With the "Speed Ramp" function, you can dynamically adjust the speed of your clip without having to set many Speedpoints.


