In this guide, I'll show you how you can easily remove a watermark from a video using DaVinci Resolve. DaVinci Resolve is a powerful editing software that offers you many options to edit and optimize your video content. Removing a watermark can be simple or somewhat more complex, depending on the circumstances. I'll explain the basic steps to you and also show you how to deal with moving watermarks. Please stay tuned until the end of this guide, as I will also provide important legal information regarding watermark removal.
Main Insights
- You can manually paint over watermarks with the Paint Tool.
- For moving watermarks, tracking is a necessary step.
- Consider the legal framework when removing watermarks.
Step-by-Step Guide
Step 1: Open DaVinci Resolve
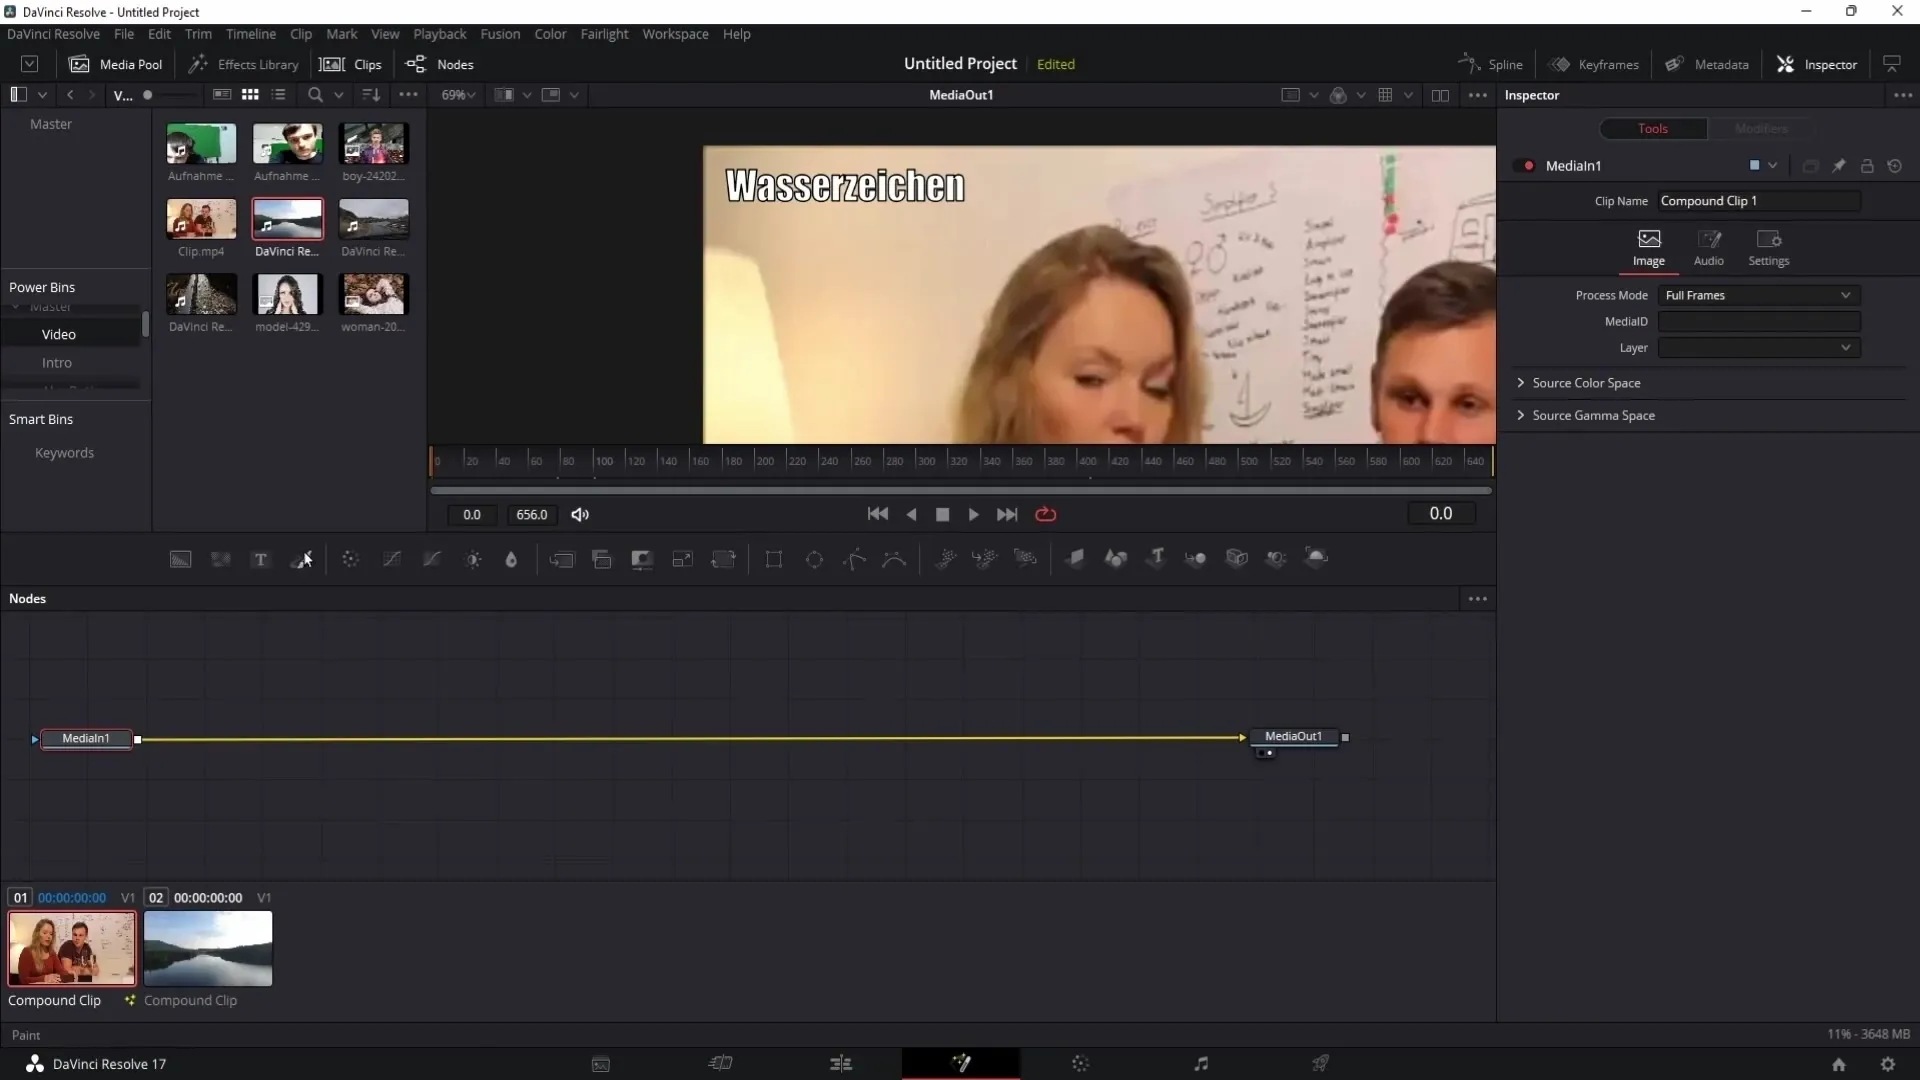
Launch DaVinci Resolve and load the video from which you want to remove the watermark. The watermark should be visible in the upper left corner of the preview.

Step 2: Choose the Paint Tool
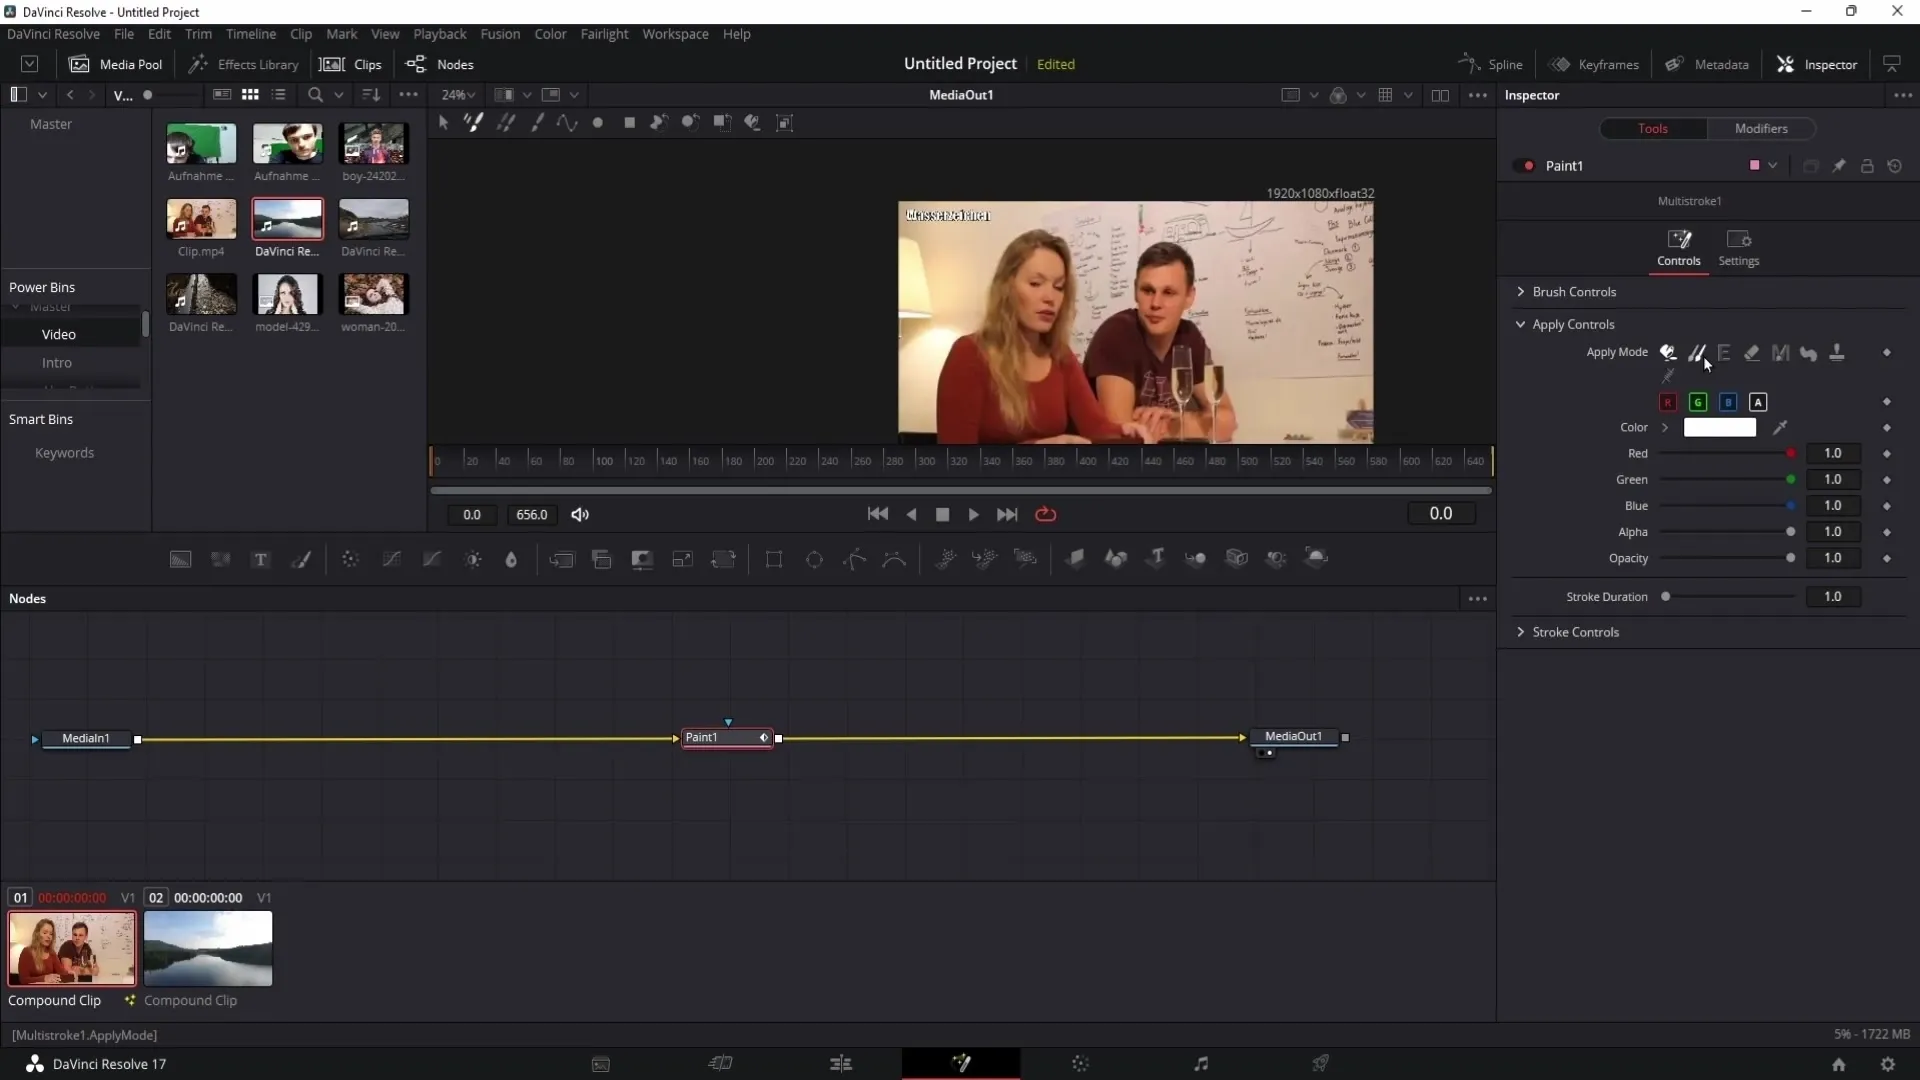
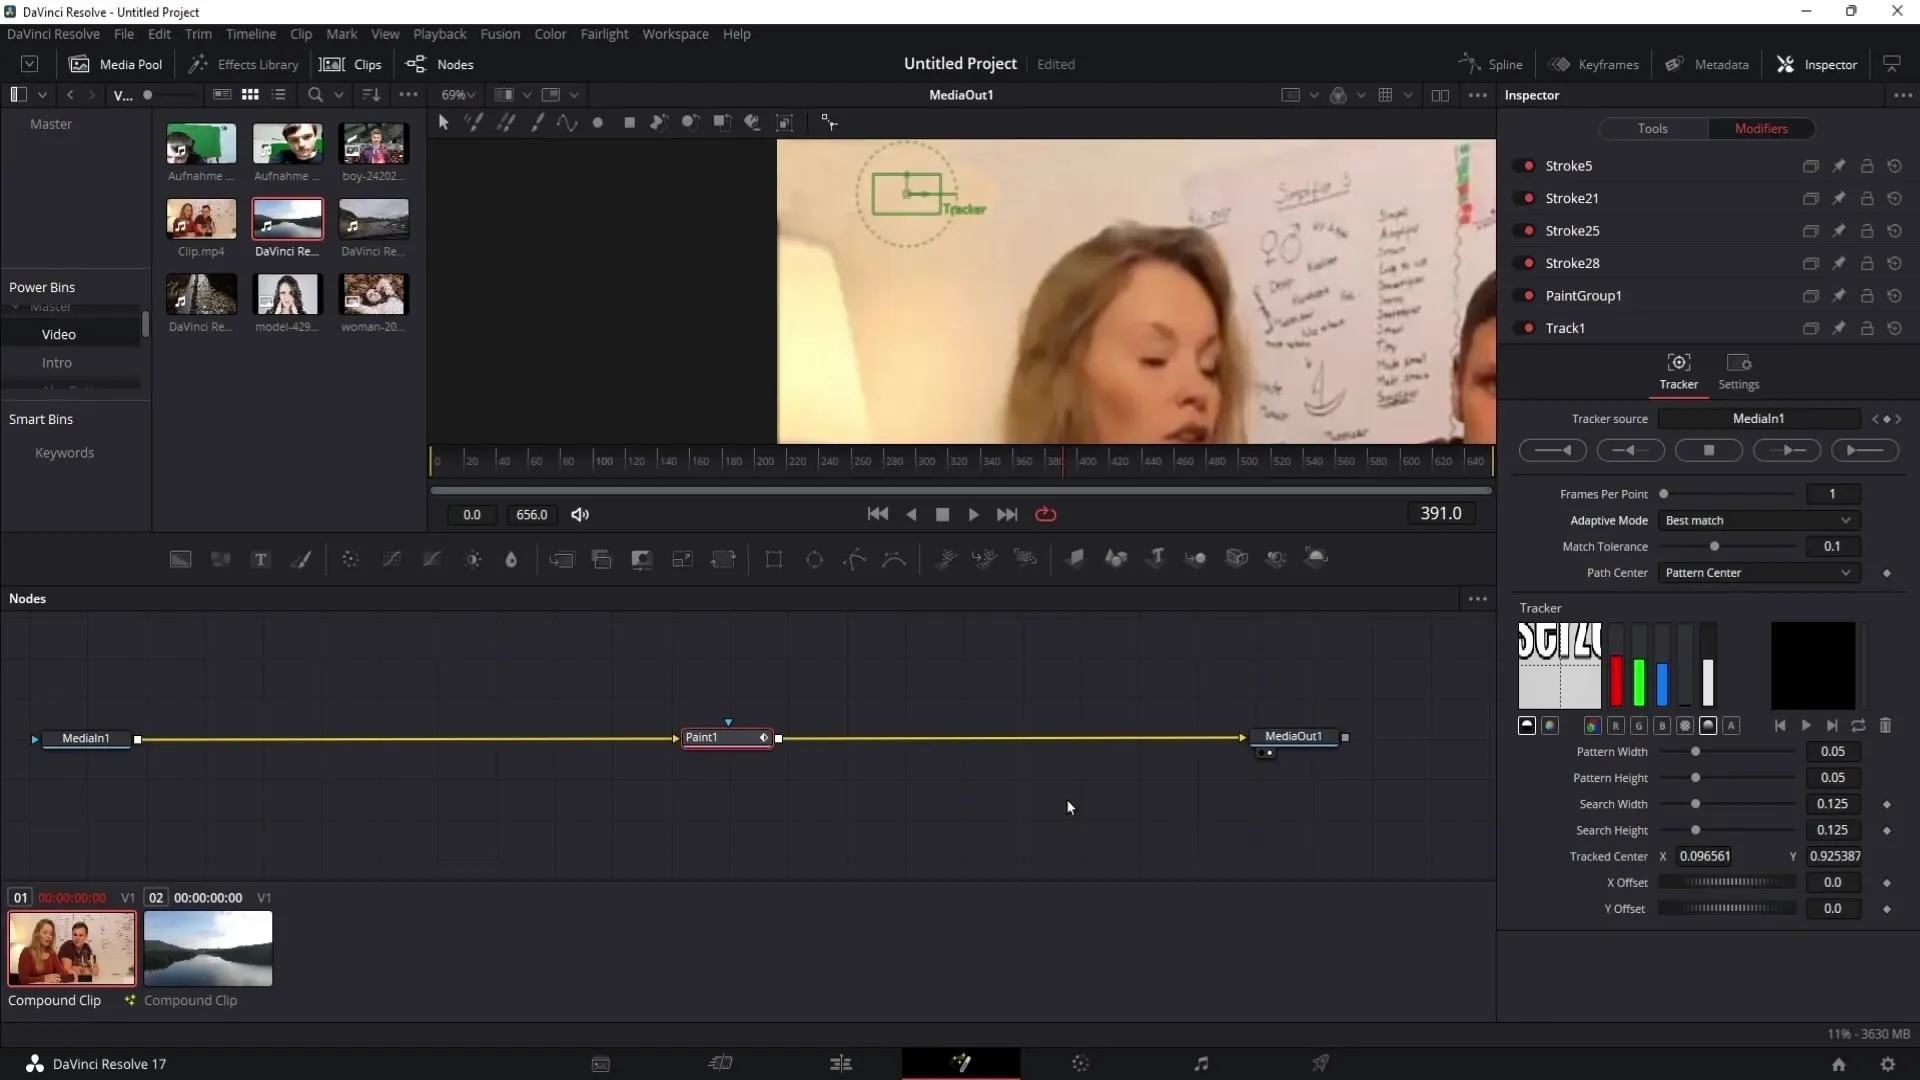
Click on the icon in the bottom bar that looks like a magic wand to enter the "Fusion" area. There, click on the paint tool, usually referred to as a "brush." You'll notice that the Brush Tool is added between "Media In" and "Media Out."
Step 3: Open the Inspector
On the right side of the screen, you'll find the Inspector. If you don't see it, you can show it by clicking on the Inspector icon at the top. Now, go to the Clone options.
Step 4: Zoom into the Preview
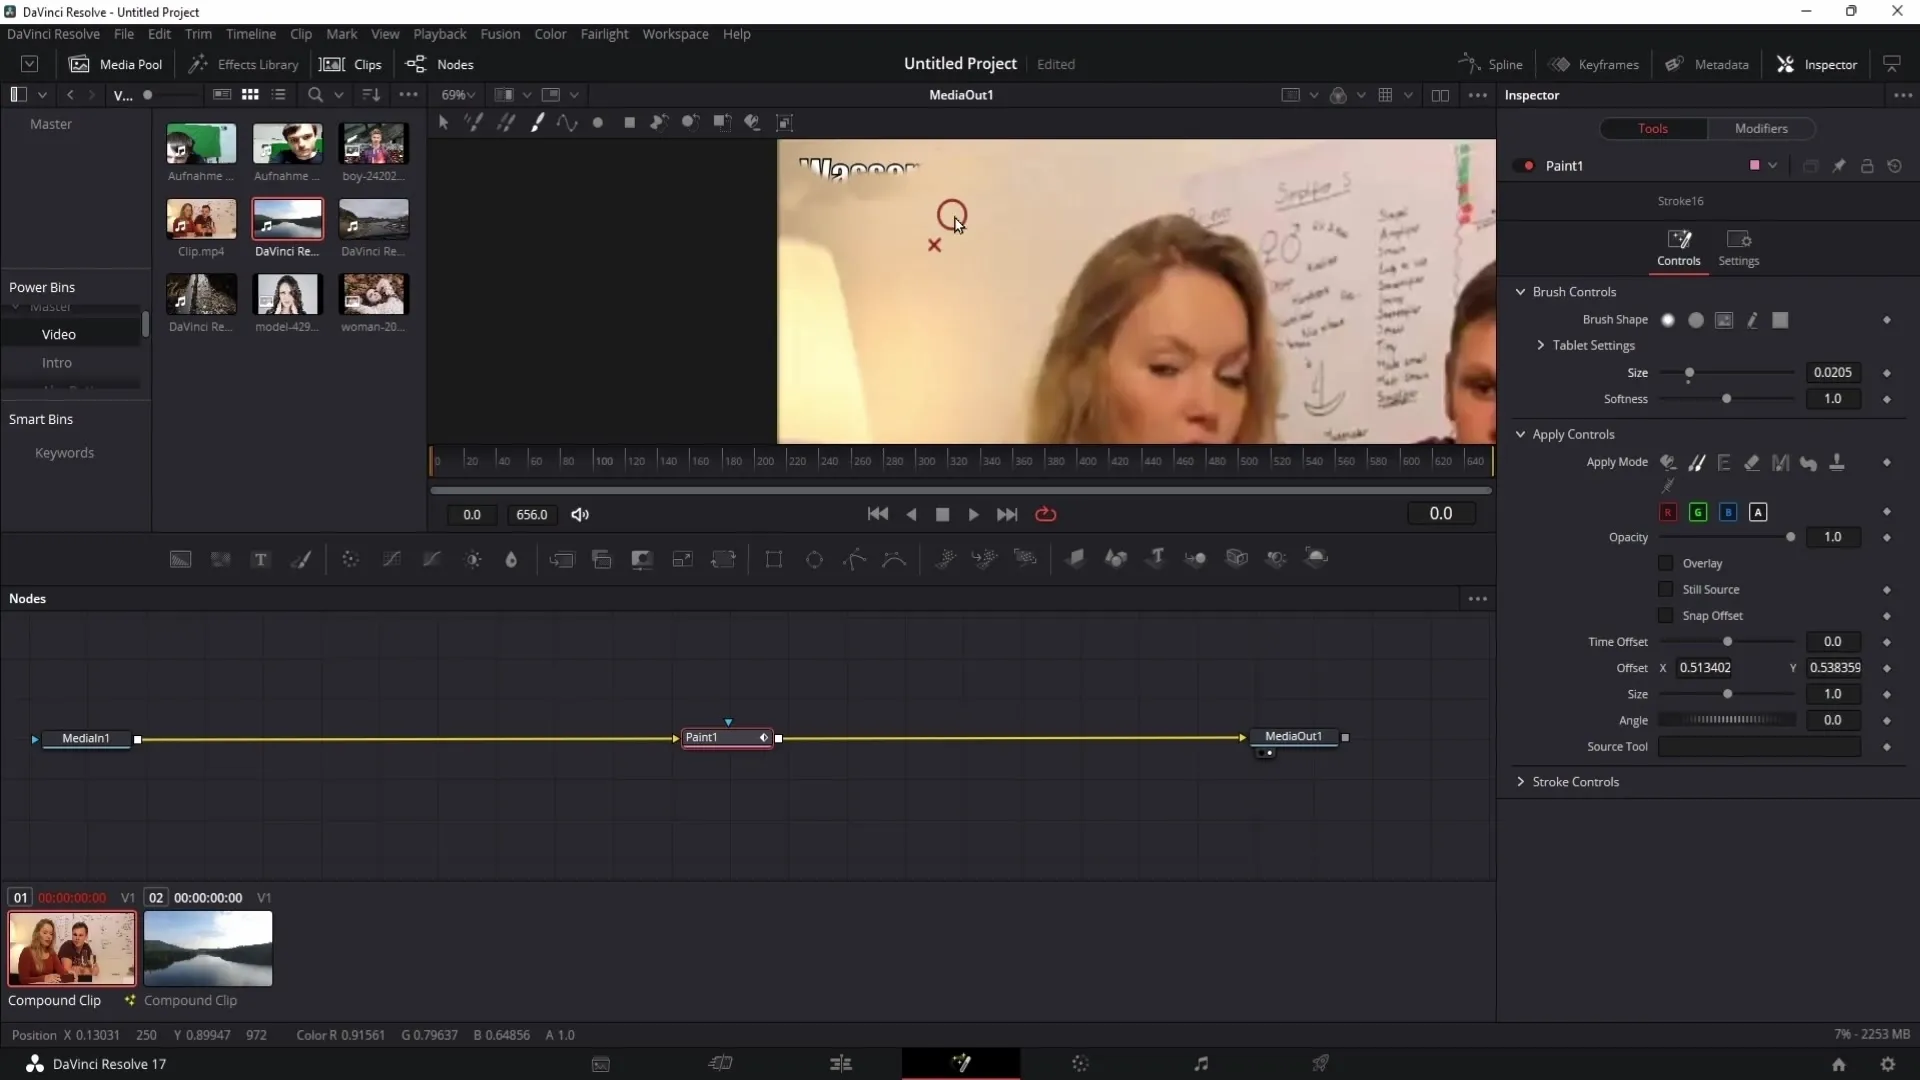
With the control key held down, you can zoom into the preview. This will help you to edit the watermark better. Press the Alt key and select an area around the watermark.
Step 5: Paint over the Watermark
Using the left mouse button, paint over the selected area on top of the watermark. Hold down the Alt key to select areas of the surrounding environment and clone them over the watermark. Repeat this process several times for a seamless blend.
Step 6: Adjust Brush Size
If necessary, adjust the brush size under the Brush Controls for better work. Completely cover the watermark by making multiple passes.
Step 7: Check the Video
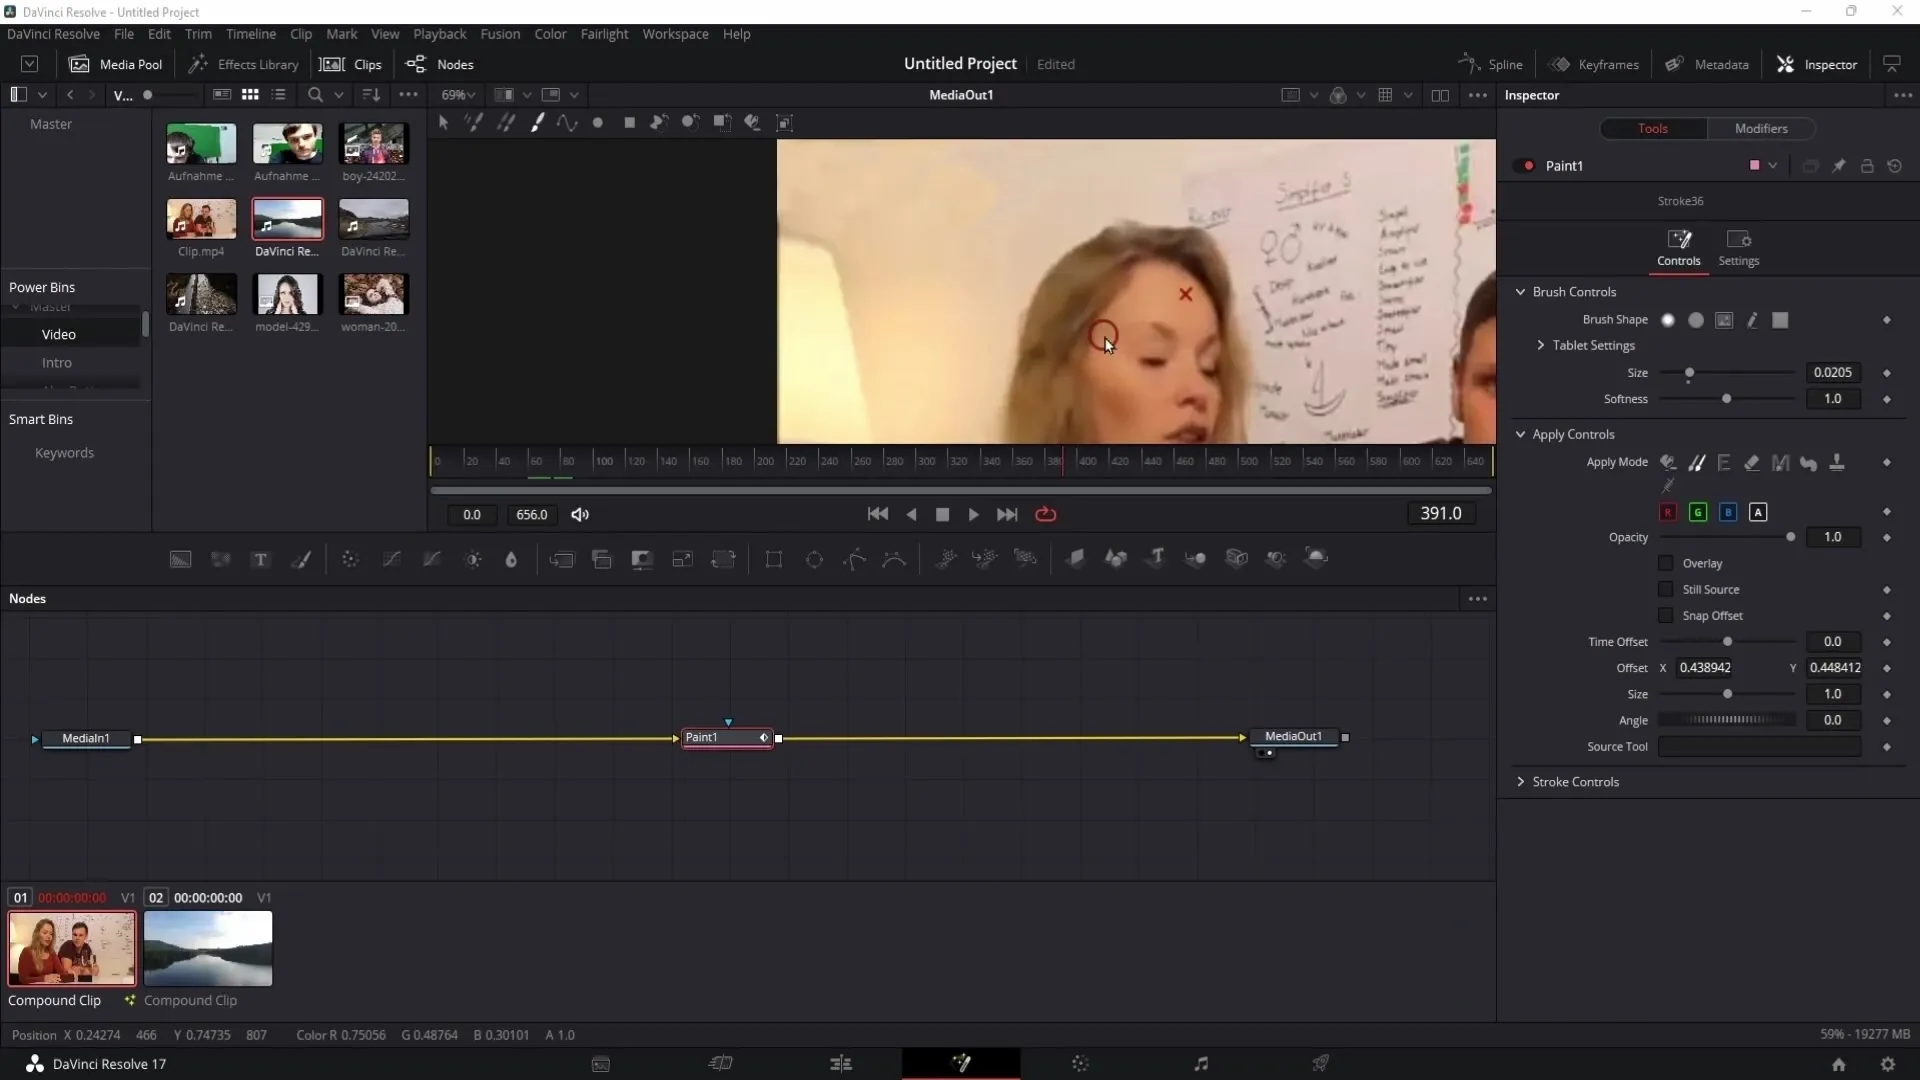
Switch to the Edit area and check if you have painted over any area in the video that has changed. Especially when people are moving in the video, you may have unintentionally transferred unwanted areas.

Step 8: Correcting Errors
If you accidentally painted over a moving area, go back to the Fusion area. Again, select a suitable area with the Alt key that is not affected and paint it over the flawed spot.
Step 9: Tracking for Moving Watermarks
If the watermark is on a moving background, you need to use tracking. Go back to the Fusion area and use the Auto-Tracker to automatically follow the area containing the watermark.
Step 10: Using the Auto-Tracker
Click on the selection tool and draw a selection around the watermark. Put this selection into a separate group and then go to "Modify with Tracker Position" to ensure that the watermark is properly tracked throughout the entire video.
Step 11: Adjustments for Moving Images
If the watermark is moving, you may need to make multiple adjustments. Use, among other things, the "Every Frame" function to refine the observation when the area behaves complicated.
Step 12: Object Removal (Pro Version)
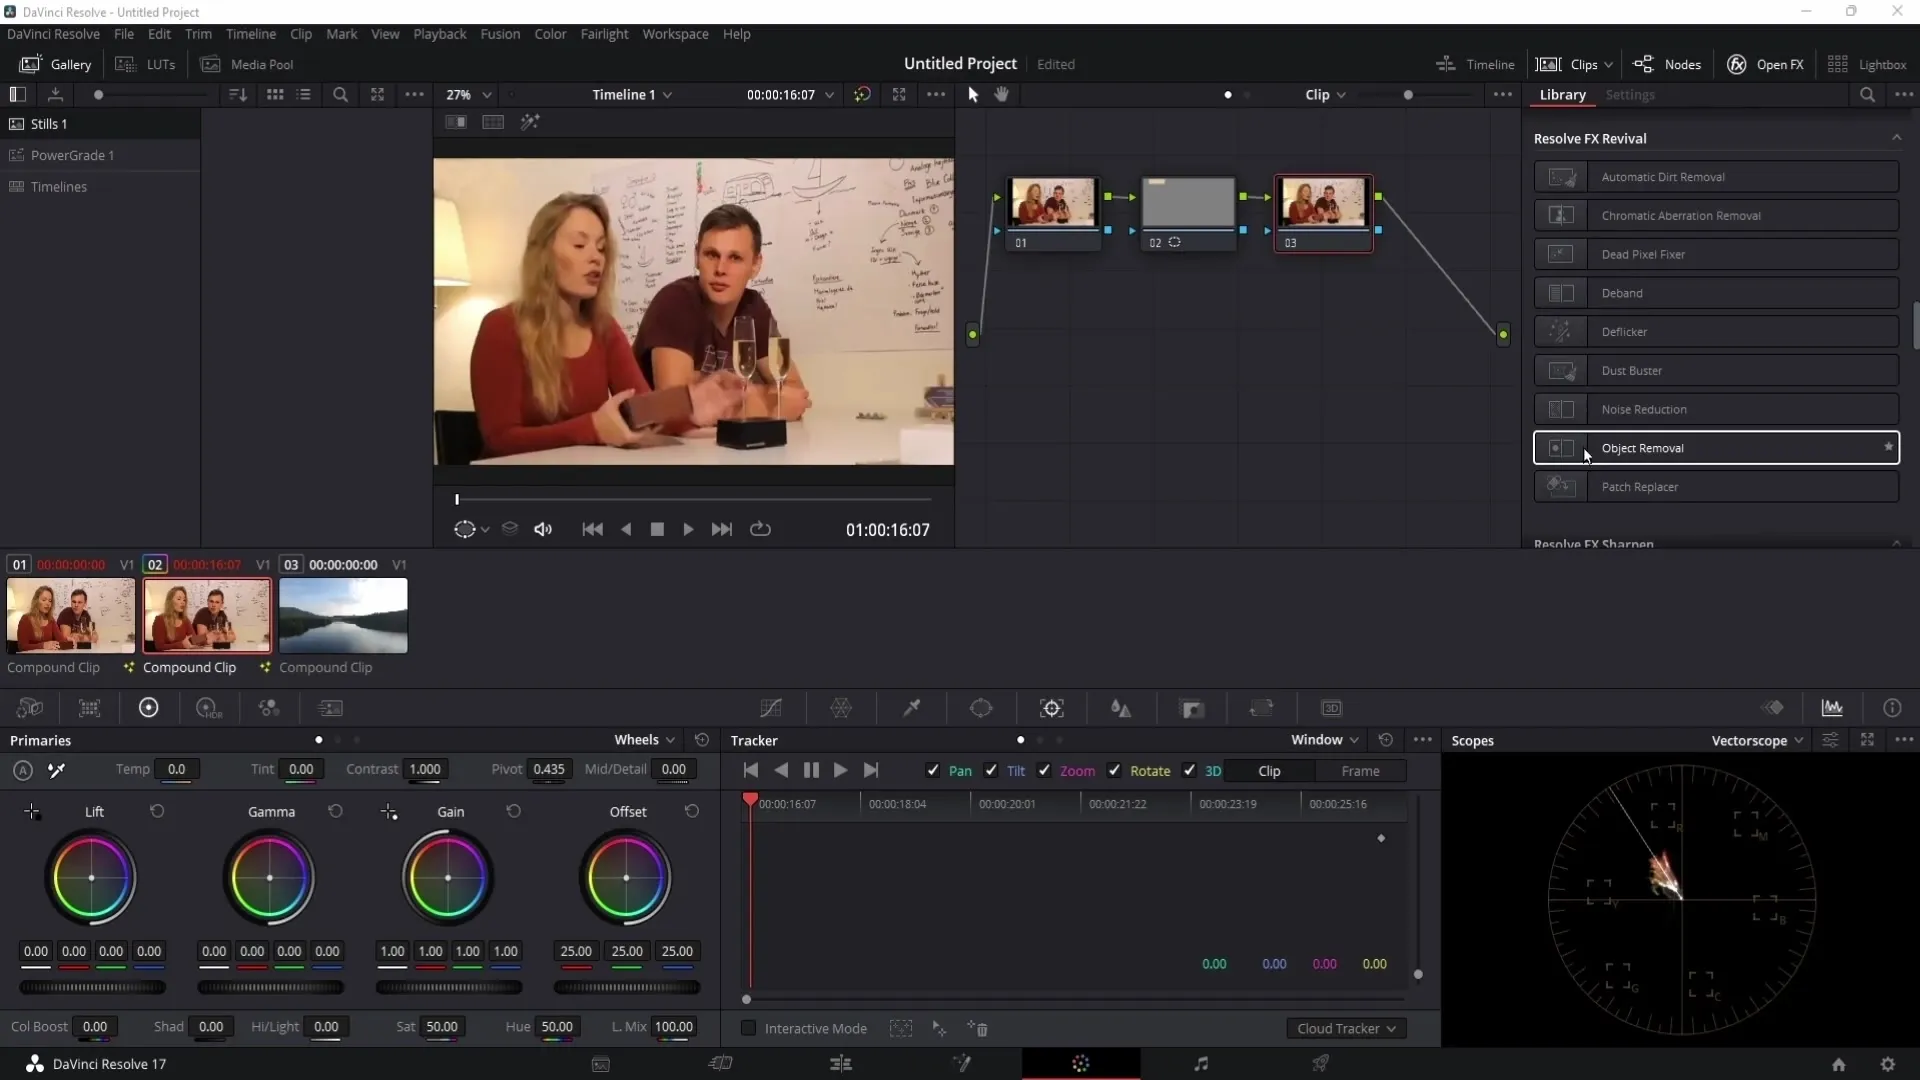
If you are using the paid version of DaVinci Resolve, you can use the Object Removal feature. Click on "Open FX" and search for "Object Removal" to completely eliminate the watermark.
Step 13: Final Check and Legal Aspect
Make sure that the watermark has been completely removed and that the video content is of high quality. Finally, regarding the legal aspect: Removing a watermark is only allowed for private use. The publication or commercial use of this edited material may have legal consequences.

Summary
In this guide, you have learned how to remove a watermark in DaVinci Resolve. I have introduced you to the functions of the Paint Tools and shown you how to deal with moving watermarks through tracking. Don't forget to respect the legal regulations.
Frequently Asked Questions
How can I remove watermarks in DaVinci Resolve?The watermark can be painted over using the Paint Tool or removed in the Pro Version with Object Removal.
Can I remove a watermark and publish the video?No, removing a watermark is only permitted for private use.
What should I do if the watermark is moving?You must use tracking to correctly remove the watermark, which can vary depending on the video.


