In this guide, you will learn how to realistically insert your logo or designs into a video using the Surface Tracker in DaVinci Resolve 18. Whether you want to showcase a T-shirt design or a tattoo, the Surface Tracker is a powerful tool to take your project to the next level. Follow the steps in this guide to achieve seamless integration of your graphics on moving objects.
Key Takeaways
- The Surface Tracker is only available in the Studio version of DaVinci Resolve.
- You can apply different designs to moving surfaces using the Surface Tracker.
- By proper setup and adjustments, you can achieve a realistic result.
Step-by-Step Guide
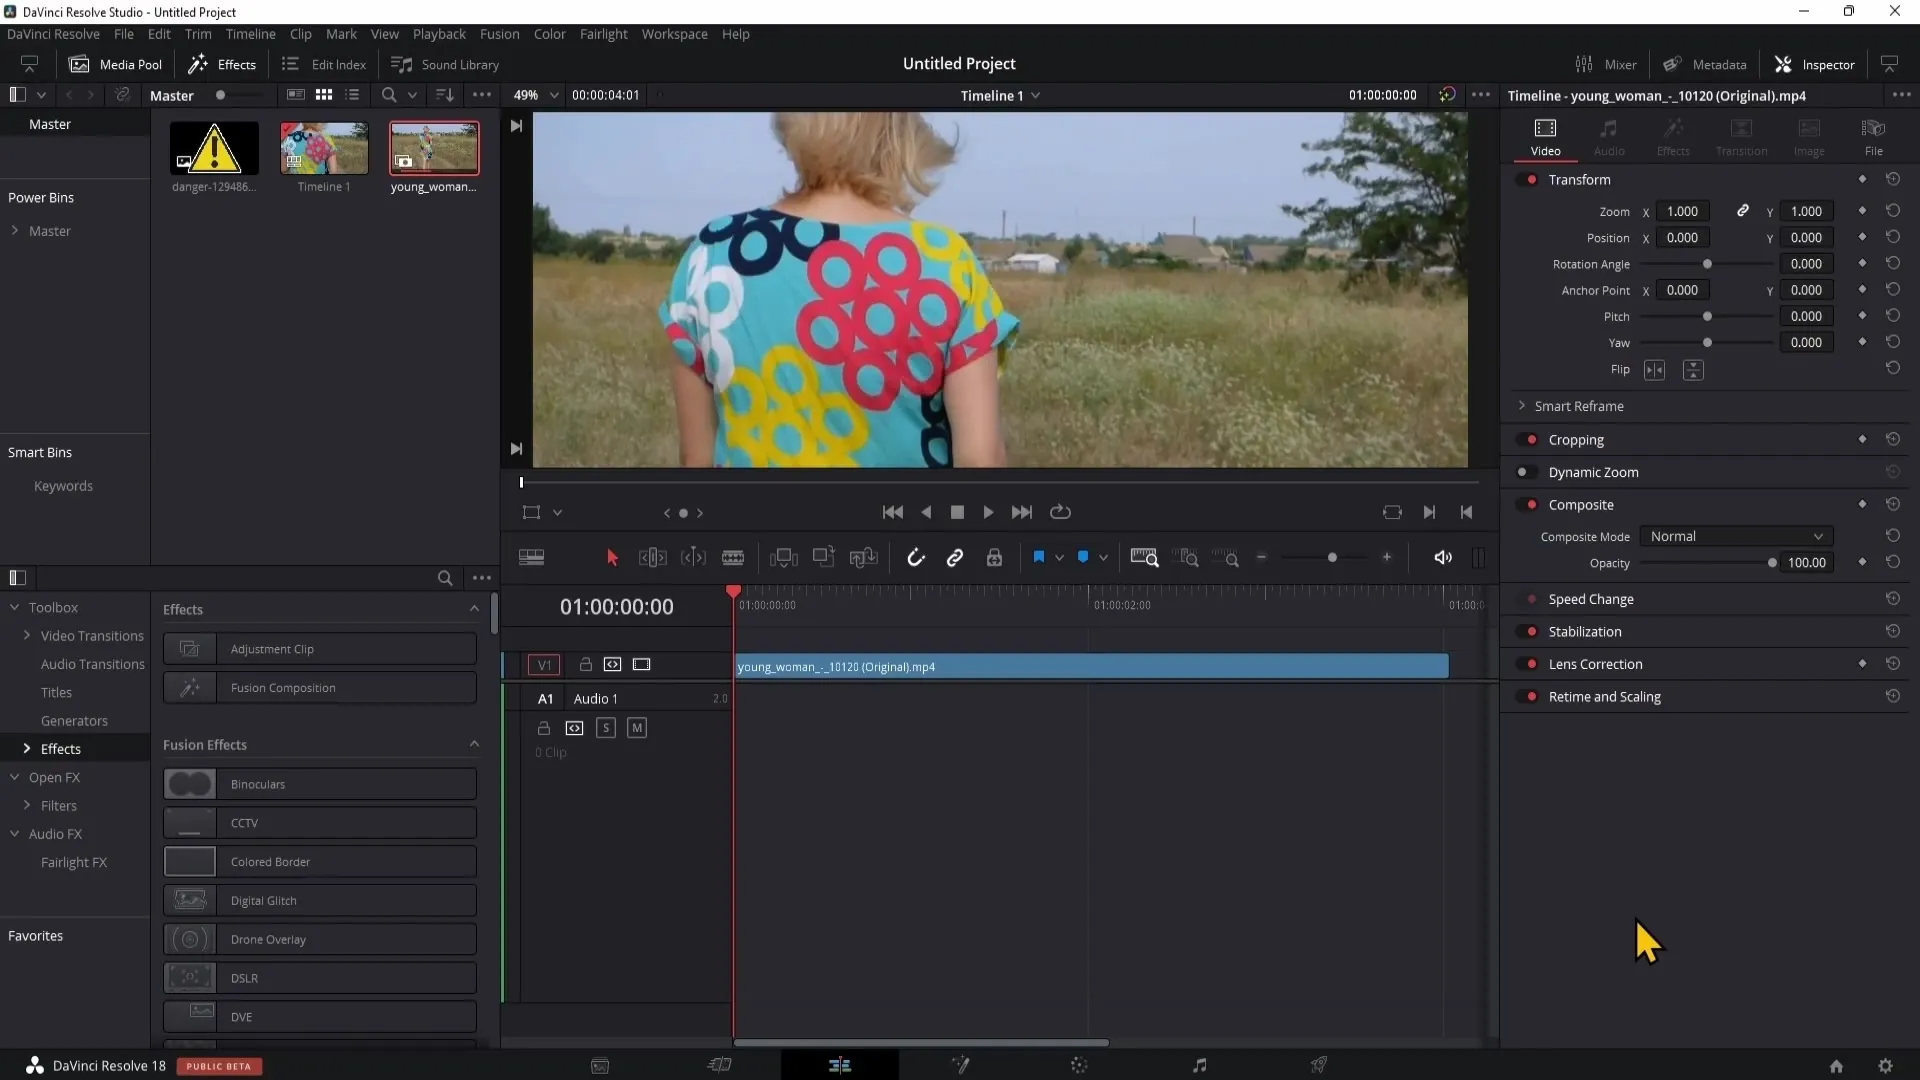
First, open DaVinci Resolve and load the video where you want to insert your logo. Make sure your project is set up with the Studio version, as the Surface Tracker is only available there.
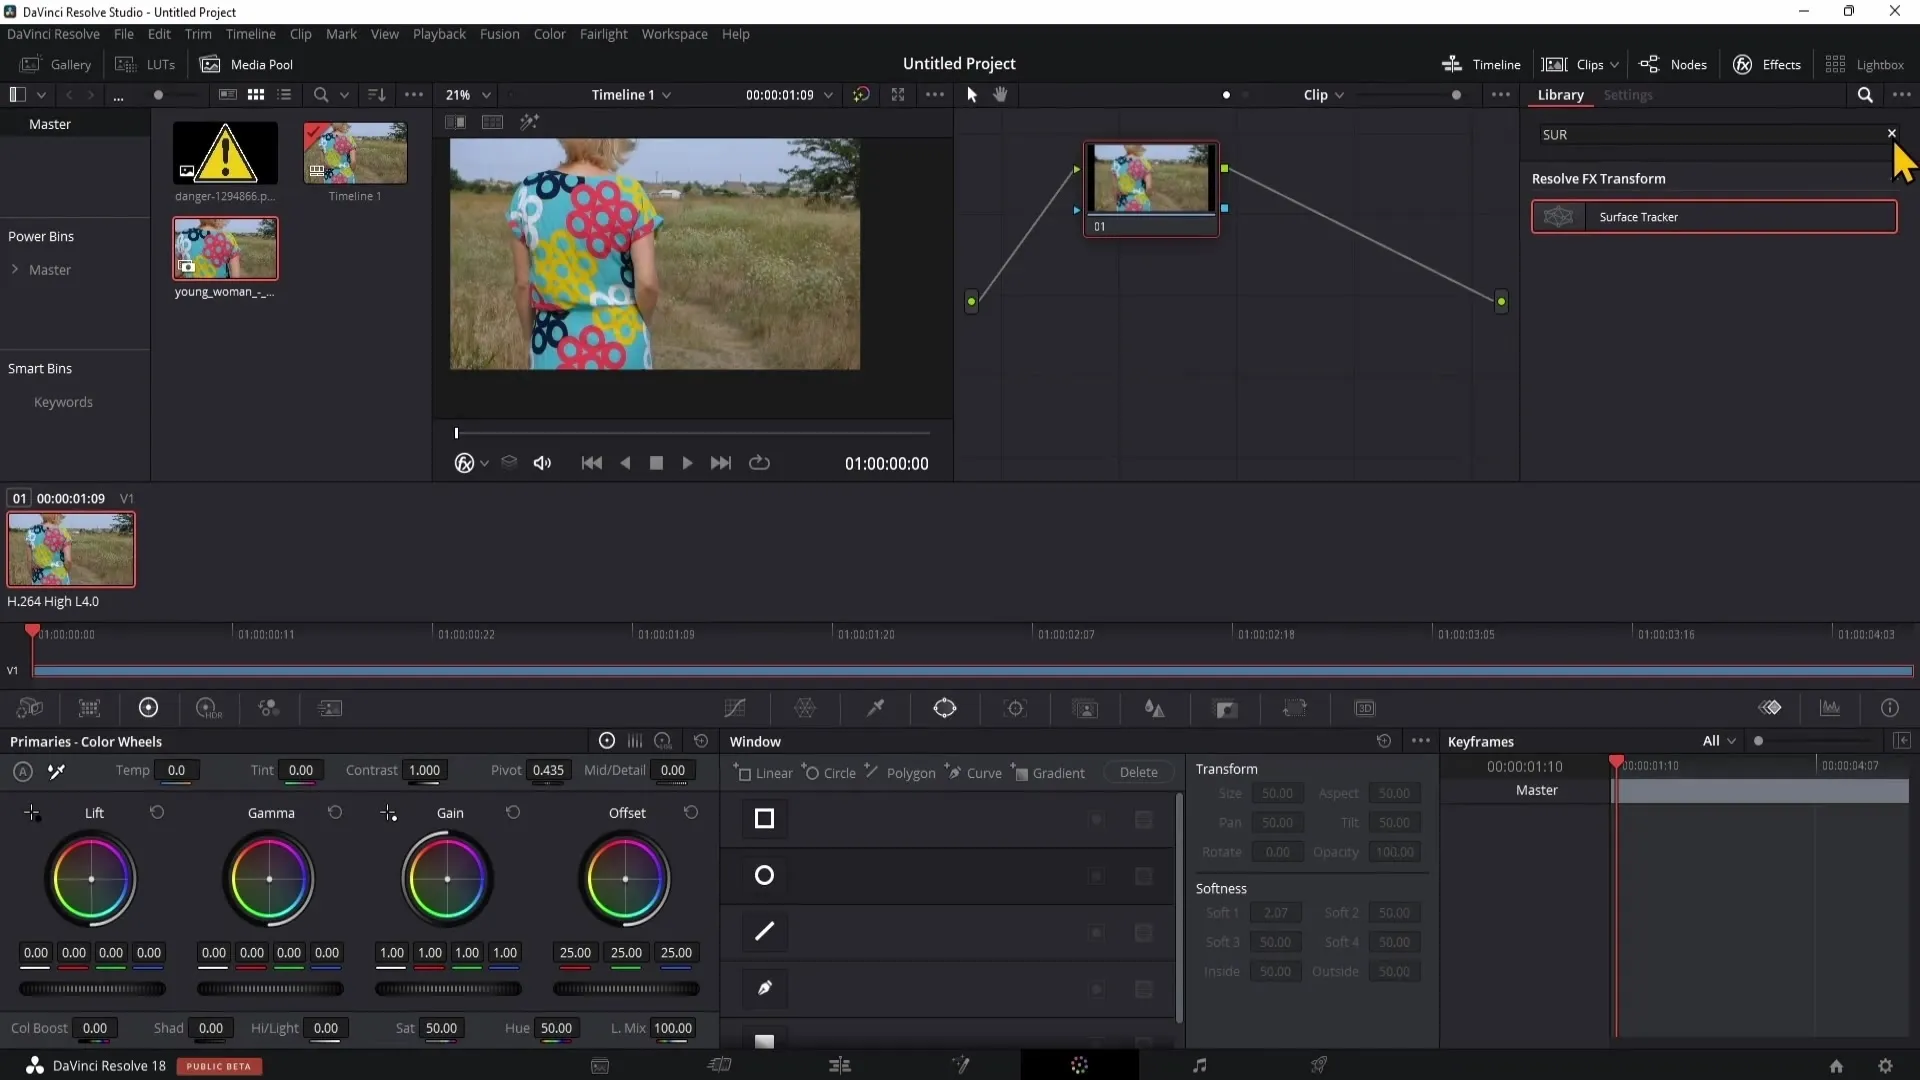
Next, navigate to the Color Grading area. Here you will find the Surface Tracker by searching for "Surface Tracker" in the OpenFX section. Drag the Surface Tracker onto an empty area in your Node environment, not directly onto the clip.
Now, connect the green dots of the Surface Tracker to your video clip. The front green dot should match the clip, while the back green dot should be connected to the output.
To determine which areas to use for your logo, start by selecting the "Bounce" mode. This allows you to specify the area where your logo should be placed. It is advisable to select a circular area if your logo has this shape.
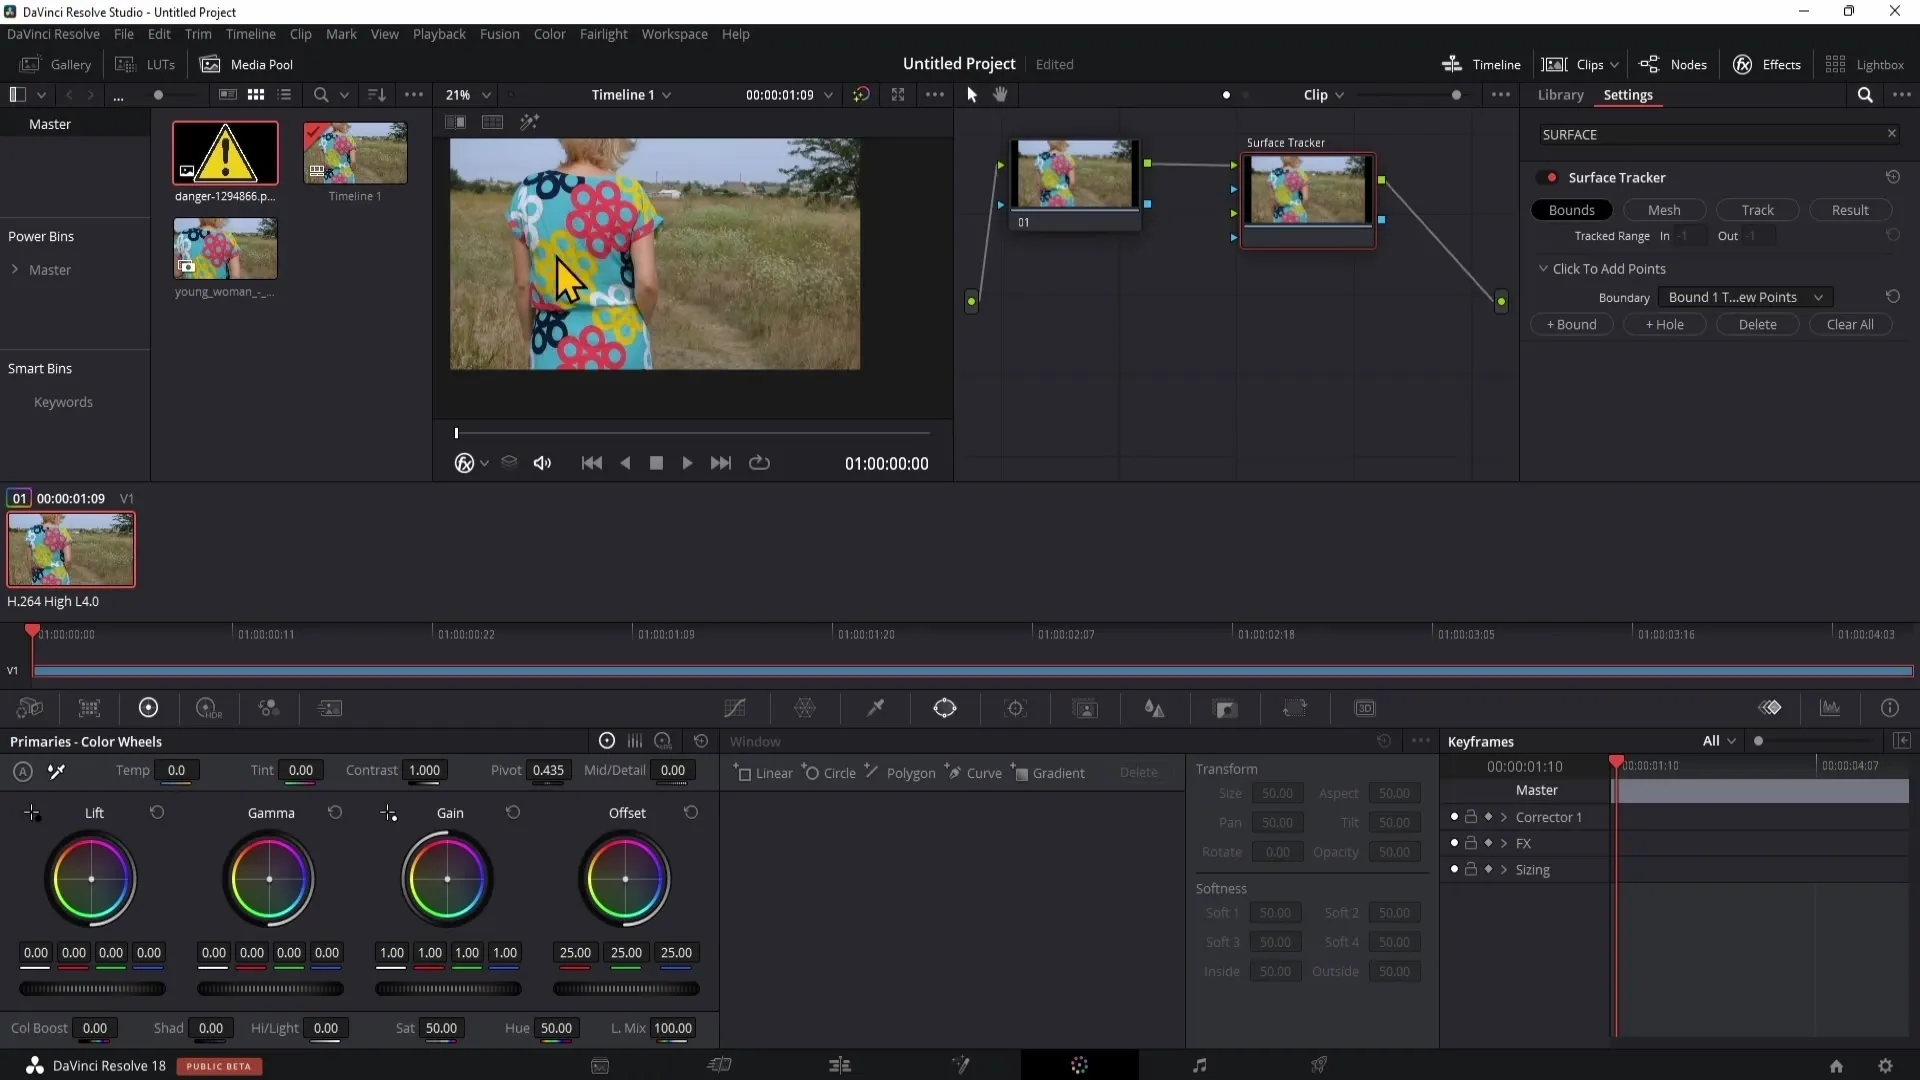
Go back to the beginning of your clip and place some points in the preview that support the logo's movement. Position the points near the areas you have already defined to help you precisely position the logo later on.
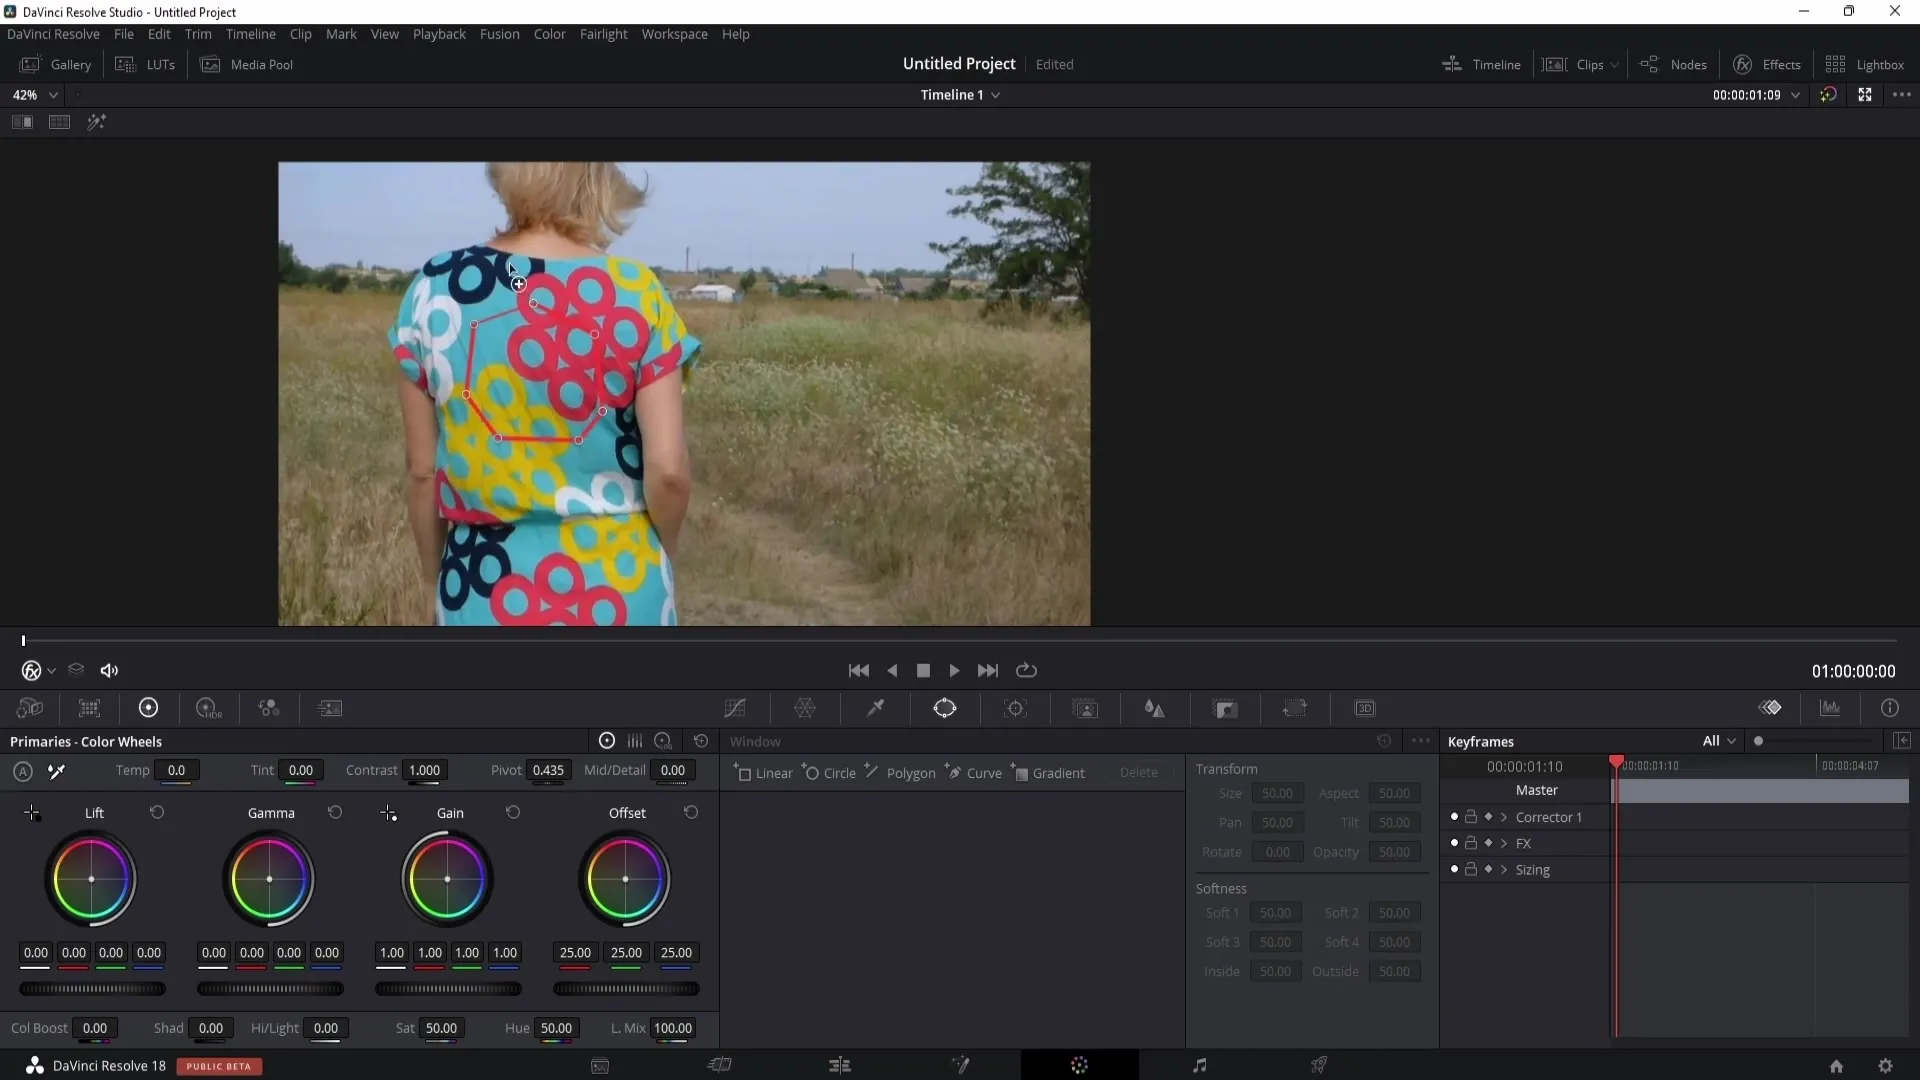
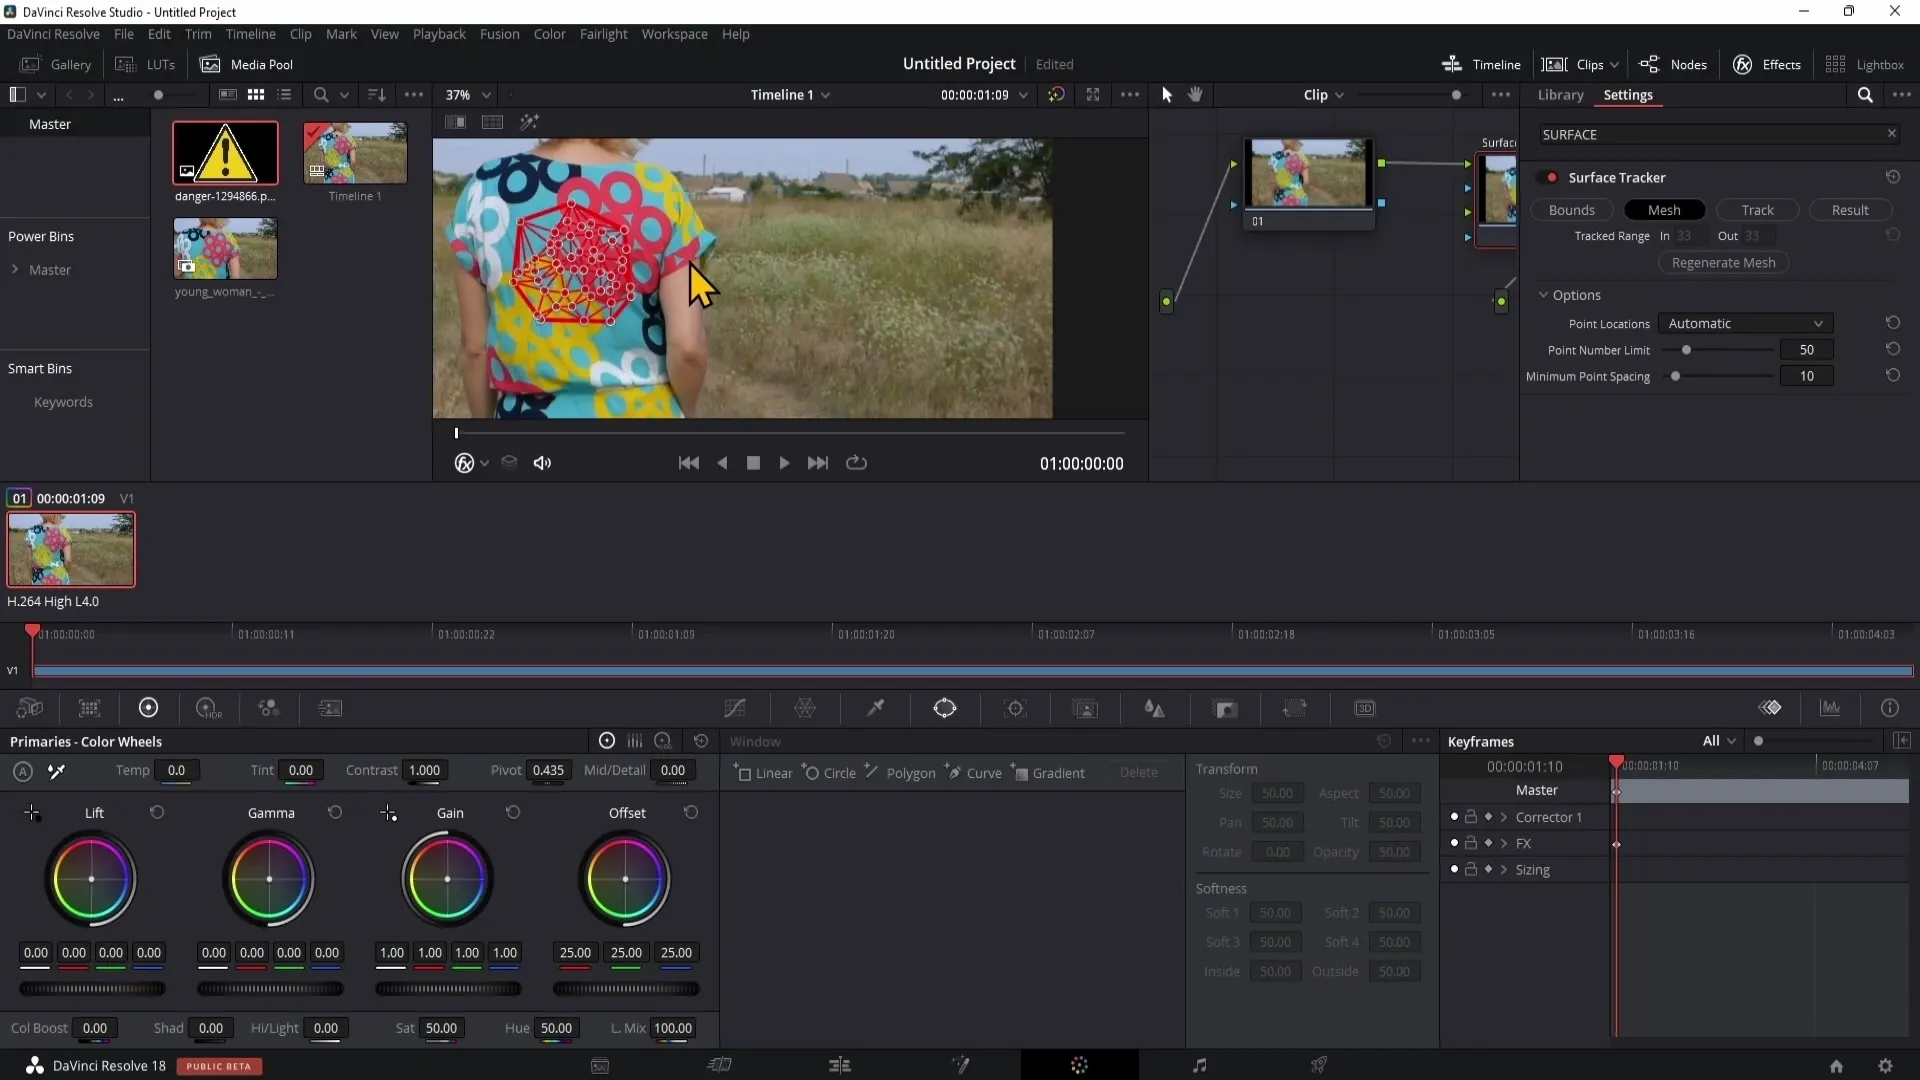
Now it's time to switch to the node with the "Mesh" tool. Here, you can activate the small dots that help you track folds and movements on the T-shirt. In most cases, it is not necessary to make deeper adjustments here.
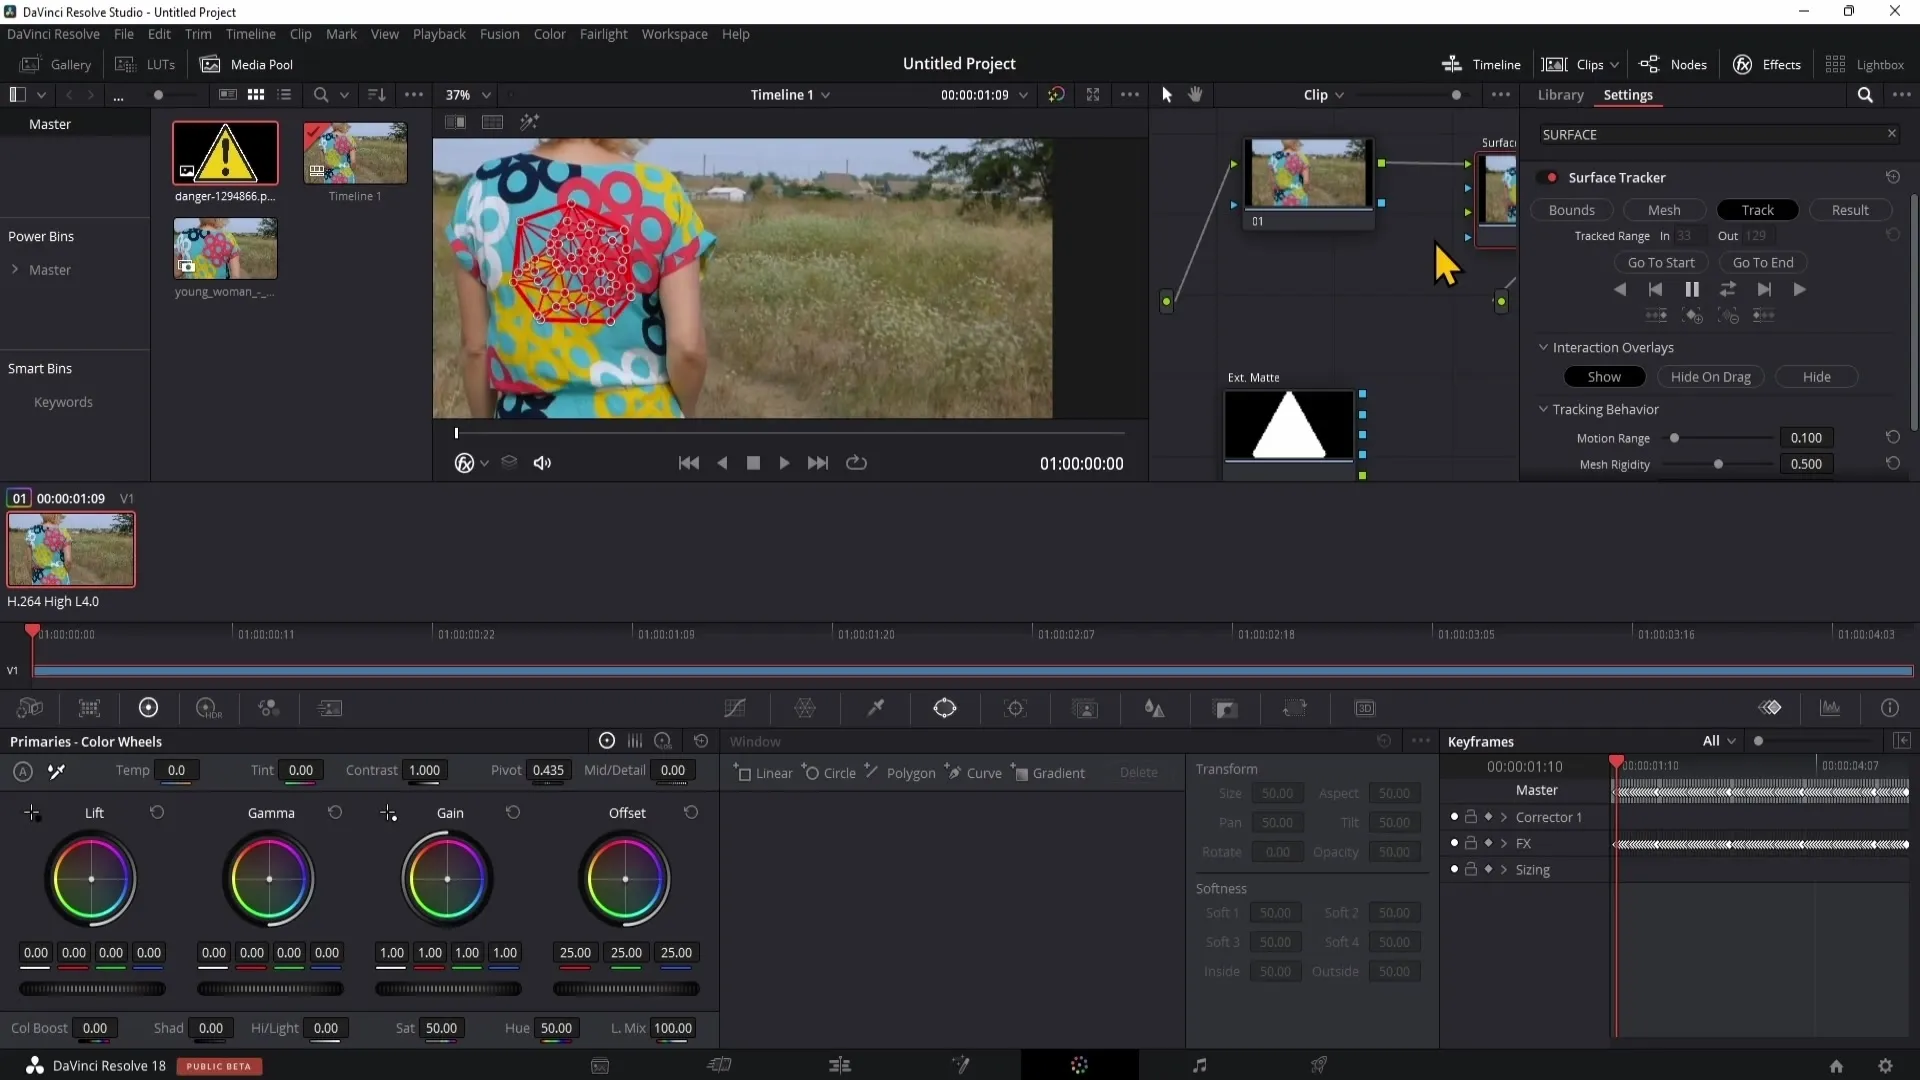
Now comes the crucial step: Tracking. Click on the "Track" button to track the area. It is recommended to run the tracking both forward and backward to achieve a clean and effective result.
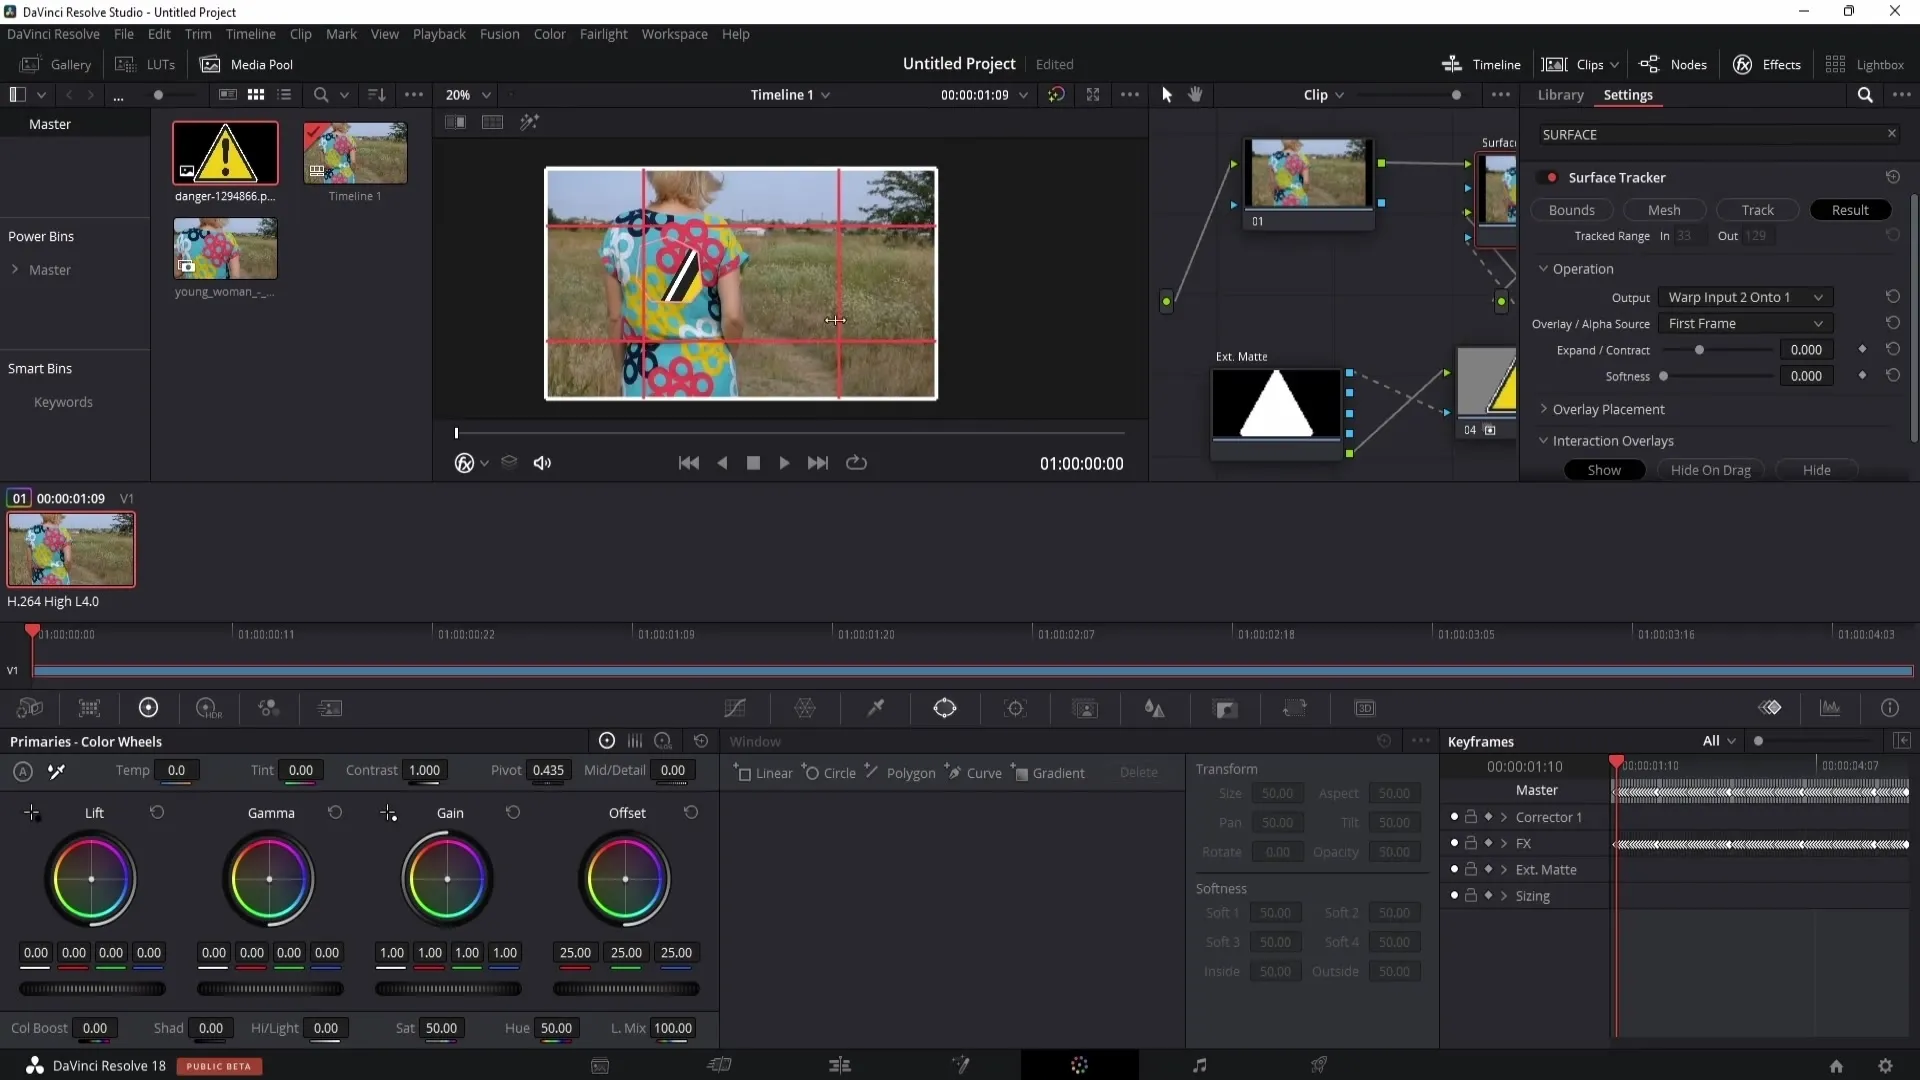
Once the tracking is complete, you can insert your logo. Drag your logo file (ideally in PNG format) into the node structure and connect it to the Surface Tracker. Make sure to use a transparent background mask, which you can activate by connecting the blue dots accordingly.
Now you need to position the logo correctly. Go back to the effects and select the "Resolve" point. Here, you can align your logo by adjusting its proportions and placing it correctly.
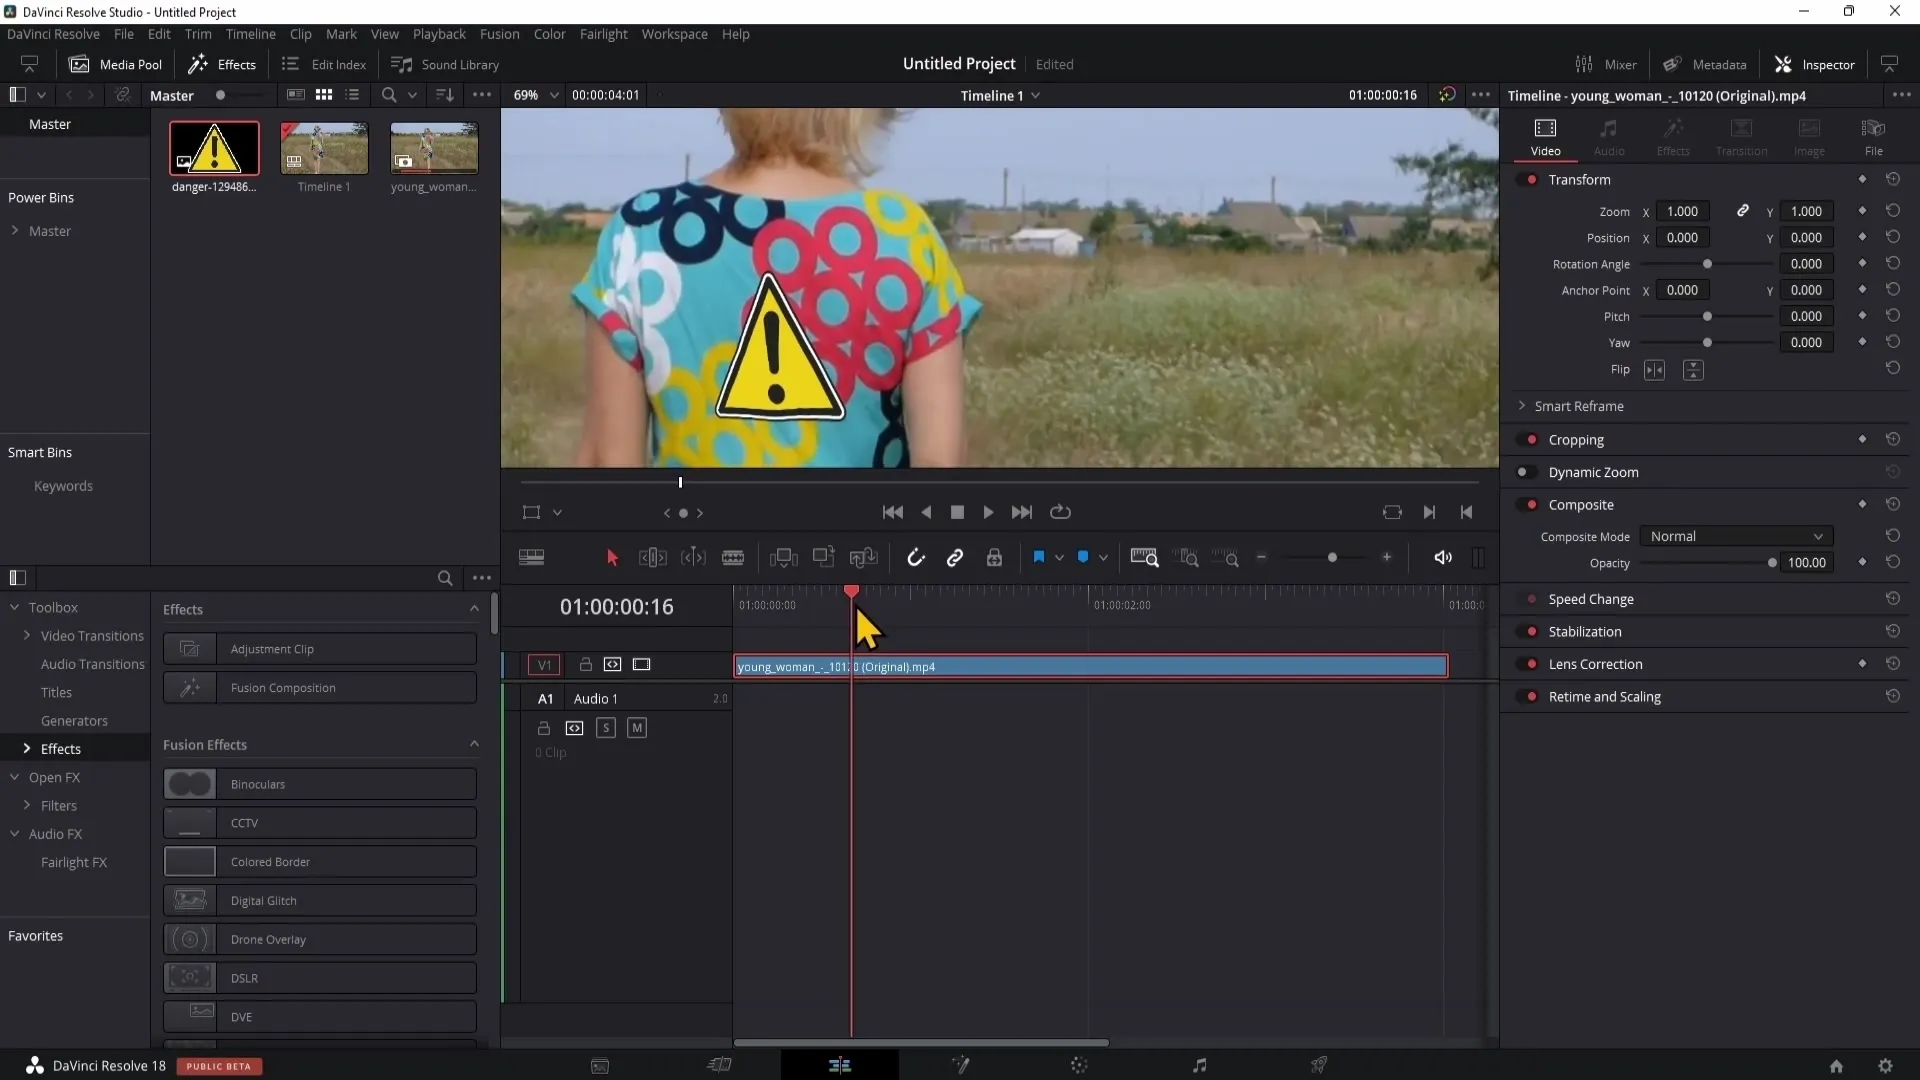
Once you adjust the logo to look realistic, you should be able to preview the result live by switching to the Edit section and playing your video there. You will see that your logo moves seamlessly with the T-shirt's motion, tracking every movement and fold.
Summary
Using the Surface Tracker in DaVinci Resolve 18 allows you to realistically insert logos and designs into videos. With precise tracking and effective masking techniques, you will achieve professional results that enhance your project.
Frequently Asked Questions
How does the Surface Tracker work exactly?The Surface Tracker tracks the movement of images and adjusts graphics to these movements.
Can I use the Surface Tracker in the free version of DaVinci Resolve?No, the Surface Tracker is only available in the Studio version of DaVinci Resolve.
How can I ensure that my logo is displayed without a background?You need to make sure you are using a PNG file with a transparent background and setting the appropriate mask.
Are there any specific requirements for the logo?The logo should ideally be in PNG format to allow for transparency.
What should I do if the tracking is not working well?Check the tracking points you have set and the positioning; sometimes it helps to set the points again.
