In this guide, you will learn how to create and properly export Instagram Stories or video posts using DaVinci Resolve. Whether for personal projects or to enhance your online presence, using this versatile video editing program can help you produce high-quality content. I will guide you through the process step by step, from importing the video to formatting and exporting. Let's get started!
Key Takeaways
- DaVinci Resolve allows for customization of video formats for Instagram Stories and video posts.
- You can optimize aspects of your video to ensure they look good on Instagram.
- The export process in DaVinci Resolve is simple and allows you to upload your videos directly to Instagram.
Step 1: Import Video
To create your Instagram Story or video, start by importing your material into DaVinci Resolve. To do this, press the Control + I (Windows) or Command + I (Mac) keyboard shortcuts. Find the corresponding video, for example, from your folder, and
double-click on it. This will add the video to the Media Pool.
You can then drag the video into your timeline to work with it.
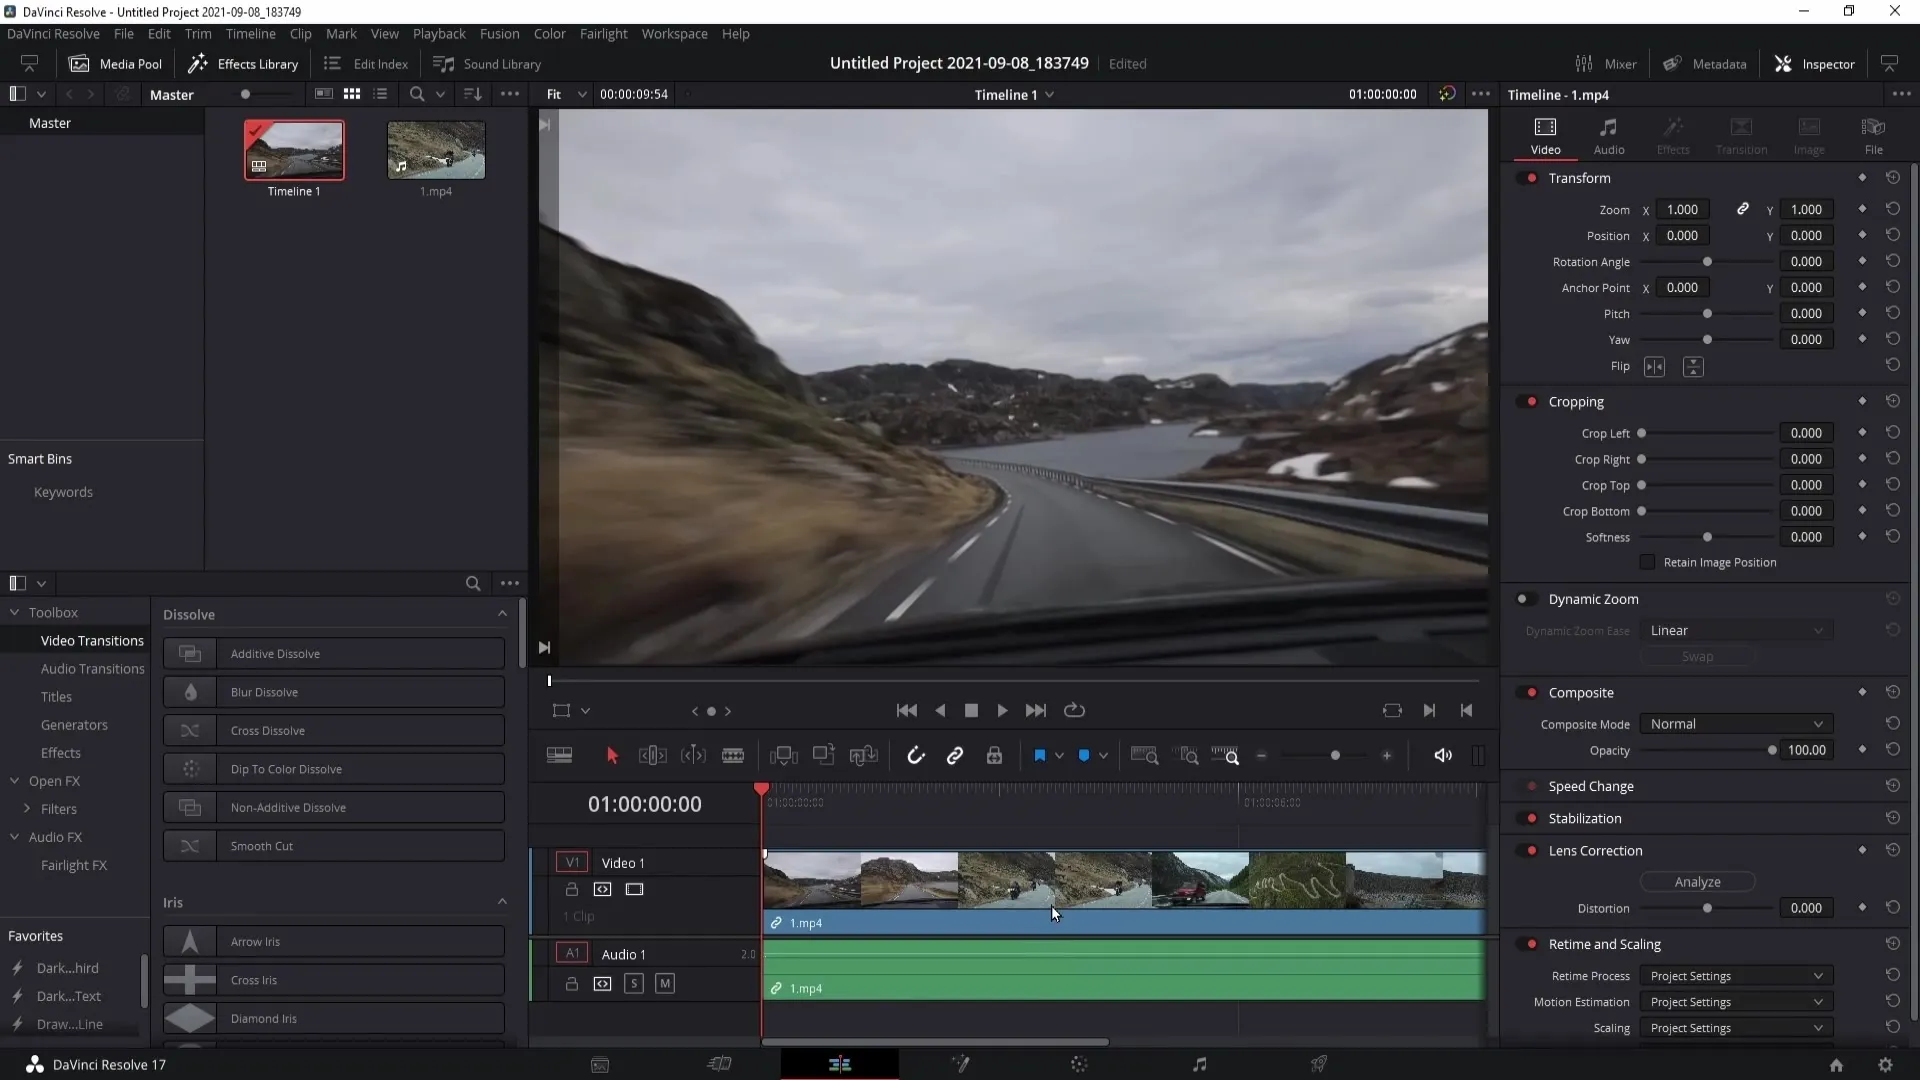
If you wish, you can also adjust the audio settings to increase the sound volume or make other adjustments.
Step 2: Format Adjustment for Instagram Stories
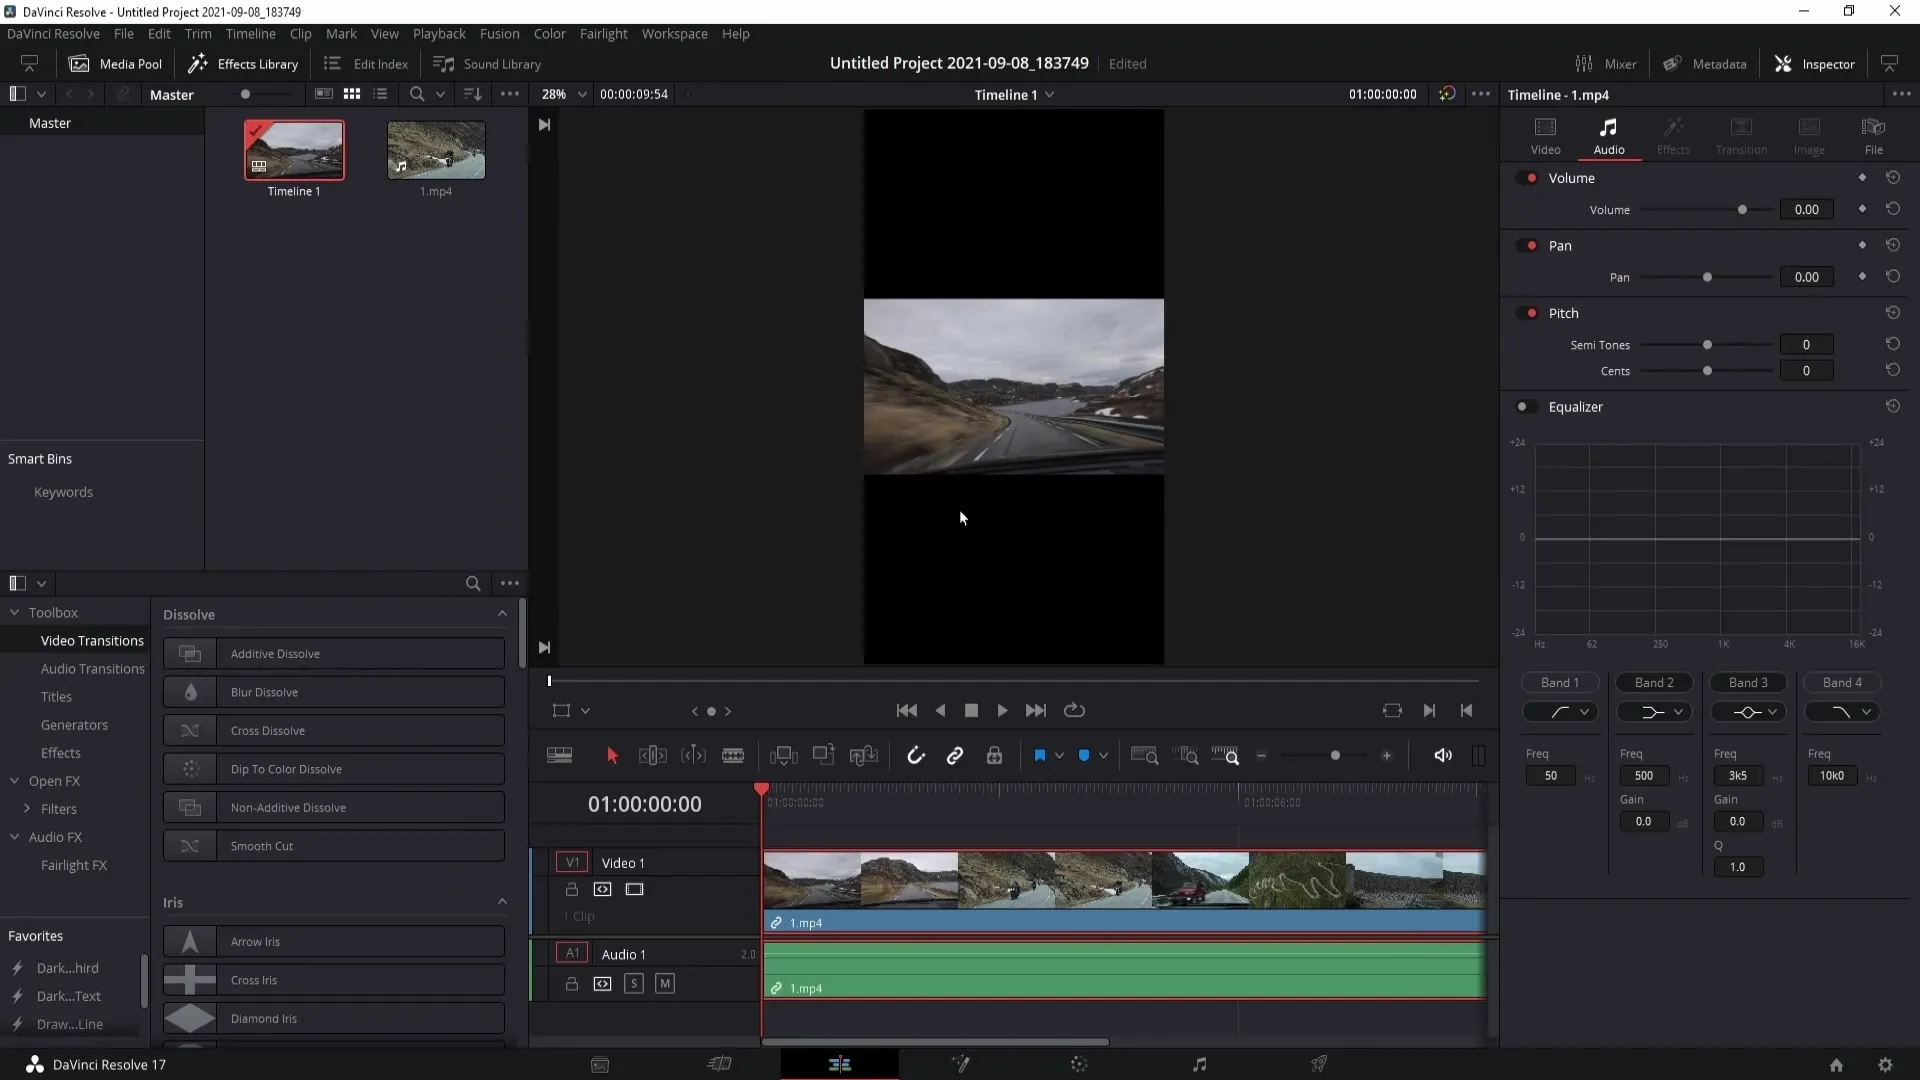
The next step is to adjust the video formats. Click on the cog icon in the bottom right to open the project settings. You should change your video resolution to 1080 x 1920 to get the correct format for Instagram Stories.
Swap the two values and save the changes. You will notice that your video now has black bars on the top and bottom.
To remove these black bars, go back to the cog icon, then select "Image Scaling". Choose "Scale full frame with crop" here.
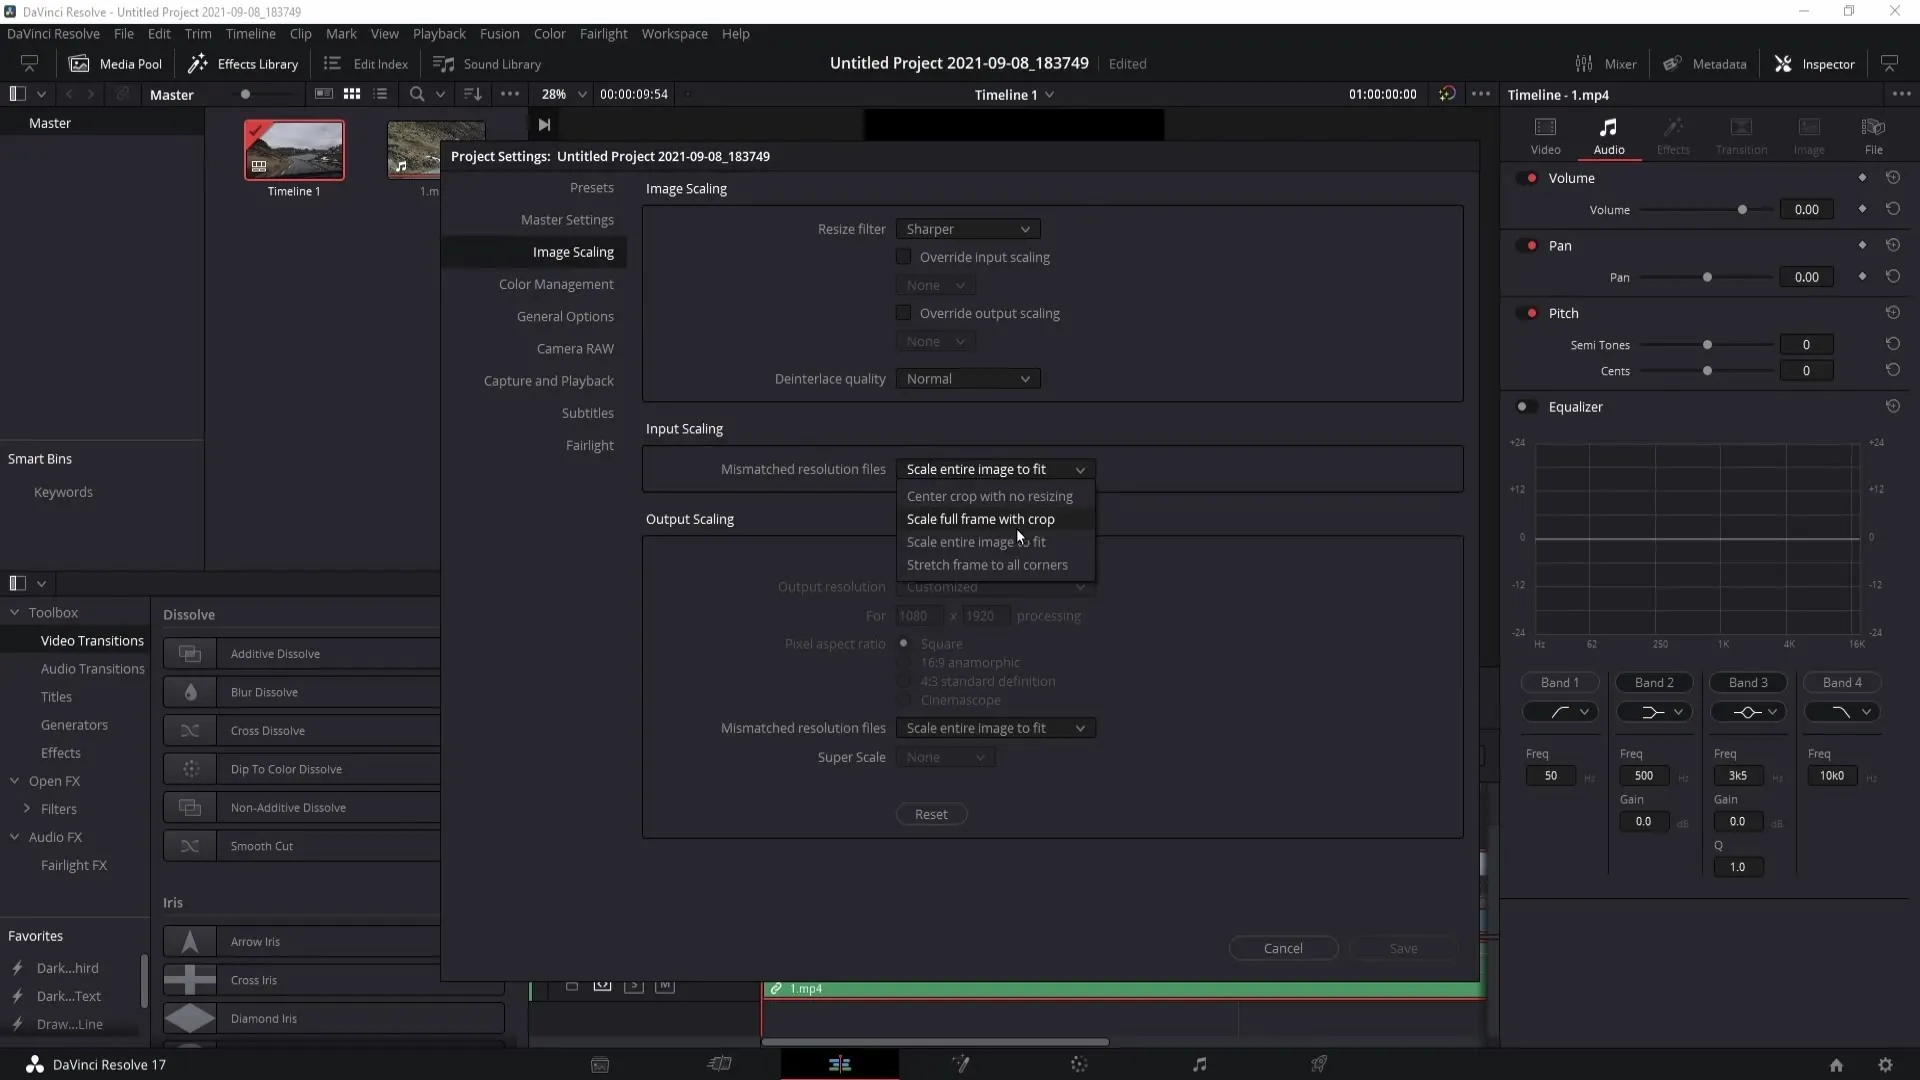
Save the changes, and your video will be stretched to the 9:16 format.
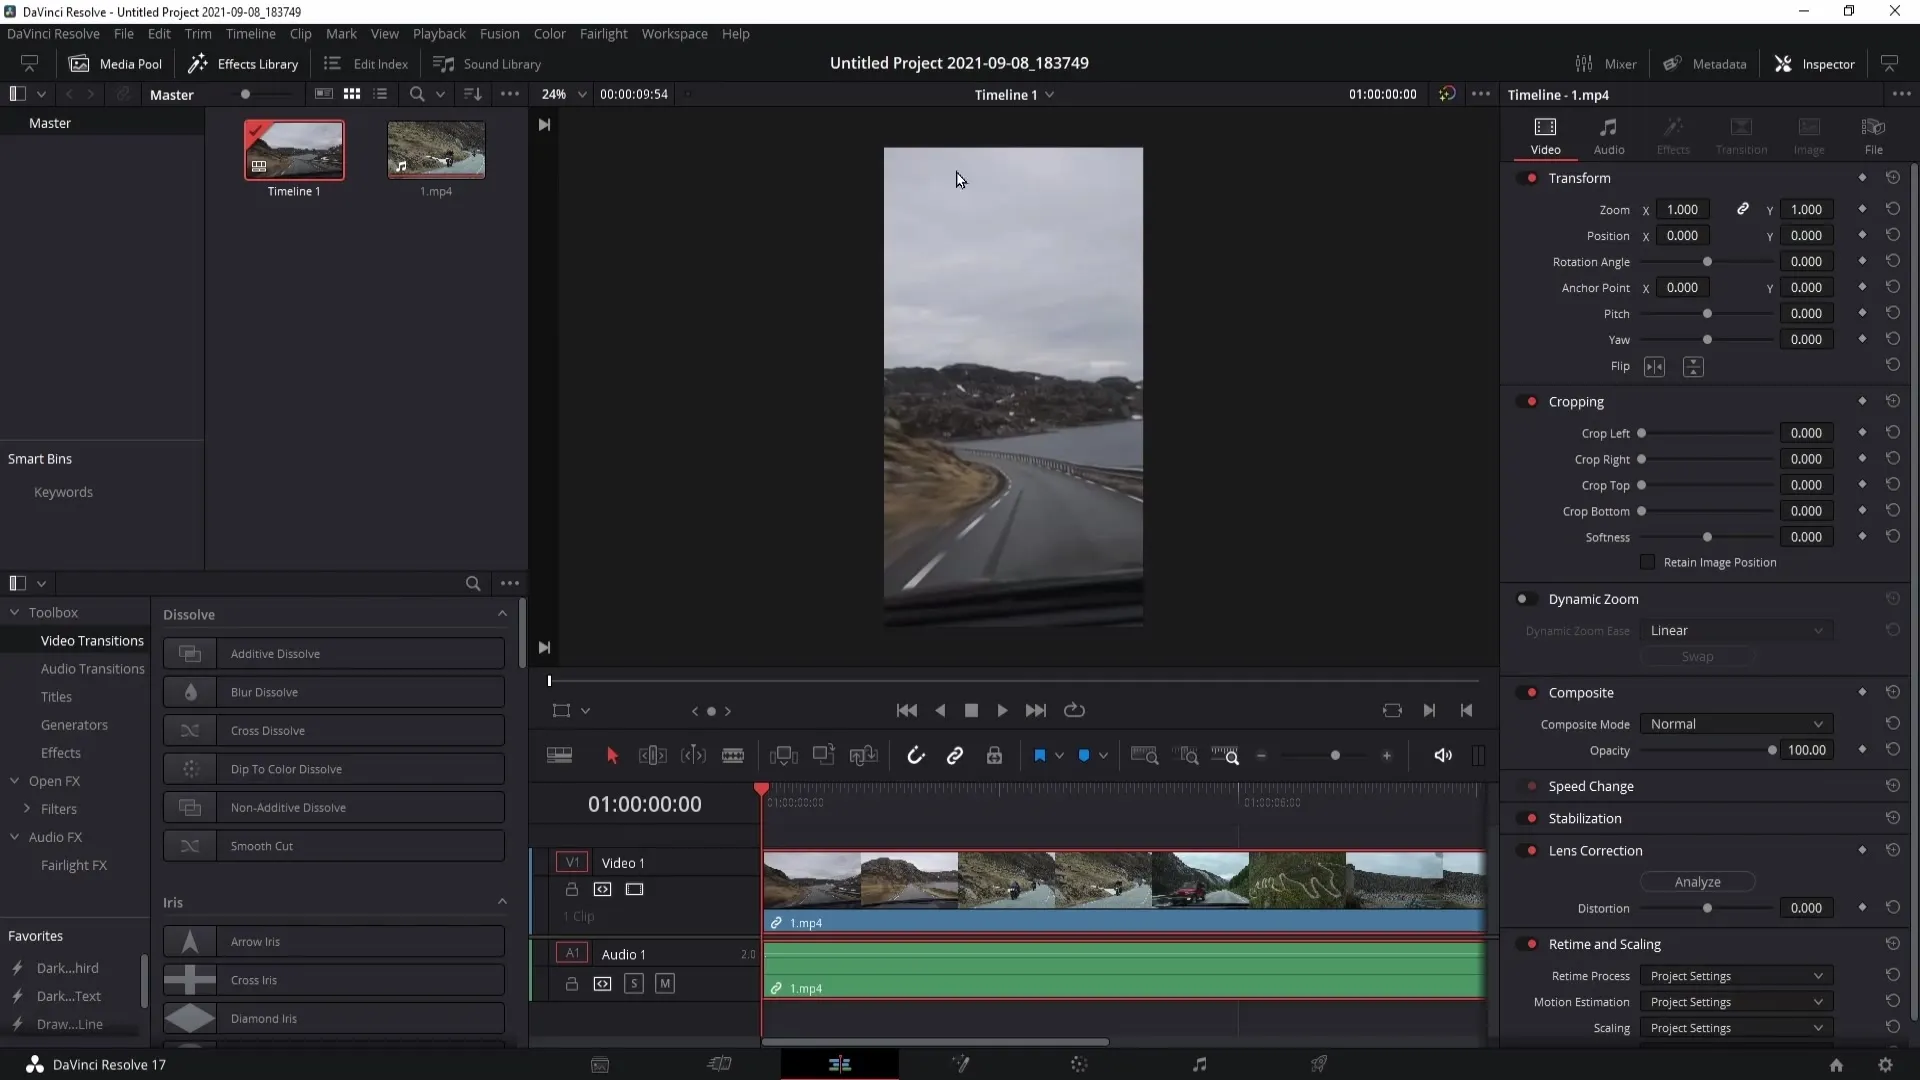
You can also adjust the X position of the video to position your subject correctly in the frame.
Step 3: Format Adjustment for Video Posts
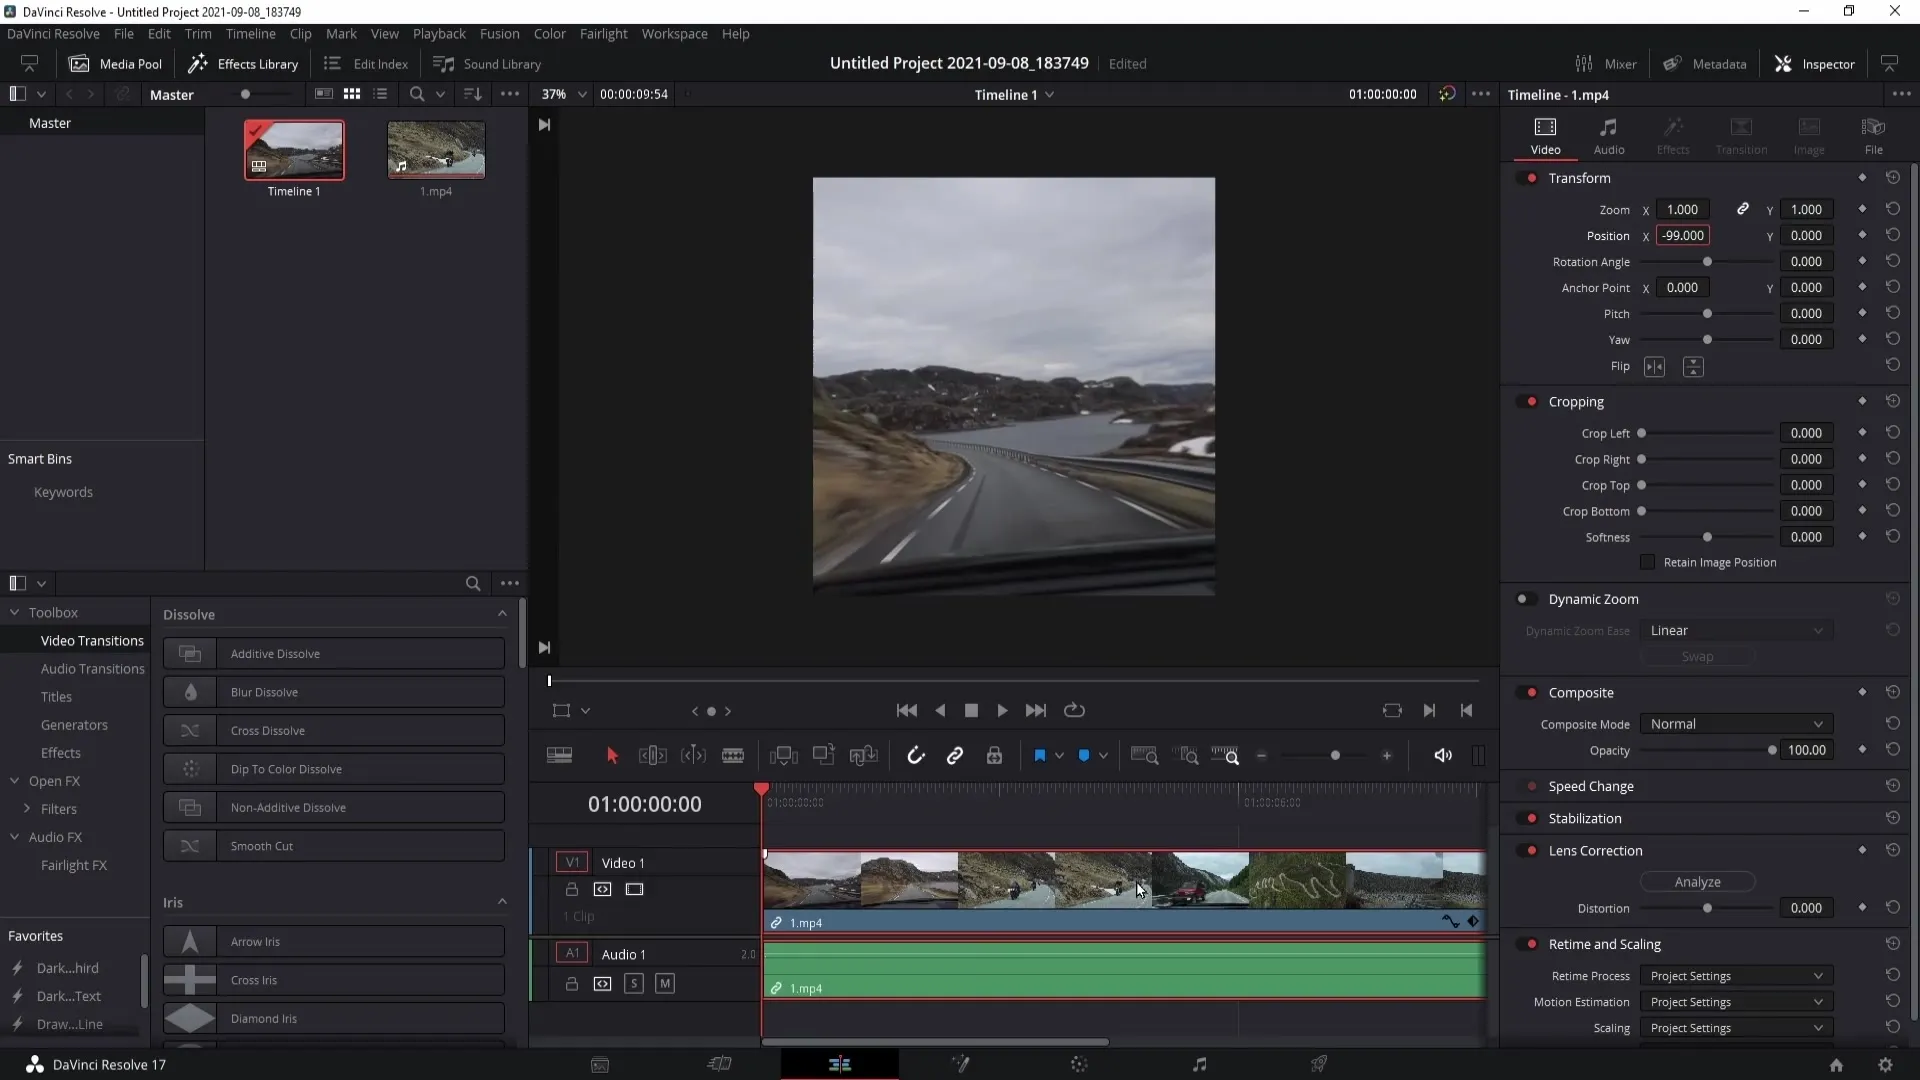
If you want to create a video for a post instead, click on the cog icon again in the project settings. Here, choose 1080 x 1080 (or 1080 x 1350) as the resolution. Note that the latter may be cropped in the preview when the video is displayed on your channel.
For the preview, 1080 x 1080 is the more common option as it fits better in the frame.
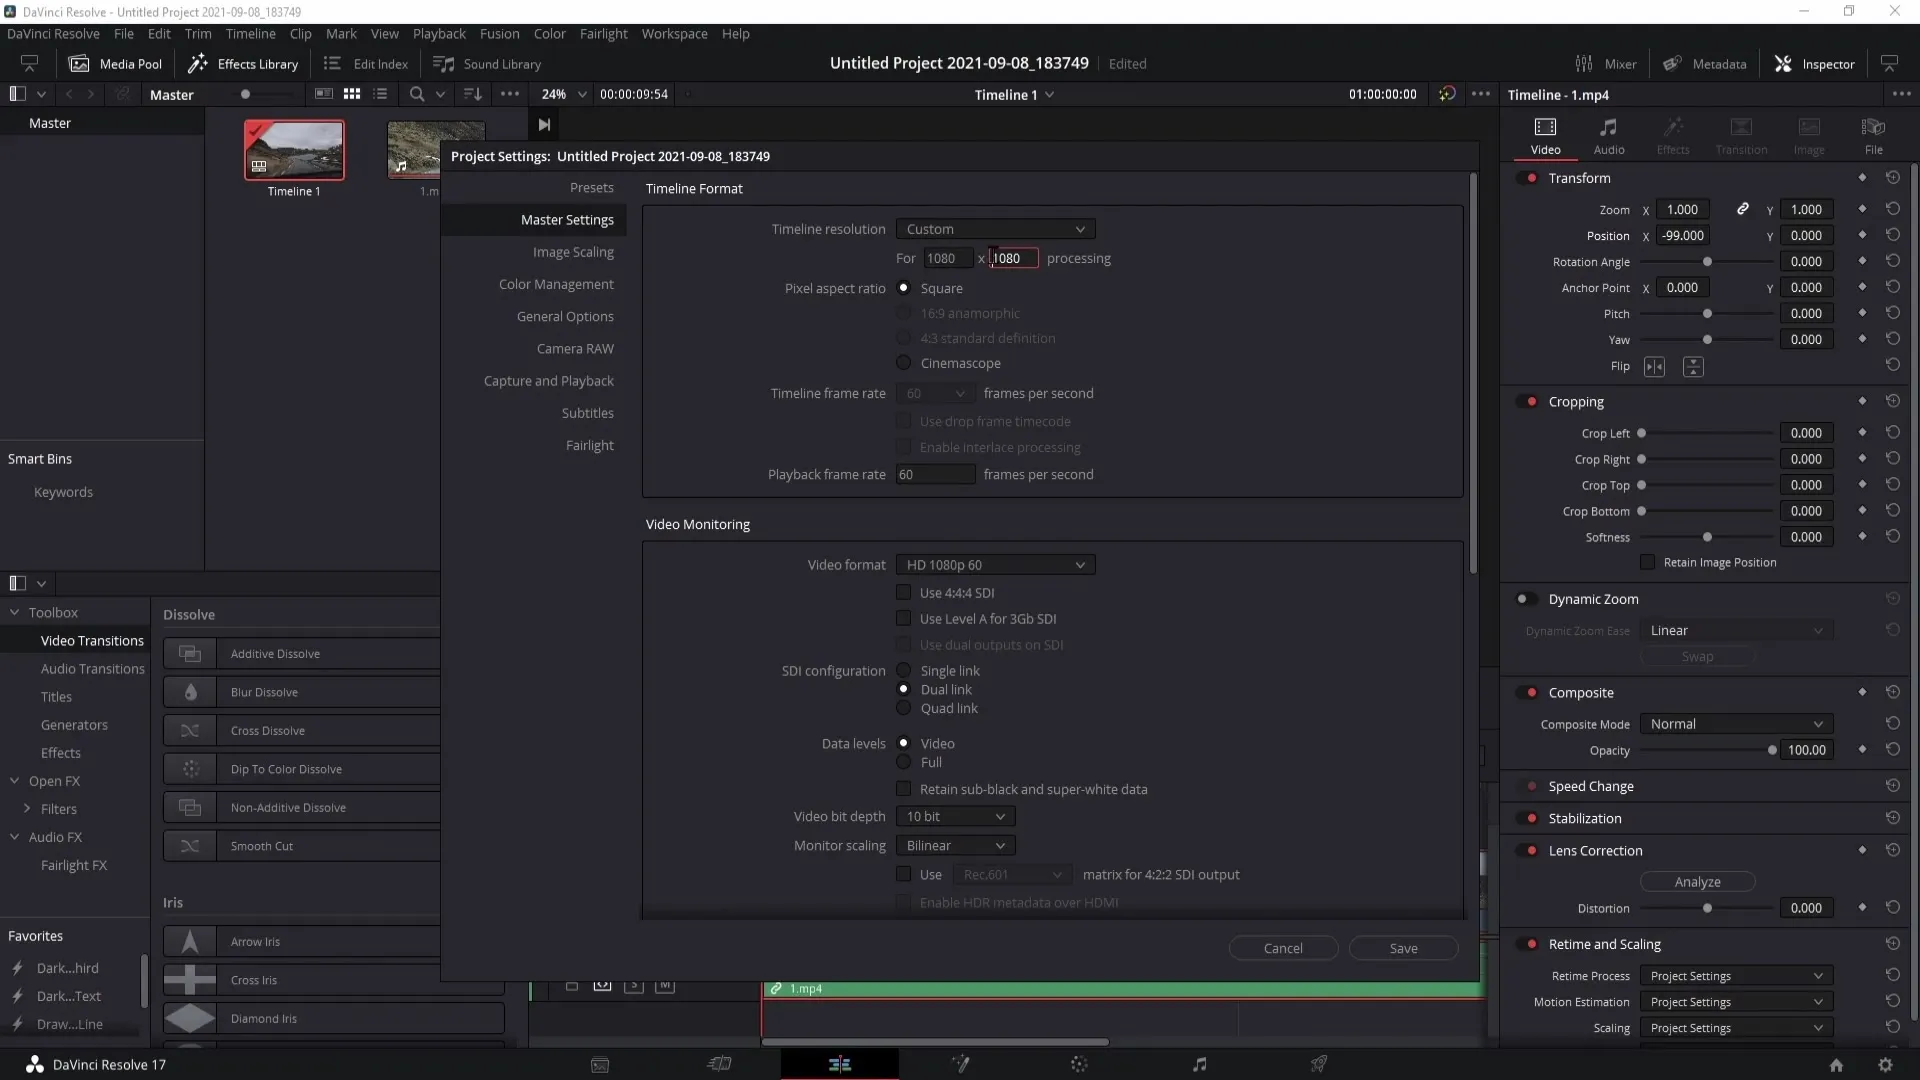
Save the changes with a click on "Save".
Step 4: Export the Video
Once your video is finished editing, you need to export it. Click on the rocket icon (Deliver) in the bottom right. Ensure that the options "Export Video" and "Export Audio" are enabled.
Select MP4 as the format. You can leave the remaining settings as they are.
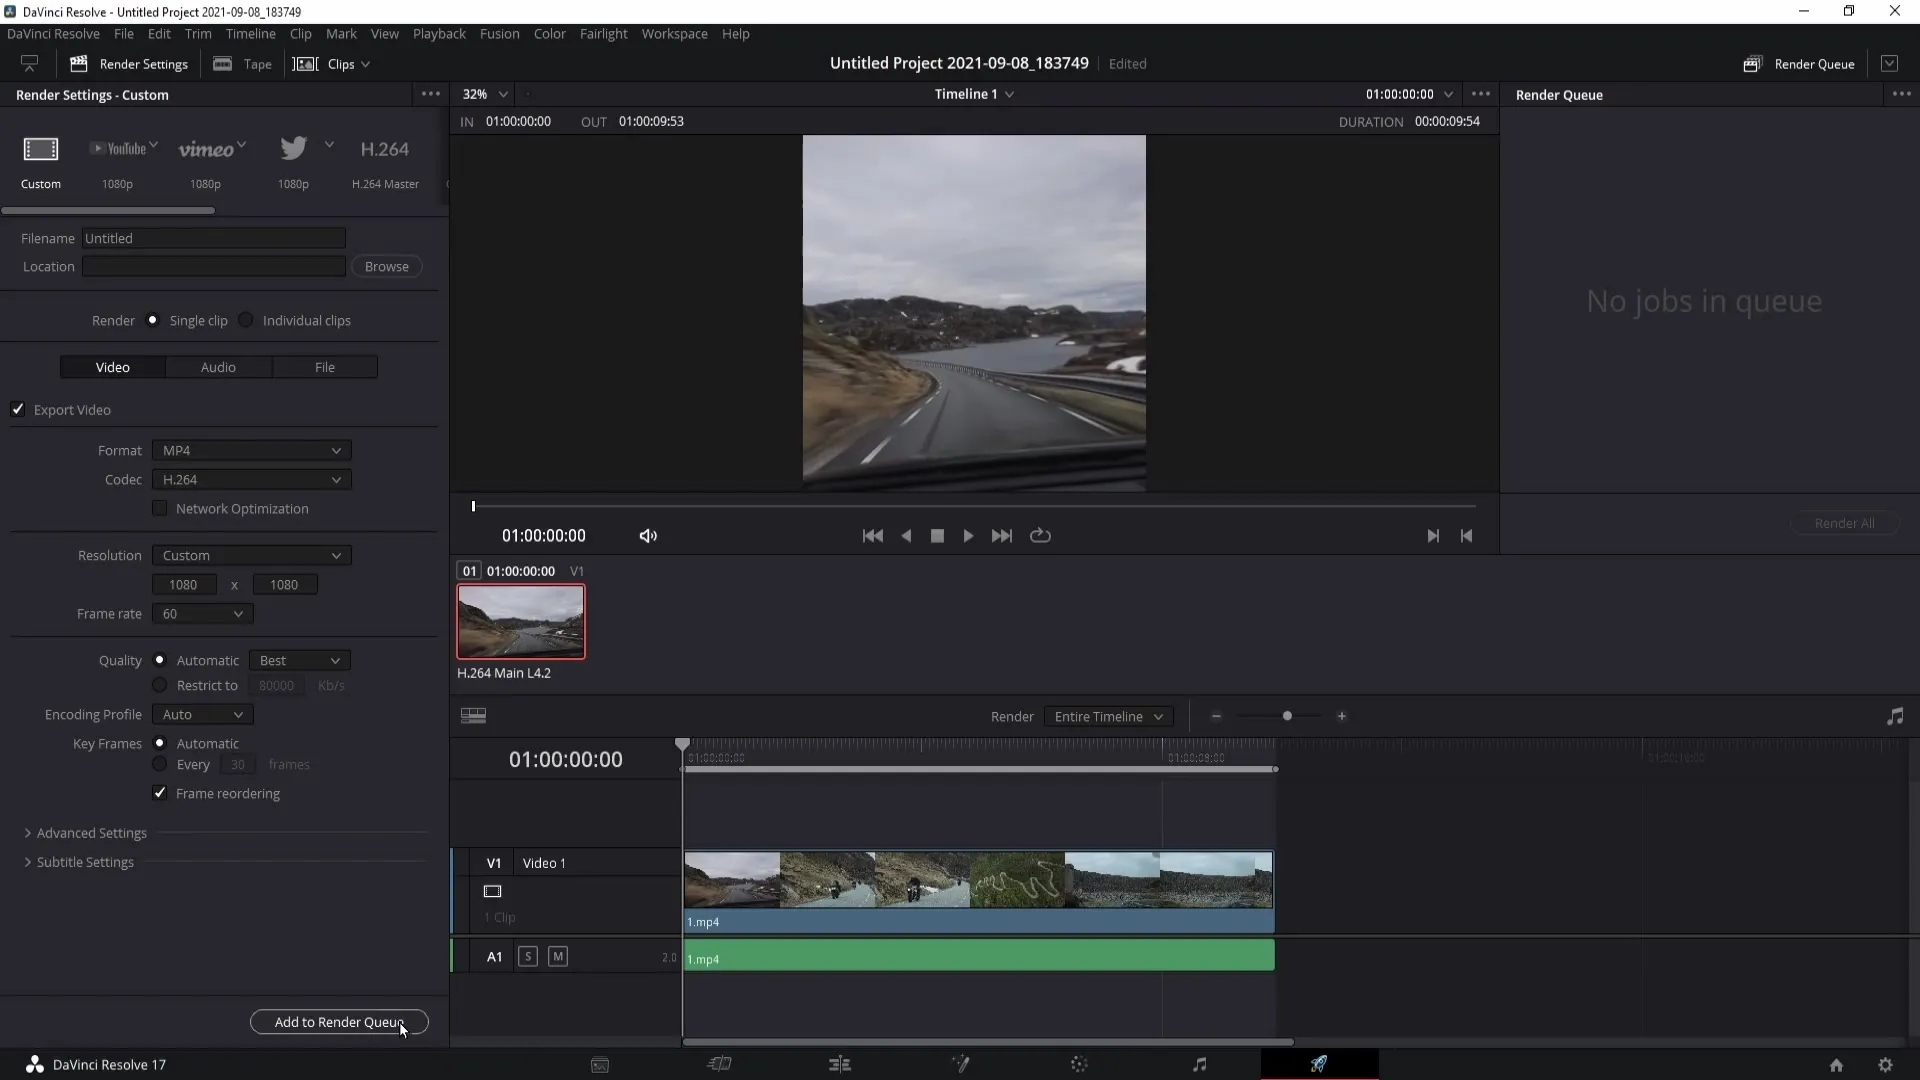
Click on "Add to Render Queue". Then choose the location to save your video, for example, on your desktop, and name it, such as "Instagram Video".
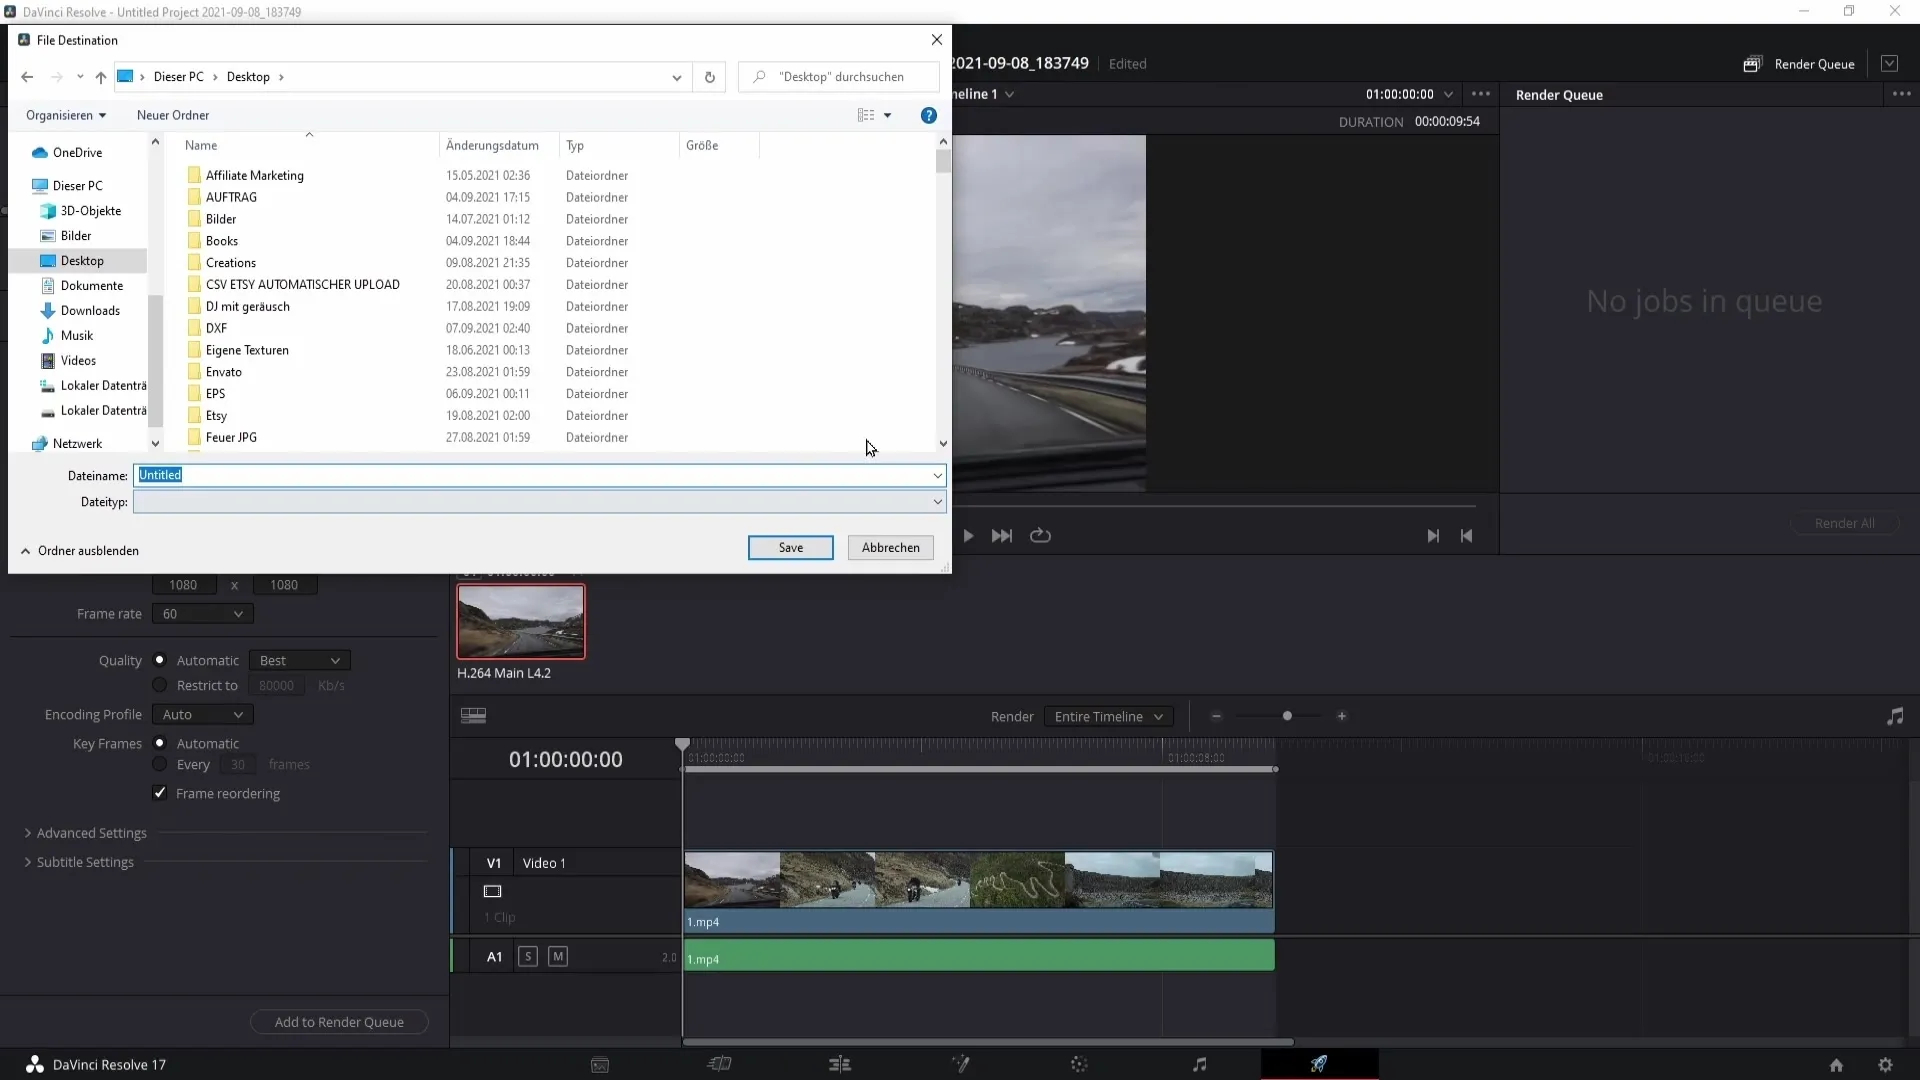
Click on "Save" and then on "Render All" to start the export process.
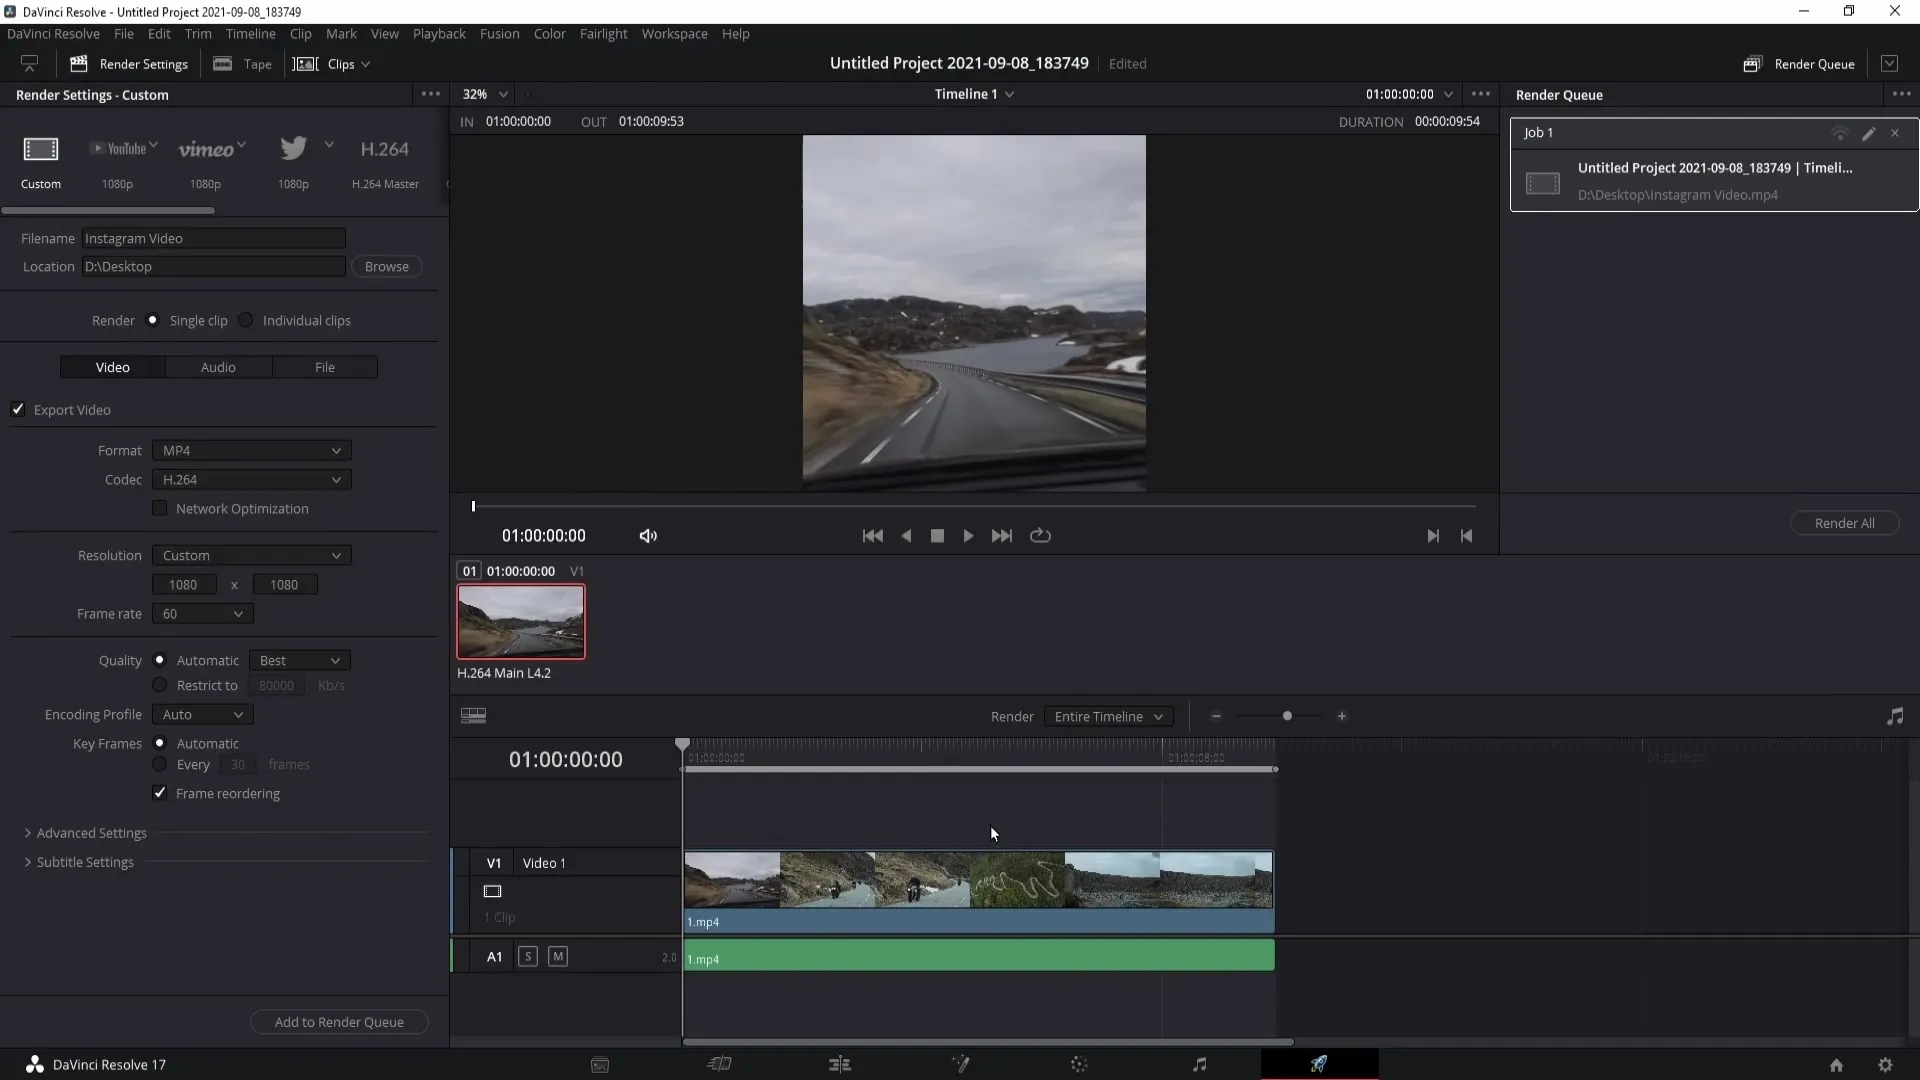
The rendering process will not take long, especially for a short video. Once completed, you will find the video at the location you specified.
Now you can easily upload your video to Instagram!
Summary
In this guide, you learned how to create Instagram Stories and video posts with DaVinci Resolve. You learned how to import your video, adjust the formats, and ultimately export it to upload on Instagram. With these steps, you can ensure that your content looks good and is properly formatted.
Frequently Asked Questions
How do I import a video in DaVinci Resolve?You can import a video by pressing Control + I (Windows) or Command + I (Mac) and selecting the video.
How do I adjust the format for an Instagram Story?Change the resolution to 1080 x 1920 and select "Scale full frame with crop" to adjust the format.
What should I do if the video is cropped?Make sure to use the correct dimensions for the preview, e.g., 1080 x 1080 for video posts.
In which format should I export my video?Export the video in MP4 format to ensure high compatibility for Instagram.
