In this tutorial, I will show you how to easily fade in and out audio in DaVinci Resolve. You will learn how to edit your sound with just a few clicks to smoothly fade in and out. This is particularly useful for creating a harmonious audio atmosphere and avoiding abrupt transitions. Let's go through the steps together.
Key Takeaways
- You can smoothly fade in and out audio in DaVinci Resolve with simple adjustments.
- There are different methods to adjust the volume of your audio: by scaling the track or by setting keyframes.
- Well-faded audio contributes to the overall aesthetics of your project.
Step-by-Step Guide
Insert Music into Your Timeline
In the first step, add your music or the audio you want to edit into DaVinci Resolve. Simply drag the audio into the timeline and ensure it is correctly placed.
Expand Audio Track
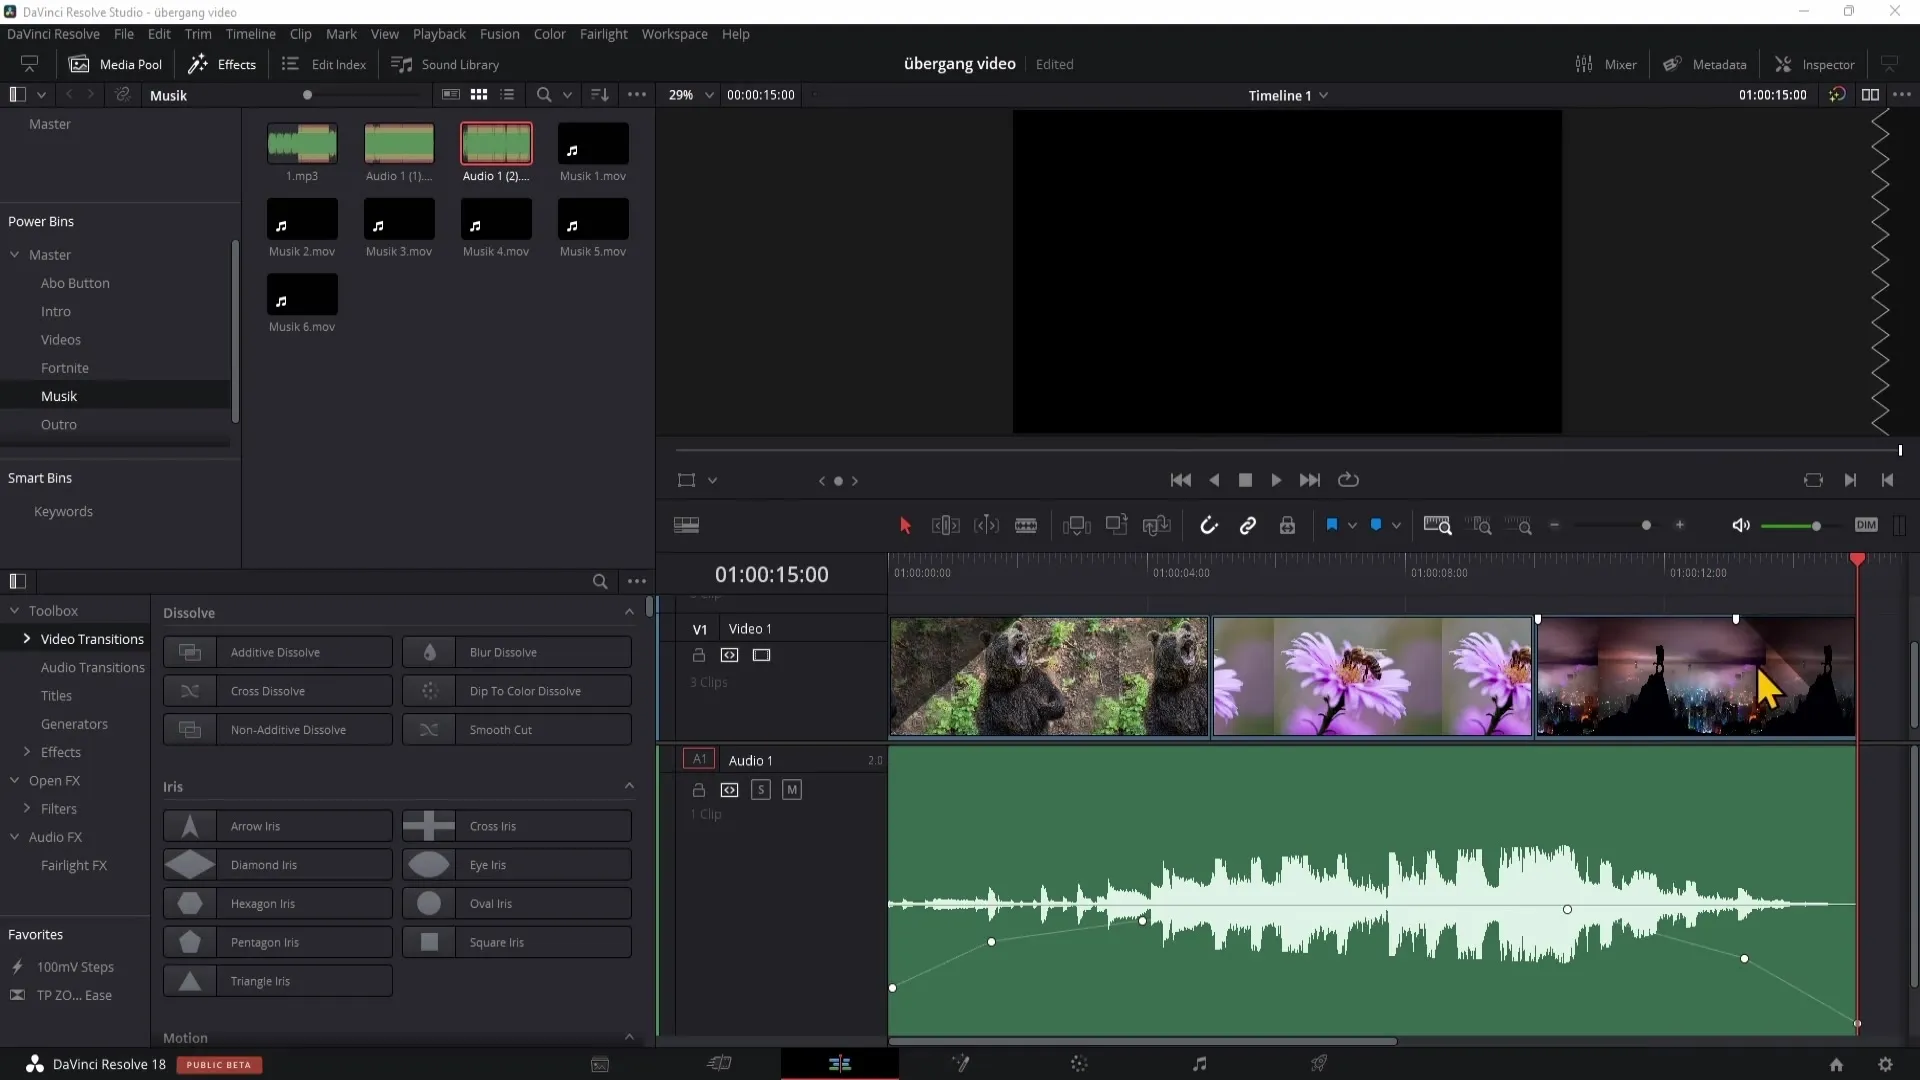
To have more control over the audio adjustments, you should expand the audio track in the timeline. Drag the top edge of the track upwards to do this.
Adjust Volume
In the top right corner of the audio track, you will find a small white point. With this point, you can easily adjust the volume. Drag the point downwards to create a fading effect that gradually fades out the audio.
Set Keyframes
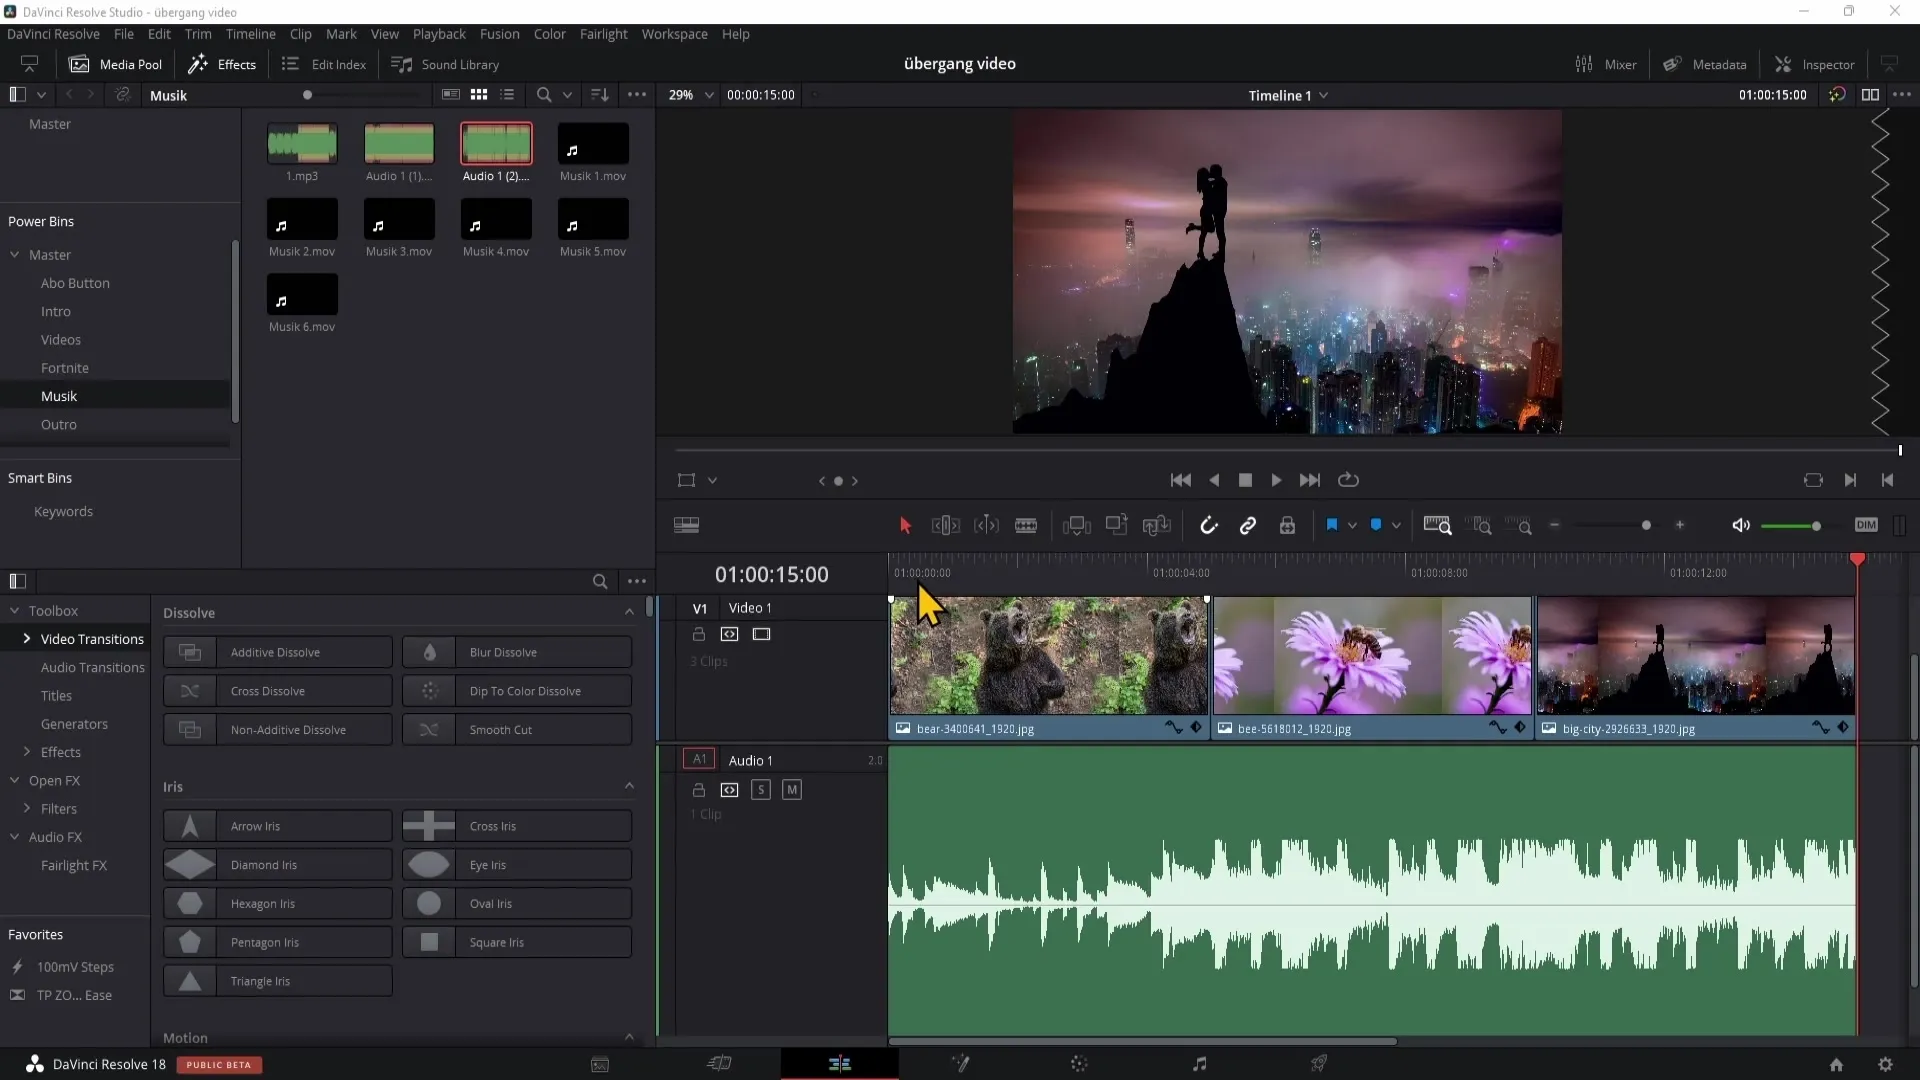
For more precise adjustments, you can set keyframes. Move the cursor to the thin white line representing the volume level and hold the ALT key while clicking on this line with the mouse to set a point.
Simple Fade-Out Settings
Place the keyframe at the end of the clip and drag it downwards to fade out the audio. These adjustments will result in a smoother and more fluid volume change.
Add Intermediate Keyframe
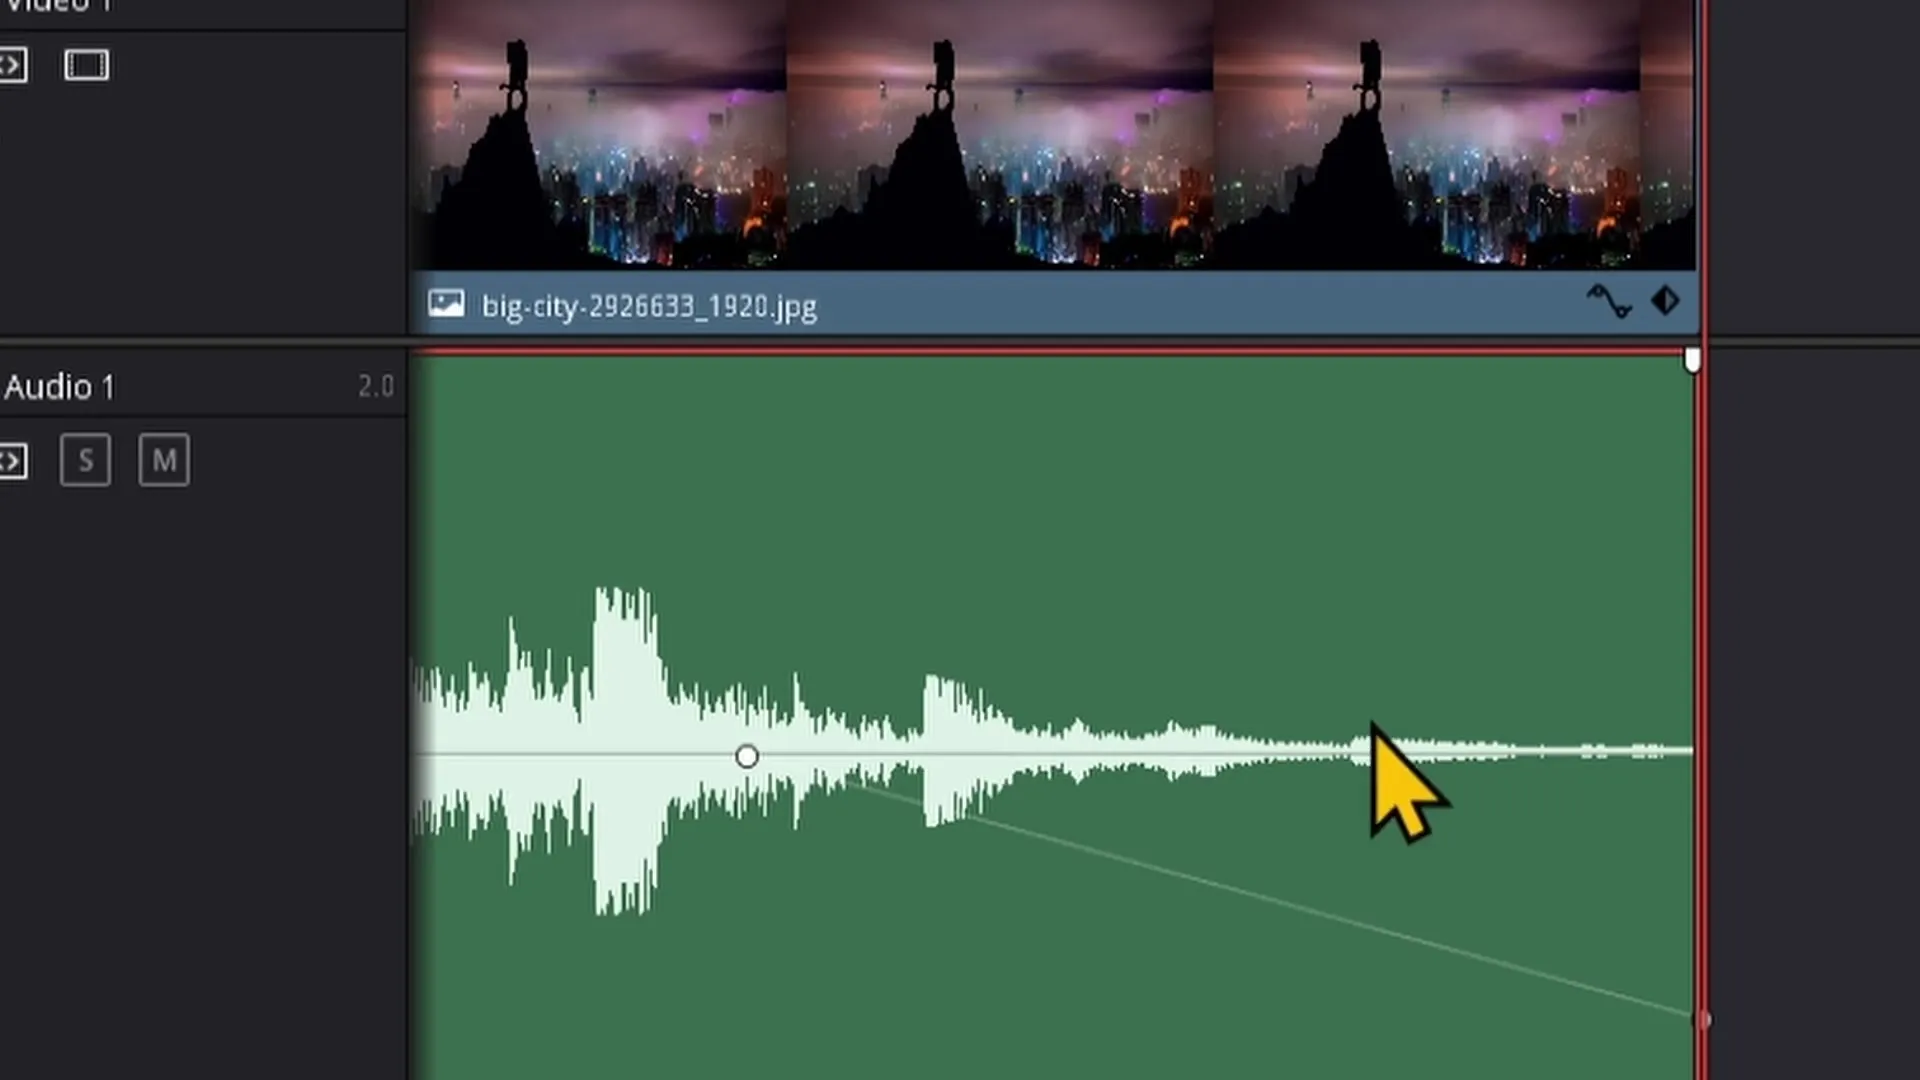
To further refine the fade-out action, you can set another point between the first two. Drag this point slightly upwards to create a gentle curve that doesn't linearly decrease the volume.
Gradual Volume Adjustment
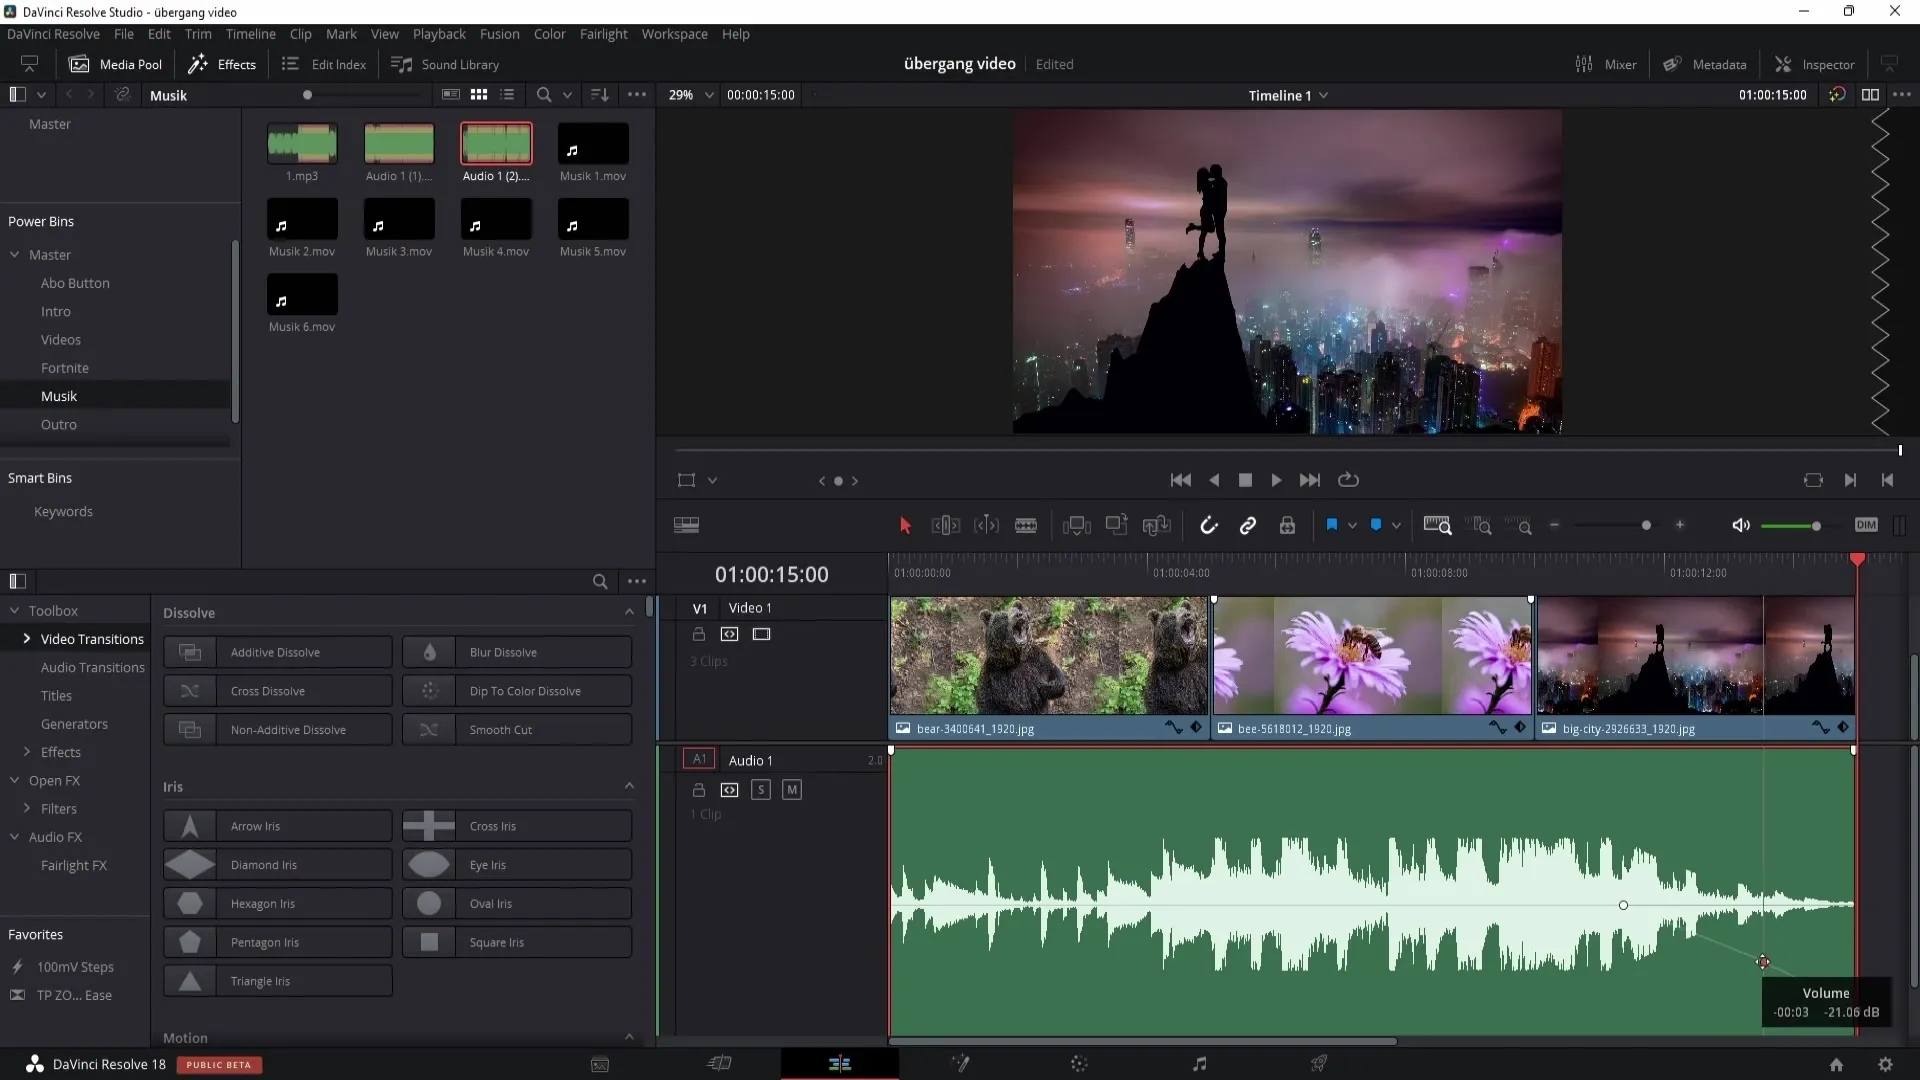
If you want the fade-out to occur more slowly, simply spread the keyframes apart. This way, you have more control over the transition time.
Fade-In at the Beginning
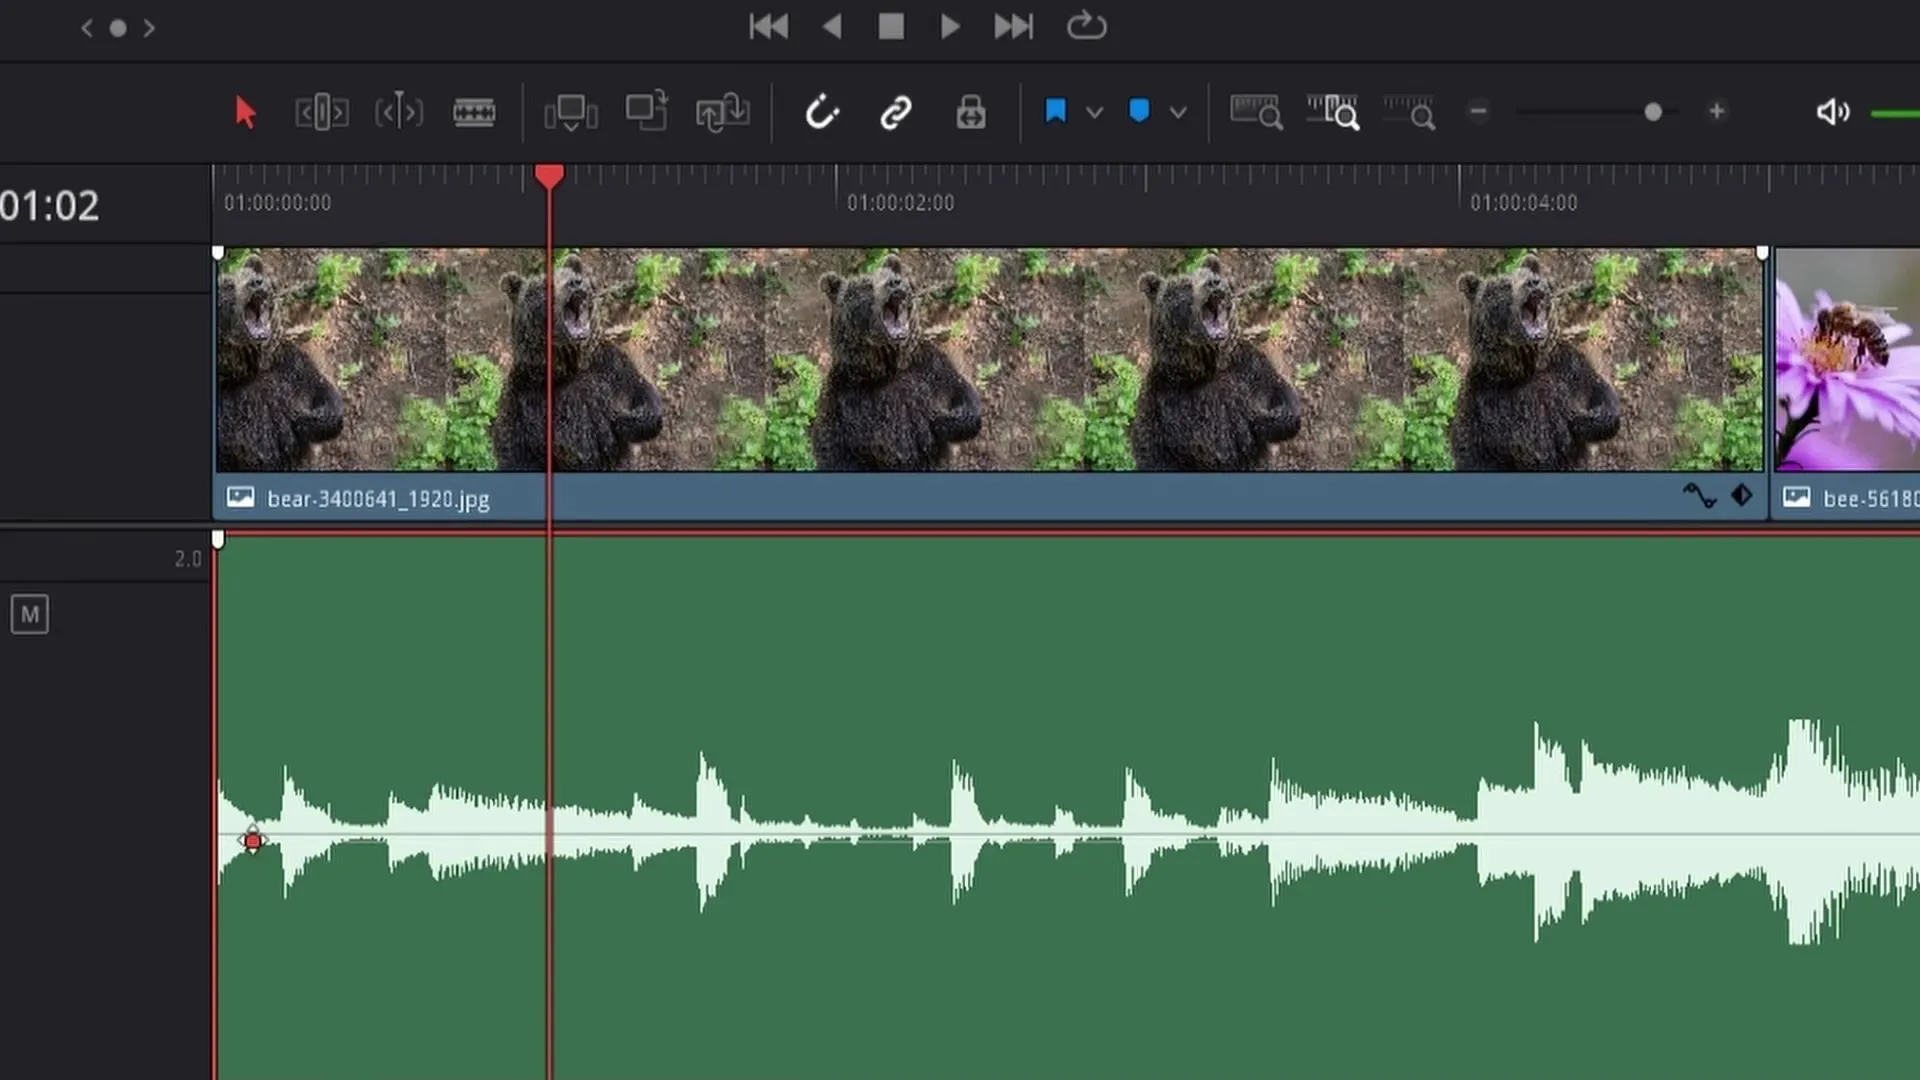
You can apply similar techniques for the fade-in at the beginning of the music. Set keyframes here as well to gradually increase the volume from zero to the desired level.
Create Harmonious Transitions
With the methods described above, you can ensure that the audio transitions are harmonious. Experiment with different settings and listen to the results to achieve the best outcomes for your project.
Summary
In this tutorial, you have now learned how to easily fade in and out audio in DaVinci Resolve. With the techniques described, you create smooth transitions and improve the quality of your audio outputs. Use keyframes for fine-tuning to achieve the ideal sound transmission.
Frequently Asked Questions
How can I adjust the volume of my audio clip?You can adjust the volume by dragging the small white point on the audio track or by setting keyframes.
What are keyframes?Keyframes are points you can set in DaVinci Resolve to control changes over time, such as volume.
Can I create a fade-in effect as well?Yes, you can create fade-ins and fade-outs by setting keyframes at the beginning and end of the audio track.


