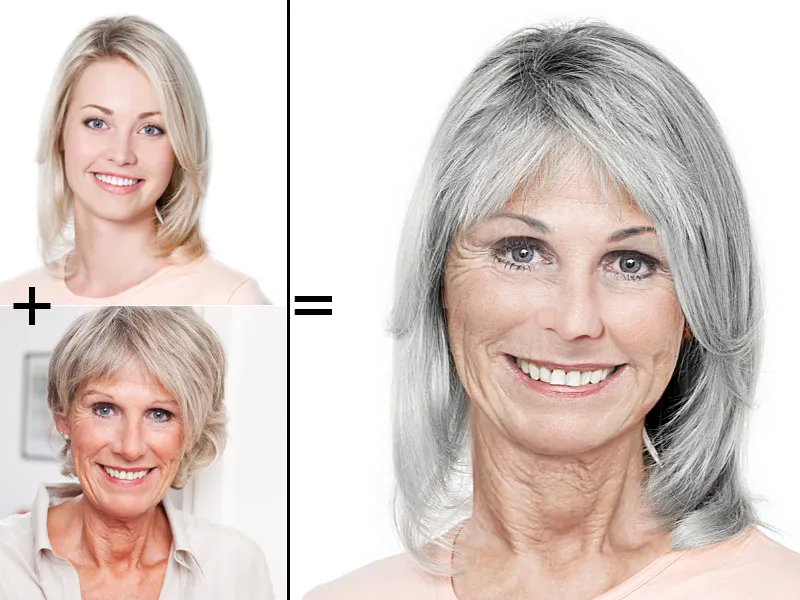
The transformation of a young face into an aged one is a fascinating technique that can be realistically implemented with Photoshop. By combining morphing techniques, you merge details like wrinkles, skin texture, and color changes to create an authentic aging effect. Whether for creative projects, digital art, or film projects - this look is sure to attract attention. In this tutorial, I'll show you step by step how to represent the aging process on a portrait using layers masks, textures, and color corrections. Let's get started and integrate the passage of time into your design!
Aging effect
The aging effect is basically a photomontage of 2 photos with similar characteristics. These two images will merge into a new image during editing. The goal is to define a new person - the aged model.
Step 1 - Graying the hair using adjustment layer and mask
Our young model still has their natural hair color in the initial image, which I now want to change in the first step.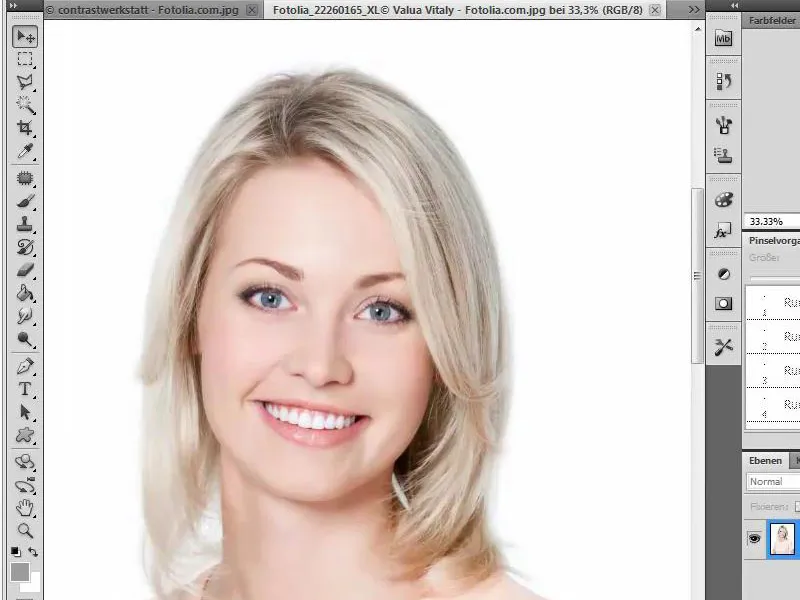
To do this, I need to gray the hair. This works particularly well with blonde hair and is realized using an adjustment layer Color Fill and a layer mask. First, I create a new Color Fill adjustment layer and fill it with a neutral gray value. The values for Red, Green, and Blue should be set to 157.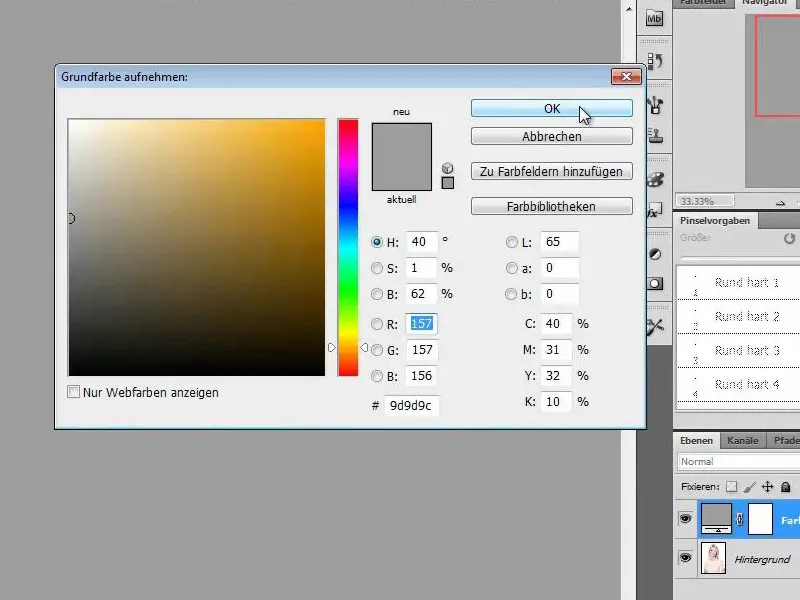
Step 2 - Transform layer mask to black and cut out the hair
The newly created gray adjustment layer now covers our entire image. To see the underlying layer, I transform the layer mask to black and fill it with black. I need to ensure the correct marking of the mask in the layer palette, or else I would be coloring the image and not the mask.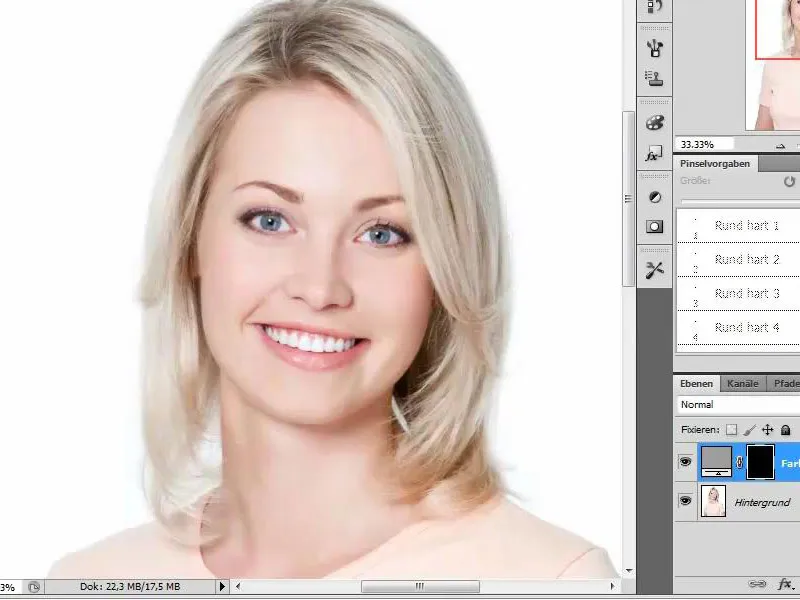
Once the mask is transformed to black, I can now use a white medium-sized brush with high opacity to color the hair by revealing the areas on the layer mask.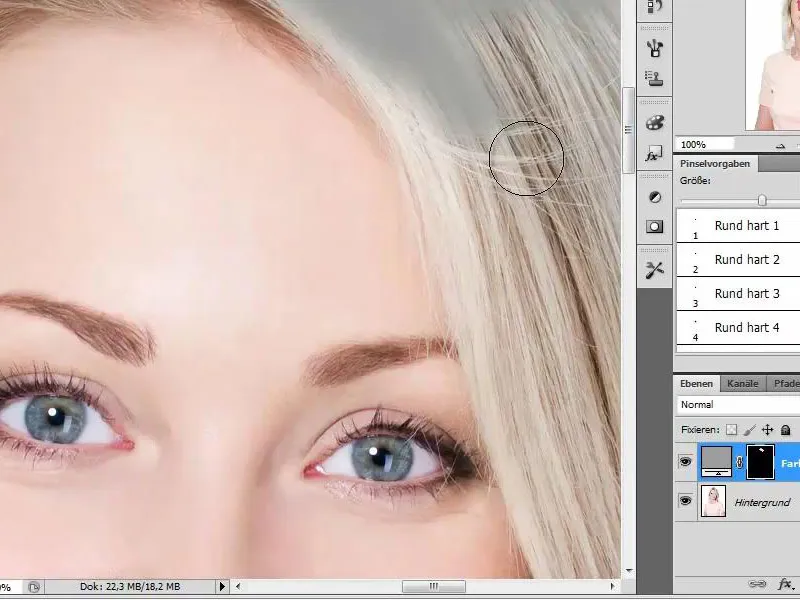
Step 3 - Refine hair details and set layer to "Color" mode
To actually display the hair as gray, I need to set the layer to the Color mode after cutting out the hair. Before that, I meticulously work on even the smallest hair details with a customized brush size and appropriate opacity.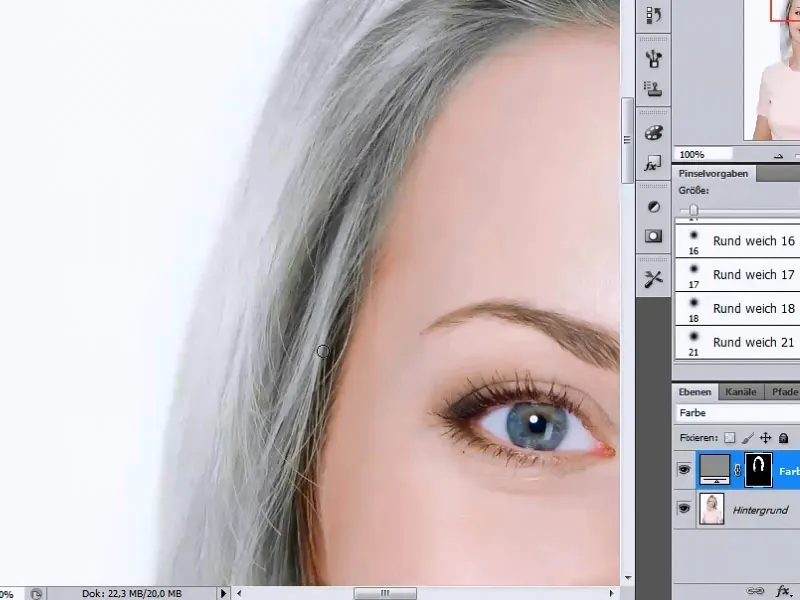
Step 4 - Increase the contrast of the hair area
To enhance the contrast in the hair area, I add another adjustment layer. But first, I need to make a selection of my hair or hair area. I obtain this selection by clicking on the mask of the color fill layer while holding the Ctrl key.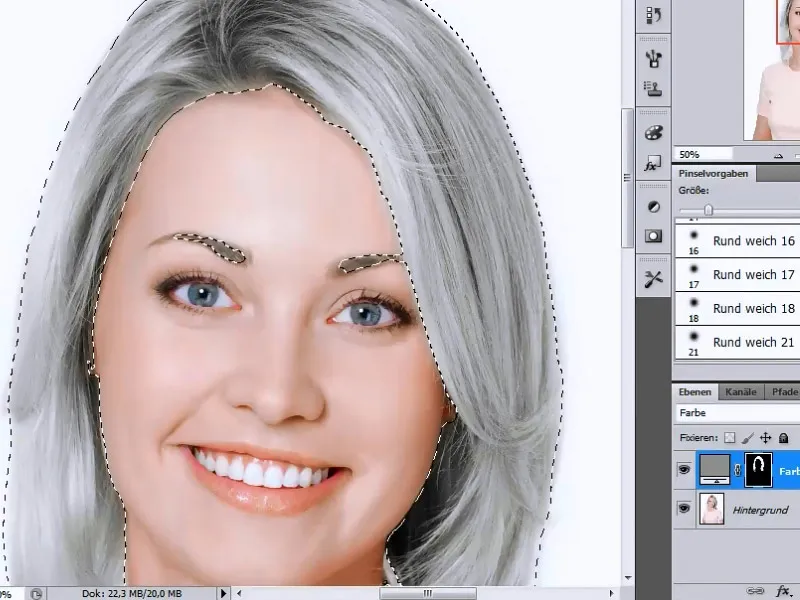
Then, I choose the Levels adjustment layer and modify the sliders so that there is a clear contrast increase in the midtones area.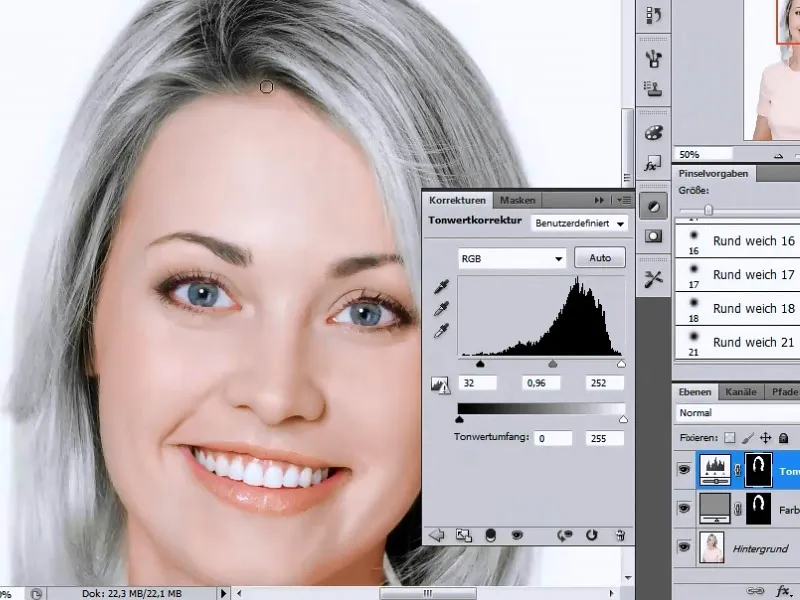
Step 5 - Open and adjust reference image
In the next step, I open the reference image from which I want to extract facial features. Before that happens, I will adjust the skin color to match my initial image. I use the Selection tool to select a skin area, which I will then adjust the color of.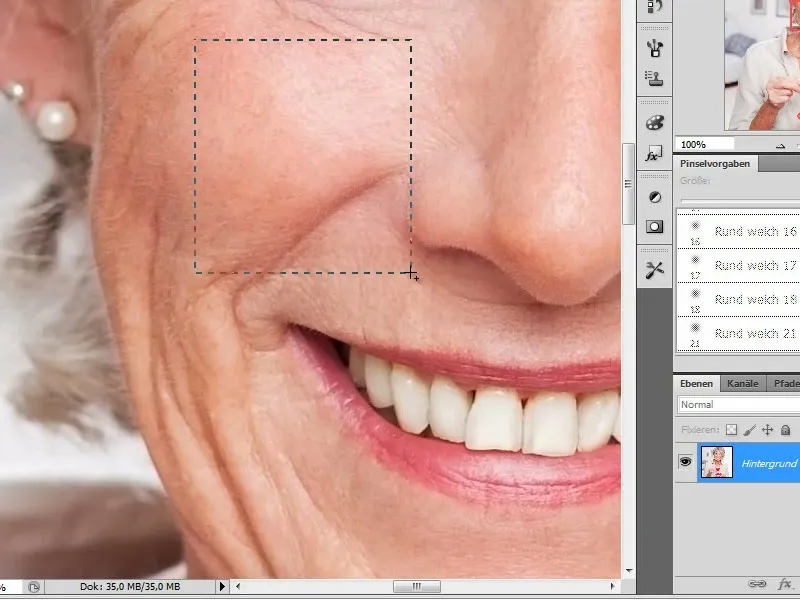
I now place this piece of skin on the face of my model and adjust it to match the skin color of the initial image using the Hue/Saturation adjustment. I increase the hue slightly and decrease the saturation. I note the adjustment values made as I will need them again shortly.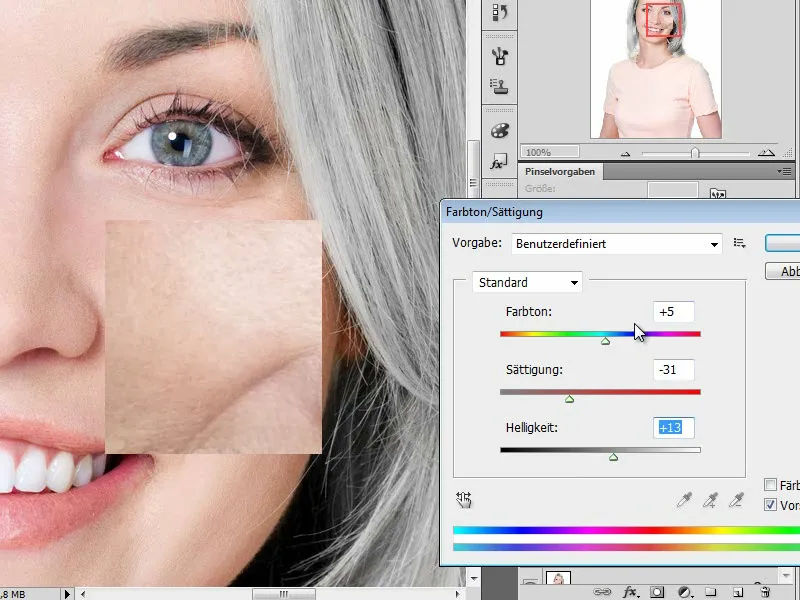
Next, I switch to my image with the older lady and adjust the skin tone holistically by using an adjustment layer Hue/Saturation with the values I noted earlier.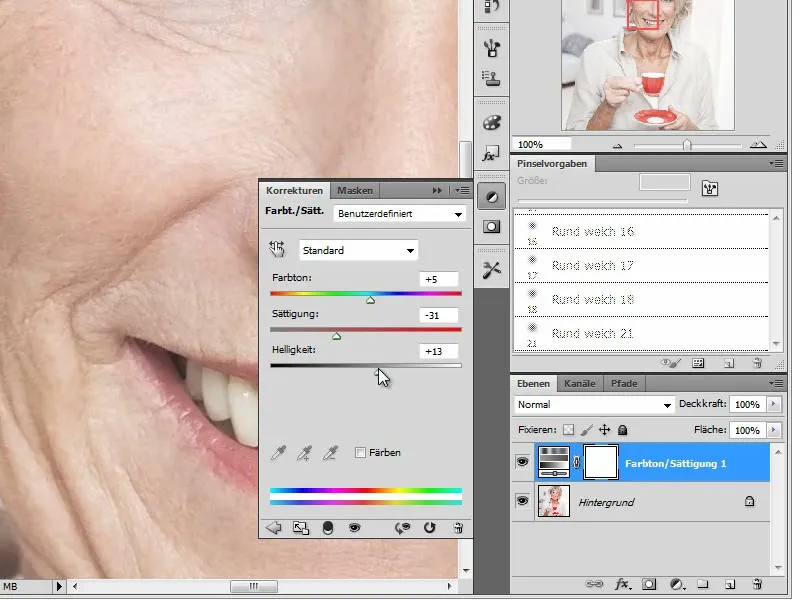
Step 6 - Drag and resize reference image into working document
Now that the skin tone has been adjusted to the model, I can transfer the image to my working document after merging all layers by pressing Ctrl+Alt+E. To align the images, I set the layer of the older lady to Difference mode, allowing both images to overlay with the contours.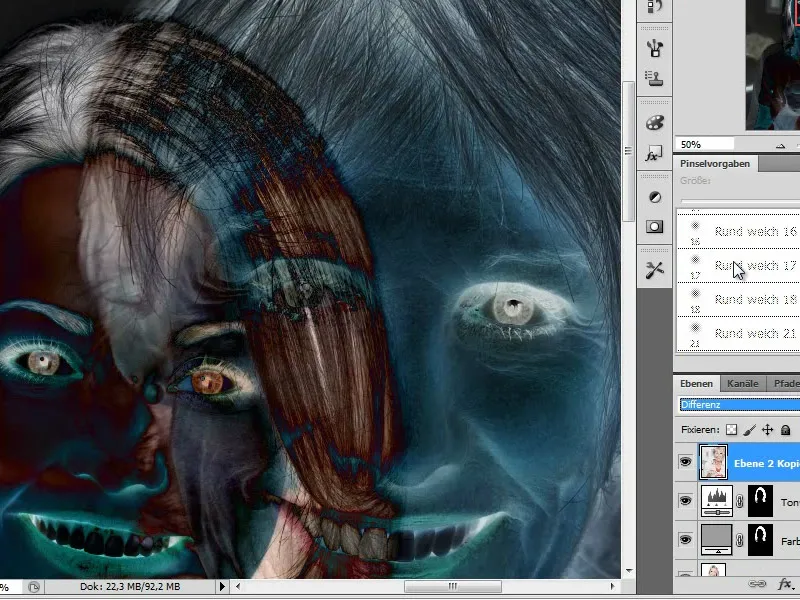
Now I adjust the image to the size of the model I am modeling. For this, I use the transform tool. I use the eyes and mouth as reference points for the same size.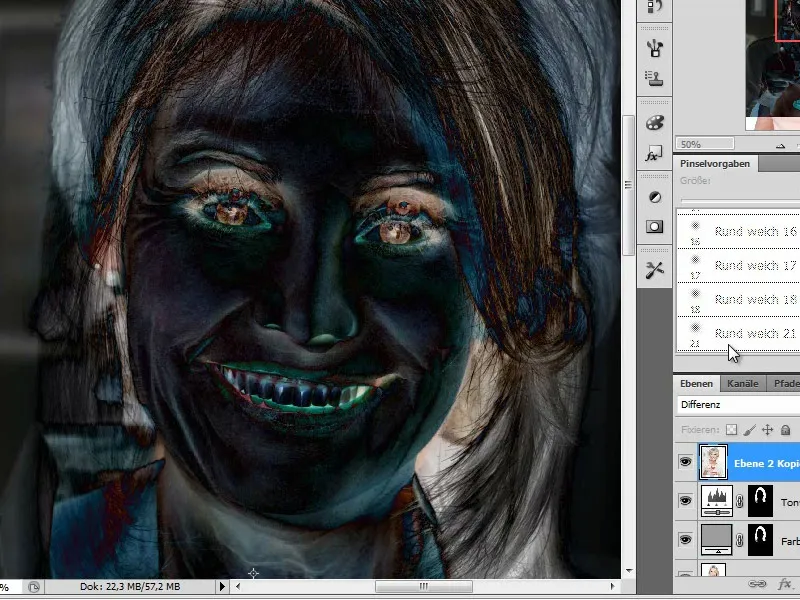
Step 7 - Transplantation of Facial Features
In the next step, we already begin with the transplantation of the first facial features. For this, I select the right half of the forehead from the face of the elderly lady.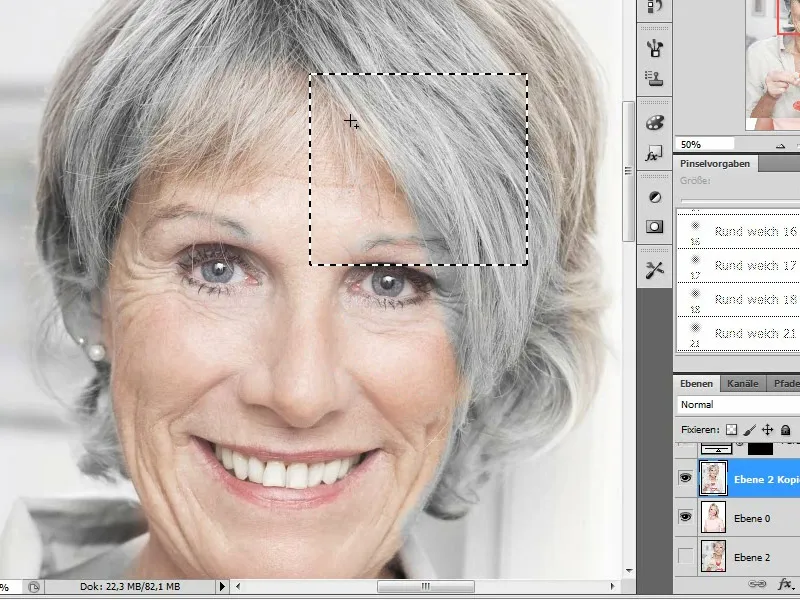
By pressing the key combination Ctrl+C & Ctrl+V, I copy and paste this section onto a new layer.
Step 8 - Fitting the Copied Facial Features
The copied facial feature does not yet completely match the face of the young woman. Therefore, an adjustment using layer masks is necessary. I choose a soft brush and work on the edges of the "snippets" with varying size and opacity to achieve a smooth transition to the face of the younger lady.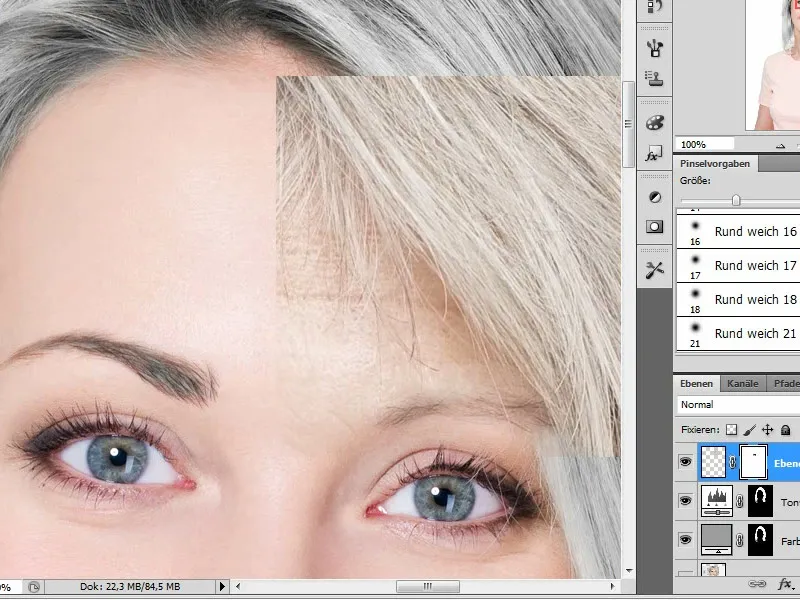
Step 9 - Adapting the Copied Hairpieces
With the copies from the layer of the elderly lady, we also incorporate some of her hair. Hairstyles from copied photos can sometimes be completely different from those of our model. However, in my example, they are similar. In order to achieve a smooth transition to the existing hair and the inserted hairpiece, I work along the hairline with my brush tip.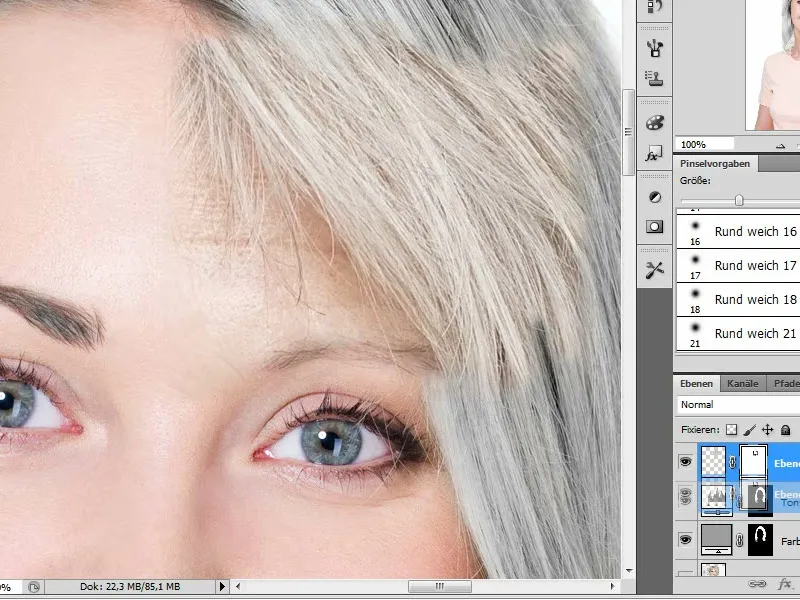
Step 10 - Creating a Duplicate of the Implanted Forehead Half and Mirroring
In the next step, we save ourselves the hassle of cutting out the forehead again and simply duplicate the inserted and edited forehead half. We mirror this copy using the transform tools.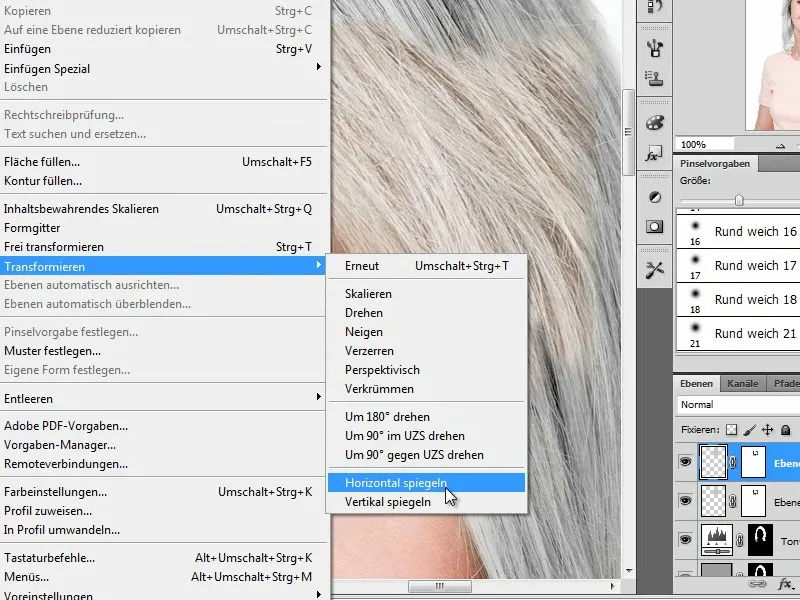
Step 11 - Adjusting the Duplicate Forehead Half
Since our young model does not hold her head completely straight and we encounter different perspectives here, it is necessary to adjust the duplicated forehead half to the curvature of the young lady's head using the transform tools. I select the tool Image>Transform>Perspective Distortion and adjust the perspective by moving the handles. I already pay attention to a natural wrinkling of the forehead by using the tilt function during the transformation.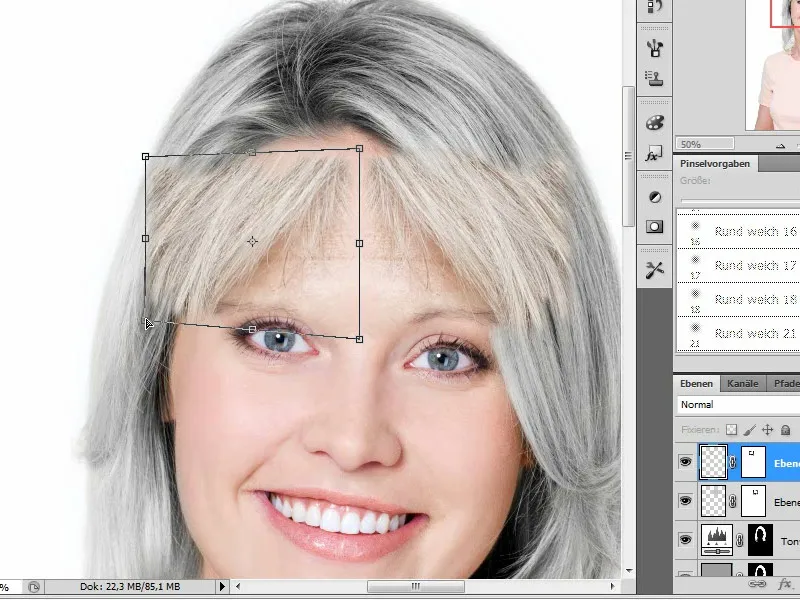
Here, further adjustments need to be made using the layer mask we inherited from the copy. Especially the hair on this side is positioned differently, and the transition from the forehead to the hairline is slightly shifted. I leave the protruding hair on the face in place. This allows me to achieve a more realistic transformation in the overall image through a hairstyle adjustment in aging.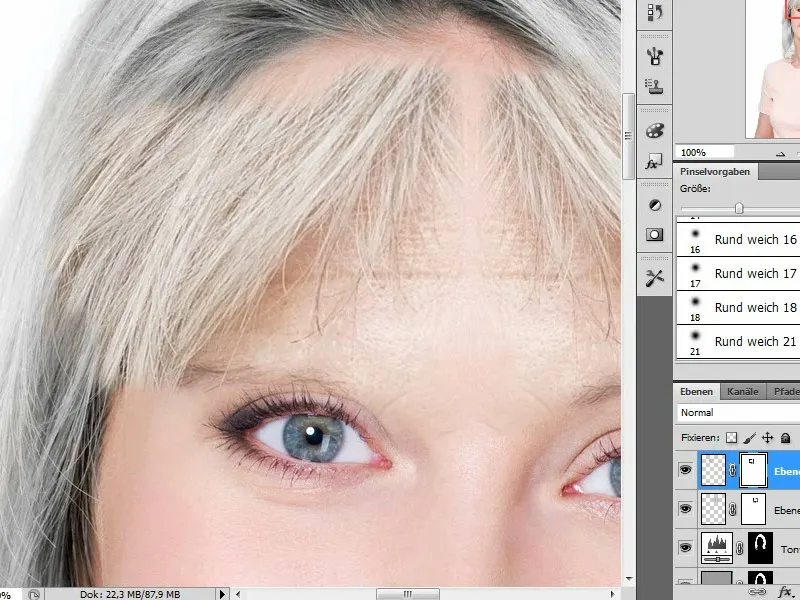
Step 12 - Selecting and Inserting Cheek Area
After making the initial transplants, we now focus on the cheek area. Here, I generously select them and make sure to also transfer parts of the eye area at this point. After pasting the copy, I immediately rename the layers so that I do not lose orientation during the rest of my editing.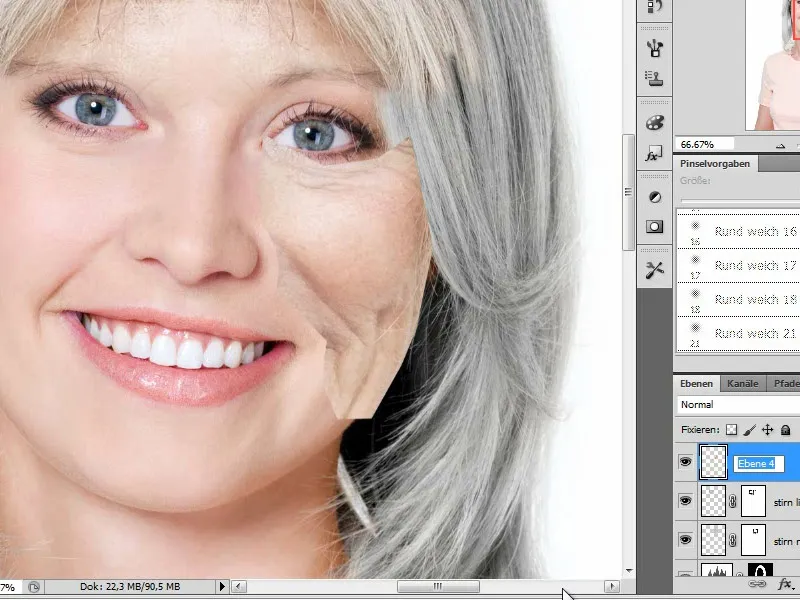
Step 13 - Adjusting the Cheek Area
As in the previous step, this inserted layer can be modified in terms of perspective, size, and also adjust the opacity, for example.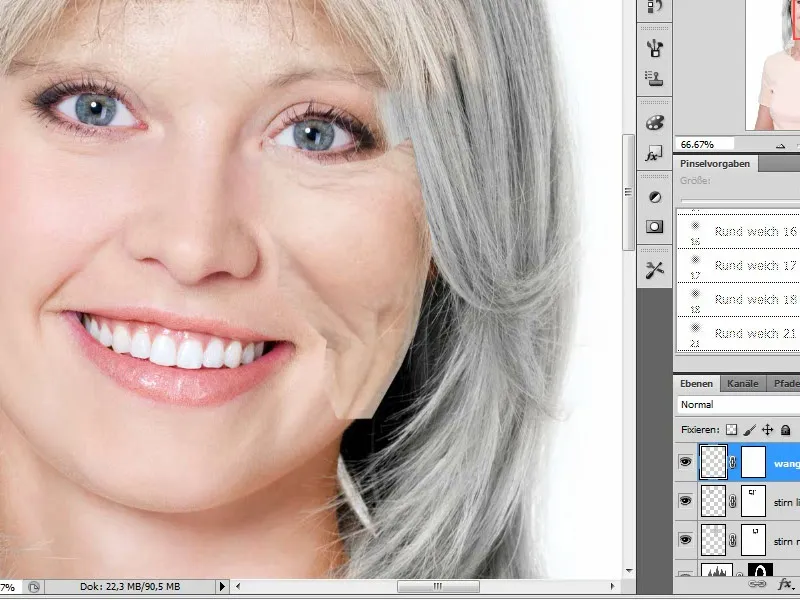
For the cheek example, I also use the Warp tool (Image>Edit>Transform>Warp) to adjust the cut-out shape to the model's face. I drag the handles outward so that the curves of the jaw area are covered.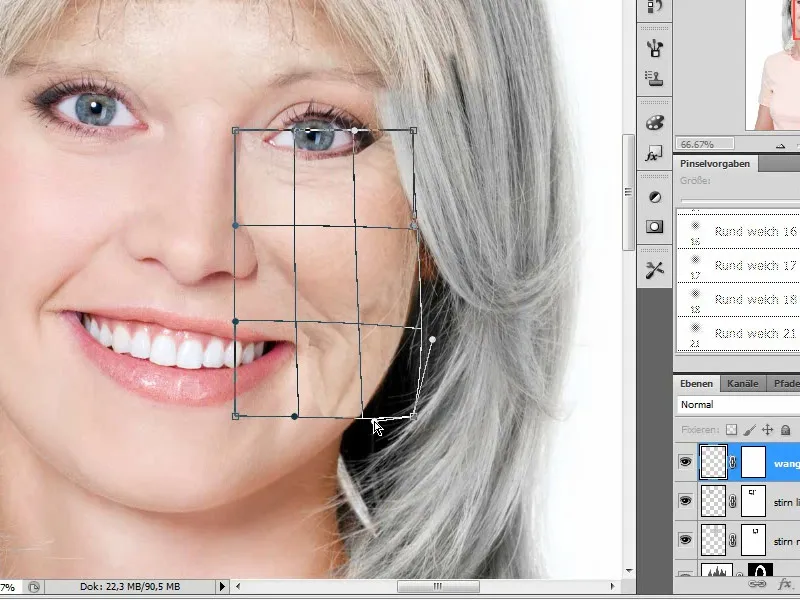
Also in the area of the nose and mouth, I already pay attention to a natural wrinkle progression and adjust the shape using the Warp tool if necessary.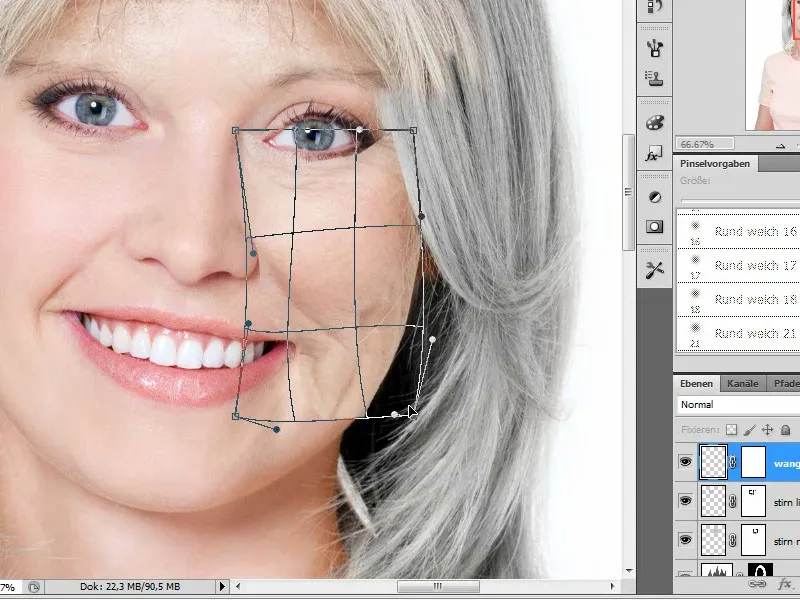
After the distorting, the layer mask is activated, and the blending with the young model is done over it. I use a soft brush with varying size and opacity and fade out parts of the transplanted tissue on the layer mask with black foreground color. I pay attention to details like eyelashes and the transition from eye to nose, in particular. I move the "cheek" layer further down the layer stack.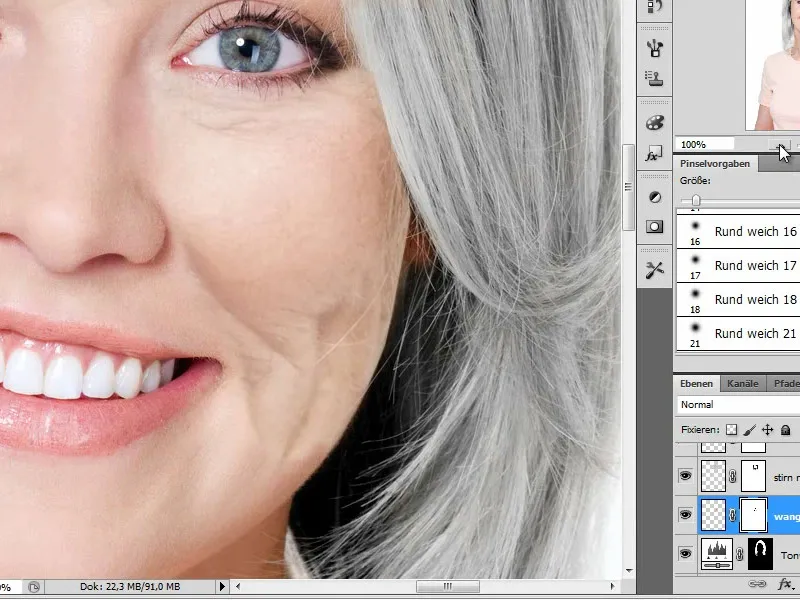
Step 14 - Transplanting more facial areas - the mouth, the chin
The essential editing steps have already been mentioned at this point. Now it's about capturing the remaining facial areas and transplanting them onto the face. After having inserted and adjusted the other cheek half in the meantime, I now dedicate myself to the mouth.
I also take over this from the older lady. Alternatively, the existing mouth structure of the young lady can be used as a base here. For this, the teeth and lips would then have to be edited separately. It's easier to insert the entire mouth area. Since the teeth of the older generation don't look as fresh as those of a 20-year-old, editing afterwards would be more time-consuming.
So, as described earlier, I insert a copy of the entire mouth area.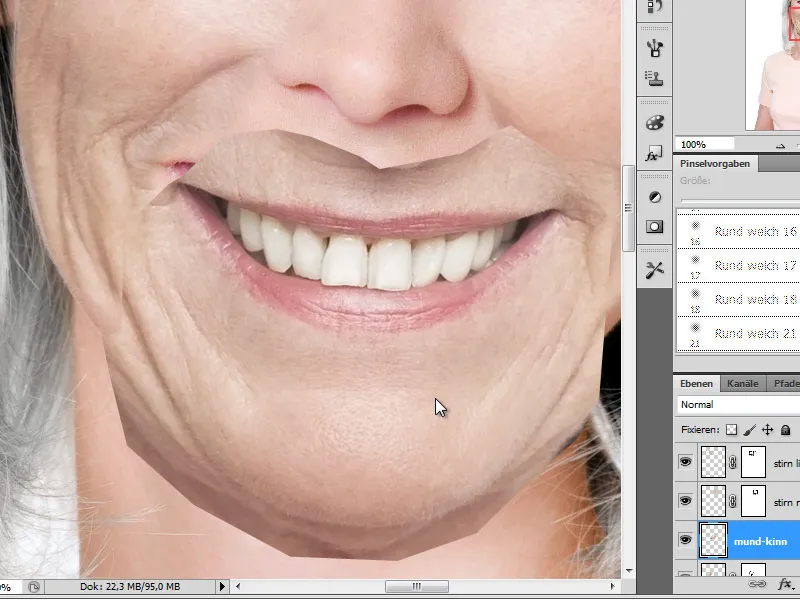
I temporarily switch the layer mode back to Difference to see the overlaps better.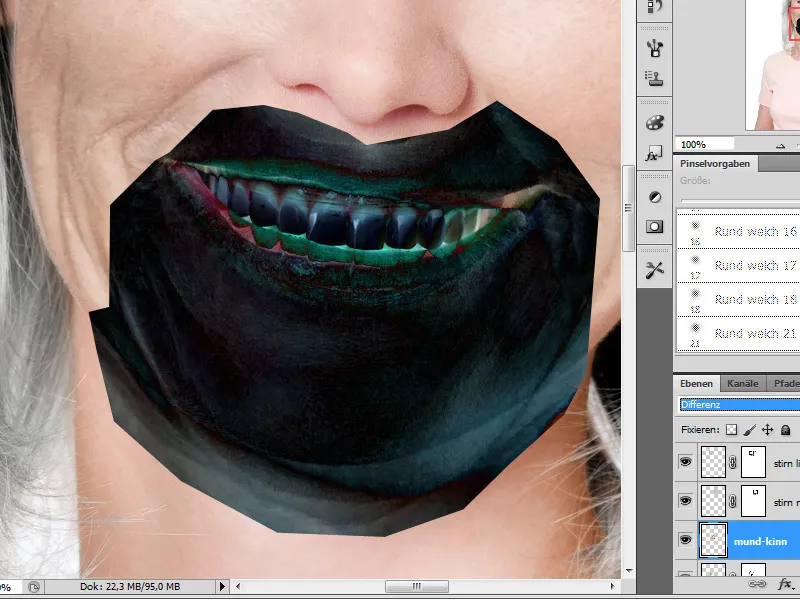
I try to adjust the inserted mouth so that it aligns perfectly with that of the young woman. Otherwise, the change in the aging process would be too noticeable, and the image would look more like a montage.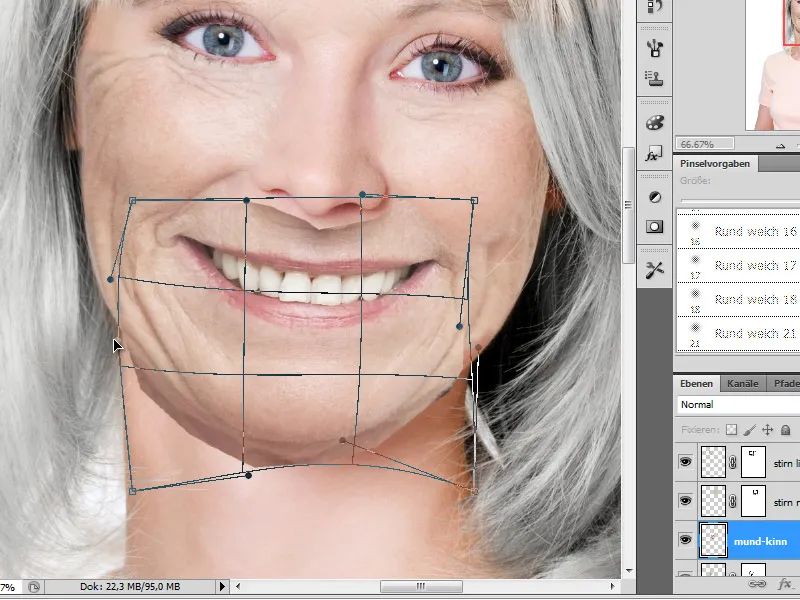
Step 15 - Blending the mouth area with a layer mask
Now, just like with the other facial parts, the goal is to create a smooth transition, which I achieve once again with a layer mask. I use a soft brush with varying opacity and different-sized brush tips for this purpose. The special feature of this editing step is that this time we need to blend the chin.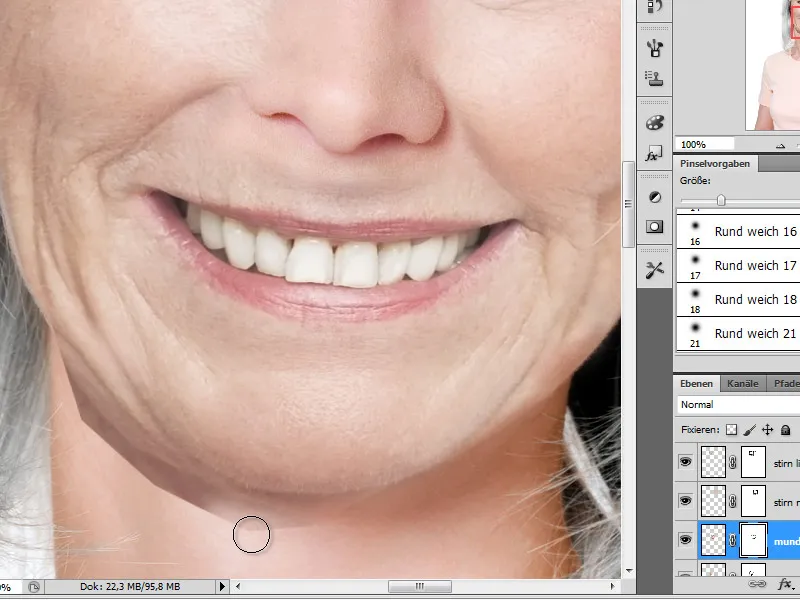
Step 16 - Eyes
Now comes one of the most exciting steps, as by choosing the eyes we attempt a fundamental step that greatly influences the impact of our work, as the expressiveness of the eyes is characteristic of a portrait. So, I first select an eye from the older lady and insert a copy into my layer palette. Like all other facial parts, this fragment is adjusted to the background using a layer mask.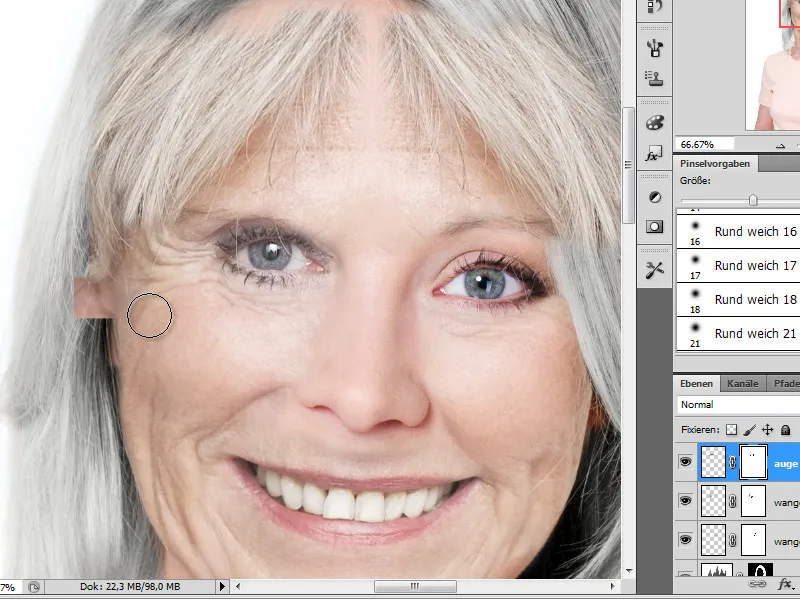
Potentially, further editing steps such as transformation may be necessary for size or perspective adjustments. I once again check the position of the inserted piece by temporarily switching the layer mode to Difference. If the placement meets my expectations, I can proceed with editing the layer mask.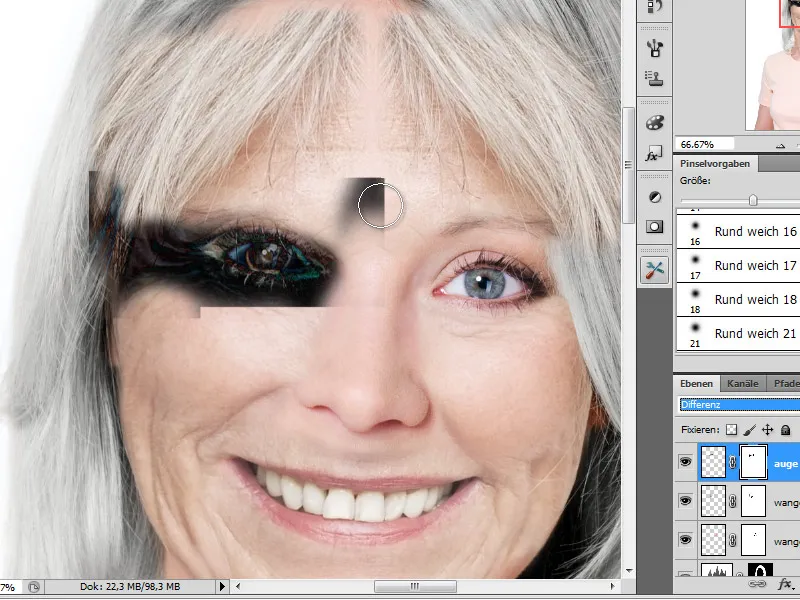
Step 17 - Modifying the neck area
In the next step - after we have inserted and adjusted the eyes as described - the neck follows. The skin of our young model still looks too smooth, so I want to incorporate parts of the neck area from our older lady to line this part.
The inserted piece is scaled and, if necessary, adjusted in perspective.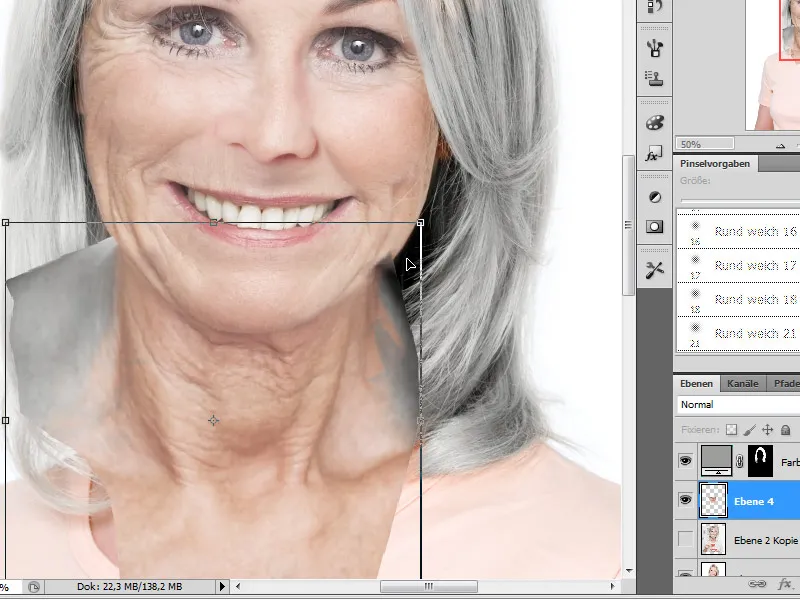
The "Neck" layer is placed in the layer palette below the "Mouth-Chin" layer. I edit the applied layer mask as in the previous steps.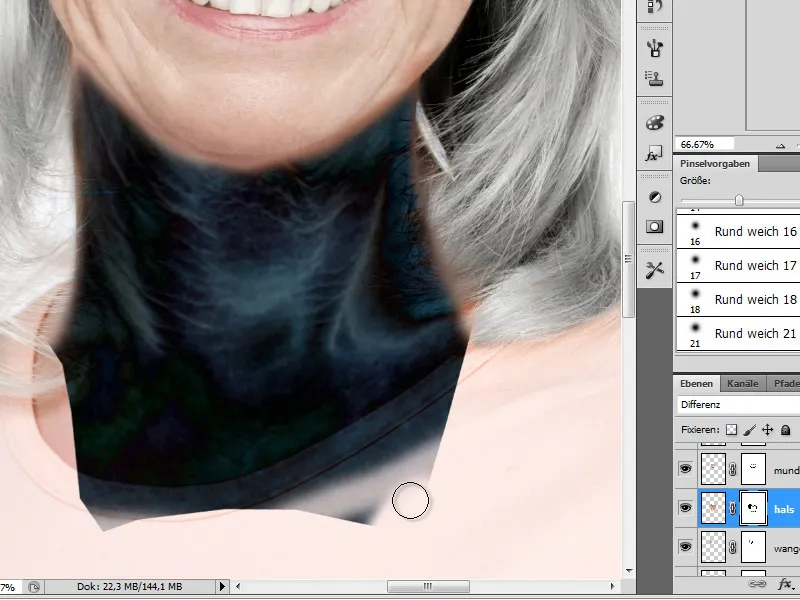
During this editing step, I must ensure that the young woman's hair in the neck area is still visible. Therefore, I will expose these areas with a small brush tip and reduced opacity on the layer mask.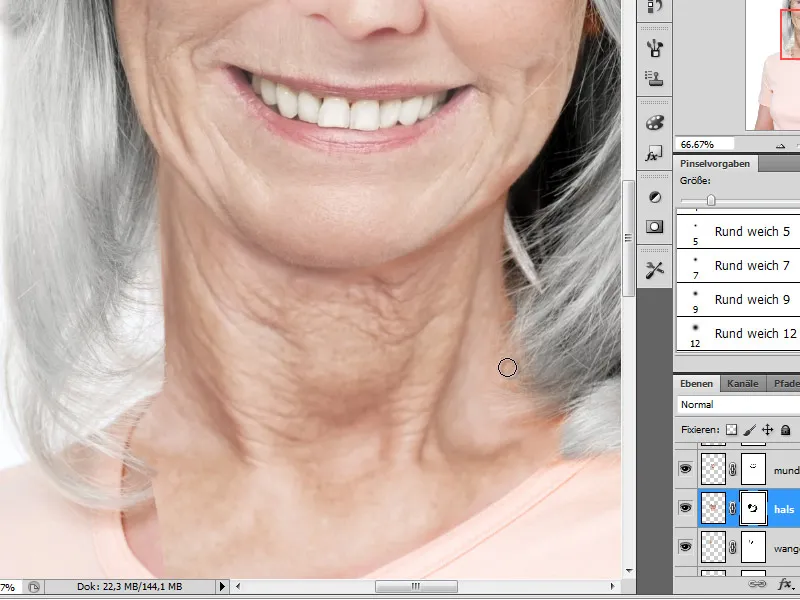
Missing areas of the neck need to be filled in with additional partial copies. Here too, the transition to the existing skin structure is made through a layer mask.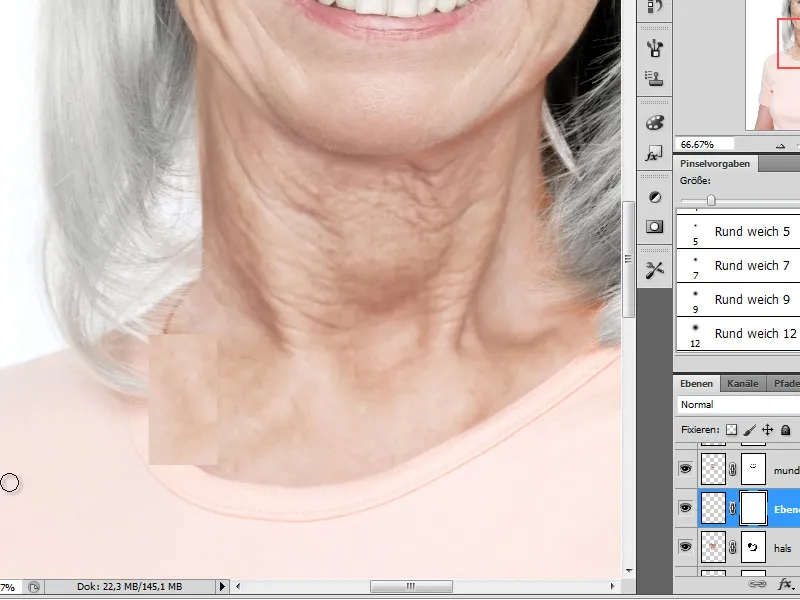
Step 18 - Graying the hair
With the insertion of the facial parts, additional hair textures have also been added, which now appear in their original color. I also need to gray these, so I return to the lower levels from the hair editing. I now move these to the very top of the layer stack. There, I edit the layer masks according to my modified amount of hair.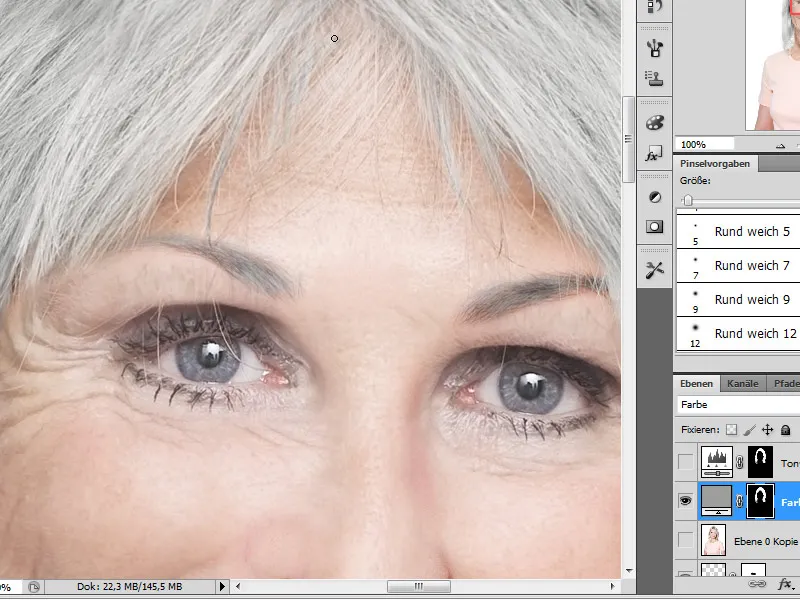
Step 19 - Detailed elaboration
We are close to the final result. Only a few details should still be incorporated into the image. For example, I will now draw the imprint of glasses on the nose, as older people often need eyewear and this way I make the overall appearance more realistic.
I reduce the layers to a new layer using the keyboard shortcut Ctrl+Alt+E as a new, merged layer. I select the Burn or Dodge tool to darken or lighten certain facial details, and I vary the opacity and mode of the tool between Midtones and Shadows and Highlights. This way, I also darken the depths at the hairline.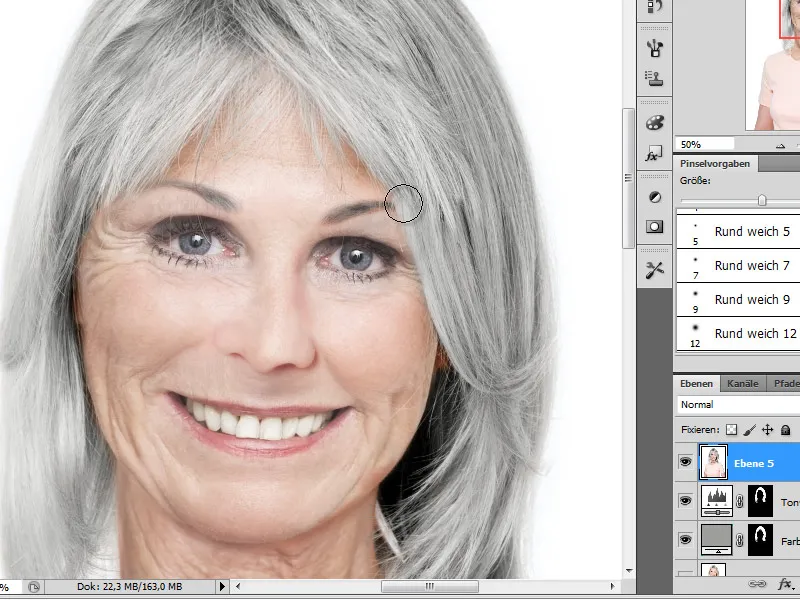
Our image is finished after these editing steps. If you like, you can of course make further changes such as color adjustments and emphasizing depths.