The audio quality is just as important as the video quality. A central aspect of this is the volume of the audio elements. In this tutorial, I will show you how to adjust the volume of your audio tracks manually and automatically in DaVinci Resolve. These techniques are essential for professional audio production.
Main Insights
- You can manually adjust the volume through the audio settings in DaVinci Resolve.
- With keyframes, you can create precise volume changes within your project.
- Using a compressor allows for automated volume adjustment for consistent sound.
- By adjusting different audio tracks, you can ensure that all elements harmonize evenly.
Step-by-Step Guide
Manual Volume Adjustment
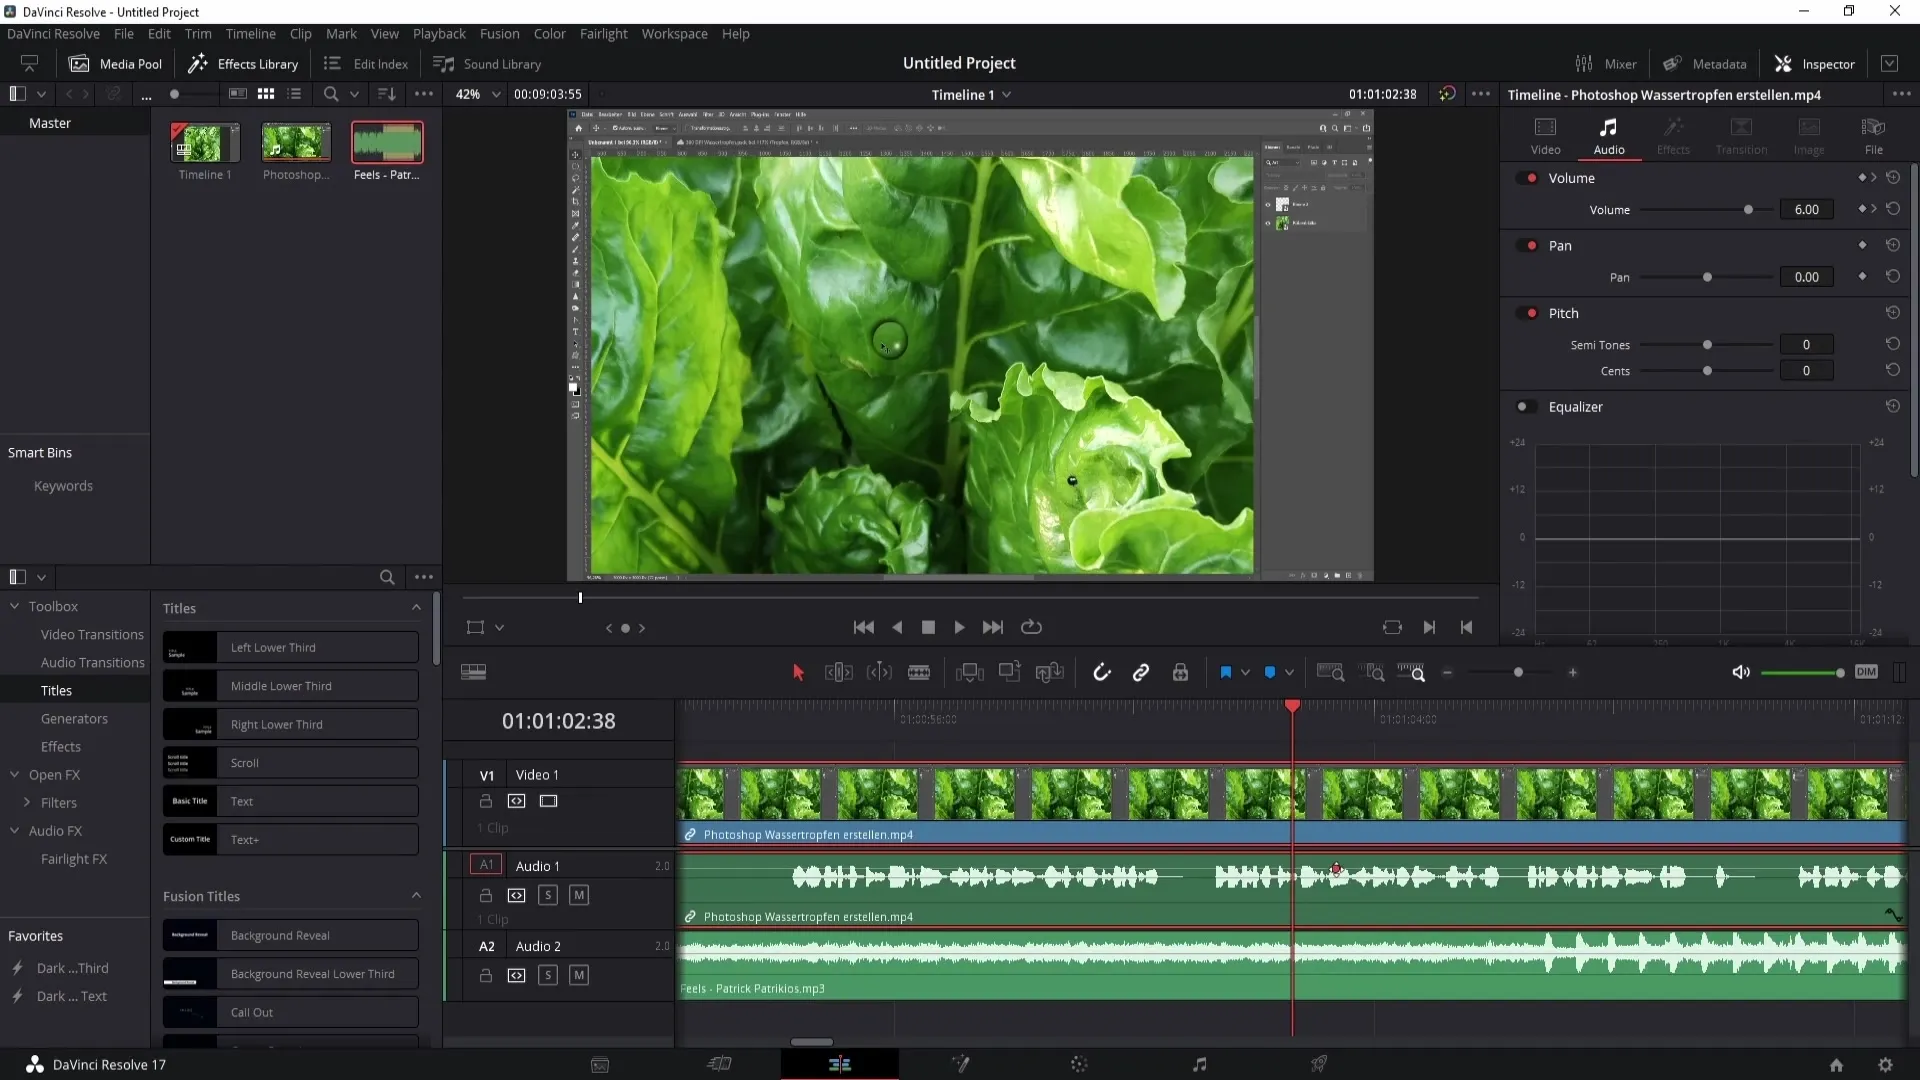
To adjust the volume manually, start in the timeline area of DaVinci Resolve. Scroll to the point in your video where you want to change the volume. Click on the corresponding audio track and adjust the view as desired. Now you can adjust the volume under the "Audio" menu in the "Volume" section. Moving the slider up increases the volume; moving it down decreases the volume.
If you need consistent adjustments at various points of the audio track, you can use keyframes. Hold down the Alt key and click on the white line in the audio wave at the desired point to set a keyframe. You can set additional keyframes to dynamically control the volume. This allows you to make precise changes by moving the keyframes as needed and adjusting the volume accordingly.

Manually adjusting the volume can be time-consuming, especially for longer videos. Therefore, DaVinci Resolve also offers an automated method for volume increase.
Automatic Volume Adjustment with a Compressor
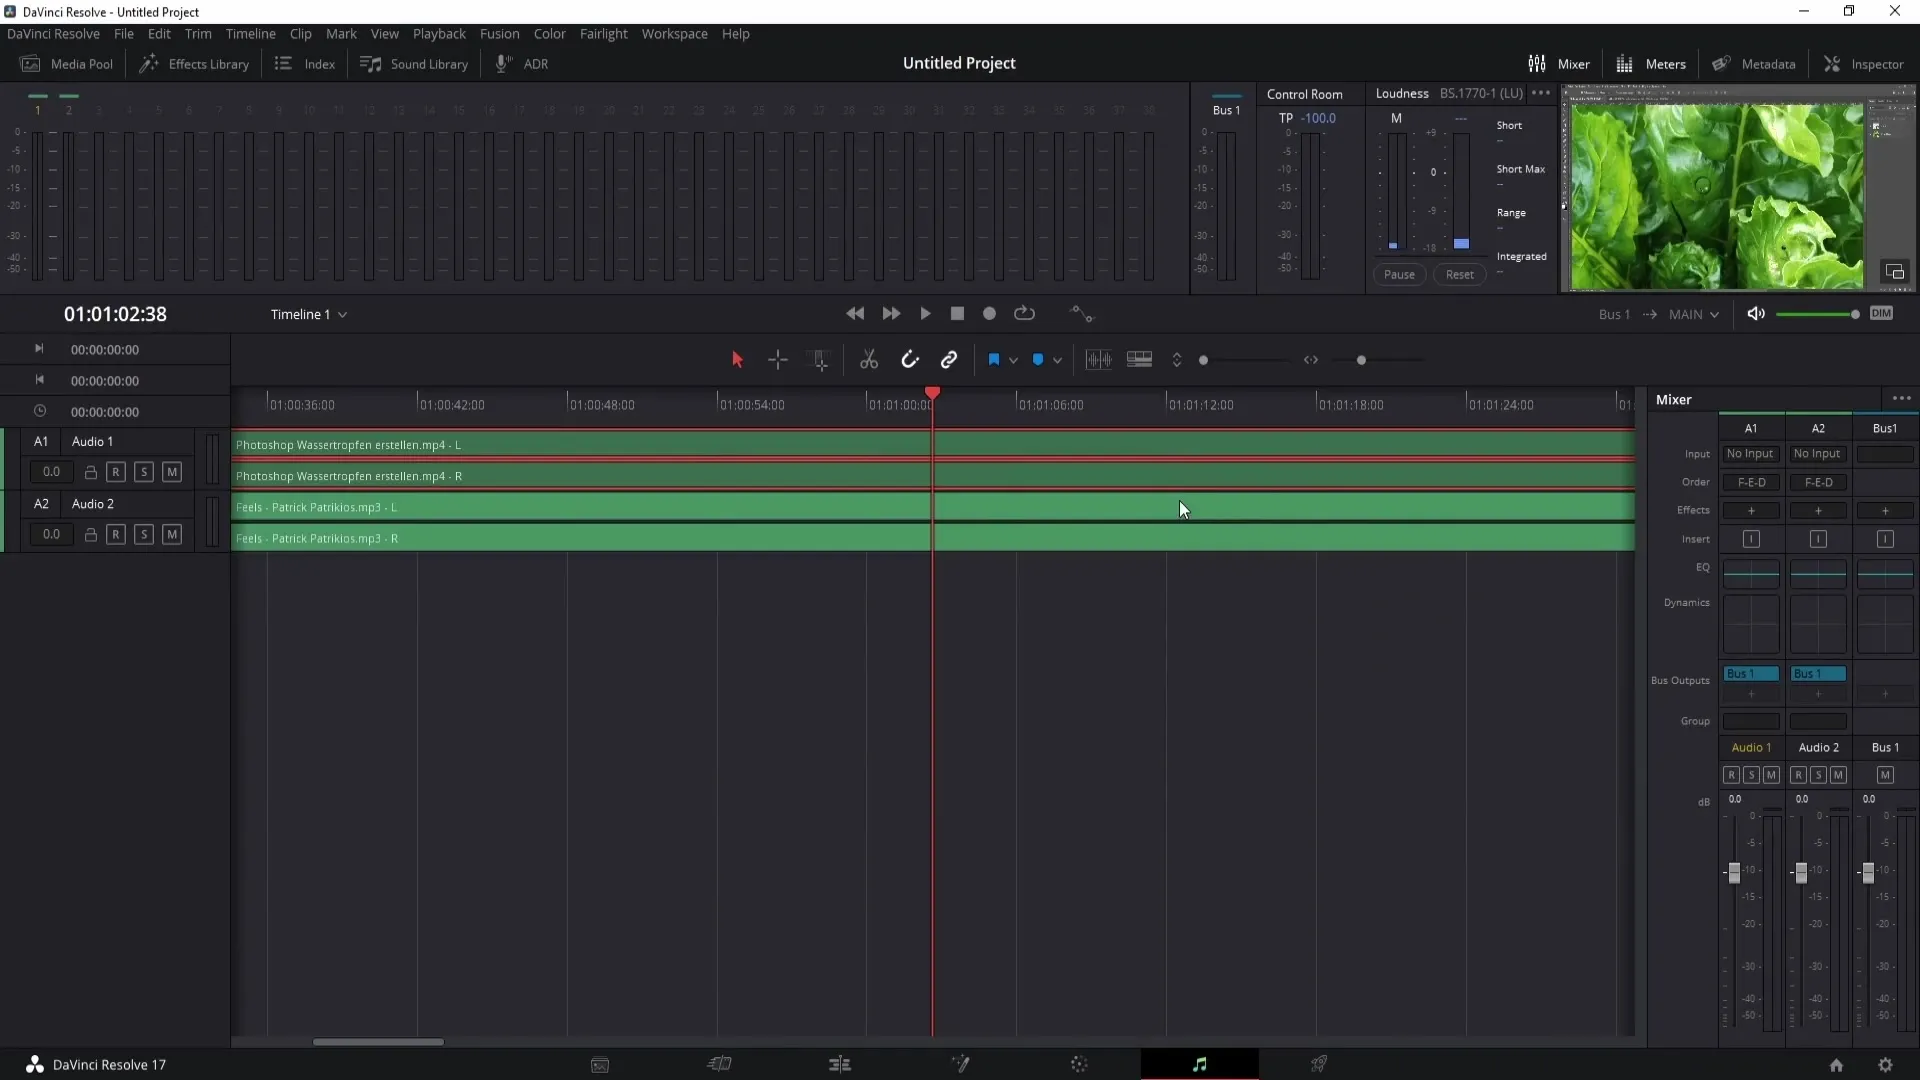
To adjust the volume automatically, you need to access the more complex area of DaVinci Resolve: Fairlight. To get there, click on the musical note and then go to the Fairlight section. Here, you will find the option to set up a compressor that adjusts the volume for you. Click on "Dynamics" and select the tracks you want to edit.

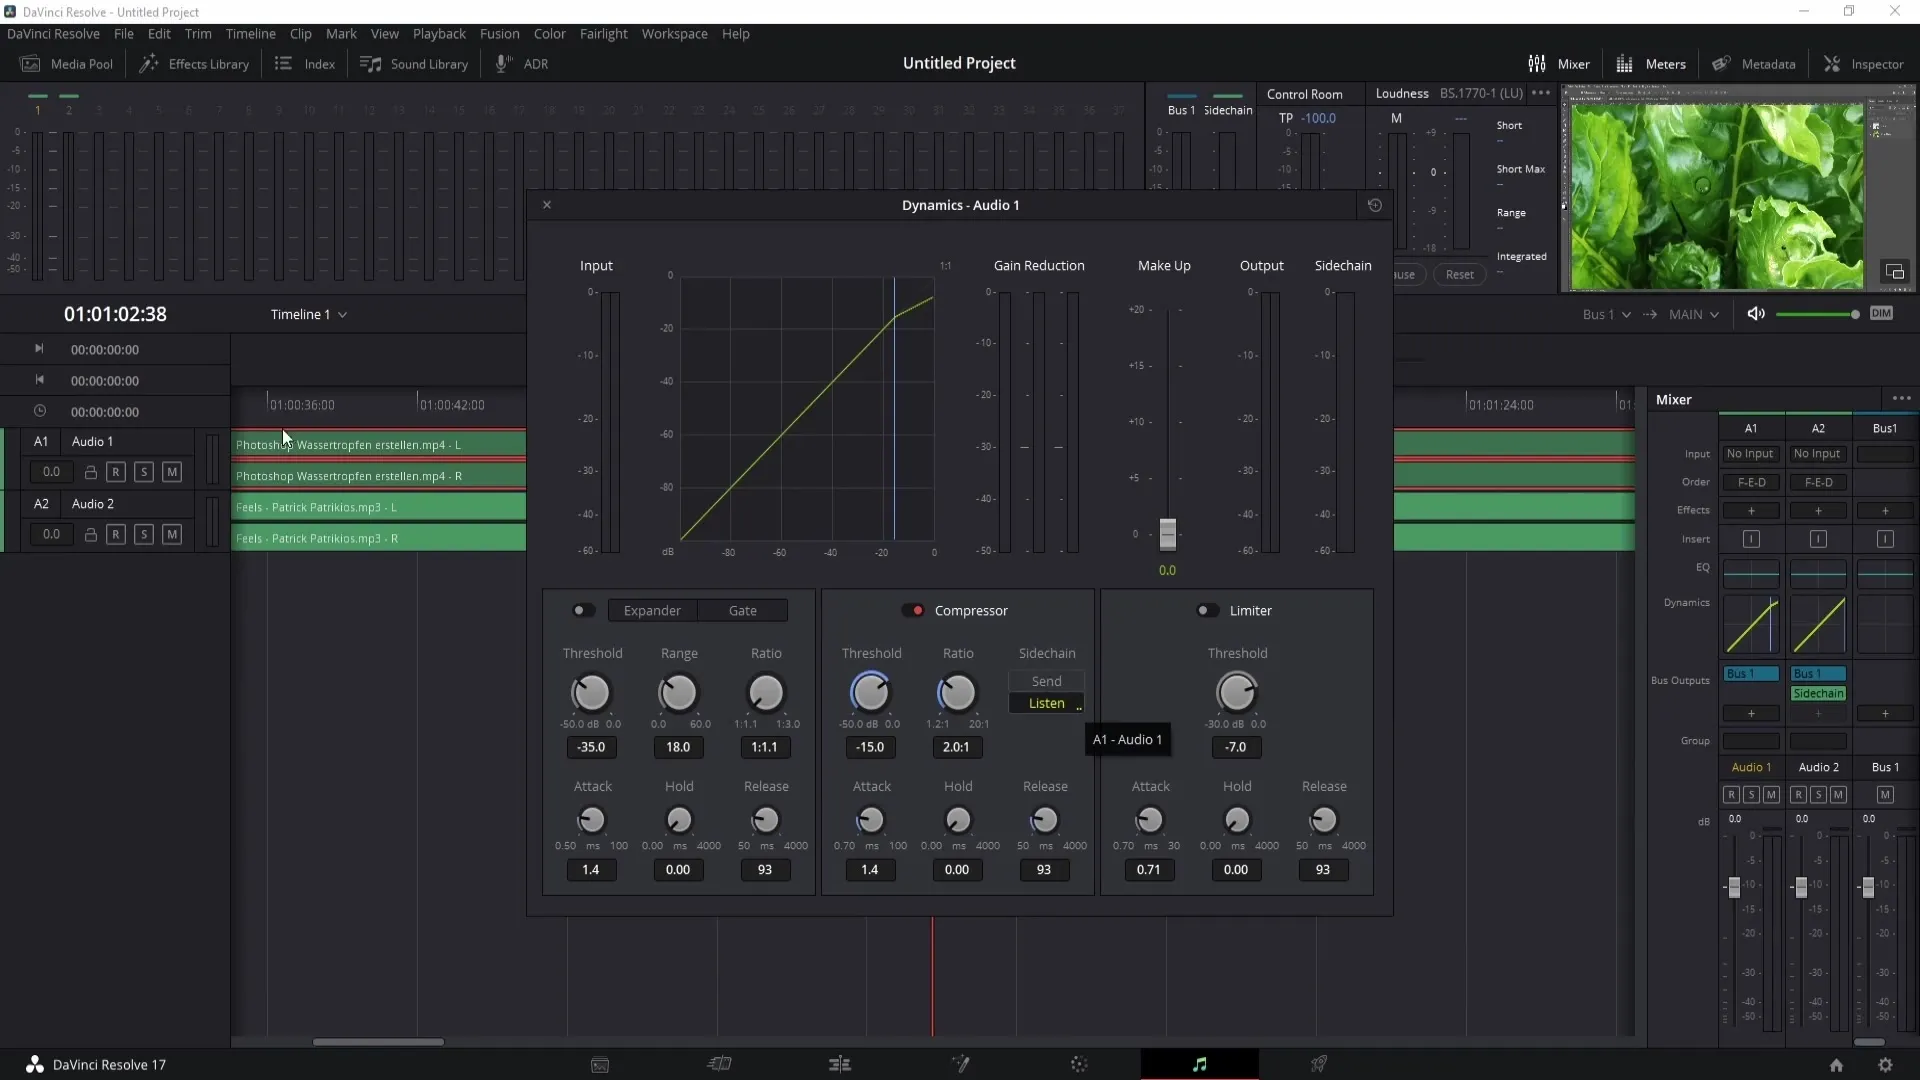
In the menu shown, you should activate the compressor. It is advisable to initially keep the default values to ensure an initial adjustment. The so-called limiter should also be activated. Set this to a value of approximately -7.0 dB. This will make the loudest sounds a bit quieter, while raising the quieter sounds, ensuring a balanced sound experience. Click on the "X" to save the compressor settings.
Equal Volume Among Multiple Audio Tracks
If you have multiple audio tracks, such as "Audio 1" and "Audio 2", and you want to match them sonically, follow these steps: Select "Audio 2" and also activate the compressor there. Set the threshold to zero. This will ensure that the volume of "Audio 2" is brought to the same level as "Audio 1".
To sharpen the synchronization between the tracks, go to "Audio 1" and activate the compressor there as well. Click on "Listen" so that "Audio 1" sends the volume adjustment directly to "Audio 2". Now your second audio track should be optimally adjusted to the first, allowing you to minimize volume differences effortlessly.

Summary
In this guide, you have learned various methods for adjusting the volume in DaVinci Resolve. You can make manual adjustments using keyframes or utilize automation through a compressor to ensure a balanced audio production.
Frequently Asked Questions
How do I adjust the volume in DaVinci Resolve manually?You can adjust the volume manually by changing the audio settings in the timeline.
What is a compressor and how does it work?A compressor evens out loud and soft sounds by making loud sounds quieter and soft sounds louder.
How do I set keyframes for volume changes?Hold down the Alt key and click on the white line of the audio track to set keyframes for volume changes.
How can I adjust the volume between multiple audio tracks?Activate the compressor on each track and ensure the tracks are configured to influence each other.
What should I consider when setting limiter values?Set the limiter value to approximately -7.0 dB to regulate loud sounds and achieve a balanced sound image.


