In this guide, you will learn the best render settings for 1080p and 4K videos in DaVinci Resolve. The correct configuration can be crucial for how your videos will be played on different platforms and the quality they will achieve. Follow the steps below to ensure that your exports both look optimal and work well.
Main Insights
- Choose between "Single Clip" and "Individual Clips" for export.
- The choice of format is crucial - MP4 is often the best choice.
- Use CBR (Constant Bitrate) for consistent video quality.
- Save your preferences to save time.
Step-by-Step Guide
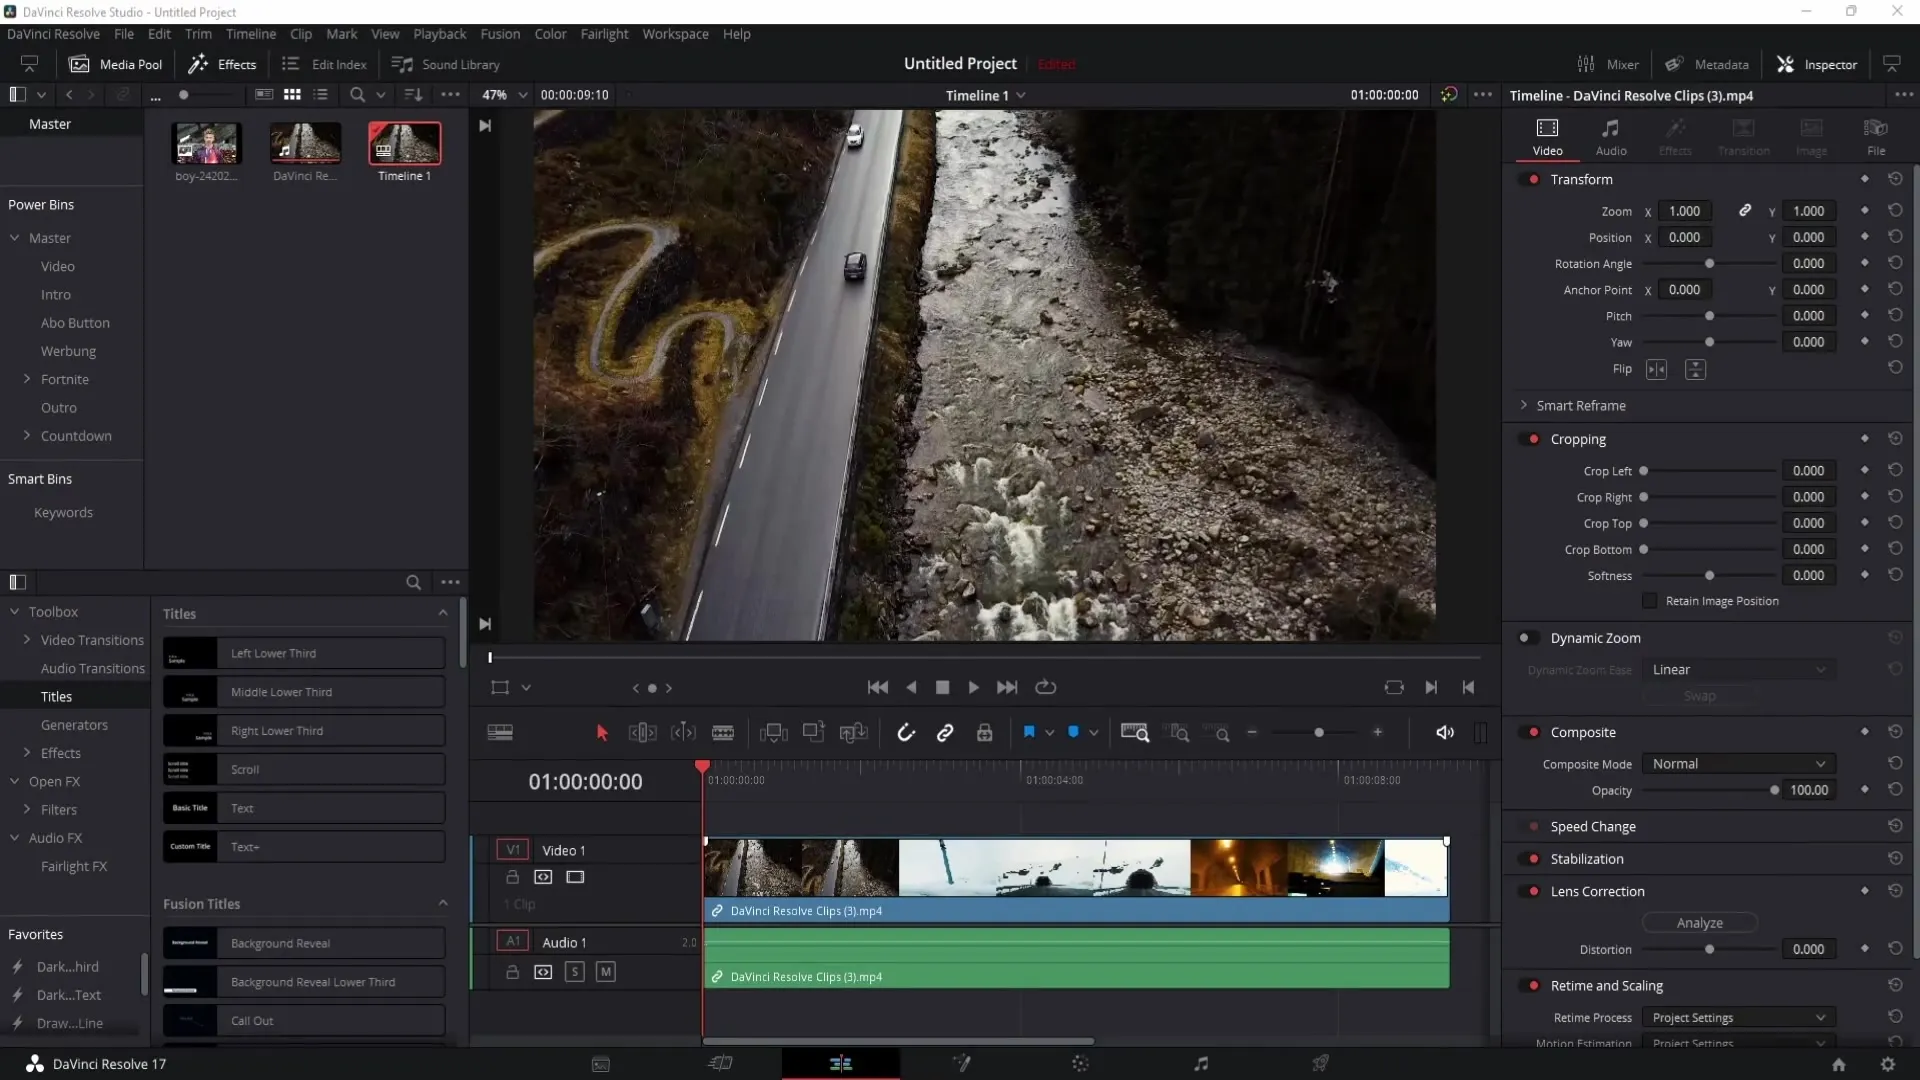
Step 1: Opening the Deliver Tab
Once you are in DaVinci Resolve, you need to switch to the Deliver tab. To do this, click on the rocket icon at the bottom right. In this tab, you can make all the export settings for your project.
Step 2: Selecting the Render Mode
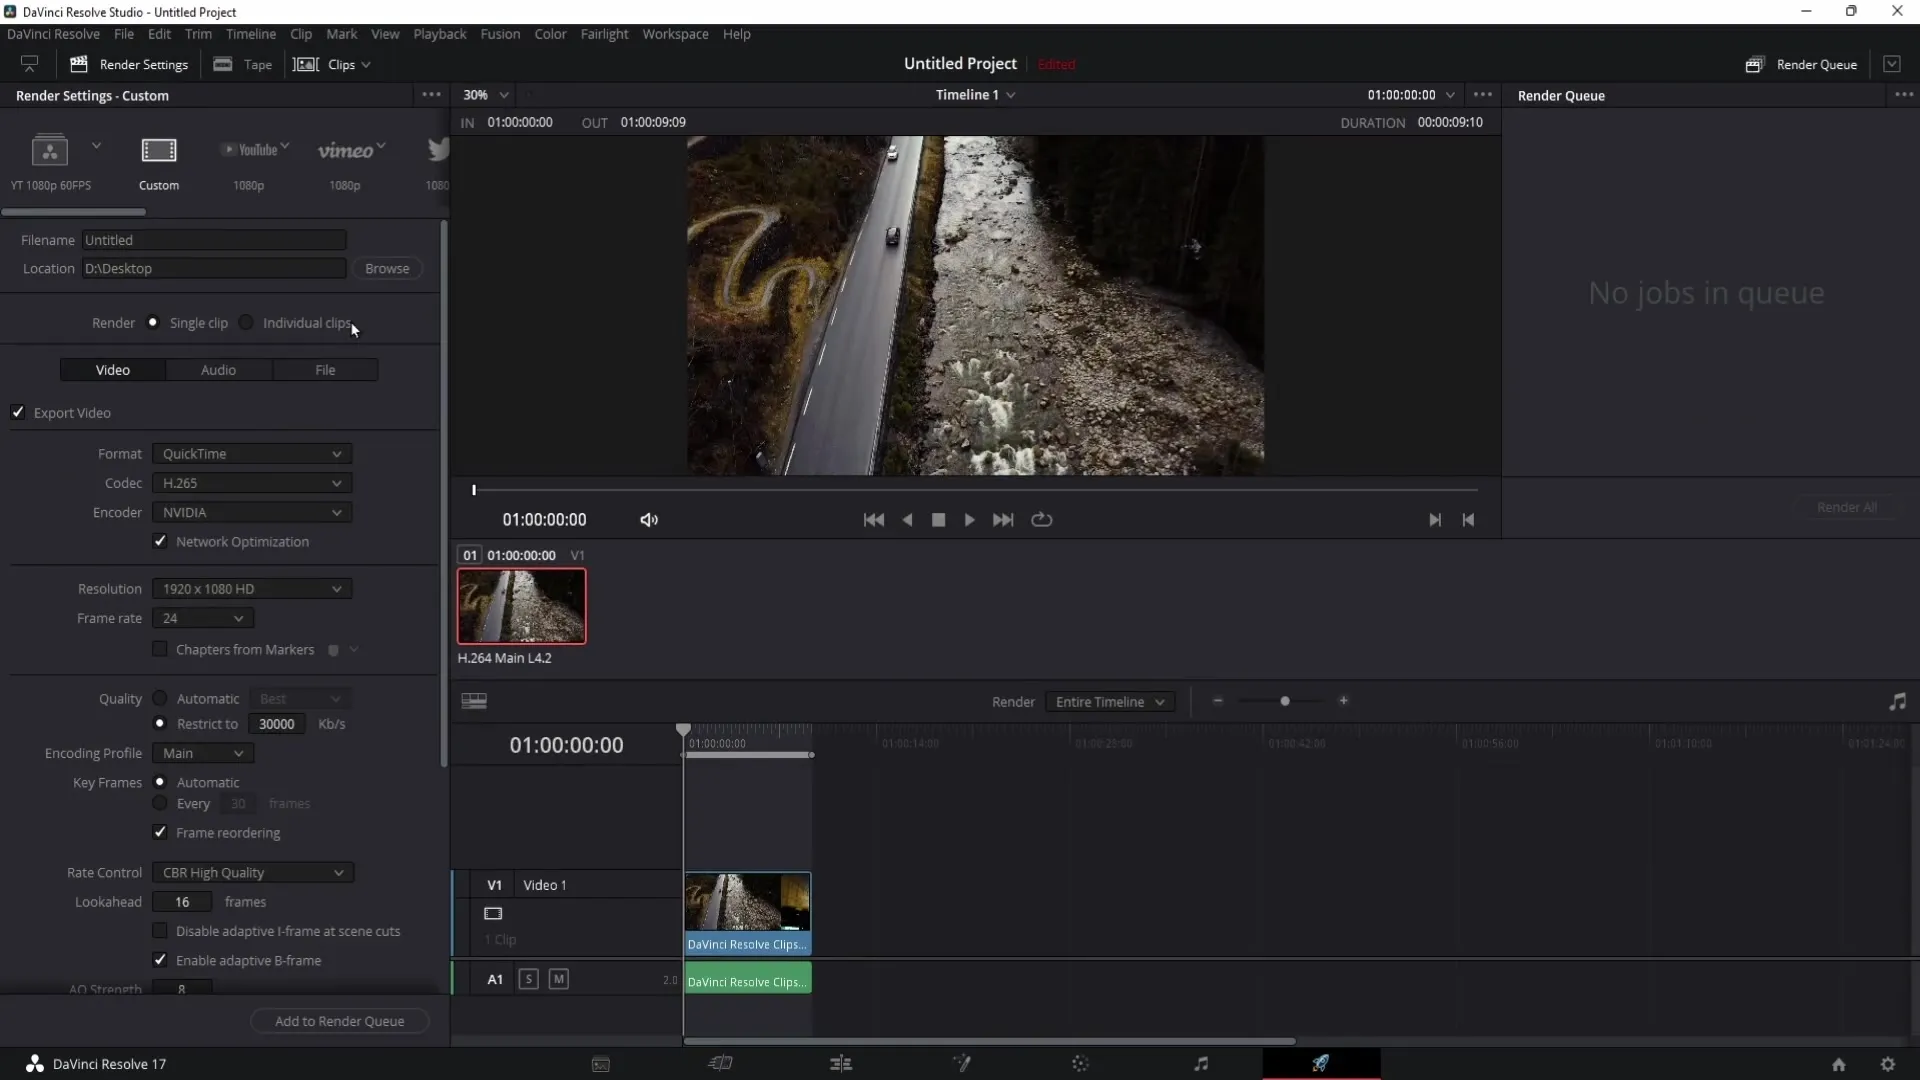
You will see the option "Render Single Clip," which allows you to render the entire project as one clip. However, if you want to create separate clips, choose "Individual Clips." This option is especially useful if you have edited multiple short videos in a timeline and want to export them individually.
Step 3: Setting Video and Audio Export Options
There are several options for video and audio exports. Make sure the checkmarks are set for "Video" and "Audio" if you want to export both video and audio content. If you only want to export the audio track without video, uncheck "Video."
Step 4: Choosing the Video Format
When it comes to format, I recommend choosing MP4. MP4 is supported by most platforms and is usually the safest choice for video uploads. Avoid selecting Quicktime as it may sometimes lead to playback issues.
Step 5: Choosing the Codec
Here, you have the option to choose between H.264 and H.265. H.265 offers smaller file sizes and better image quality, but may not have the same support as H.264. Choose the codec that best suits your needs.
Step 6: Selecting the Encoder (Studio Version)
If you are using the DaVinci Resolve Studio version, you can use the hardware encoder. This allows for faster rendering utilizing your graphics card. Make sure to uncheck "Network Optimization" to maximize performance.
Step 7: Setting Resolution and Framerate
For 1080p videos, set the resolution to 1920x1080. The framerate should remain as defined in your project, and I recommend setting the quality options to "Restrict to" and entering 30,000 for the bitrate.
Step 8: Bitrate Adjustments
When it comes to bitrate, it is advisable to select "CBR (Constant Bitrate) High Quality." This ensures consistent streaming and playback quality, unlike variable bitrate, which may not be as stable.
Step 9: Leave Audio Settings as Is
You can usually leave the audio settings as they are. In most cases, no changes are needed here to ensure satisfactory audio quality.
Step 10: Save Presets for 1080p
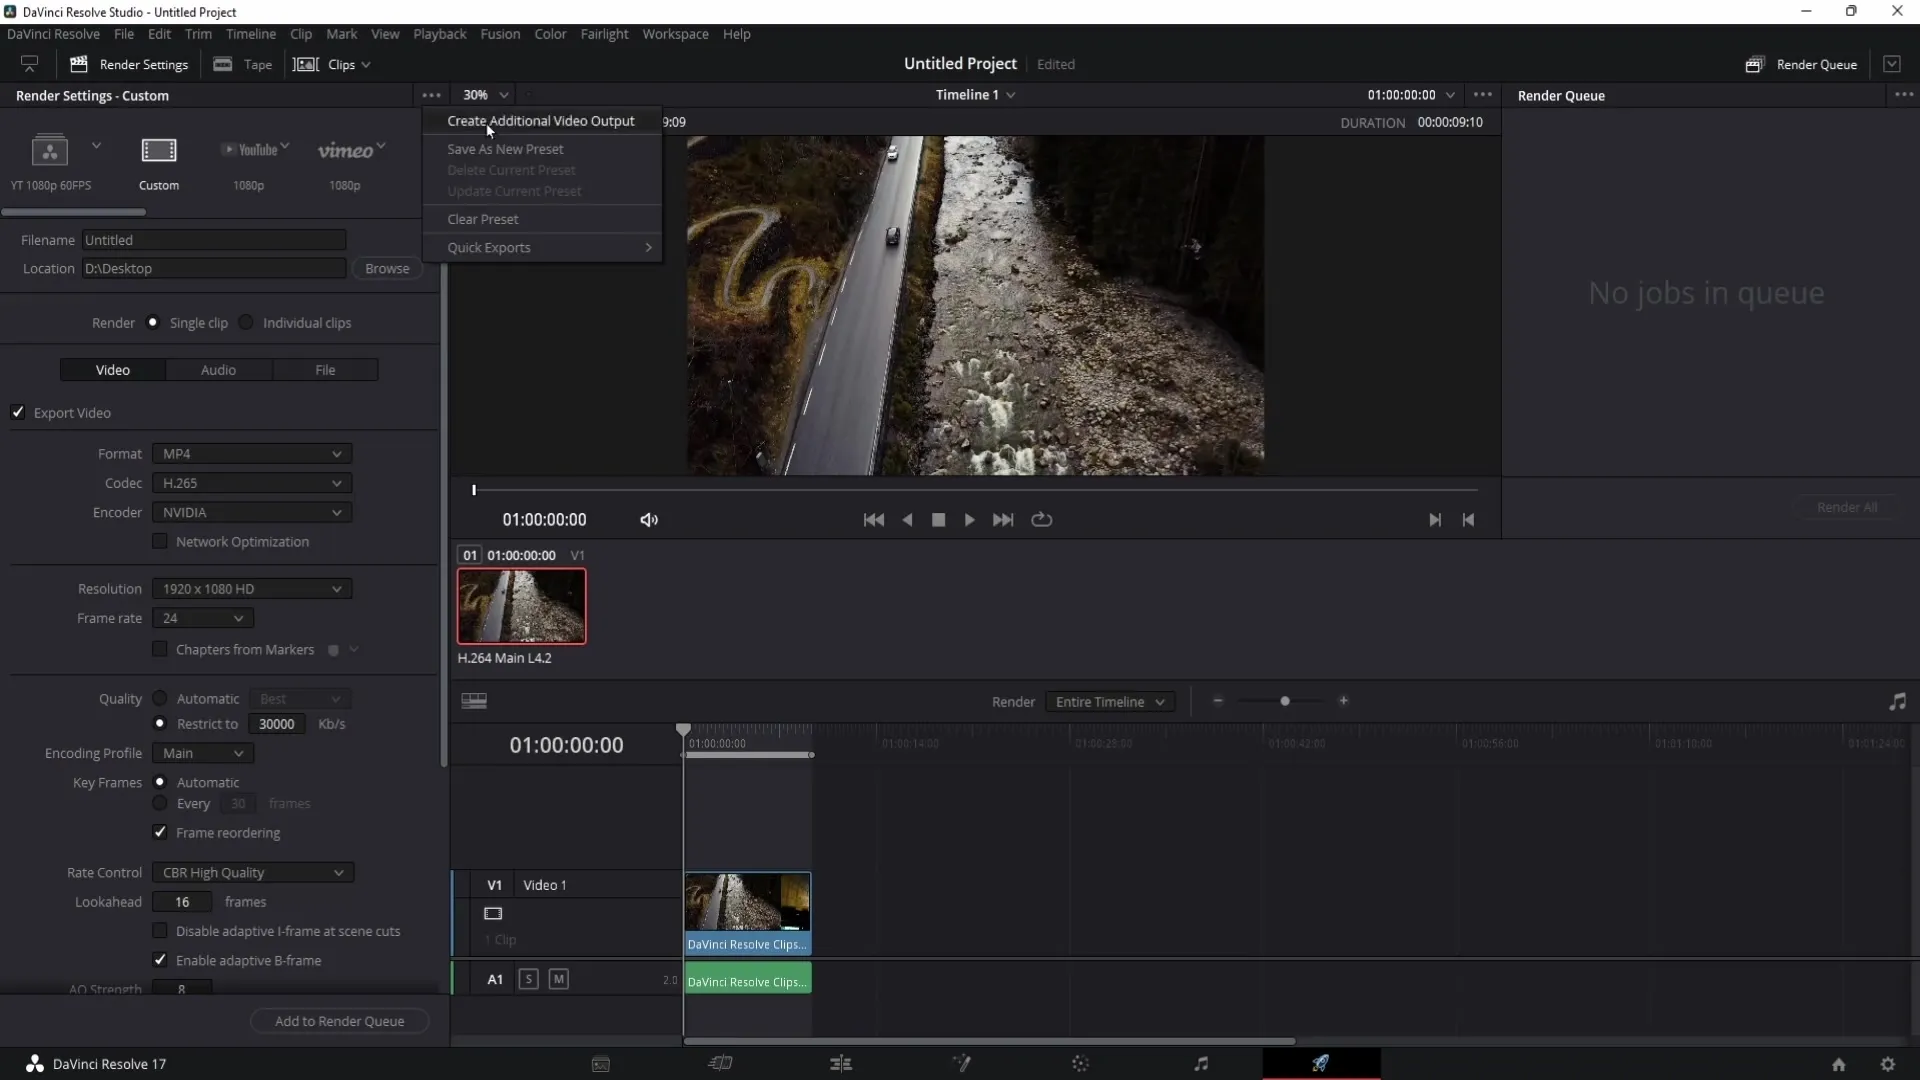
To make it easier to find the settings later on, you can save them as a preset. Click on the three dots icon at the top right and select "Save as New Preset." Enter a name like "1080p MP4" and save it.
Step 11: Adjust Settings for 4K
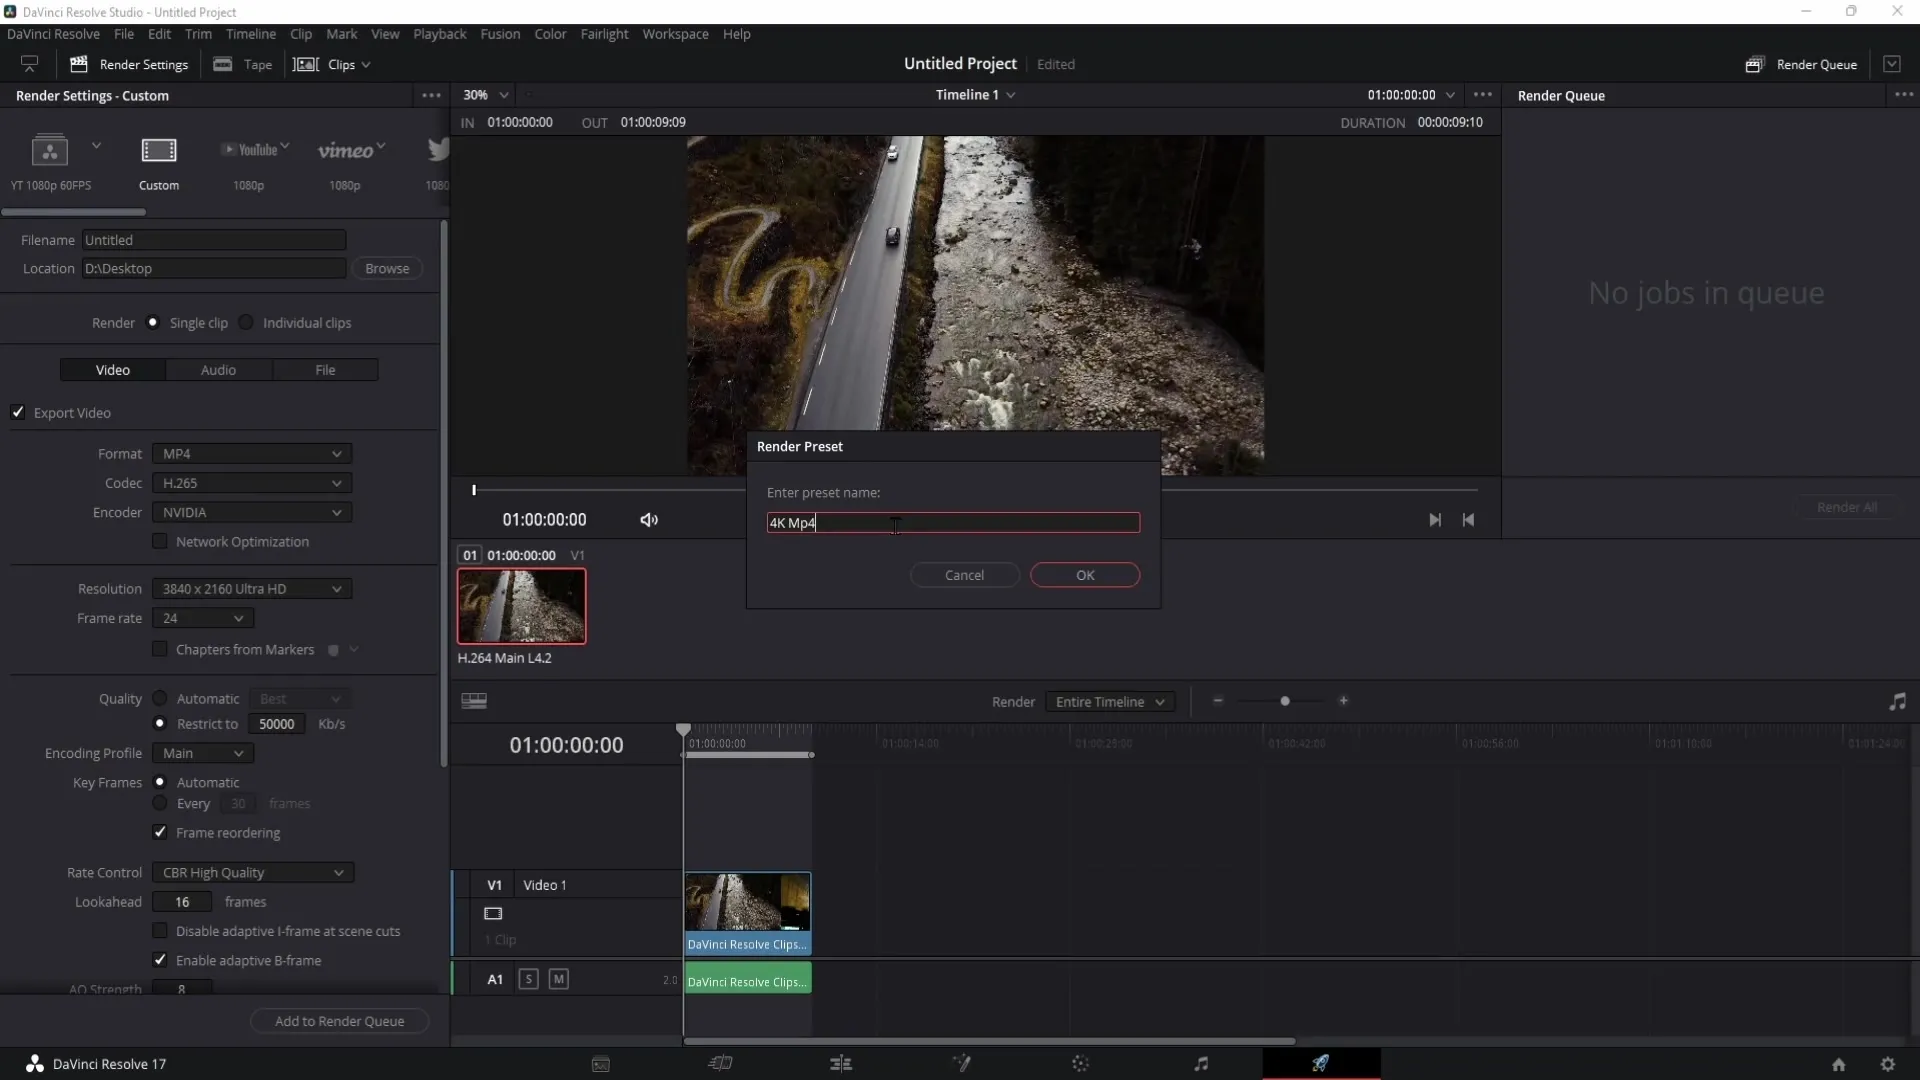
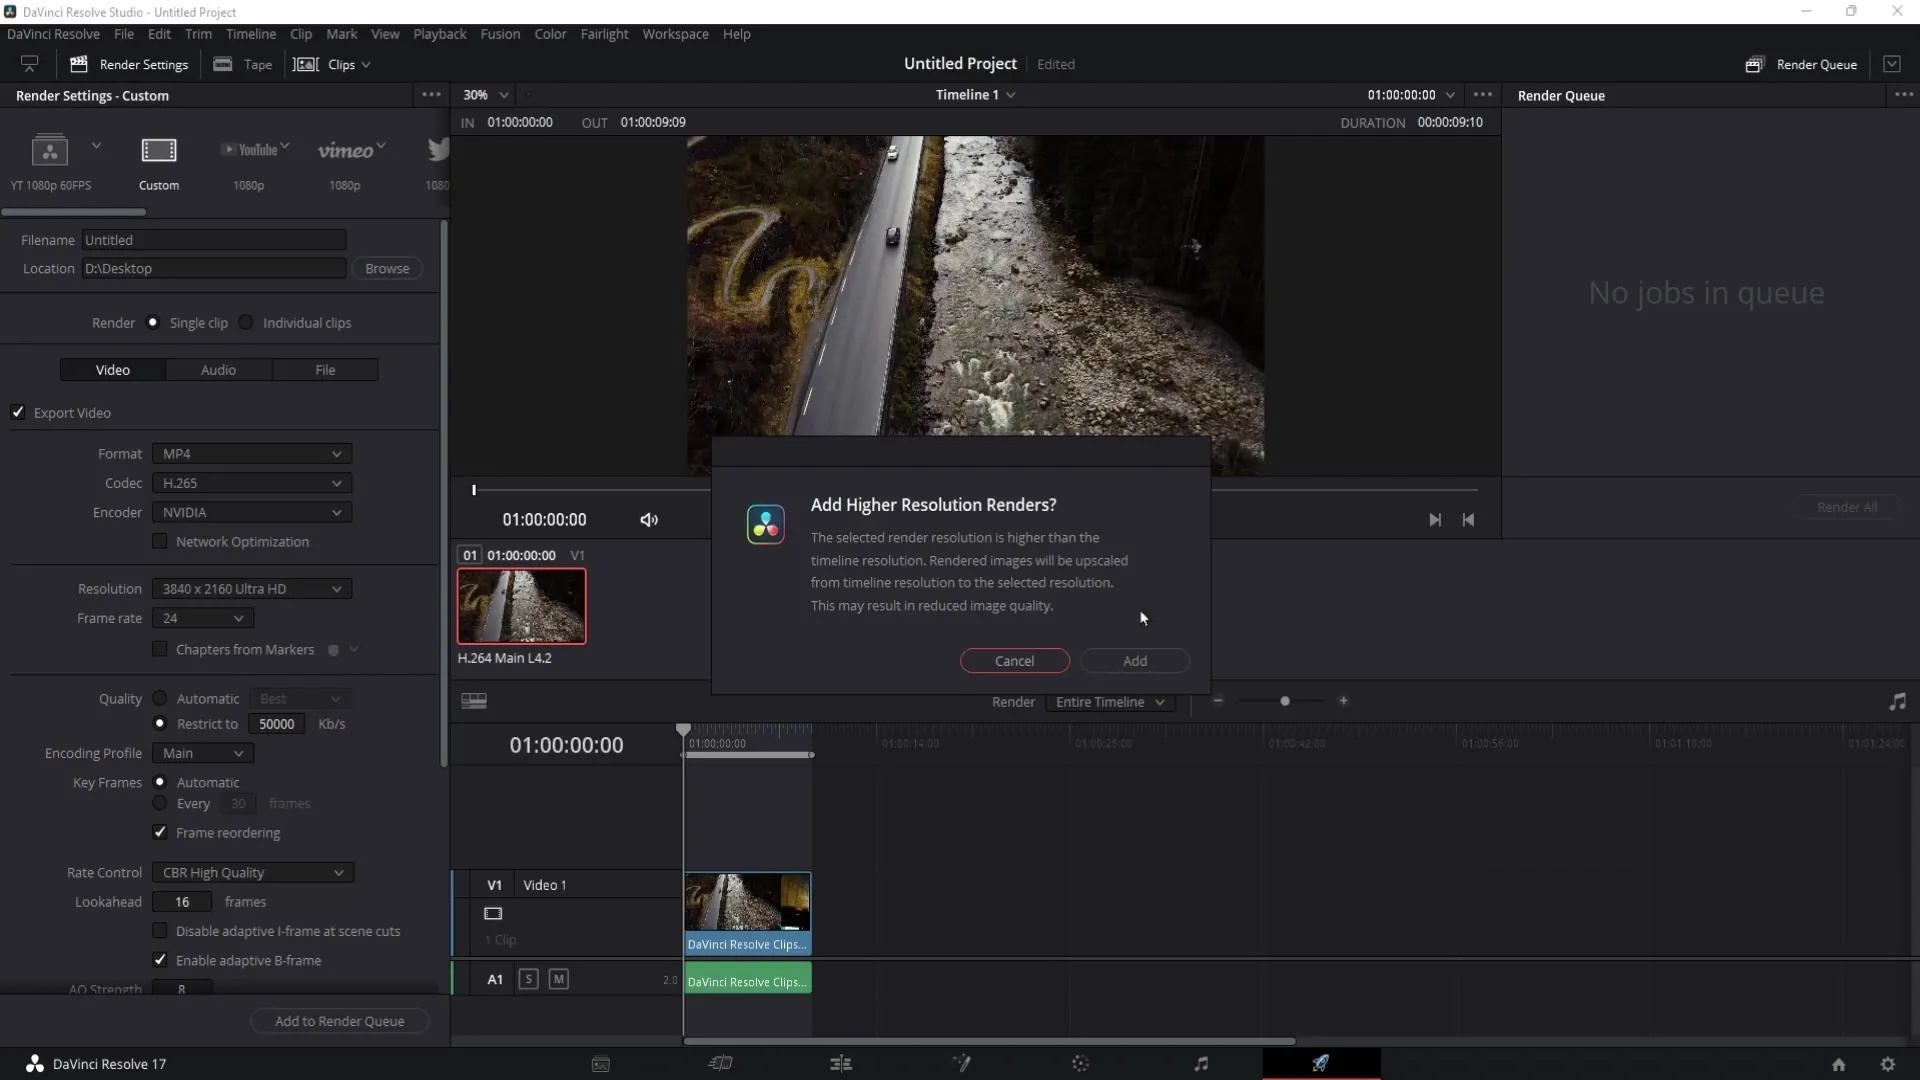
For 4K videos, you need to change the resolution to 3840x2160 (Ultra HD) in the settings above. For bitrate under "Quality," I recommend setting "Restrict to" to 50,000 to achieve the best quality for your 4K export.
Step 12: Save 4K Preset
Also save the 4K settings as a Preset by following the same steps as before, but use a name like "4K MP4". This way you have easier access to these specific export options.
Step 13: Rendering your Project
When you are ready to render, go back to the layout and click on "Add to Render Queue". On the right side in the middle, you will find the option "Render All". Click on it to start the rendering process. Your video will now be rendered and saved.
Summary
In this guide, you learned how to set the best render settings for your 1080p and 4K videos in DaVinci Resolve. The right settings can significantly impact the quality and playability of your videos. By following the steps described, you can efficiently and effectively manage your exports.
Frequently Asked Questions
How do I choose between Single Clip and Individual Clips?You can choose "Single Clip" to render the entire project as one clip or "Individual Clips" to export each clip separately.
Why should I use MP4 as a format?MP4 is supported by most platforms, ensuring better compatibility.
What is the advantage of H.265 over H.264?H.265 offers smaller file sizes and better image quality, but may not have the same level of support as H.264.
How do I save my presets in DaVinci Resolve?Click on the three dots in the top right and select "Save as New Preset". Enter a name for your preset and save it.
Can I change my audio settings?Usually, you can leave the audio settings as they are without compromising the quality.


