In this tutorial, you will learn how to set the optimal render settings for your YouTube channel in DaVinci Resolve. Whether you want to render videos in 1080p or 4K, here you will find a detailed step-by-step guide to help you achieve the best results. We will discuss the adjustments you can make to increase the quality of your videos without unnecessarily increasing the file size.
Main Insights
- Use custom settings for maximum adaptability.
- Ensure you export both video and audio.
- Use the H.265 codec for better quality and smaller file sizes.
- Choose the Linear PCM codec for optimal sound quality.
- Save your settings as presets for future projects.
Step-by-Step Guide
1. Prepare Project and Open Render Tab
Once you have edited your video in DaVinci Resolve, navigate to the Render tab by clicking on the rocket icon in the lower right corner. Here, you can define all the necessary render settings before making the final export.

2. Choose Between Single Clip and Individual Clip
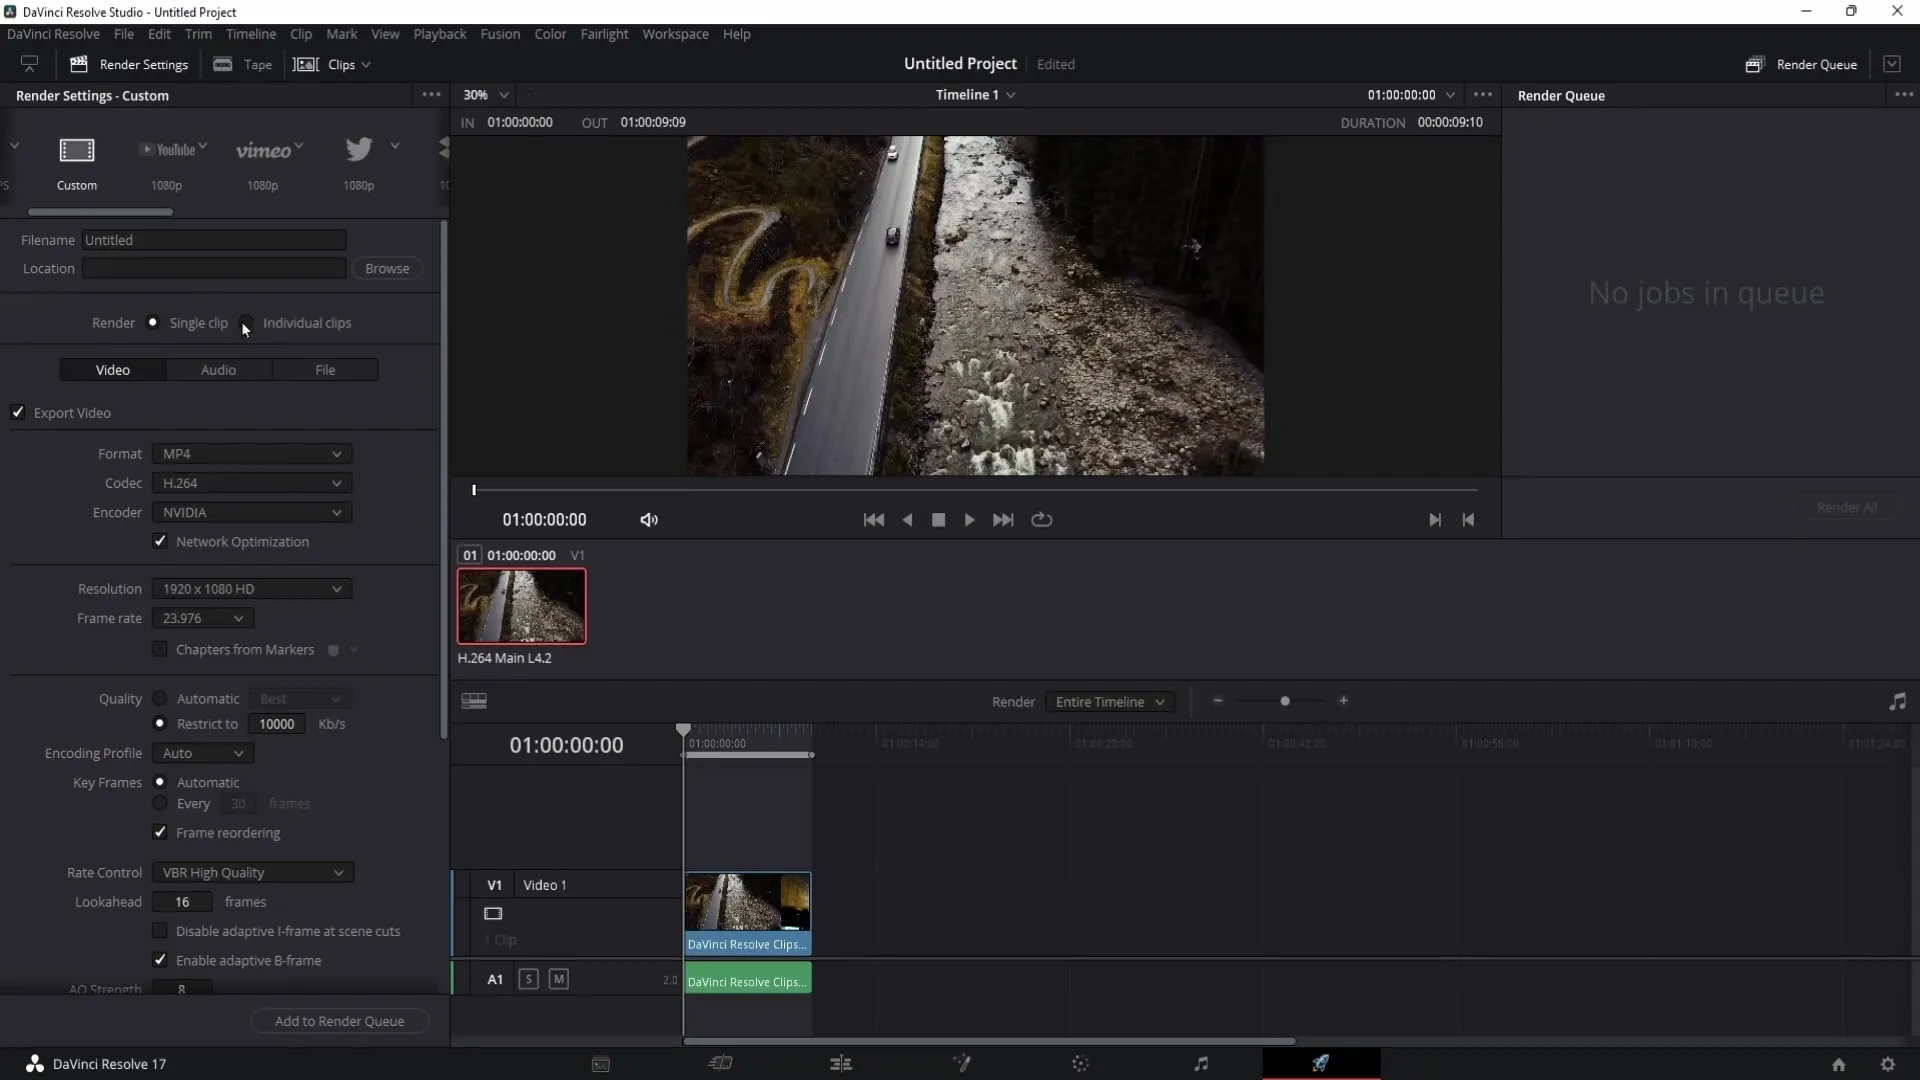
In the Render section, you have the option to choose between "Single Clip" and "Individual Clip." Select "Single Clip" if you want to export the entire timeline as a single cohesive video, which is the common practice for most YouTube videos.
3. Activate Video and Audio Export
In the settings, make sure to tick the box for "Export Video." If you also want to export audio, enable "Export Audio." It is crucial to have both enabled for your video to be available with sound.
4. Select Format and Codec
For the format, I recommend choosing QuickTime. Use the H.265 codec as it provides better image quality with smaller file sizes. Especially for uploads on YouTube, you will benefit from the improved compression.
5. Adjust Encoder and Speed
If you are using DaVinci Resolve Studio, you have the option to choose the encoder. Consider using the NVIDIA encoder as it can significantly increase rendering speed. If you are using the free version, you won't have this setting. Also, uncheck the box for "Network Optimization."
6. Set Resolution and Frame Rate
For 1080p videos, the standard resolution is 1920x1080, which you can keep as is. You can leave the frame rate at 23.976 FPS, which is suitable for most YouTube videos.
7. Optimize Quality Settings for Bitrate
For quality, there is the "Automatic" option, but I recommend selecting "Restrict to" and setting the value to 30,000 kbps. This ensures that your videos maintain a consistent quality without significant bitrate fluctuations.
8. Check Audio Settings
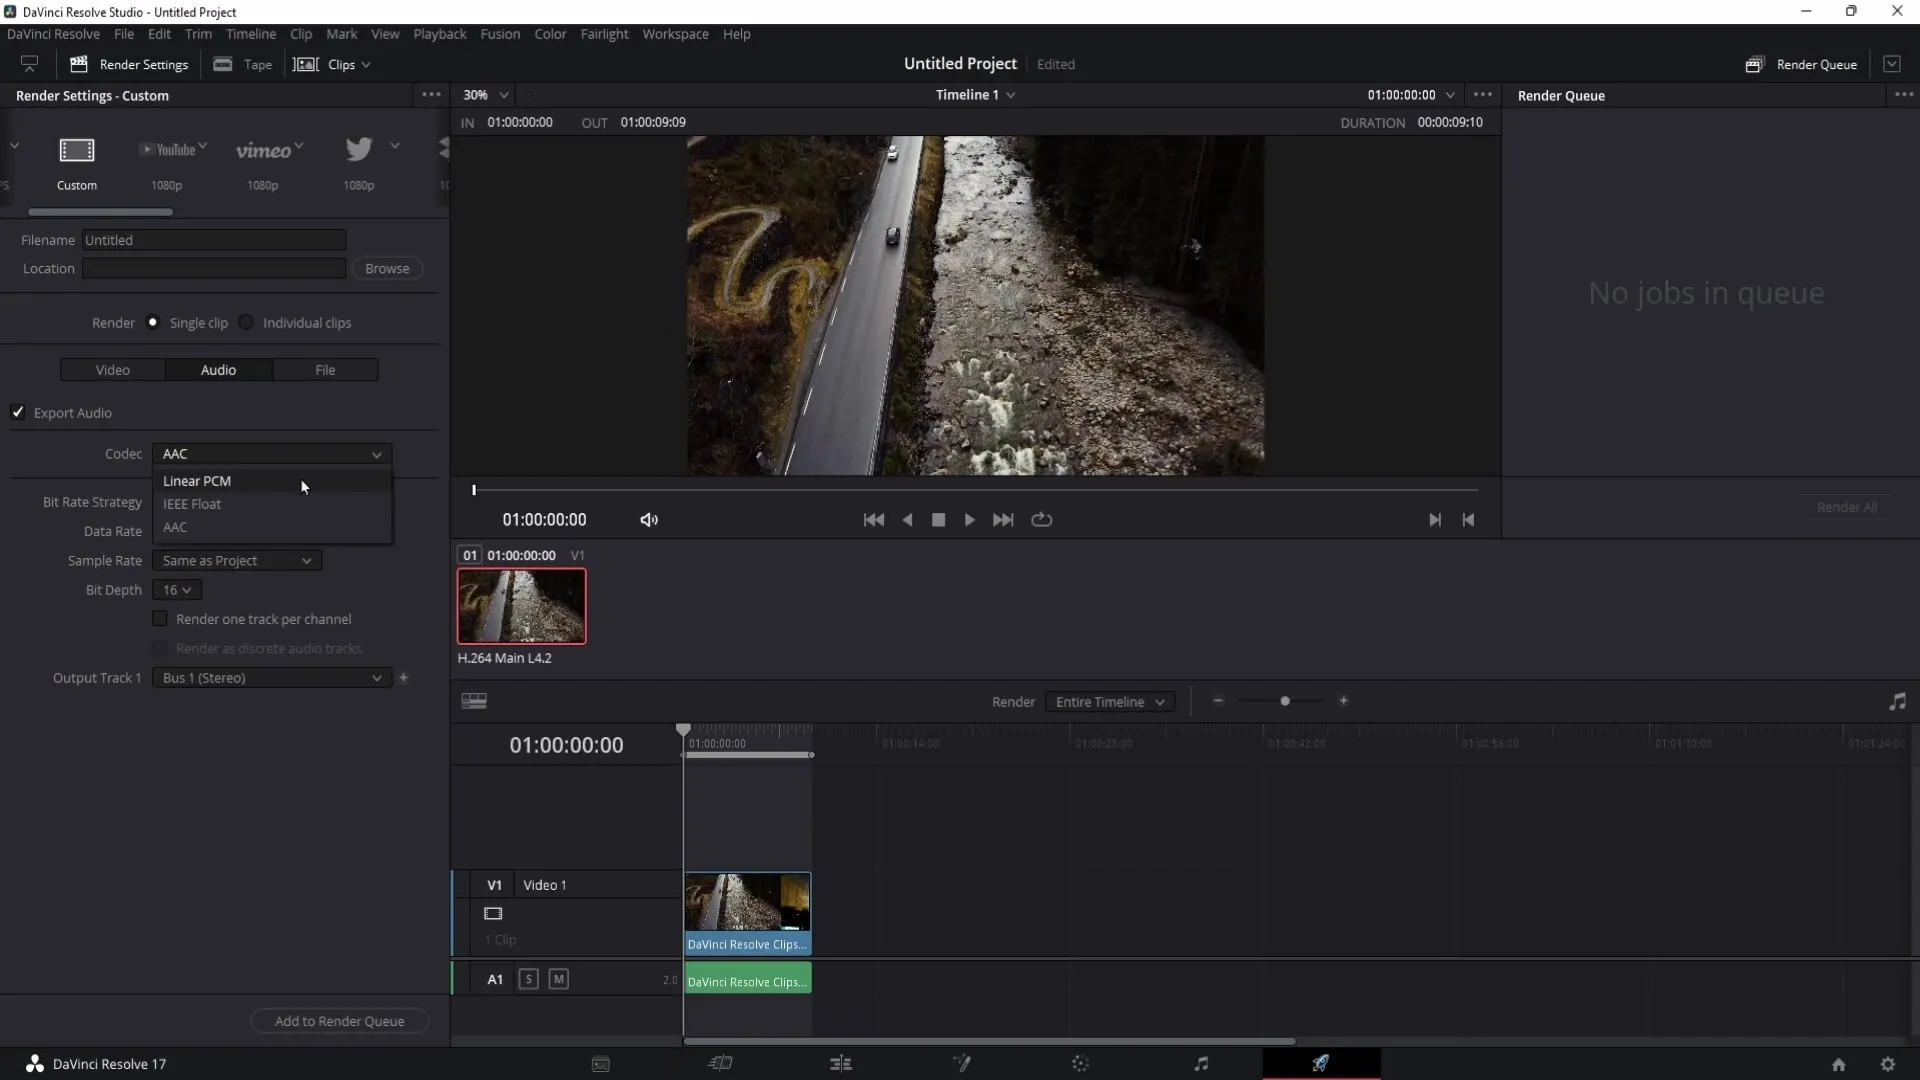
Switch to the audio settings and choose the "Linear PCM" codec. This codec ensures excellent audio quality, which is important for professional YouTube content.
9. Save Preset for 1080p Settings
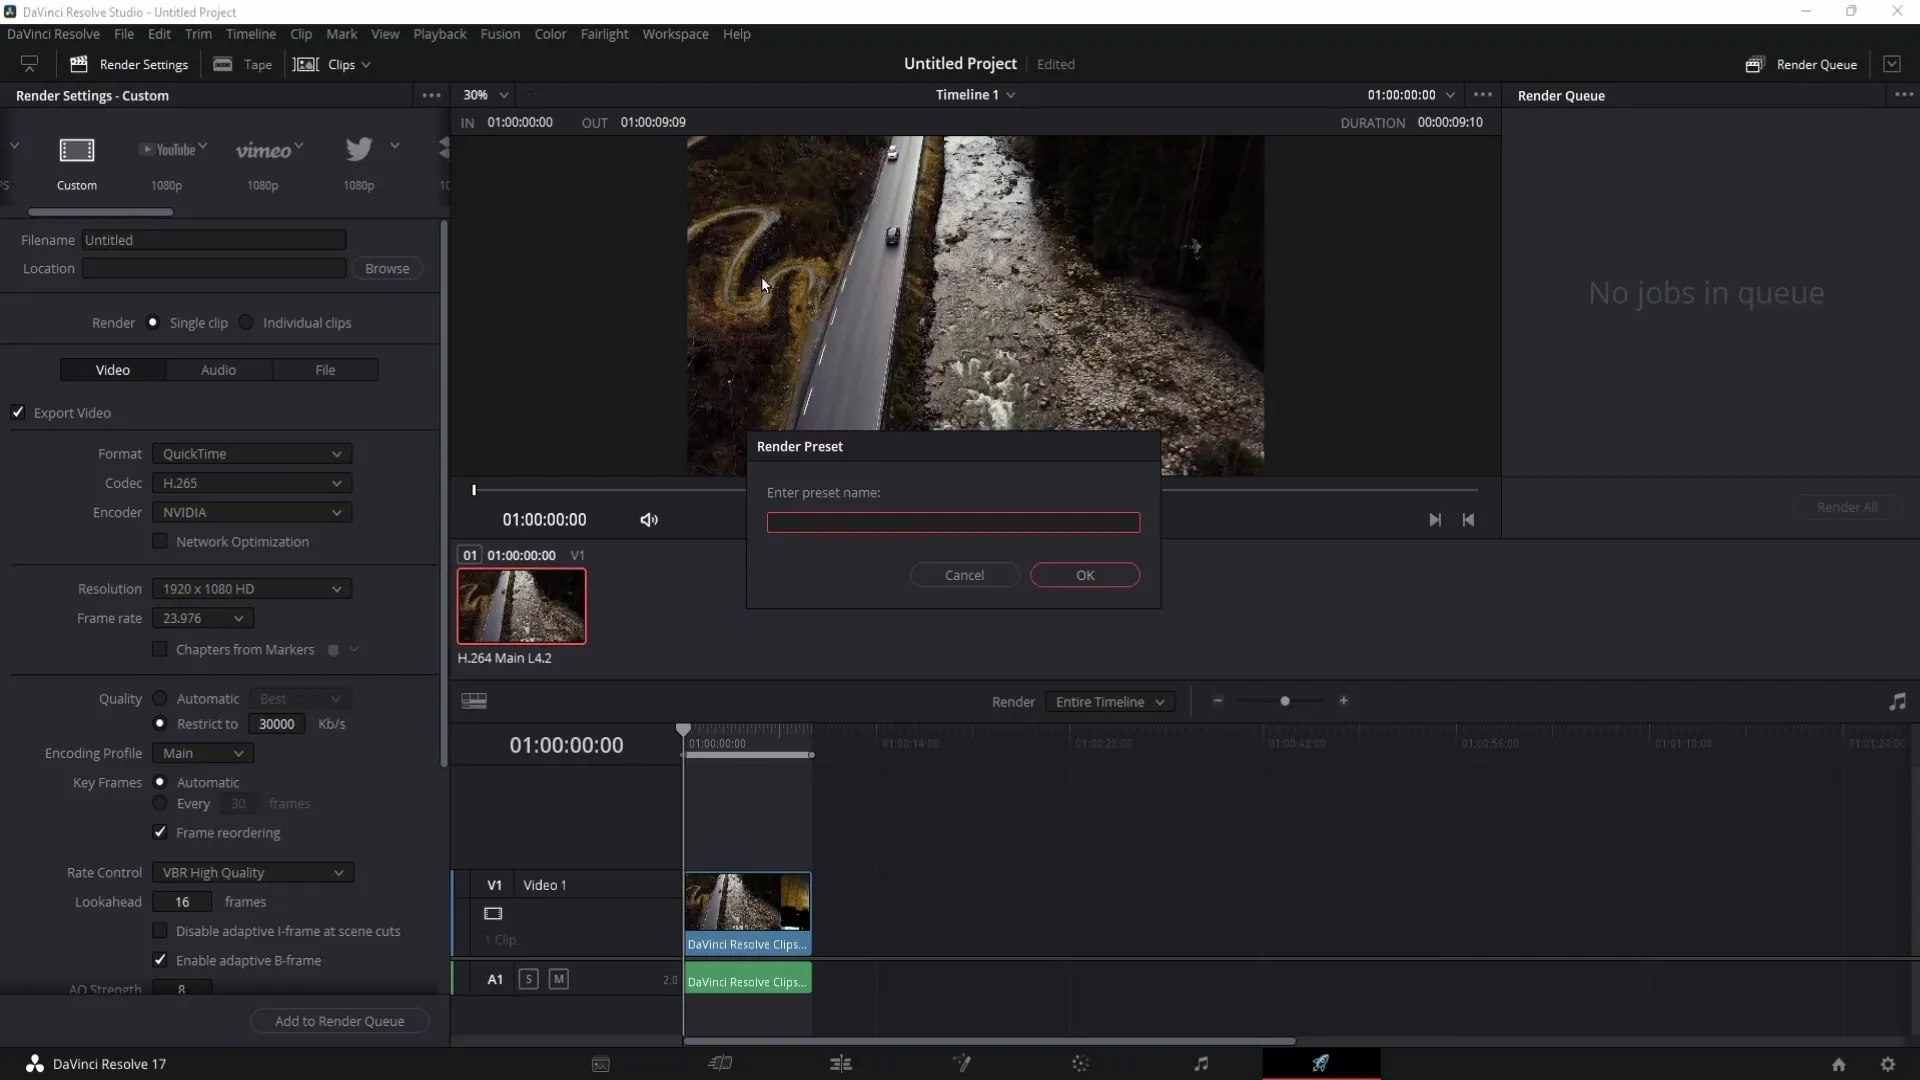
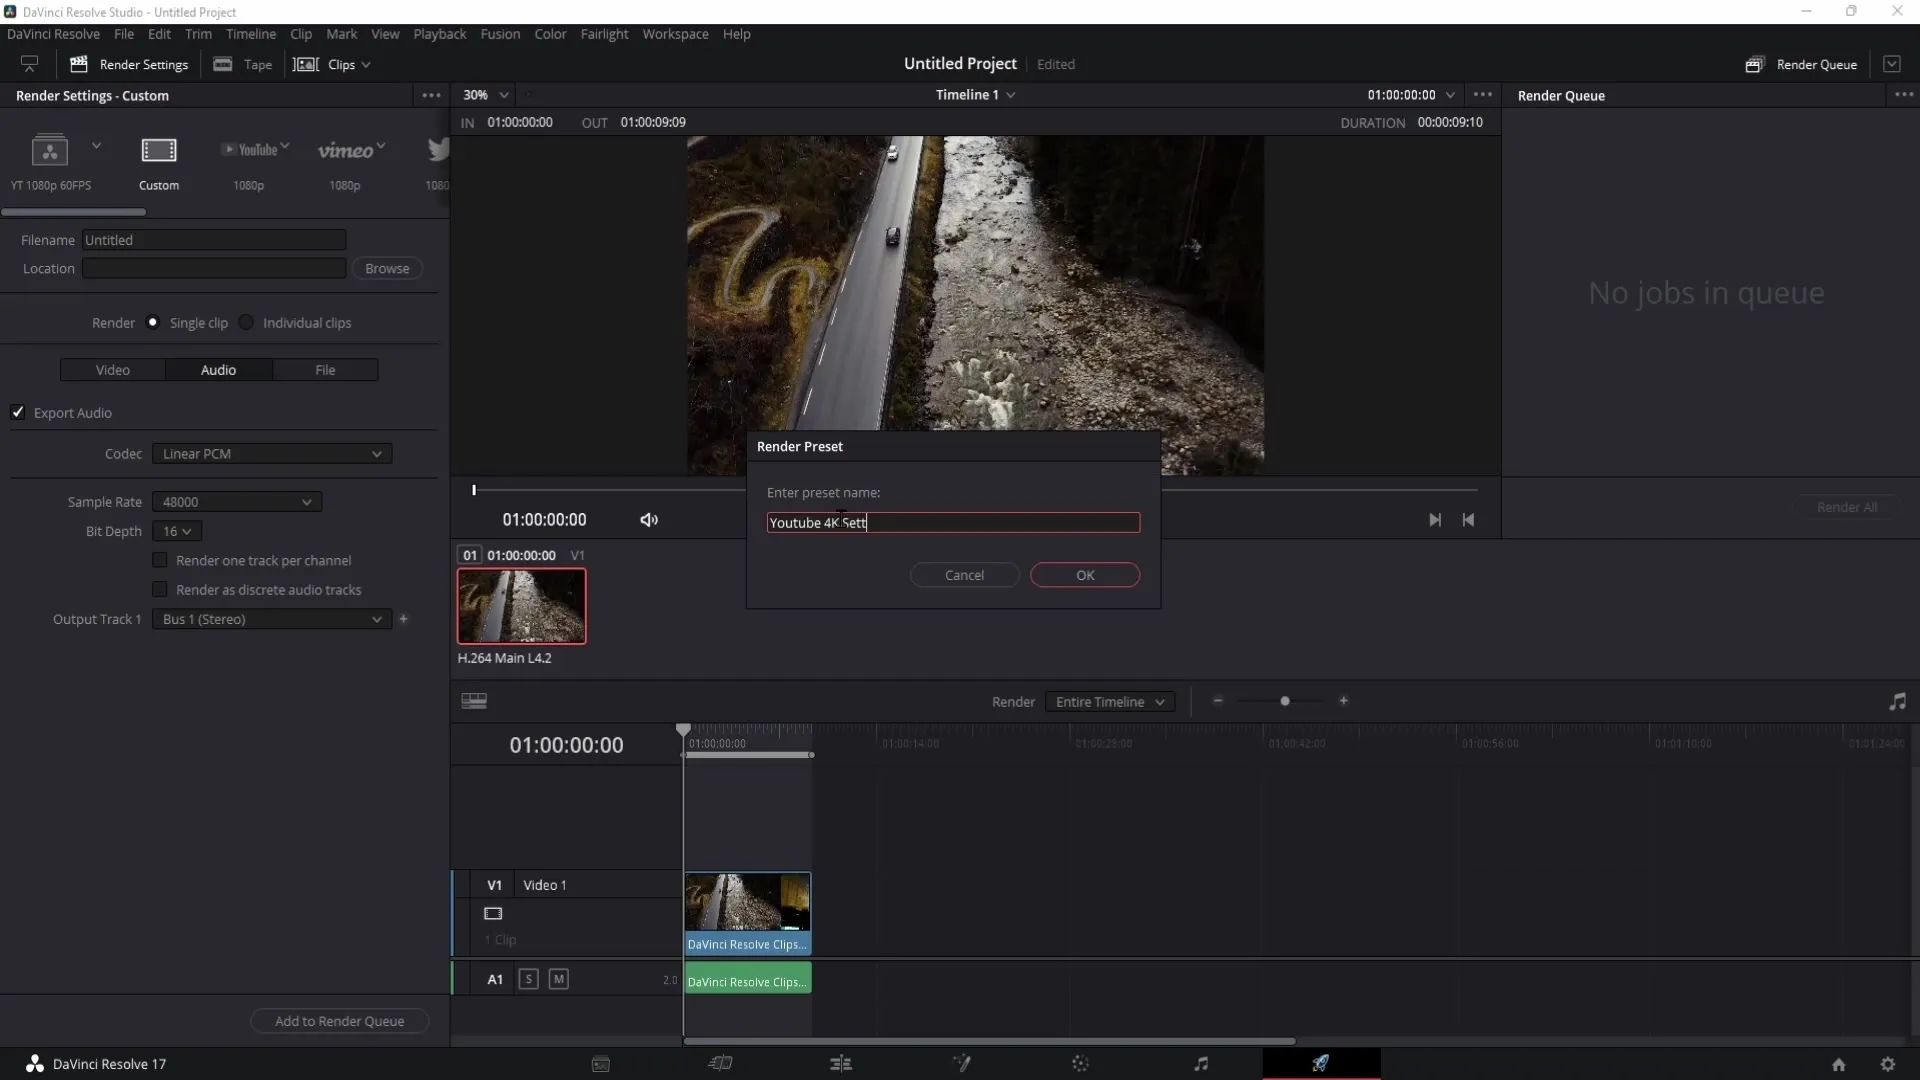
After making all these settings, you can save your setup as a preset. Click on the three dots in the top right corner and select "Save as new Preset." Name your preset meaningfully, for example, "Youtube 1080p Settings."
10. Adjust 4K Settings
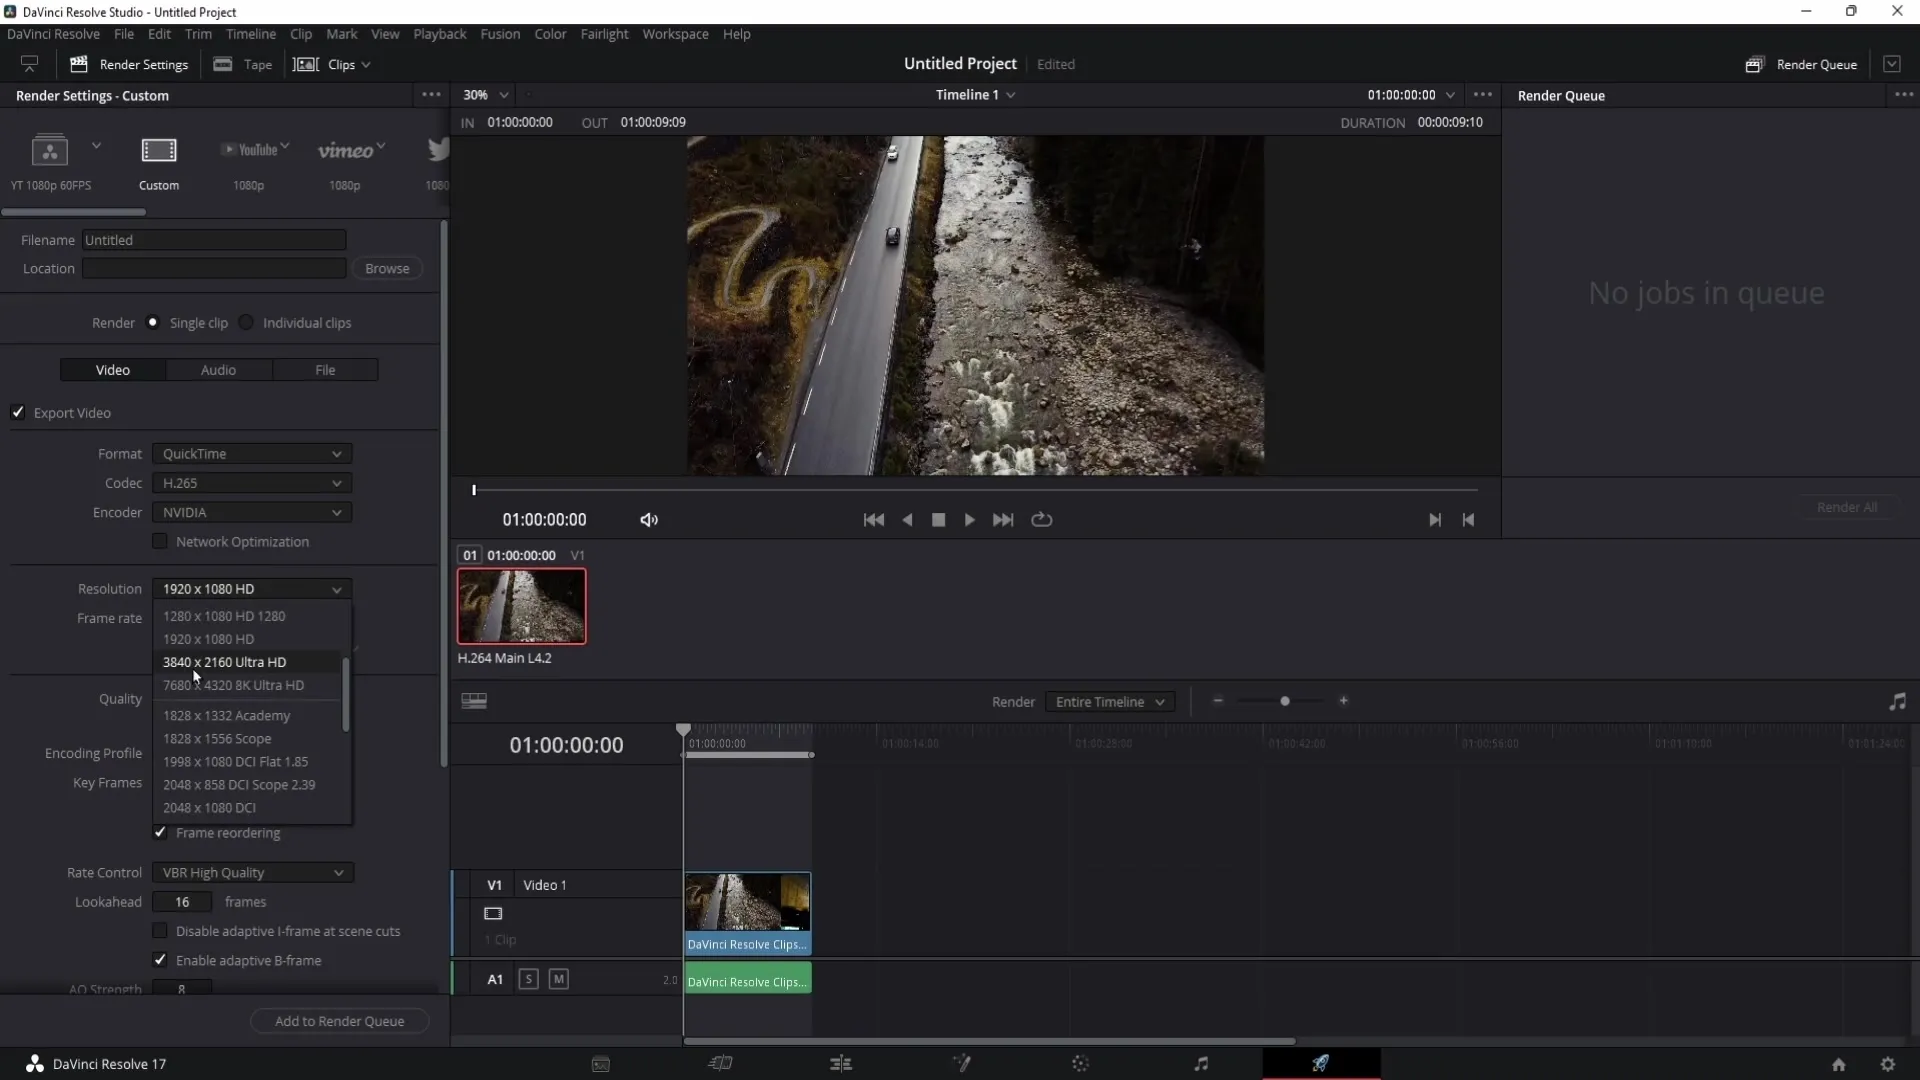
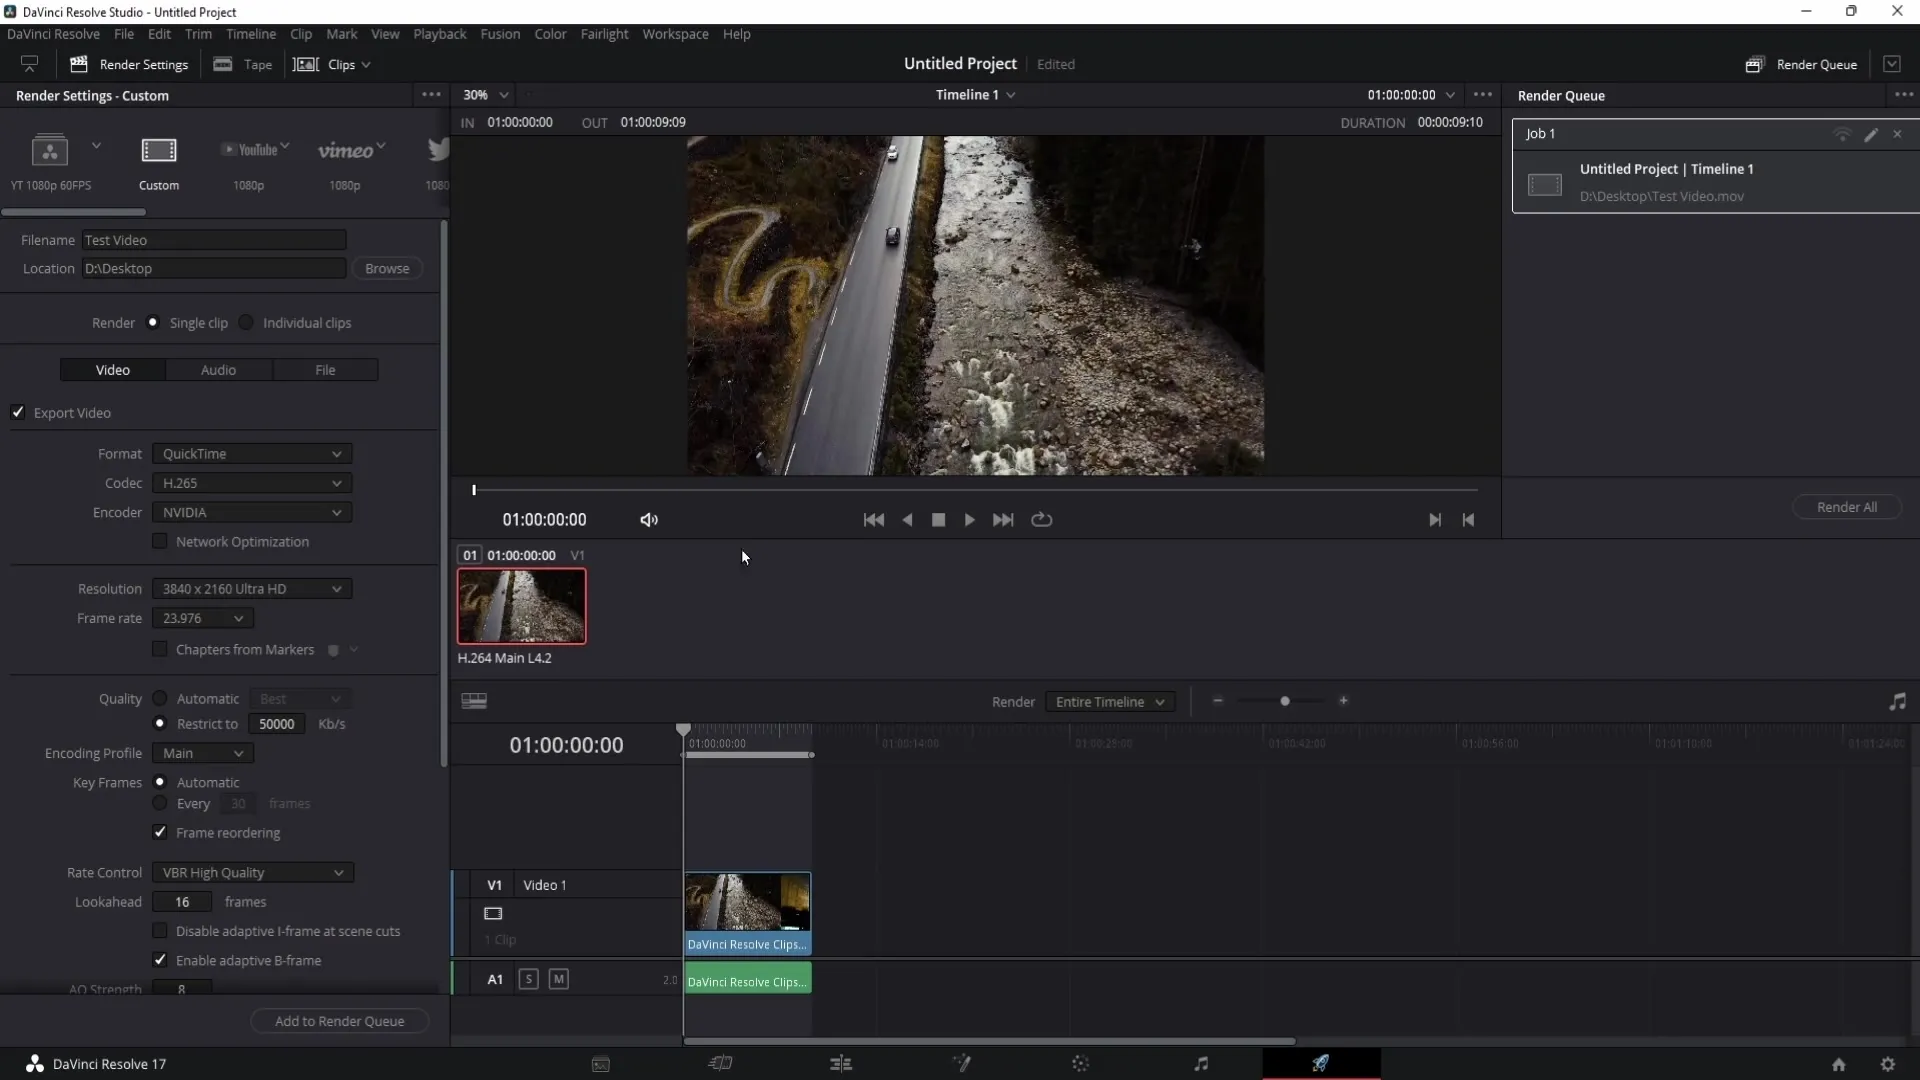
Now, let's move on to the 4K settings. These are largely similar, but you will select "Resolution" and set it to 3840x2160. For bitrate, you will now set it to 50,000 kbps to accommodate the higher resolution.
11. Save 4K preset
Just like the 1080p settings, you can also save the 4K settings as a preset so that you can access them more quickly in the future.
12. Render Queue and Export
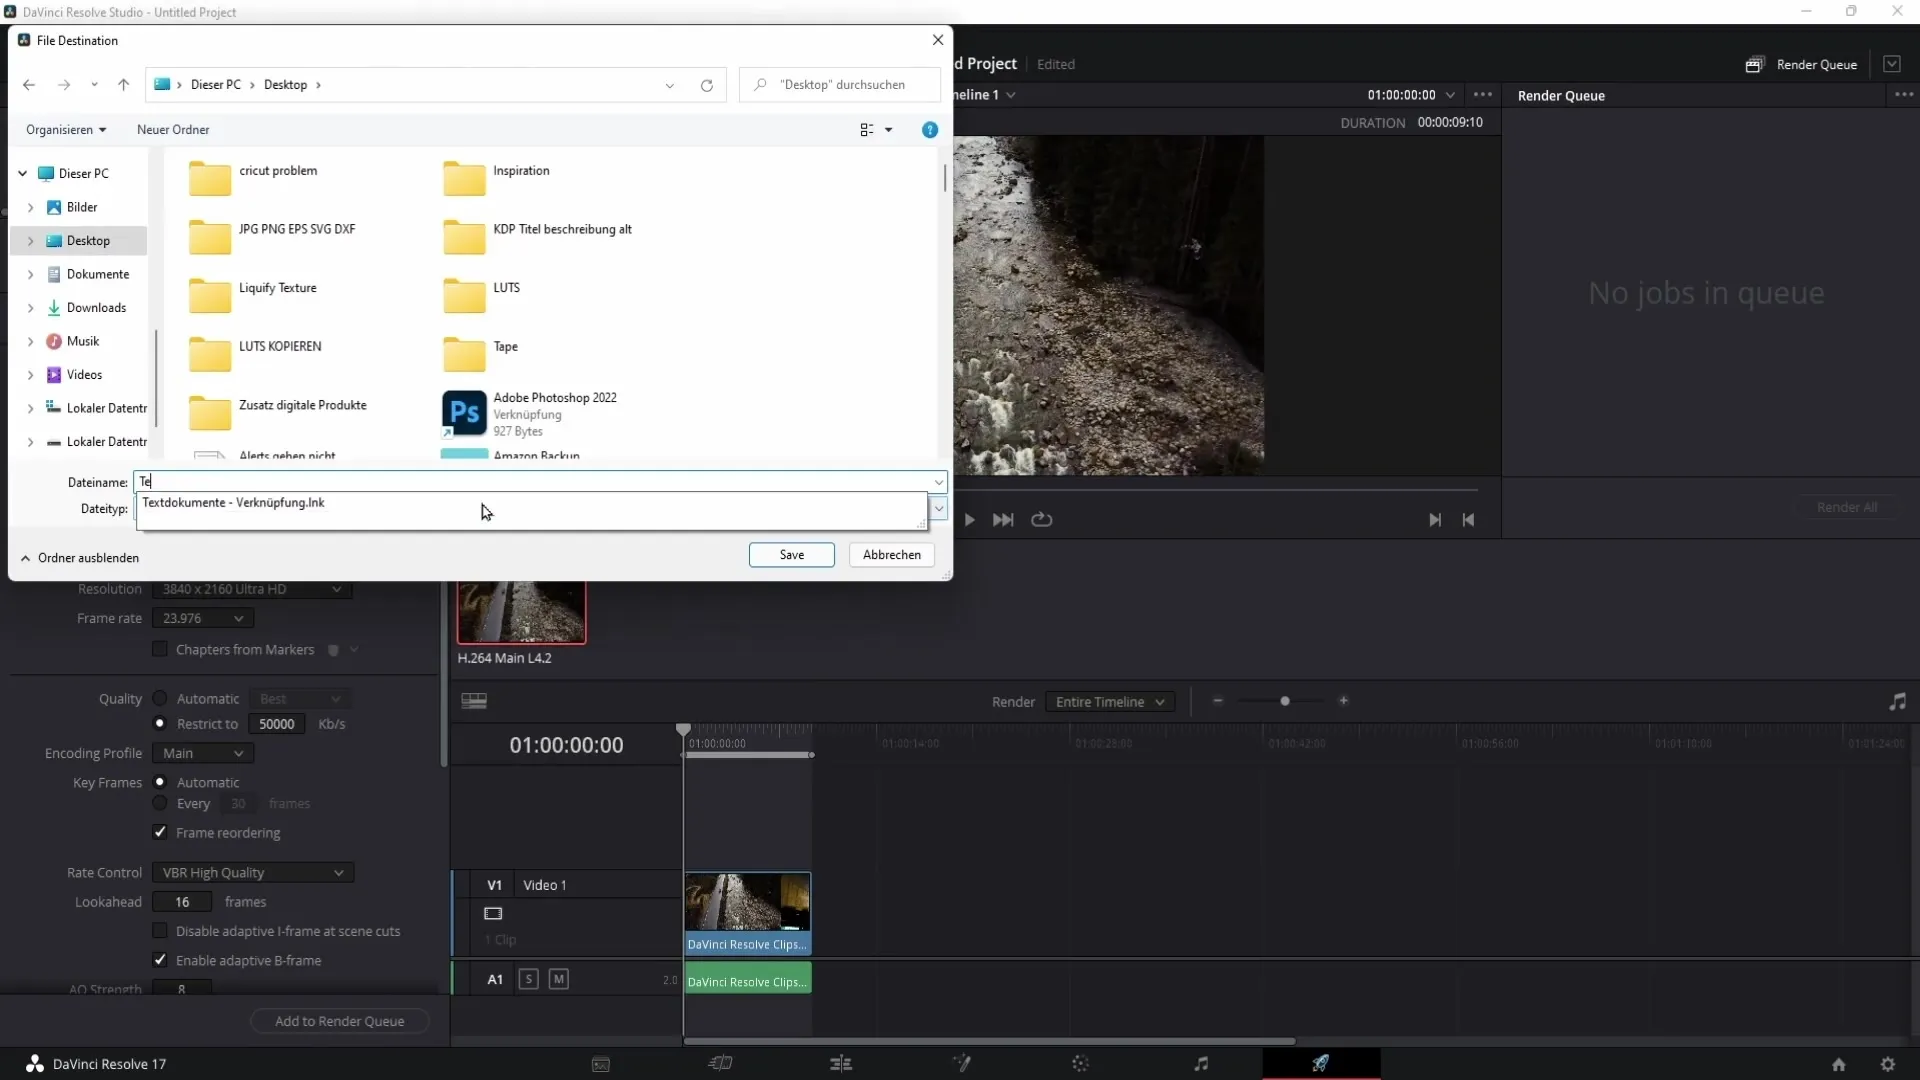
Once you have made all the settings, go to the Render Queue. Add your project, choose a target folder, and give it a filename. Click "Save", then "Add", followed by "Render All" to start the rendering process.
13. Information about File Sizes
Note that 4K videos have significantly larger file sizes than 1080p videos. Plan accordingly if you intend to upload your videos.
14. Using Custom Settings
Using custom settings allows you to achieve much better results than with the default YouTube settings. Make use of these options for your next project.
Summary
In this tutorial, you have learned how to set the best render settings in DaVinci Resolve for YouTube videos. From options to codecs to presets, we have covered all the important points.
Frequently Asked Questions
What resolution should I use for YouTube?For most content, 1080p or 4K is recommended, depending on the purpose and audience.
Is the H.265 codec better than H.264?Yes, H.265 offers better quality at similar or even smaller file sizes.
Why should I use custom settings instead of the predefined YouTube settings?Custom settings give you more control over the image and audio quality and lead to better results.
Can I edit the presets after saving them?Yes, you can edit saved presets at any time and customize them to your current needs.
Where can I find the rendered videos?The rendered videos are saved in the target folder you specify during the rendering process.


