In this guide, you will learn how to export audio in DaVinci Resolve. This is especially useful if you only want to export the audio tracks without video. The steps are simple and will quickly lead you to the desired result. Let's dive right into the guide!
Key Takeaways
- Selecting "Audio only" allows you to export audio without video.
- The recommended formats are MP4 or WAV, with MP4 being advantageous.
- If you have multiple audio tracks, you should make the necessary settings to export the desired tracks.
Step-by-Step Guide
First, you need to open DaVinci Resolve and access the project where the audio track is located. To access the export menu, click on the rocket icon in the bottom right corner.
Next, you will see various options for exporting data. Since we only want to export the audio tracks, you need to go all the way to the right in the export options. Here, select the "Audio only" option.
After selecting "Audio only", the next step is to set the format for exporting. You have the option to choose between different formats. I recommend using MP4 or WAV. Personally, I prefer MP4 as I have often encountered issues with uploading WAV files in the past. Therefore, choose MP4 as the format and leave the AAC codec as it is.
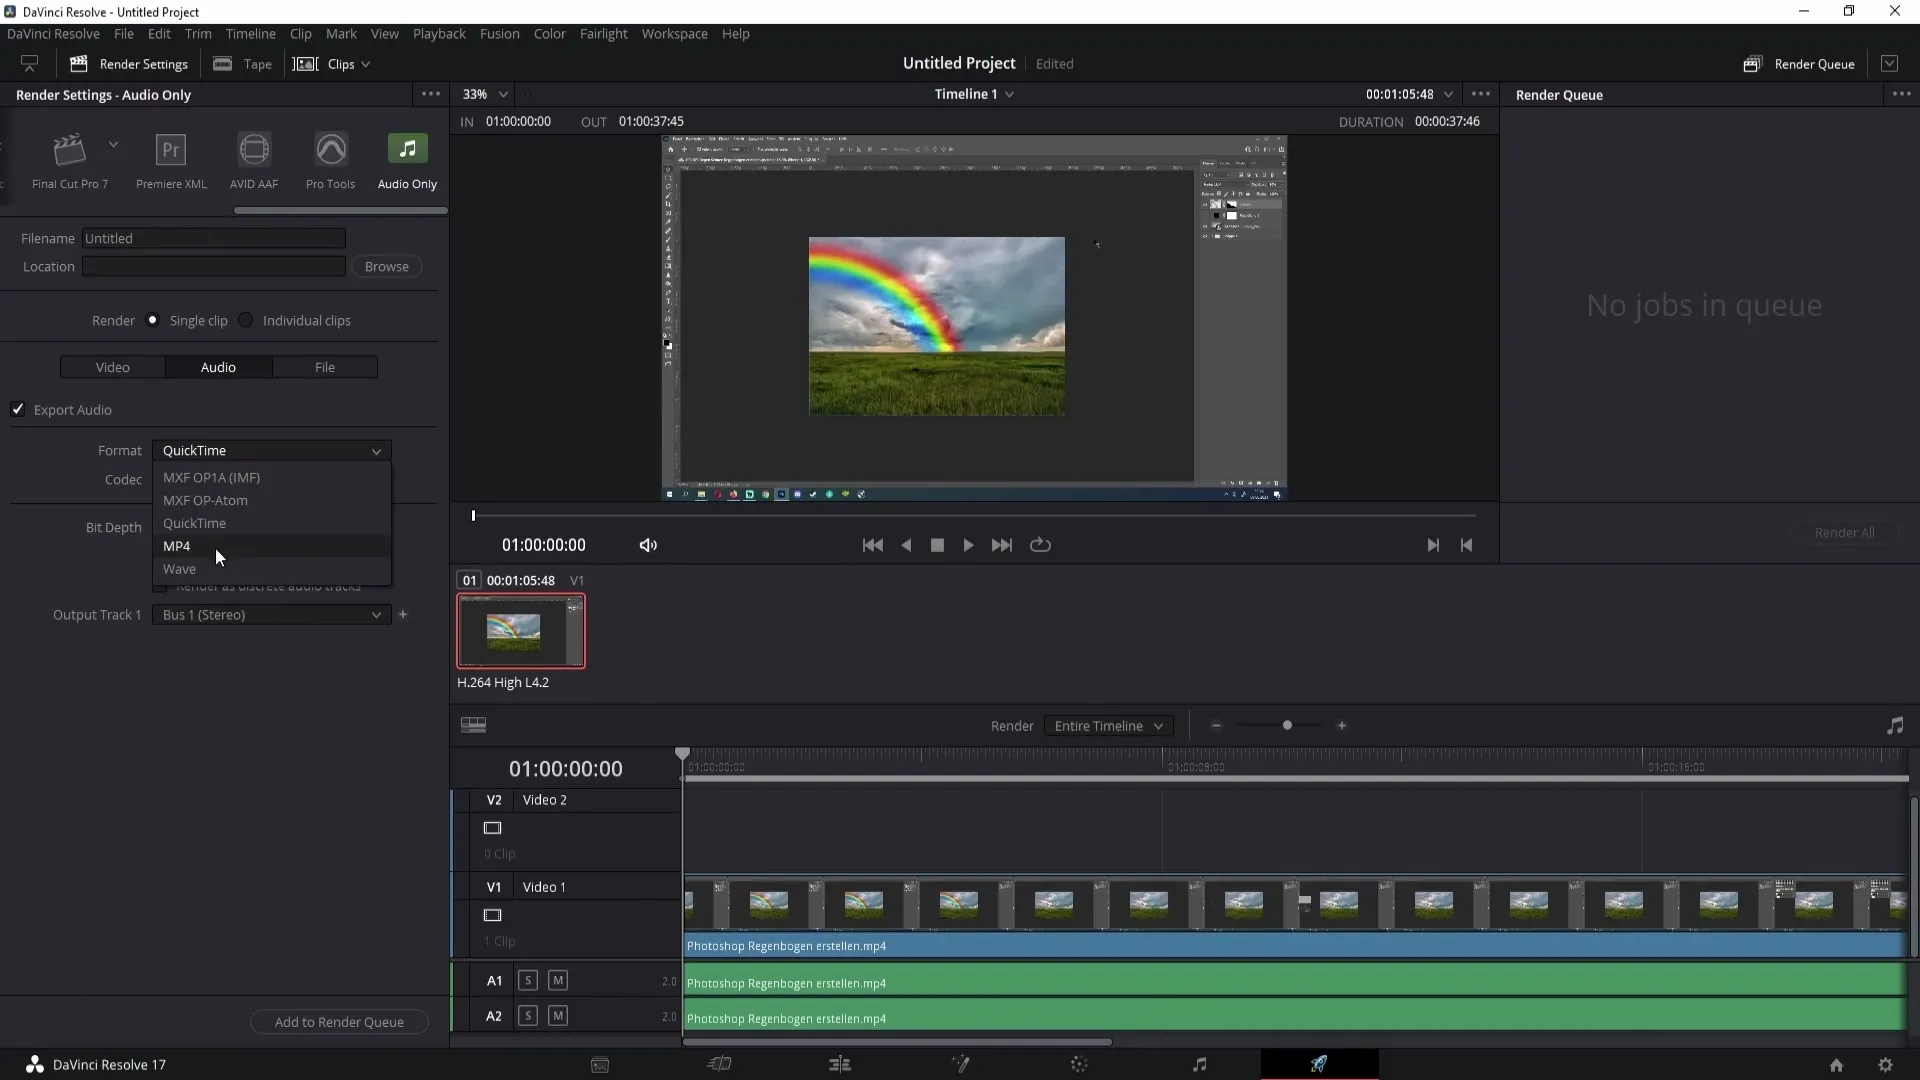
Now, let's move on to the audio settings. You will see the "Output Track 1" point, which is relevant for us. If you have only one timeline, you can leave the default setting at Bus 1 Stereo. However, if you have multiple audio tracks, like in my case with A1 and A2 on different tracks, you need to choose the "All Timeline Tracks" setting. This way, DaVinci Resolve will export all available audio tracks.
If you want to export specific audio tracks, you can do so as well. Click on "Output Track 1" and then select "Timeline Track." Here, you can set the number of the audio track. If you want to export only audio track 1, choose that number. If you go one number higher, you can select audio track 2, and so on.
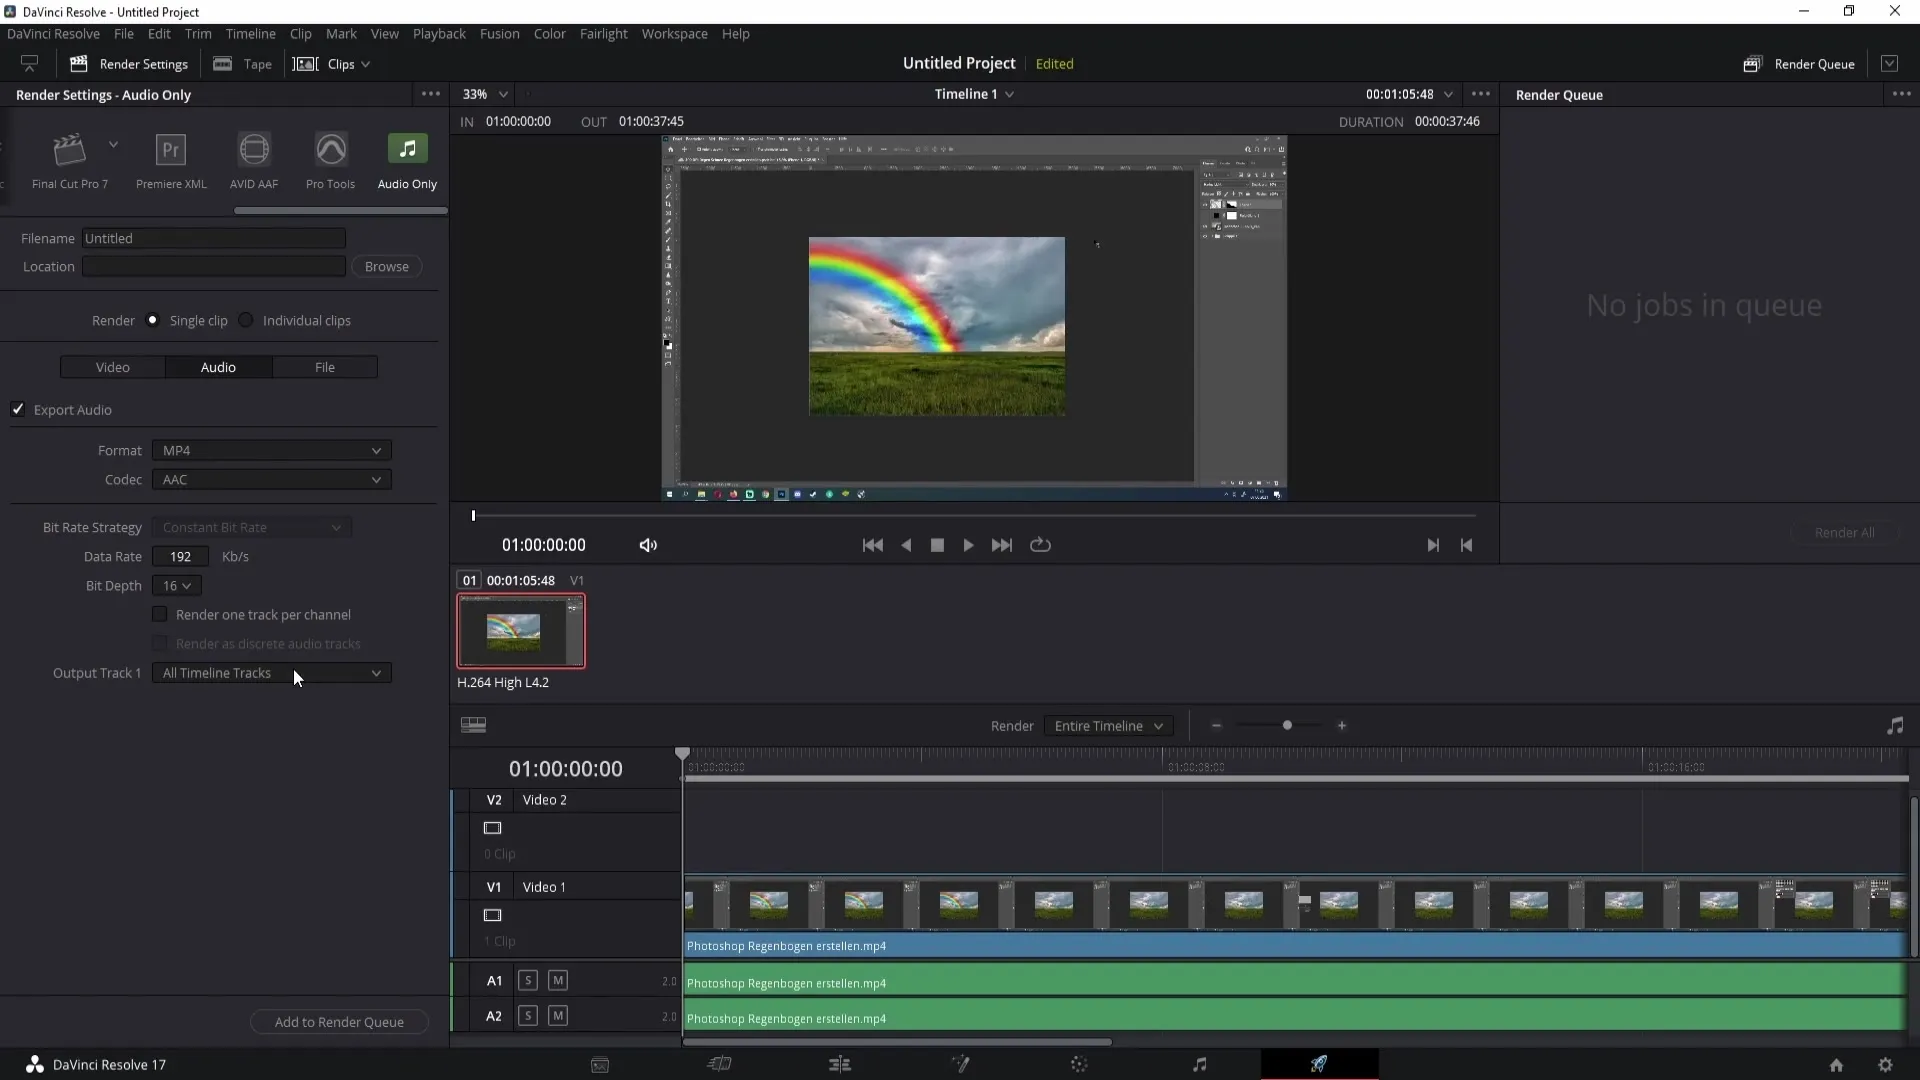
If you wish to export a specific section of your audio track, you can set the in and out points. First, go to where you want your audio to start and press the "I" key. Then, go to where you want to end your audio and press the "O" key. This way, you have selected a specific range for export.
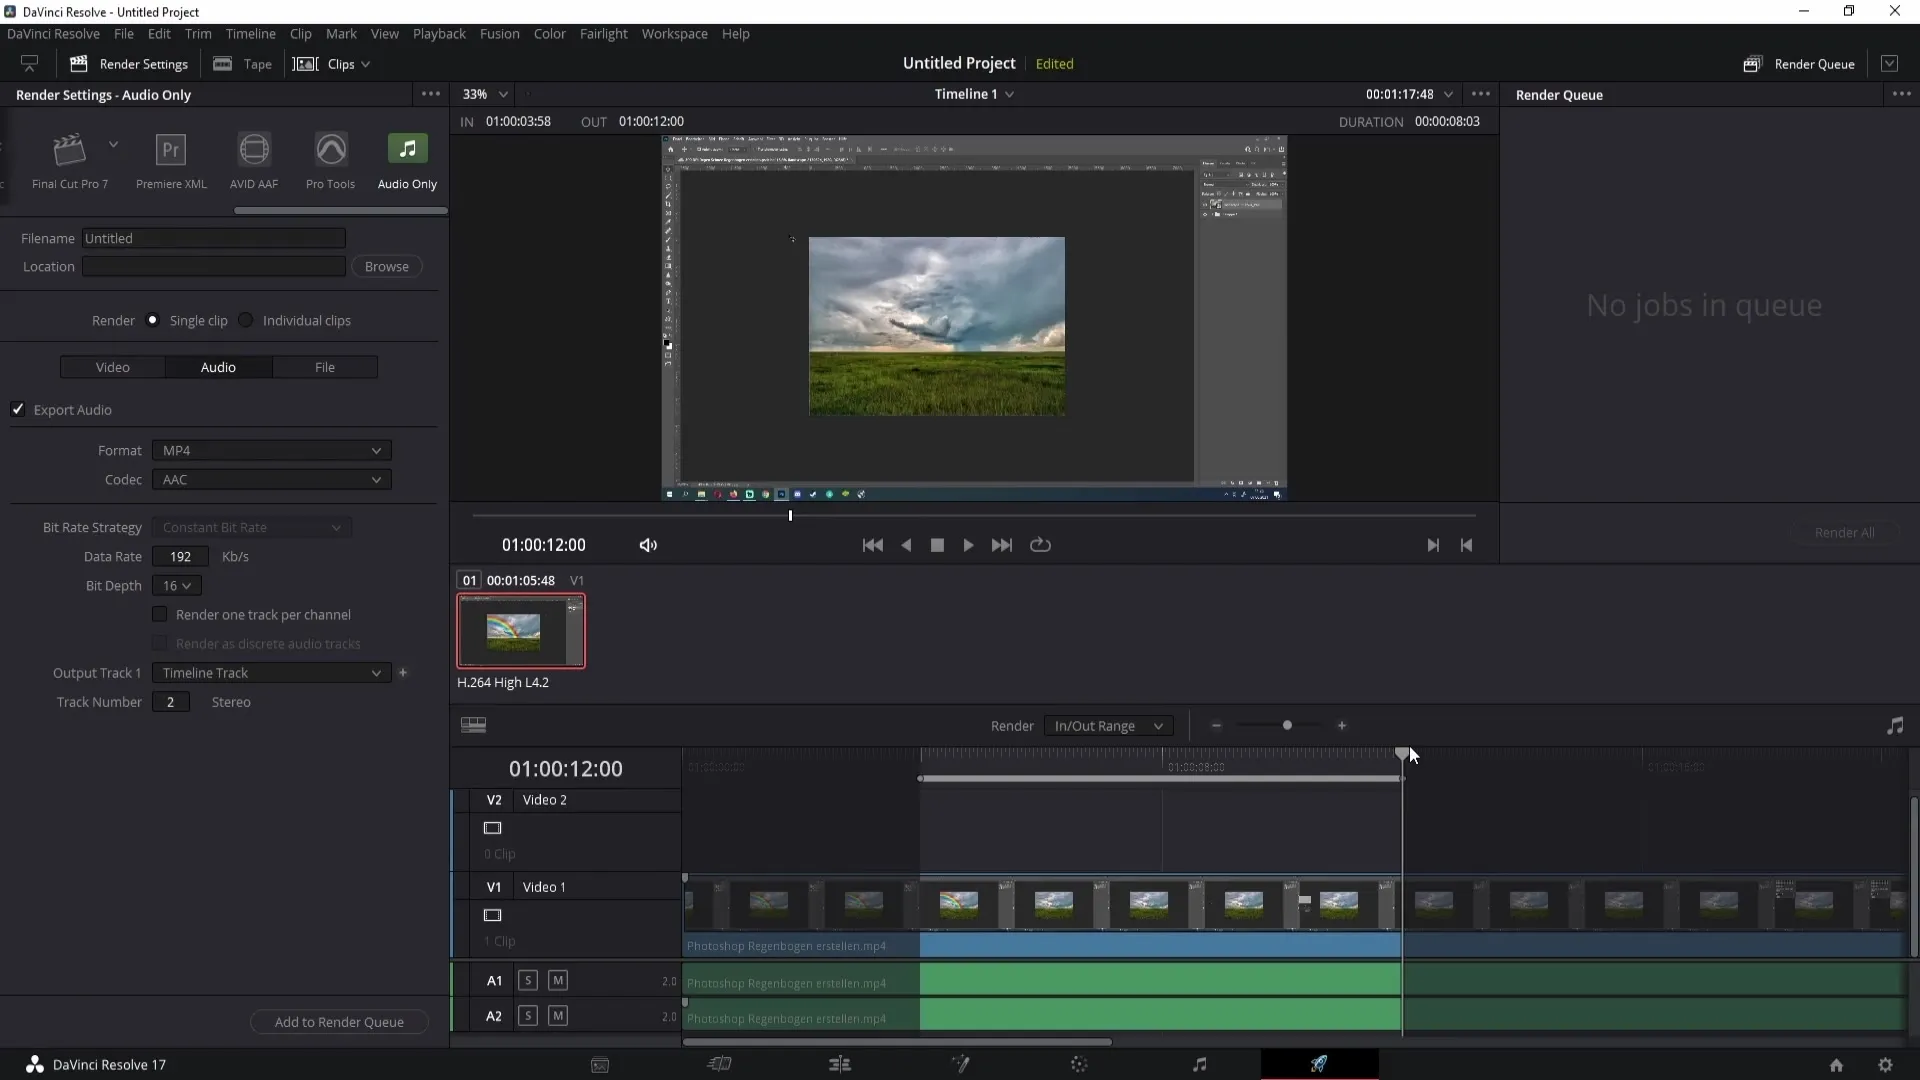
Now we are almost there. To export everything, you must give your file a name, such as "Audio 1." Additionally, select the storage location by clicking on "Browse" and choosing the desired location, such as the desktop.
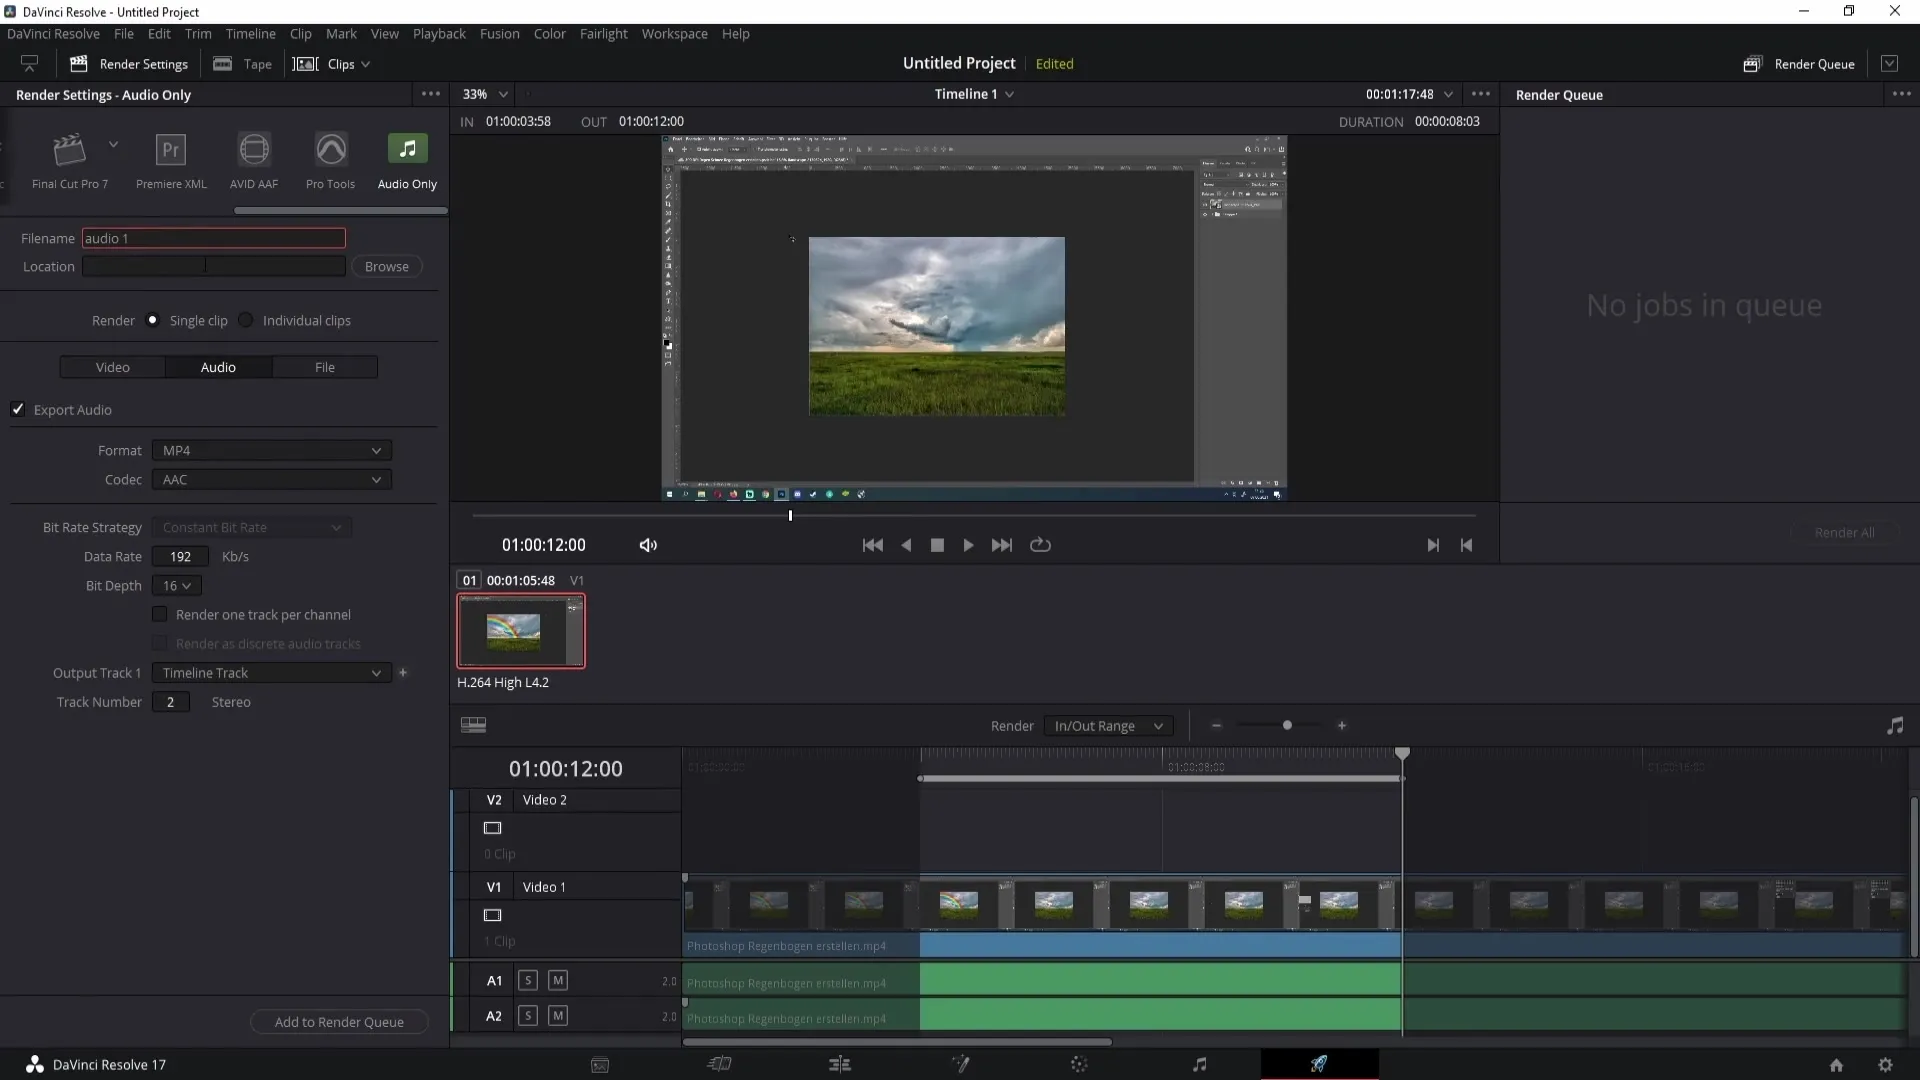
After you have made all the settings, click on "Add to Render Queue." This will add your export to the render queue. To start the export process, go to the bottom right corner and click on "Render All." DaVinci Resolve will now carry out the export process.
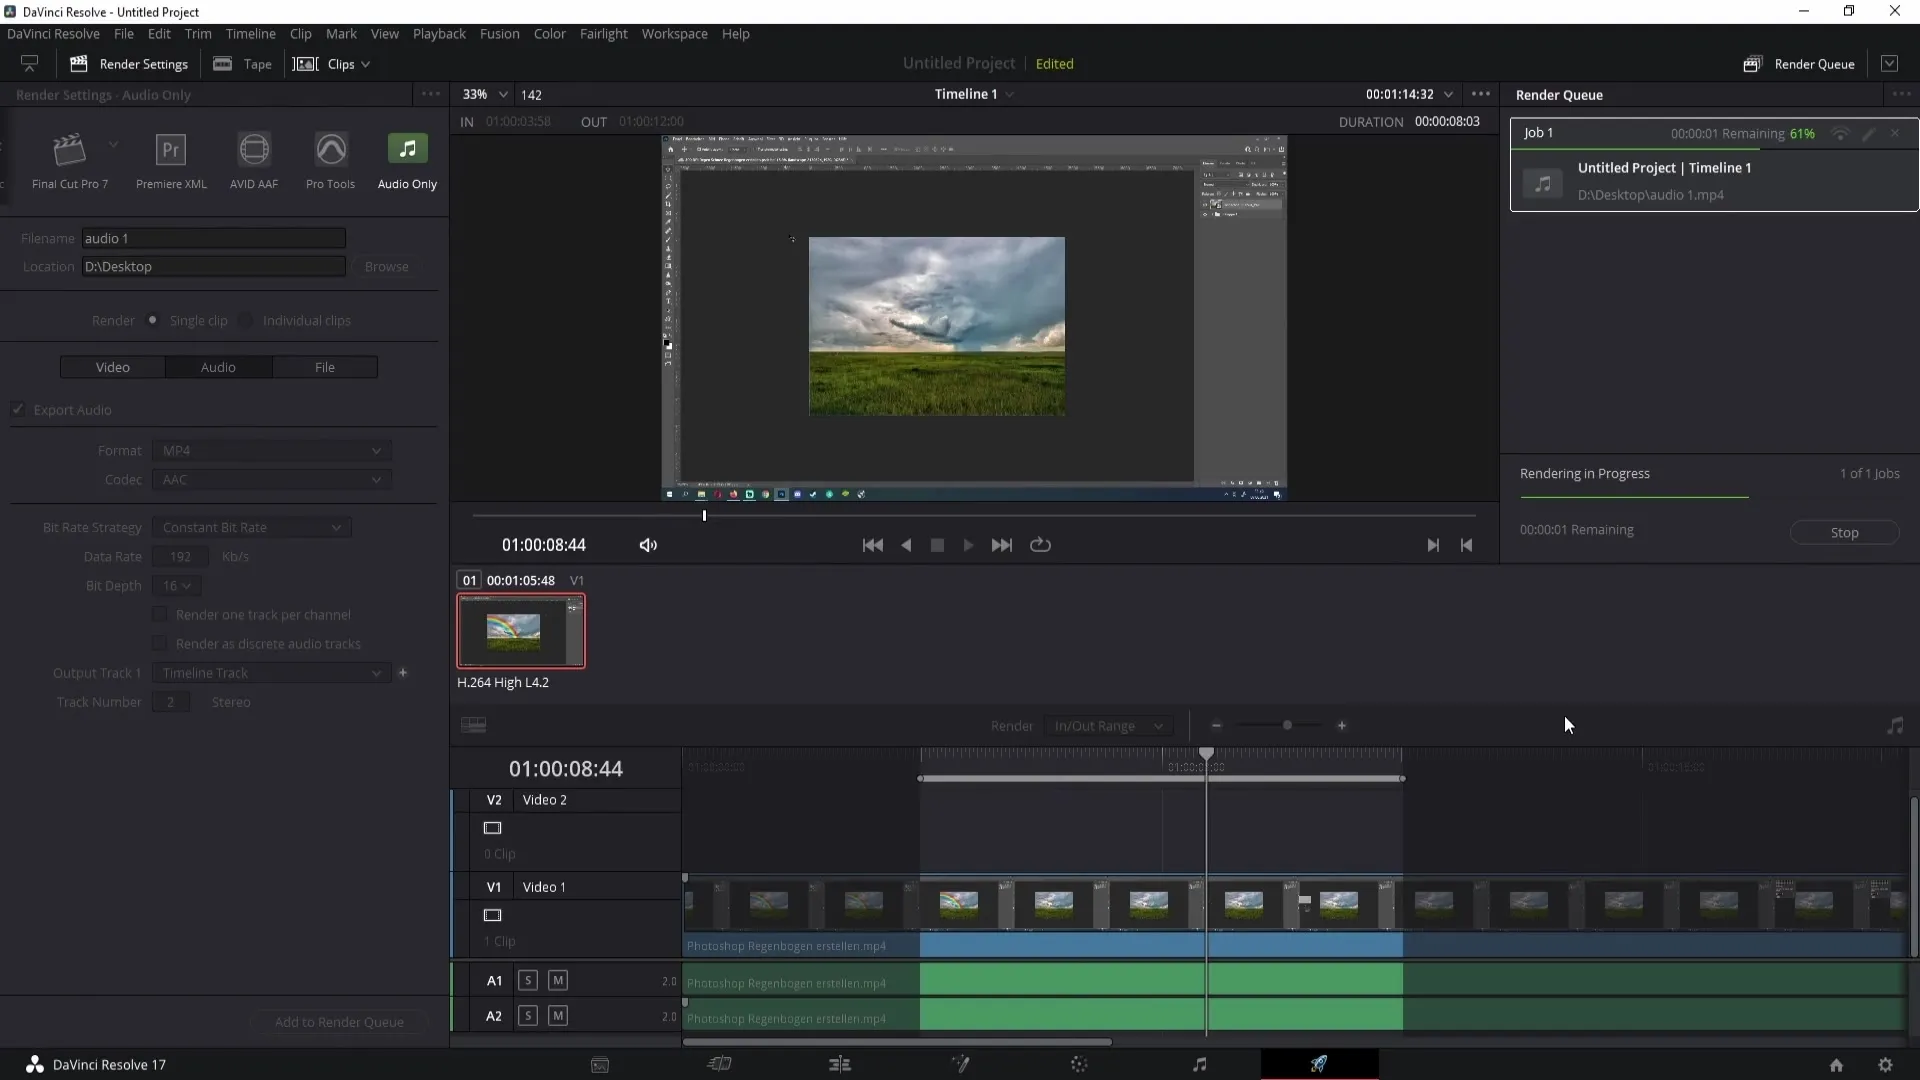
Once this is completed, you have successfully exported only the audio track and can now use it!
Summary
In this step-by-step guide, you have learned how to only export audio in DaVinci Resolve. You have familiarized yourself with the key options for selecting the format, audio tracks, and export settings. With these simple steps, you will be able to extract your audio without exporting the video.
Frequently Asked Questions
Why should I only export the audio?If you only need the sound to use in another project or for external purposes, exporting the audio alone is much more efficient.
Which format is better, MP4 or WAV?MP4 is generally better as it causes fewer upload issues and provides broader support across different platforms.
How do I select the specific audio track?You can choose the desired audio track by clicking on "Output Track 1" and setting the relevant number of the audio track in the Timeline Track.
Can I export a specific section of the audio track?Yes, you can set the in and out points to select a specific area for export.
What should I do if the export does not work?Check your settings and the chosen storage location. If everything is correct, try exporting again or restart DaVinci Resolve.


