In this tutorial, you will learn how to easily export images from DaVinci Resolve. While this software is often focused on exporting videos, the ability to export individual images is also very useful. Whether you want to save a specific frame as a reference or use a still image for your projects, you will find out how to achieve exactly that here. Let's get started!
Key Takeaways
- You can export not only videos, but also images from DaVinci Resolve.
- The process involves grading the image and finding the desired frame.
- There are various file types you can choose from when exporting, including JPG and PNG.
Step-by-Step Guide
To export an image from DaVinci Resolve, follow these steps:
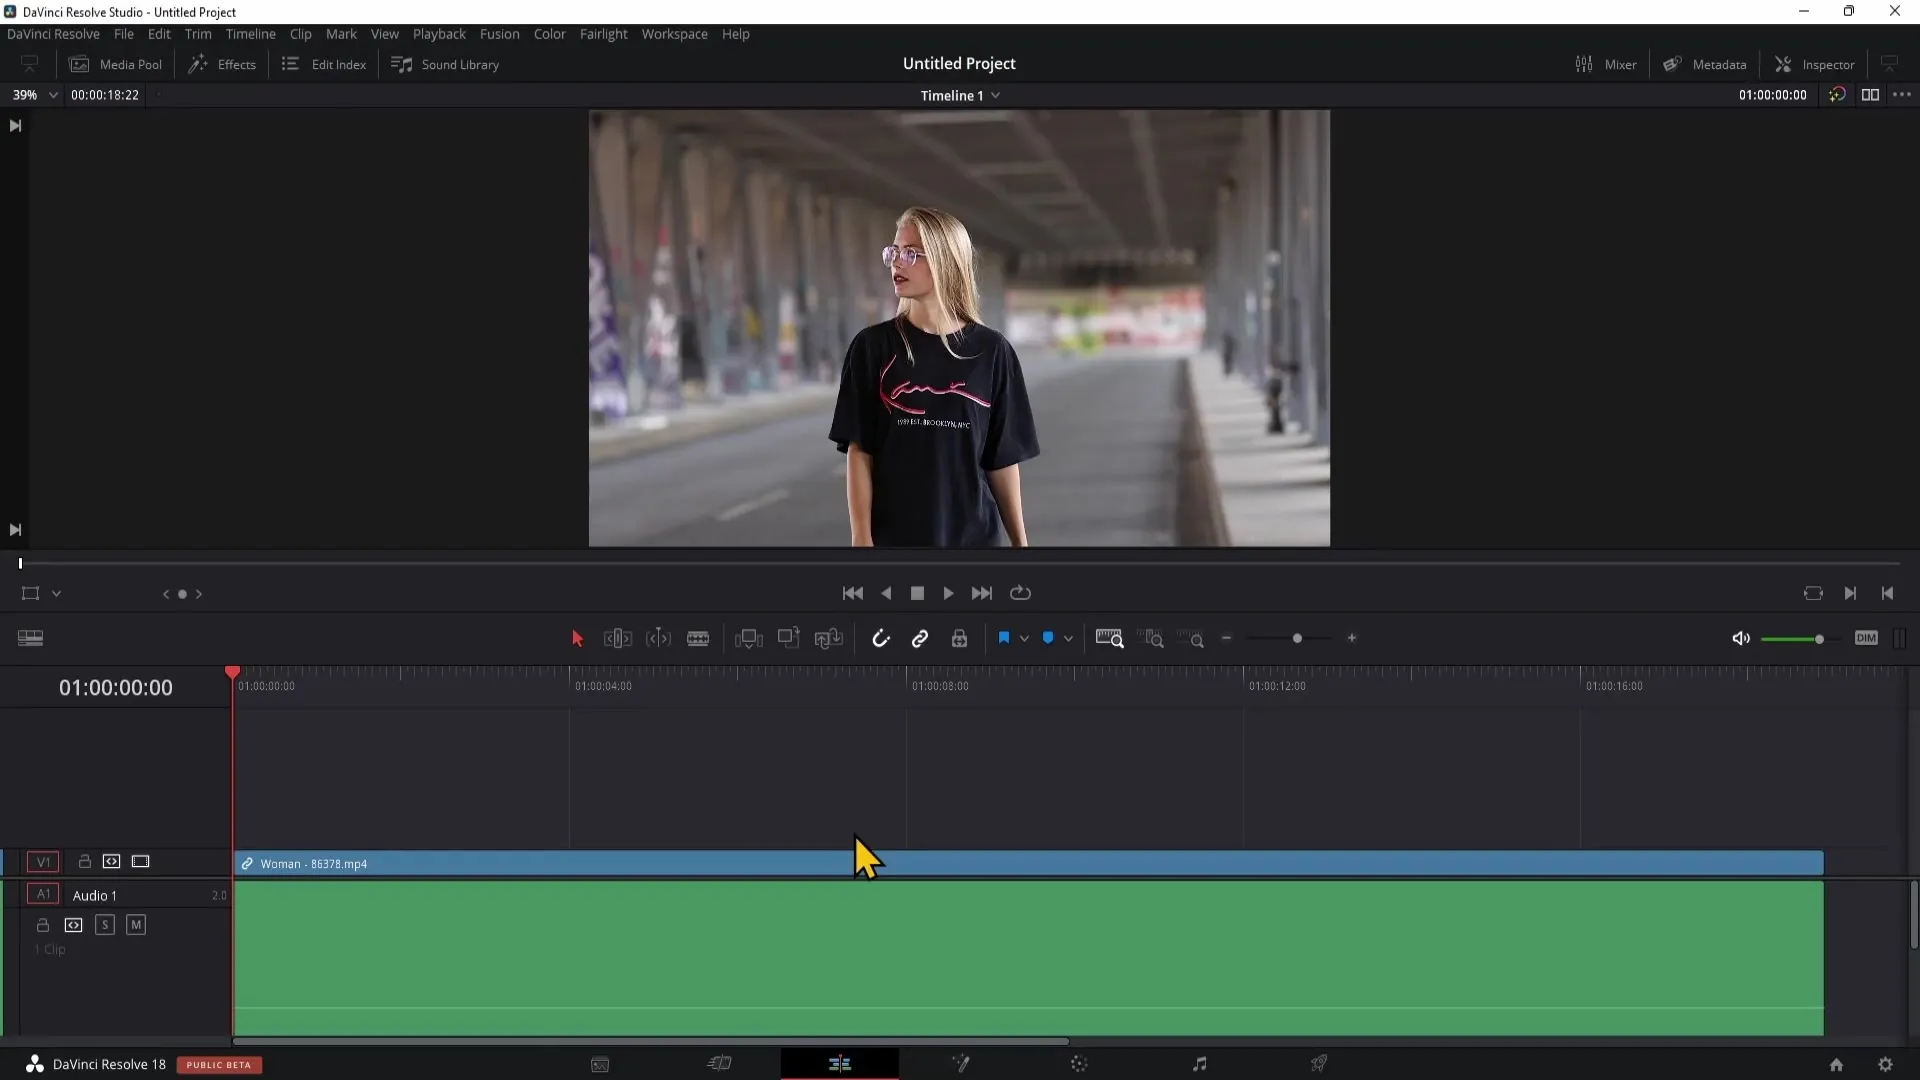
First, open DaVinci Resolve and load the project from which you want to export an image. If you have a video in the timeline, that's perfect because you can export a frame from that video. You don't necessarily need an image in the timeline; you can also use any frame from your video.
Now navigate to the Color Grading section of DaVinci Resolve. Here, you have the opportunity to make color adjustments to the image before exporting it. You can use your grading curves to change the contrast or colors of the image.
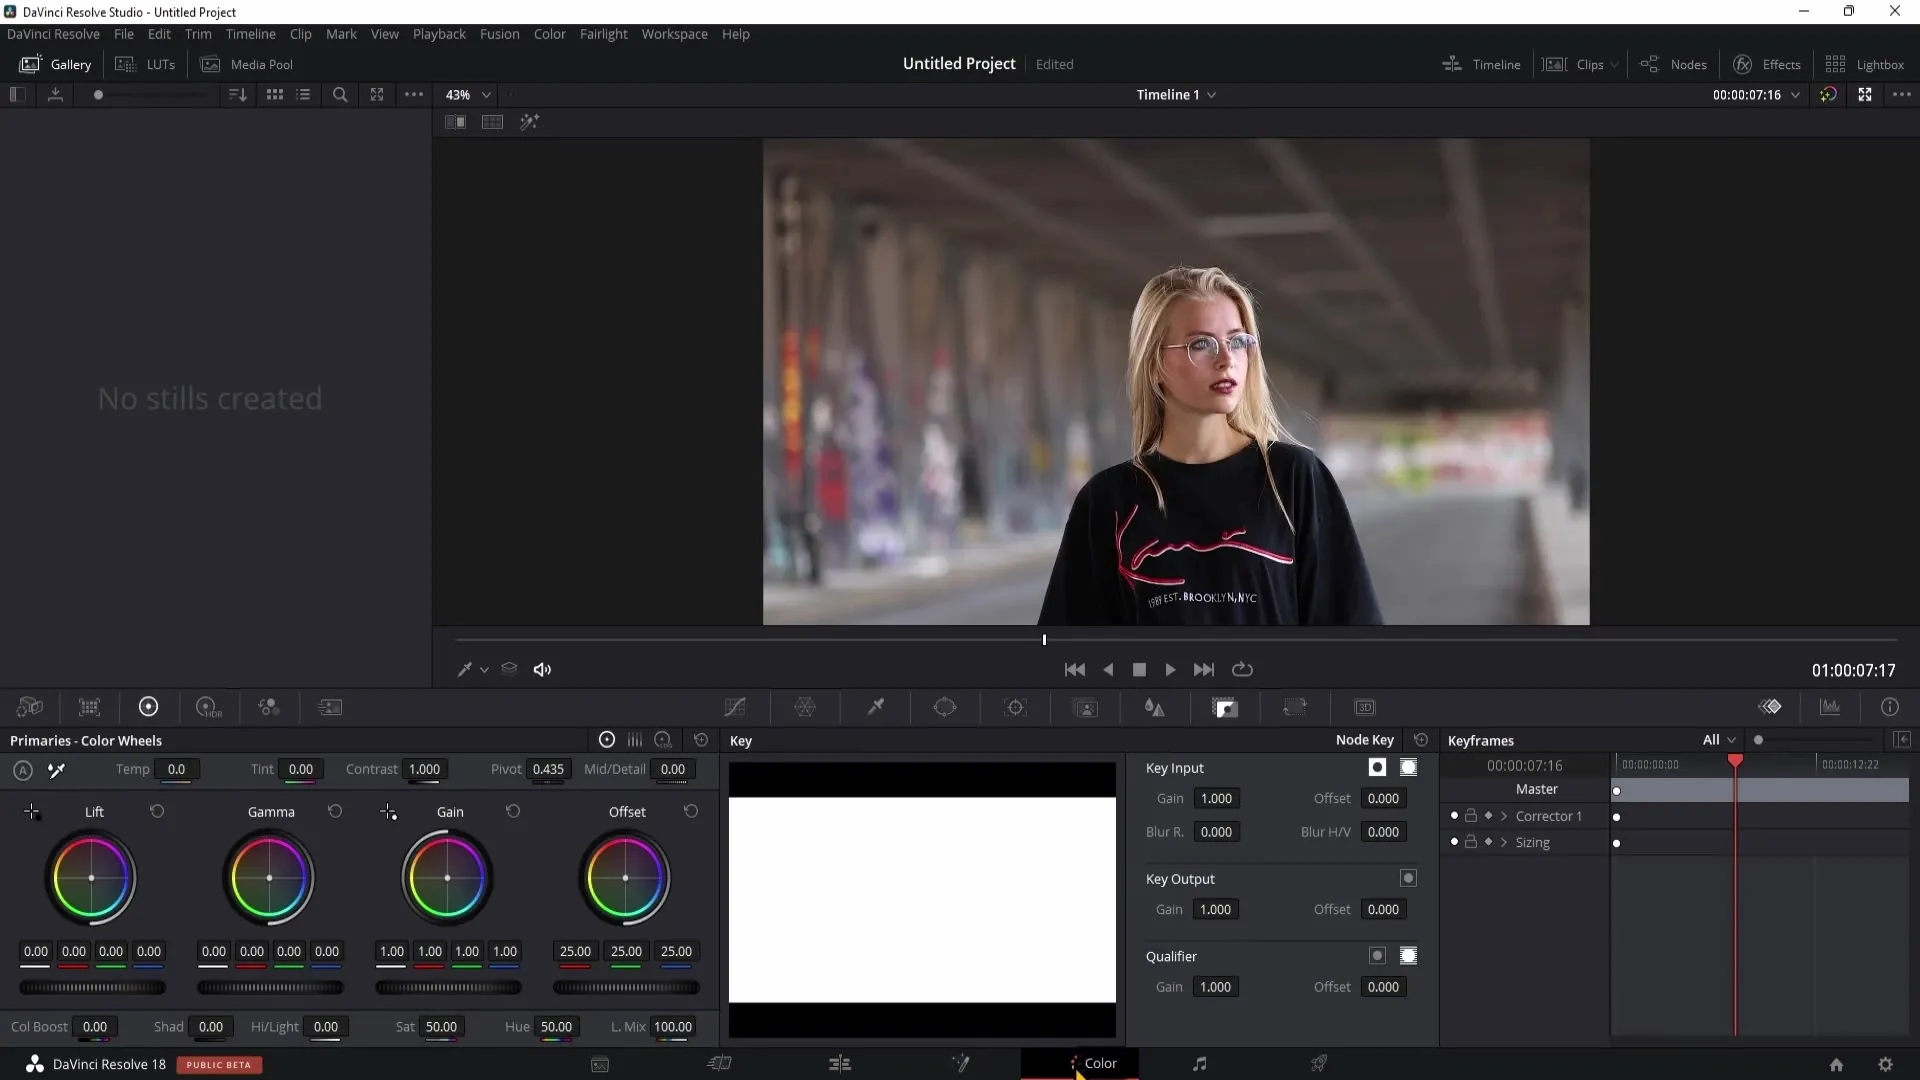
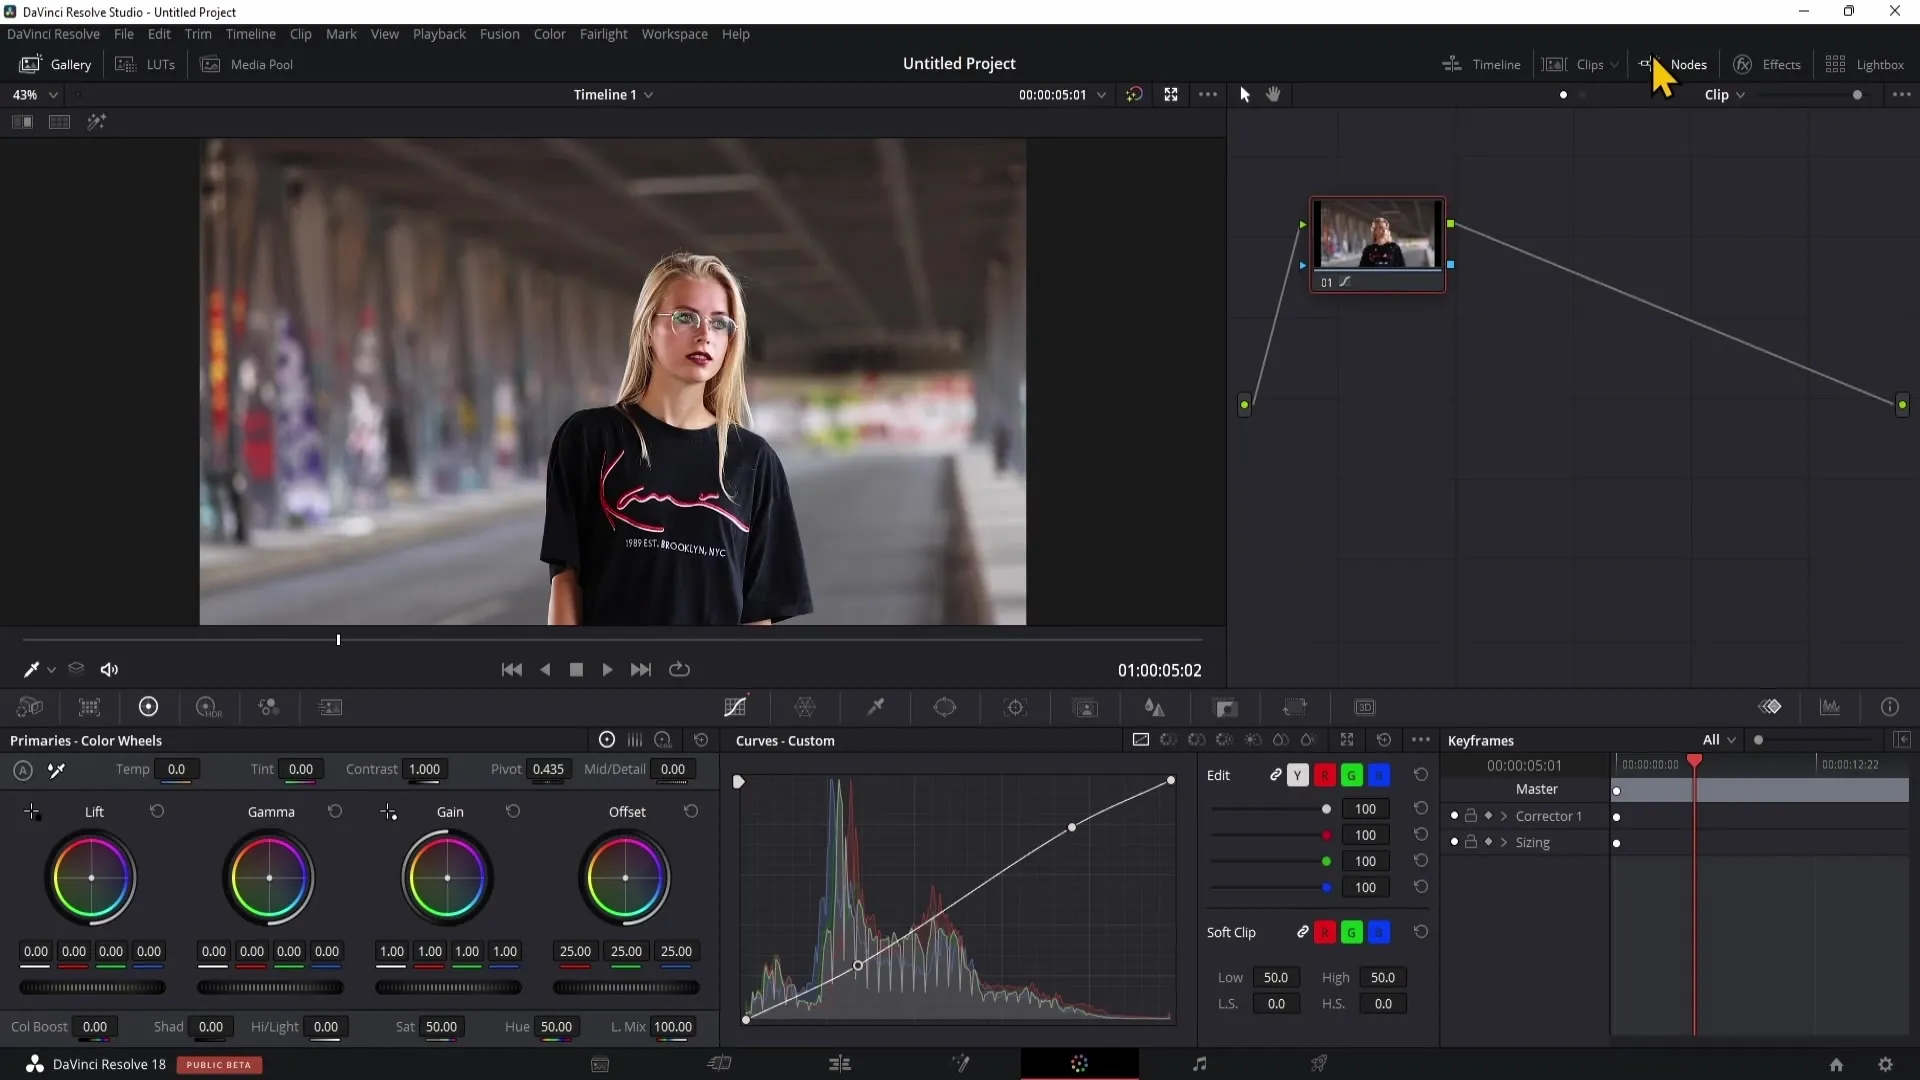
Once you are satisfied with the adjustments, proceed to find the exact frame you want to export. Scroll through your video to do this. Once you reach the desired frame, right-click on the preview.
Then select the "Grab Still" option. This saves the current frame as a kind of preview. Now you have created the image you want to export. However, you still need to take a few more steps to export it.
Now hide the notes and expand the gallery on the left side. If you are having trouble finding your gallery, check to see if the full-screen mode is enabled. In that case, you need to disable full-screen mode to make the gallery visible.
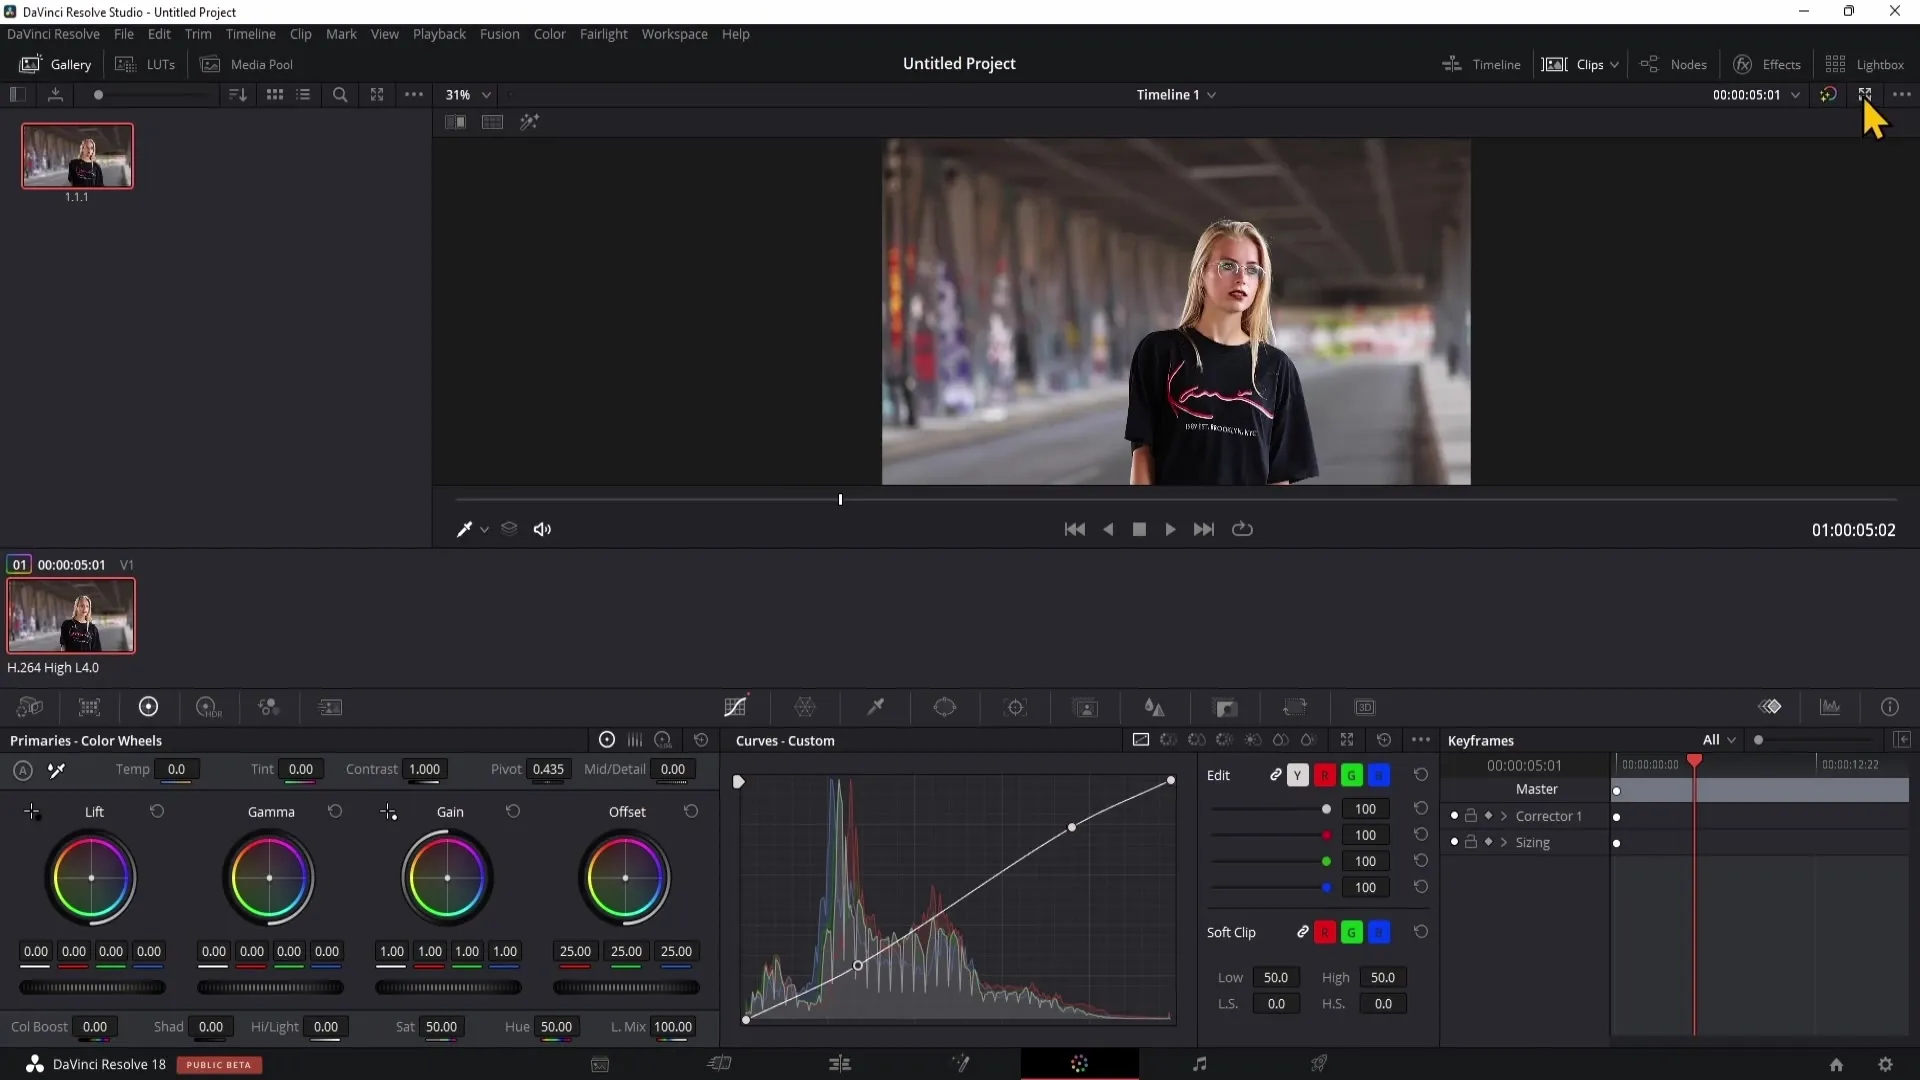
In the gallery, you will see the image you just saved. To export it, right-click on it and choose "Export".
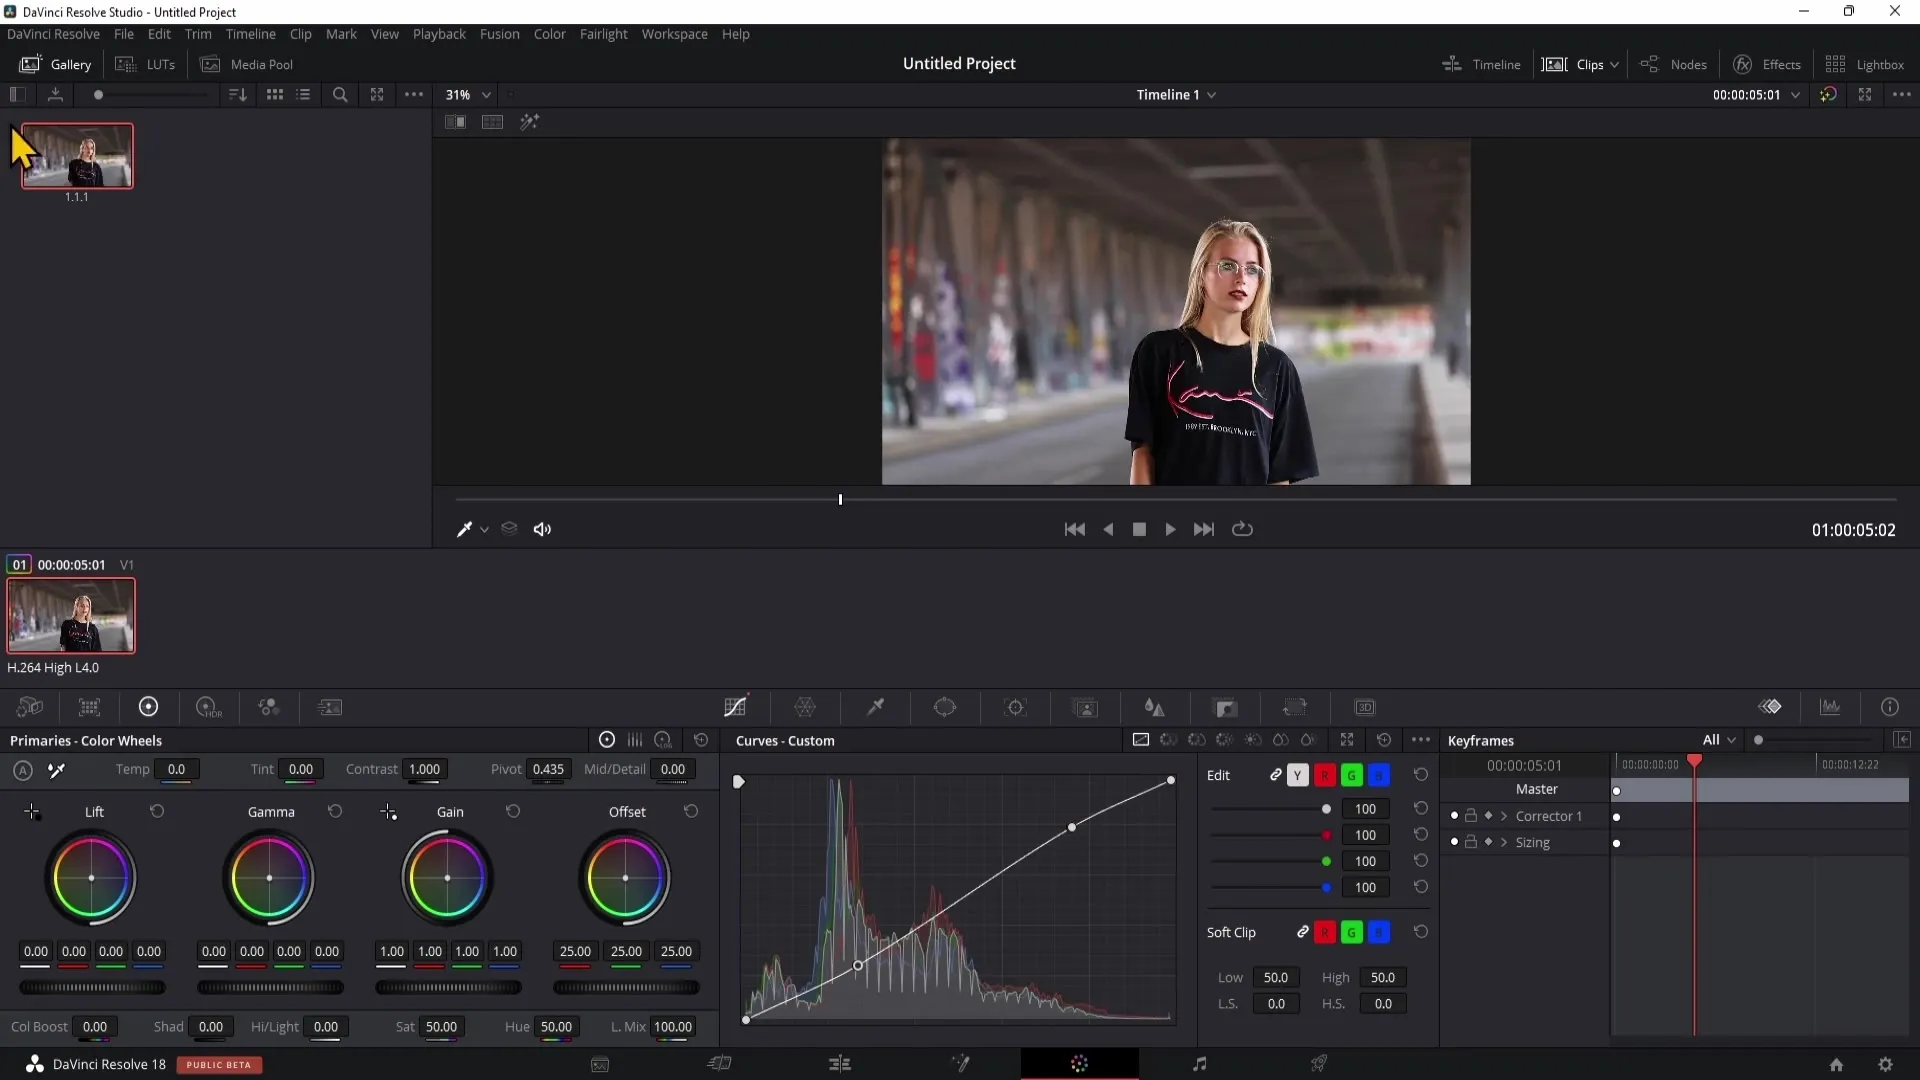
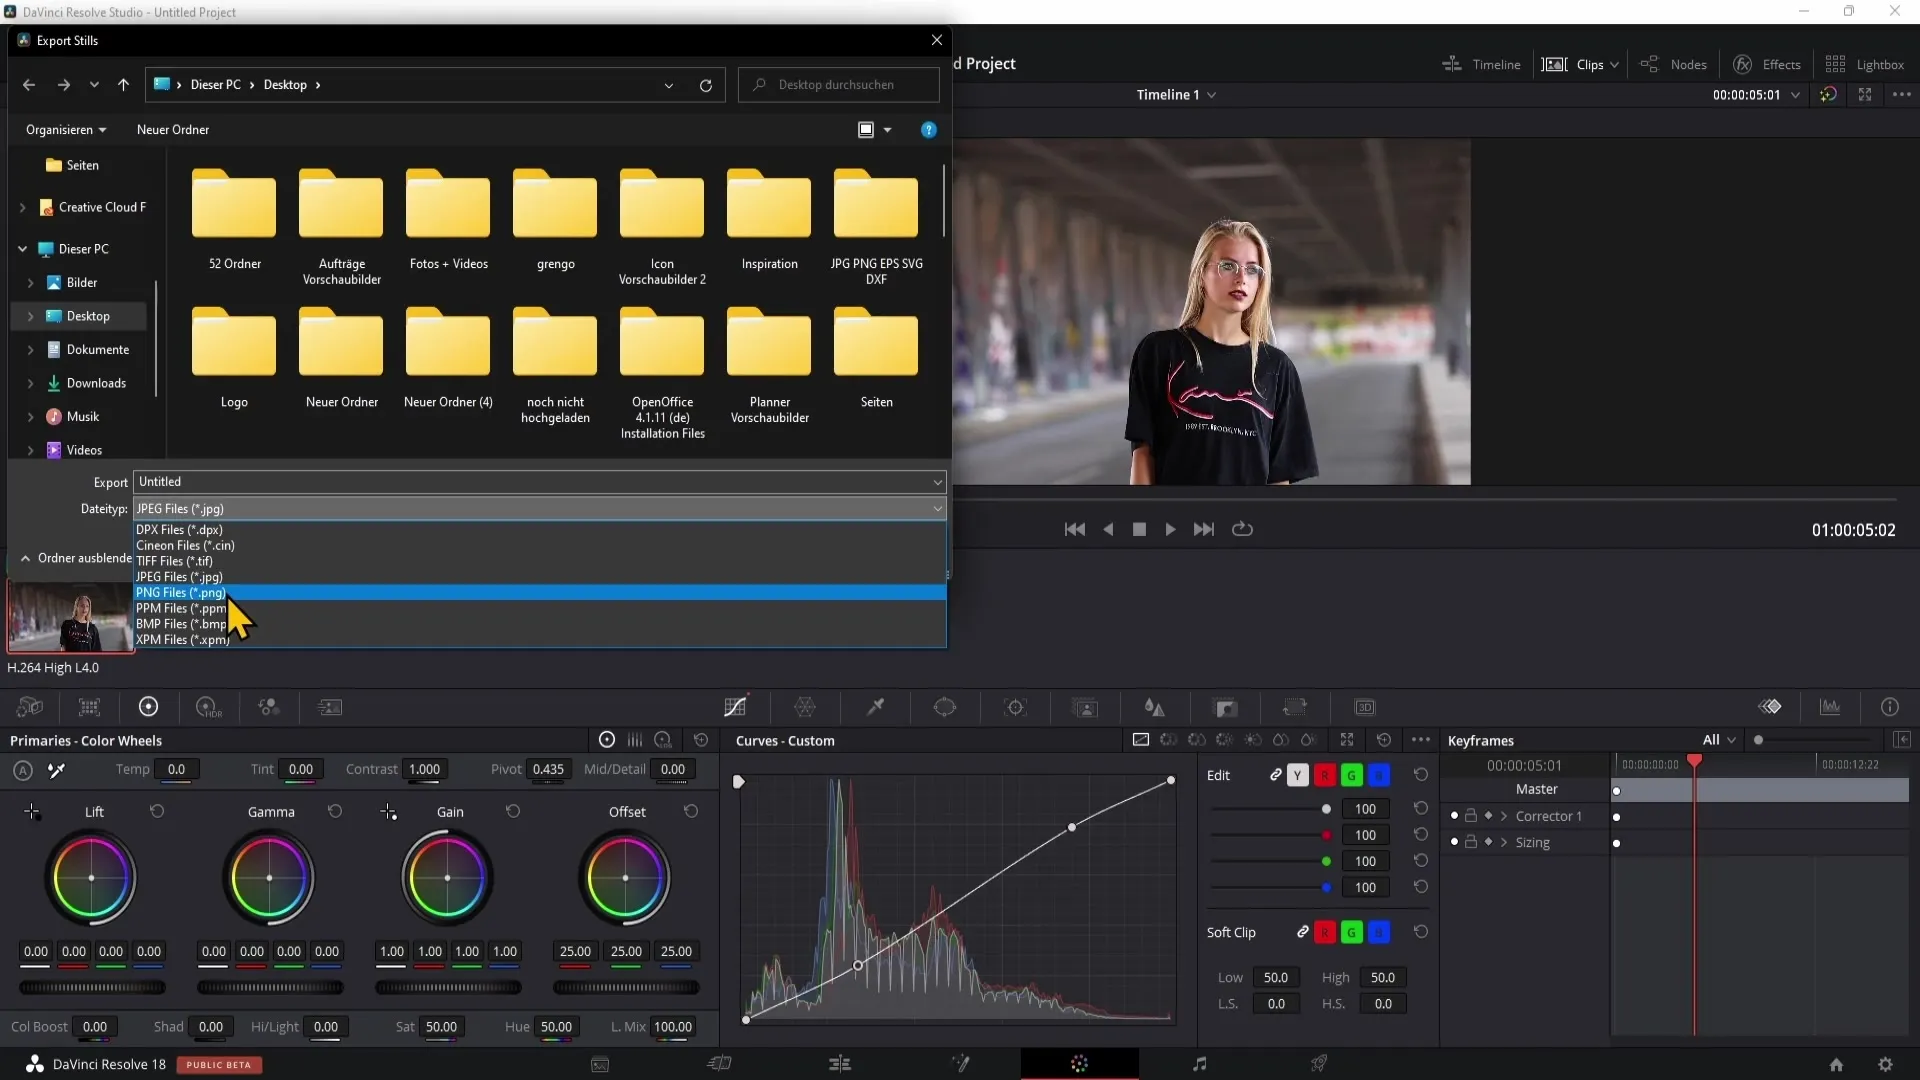
Now a dialog box will appear where you can select a location to save your image. You can also set a name for the file.
An important decision is the file type of the image. The most common choice is JPG. However, if you need a transparent background, you should choose PNG.
After entering all the necessary information, click on "Export", and your image will be saved at the chosen location. If you have followed all the steps, you should have successfully exported an image from DaVinci Resolve!
Summary
In this tutorial, you learned how to export an image from DaVinci Resolve. It is a simple process that allows you to use frames from your videos and save them in various formats.
Frequently Asked Questions
How do I export an image from DaVinci Resolve?You export an image by going to the Color Grading section, selecting the desired frame, right-clicking, and choosing "Grab Still".
What file types can I choose when exporting?In most cases, you can choose JPG or PNG. JPG is suitable for images without transparency, while PNG can be used for images with a transparent background.
What should I do if the gallery is not visible?Check if the full-screen mode is active. If it is, deactivate it to see the gallery on the left side.


