If you are facing the issue in DaVinci Resolve where the "Add to Render Queue" button is grayed out, it can be frustrating. In this guide, I will show you step by step how to solve this problem. This way, you can render your projects quickly and easily.
Key Takeaways
- You need to ensure that all clips in your timeline are selected and create a new timeline to enable proper output.
- The steps are easy to follow and only require a few minutes of your time.
Step-by-Step Guide
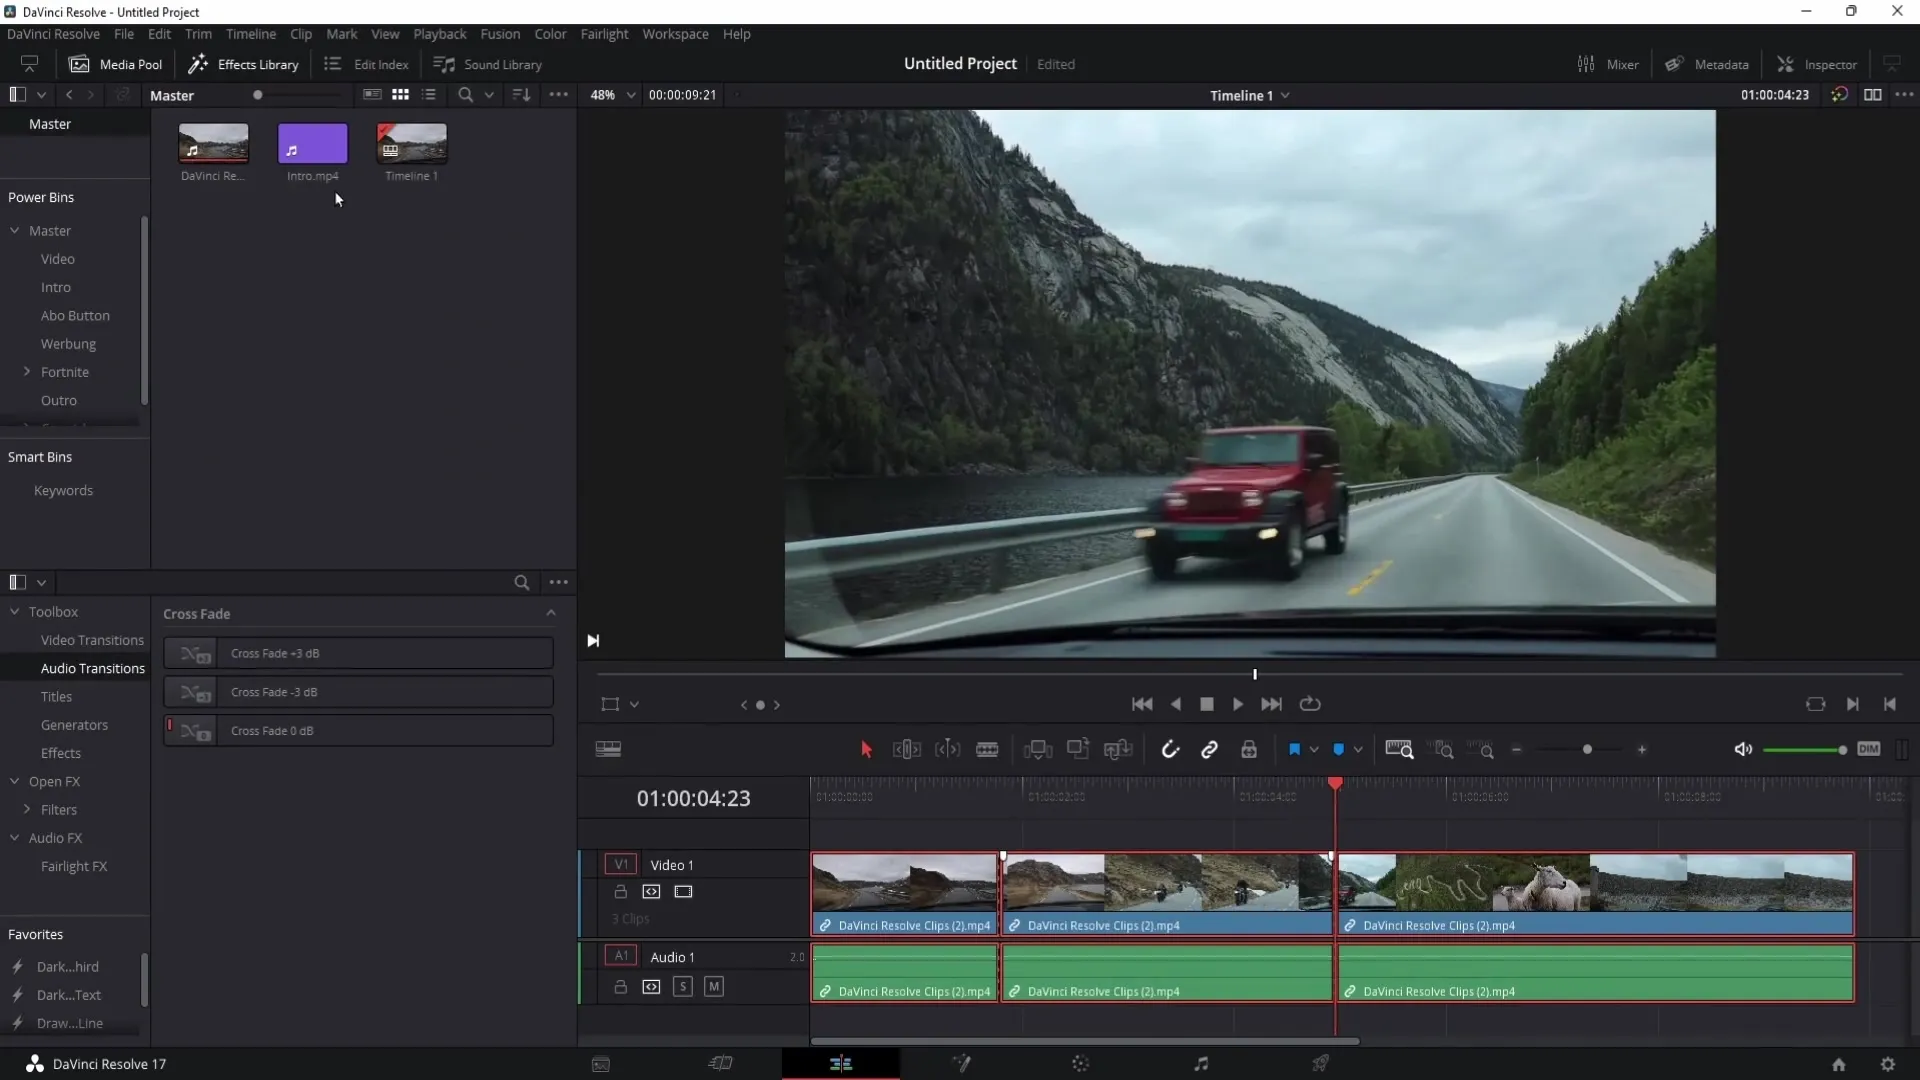
You start in the Edit section of DaVinci Resolve. If you are having trouble rendering, it may be because you have not selected all clips correctly.
Press the Ctrl + A keys on your keyboard to select all clips in your timeline. This ensures that you have considered everything and nothing is overlooked.

Once all clips are selected, you need to go to the Media Pool menu. This is the next important action you need to take.
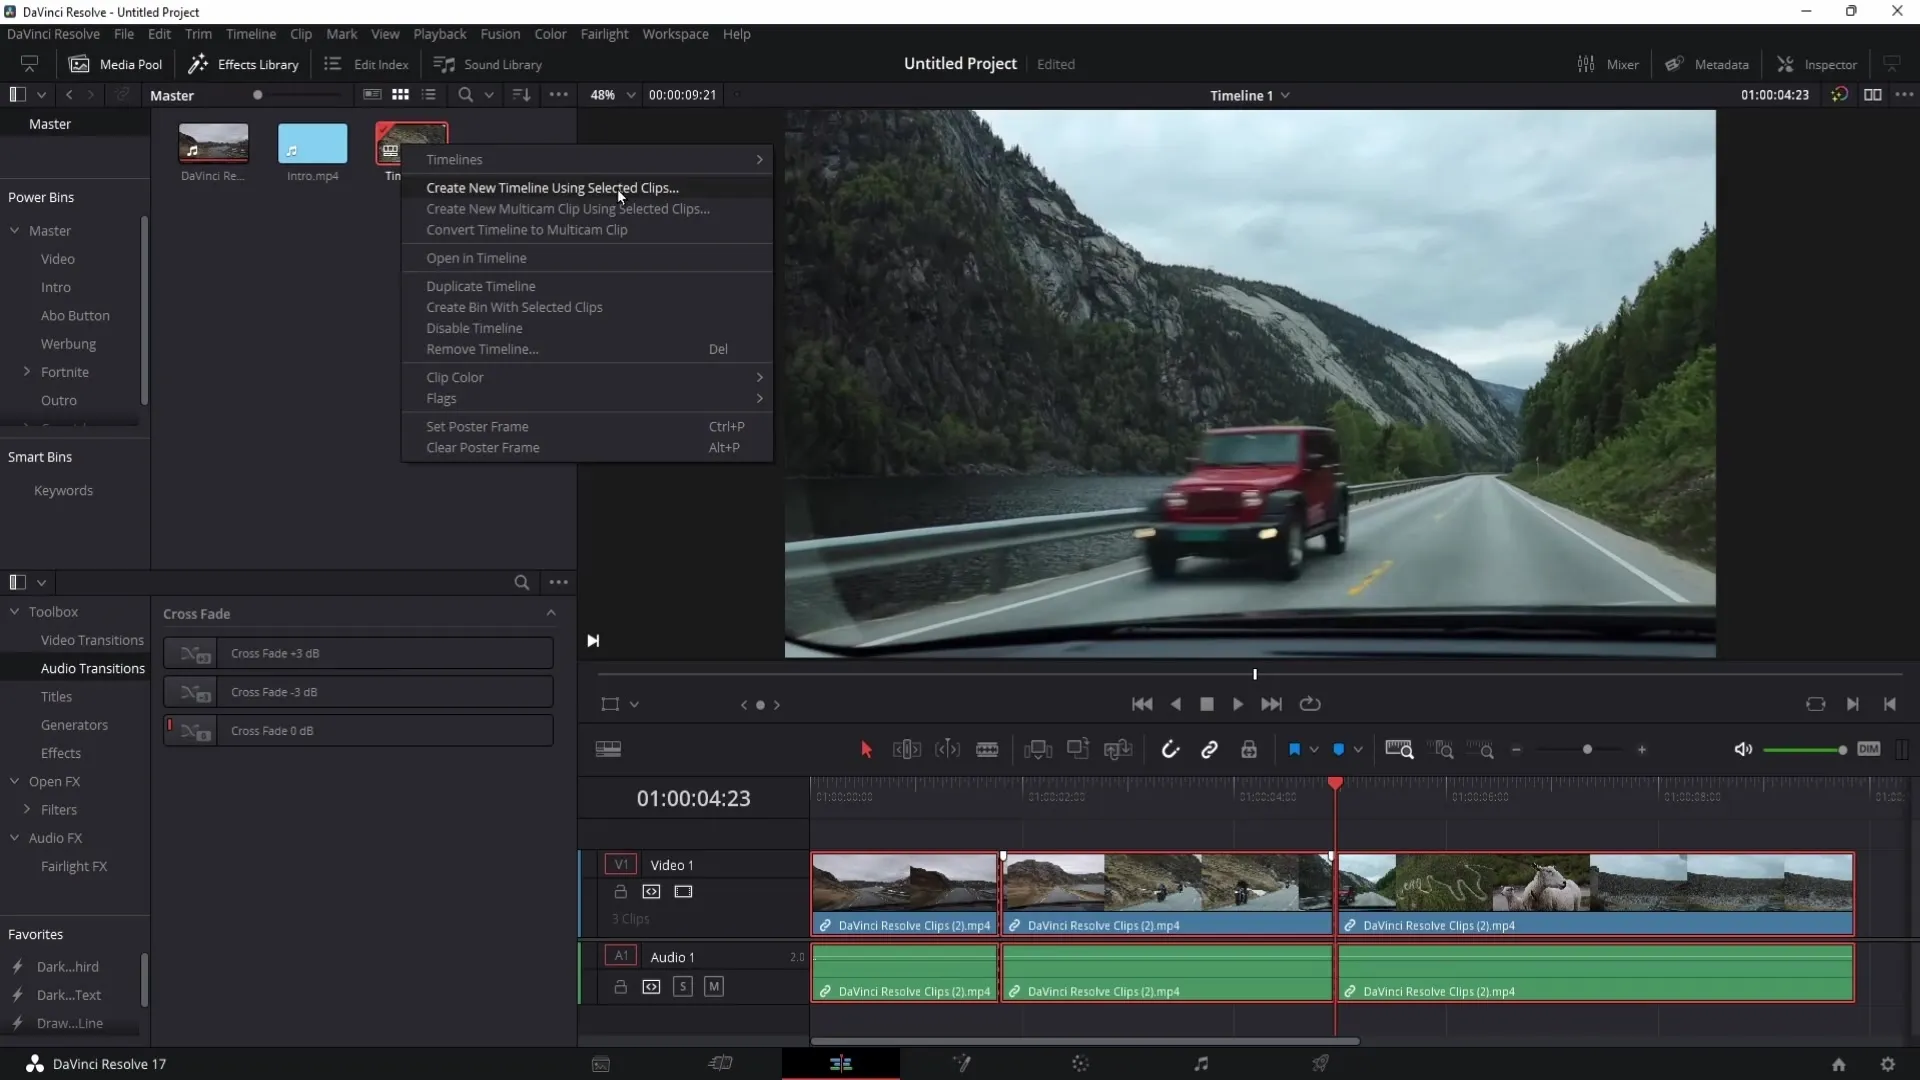
Now, right-click on the selected clips in your timeline and choose the option "Create New Timeline Using Selected Clips." This is a crucial step to create a new timeline that includes all your important clips.

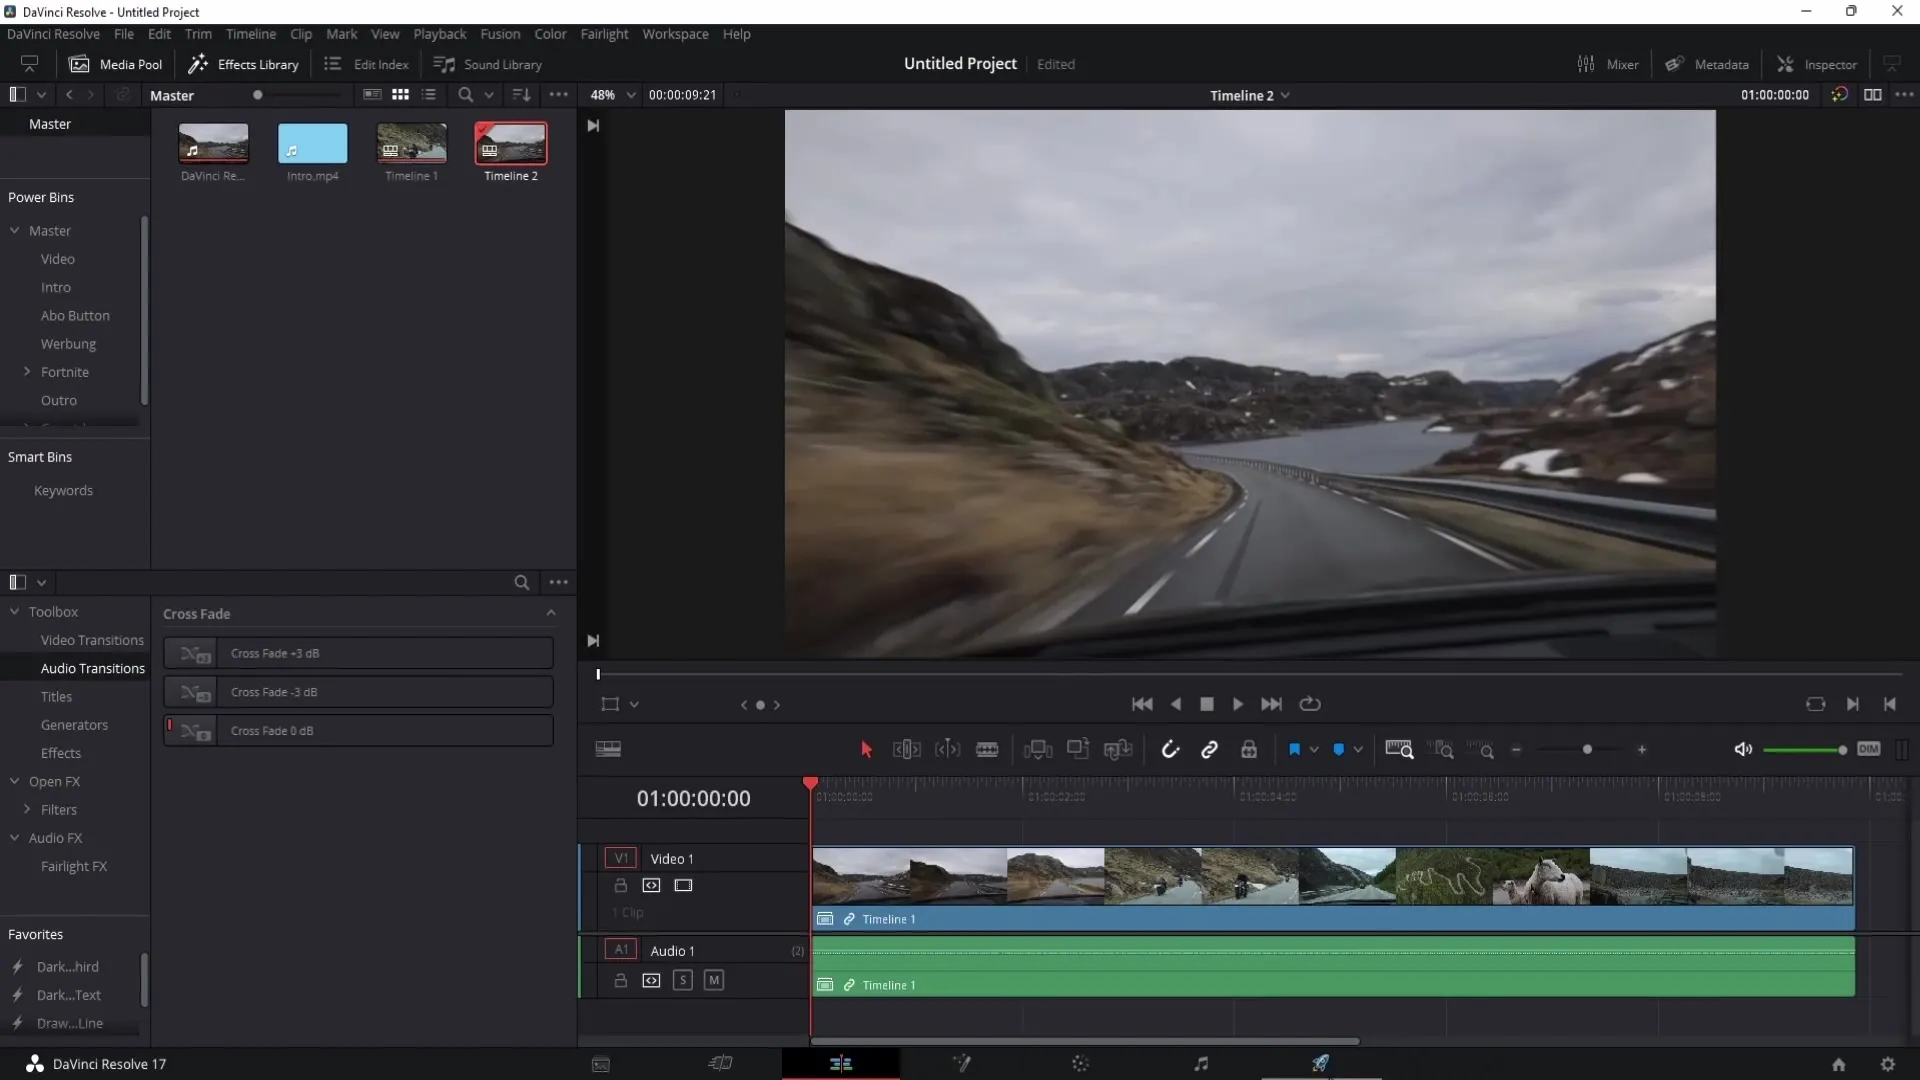
You can usually leave the default settings for the new timeline as they are. Just click "Create," and your new timeline should now be created.

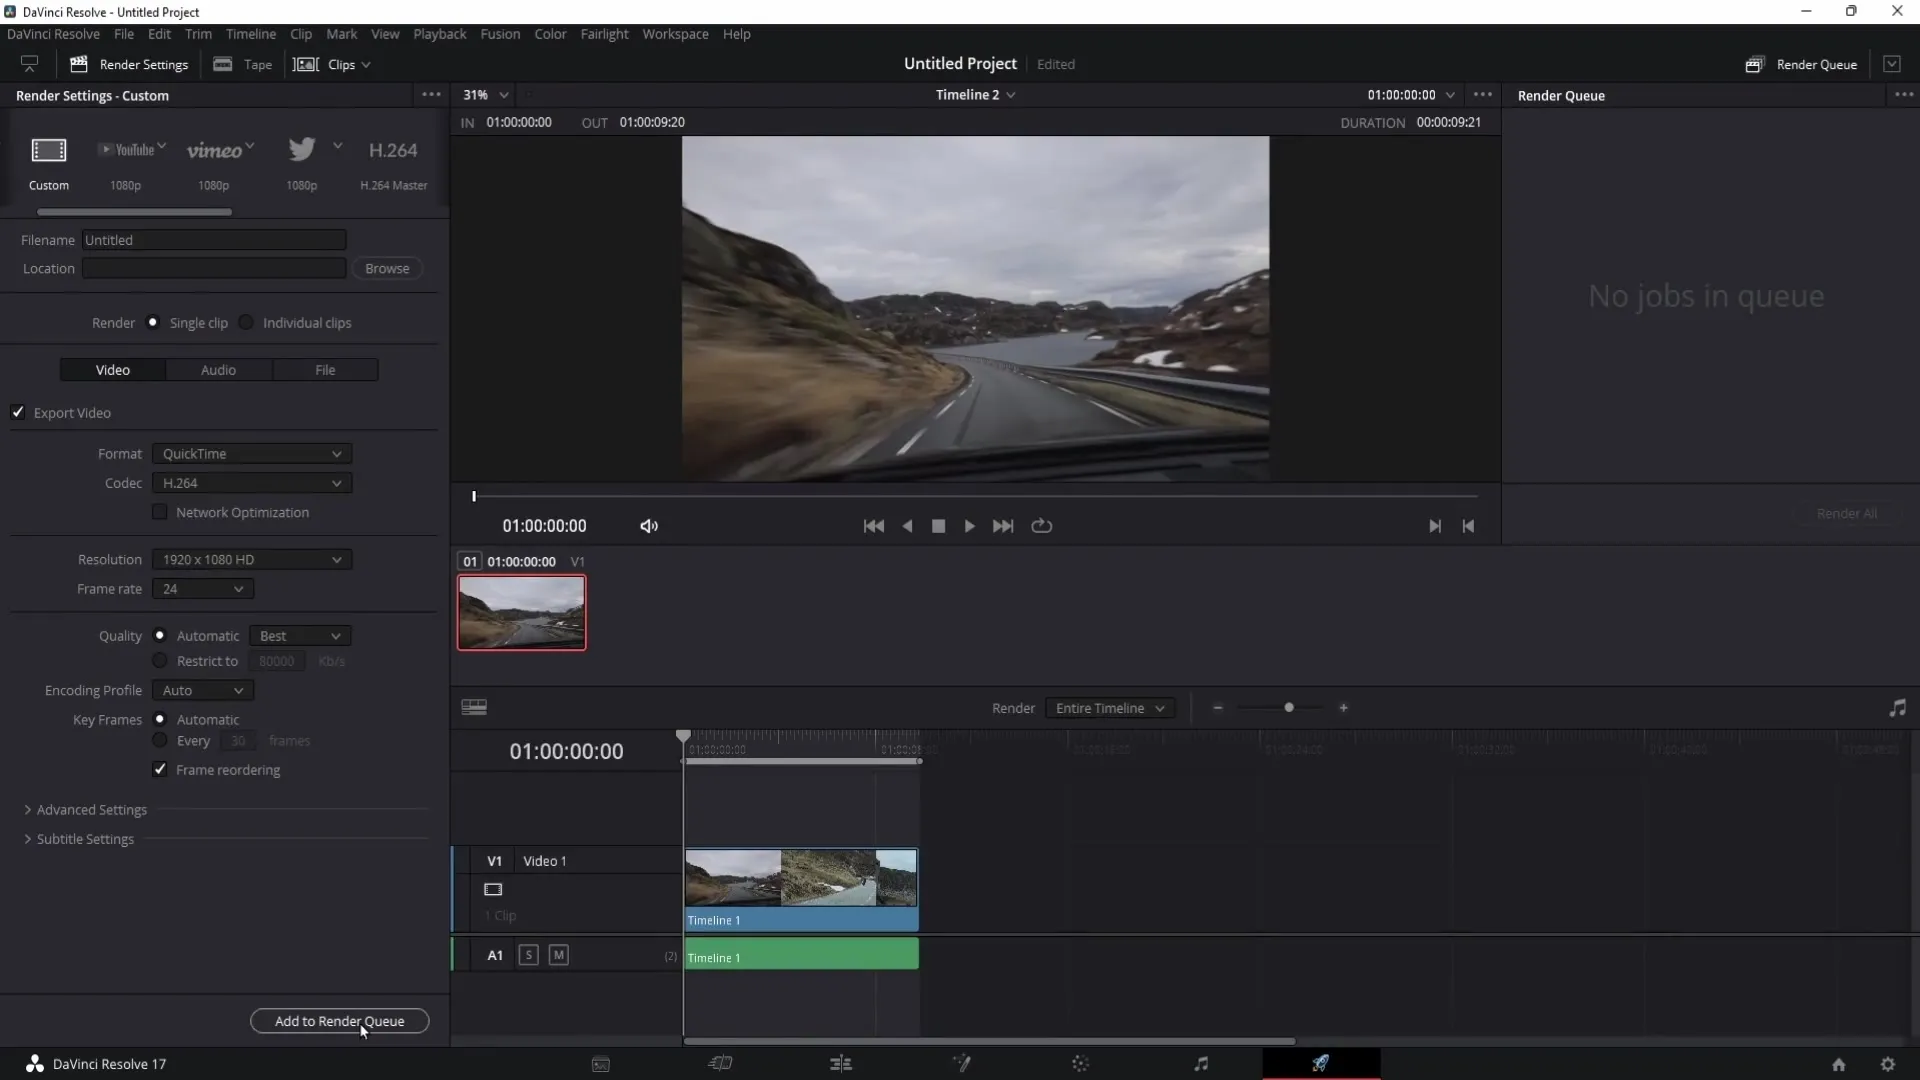
Now it's time to access the Deliver section of DaVinci Resolve. Once there, you can observe that the "Add to Render Queue" button is active again.

Click on the "Add to Render Queue" button now to add your videos to the Render Queue. You can then easily click on "Render All" to start rendering your videos.
After following these simple steps, you should be able to render your videos without any issues.
Summary
In this guide, you have learned how to solve the issue with the grayed out "Add to Render Queue" button in DaVinci Resolve. The steps are clear and memorable, so you can be confident that after following this guide, you will be able to successfully render your project.
Frequently Asked Questions
What should I do if the "Add to Render Queue" button is still grayed out?Check whether you have truly selected all clips in your timeline and whether a new timeline was created correctly.
Can I change the settings for the new timeline?Yes, you can change the settings, but in most cases, the default values are sufficient.
Do I always need to create a new timeline?Yes, if you want all selected clips to be included in the rendering process, creating a new timeline is important.
Are there other reasons why the button may be grayed out?Yes, other factors like software malfunctions or incompatible formats could also prevent rendering.


