The selective color correction is a powerful tool that allows you to edit specific color ranges in your images individually. With this function, you can not only adjust colors but also significantly influence the mood and overall impression of your image. In this guide, you will learn how to effectively use the adjustment layer "Selective Color Correction" in Affinity Photo to achieve the desired results.
Main insights
- The selective color correction allows for targeted adjustment of color areas.
- By adding and subtracting colors, you can significantly change the look of your image.
- The adjustment layer offers various options for editing, including changing brightness and hue.
Step-by-Step Guide
To apply selective color correction in Affinity Photo, follow these steps:
Step 1: Add Adjustment Layer
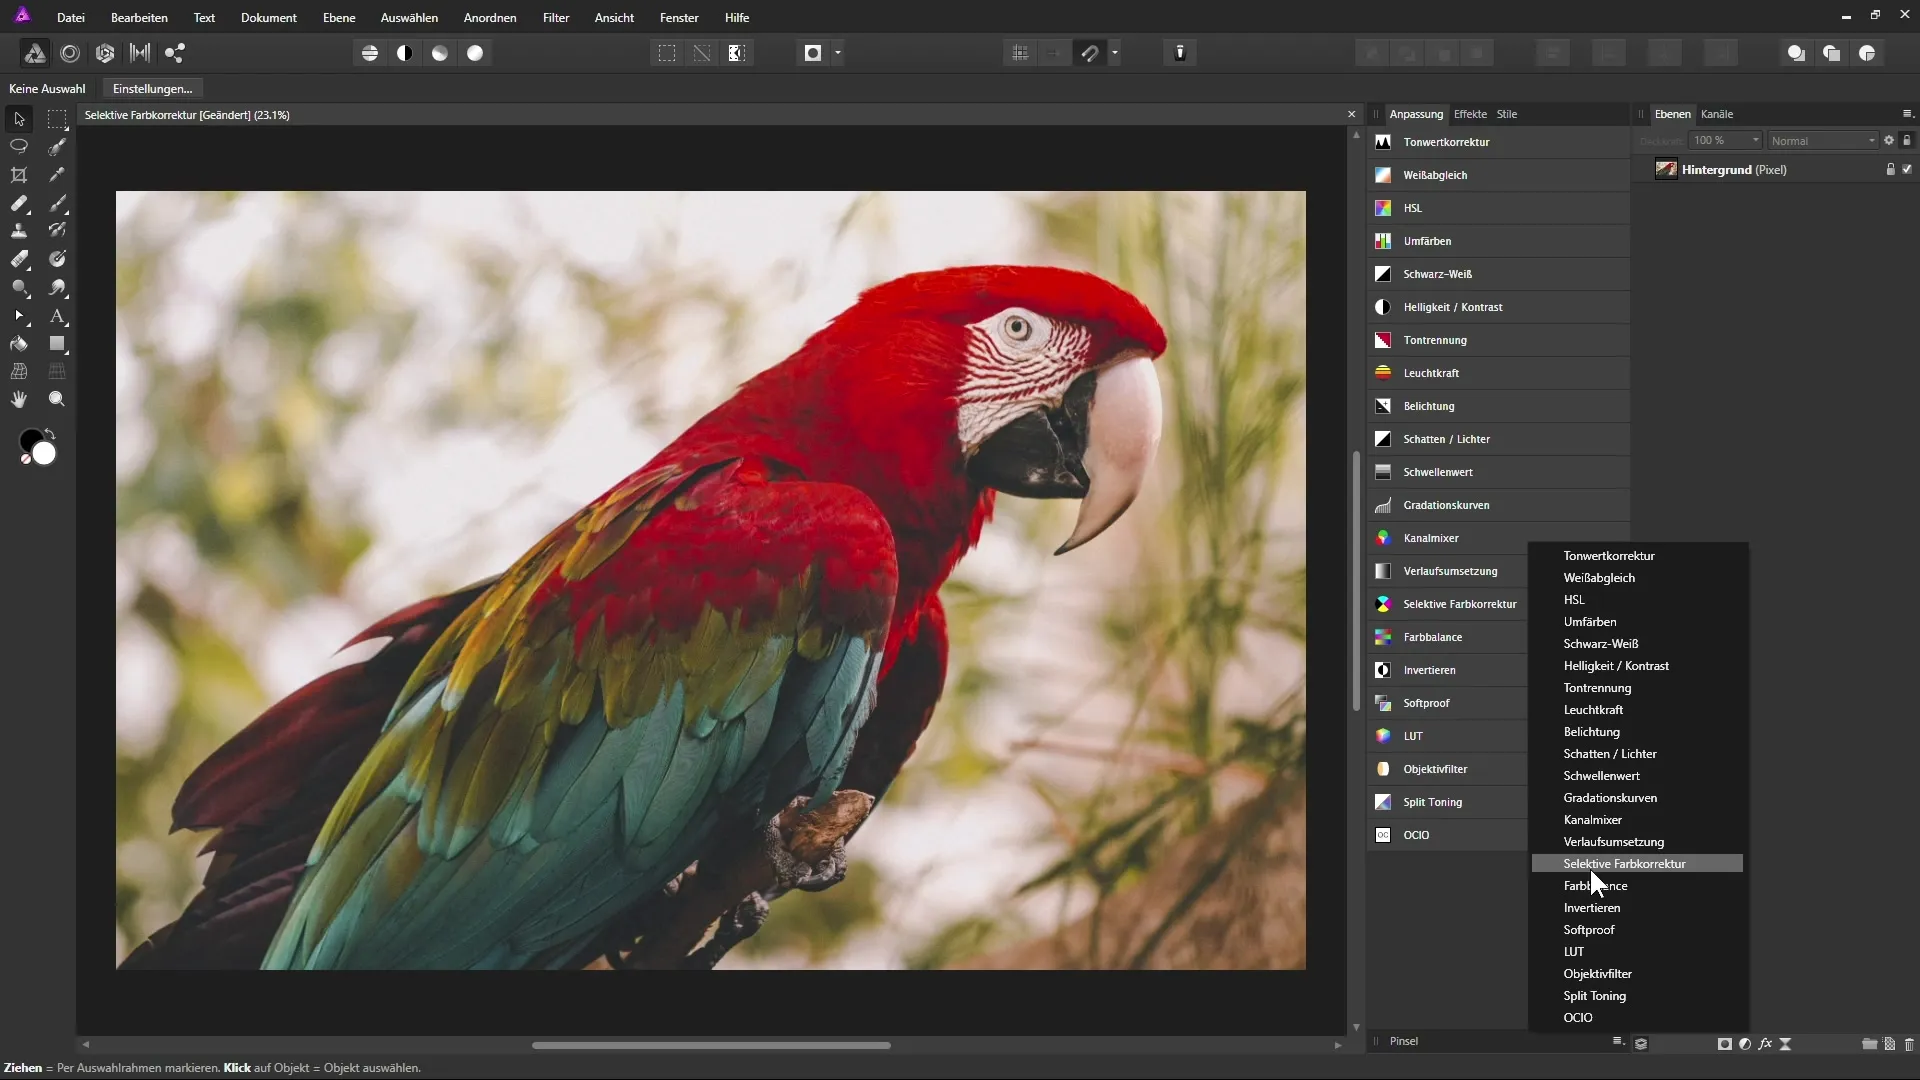
Start by opening the desired image in Affinity Photo. You will see that the image is in the background layer in the layers palette. Click on the adjustment layers icon and select the option "Selective Color Correction." This will open a new dialog box with various sliders and options for color manipulation.

Step 2: Select Color Ranges
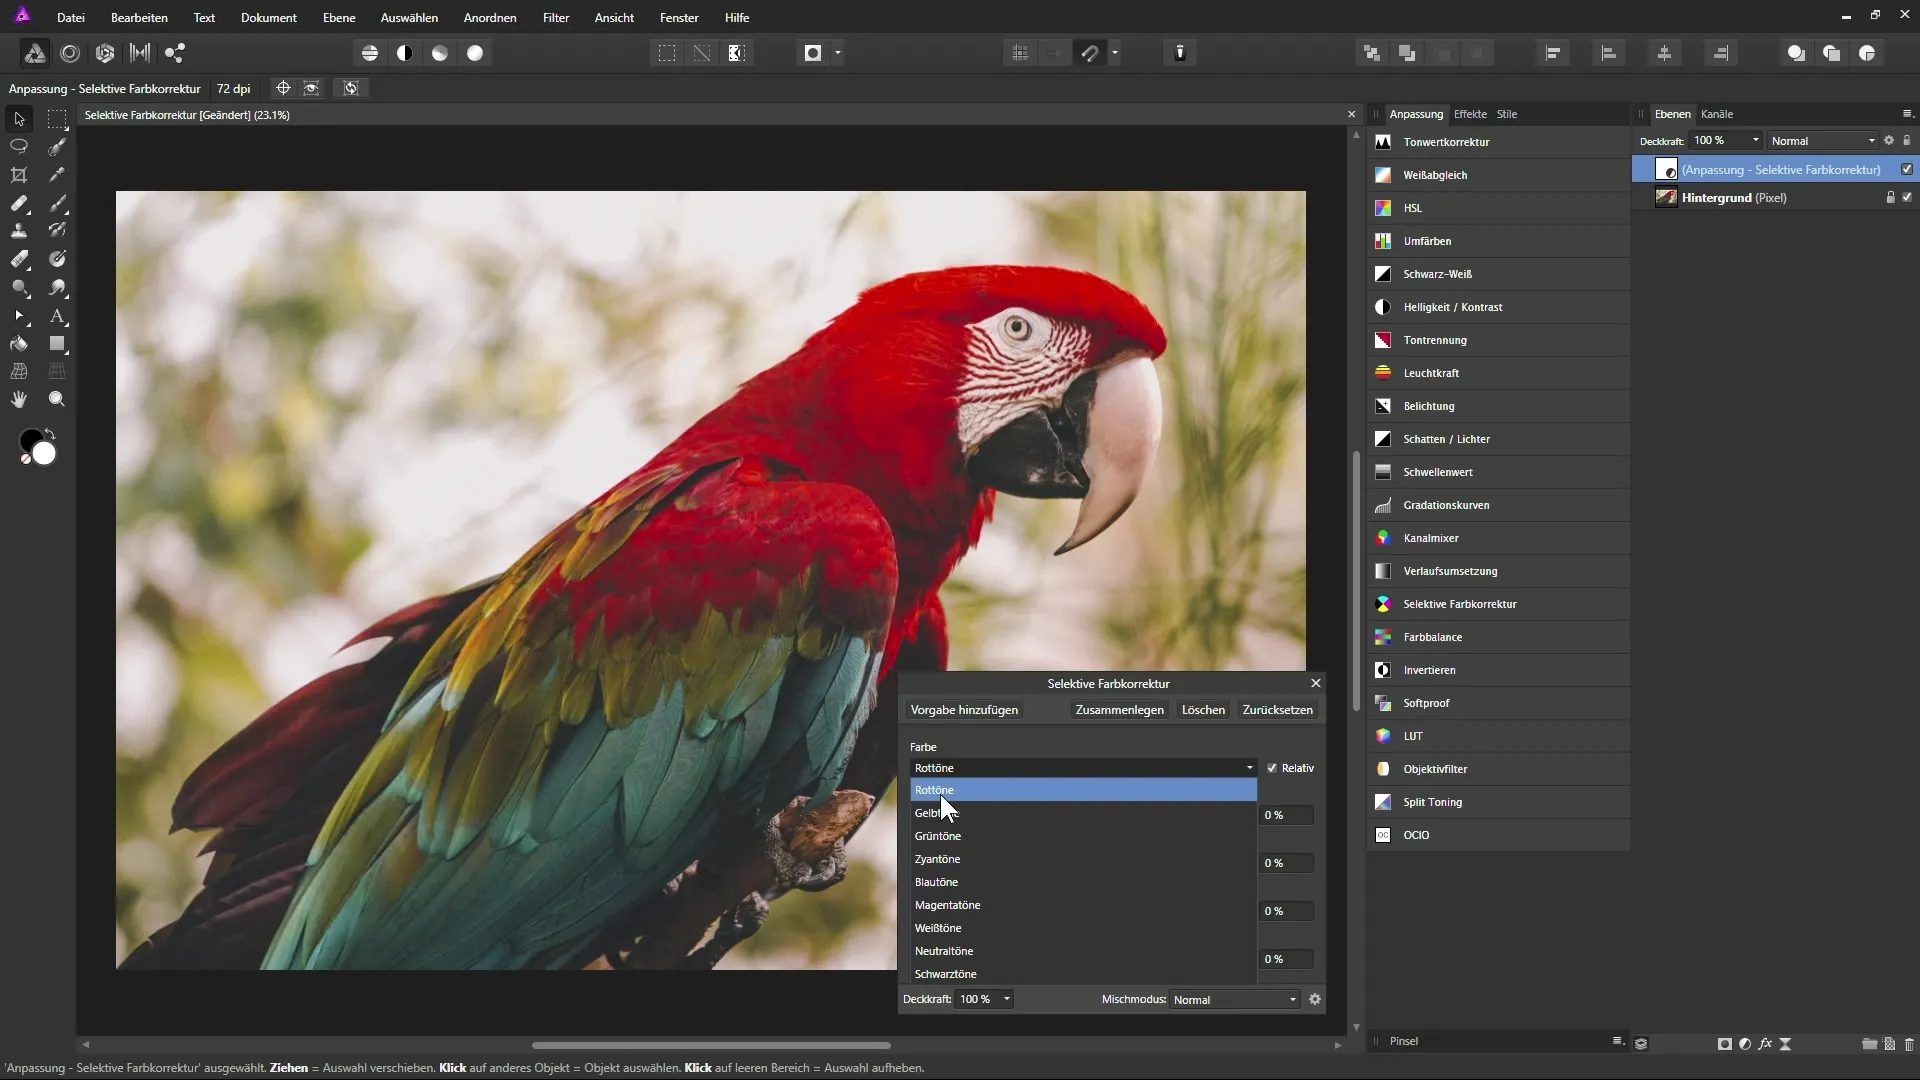
In the dialog box, you can choose the color range that you want to adjust. You have the option to select reds, yellows, greens, cyan, magenta, as well as whites, midtones, and blacks. Click on the dropdown menu and select the desired color range you want to edit.

Step 3: Add or Subtract Colors
Once you have selected the color range, you can now add or subtract colors. For example, if you want to correct the reds, move the corresponding slider to the right to add more red or to the left to subtract reds. Make sure the "relative" option is activated to achieve natural results. If you deactivate the option, the applied hue will strictly follow the specified percentage, which can sometimes lead to unwanted results.
Step 4: Check Results
Look at the changes in your image as you move the sliders. You can see the changes immediately, allowing you to experiment live and see how the hue adjustments affect the image. If you are not satisfied, you can reset the settings at any time.

Step 5: Adjust Different Color Ranges
Apply this process to other color ranges you want to adjust. For example, if you want to make the yellow tones in a parrot's feathers look more bluish, select the cyan tones and increase the cyan value while subtracting the yellow value. This allows for targeted color correction according to your vision for the image.
Step 6: Adjust Bright and Dark Areas
The selective color correction is not limited to the main colors. You can also adjust brightness and hues in the highlights, shadows, and neutral tones. So, if you want the highlights to appear less yellow and clearer, select the whites and pull the yellow slider to the left.
Step 7: Make Overall Image Warmer
To make the entire image warmer, you can add yellow and magenta in the neutral tones. This influences the overall color look of the image. Be sure to make changes gradually to achieve a harmonious result.
Summary - Mastering Selective Color Correction with Affinity Photo
In this guide, you have learned how to make optimal use of the selective color correction function in Affinity Photo. These adjustment layers allow you to manipulate colors specifically and significantly change the overall impression of your image. Try out the individual steps and experiment with different colors to find the best look for your images.
Frequently Asked Questions
What is selective color correction?Selective color correction is a tool in Affinity Photo that allows you to specifically edit certain color ranges in an image.
How do I add an adjustment layer?Click on the adjustment layers icon in the layers palette and select "Selective Color Correction."
What does the "relative" option mean?When the "relative" option is activated, the color adjustments are based on the already existing color amount in the image, leading to more natural results.
Can I undo the adjustments?Yes, you can reset the sliders at any time or pull them back to the middle position to cancel the changes.
How can I adjust the highlights and shadows?Select the corresponding color ranges (e.g. whites or blacks) and set the sliders according to your wish to adjust brightness and hue.


