Note: This tutorial is a text version of the accompanying video training by Marco Kolditz. The texts may therefore have a colloquial style.
You can imagine that no normal person would go out to sea in such gloomy weather without a lamp, lantern or other source of light. Probably no one in general would go out to sea in such weather, but this little man dares to do so and should therefore be accompanied by a small lantern.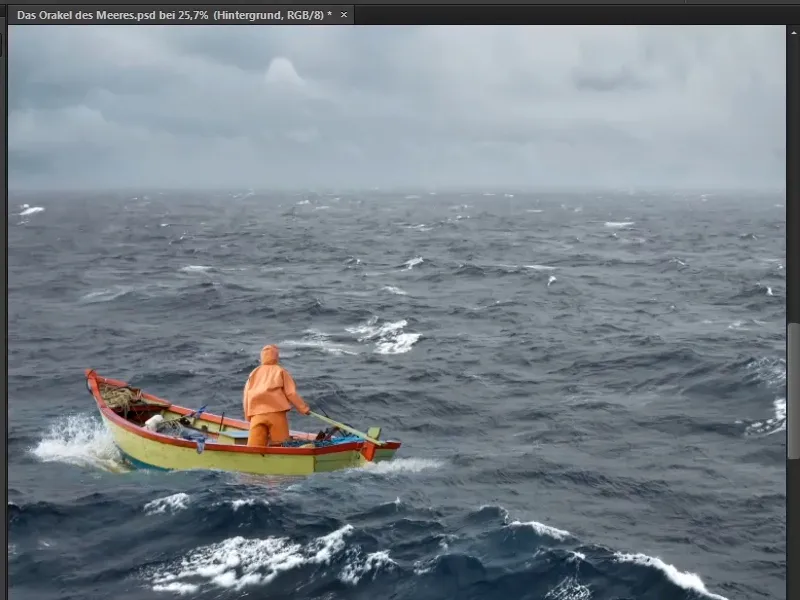
Steps 1-10
Step 1
First, Marco recommends tidying up the layers palette. There are the layers "Boat", "Sky", a layer for the sea and a completely unnecessary background layer.
As you have already learned by now, background layers cannot be moved and in this case are completely pointless, as this white area is no longer visible anywhere in the image.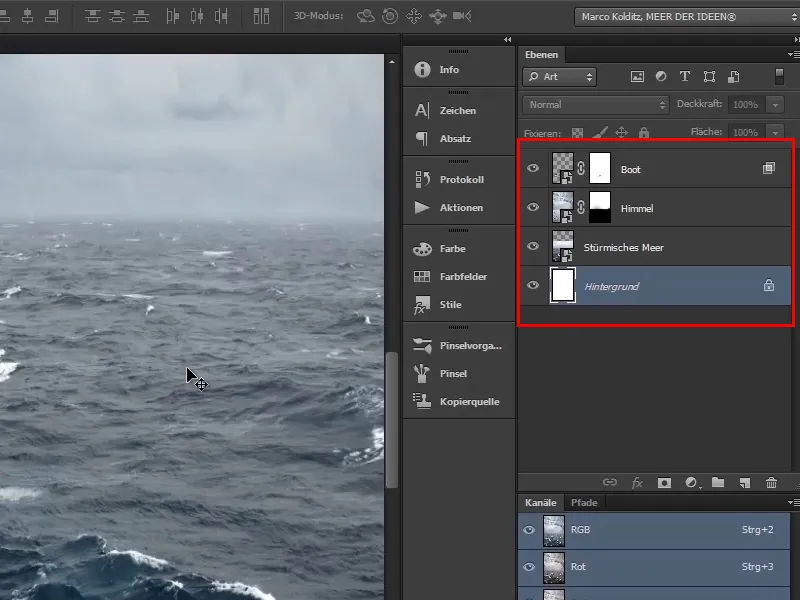
Step 2
First, merge the sky and the stormy sea: To do this, click on the "Sky" layer and then, holding down the Shift key, click on the "Stormy Sea" layer. Use Ctrl+G to create a group.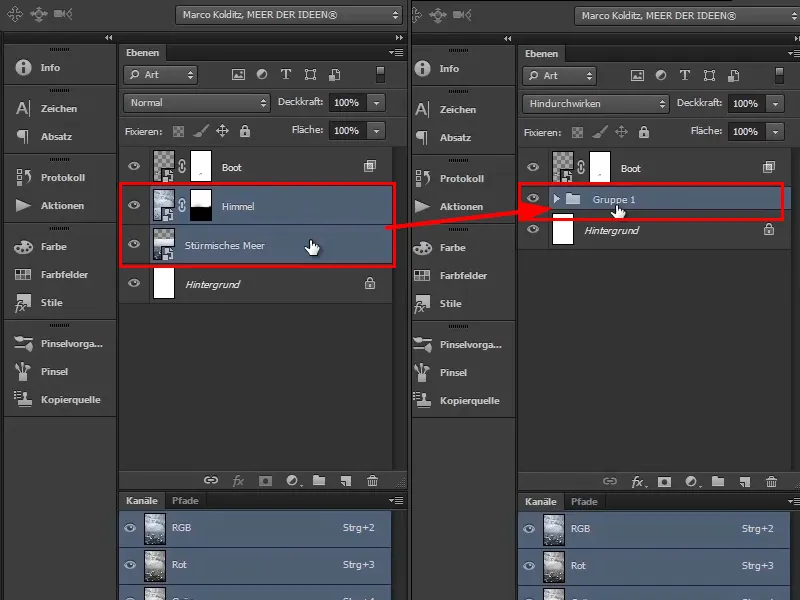
Step 3
An alternative way to create a group of layers would be to select both layers and drag them onto the folder icon. But only by the way. How you do it is not so important.
Double-click on the layer name to rename the group to "Background", because the sea and the sky represent the background.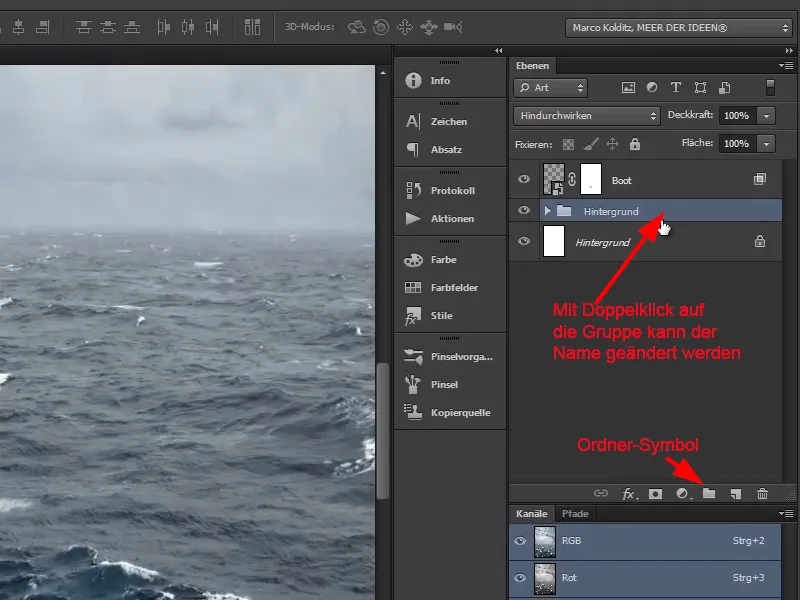
Step 4
As a precaution, put the boat into a group and rename it "Boat". Drag the completely unnecessary background layer into the trash.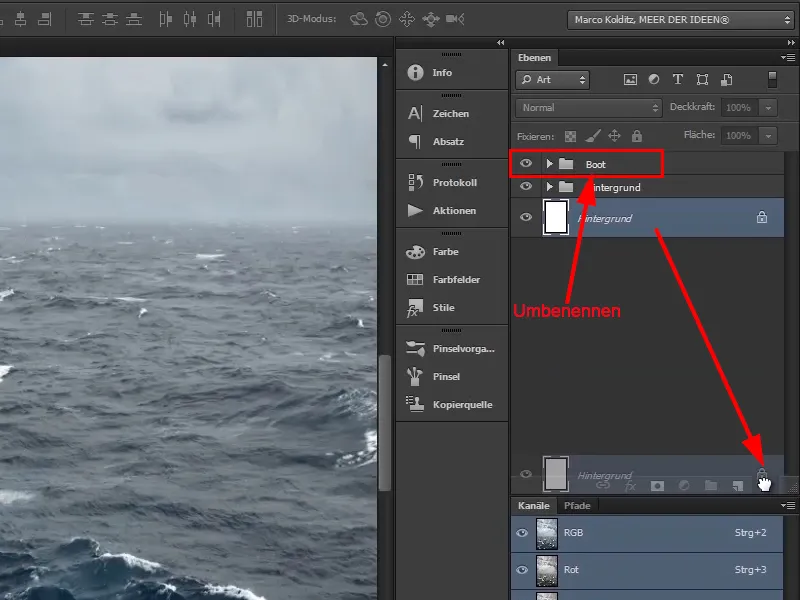
Step 5
Double-click on the hand and the whole image will be shown again.
Next, take care of the lantern ...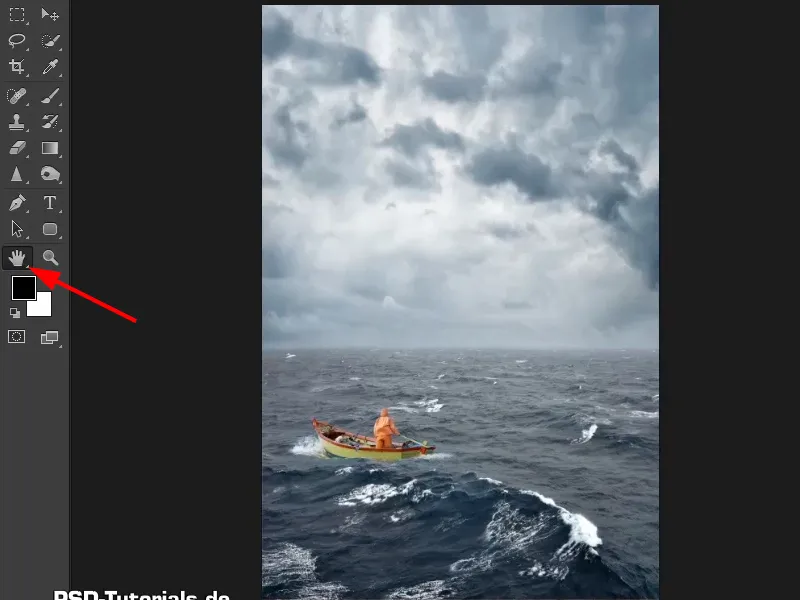
Step 6
Select the lantern via File>Open... and open it.
Step 7
Just like before, you now crop the image and in this case it is relatively easy because the background is white.
Take a look at the Channels palette. As you can see here, you are in RGB mode, and that's a good thing.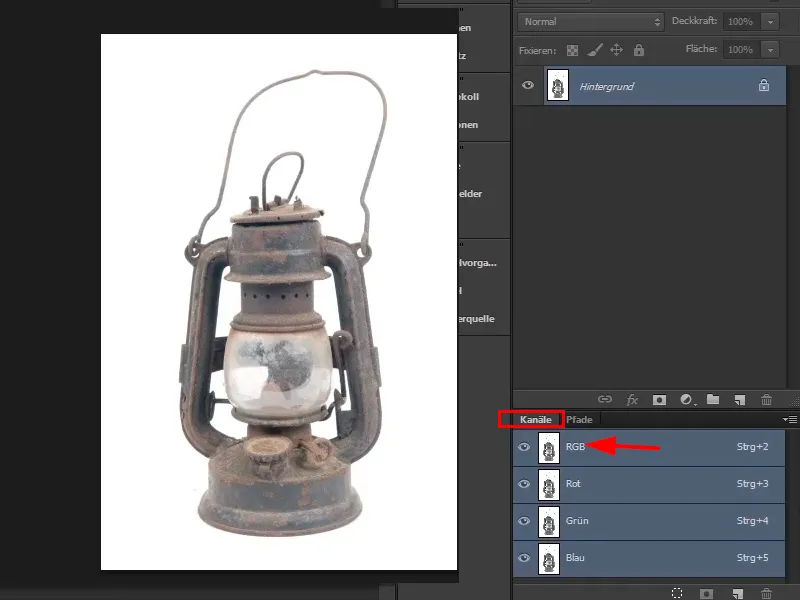
Step 8
Now take each individual channel, click on each one and take a look at it.
The point is to find a channel that has a particularly high contrast. In this case, they are all quite similar, but the blue channelhas the greatest contrast because the others have many bright areas.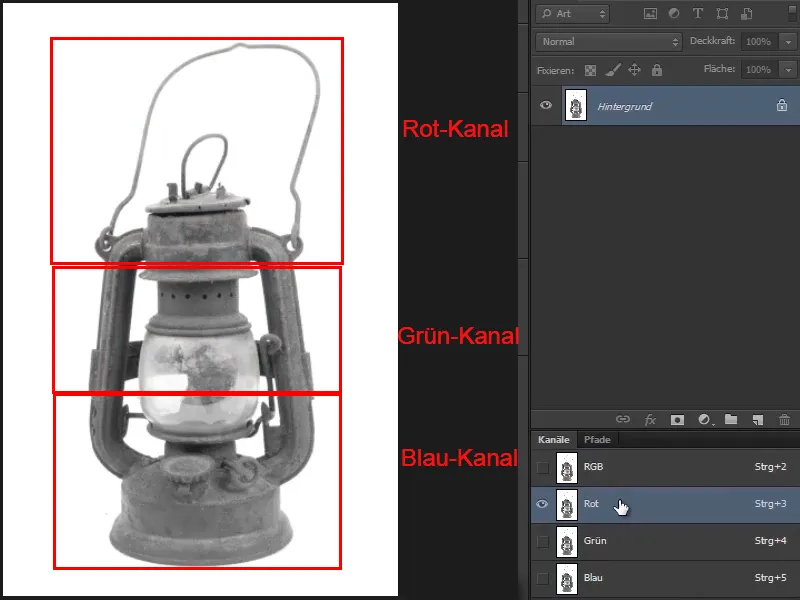
Step 9
Now select the bluechannel.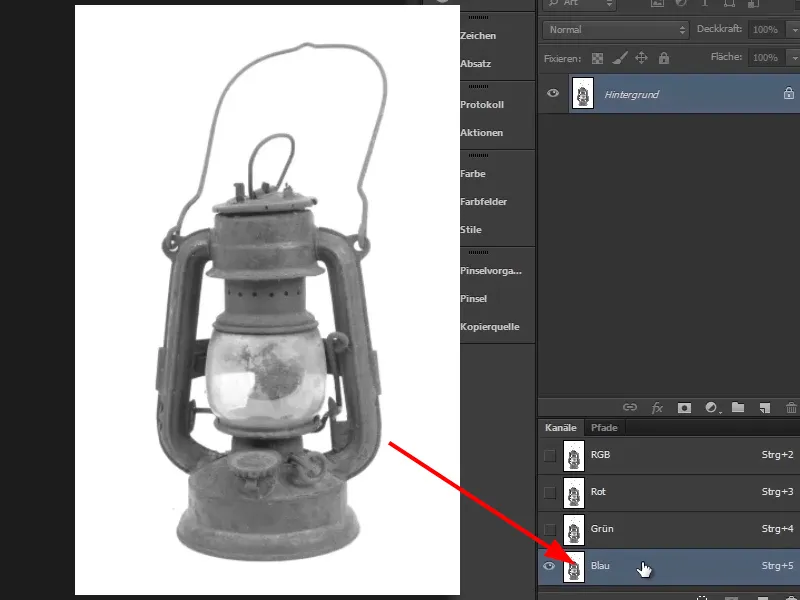
Step 10
Now combine this channel with itself. This means that you now select the channel calculations... from the Image menu item.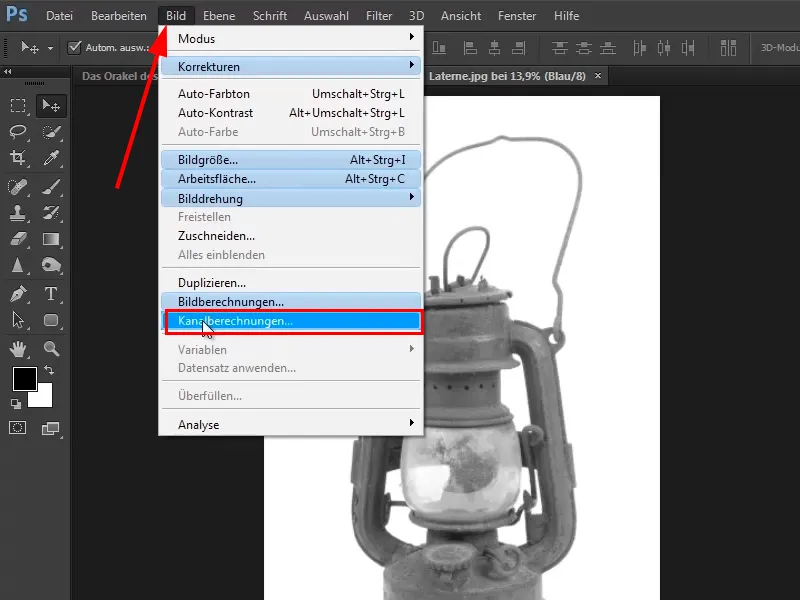
Continue with steps 11-20
Step 11
The Channel Calculations dialog box opens with the following information: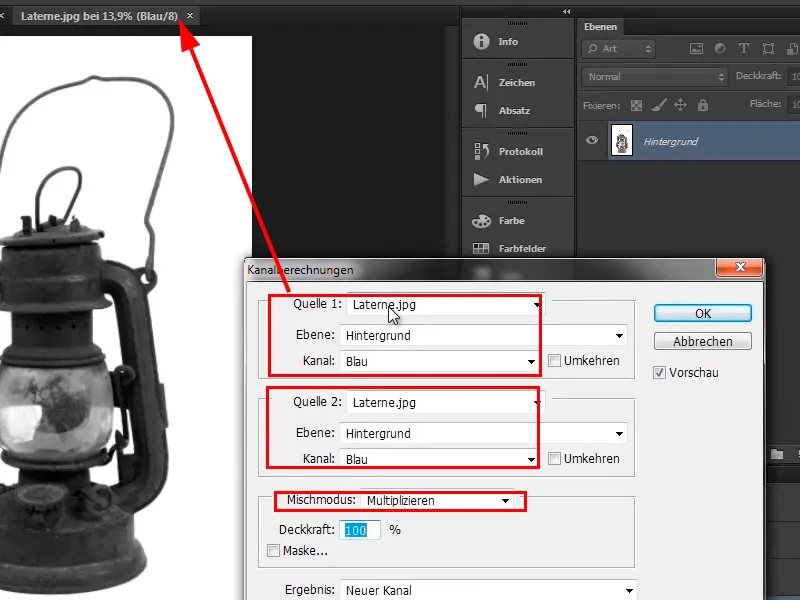
There are various mixing modes, of which Multiply is currently selected.
Step 12
Take a look at the others. You can select the upper mode and then move down with the arrow key. This way you can try out which one provides a higher-contrast image.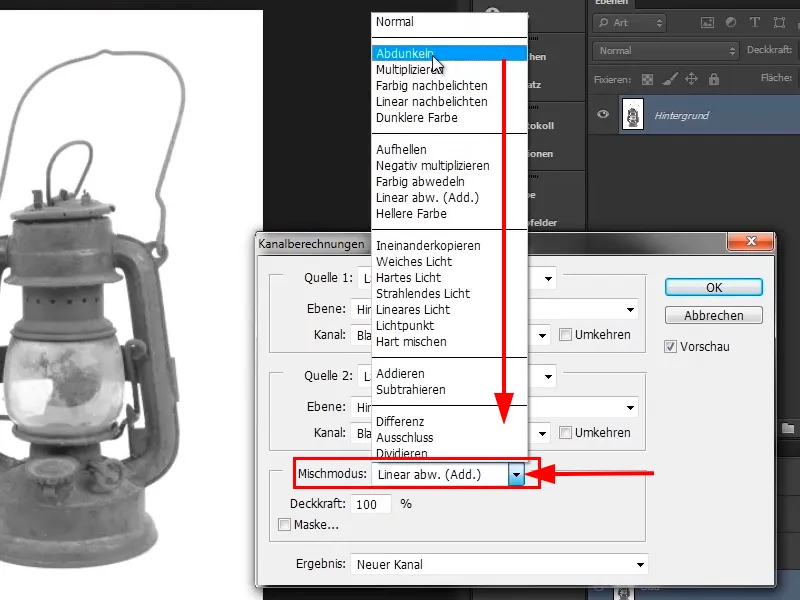
Step 13
In this case, linear post-exposure looks quite good. You can leave it as it is and confirm with OK.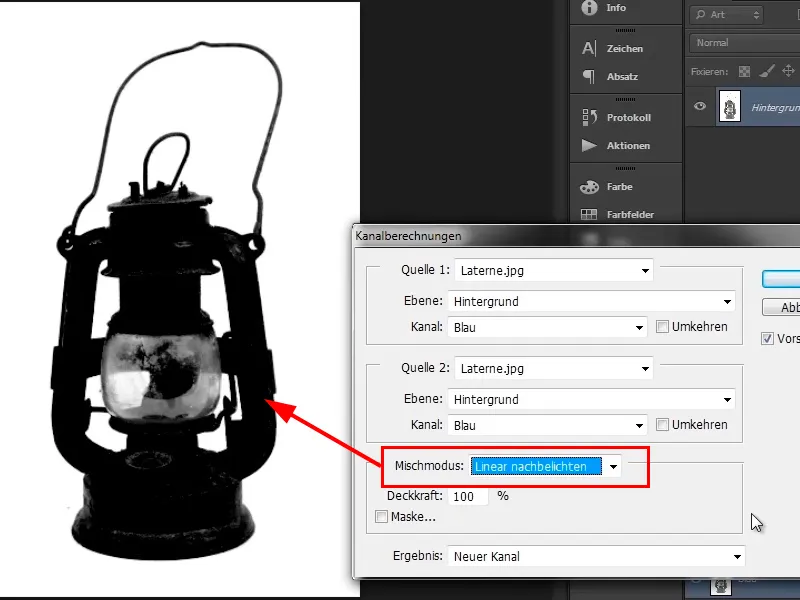
Step 14
Now zoom into the image. Everything that is black will be visible in the image. The light spots on the lamp should still be removed.
You are now in the alpha channel, which was created because you created a channel calculation. This means that you have activated the background and are not in the RGB, red, green or blue channel, but in the alpha channel. This is very important!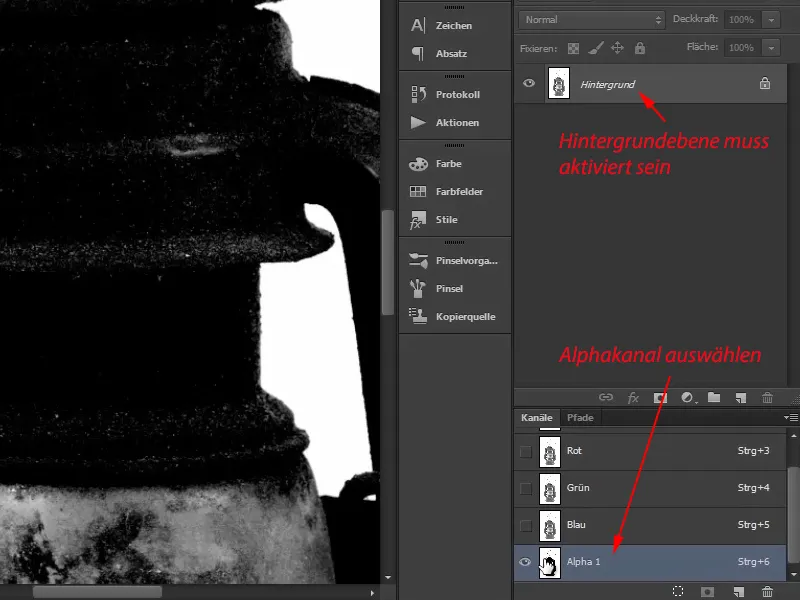
Step 15
Now select the post-exposure tool from the tool palette; you will find it next to the dodge and sponge tools.
Simply click on the icon and hold down the left mouse button for a little longer, then all the tools hidden underneath will appear.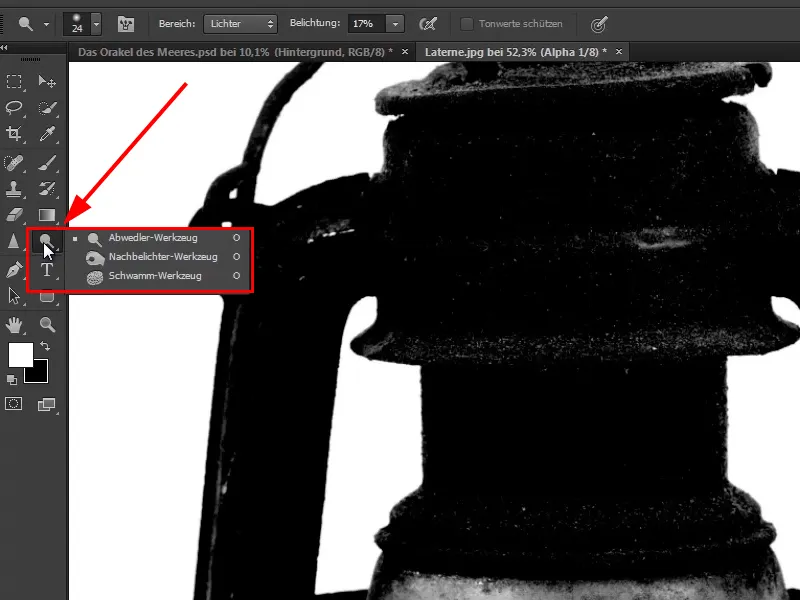
Step 16
The darkening tool darkens. It darkens the shadows and midtones as well as the highlights.
Shadows means that everything that is already relatively dark becomes even darker, i.e. almost black. Midtones are all shades of gray that lie in the middle range. They also become darker, as do the highlights in the image.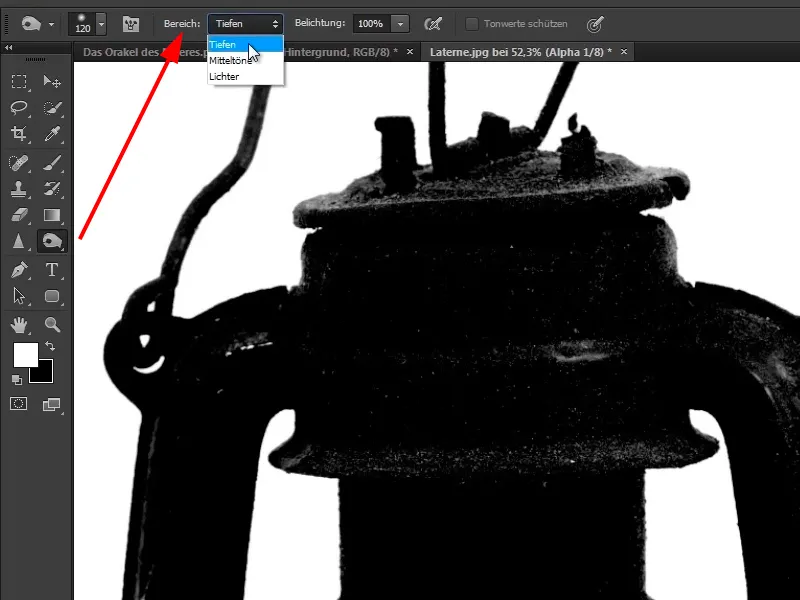
Step 17
First select the depths. If you now paint beyond the edge, nothing will happen because you have selected the shadows. The white is not affected.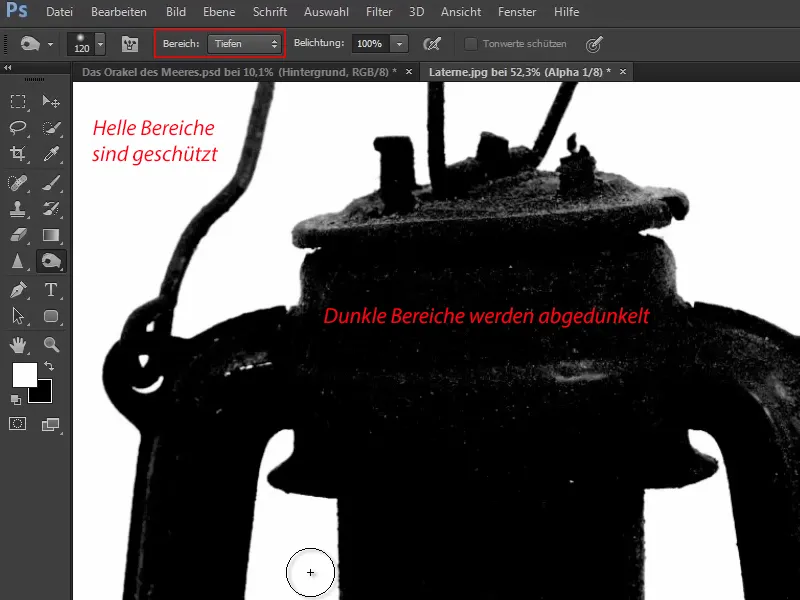
Step 18
Now go over the black areas. Some white areas will remain, but that's not a problem. You can paint over them later with the brush.
So go over the whole picture relatively roughly. You can also paint over some parts several times to cover the light spots in the black areas.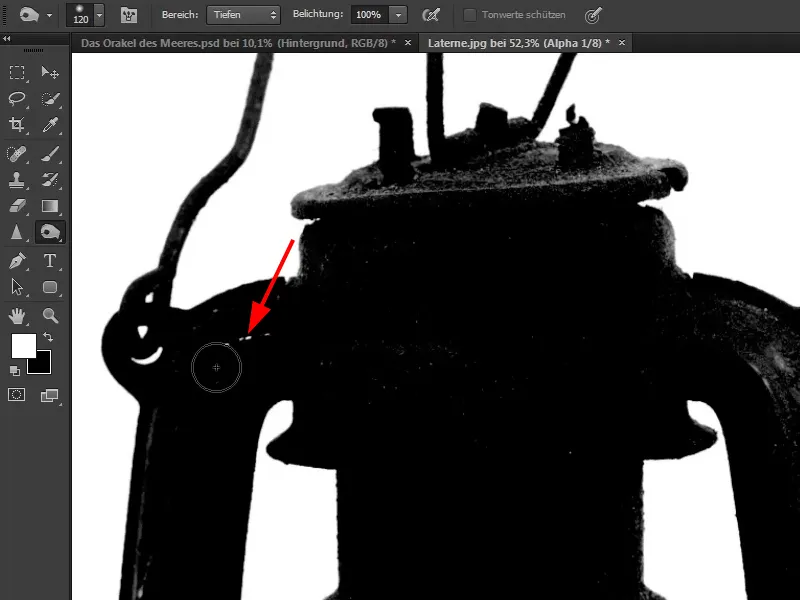
Step 19
When you paint over the handle, it will be slightly wider because the background light shines through a little in the photograph and a kind of color fringe has formed. And as you now make everything darker, this color fringe also becomes black. This is why everything looks a little wider than desired after cropping.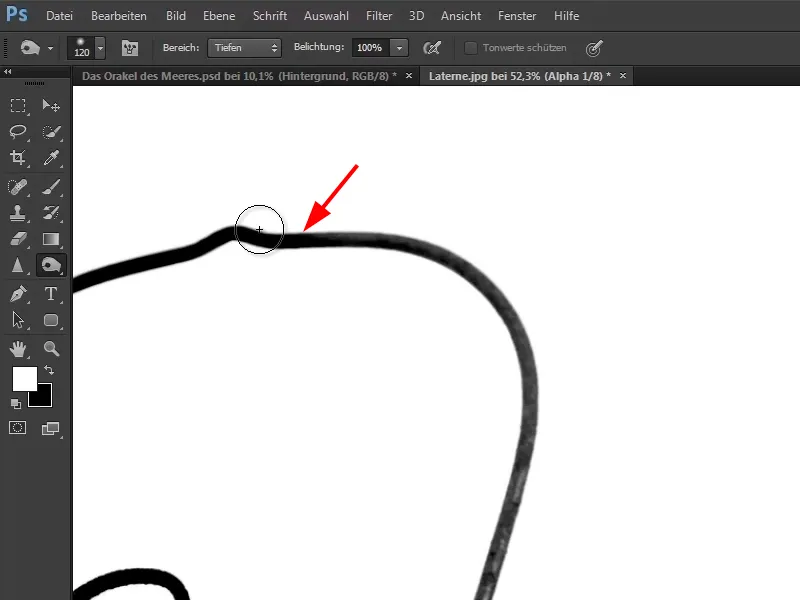
Step 20
As you can see in the screenshot, you must not darken the light part. This is glass and the light should shine through.
You can darken the other area, the inside of the lamp. You can also paint over the dark areas more often.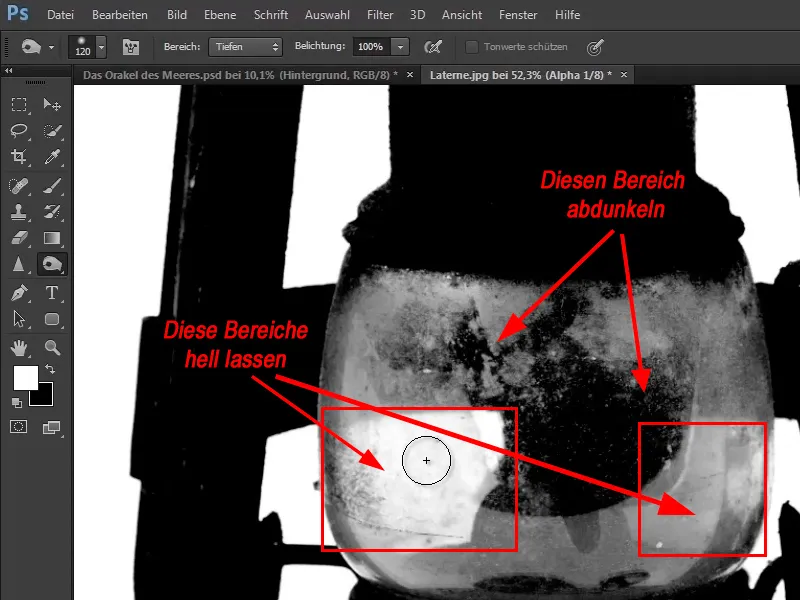
Keep at it: Steps 21-29
Step 21
The result should look something like this - take your time and work carefully.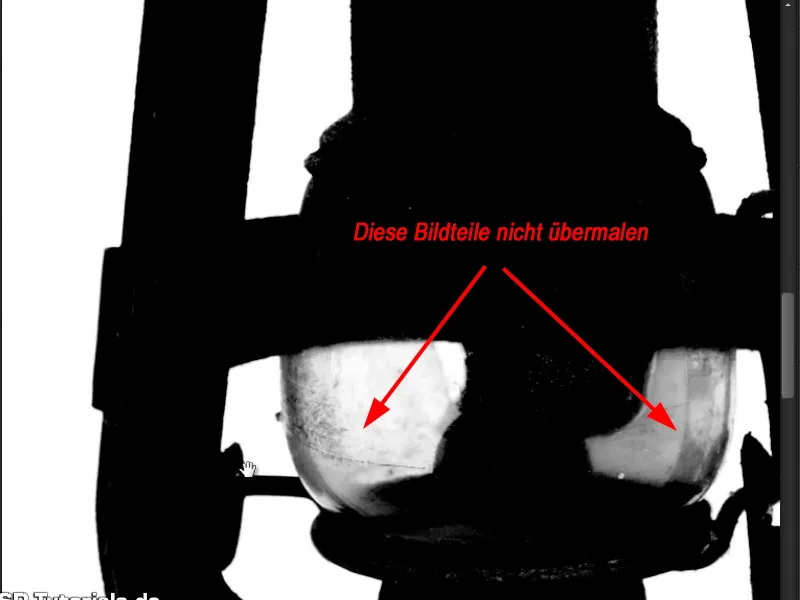
Step 22
Use a normal black brush to paint over the light areas. If white is set as the foreground color, simply press the x key and swap the foreground and background colors.
Then use the brush to paint away all the obvious white spots.
If there are dark spots on the white area, you can remove them with the brush with the white foreground color set.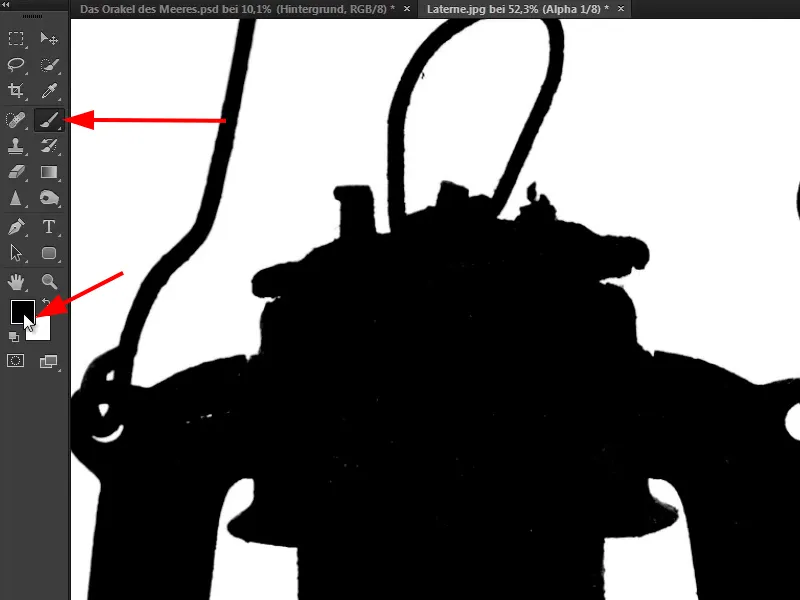
Step 23
You have now cropped the lamp. What do you need to do now? Basically, you have created a mask that is stored in the form of an alpha channel.
Apply this mask to the original image, ...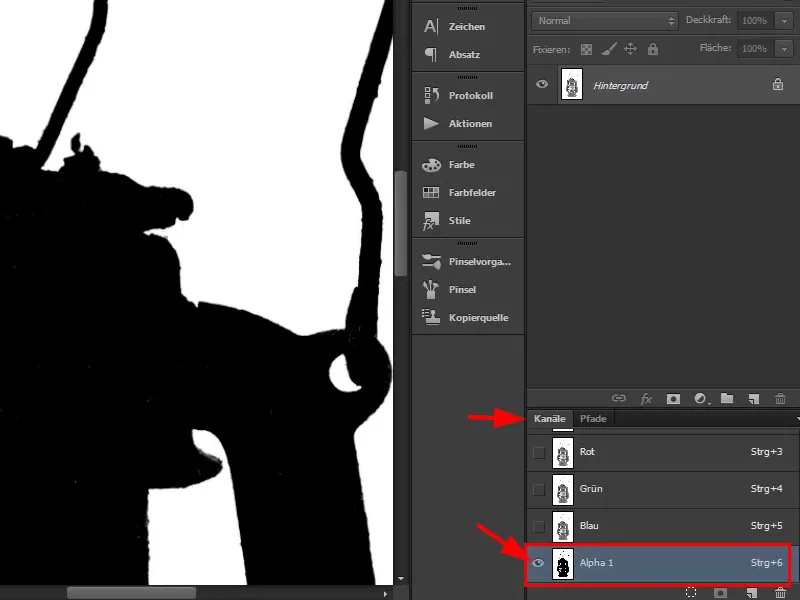
Step 24
... by proceeding as follows: You are in the alpha channel, hold down the Ctrl keyand simply click once on this channel (the lantern is highlighted) ...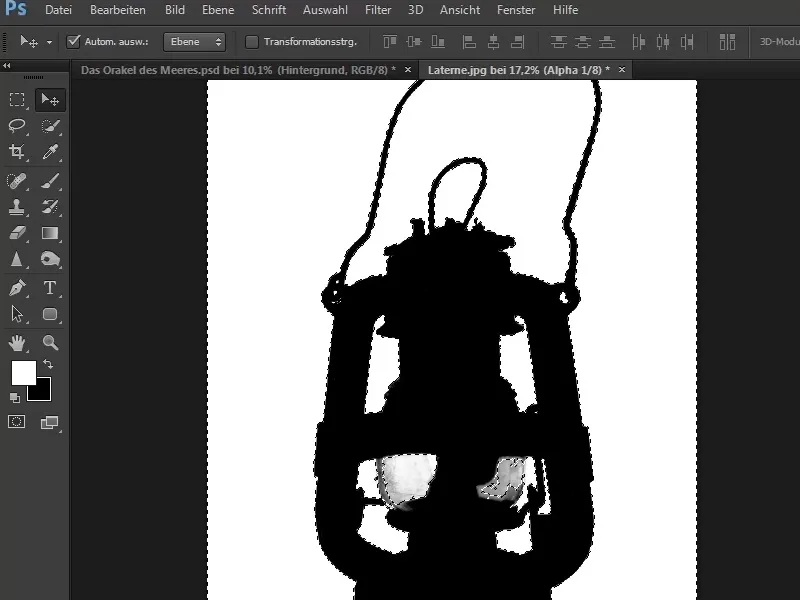
Step 25
... and now switch to the background layer and click on the mask symbol while holding down the Altkey. This automatically turns the background layer (from version PS6) into layer 0 and creates a mask.
The background is gone, the lamp appears in the old "glow" and is now cropped.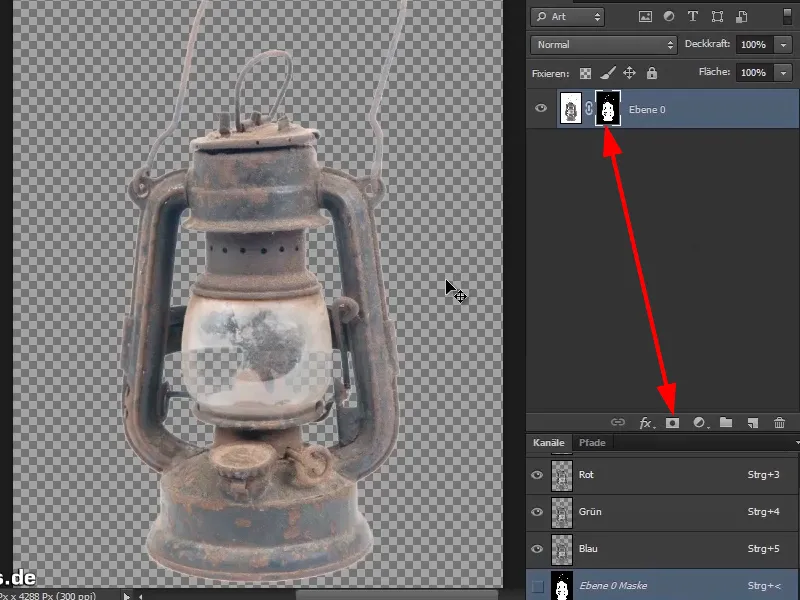
If you had not pressed the Alt key, only the background would be visible. This makes little sense, hence the pressed Alt key.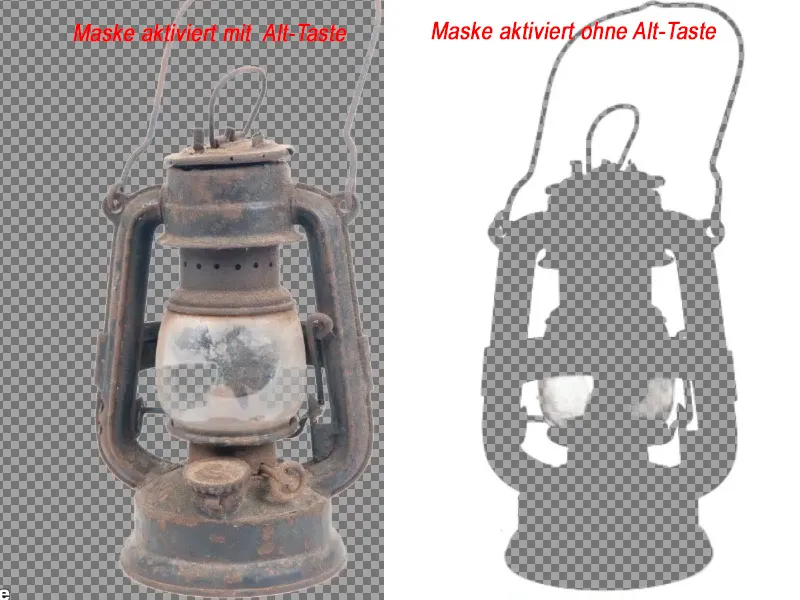
Step 26
Now create an auxiliary layer via Color plane....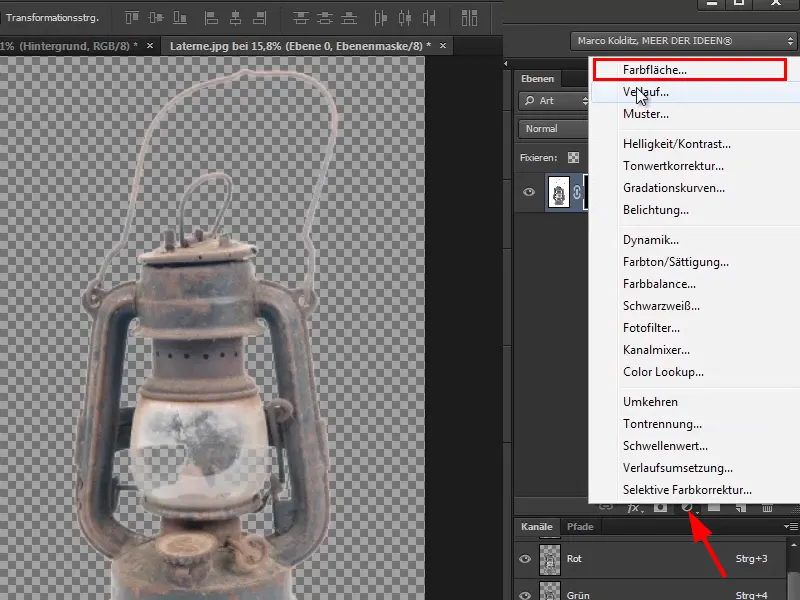
Step 27
Select a slightly brighter color (e.g. green) and drag the layer into the background.
Zoom into the picture and take a close look at the lamp. The green is not so good for finding flaws.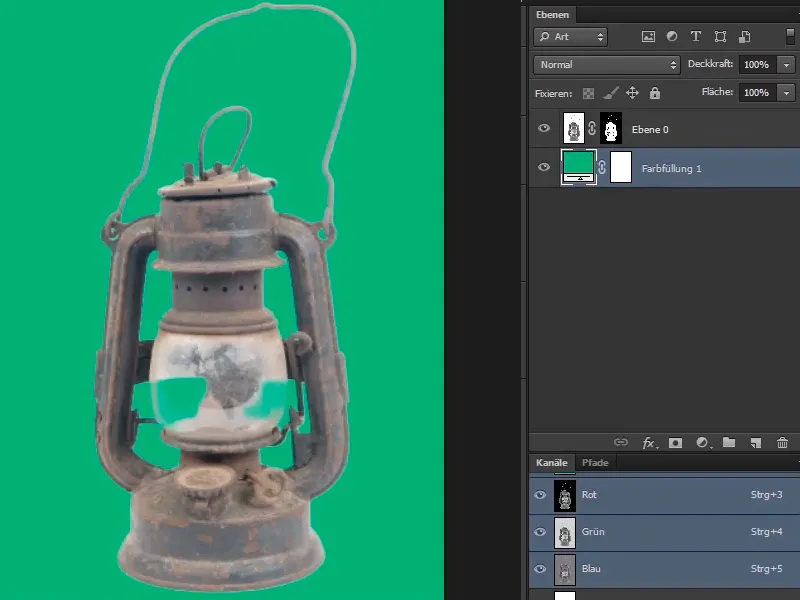
Just switch to blue and zoom into the picture again. It looks quite good. What is noticeable, however, are these white areas. You could ignore them because the lamp is only very small in the final image.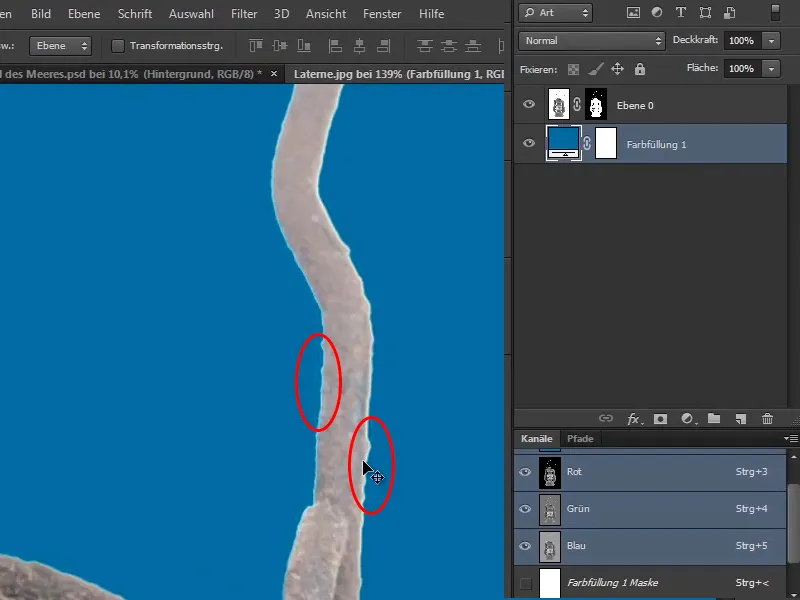
Step 28
However, as Marco pays a lot of attention to detail, he recommends adjusting the image a little and removing the unsightly color fringing.
So create a new layer above the lamp layer by clicking on the Create new layer icon and name it "Contour correction".
Move the mouse exactly between the two layers "Contour correction" and "Lamp" while holding down the Alt key. As soon as the mouse pointer changes to this symbol, click to create a clipping mask.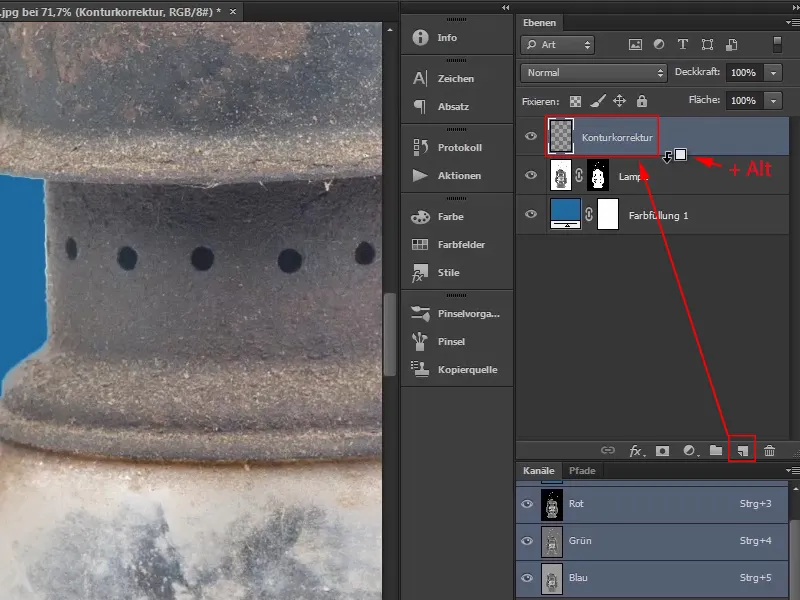
You can also undo this clipping mask in the same way by simply holding down the Altkey and clicking again between the two layers.
Alternatively, you could have created the clipping mask by right-clicking on a free area of the "Contour correction" layer to open the selection window. Here you can select Create clipping mask and get the same result:.webp?tutkfid=52961)
The clipping mask causes everything you change on the "Contour correction" layer to apply exclusively to the layer below it. In this case, the lamp layer.
To demonstrate this, Marco takes a brush with red paint and moves it randomly over the image. The red color only appears on the lamp area.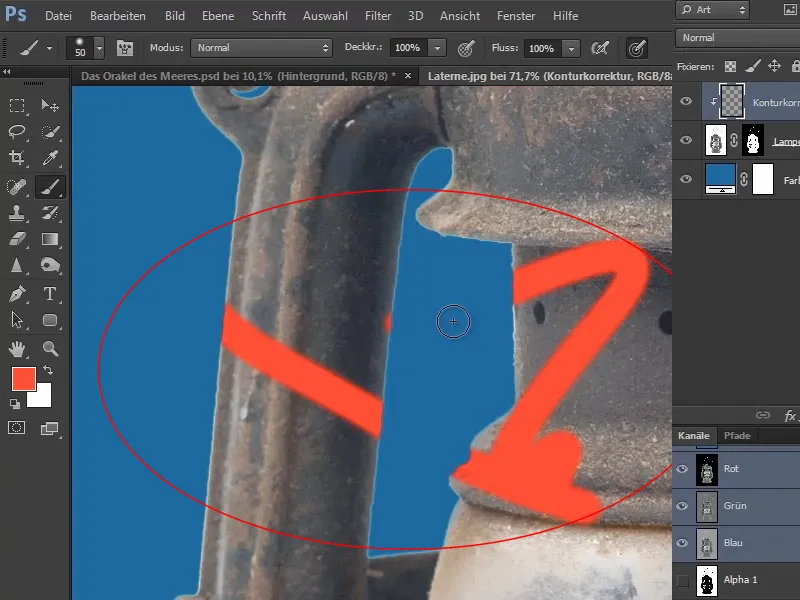
Step 29
Next, select the copy stamp from the toolbar and set Record: Act. and below. This allows you to edit both the current layer ("Contour correction") and the layer below ("Lamp") when working with the copy stamp.
The tip of the brush should be about as small as the actual white border.
Hold the brush tip slightly to the right of the white edge and click once on the lamp (1) while holding down the Alt key. This defines the source from which you want to copy. Then release both keys.
Then place the tip of the brush on the white border and move along it while holding down the left mouse button (2). This will copy a piece of the lamp and paste it in place of the white border..webp?tutkfid=52963)
The small cross to the right of the brush tip indicates where areas are being copied from.
You have to start again from time to time to redefine the source point by holding down the Alt key. At such a point, for example, the copy stamp would pick up an unsuitable color tone. Simply start again and select a suitable area further up..webp?tutkfid=52964)
At this point, some of the former shadow still shines through at the outer edge, so you can enlarge the copy stamp slightly and move it along so that what is disturbing disappears.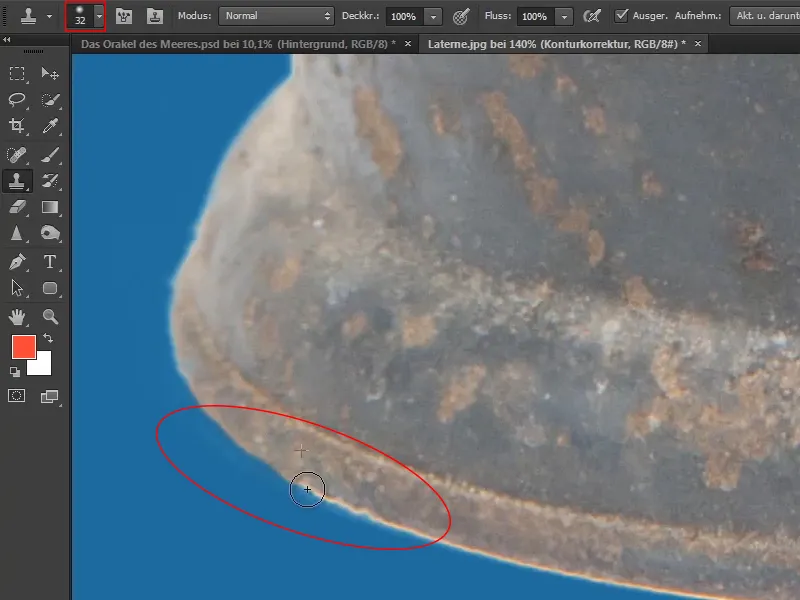
Of course, this also works with any other image. Color fringes can be removed incredibly well in this way. There are also more advanced techniques, but these are not part of this tutorial.
Now simply remove these bright edges all around and we will continue in the next part of this tutorial series.


