Digital Art opens up numerous possibilities for you to express your creativity. One of the fundamental techniques in digital drawing is the use of layers and their various blending modes. In this tutorial, you will dive into the blending modes "Lighten" and "Contrast". You will learn how to use these effectively to influence the brightness and contrast of your images.
Main Insights
- The blending mode "Lighten" displays the brighter pixels of a layer while preserving the original shape of the underlying colors.
- The blending mode "Contrast" combines the effects of "Darken" and "Lighten" and affects the brightness of the underlying layer.
- Understanding the different blending modes allows for more precise control over your digital drawings and their colors.
Step-by-Step Guide
Step 1: Prepare Your Layer
Start by creating a layer that contains a gradient from black to white. This ensures that you can clearly see the changes when you apply the blending modes. You can easily create this layer in the Procreate program and apply the gradient using the fill tool.
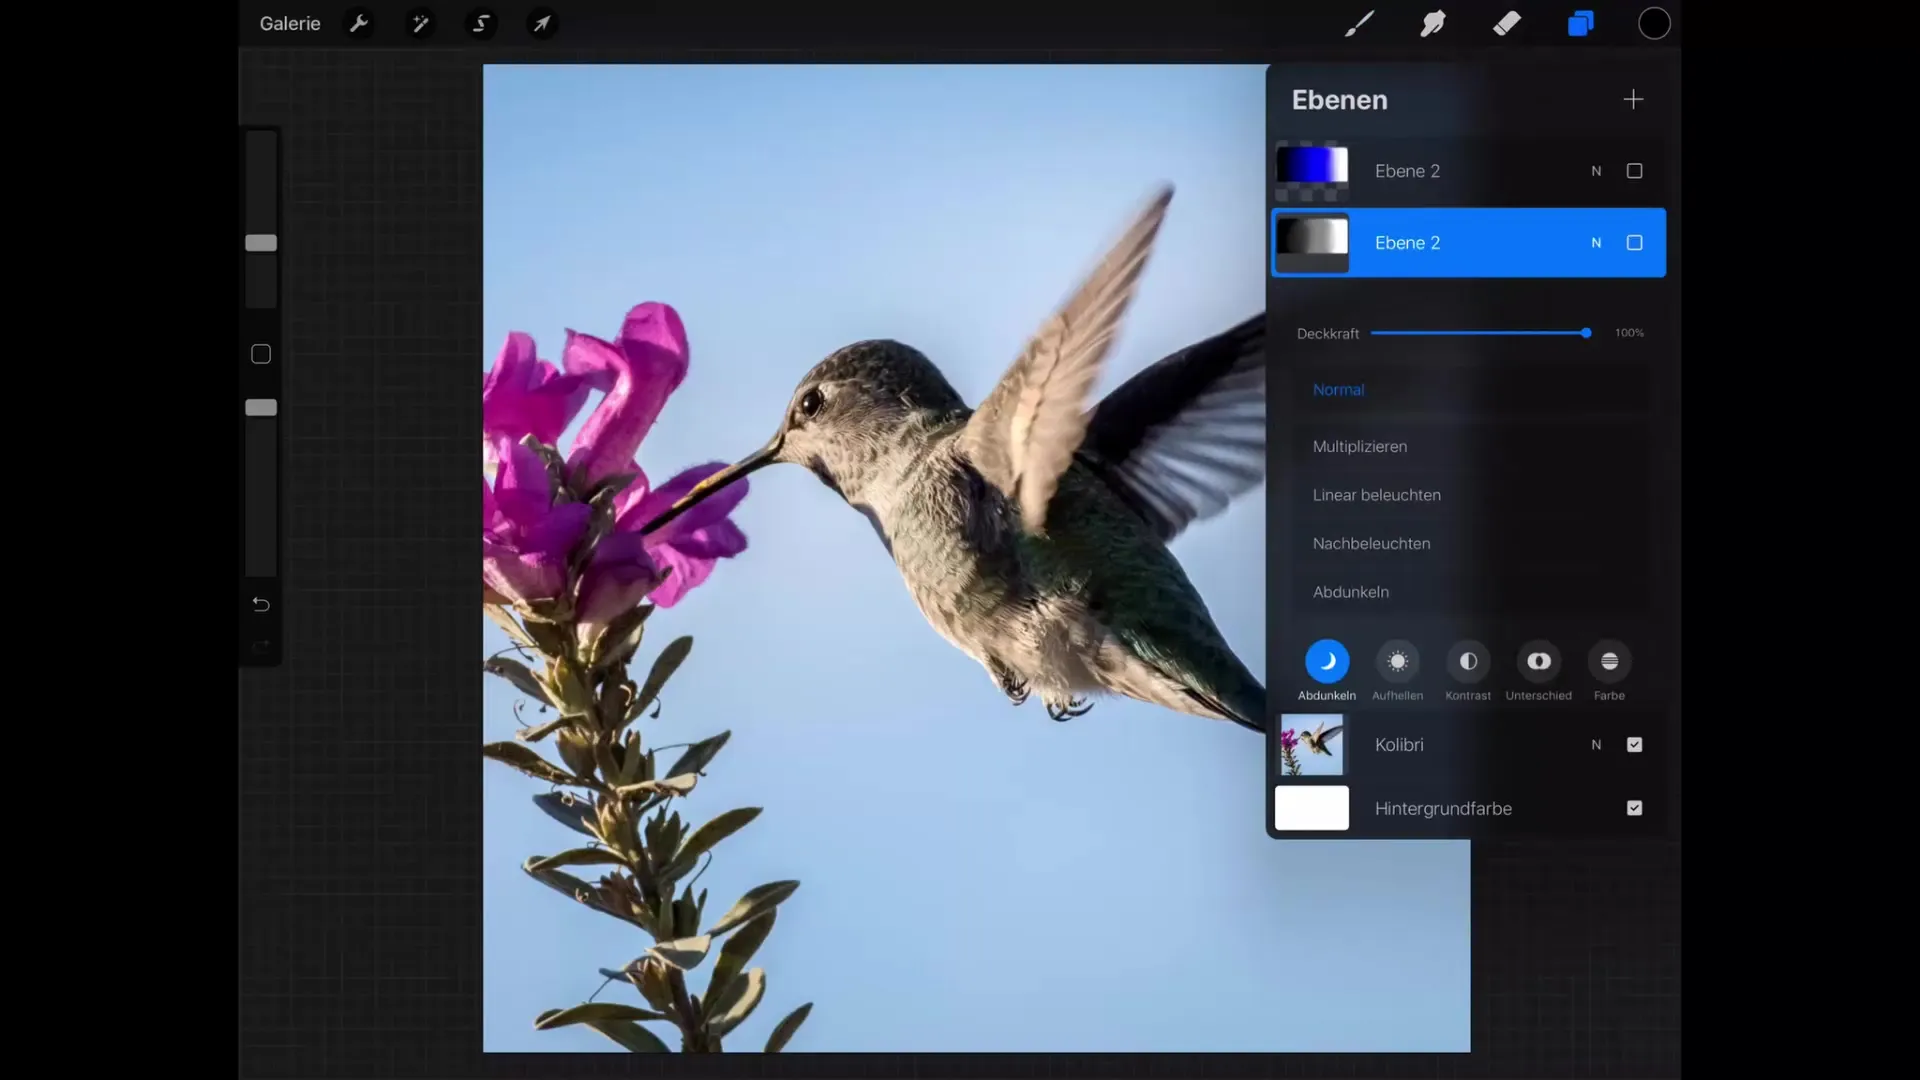
Step 2: Activate the "Lighten" Blending Mode
Now go to the layer settings and select the blending mode "Lighten". You will find this among the various mode options. Make sure to choose the "Lighten" menu item to observe the effect.
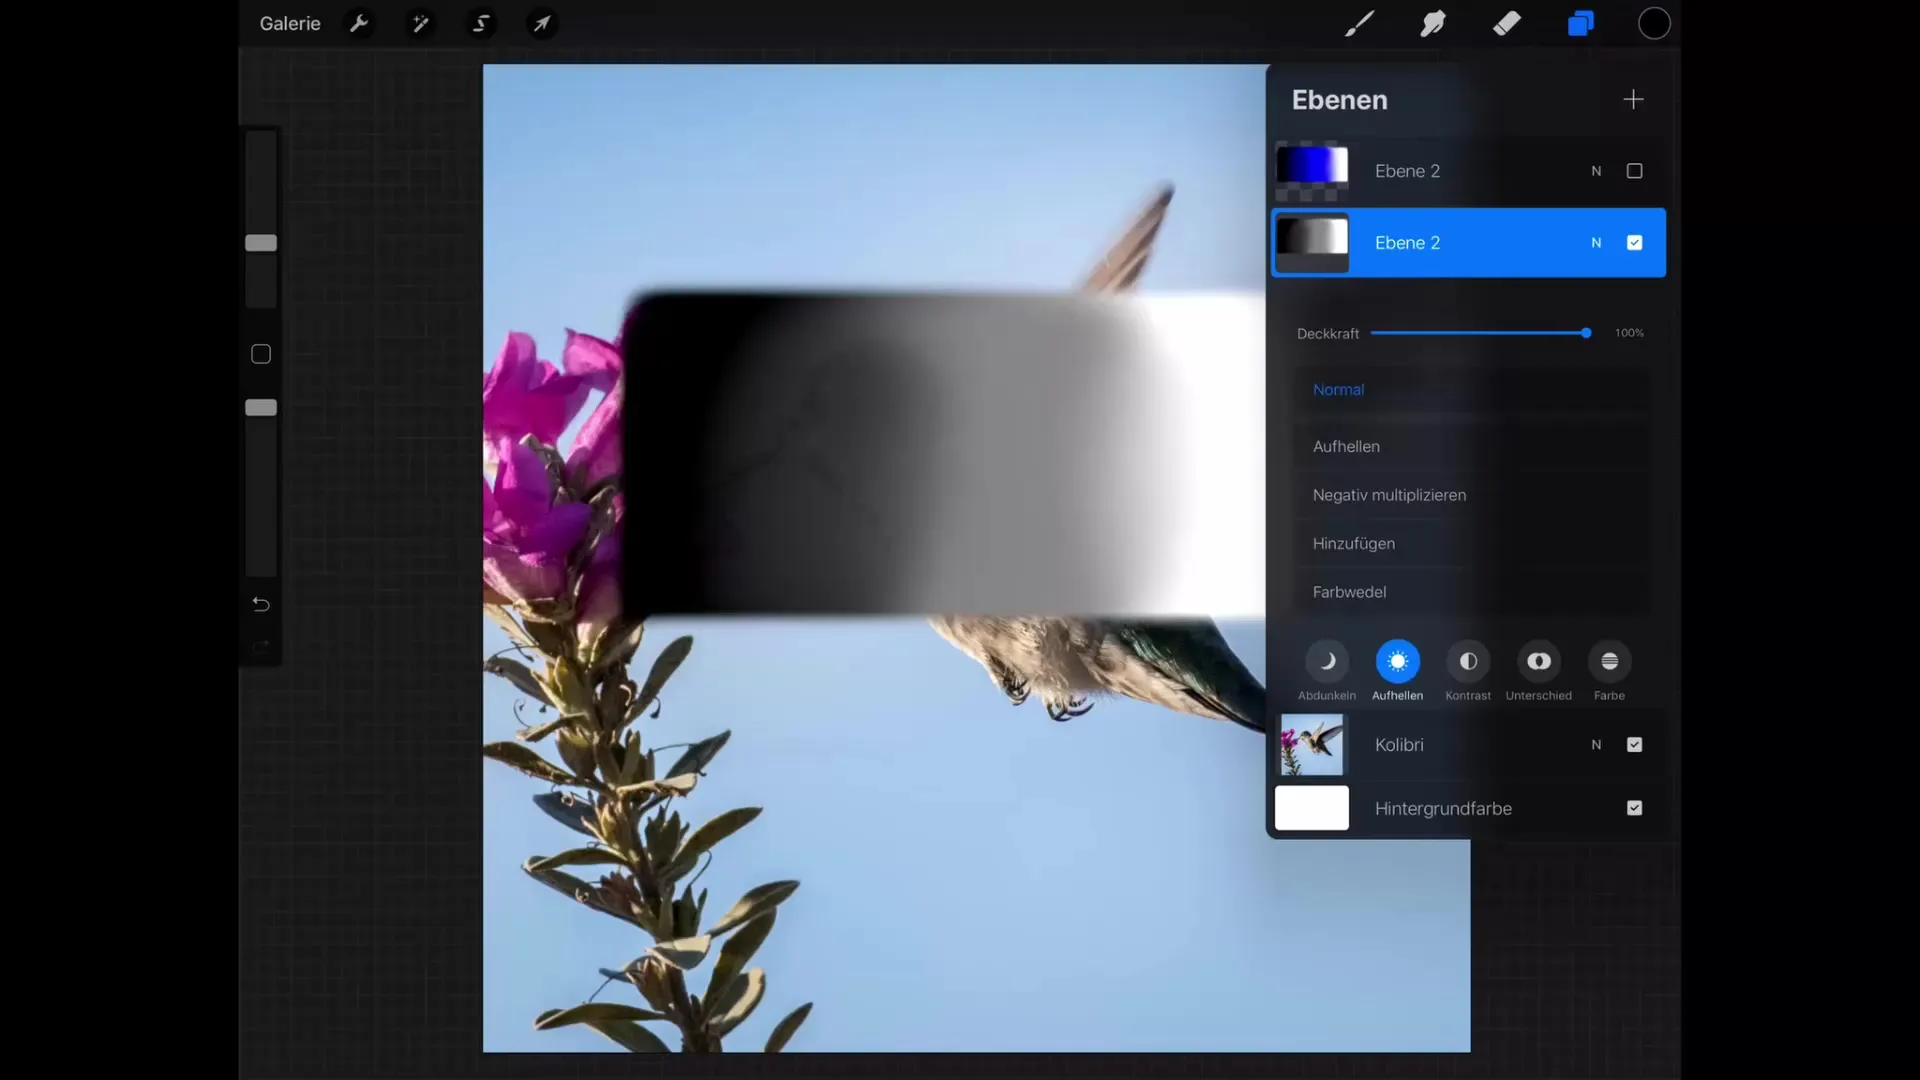
Step 3: Observe the Changes
Once you activate the "Lighten" blending mode, you will notice that the white area of your layer remains unchanged, while the gray areas that are slightly above the bird also remain gray. This shows that the mode only picks up the brighter pixels.
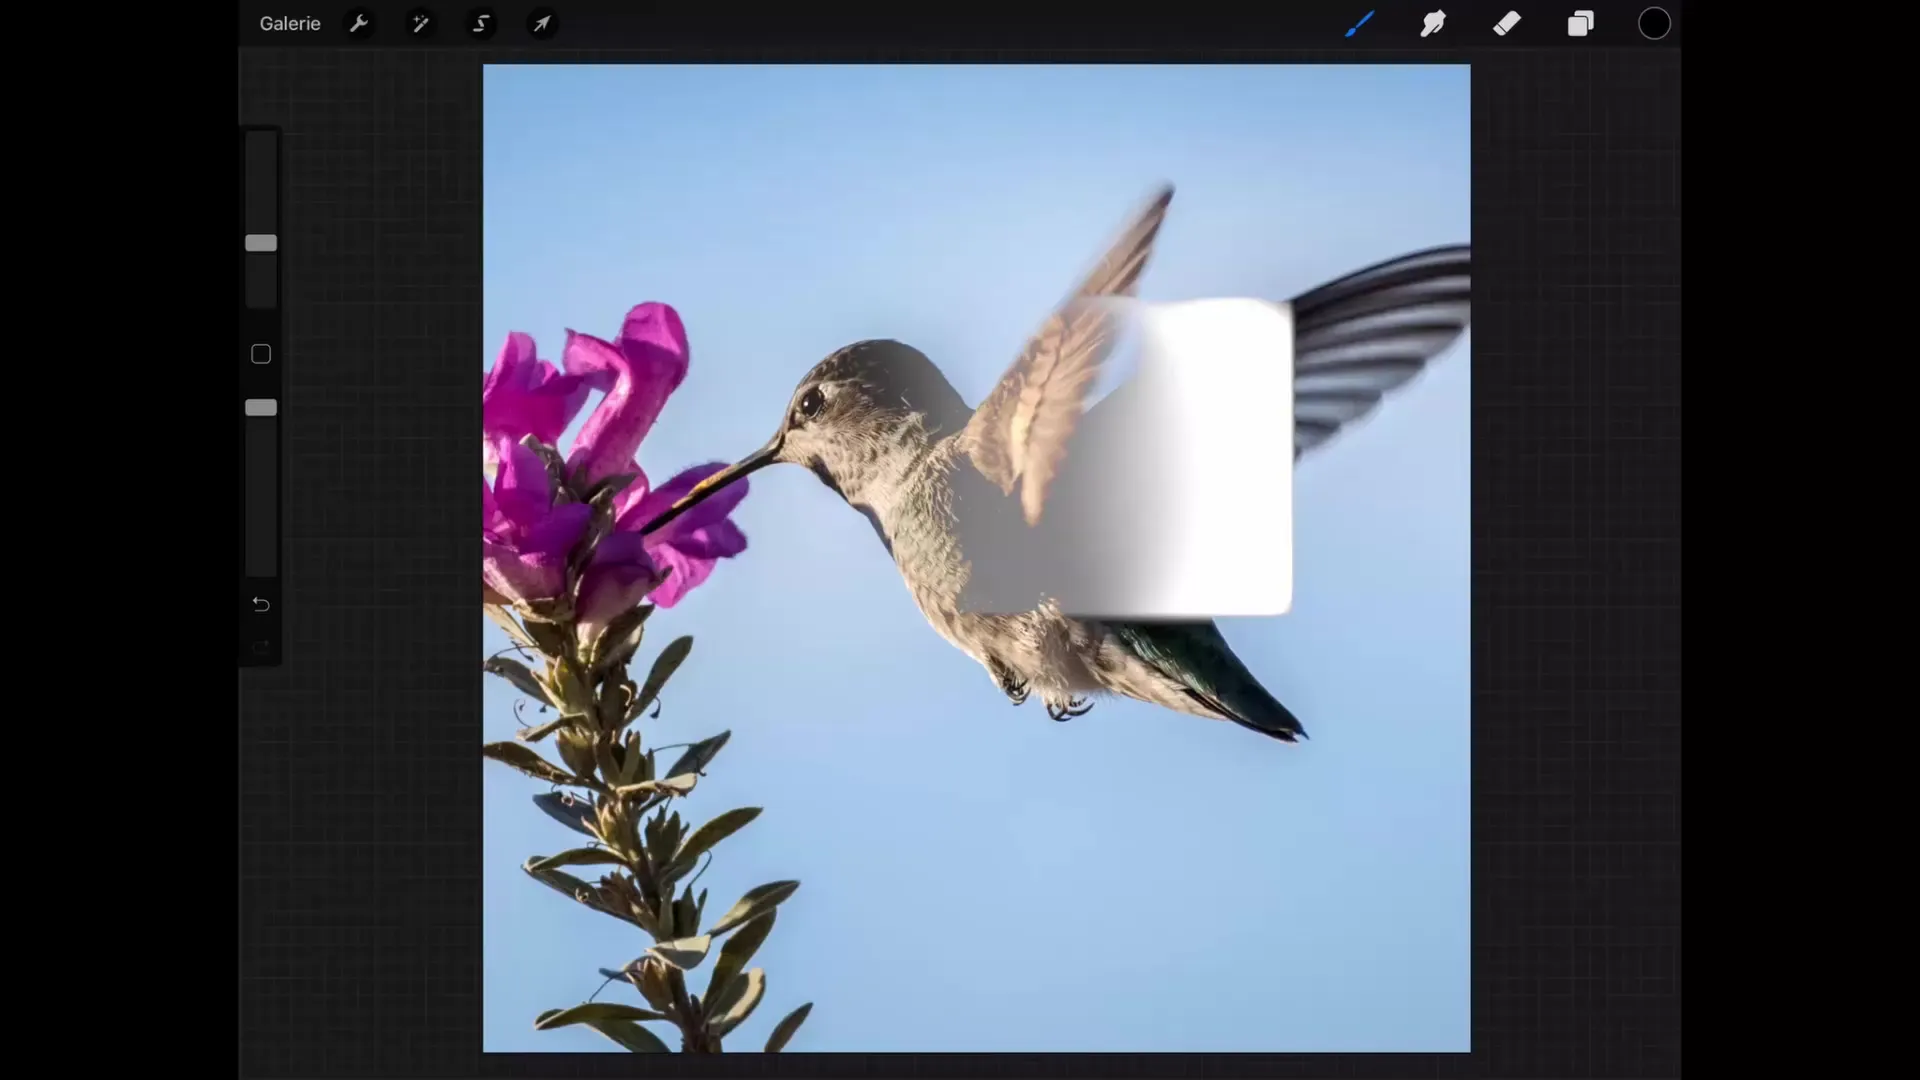
Step 4: Test with a New Gradient
To better understand the effect, you can add a blue gradient. When you create this gradient and apply the "Lighten" blending mode, you will see that here too, only the brighter pixels are visible.
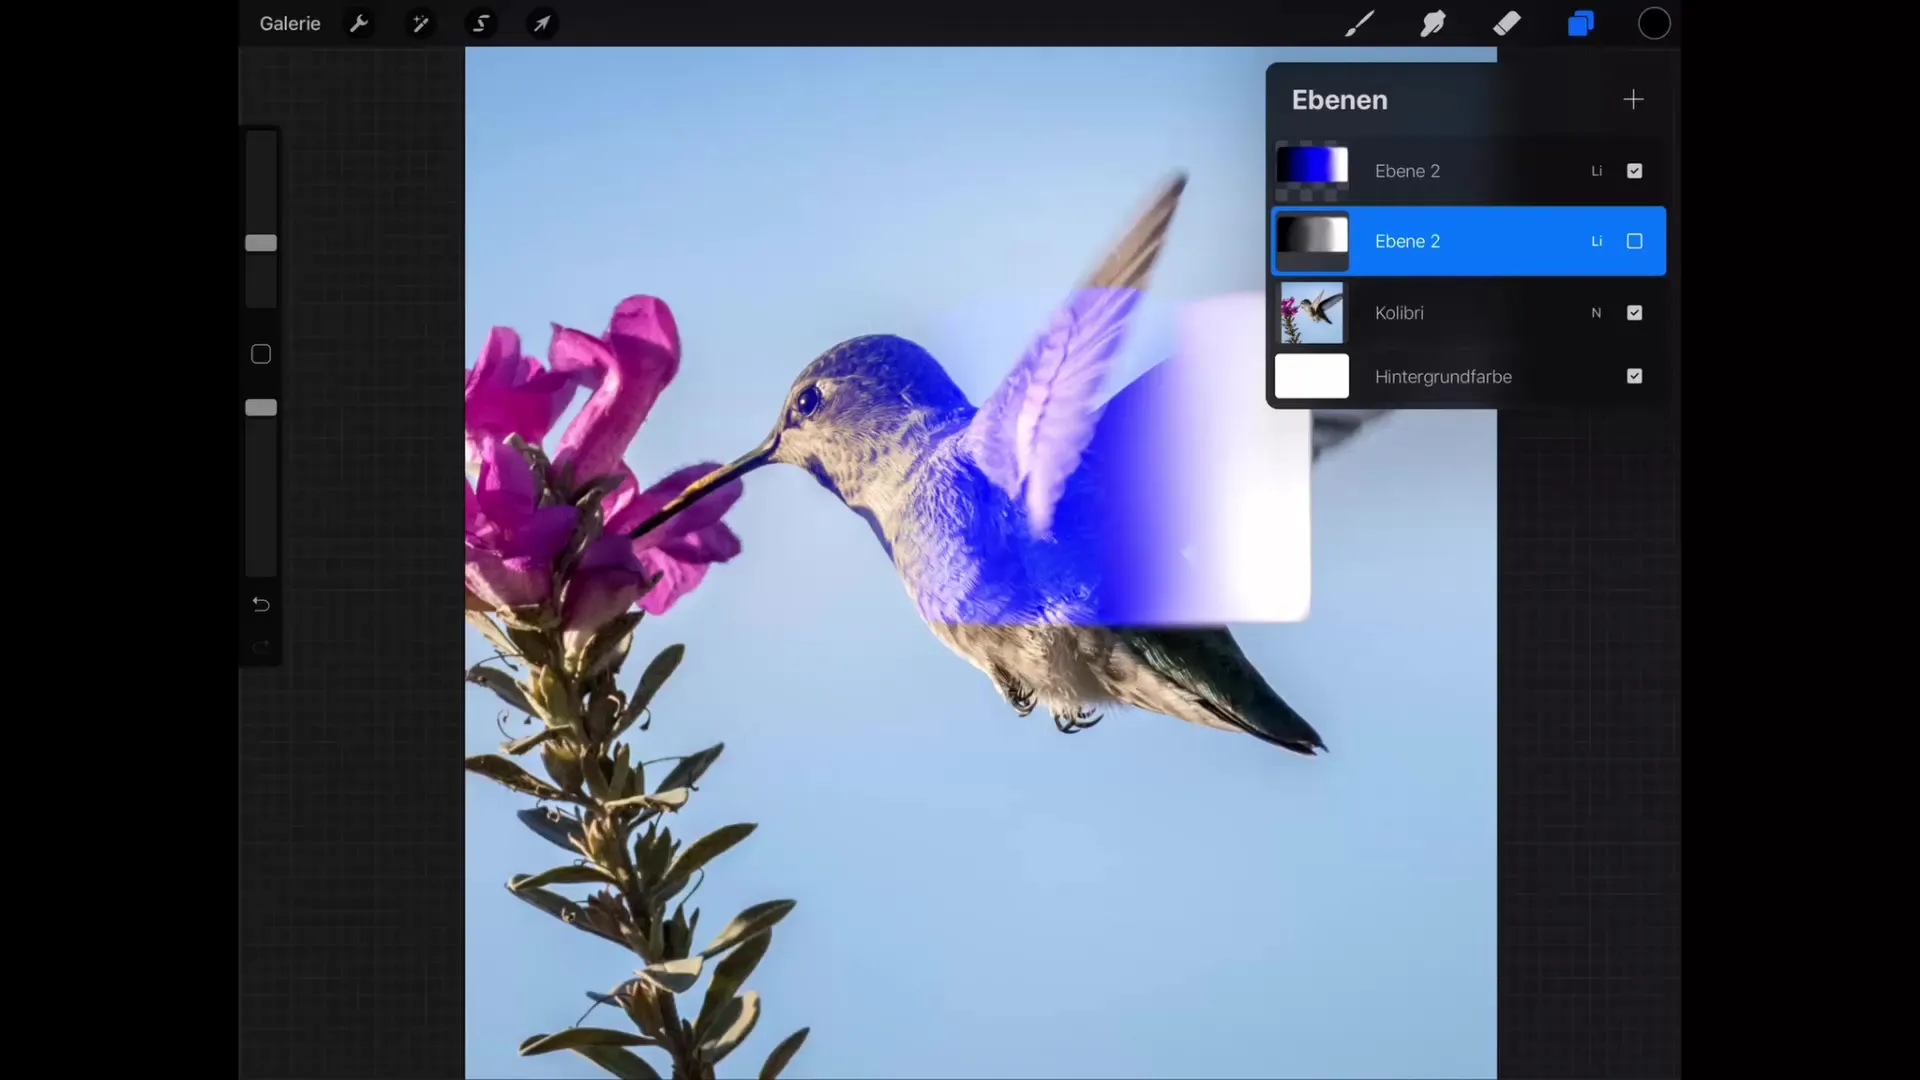
Step 5: Apply the "Contrast" Blending Mode
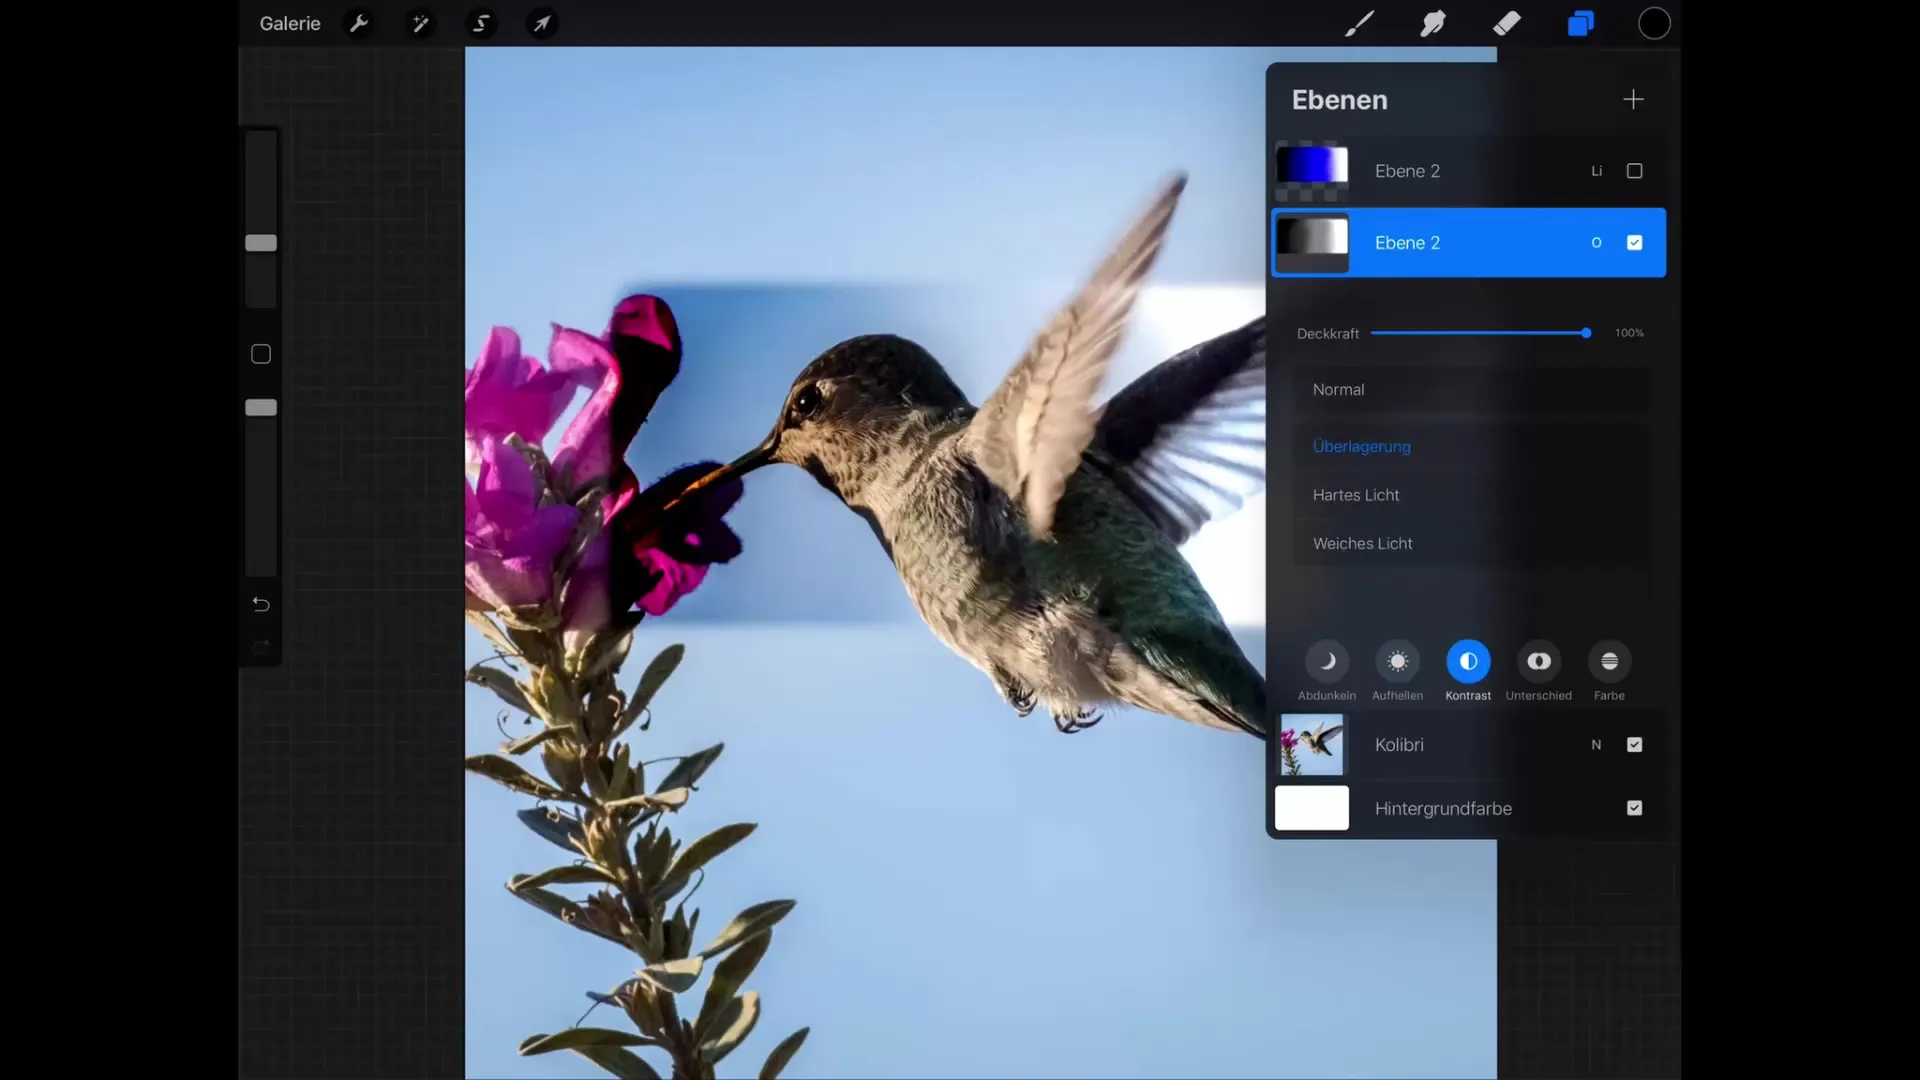
Another commonly used blending mode is "Contrast". Here you can choose between several options such as Overlay, Hard Light, and Soft Light. Each of these settings influences the contrast and brightness of your layer in different ways.
Step 6: Differences Between the Modes
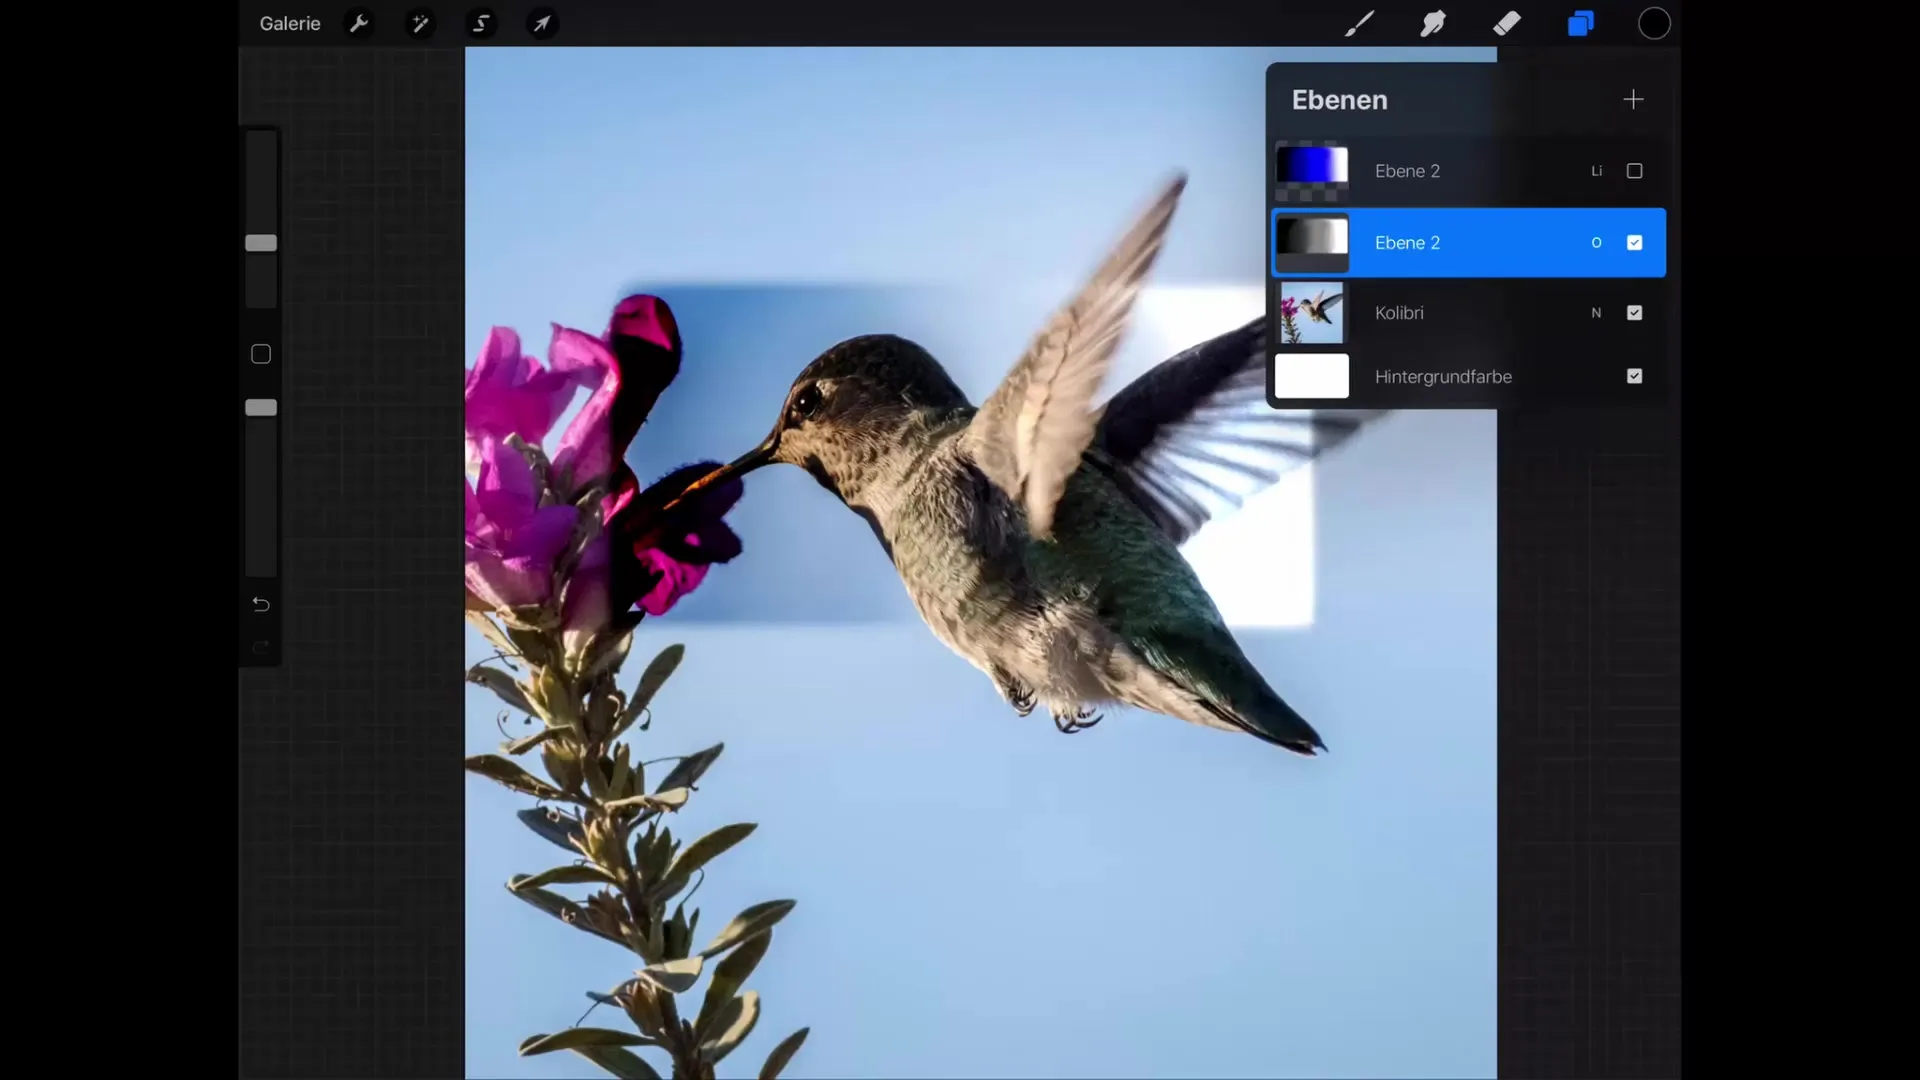
Observe the differences between the modes. The "Overlay" blending mode combines the effects of Darken and Lighten, meaning that the dark pixels are used to darken the underlying image, while the bright pixels lighten the underlying color.
Step 7: Tests with Hard and Soft Light
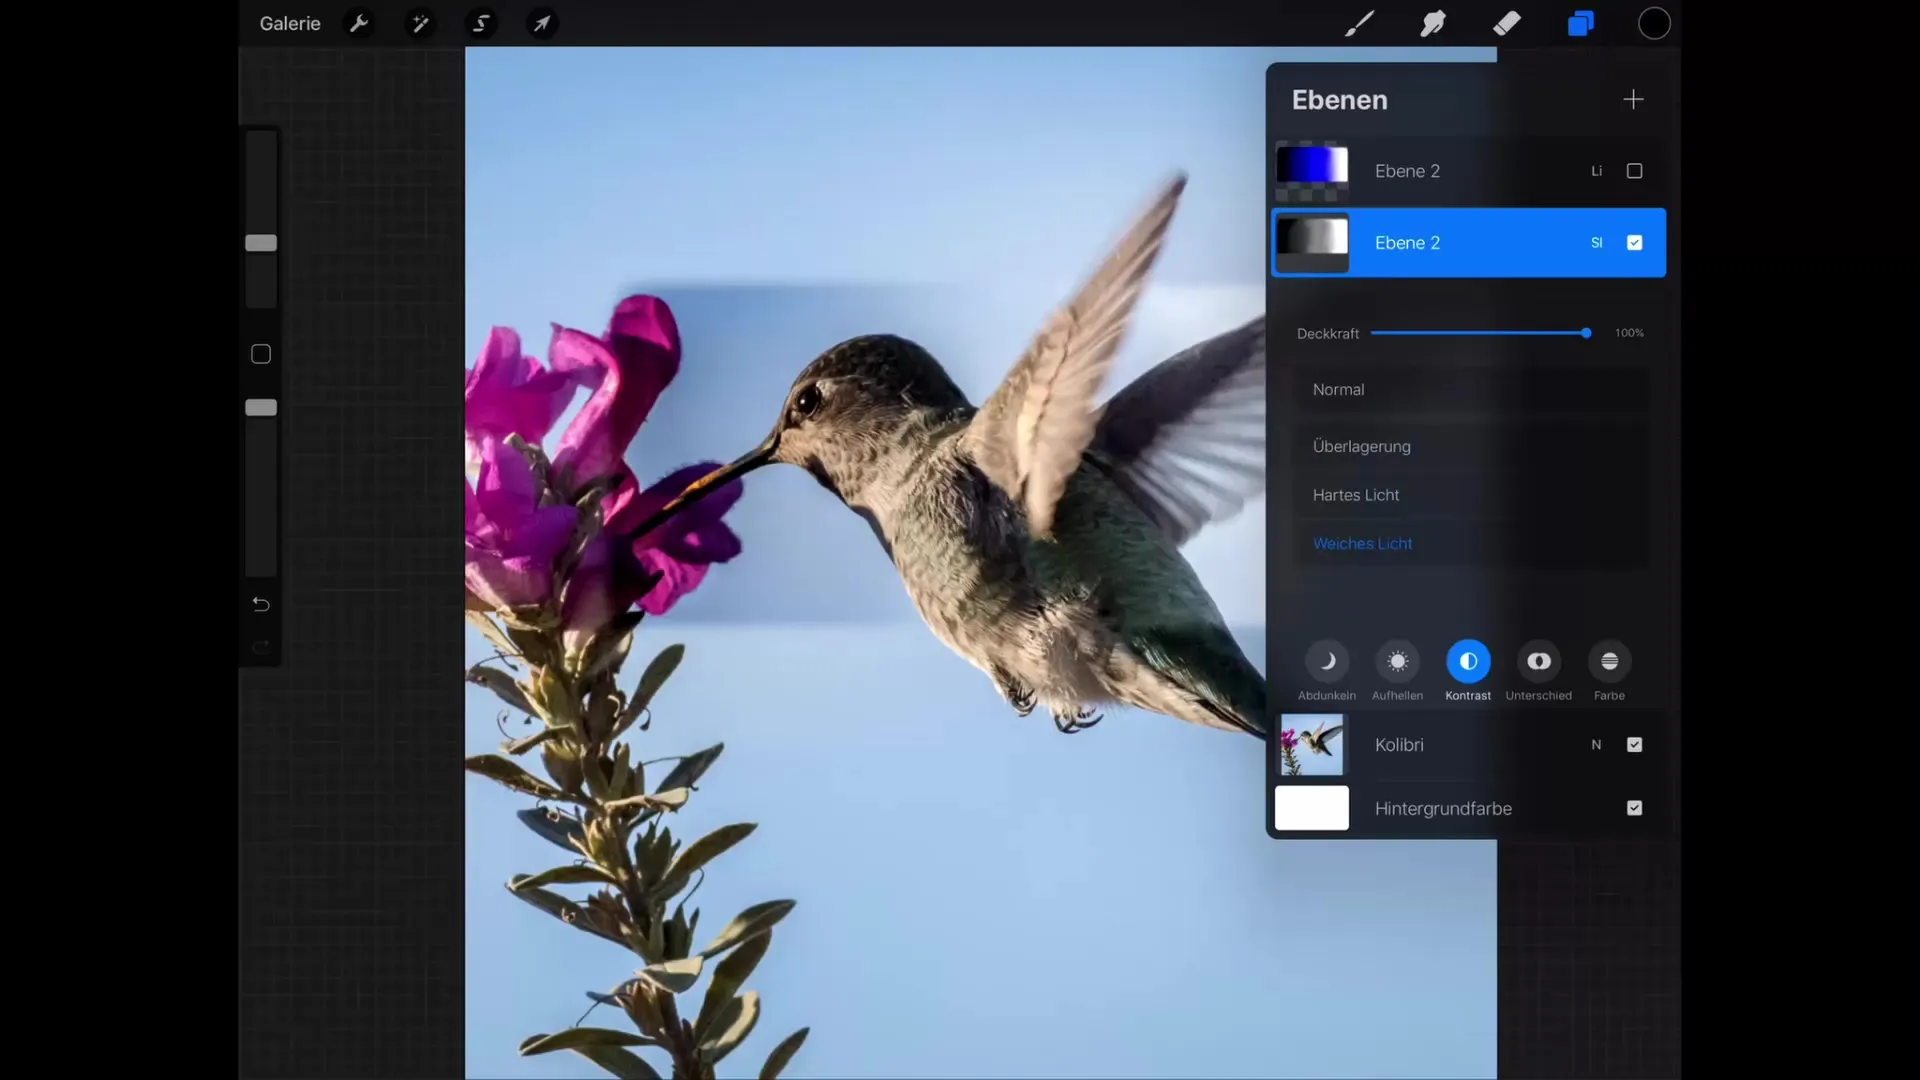
To better understand the details, activate both the hard and soft light modes. You will notice that hard light creates a more intense color change, while the soft light option allows for a more moderate and gentle application.
Summary – Procreate Tutorial: Lighten and Contrast with Blending Modes
In this tutorial, you have learned about the fundamental blending modes "Lighten" and "Contrast". You have discovered how to use these modes to manipulate the brightness and contrast of your digital drawings. By understanding these functions, you can further develop your artistic skills and elevate your work to the next level.
Frequently Asked Questions
What blending modes can I use in Procreate?In Procreate, you can choose from many blending modes, including Normal, Lighten, Darken, Multiply, and Contrast.
What is the difference between "Hard Light" and "Soft Light"?"Hard Light" creates more intense color combinations, while "Soft Light" softens the effects and makes them gentler.
Why does the white area remain unchanged when using "Lighten"?The "Lighten" mode only displays the brighter pixels and therefore does not alter the darker pixels.


