In this tutorial, I will show you how to effortlessly convert stereo audio to mono in DaVinci Resolve. It may be necessary to reduce the audio output to one channel, whether for aesthetic reasons or to ensure compatibility with certain playback devices. Whether you are a beginner or experienced user, this step-by-step guide will help you perform the conversion quickly and easily.
Main Takeaways
- You can easily adjust the audio settings in the Edit area of DaVinci Resolve.
- It is important to select the correct channel to ensure that the audio is played back as desired.
- You can switch between mono and stereo at any time, depending on your needs.
Step-by-Step Guide
Start with DaVinci Resolve and open your project. I recommend creating a backup copy of your audio track before conversion.
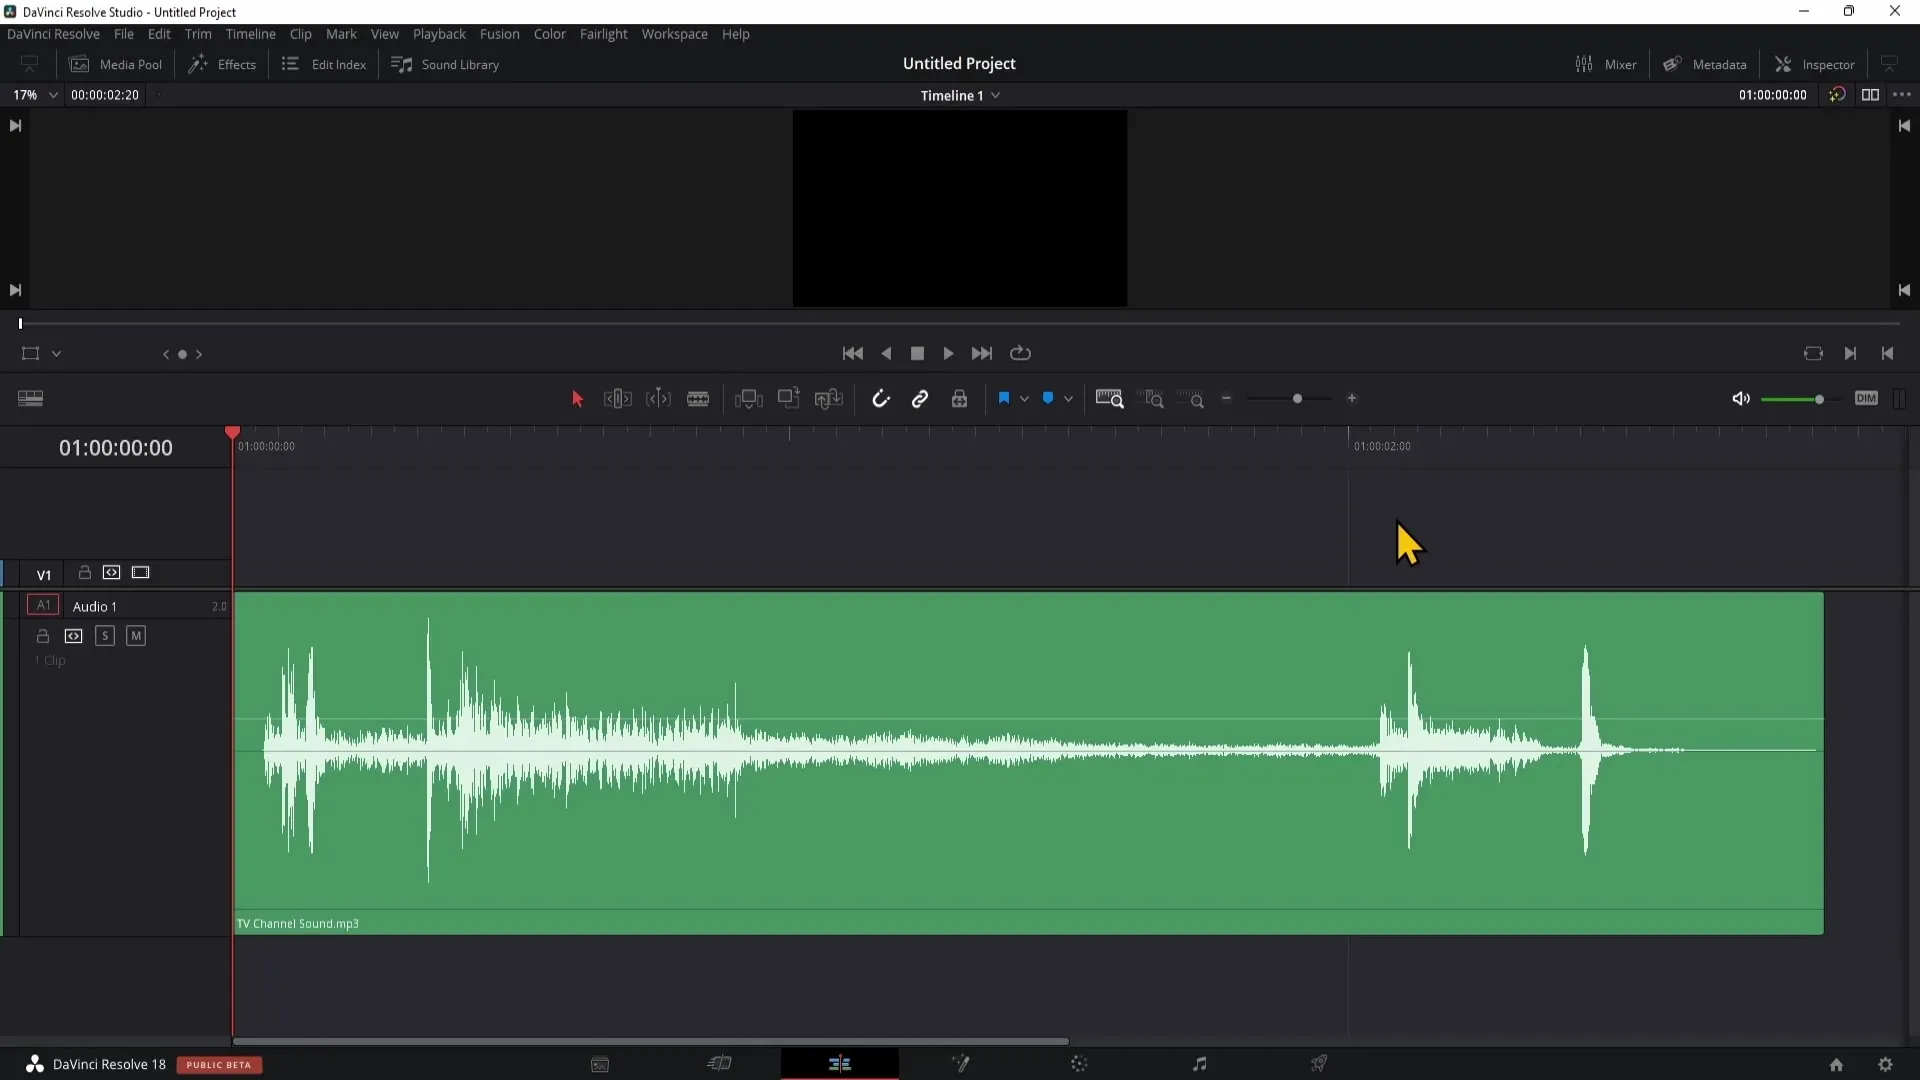
Once you are in DaVinci Resolve, go to the Edit area. Here, you already have an audio or video track that you want to edit.
Now expand the mixer at the top right of the user interface. You can adjust the volume and other settings of your audio tracks using the mixer.
Play your audio now and pay attention to what happens on Audio Track 1. You may notice that only the right channel shows activity.
If you only hear audio on one side, this can be problematic, especially when using headphones. To hear on the left side as well, you need to adjust your audio settings.
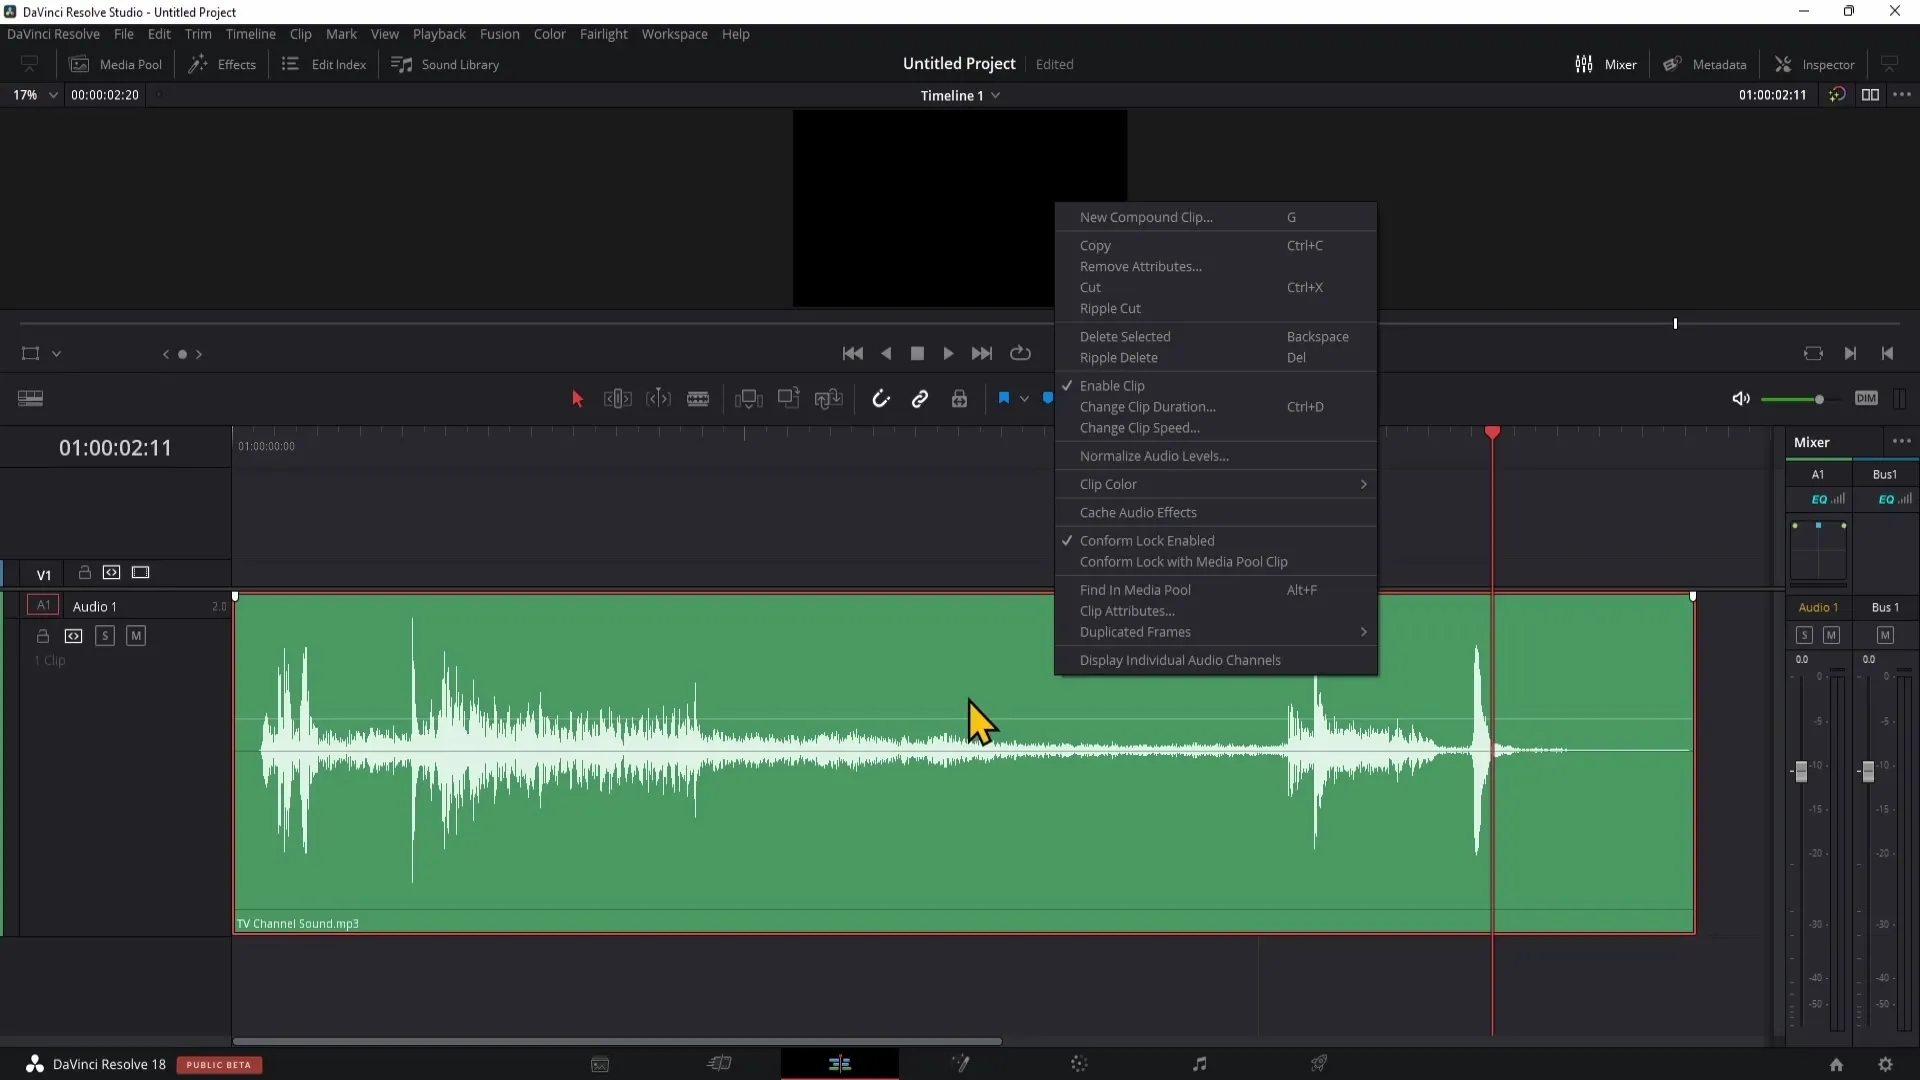
Right-click on the audio track and select "Clip Attributes." Here you can adjust the channels of the audio source. Then go to the "Audio" tab.
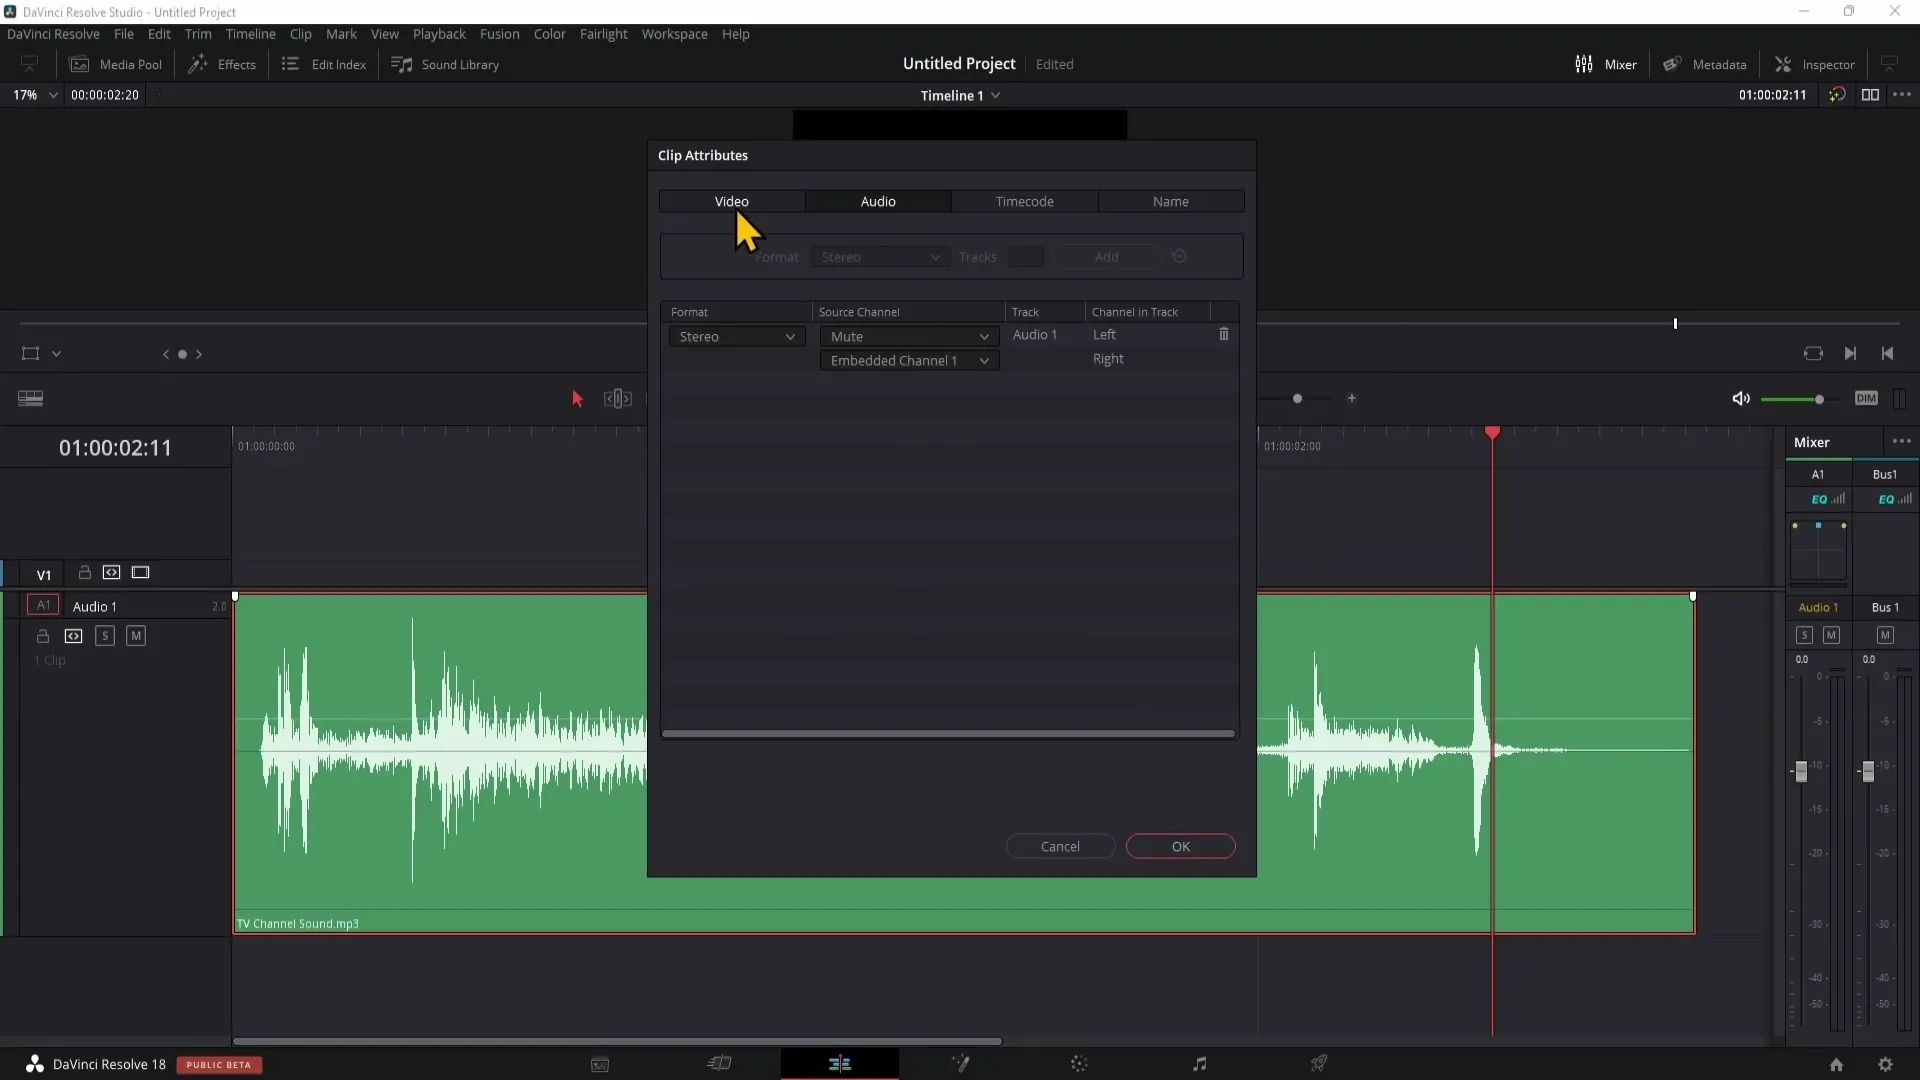
Now select the first channel under "Source Channel." This will give you stereo playback on both sides - left and right.
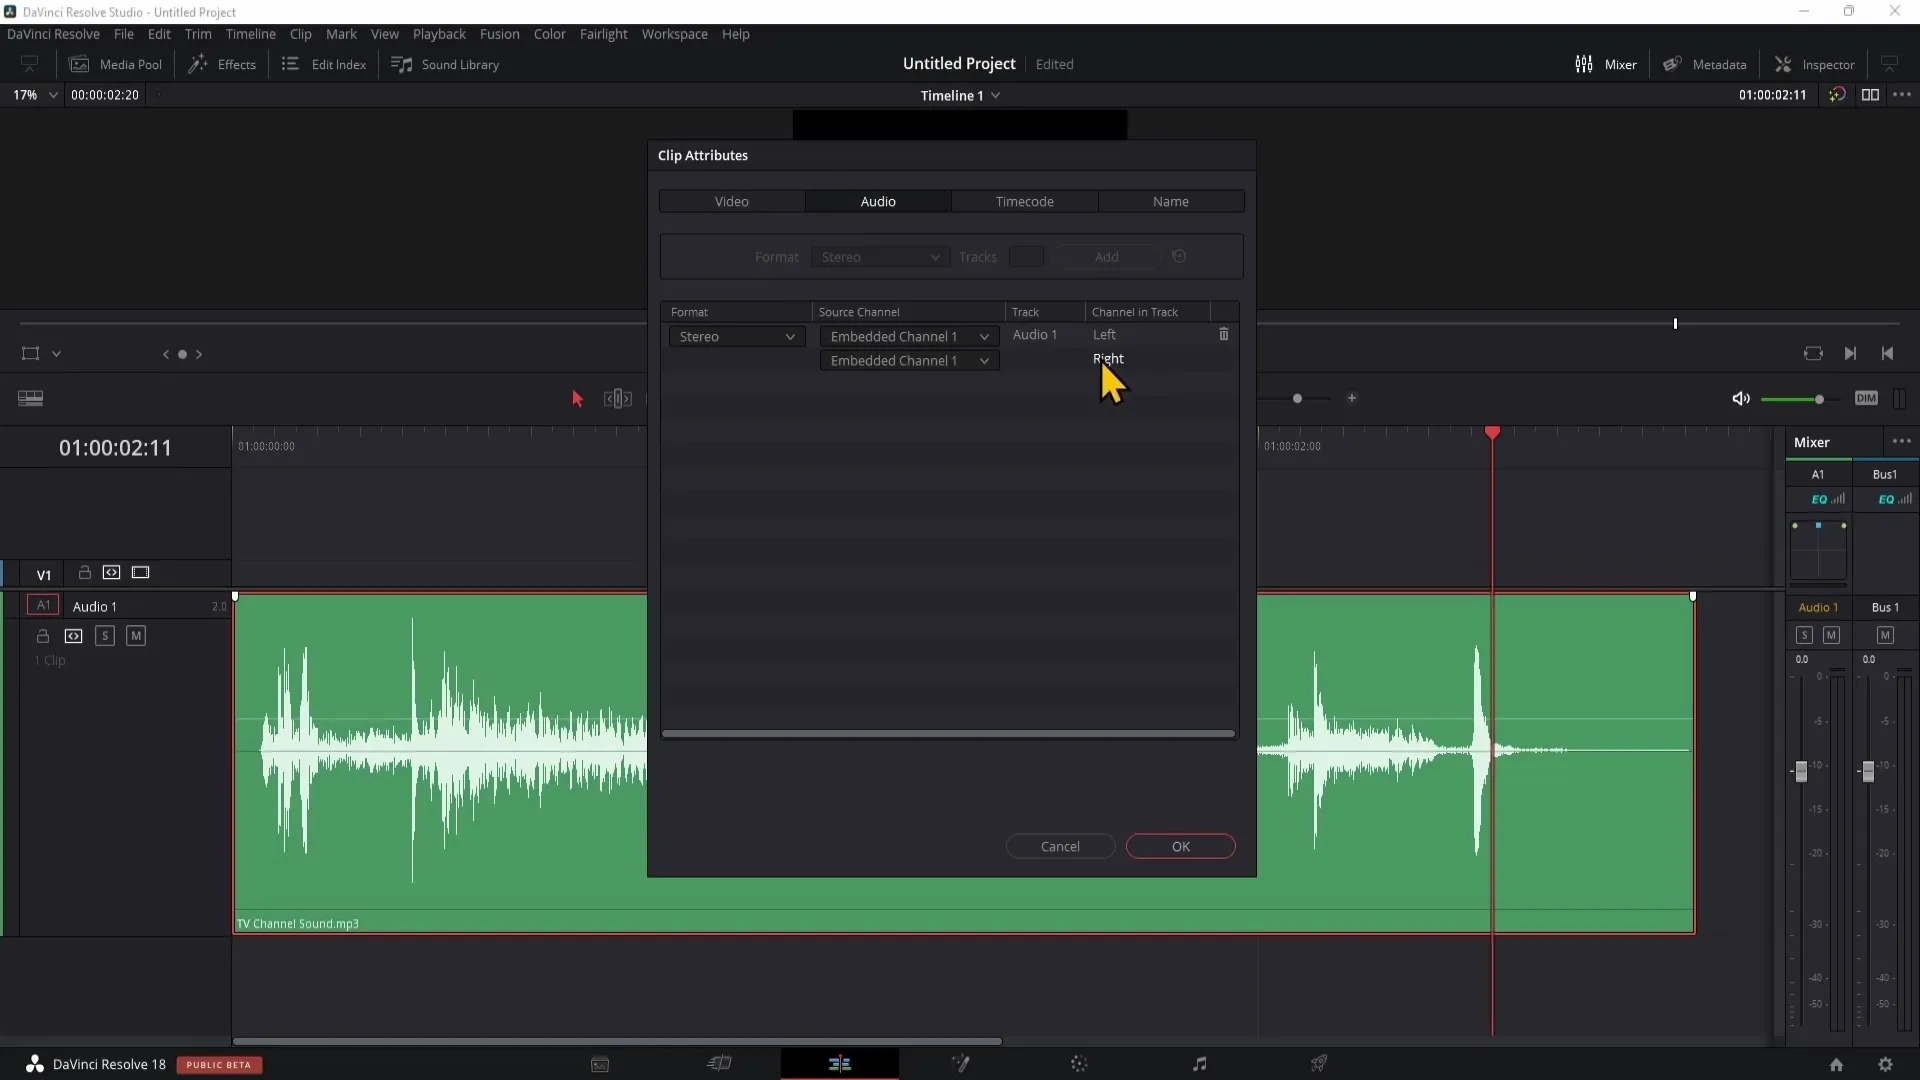
Click "OK" and play the audio again. You can now hear the sound on both sides. Make sure that both bars on the mixer show activity, confirming that it is now stereo audio.
If you prefer to only hear the left side, you can do that too. Right-click on the audio track again and go to "Clip Attributes."
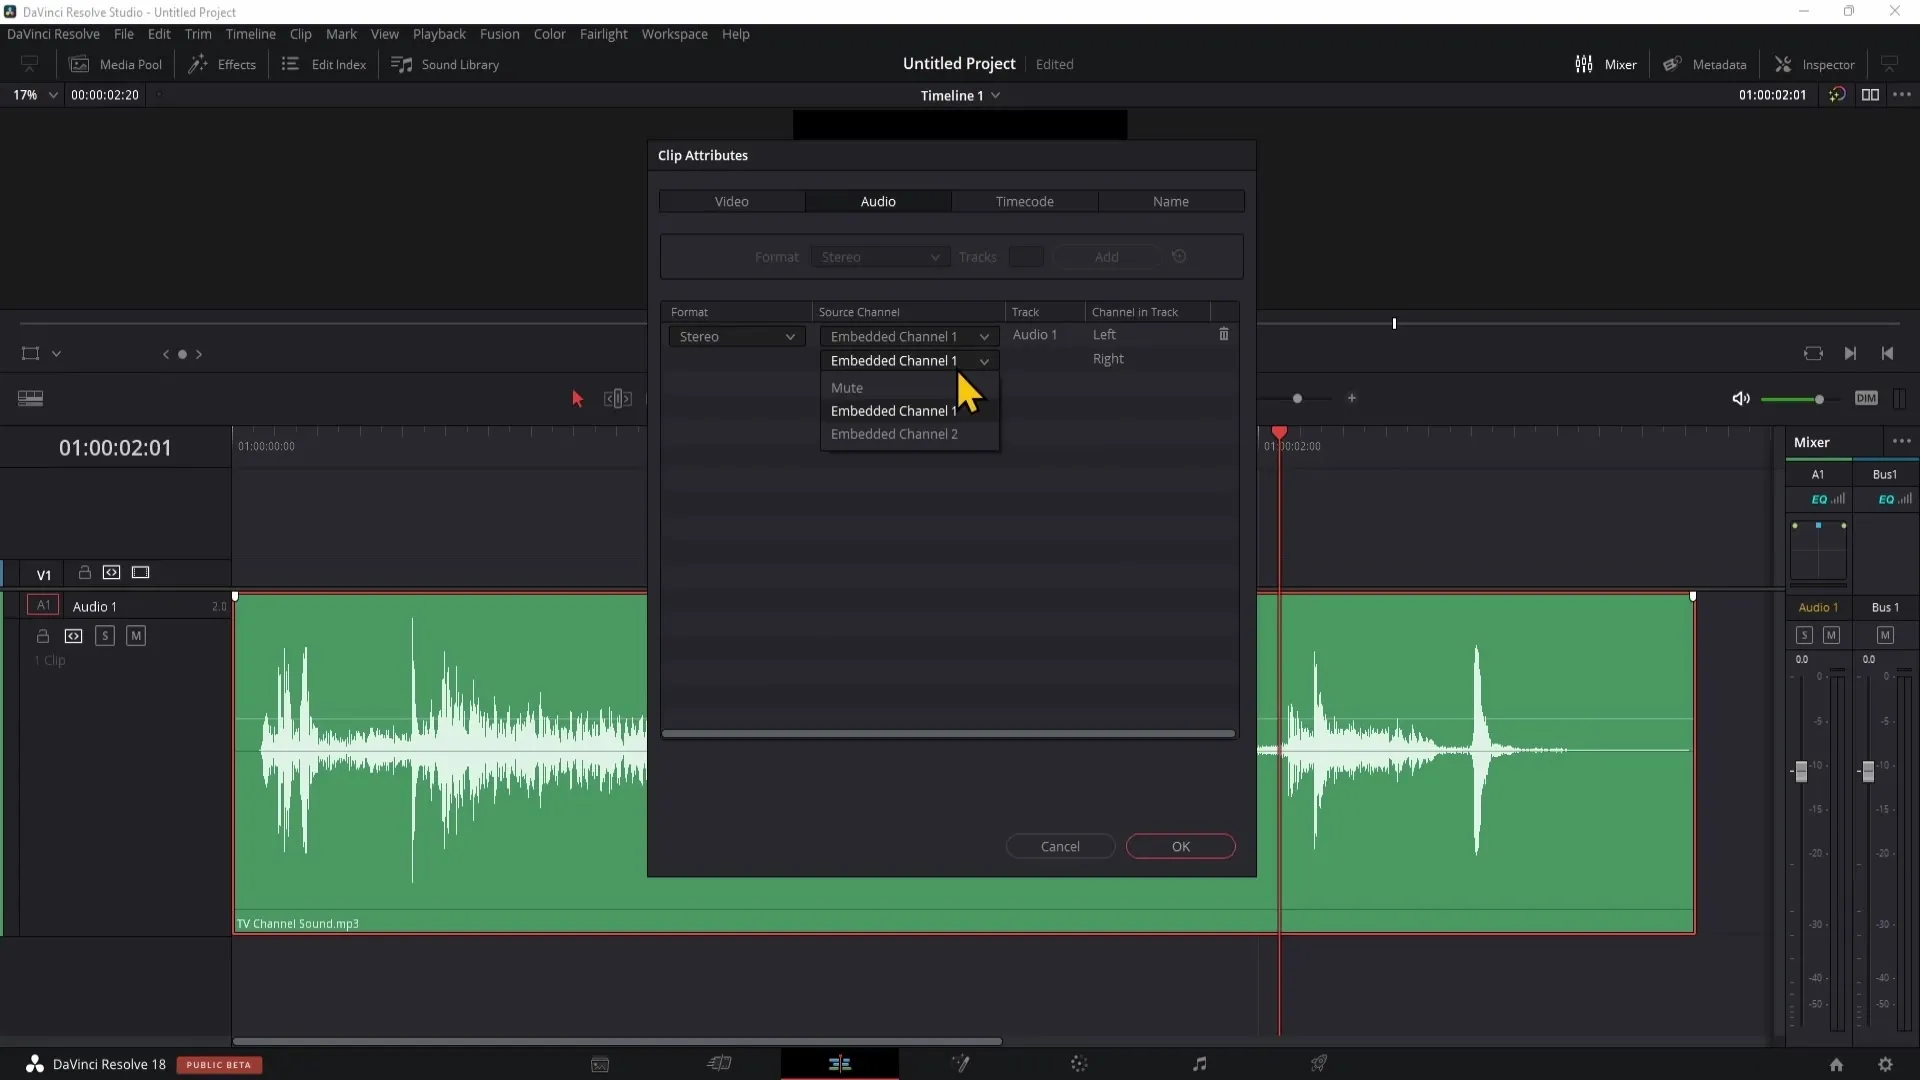
This time, mute the right side. Check the "Mute" box on the right side.
Click "OK" again. Now you will only hear the left side of the audio track, while the right side is muted.
Summary
In this guide, you learned how to convert stereo audio to mono in DaVinci Resolve. With just a few clicks, you can adjust the audio settings to have control over playback. This is especially useful if you want to achieve specific effects or optimize the audio output.
Frequently Asked Questions
Wie kann ich Mono-Audio in Stereo umwandeln?You can reverse the steps to convert stereo to mono and select the channels accordingly.
Was passiert, wenn ich nur eine Seite höre?In this case, you should check the clip attributes and ensure that both channels are active.
Kann ich die Einstellungen jederzeit wieder ändern?Yes, you can adjust the audio settings anytime to switch between mono and stereo.


