The use of digital cameras has revolutionized the way we take and edit photos. Every camera has the ability to save images in different formats, with the raw format, also known as RAW, being particularly popular. With Corel PaintShop Pro, you have the ideal software to edit these RAW files. In this guide, you will learn how to effectively use the camera RAW editor to optimize your images.
Key Insights
- The camera RAW editor opens RAW images for editing in PaintShop Pro.
- Various tools for color and exposure adjustment are available.
- Zoom and view options help you better recognize the details of your images.
Step-by-step Guide
Import RAW Image
To start editing your RAW images, you first need to import the desired image. Go to the folder where your images are stored. You can simply drag & drop a RAW image into the program. Alternatively, you can select "File" from the menu to import the image.
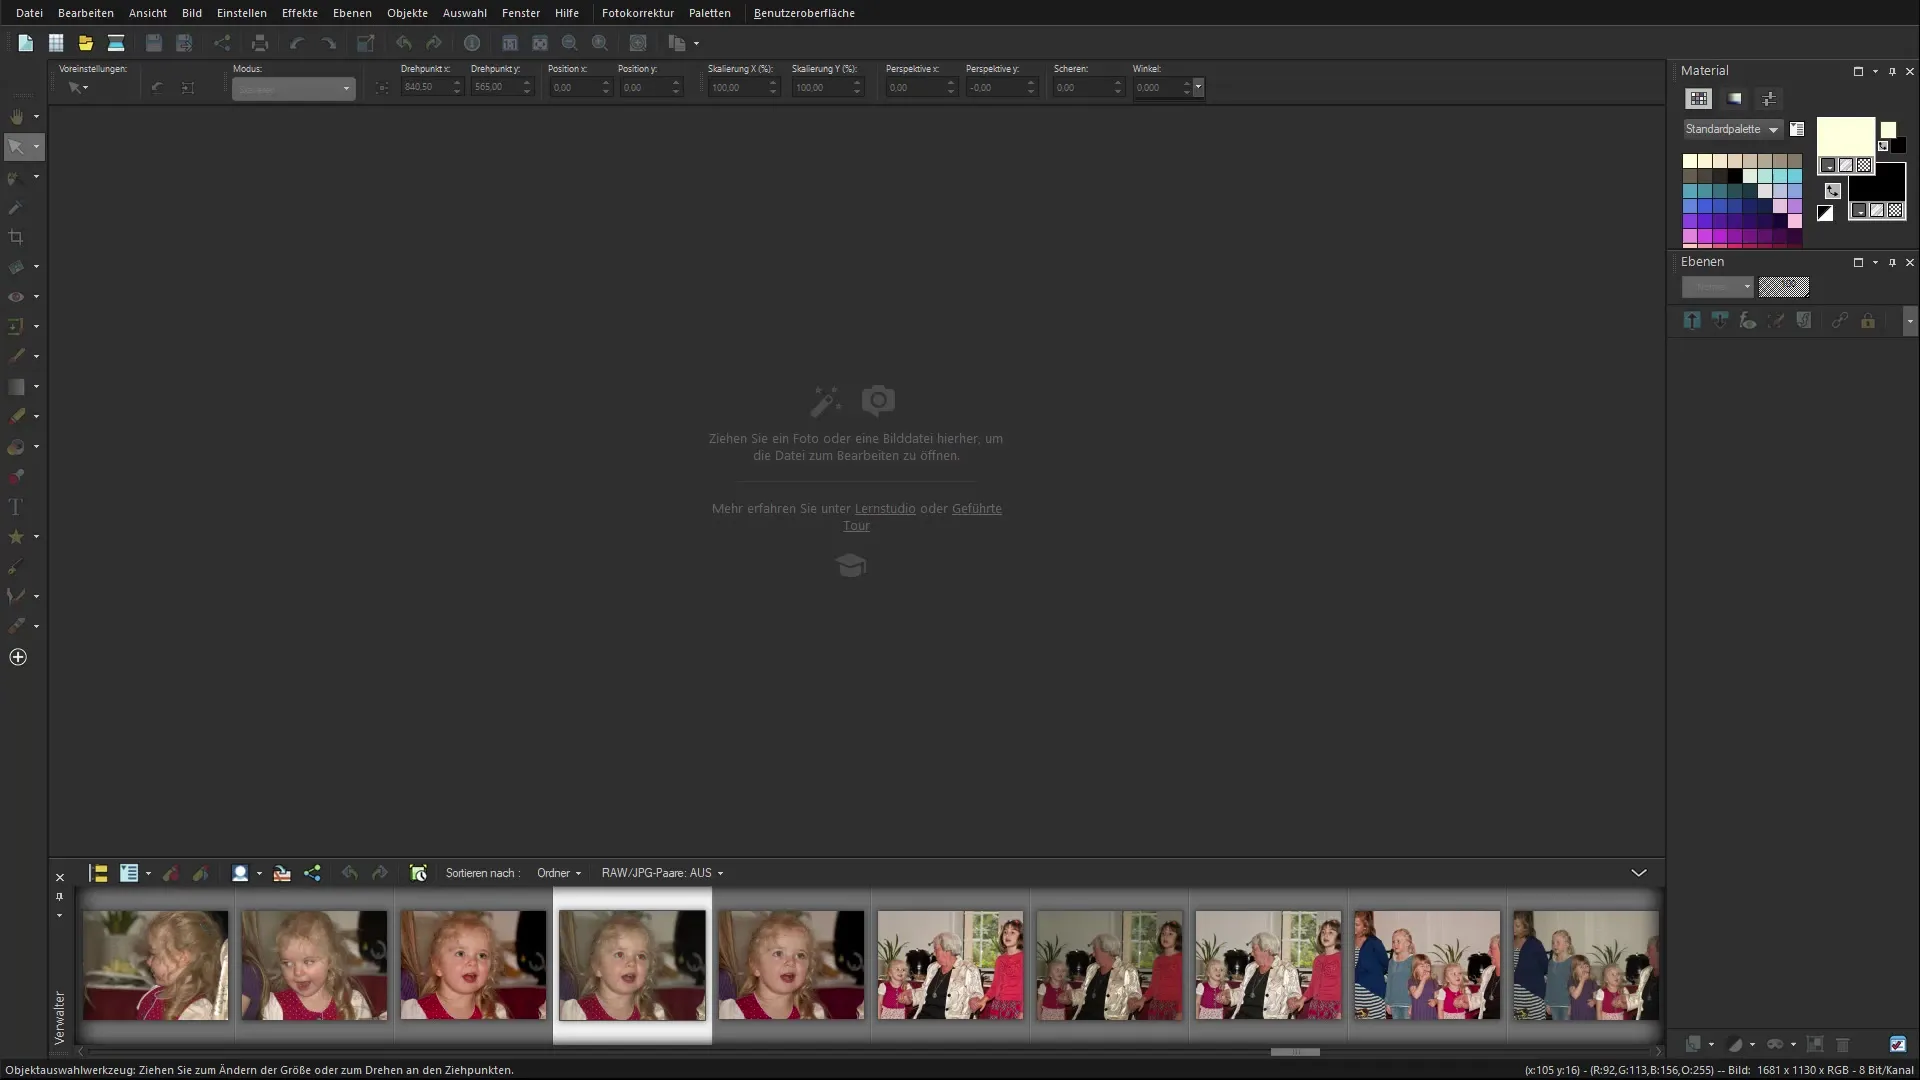
Open Camera RAW Editor
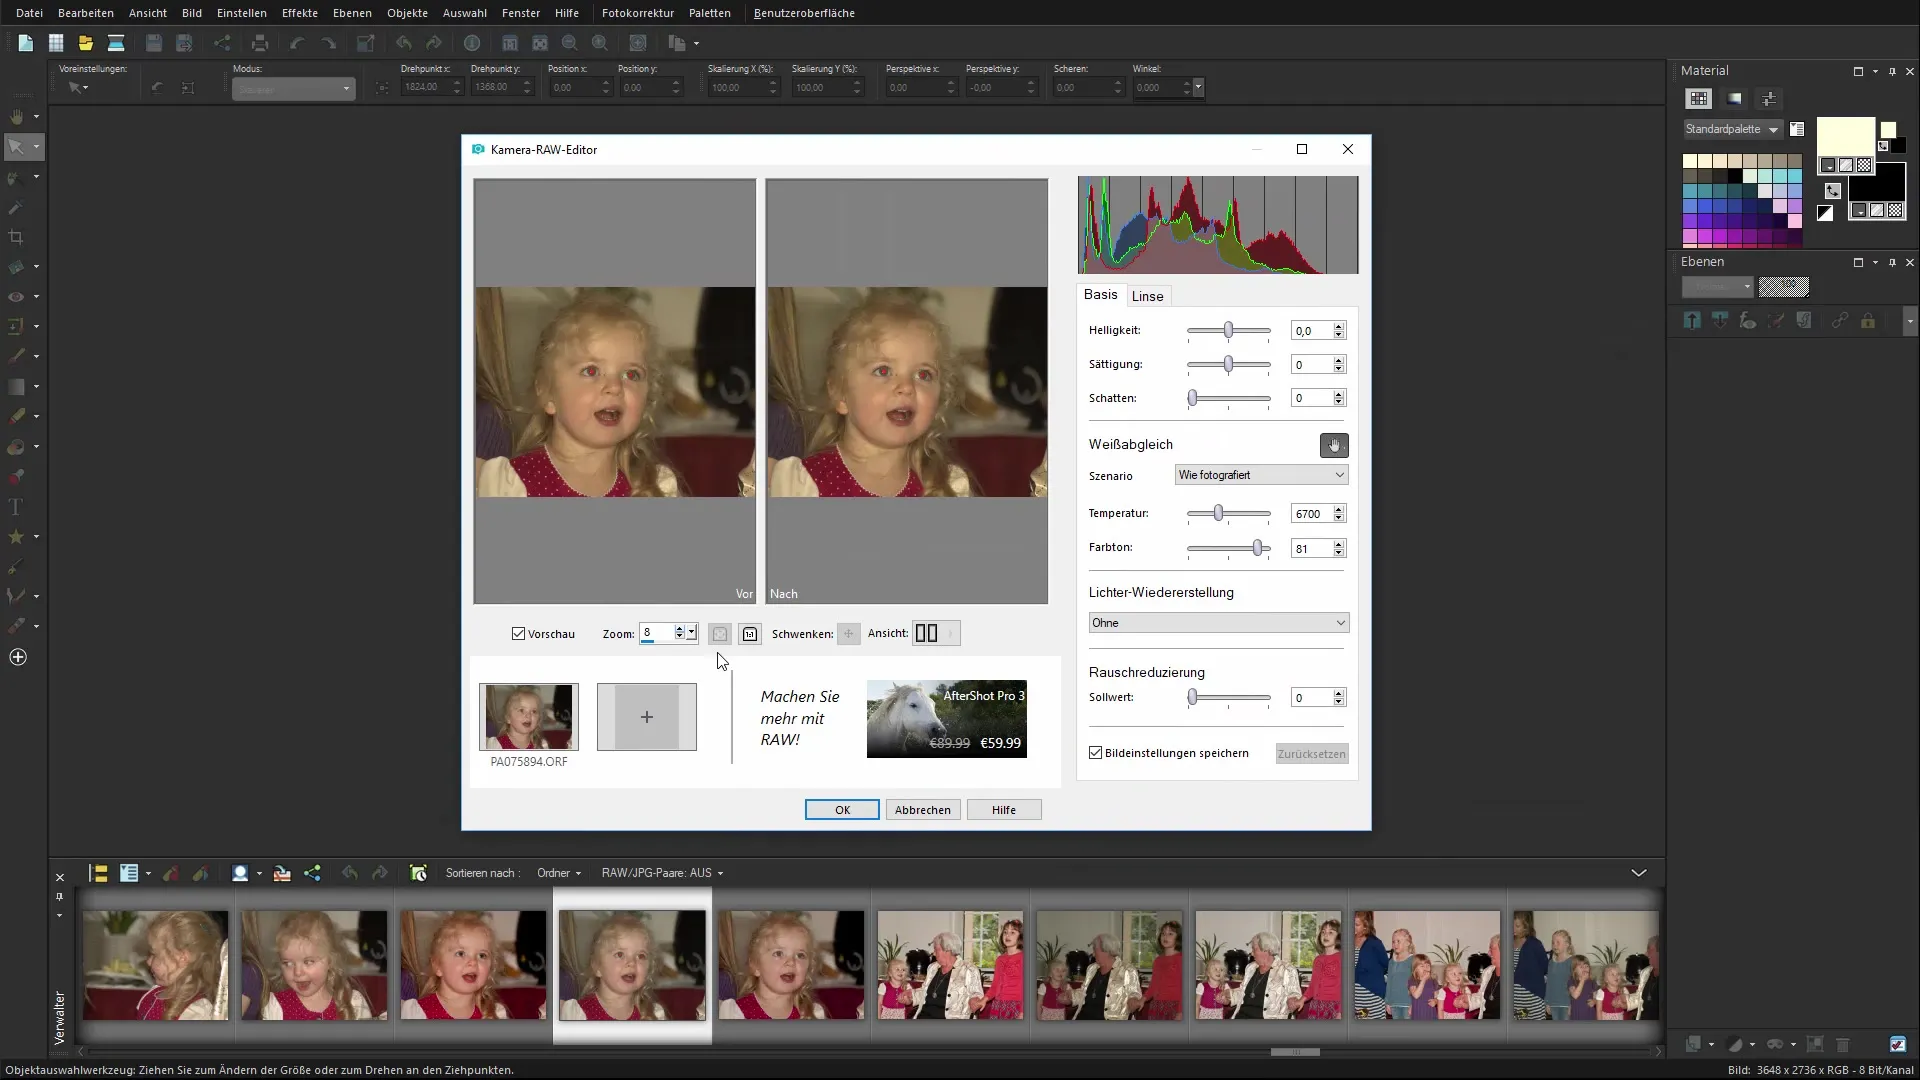
Once the image is imported, the camera RAW editor will automatically open. Here you have the opportunity to make initial adjustments to the image. The editor provides a clear interface that allows you to quickly change various settings.
Enable/Disable Preview
In the camera RAW editor, you can enable or disable the preview of changes. This function instantly shows you the effects of your adjustments on the image. When you enable the preview, you can see how each adjustment affects the picture.
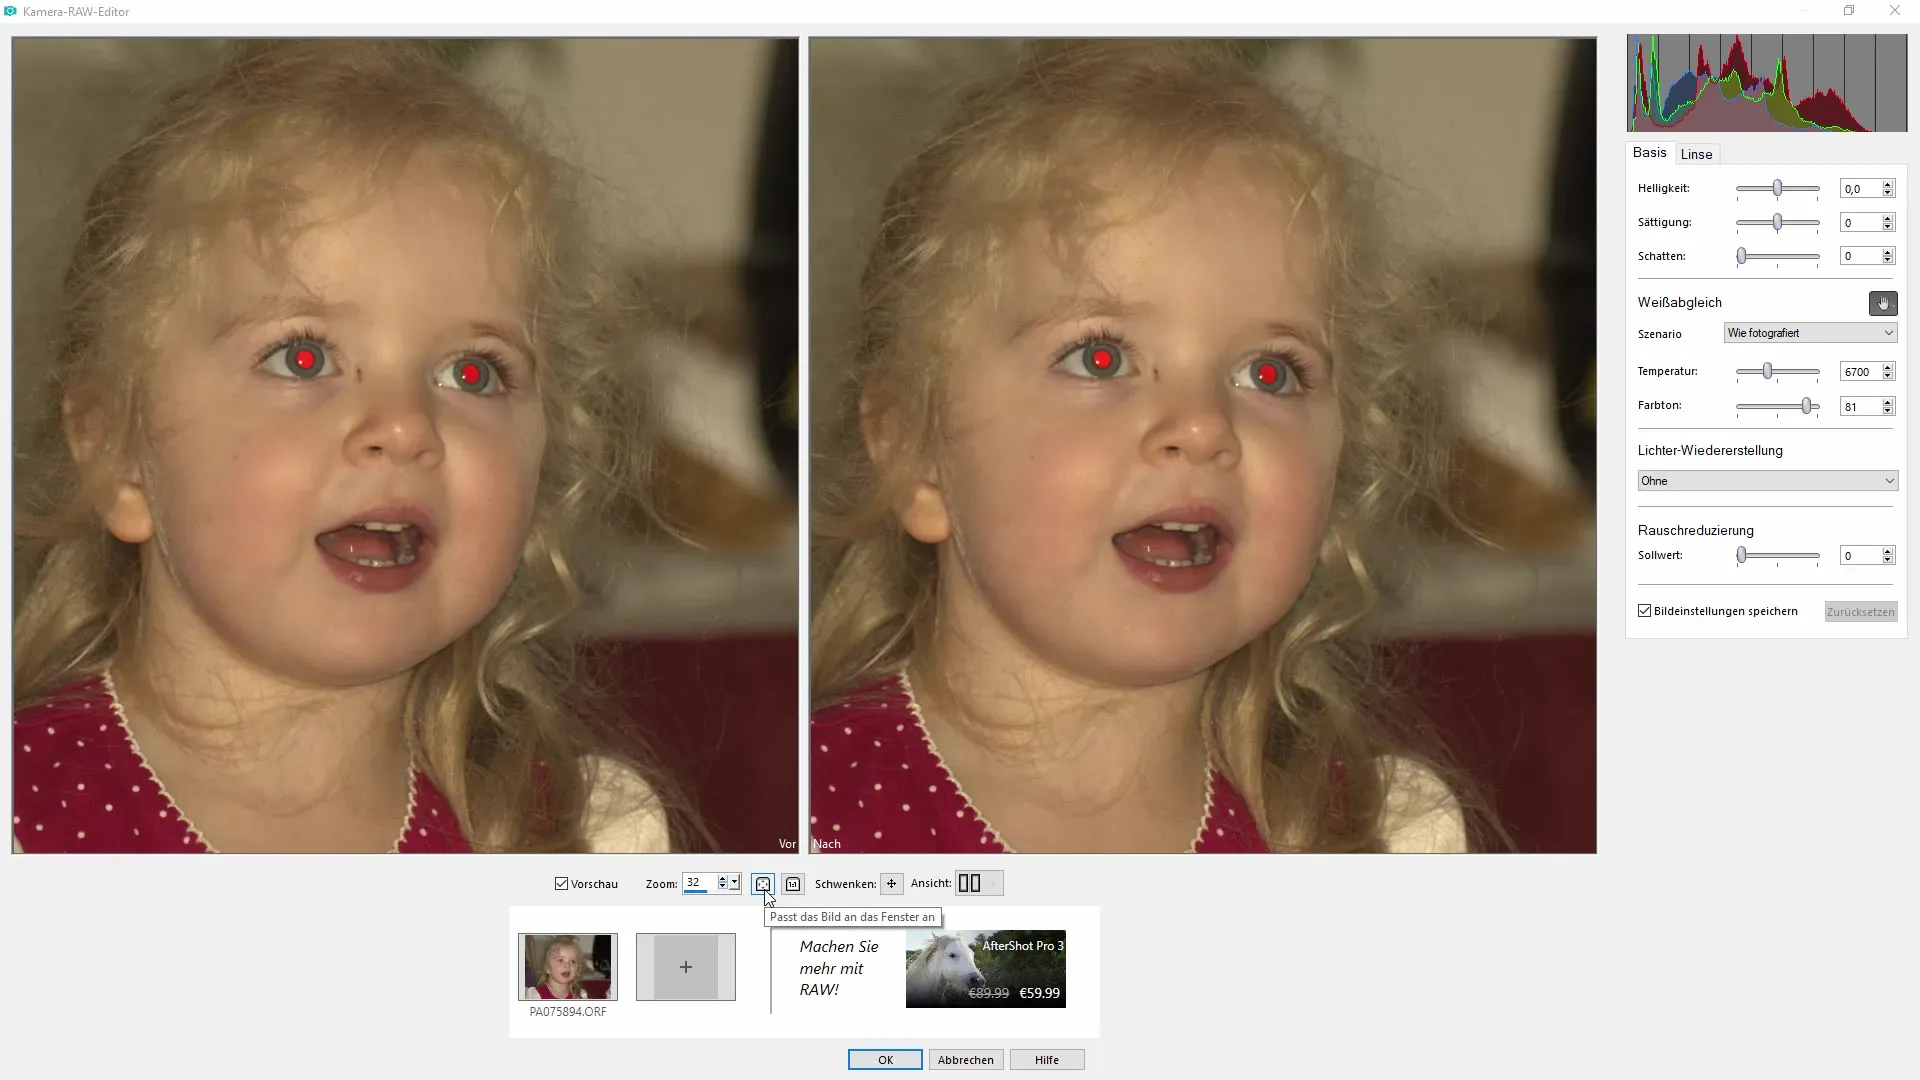
Zoom and Adjust Image
To better recognize details, you can zoom in on the image. The camera RAW editor allows you to set the zoom level. Try out which zoom level is best suited for your editing. You also have the option to switch the image to fullscreen mode for a better view.
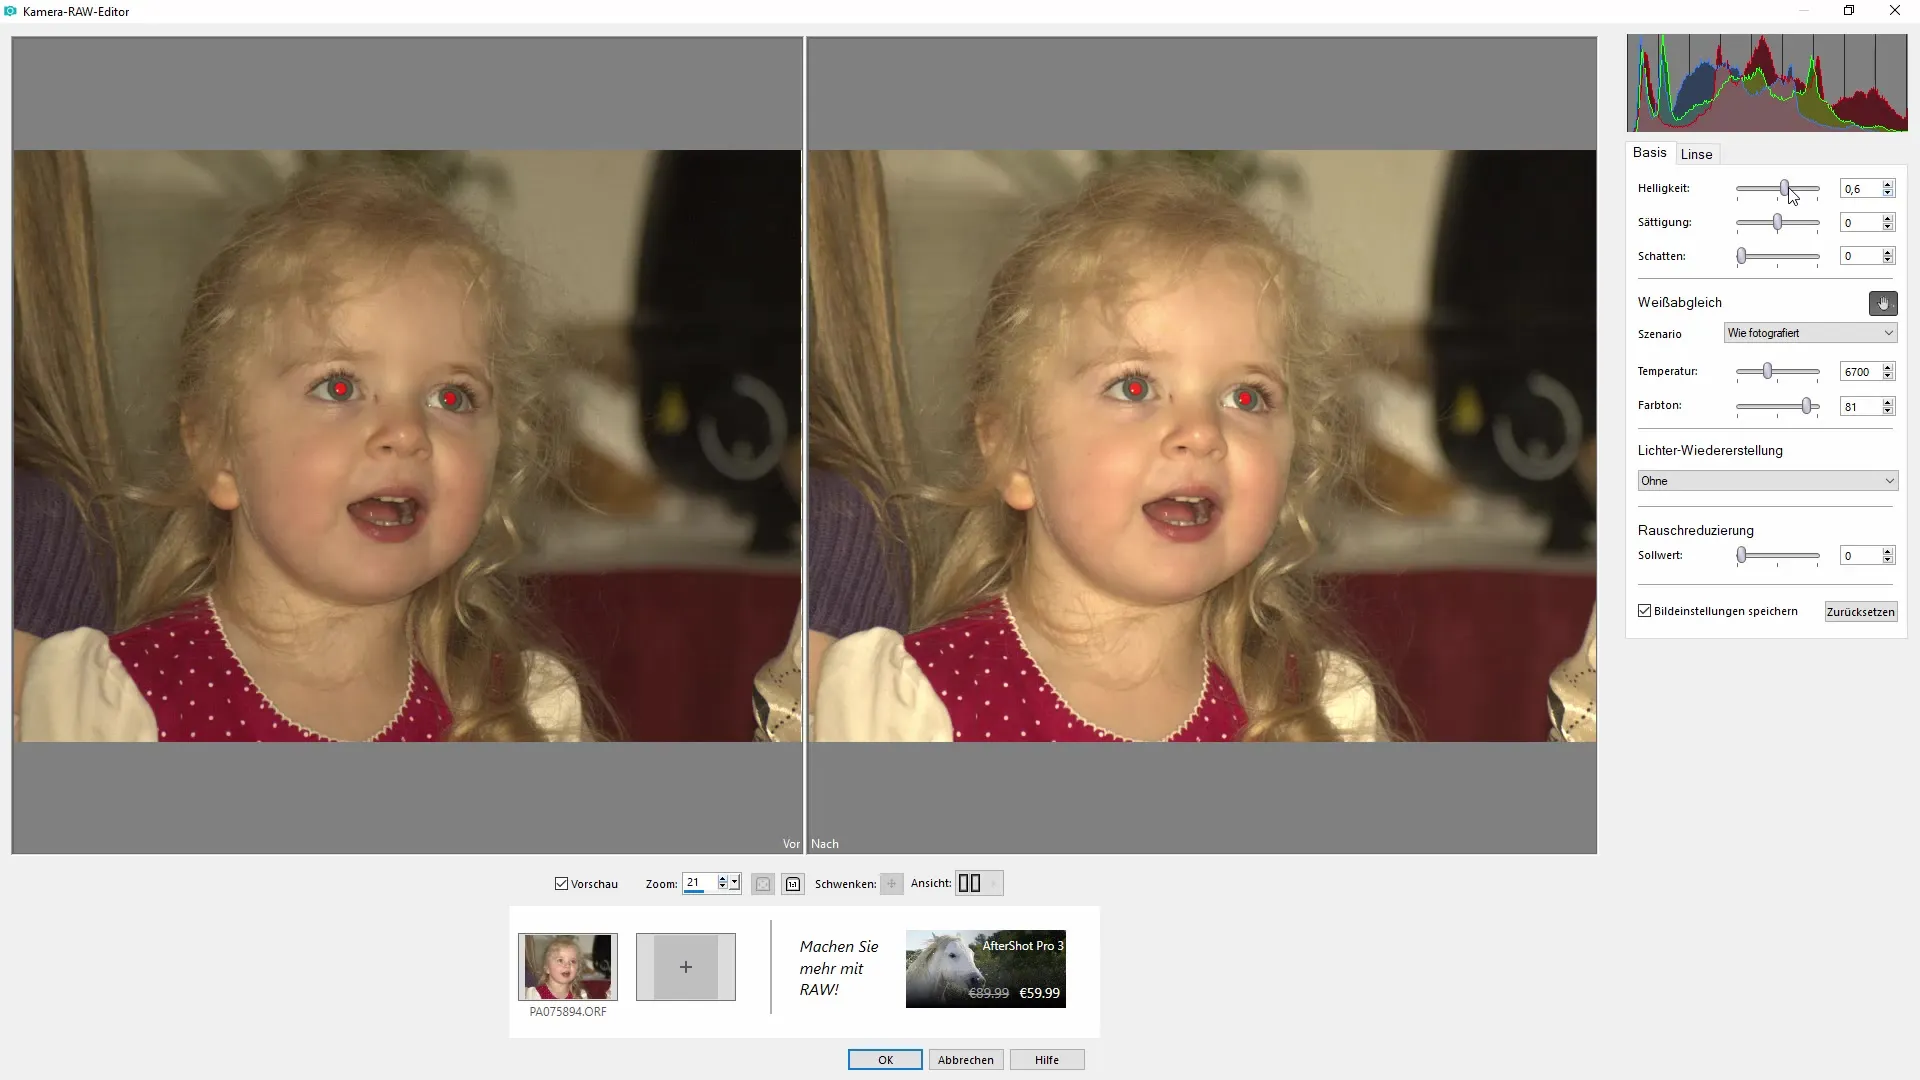
Make Color and Brightness Adjustments
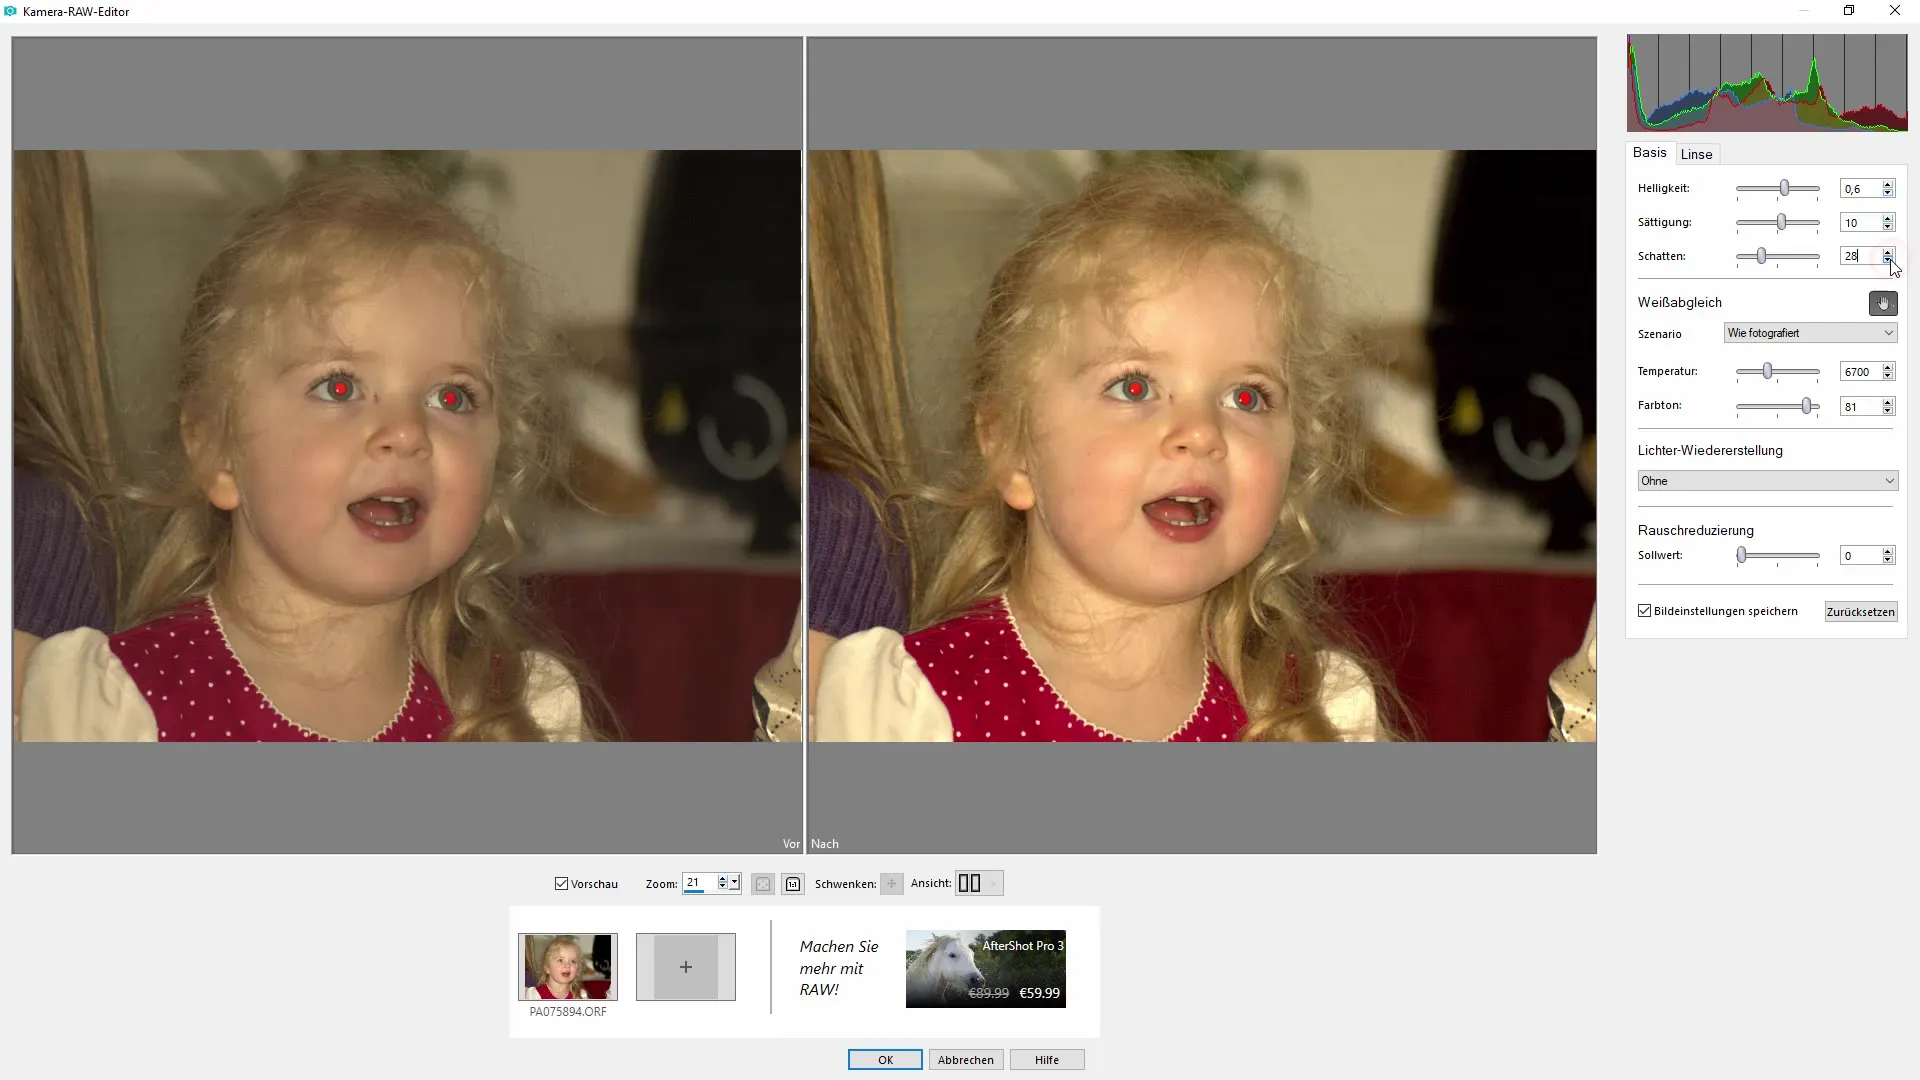
In the right sidebar, you will find various sliders for brightness, saturation, and contrast. Start by adjusting the brightness to lighten or darken the image. Be careful not to overdo the changes. A small adjustment can often make a big impact.
Adjust White Balance
An important function in image editing is the white balance. With this slider, you can adjust the color temperature of the image to achieve a more neutral color image. You can use preset settings or manually adjust the white point of the image to optimize the colors.
Apply Noise Reduction
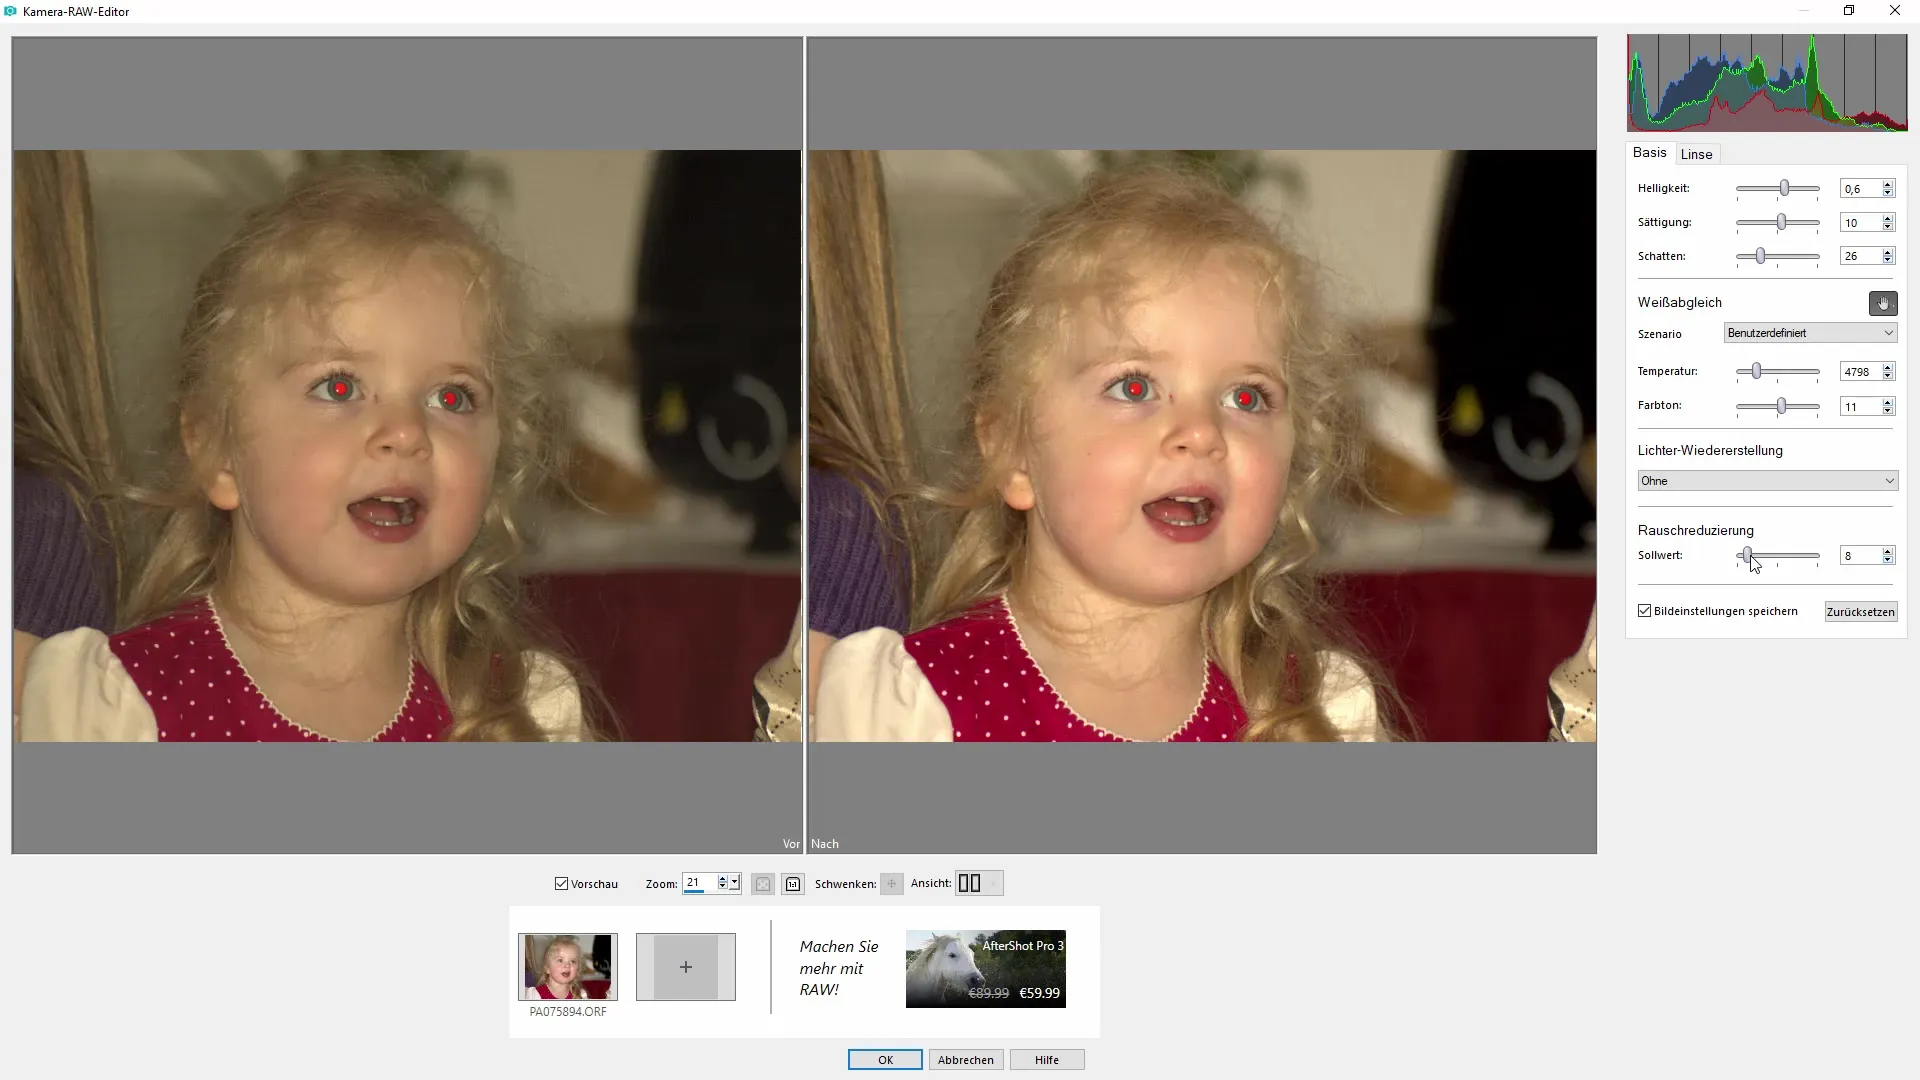
Especially in photos taken in darker environments, image noise can be a problem. The camera RAW editor gives you the option to reduce noise. Use this effect to improve image quality and enhance clear details.
Activate Lens Correction
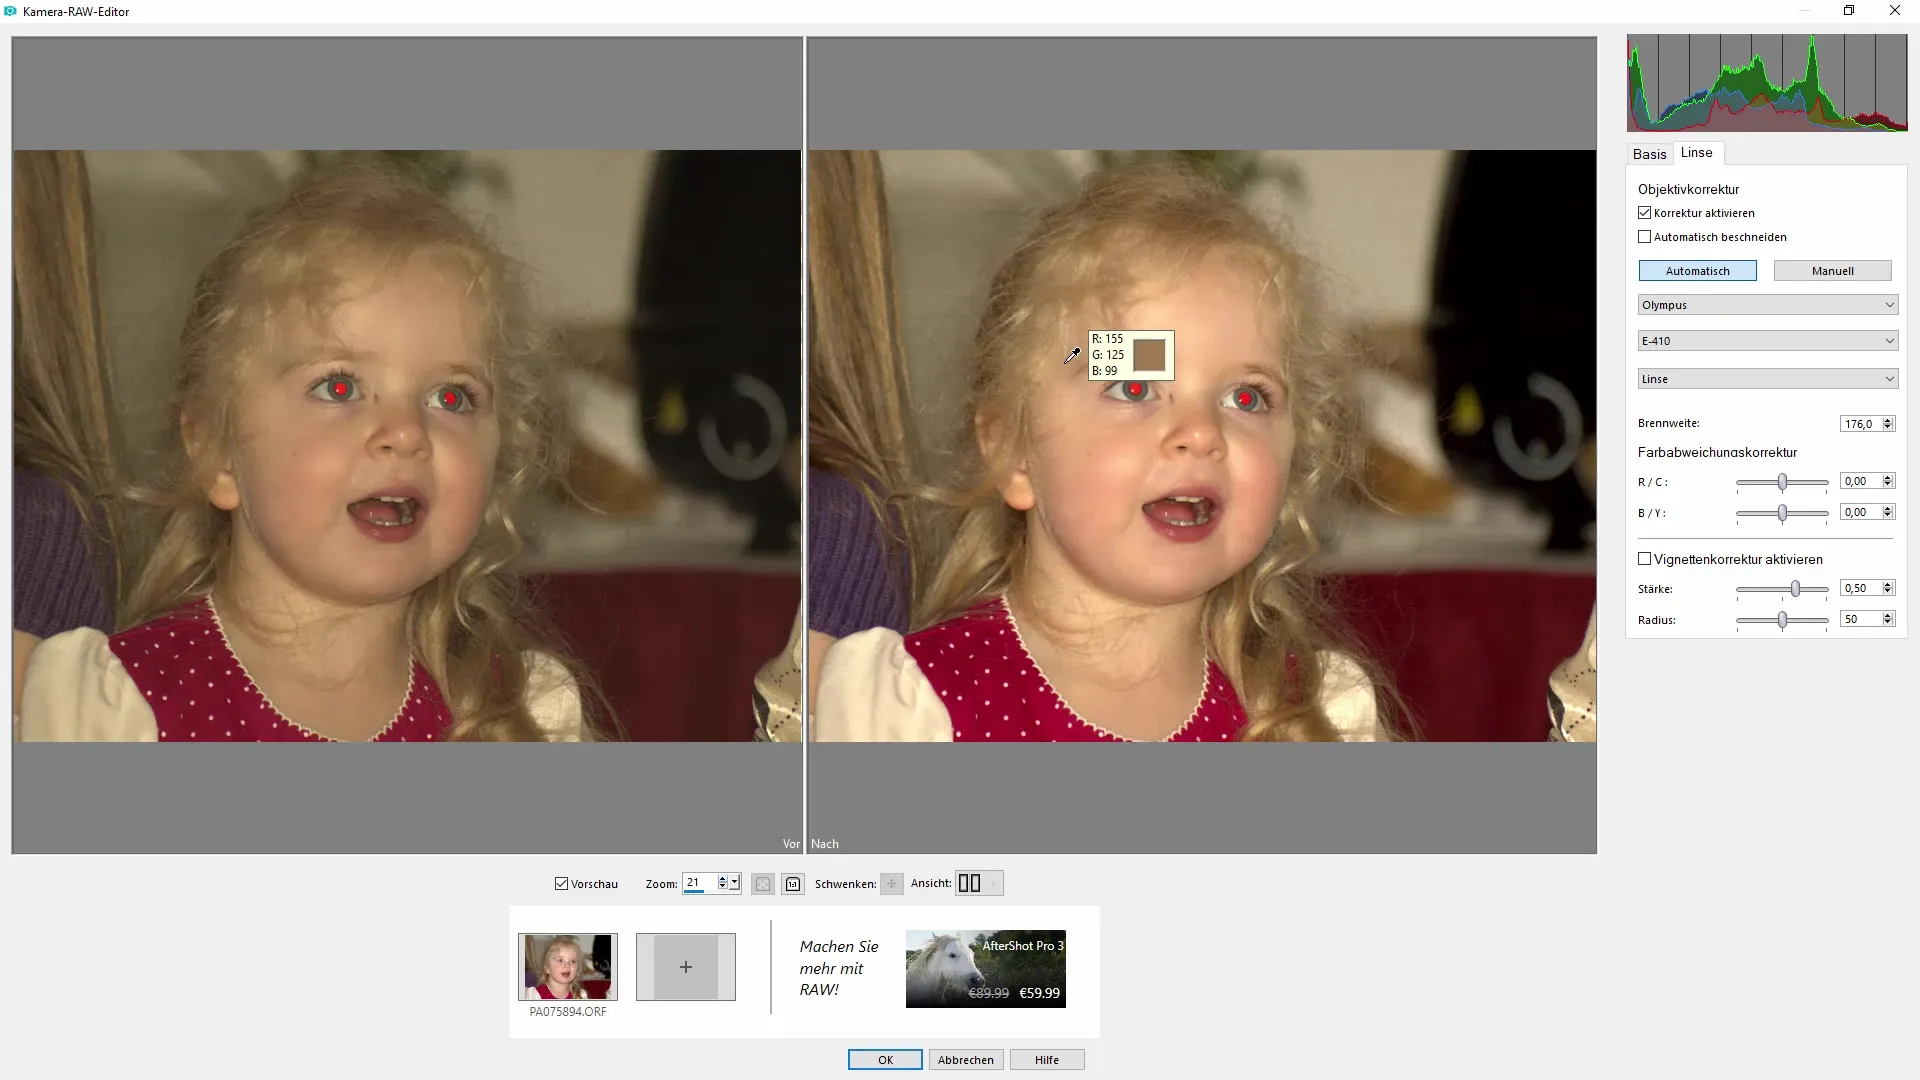
Another useful function is lens correction. If your camera has created distortions when taking the shot, you can correct them here. Select the appropriate camera model, and the software will automatically make the necessary adjustments to correct the image distortion.
Use Color Cast Correction
To avoid color casts, you can use color cast correction. Here, you can adjust specific color tones to achieve a harmonious overall image. This setting can help improve the colors of your image without making it appear overly edited.
Save Result and Continue Editing
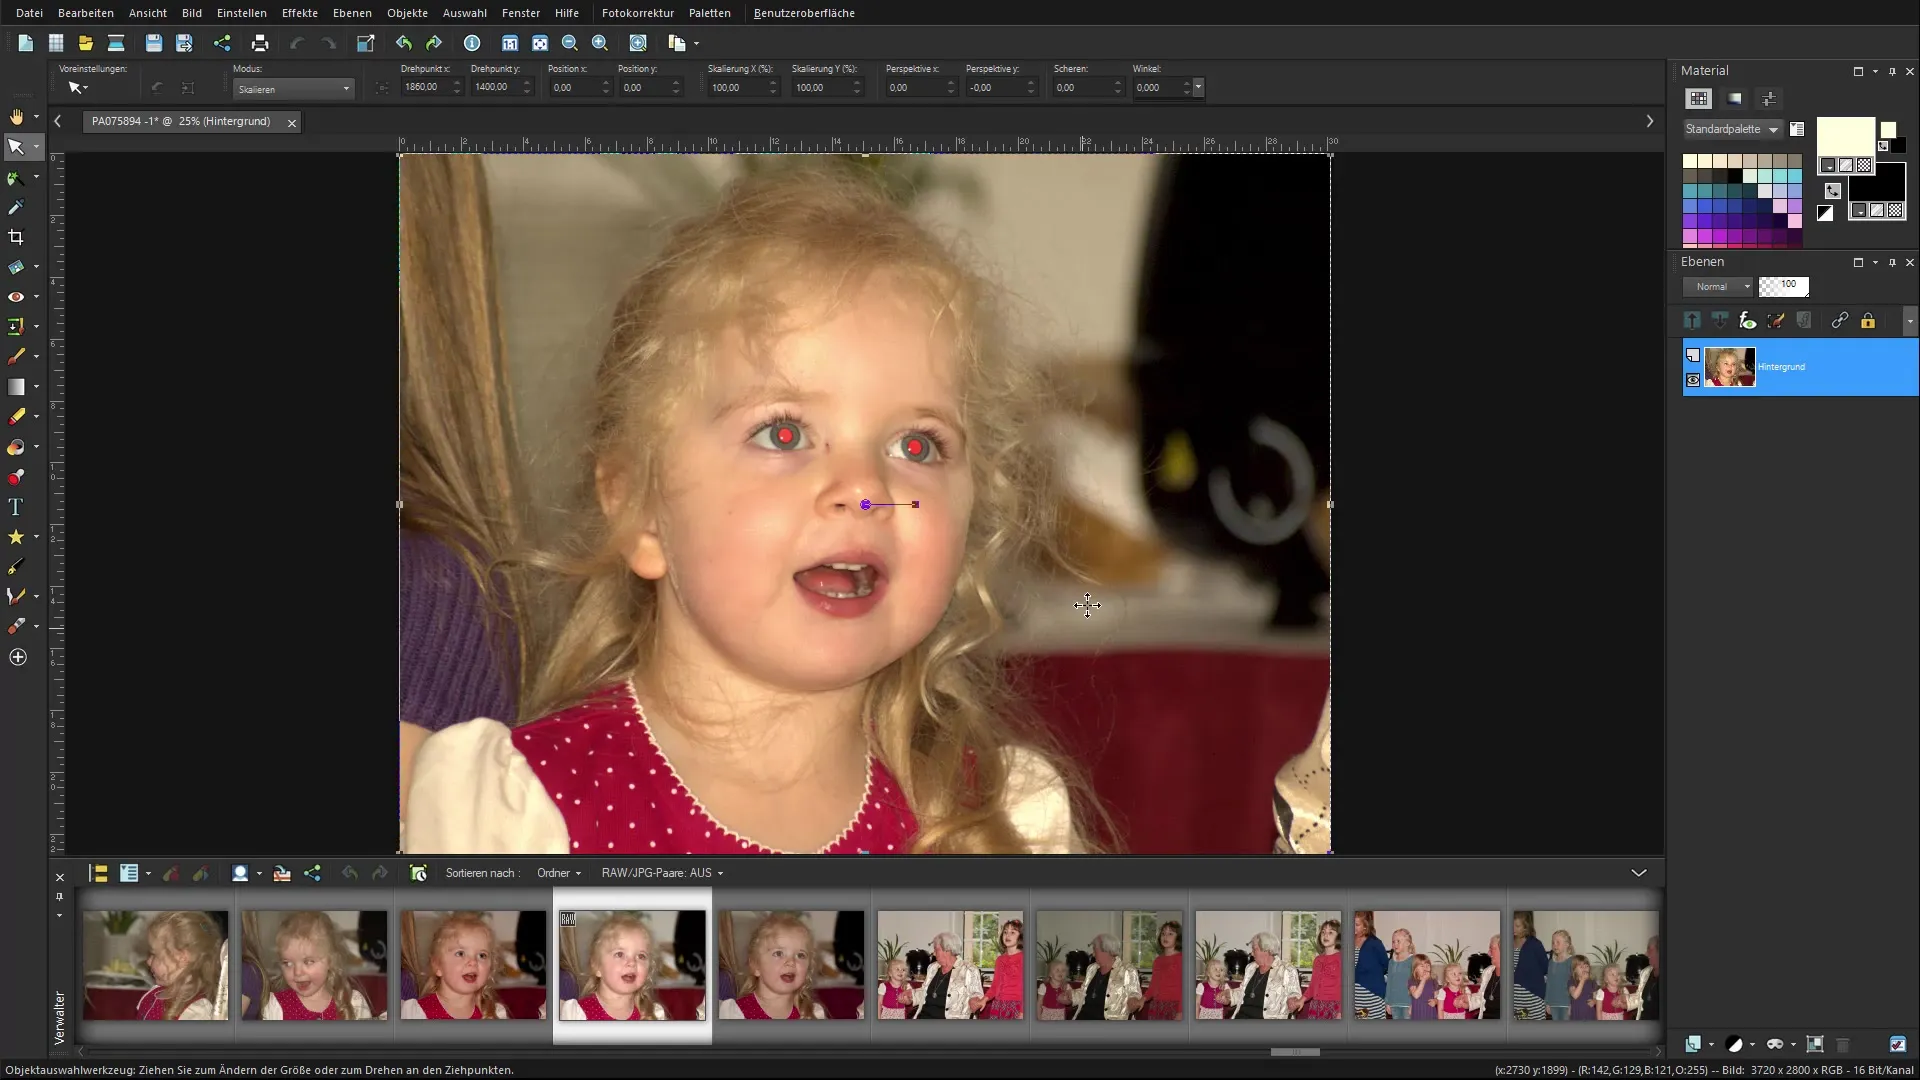
Once you are satisfied with your adjustments, click "Save." The image will now open in PaintShop Pro with the changes made. You can now carry out further touch-ups and edits, such as removing red-eye or editing small blemishes in the image.
Summary - Corel PaintShop Pro: Properly Edit RAW Images
Editing RAW images in Corel PaintShop Pro is a process that offers you many creative freedoms. By utilizing the various features of the camera RAW editor, you can significantly enhance your images. From color and brightness adjustments to lens correction – the software provides you with everything you need to take your photography to the next level.
Frequently Asked Questions
How do I import RAW images into Corel PaintShop Pro?You can drag & drop RAW images into the software or import them via the "File" menu.
What adjustments can I make in the camera RAW editor?In the camera RAW editor, you can adjust brightness, saturation, contrast, white balance, and noise reduction.
What is the advantage of lens correction?Lens correction helps eliminate distortions in the image that can occur due to certain camera models.
Can I undo changes?Yes, during editing, you can undo changes at any time.
What should I do if the image noise is too strong?Use noise reduction in the RAW editor to improve image quality.


