The creation of HDR (High Dynamic Range) images can give your photography an impressive dynamic expression. Corel PaintShop Pro offers a user-friendly way to generate appealing HDR images from both exposure brackets and single RAW photos. In this guide, I will show you how to carry out this process step by step to enhance your images with more depth and vibrancy.
Key Insights
- HDR images offer enhanced dynamic range and color depth.
- Corel PaintShop Pro allows the creation of HDR using RAW files and exposure brackets.
- The process of creating HDR images involves several steps, where various settings can be adjusted.
Step-by-Step Guide
To create an HDR image in Corel PaintShop Pro, here are the necessary steps:
Step 1: Image Selection and RAW File
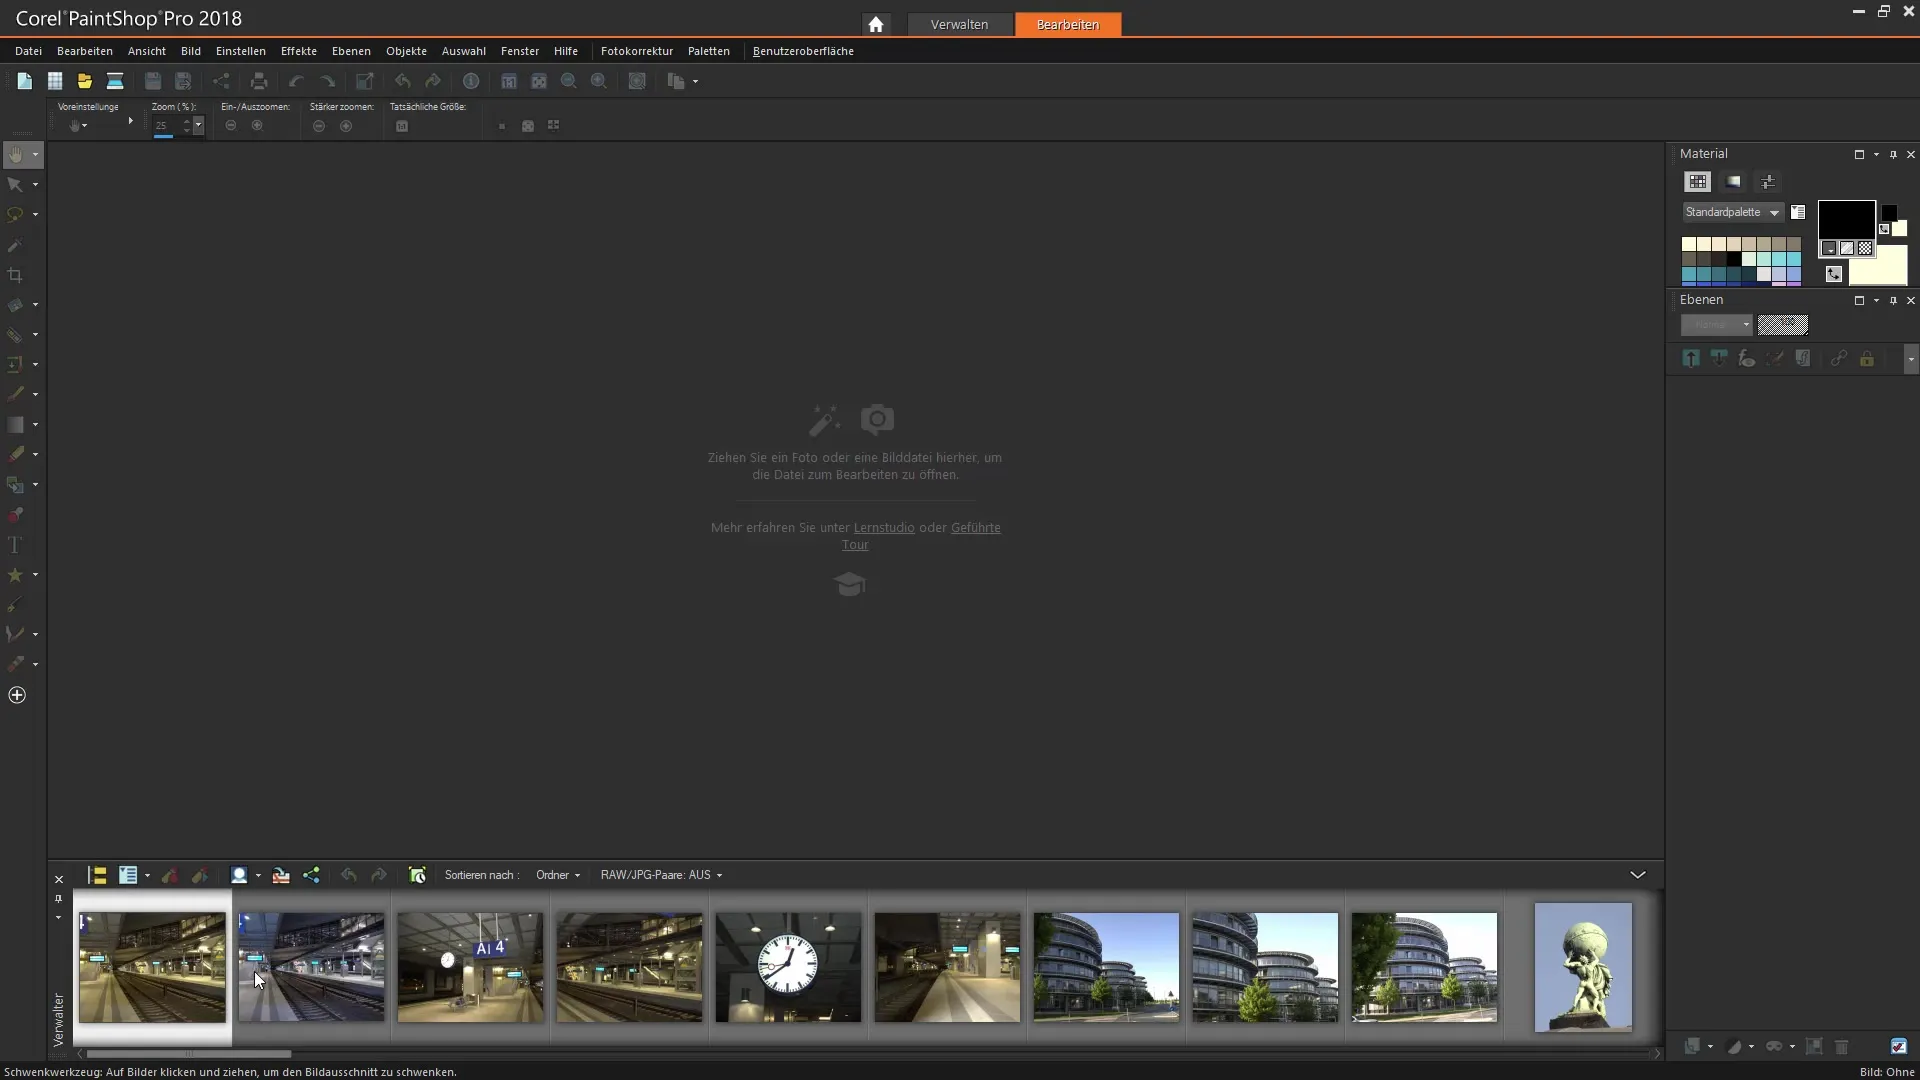
First, you need to select a suitable image. Make sure it is a RAW file, as only these can be processed for HDR. If you have a JPG or TIF image, you cannot use it. I have selected an example image in ORF format (Olympus RAW) in my organizer.
Step 2: Accessing the HDR Function
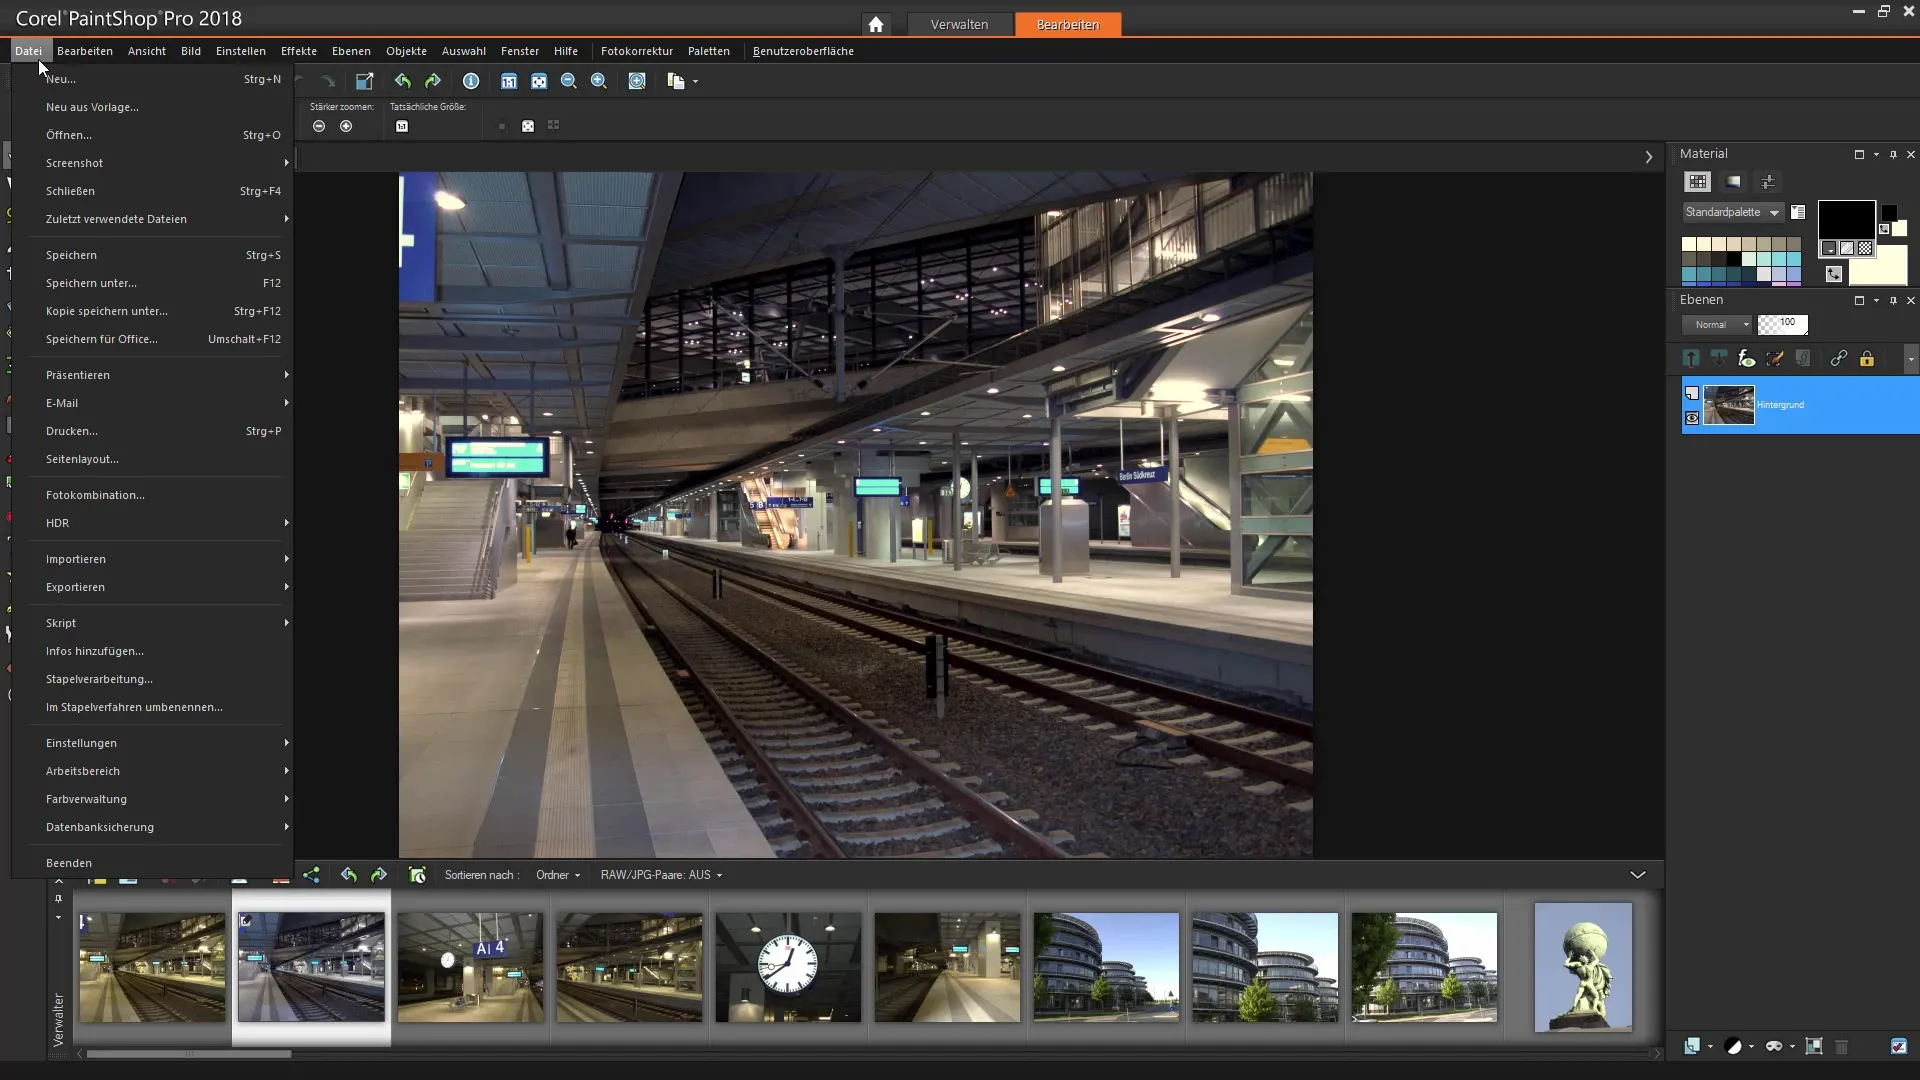
To activate the HDR function, go to "File" and select the menu option "HDR". You will notice that this option is only active when a RAW image is selected. A single photo is sufficient to start the editing process.
Step 3: Setting Exposure Intervals
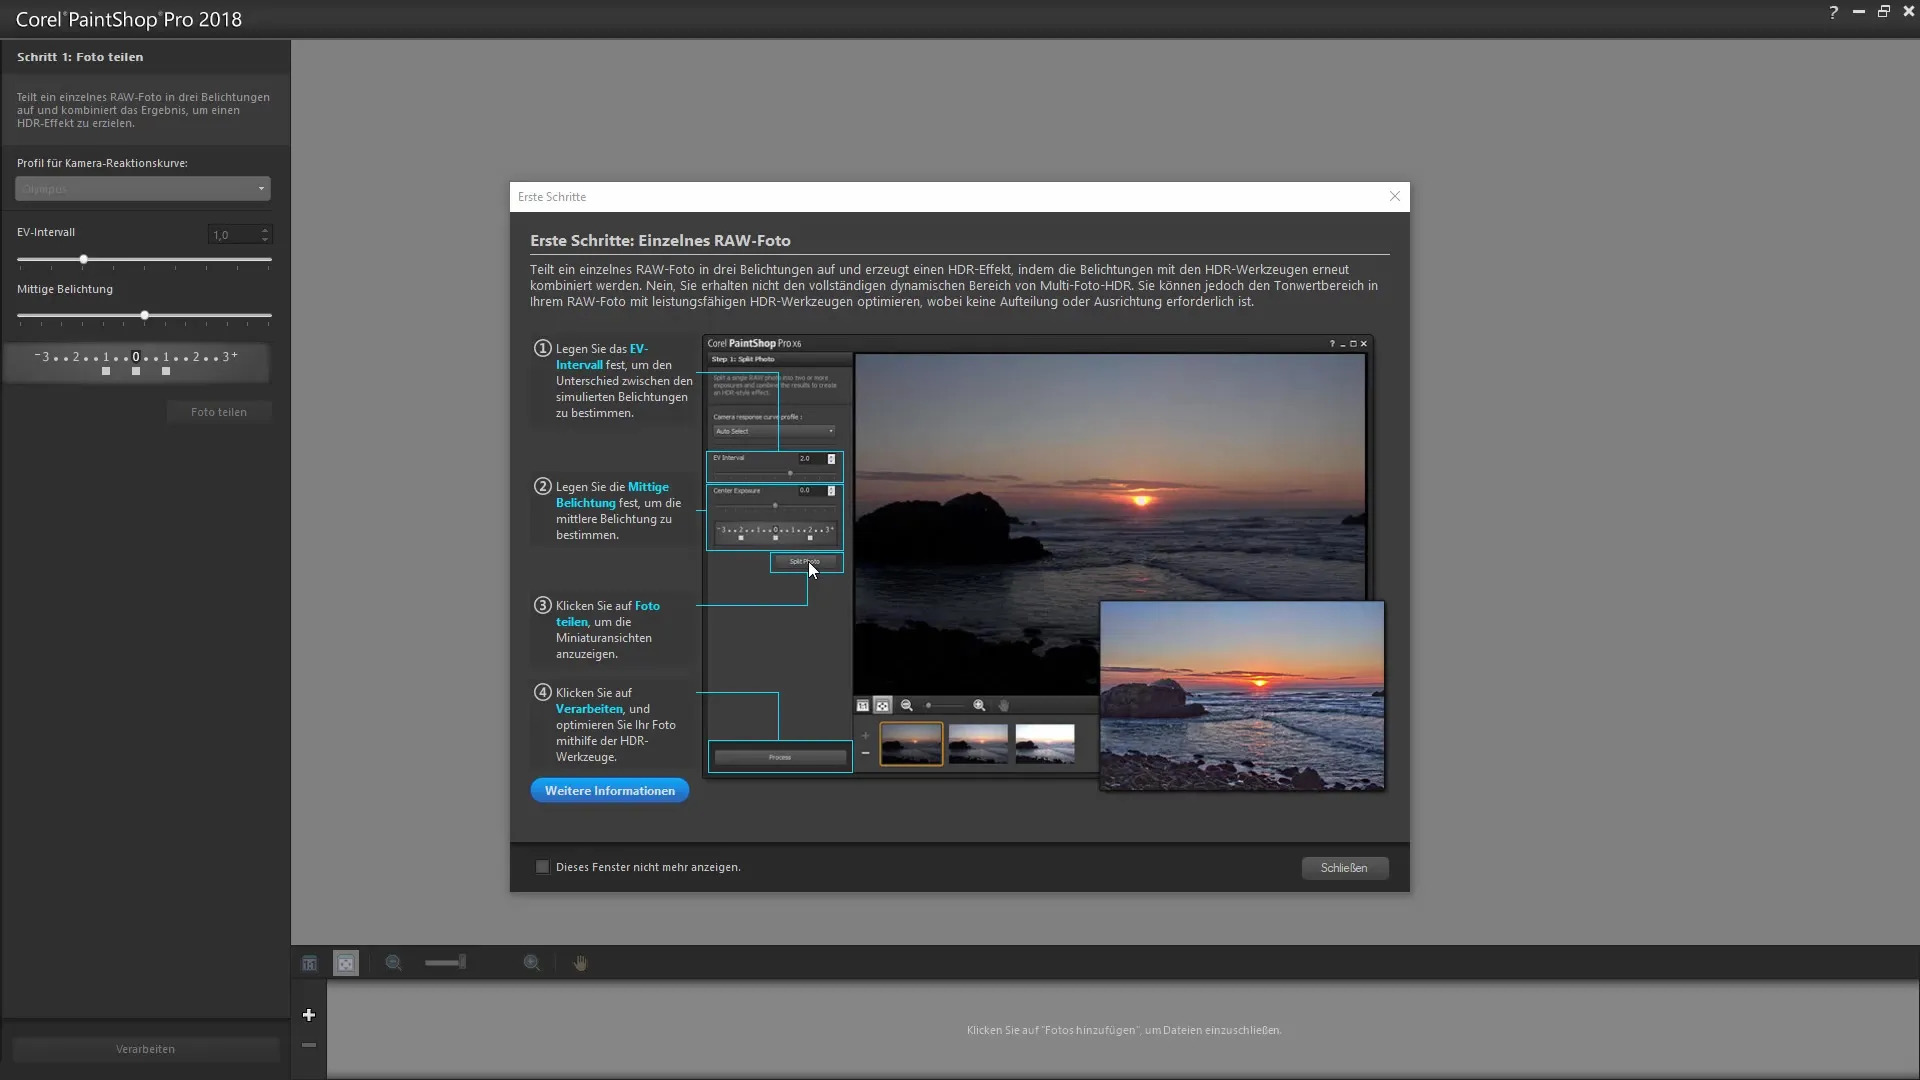
In the next dialog, you will see a slider for the exposure interval. Here you can define the increments of exposure. Choose appropriate values, for example +/- 2 exposure levels, to capture different lighting conditions.
Step 4: Splitting the Photo
Before you can start processing, you need to split the photo. Click on "Split Photo". Corel PaintShop Pro will now generate three images containing the different exposure settings.
Step 5: HDR Presets
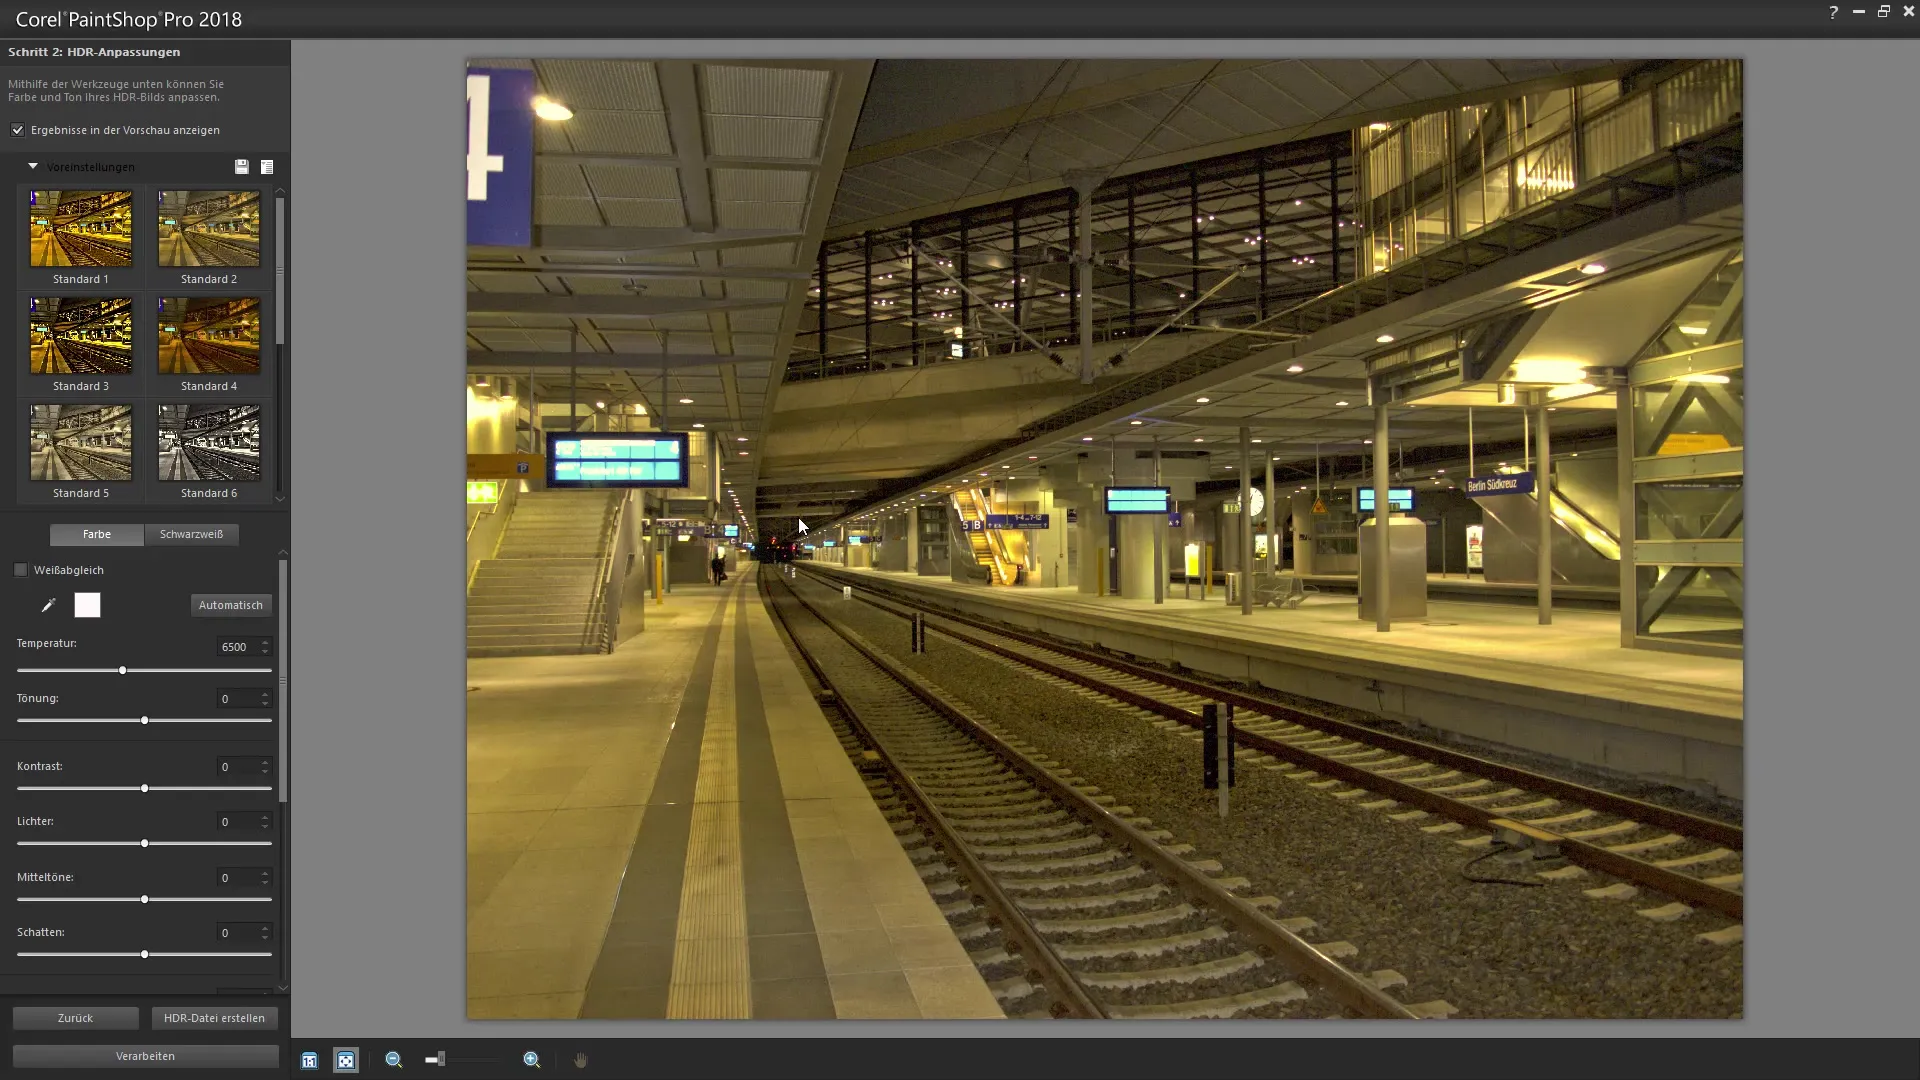
Now you will see an overview of the first results. In the second step, you can select various HDR presets. These basic settings help you achieve the desired look, whether it is a dramatic or a more subtle image. You have the option to choose between different modes, such as "X-ray" or "Sandy Shadow". Be sure to select the preset that matches your vision.
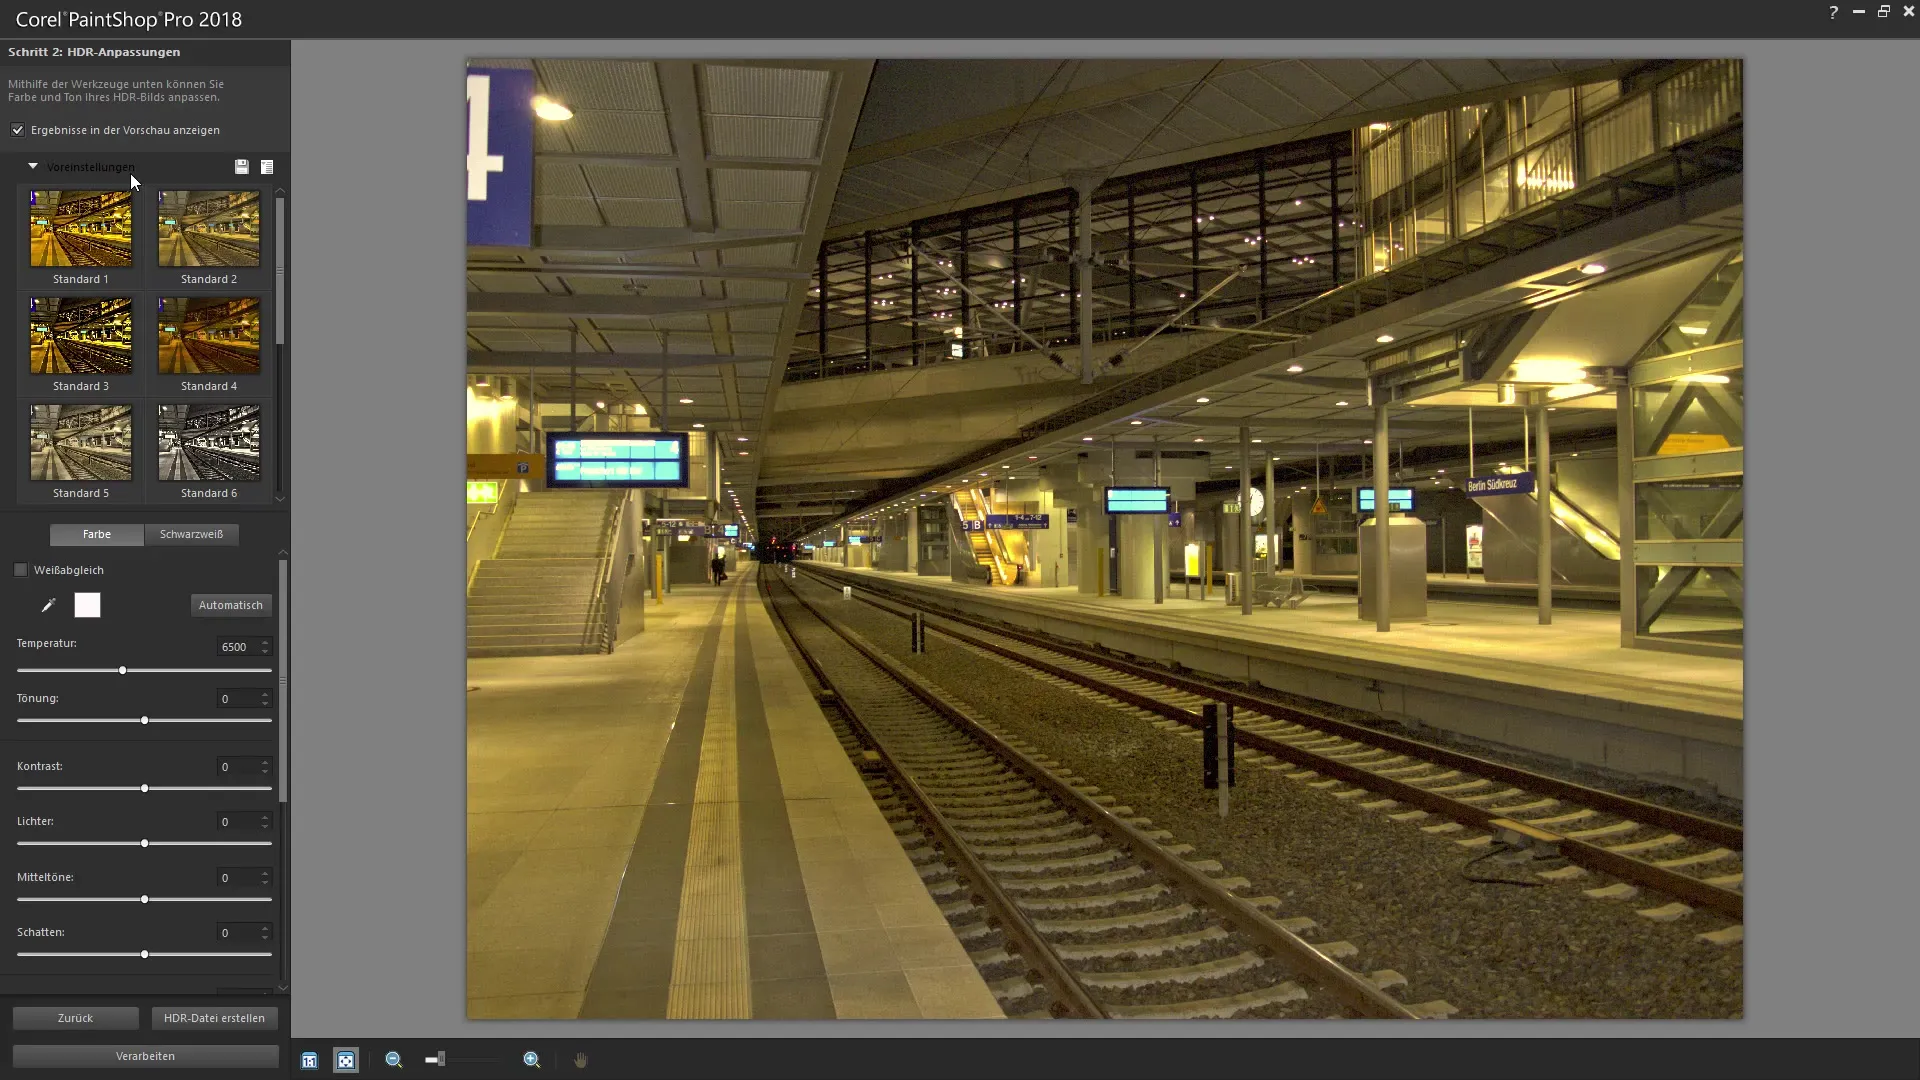
Step 6: Adjusting Color and Tint
Here you can change the color temperature and tint of the image to give the HDR more vibrancy. Adjust the values and observe how the image responds. A white balance with the pipette can also help achieve neutral colors.
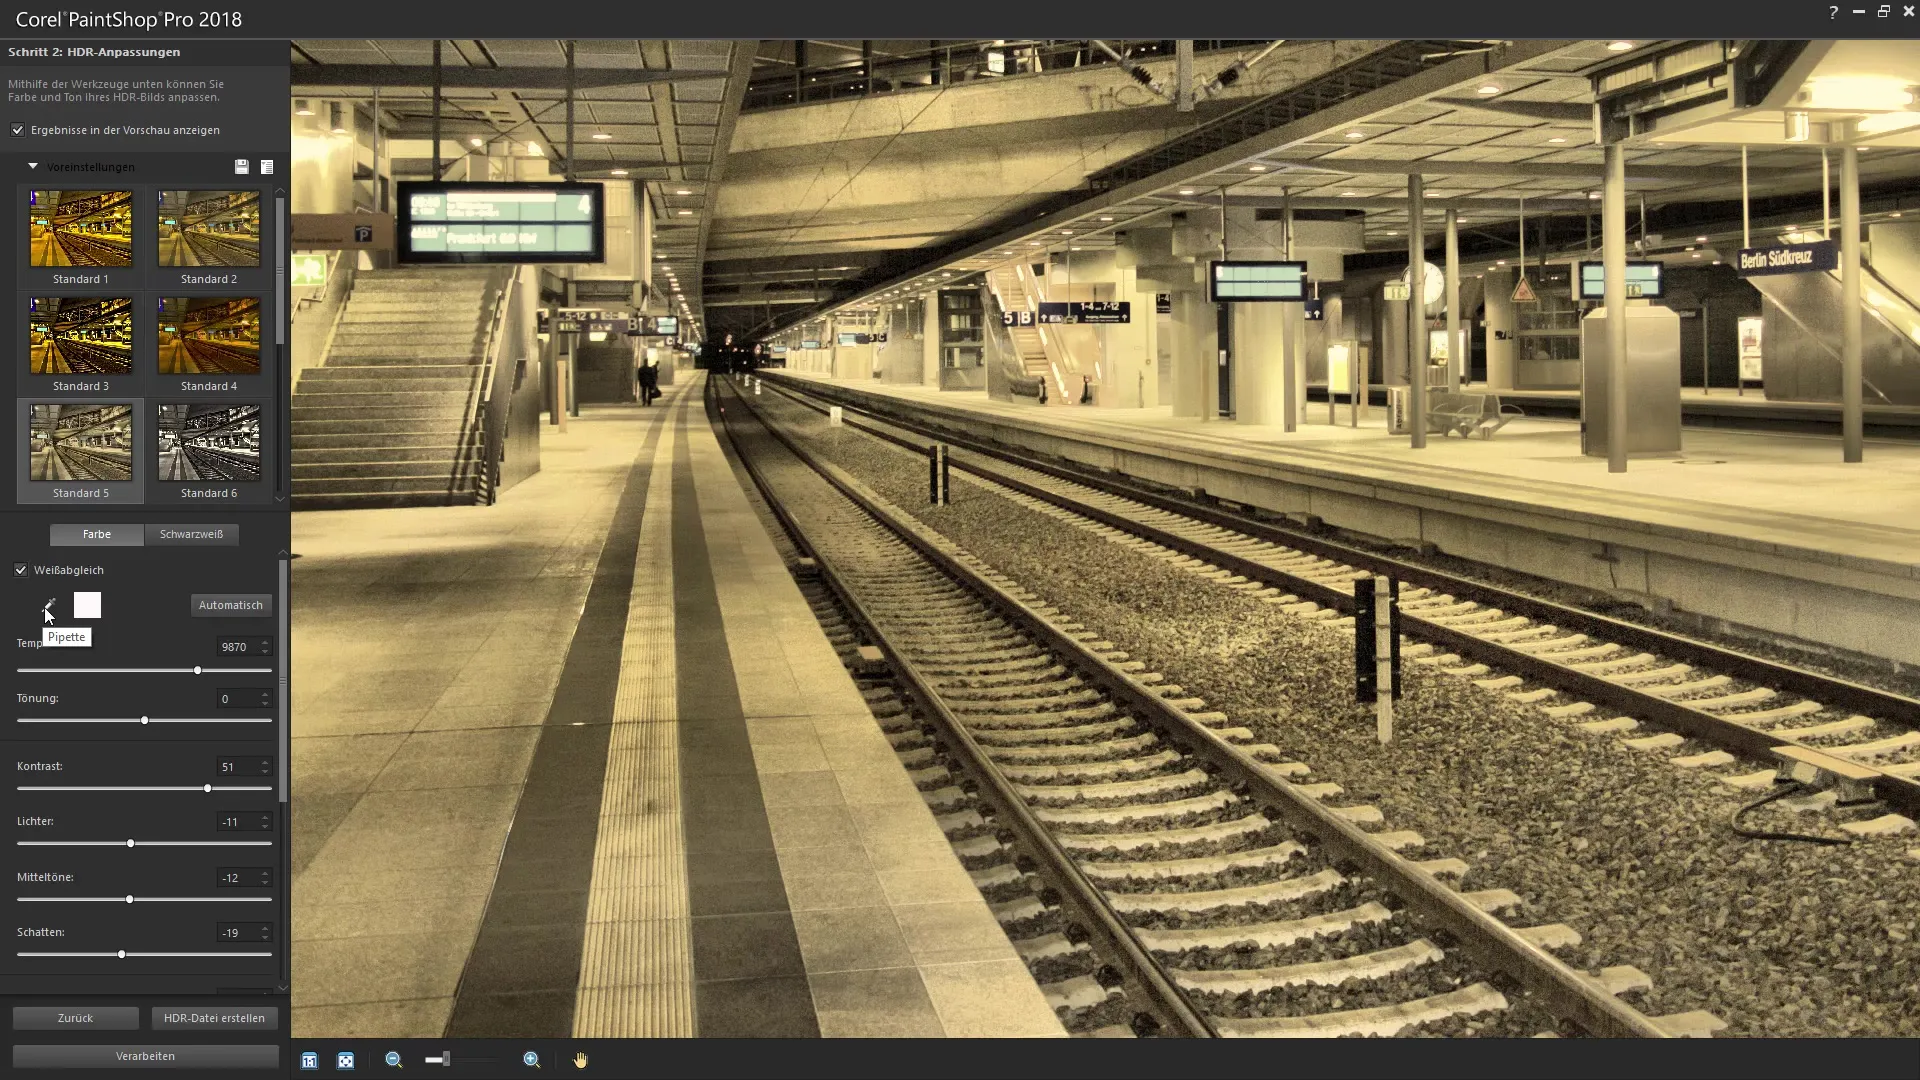
Step 7: Editing Light and Contrast
It is important to skillfully manage light, midtones, and shadows to achieve the best possible HDR quality. Ensure that the highlights are not overexposed and the shadows are not underexposed. Test different values to find the right contrast for your image.
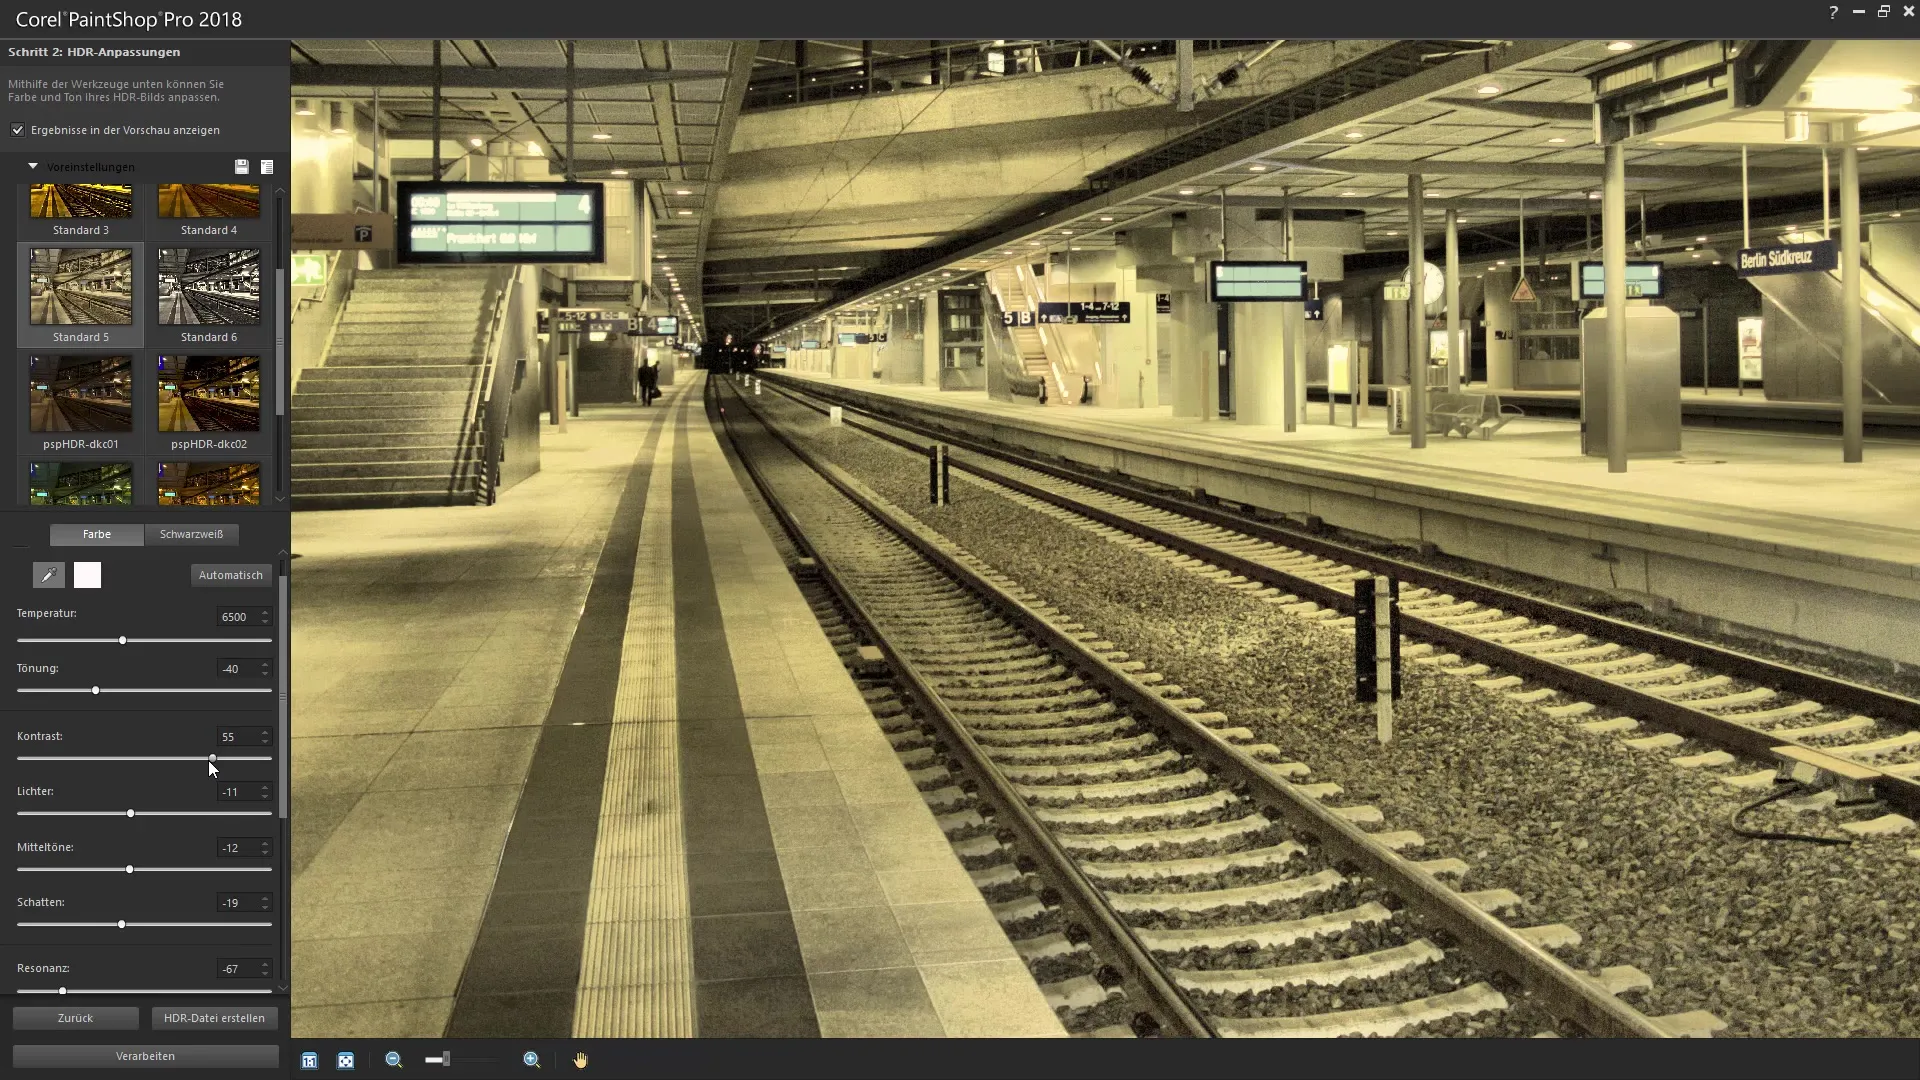
Step 8: Details and Fine-Tuning
Depending on your preference, you can choose between "natural" and "creative" details. Here, sliders are involved that allow you to adjust light reflections and local shadows. Experiment with these values to extract maximum visual fascination from your image.
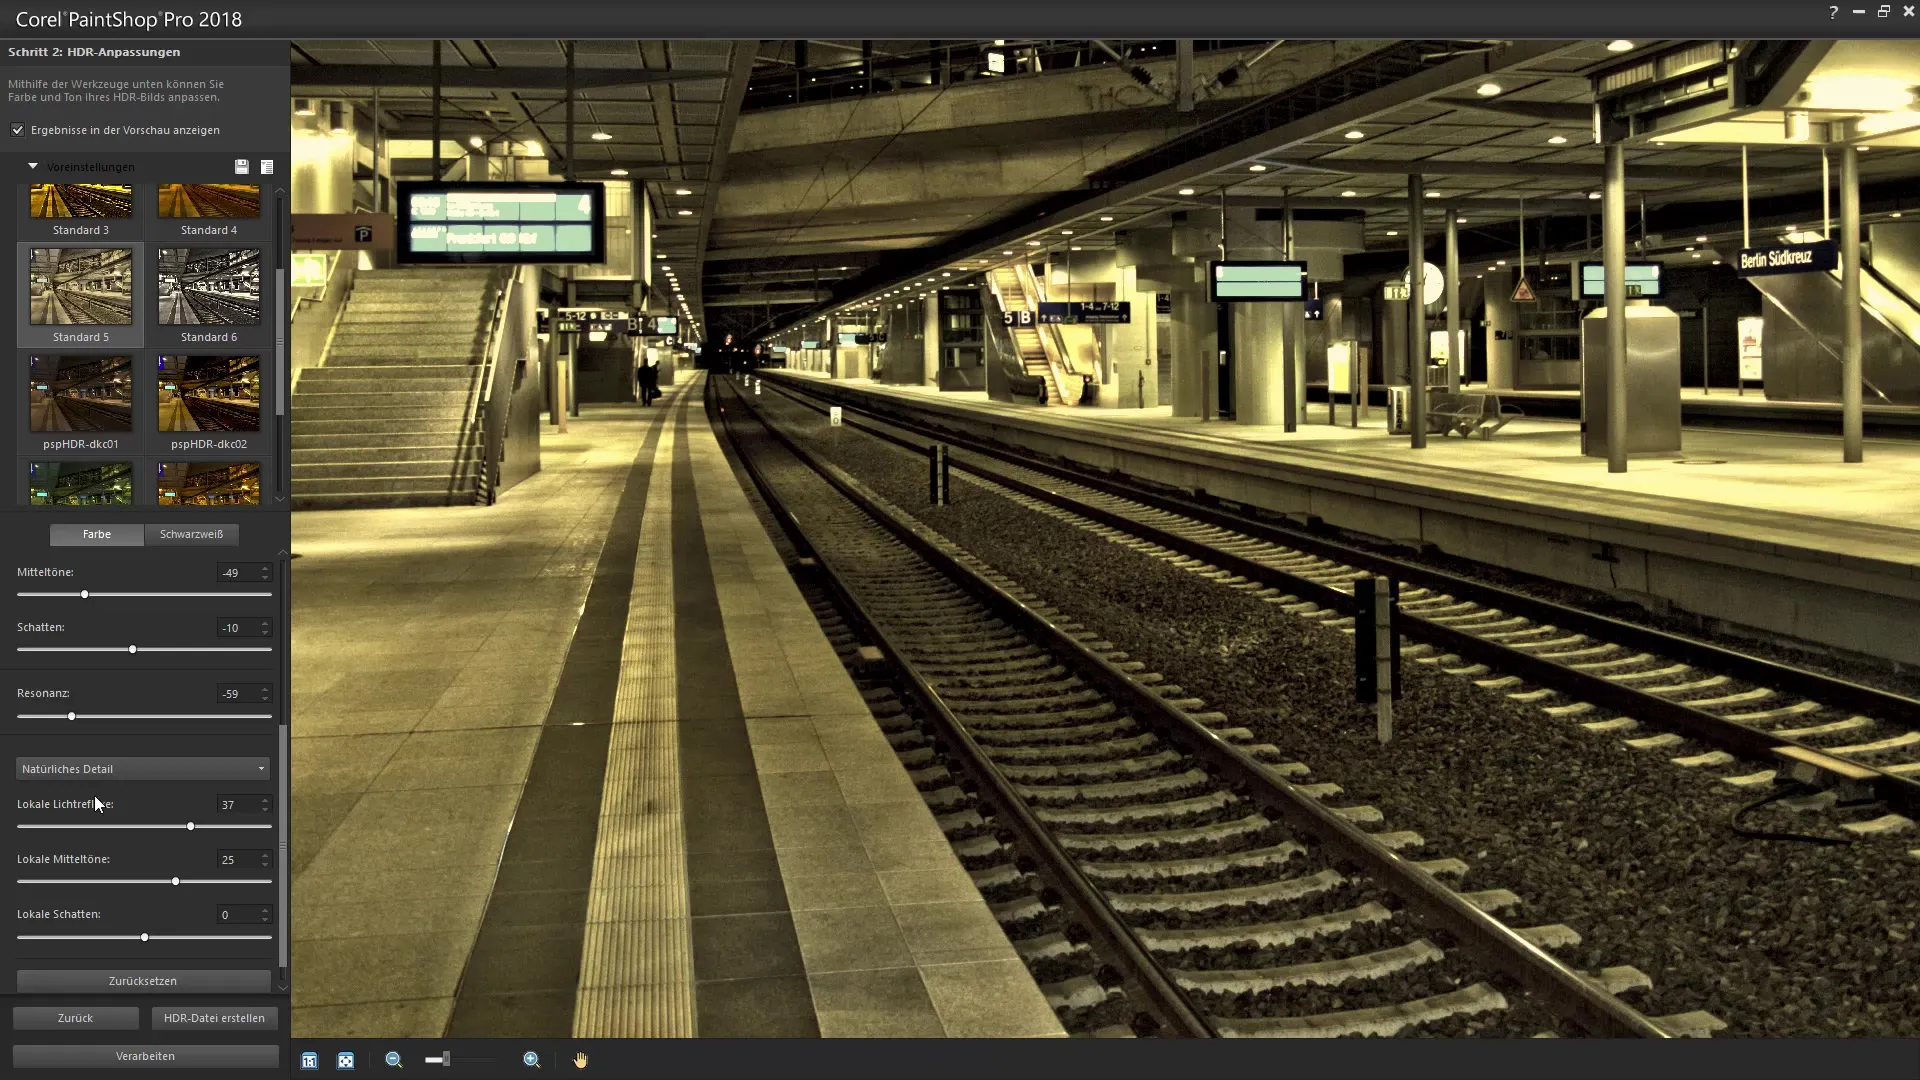
Step 9: I Save My Presets
If you like the current settings, you can save a preset for future HDR images. This will save you time when editing similar images. This feature is particularly useful if you frequently create HDR images.
Step 10: Completion and Export
If you have made all adjustments and are satisfied with the result, you can finalize the image now. Corel PaintShop Pro allows you to export the HDR image for your future projects.
Summary – Creating HDR Images with Corel PaintShop Pro
In this guide, you have learned how to create impressive HDR images using Corel PaintShop Pro. By selecting a suitable RAW image, correctly setting exposure intervals, and deliberately adjusting color and light moods, you can elevate your photos to a new level. Experiment with the various settings to achieve outstanding results.
Frequently Asked Questions
What is the benefit of HDR images?HDR images provide enhanced image dynamics by optimizing both bright and dark areas, leading to more depth and realism.
Can I use JPG files for HDR?No, JPG files cannot be used for HDR creation. Only RAW files are suitable for this.
How many images do I need for HDR editing?For editing, you need at least one RAW image. For exposure bracketing, multiple images are useful to represent different lighting conditions.
What is the difference between natural and creative details?Natural details emphasize realistic image features, while creative details can create an artistic look.
Can I save my presets?Yes, you can save your presets for quick application in future HDR images.


