If you're working with Adobe Illustrator and want to elevate your designs, it's important to use the right techniques for light and shadow. In this tutorial, I'll show you how to transform flat lips into three-dimensional and appealing shapes using gradient meshes. The goal is to give the upper and lower lip more depth through clever color and shape adjustments. Let's dive right in!
Key Takeaways
- Transform flat shapes into three-dimensional structures with gradient meshes.
- Use light and shadow for a realistic representation.
- Save colors for a consistent color palette and reusability.
Step-by-Step Guide
Step 1: Conversion to Gradient Mesh
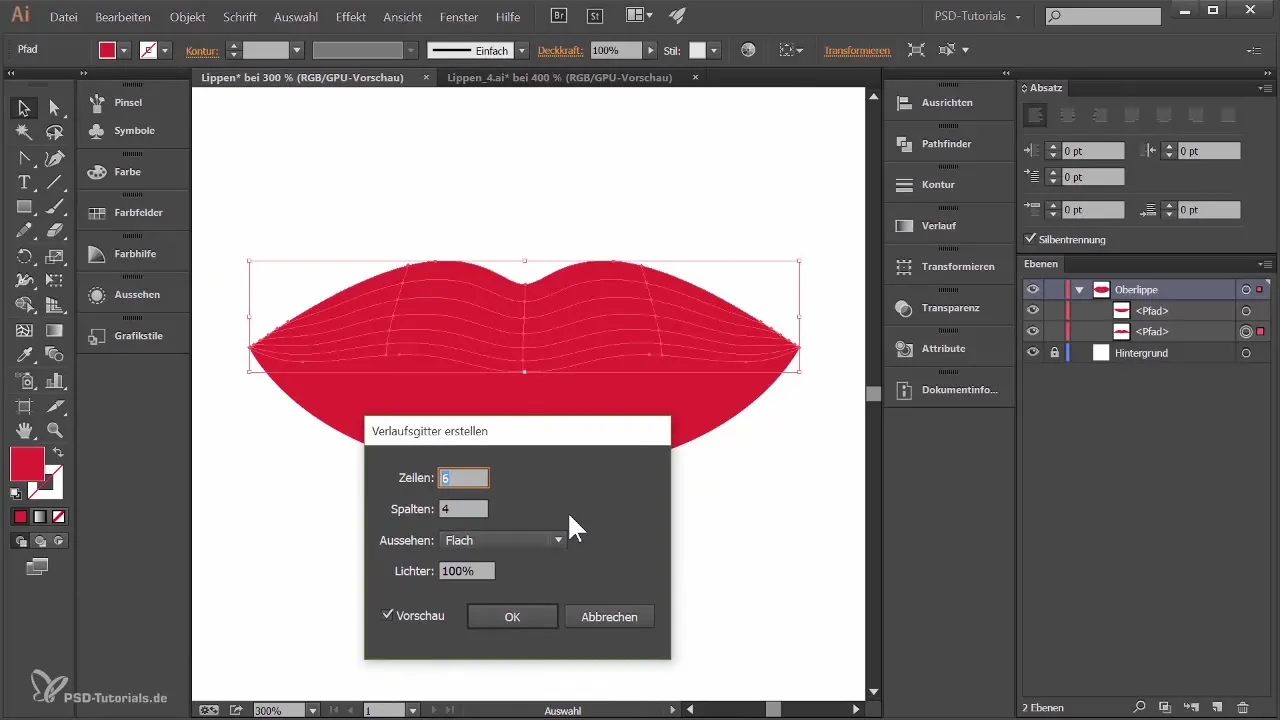
To transform your flat lips into three-dimensional shapes, start by converting the upper and lower lip into a gradient mesh. To do this, select the upper lip, go to "Object", choose "Create Gradient Mesh", and adjust the number of cells. For the upper lip, you should choose five rows and four columns, while for the lower lip, use six rows. Confirm this step with "OK". This way, you've adjusted your shapes to the form of the lips, allowing for more flexibility when working with light and shadow.
Step 2: Color Selection and Application
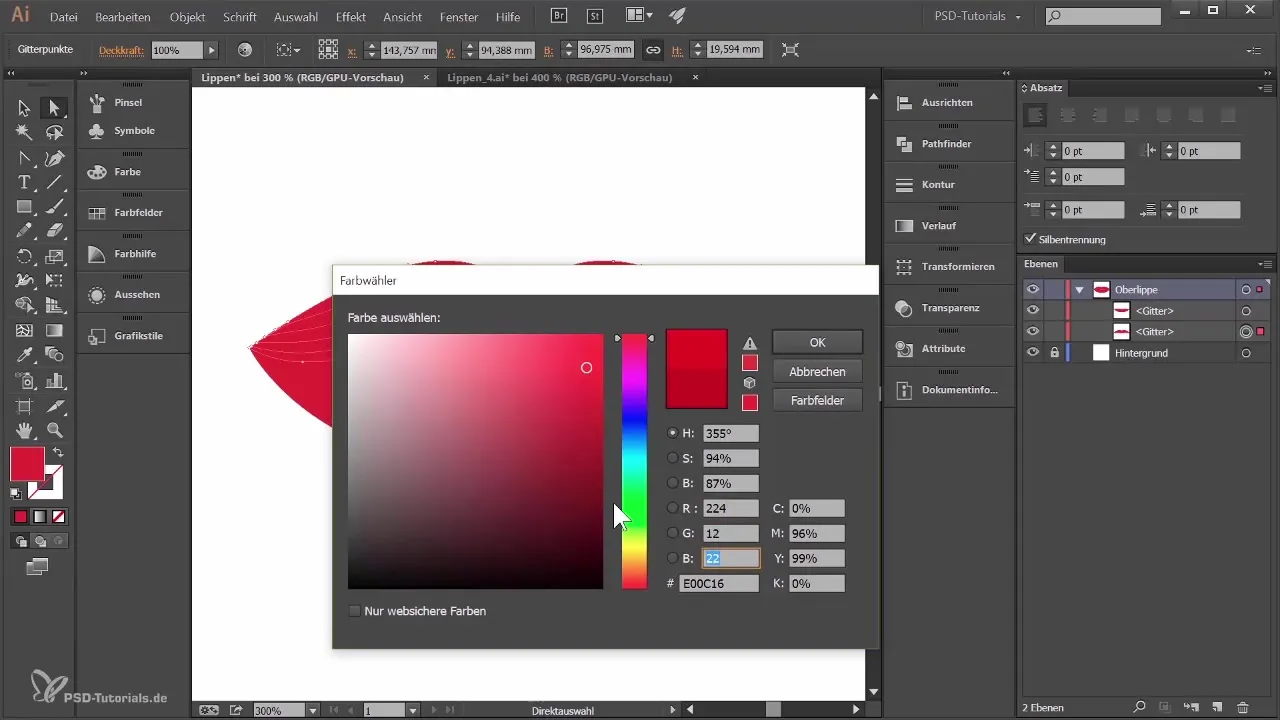
Now it's time for coloring. You can use the selection tool to select an anchor point of the upper lip and choose a color. Hold down the Shift key to select multiple anchor points at once. I recommend choosing a pink shade (e.g., RGB 224, 12, 86). You can save this color in the Swatches panel. To do this, open the Swatches through "Window" and "Swatches". Drag the chosen color into the Swatches panel to save it.
Step 3: Adjusting Colors for a Realistic Look
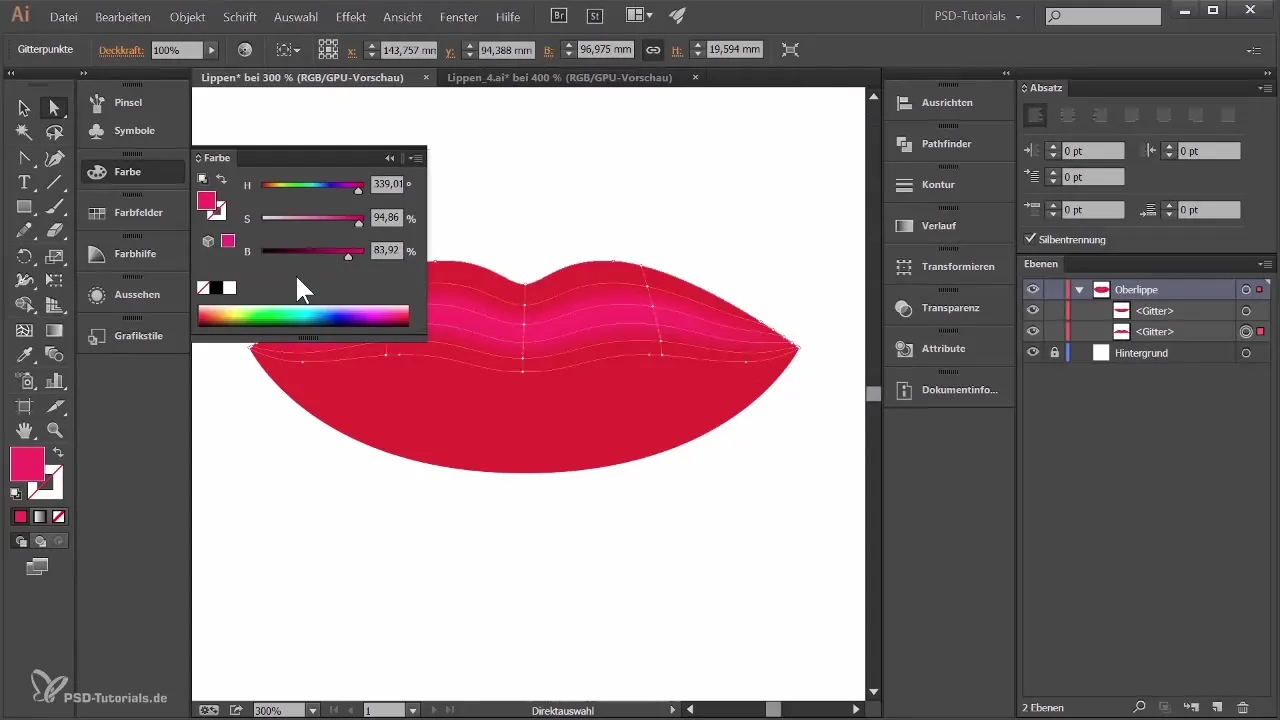
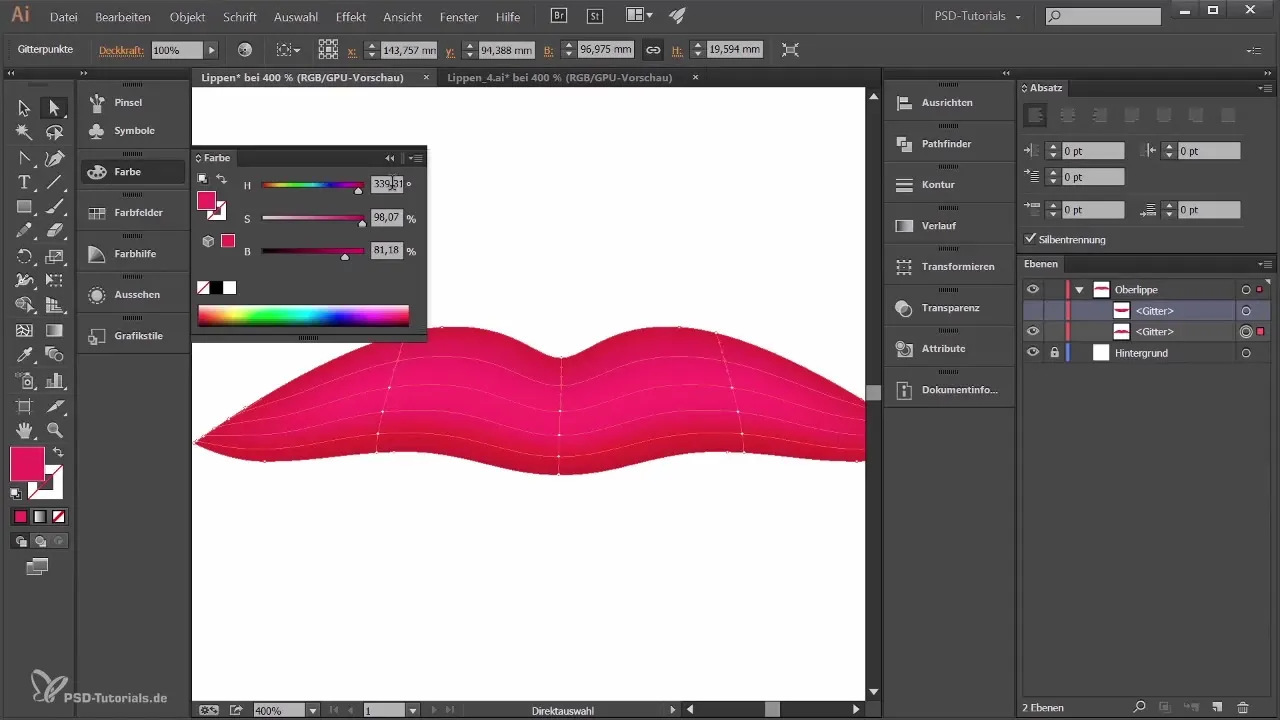
Next, select the anchor points of the lower lip and apply the same pink shade. However, you can darken it slightly to create more depth. To do this, go back to the HSB area and darken the color accordingly so that it looks more realistic. You can also color the adjacent areas in different shades to create additional dimension.
Step 4: Working with the Lasso Tool
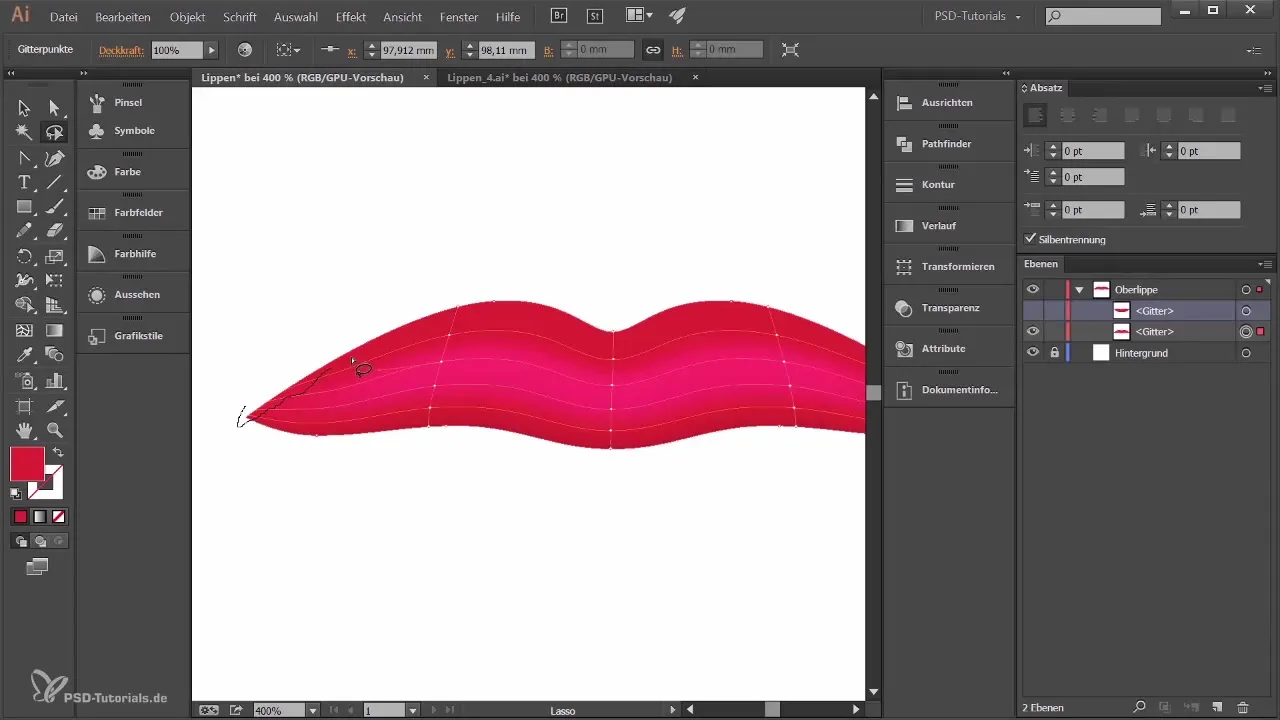
For more precise work, there's the Lasso tool. With this, you can specifically circle certain anchor points that you want to highlight or darken without having to select each point individually. For example, select all the anchor points that you want to darken to emphasize the shading of the lips.
Step 5: Finishing Touches and Color Corrections
Now you should give your design the final touch. Play with the colors by darkening some anchor points and lightening others to achieve the desired three-dimensional effect. I recommend checking each change to ensure that the colors look harmonious.
Step 6: Adjusting the Lower Lip
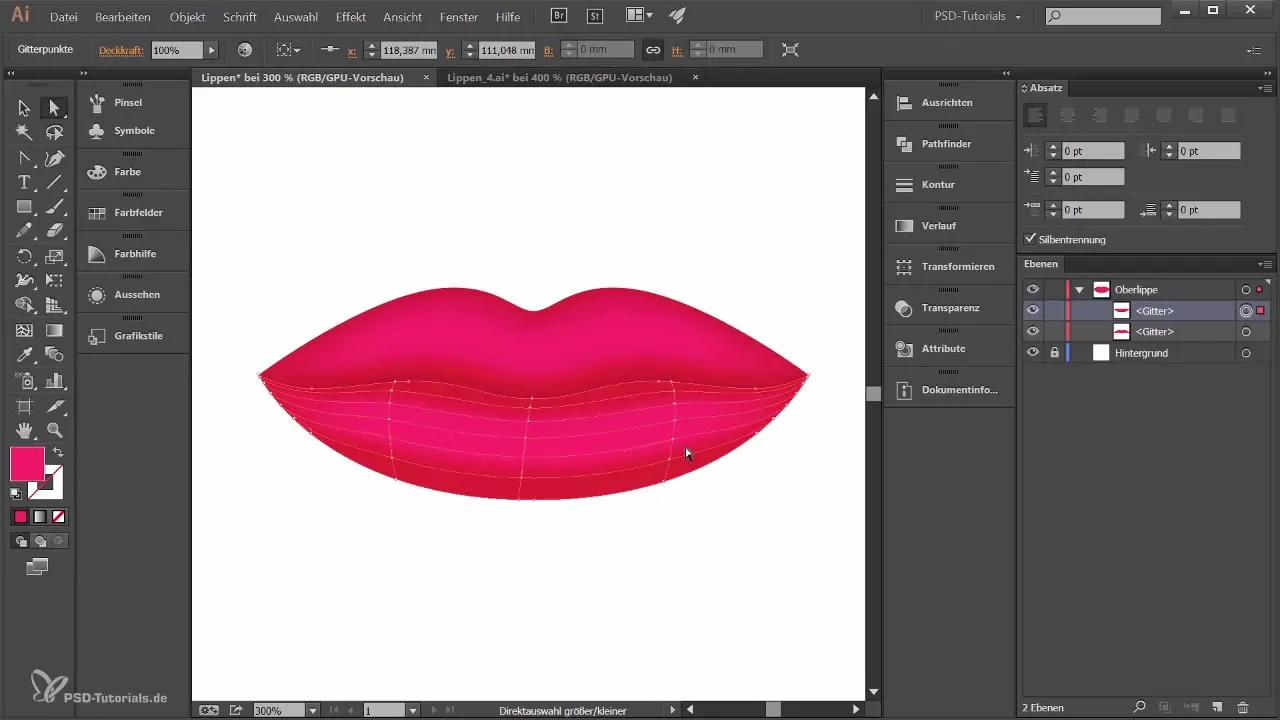
After editing the upper lip, reveal the lower lip and repeat the color adjustment process. You should use the same techniques to support the impression of light and shadow. To smooth the transition between colors, use techniques similar to those for the upper lip and ensure that the colors complement each other well.
Step 7: Final Adjustments
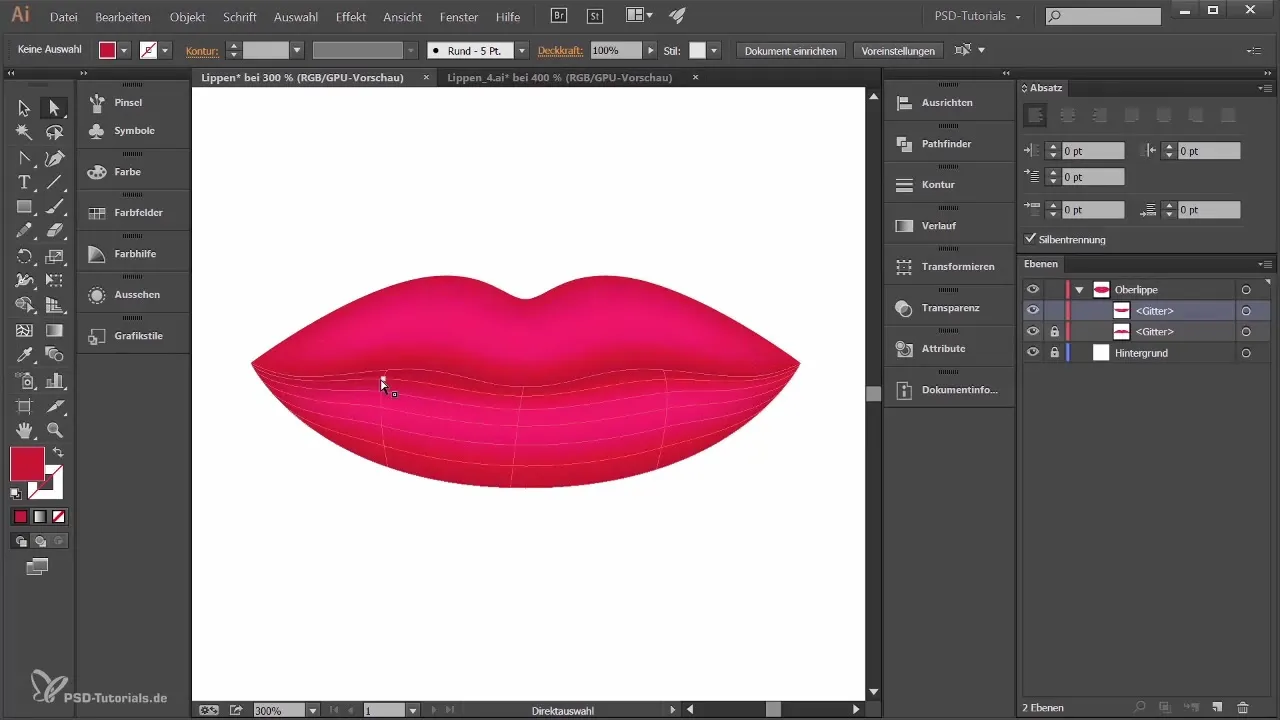
With all these changes, you should now have a fairly three-dimensional representation of your lips. Take the opportunity to review all the anchor points once more and make any small corrections if necessary. The goal is to achieve a realistic and appealing representation.
Summary - Creating Three-Dimensional Lips in Adobe Illustrator
With these steps, you've learned an effective method to make flat lips more three-dimensional in Adobe Illustrator. You've learned how crucial color choice and the application of light and shadow are. By using gradient meshes and strategic color management, you can significantly enhance your designs.
Frequently Asked Questions
How can I adjust the gradient of my lips?Use the Lasso tool to specifically select anchor points and adjust the colors in the HSB area.
What colors are best for a realistic representation?Experiment with various shades of pink and brown to vary the appearance of the lips.
How do I save colors for later use?Select the color and drag it in the Swatches panel to save it.
Why do my colors not look harmonious?Pay attention to color choices in relation to each other and use brightness and saturation for subtle adjustments.
What tool can I use for more precise work?The Lasso tool is great for selecting specific anchor points without affecting others.
