Editing images can often be a repetitive and time-consuming task, especially when you aim for a consistent visual language across an entire series. In this tutorial, you will learn how to transfer the development settings of a single image to multiple images, significantly reducing editing time. So if you are currently optimizing your photography and bringing a uniform aesthetic to your image series, this guide is just right for you.
Main insights
You can quickly and efficiently apply development adjustments of an image in Lightroom to a series of images. This is done either through direct synchronization or through automatic synchronization. Ultimately, it allows you to perfect the image aesthetics and maintain a consistent style.
Step-by-step guide
To synchronize the developments of a single image to an entire image series, follow these simple steps:
1. Select an image
First, select the image whose development settings you want to apply to the other images. This image should present the desired editing style.
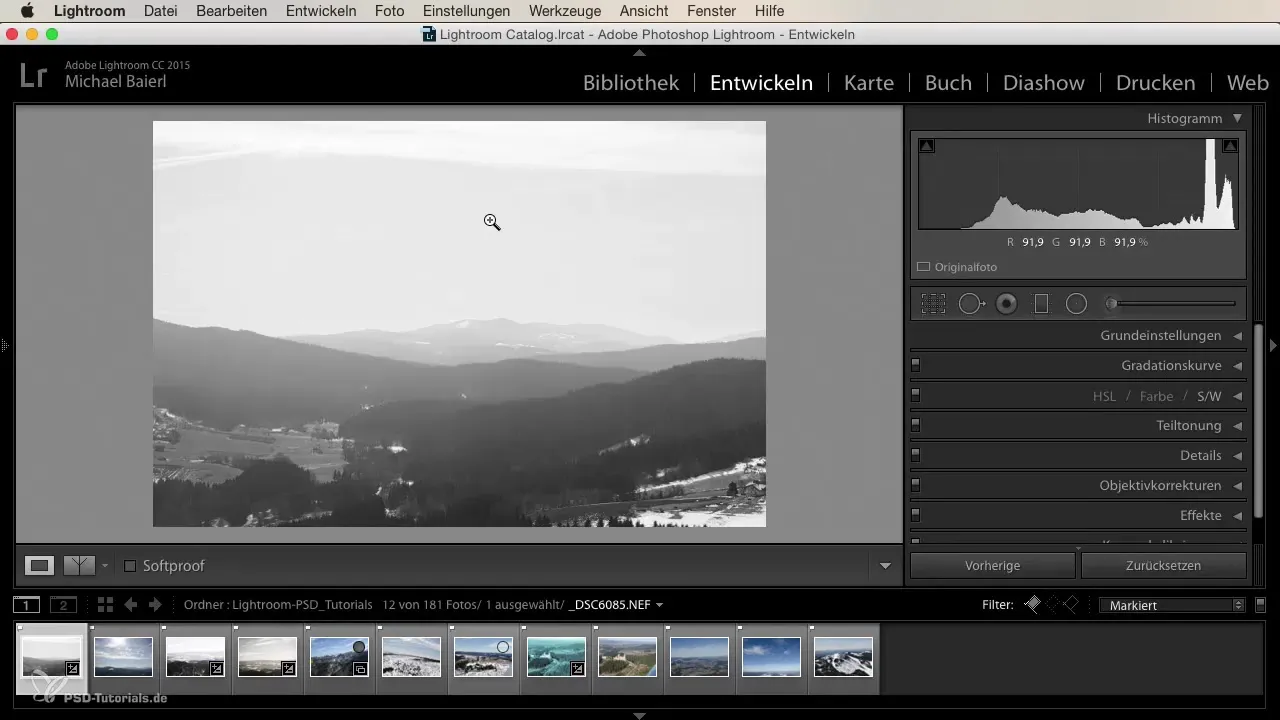
2. Select additional images
Now, either mark the entire series of images you want to adjust, or selectively choose some images. Hold down the Command or Control key while making your selection. This customized selection is crucial as it allows you to precisely control which images the developments will be applied to.
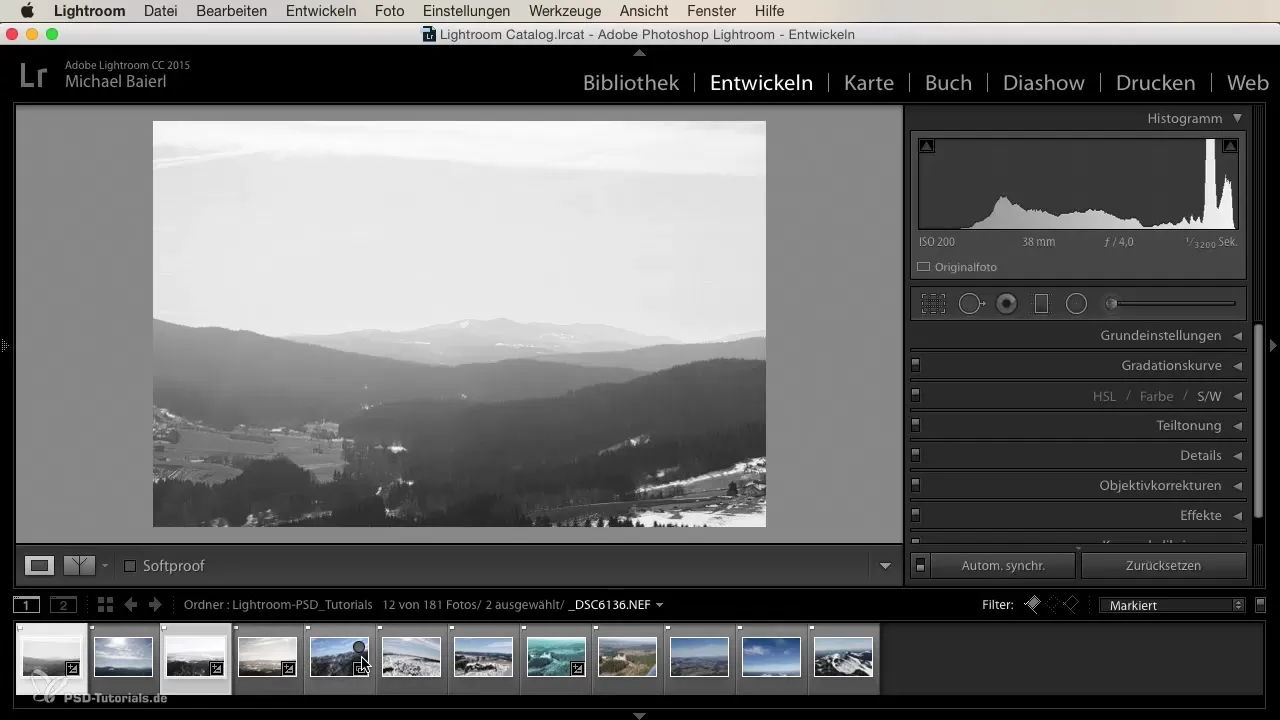
3. Choose synchronization action
In the next step, go to the menu bar and click on “Settings.” There you will find the option “Synchronize settings.” Click on it to open the synchronization window.
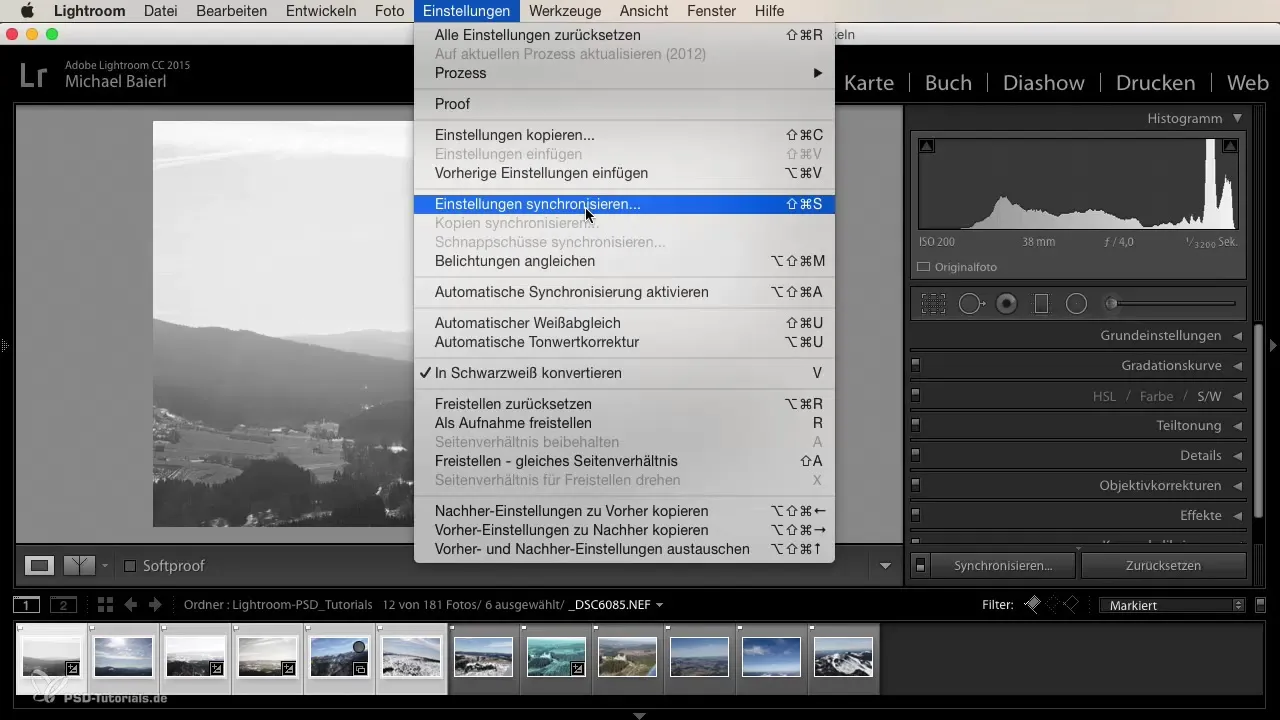
4. Check settings to synchronize
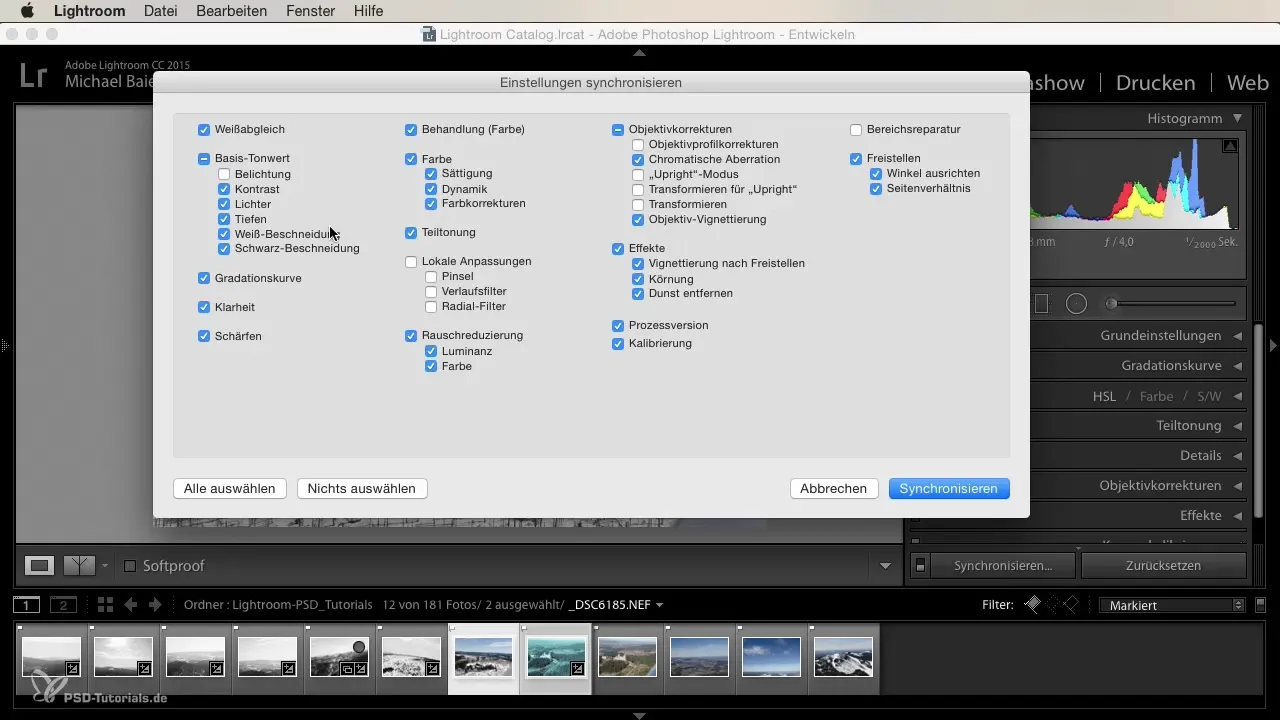
In the synchronization window, Lightroom shows you which settings are selected by default. Make sure that the checkboxes for the settings you want to transfer are activated. Here you can specifically check which parameters like noise reduction, exposure, contrast, and more are synchronized.
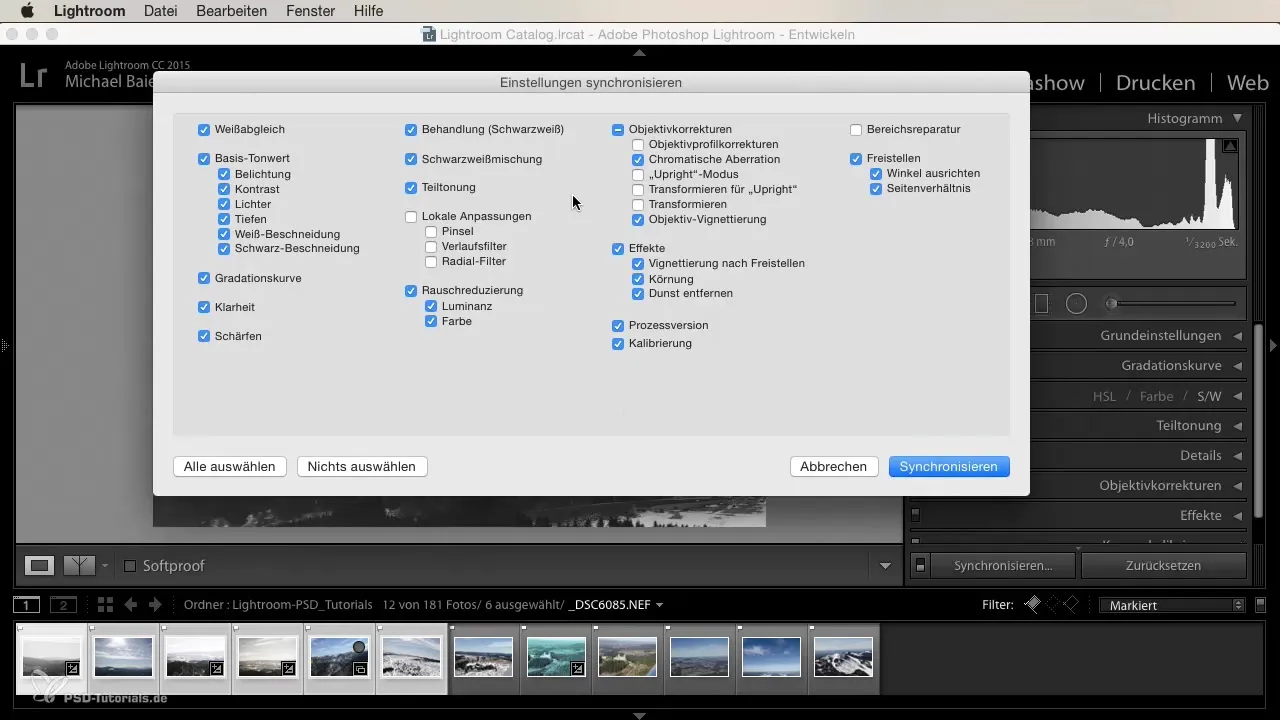
5. Synchronize
After making your selection, click on “Synchronize.” Lightroom will take a few seconds to apply the settings to the marked images. You will quickly notice that all chosen images now exhibit the uniform editing style.
6. Undo adjustments if necessary
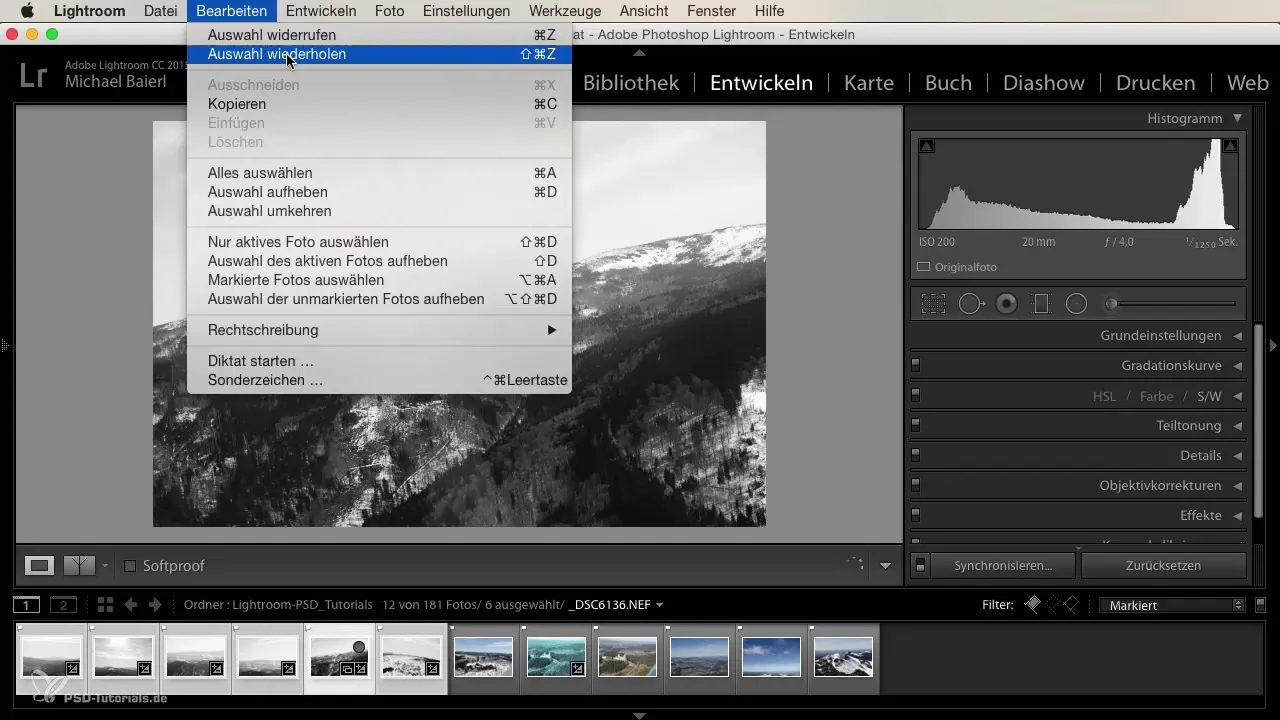
If you want to make improvements to one or more images or find that a setting does not harmonize, you can deselect the specific image or simply choose “Edit” and then “Undo selection.” This way, you can easily restore the previous state.
7. Enable automatic synchronization (optional step)
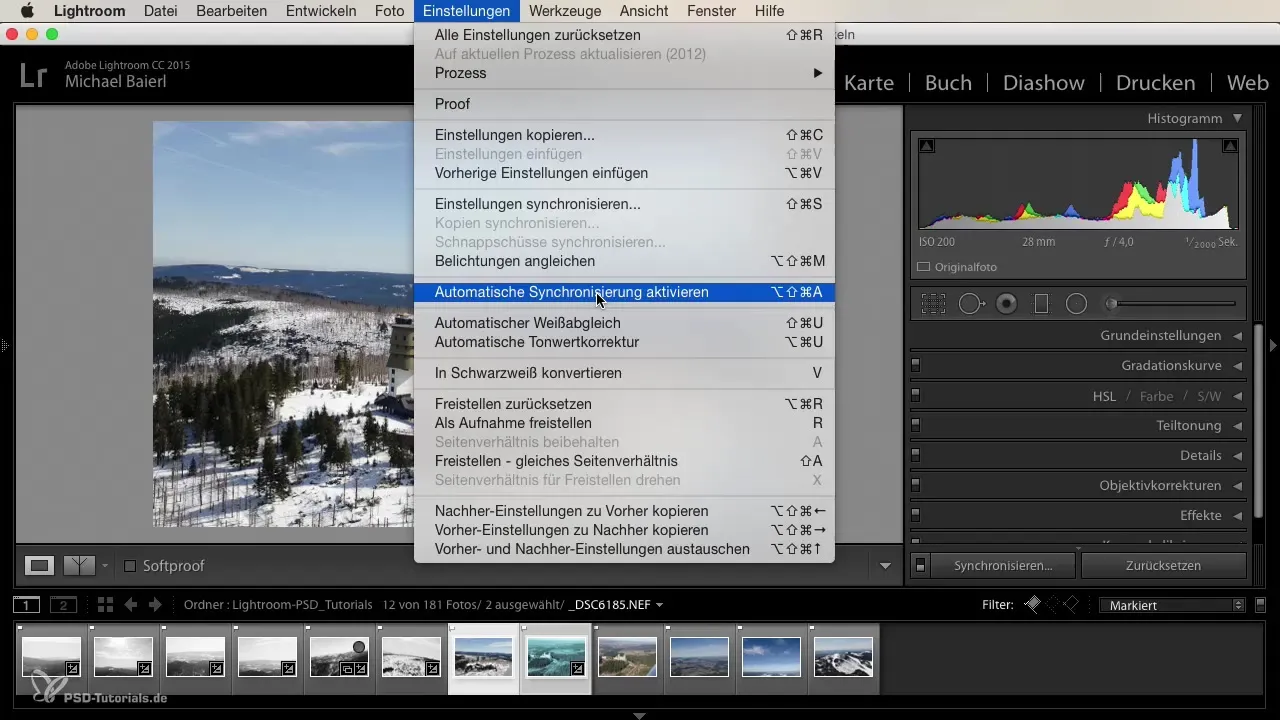
In addition to manual synchronization, you can enable the automatic synchronization function. This means that any adjustment you make to one image will also be immediately applied to the other marked images. This is especially useful if you want to make multiple changes to different aspects of your images without having to adjust each one manually.
8. Utilize differences
If you are unsure about certain settings, I recommend using the manual synchronization. This allows you to exclude specific adjustments like exposure and ensure that all adjustments remain consistent. This way, you can get the best out of your image series.
Summary – Developing images in Lightroom: Easy synchronization of developments
With these steps, you can efficiently and quickly apply the development settings of a single image to an entire series. This not only creates a uniform style but also significantly optimizes your workflow. Take advantage of Lightroom's capabilities to elevate your photography to the next level.
Frequently asked questions
How do I select images for synchronization?Hold down the Command or Control key to select individual images, or mark the entire series.
What happens if I don't like a setting?You can deselect the image or choose "Undo selection" to roll back the settings.
What is the difference between manual and automatic synchronization?With manual synchronization, you choose which settings to transfer. With automatic synchronization, changes are immediately applied to all marked images.
Can I simply deselect settings I don’t want?Yes, in the synchronization window, you can deselect specific settings.
Why should I use manual synchronization?This gives you more control over the adjustments and allows you to selectively choose settings that should not be applied to all images.


