Exporting your Gallery from Lightroom is an essential step to share or present your photographs in optimal quality. In this tutorial, you will learn how to export your gallery efficiently and even upload it. Additionally, you will receive valuable tips for the settings that will help you achieve the best possible usability and quality.
Key Insights
- The export of your gallery can be easily done through two main options: the export button and the upload button.
- You should give the gallery a concise name to easily identify it later.
- Exported files are readable in the browser and can also be easily sent via email.
- The FTP settings are crucial if you want to upload the gallery to a server.
Step-by-Step Guide
Step 1: Make Decisions
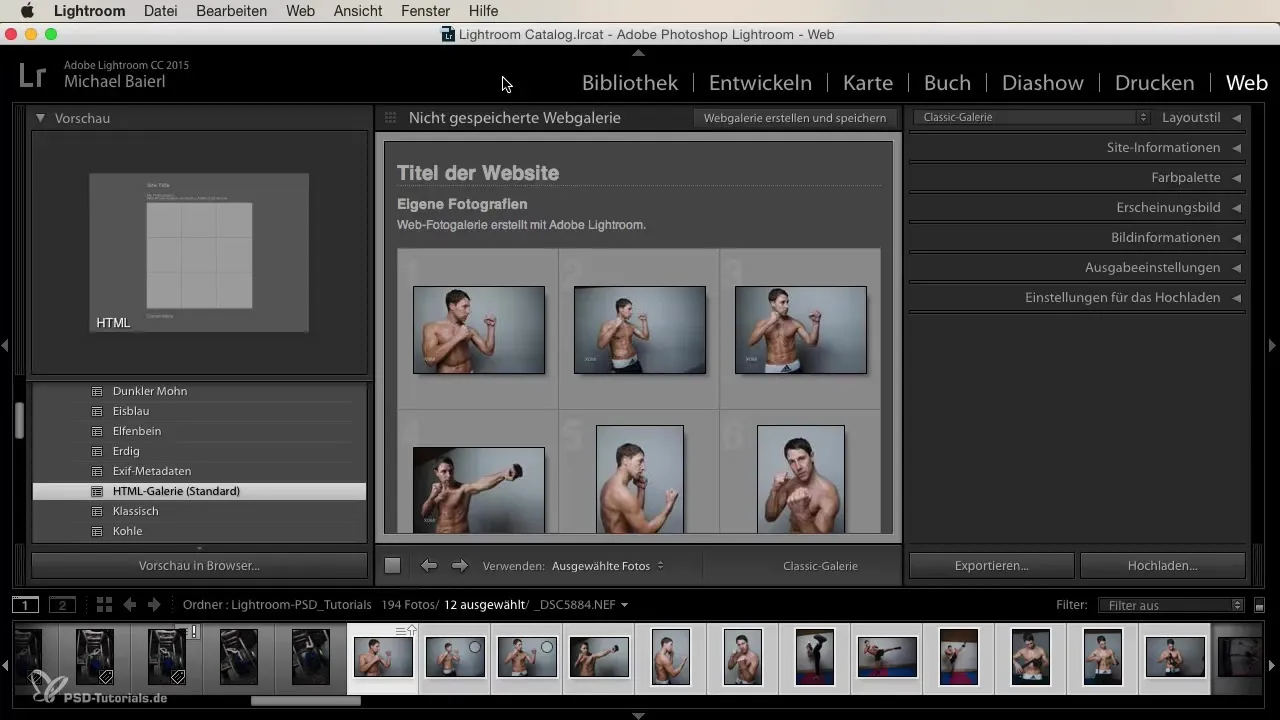
First, you have the choice between two buttons that will help you with the export: “Export” and “Upload”. Choose the “Export” button if you need the gallery locally or for emailing. The upload button is suitable if you want to transfer the gallery directly to a server.

Step 2: Name the Gallery
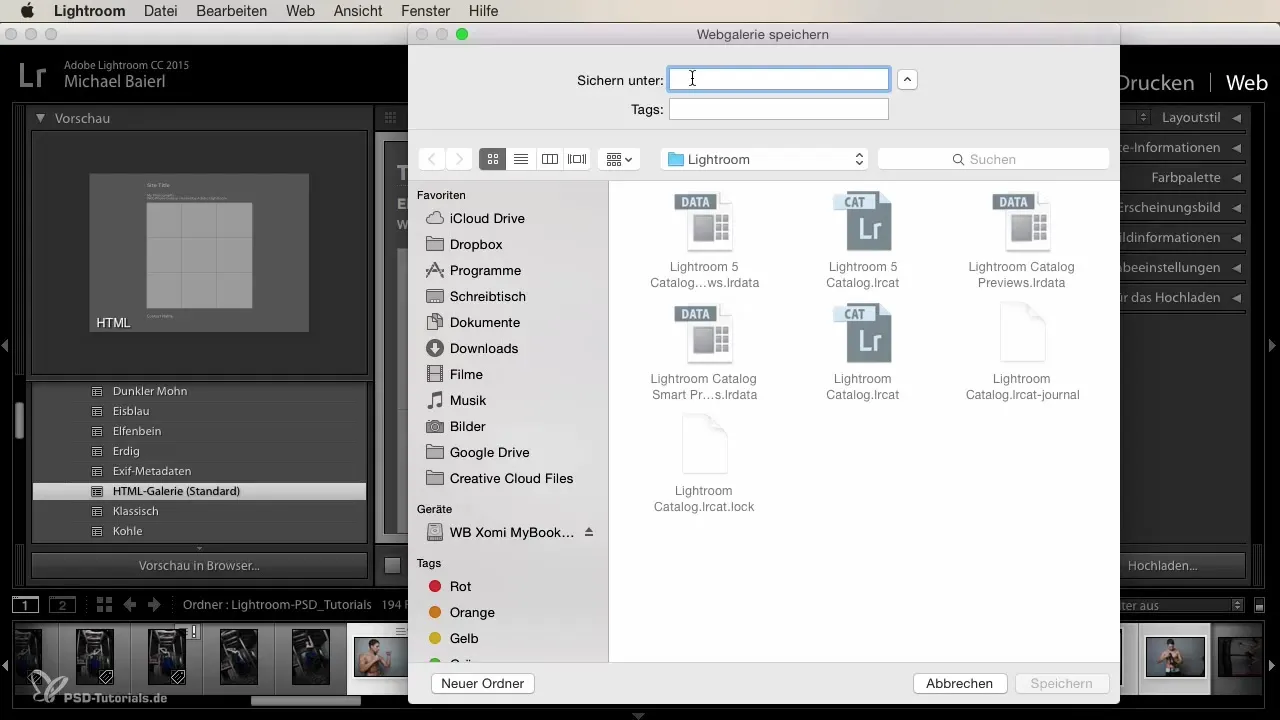
In the next step, give the gallery a name. This is important to easily find it later and assign it to your projects. Be sure to choose a name that reflects the contents and is easy to remember.

Step 3: Activate Export Options
When selecting the export, you don't need to make extensive settings. Lightroom generates a file that is readable in the browser. This means you can not only save your exported images locally but also share them quickly without worrying about compatibility.
Step 4: Optimize Images for Email
An additional advantage of the web gallery is that you can also create the exported images in reduced file sizes. This is especially useful if you want to send them via email. Make sure to adjust the size of the images according to your needs to ensure fast shipping and easy handling.
Step 5: Set Up FTP Server for Uploading
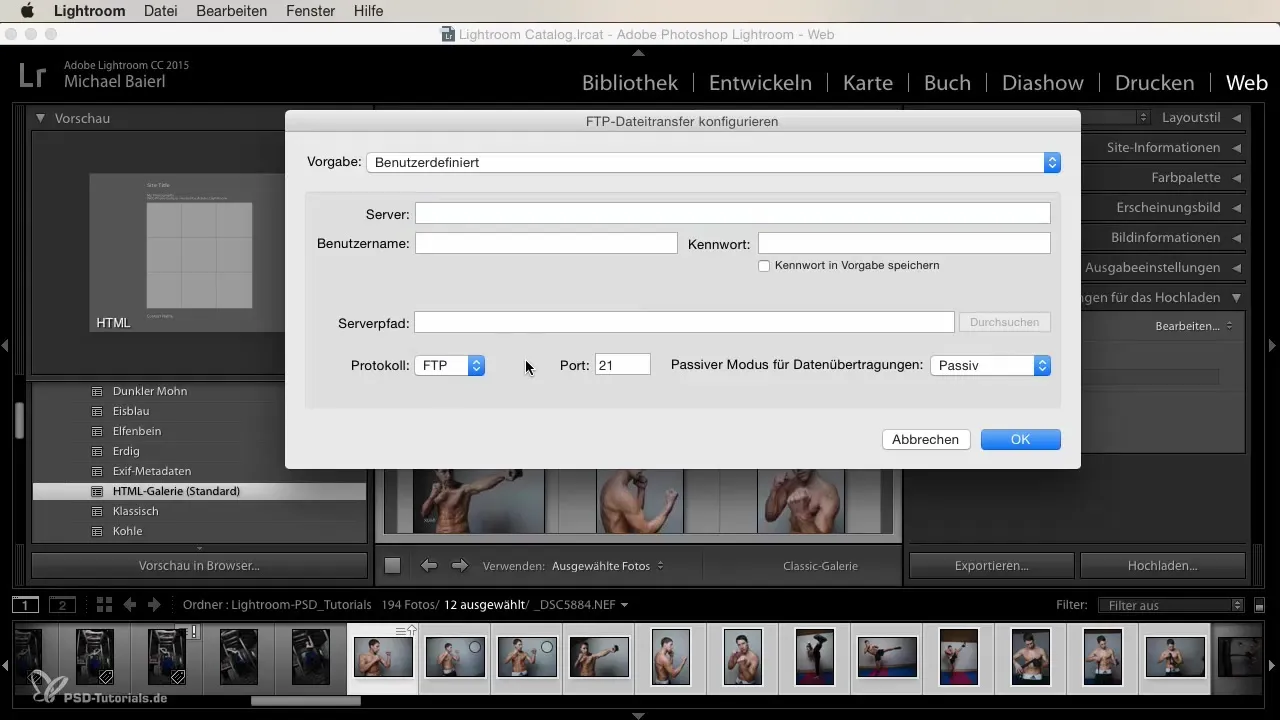
If you want to upload the gallery to a server, navigate to the upload settings found at the bottom. Here, you need to enter your FTP server. This includes the FTP address, your username, and the password. Typically, you receive this information from your hosting provider.

Step 6: Adjust FTP Configuration
Once the FTP data is entered, you can add specific guidelines that will help you optimize the upload process. This is especially useful if you want to save the gallery in a specific folder, for certain clients or projects. Usually, port 21 is sufficient, and you should activate passive transfer.

Step 7: Start the Transfer
Once all settings have been made, you can start the transfer process. Ensure that the connection is stable and the transfer proceeds smoothly. Uploading your gallery is therefore a simple and efficient matter that helps you present and share your work.
Summary – Exporting Gallery with Lightroom: A Comprehensive Guide
Exporting and uploading your gallery from Lightroom is a straightforward process that offers you many advantages. With the right settings and a clear structure, you can ensure that your work is appreciated and can be shared easily.
Frequently Asked Questions
How do I export my gallery from Lightroom?Use the “Export” button to save your gallery locally or prepare it for emailing.
Can I also upload the file to an FTP server?Yes, you need to enter the FTP server data in the corresponding fields.
What should I consider when naming my gallery?Choose a concise name that reflects the content to make it easier to identify the file later.
What file formats are supported during export?Lightroom exports the files in a format readable by browsers, ideal for web galleries.
How can I adjust the size of the exported images?You can set the export options so that the images are optimized in a reduced format for emails.


