Lightroom offers you a variety of options for effectively exporting your images. The export services are particularly practical, allowing you to automate the delivery of images for various purposes. Whether you need photos for the web, social media, or for archiving, setting up export services significantly simplifies these tasks. In this guide, you will learn step by step how to set up and use export services in Lightroom.
Main Insights
- Export services allow for the automation of image exports.
- You can create different presets for various needs.
- Export services only require dragging images to the service, simplifying the process.
Step-by-Step Guide
Open Export Services
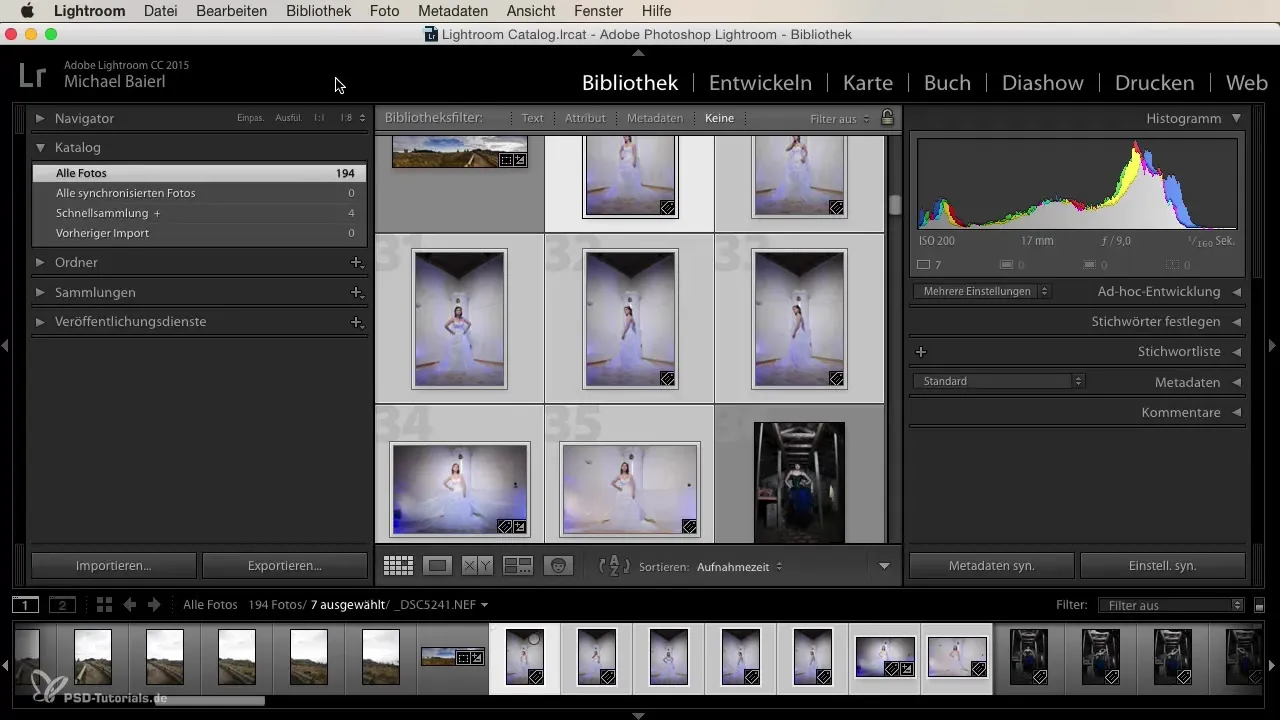
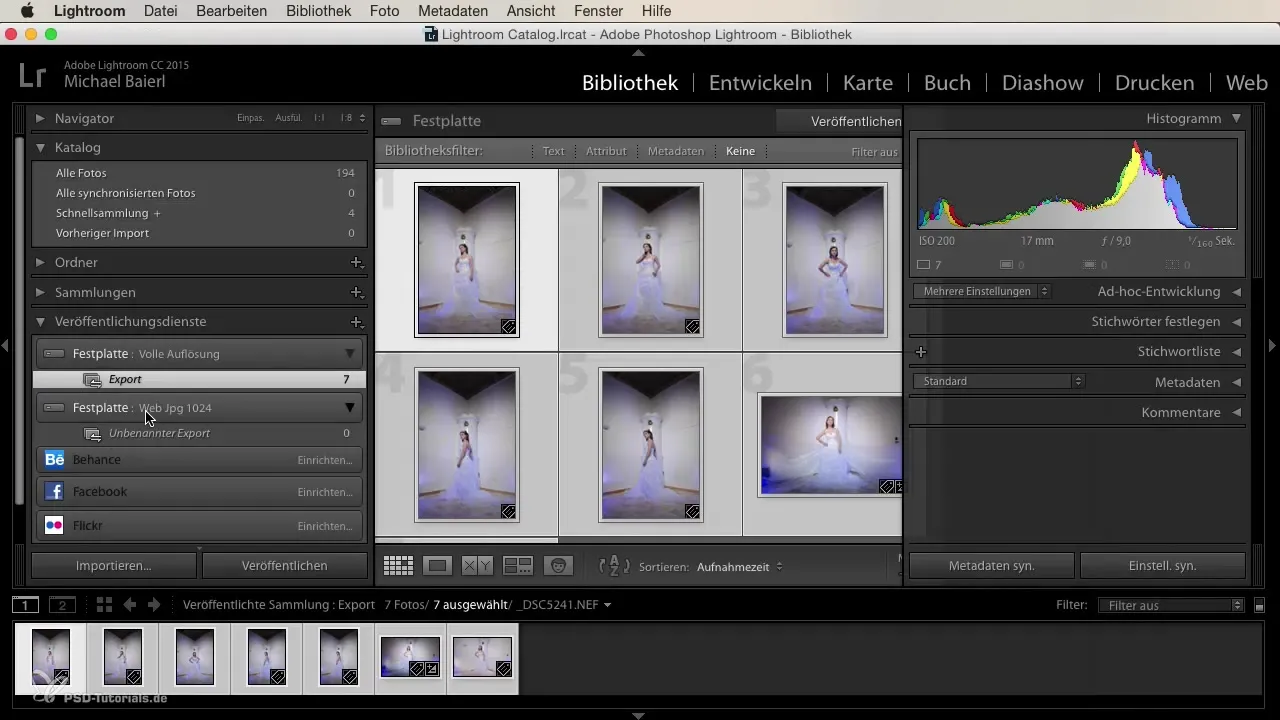
To begin setting up an export service, open the Library module in Lightroom. Here, in the lower area, you will find the section for published or export services. You can open these to view existing presets or create new ones.
Use an Existing Export Service
If you want to work with an existing export service, simply select the desired service. For example, you can choose your "Full Resolution Export Service" that you set up previously. This allows you to export images in specific formats with predefined filenames.

Select Images for Export
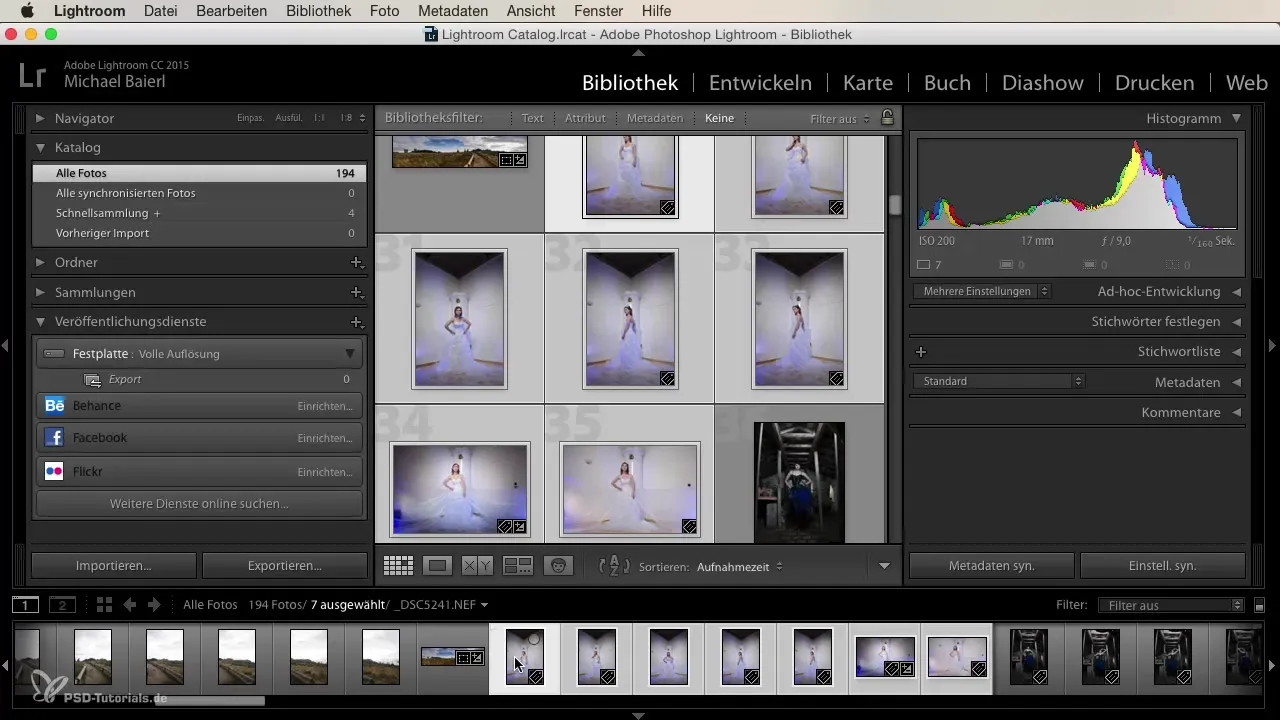
After selecting the export service, go back to your image library. Select the images you want to export. If you are satisfied with the edited images, simply drag the selected stack of images to the export service. Lightroom will automatically start the export process.
Create a New Export Service
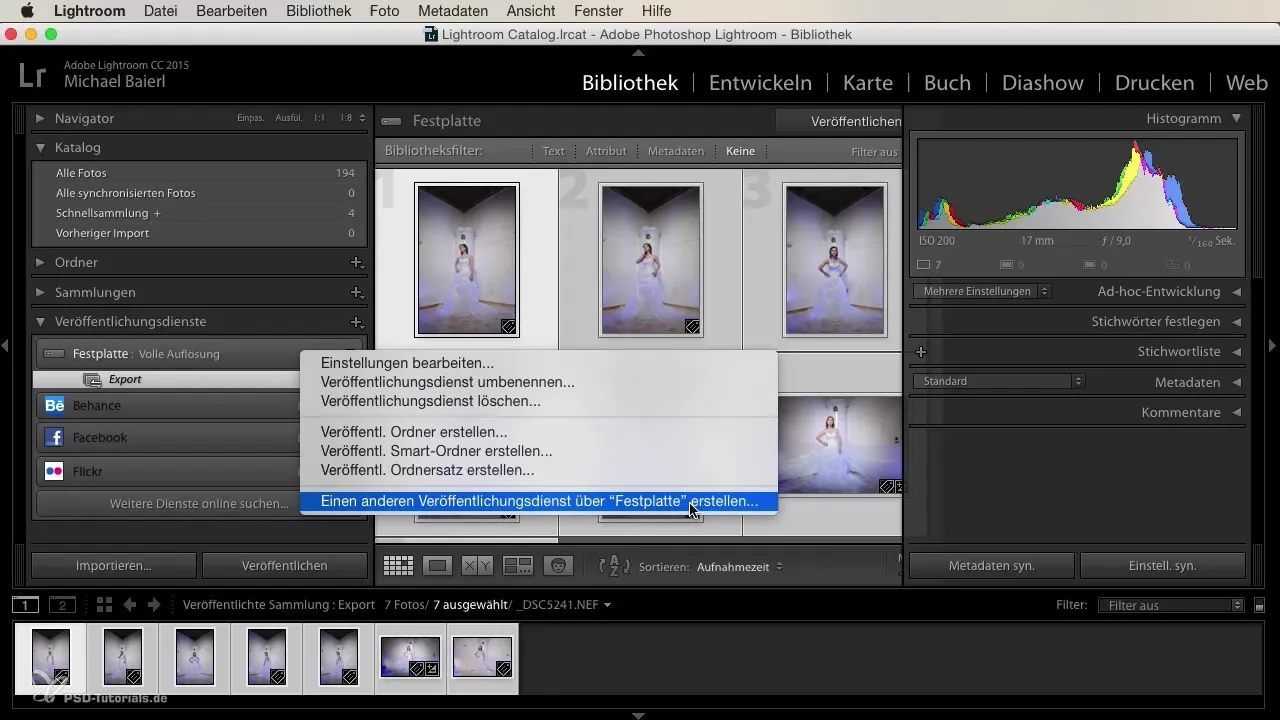
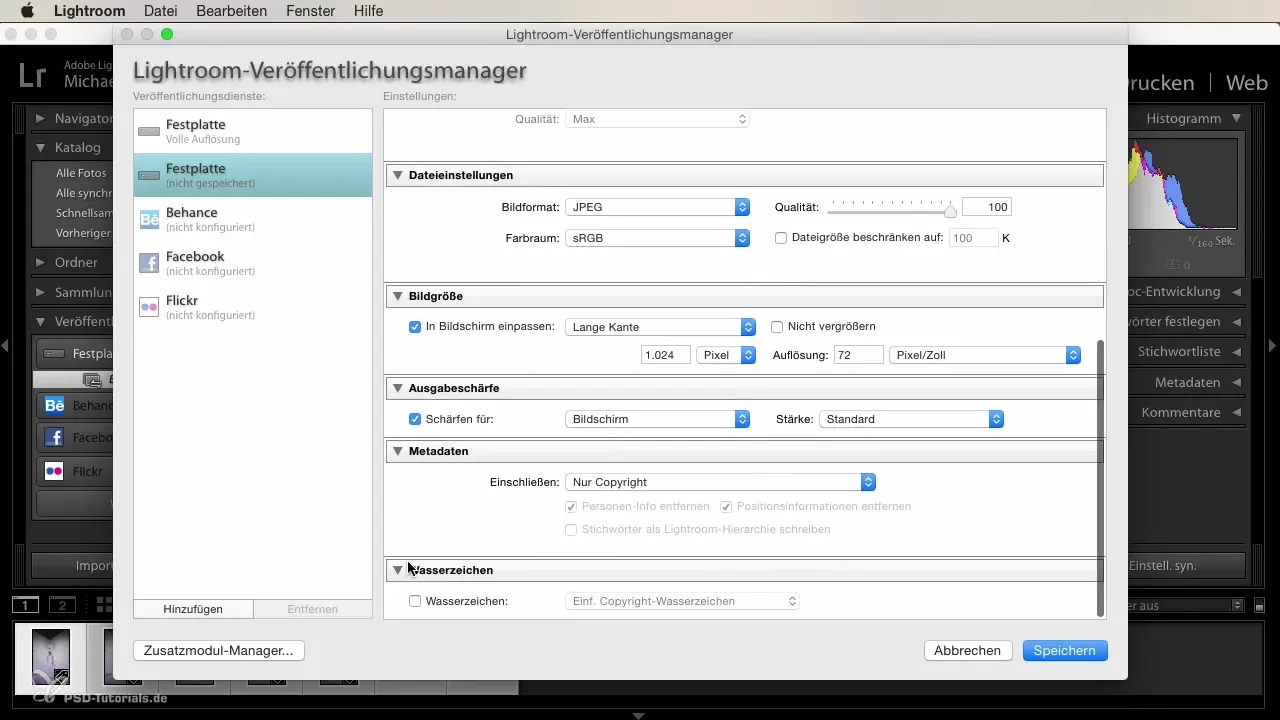
To create a new export service, right-click on your hard drive and select the option "Create another publication service via hard drive." A dialog box will open where you can name the new service. For example, call it "Web JPEG," because you want to export the images in a smaller resolution.
Configure Export Settings
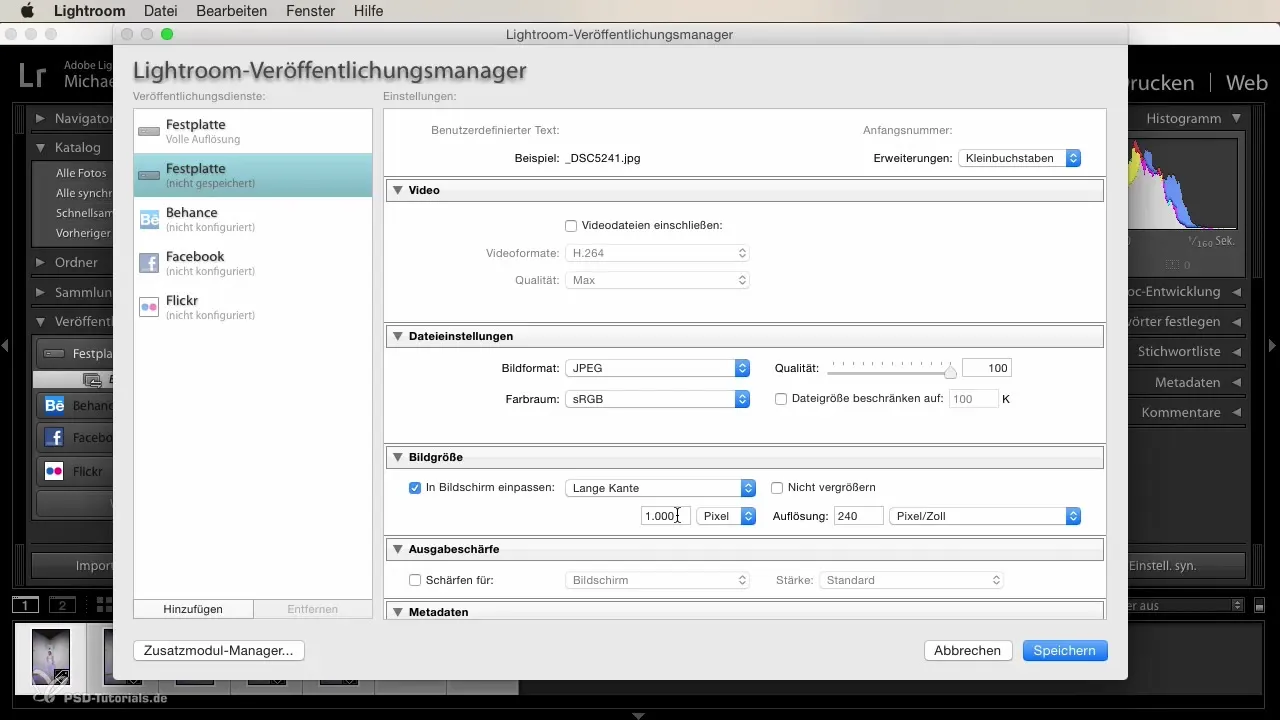
Set the desired file formats for export. In this case, choose JPEG with a maximum length of 1024 pixels. Set the quality to "full quality." You can also set the image size to limit the long edge to 1024 pixels. Set the resolution to 72 dpi and select the sharpening option for screens.
Metadata and Watermarks
In the metadata, you can specify which information should be included in the exported images. Usually, it is sufficient to provide copyright information. You can skip watermarks if they are not necessary for your export.
Save Export Service
After you have made all the settings, click "Save." You have now successfully set up a new export service that will significantly ease your work, as you only need to drag the corresponding images to the service to export them.
Using Export Services for Online Publications
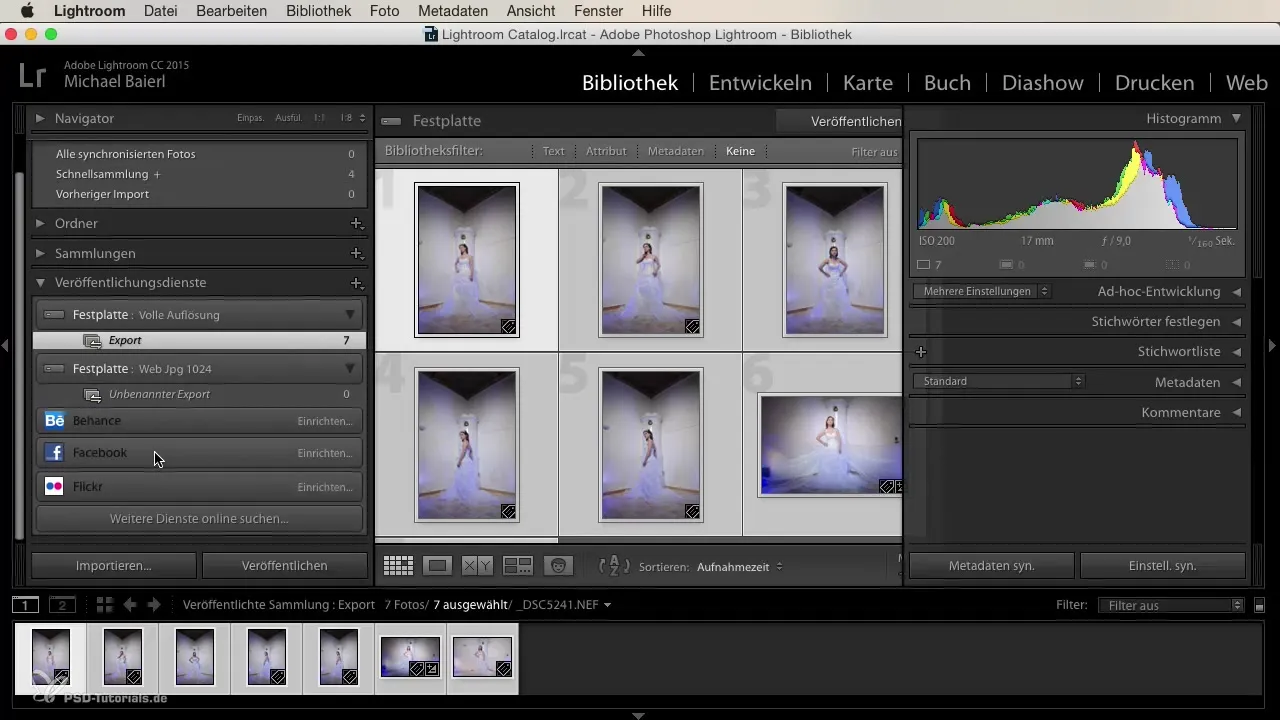
Lightroom also offers the ability to publish images online directly from the program. You can choose which platforms, such as Facebook or Flickr, should be used. Make sure your account for these services is set up to upload images without problems.
Summary – Efficiently Exporting Images with Lightroom Export Services
Using export services in Lightroom can greatly simplify image exporting. You can set up custom presets for different needs that automate the export. Whether you need high-resolution images for print or JPEGs for the web – the adjustments can be made quickly and easily, allowing you to spend more time on what matters: the creative aspects of your photography.
Frequently Asked Questions
What formats can I use with an export service?You can use various formats such as JPEG, DNG, and more as needed.
How can I set up another export service?Simply right-click on the hard drive and select "Create another publication service via hard drive."
Can I insert metadata into the exported images?Yes, you can include metadata such as copyright information in the exported images.
Are export services only suitable for local exports?No, you can also use export services for online publications, e.g., on Facebook or Flickr.
How can I adjust the quality of the exported images?You can set the quality in the export settings to "full quality" or another level.


