The interaction between Cinema 4D and Photoshop opens up numerous possibilities for impressive graphic creations. To get the most out of your renderings, the final step – saving and checking the file – is crucial. In this guide, you will learn step by step how to efficiently save your files and ensure that everything is displayed correctly before you finalize the rendering in Photoshop.
Key Insights
- Save the rendered image in 16-bit format for optimal quality.
- Check the layers in Photoshop to ensure that all desired information is saved.
- Be careful to set the blending modes of the layers correctly to avoid unwanted visual effects.
Step-by-Step Guide
To successfully save your render result and check it in Photoshop, follow these steps:
Check Rendering
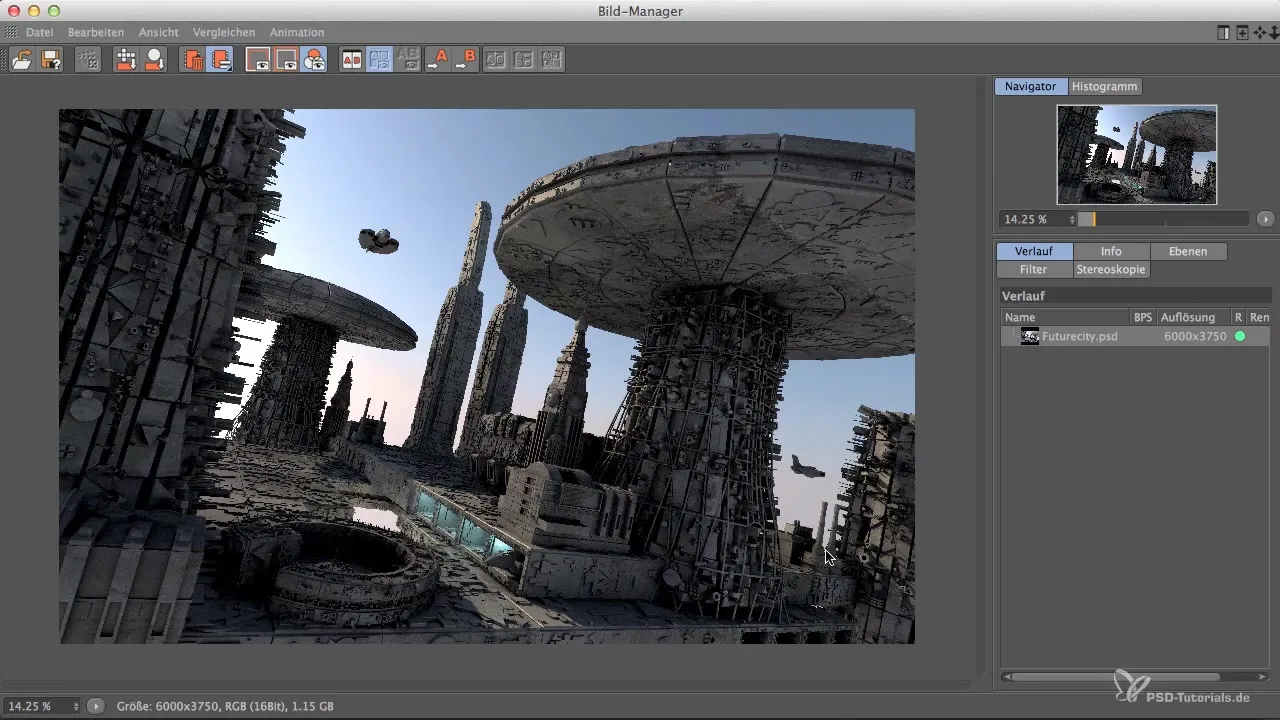
Before saving the file, you should ensure that everything has been rendered correctly. Open the preview of the rendering and take a look at the mentioned elements. Make sure that all important layers such as reflection, ambient occlusion (AO), shadows, highlights, and other channels that you might want to edit in Photoshop are included. You can navigate through the layers and view them individually to check if everything is displayed as desired.
Save Image
If you are satisfied with the rendering, the next step is to save the file. Click on “Image” in the menu bar and select “History.” It is advisable to perform this step to ensure that all layers of the image are handled and nothing is lost. Be careful not to save just a single layer to avoid unexpected issues.
Select File Format
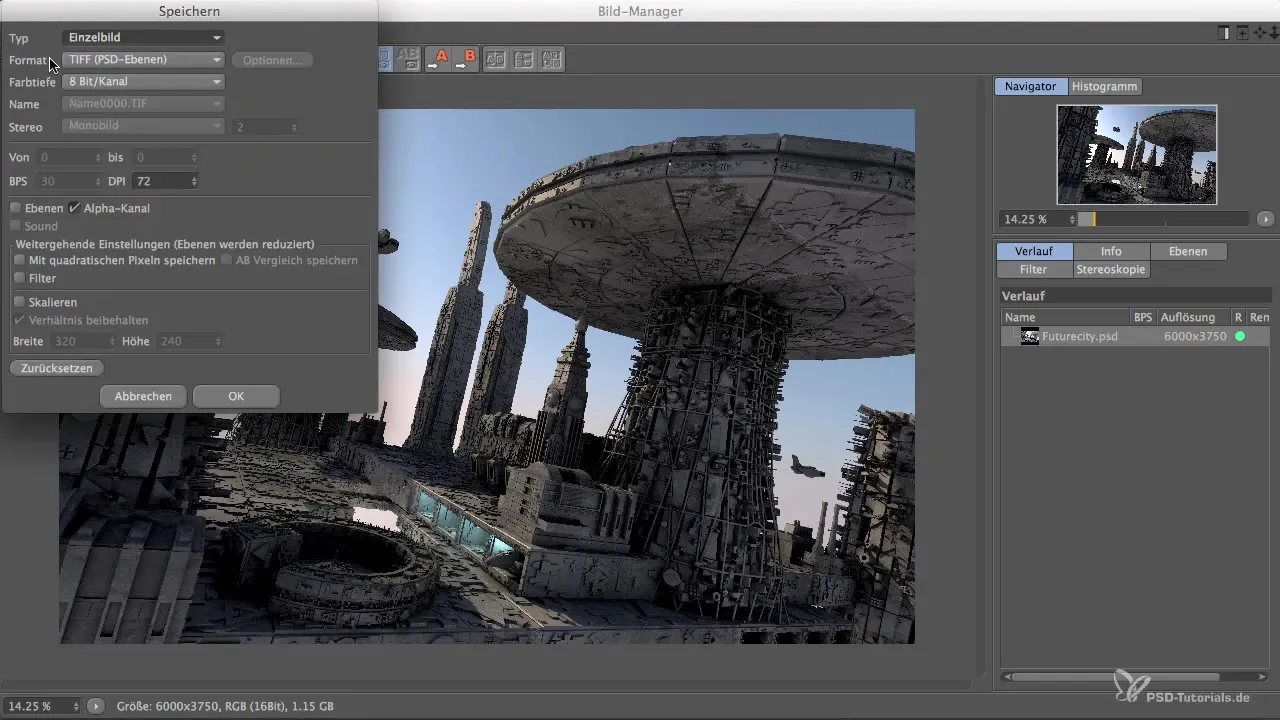
You will now arrive at the save dialog. Select “File” and then “Save As.” Typically, the TIF format is suggested, which has a color depth of 8 bits. Although you could use TIF, I strongly recommend the PSD format. It supports all layers and compresses the file losslessly.
Adjust Color Depth
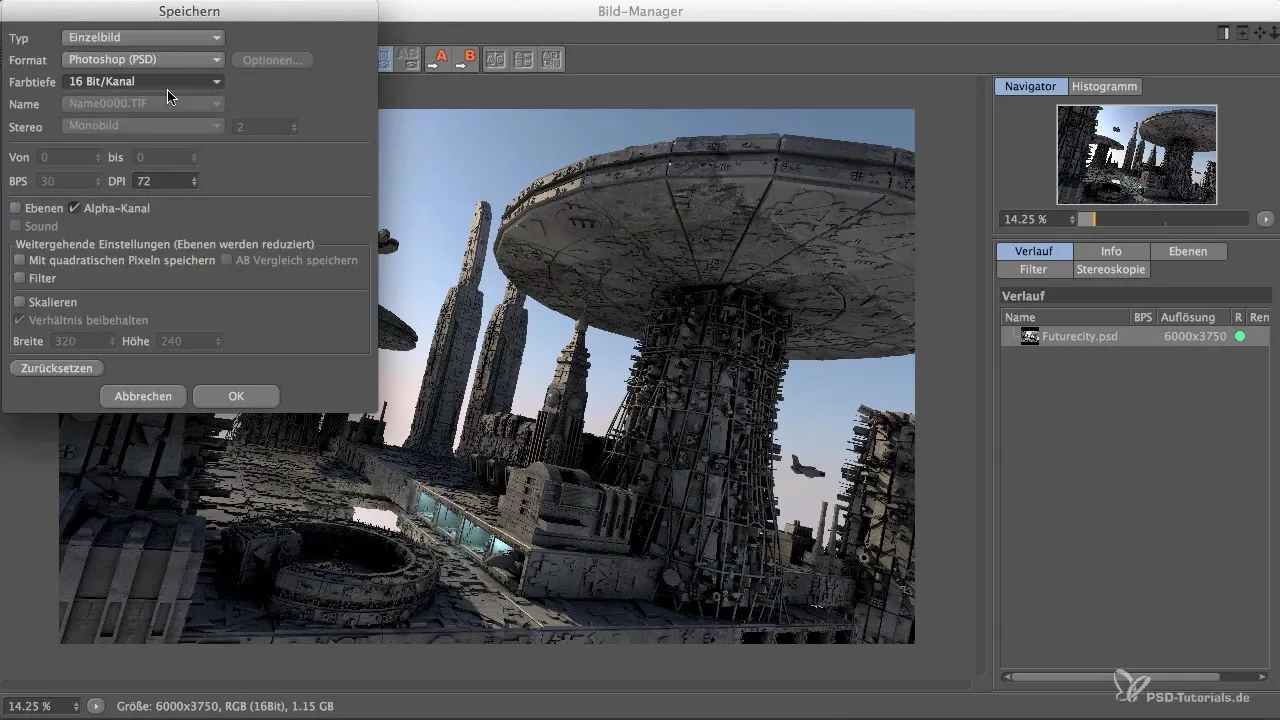
Make sure to change the color depth to 16 bits per channel when saving. This is particularly important because with multipass renderings, you can quickly encounter unwanted tonal issues in shadows and gradients. While editing, you can switch back to 8 bits later, but when saving from Cinema 4D to Photoshop, the 16-bit option should be selected.
Enable Alpha Channel and Layers
Before the final save, it is necessary to check the box for the alpha channel. Additionally, you must ensure that the box for layers is activated. This is crucial because otherwise, you will only have a single background layer that contains the entire graphic. By creating individual layers, you gain more flexibility in editing in Photoshop.
Save File and Switch to Photoshop
Click on “OK” to save the file. If you have already done that, you can switch to Photoshop to check the file. If everything has been saved correctly, you will see all the layers and channels you need for your editing.
Check in Photoshop
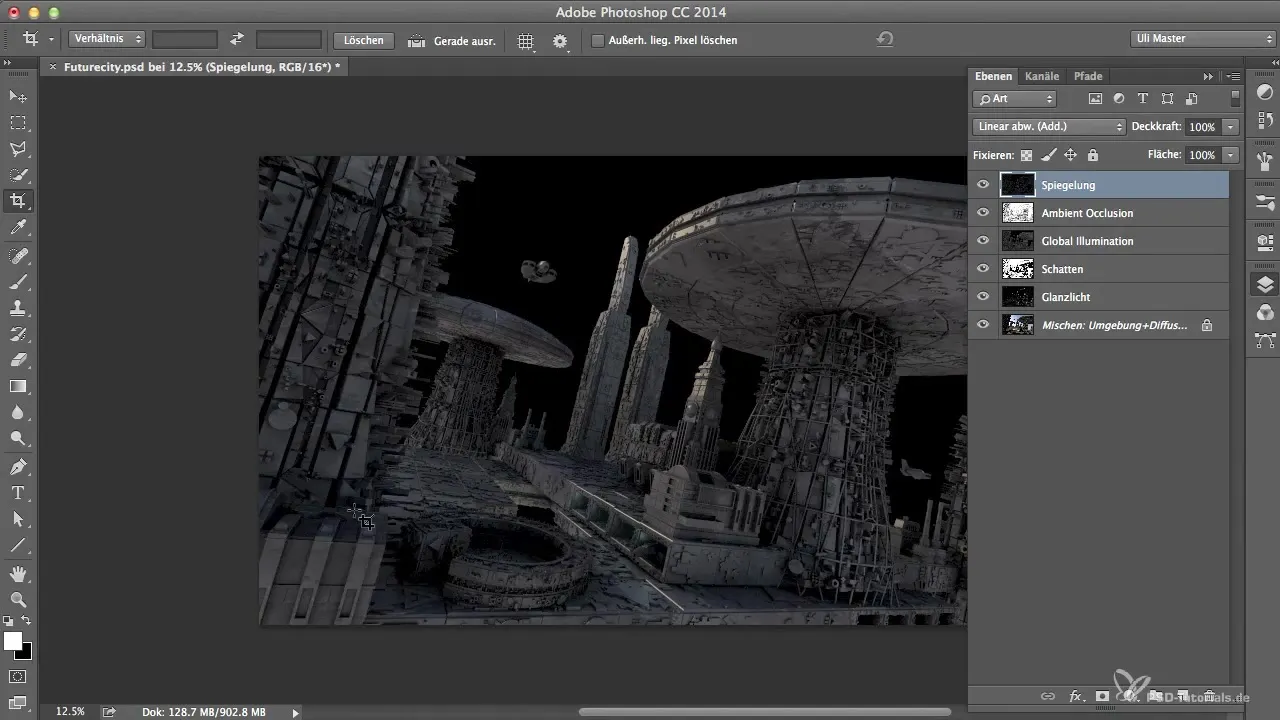
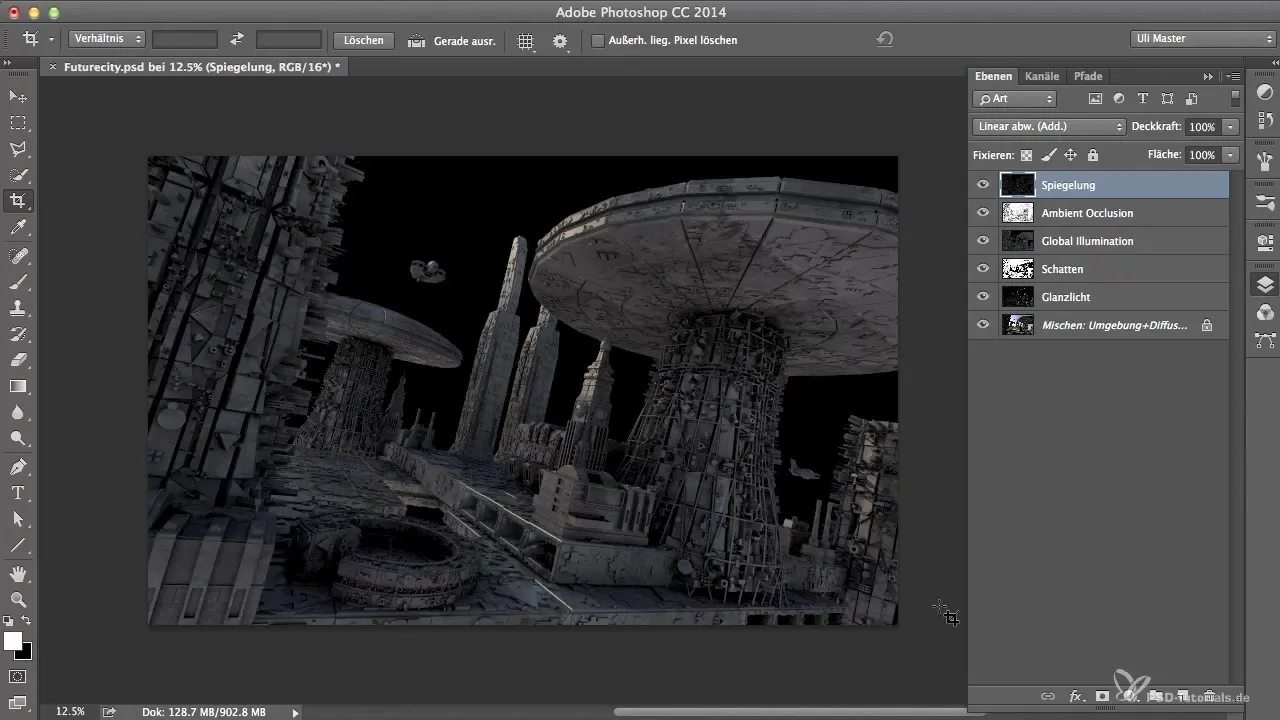
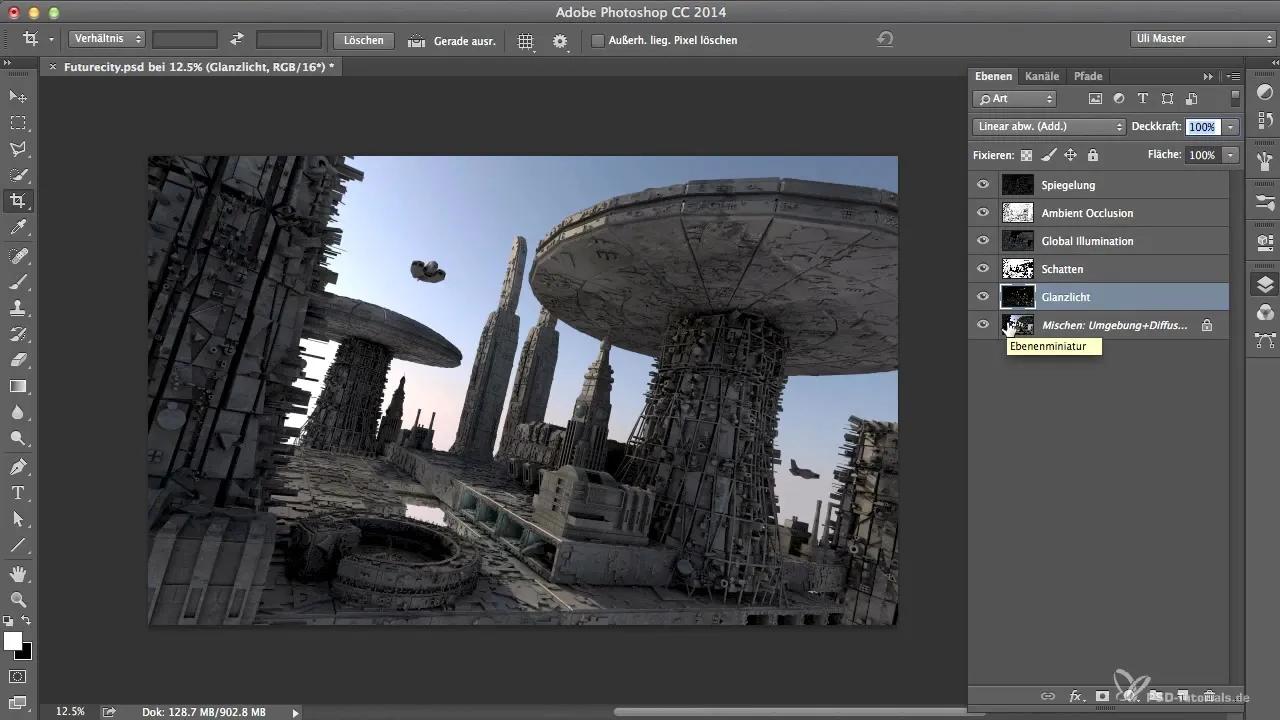
Now that the file is open in Photoshop, check the various channels to ensure that they look as desired. Pay special attention to the blending modes of the individual layers. You may need to adjust some settings to ensure proper visibility.
Make Corrections
In Photoshop, you can also make basic corrections to the blending modes in addition to checking. If you notice that certain channels (e.g., highlights or shadows) are not displayed correctly, you can change the blending mode to “Linear Dodge.” This may be necessary for many renderings to ensure that colors and brightness are rendered correctly.
Final Adjustments
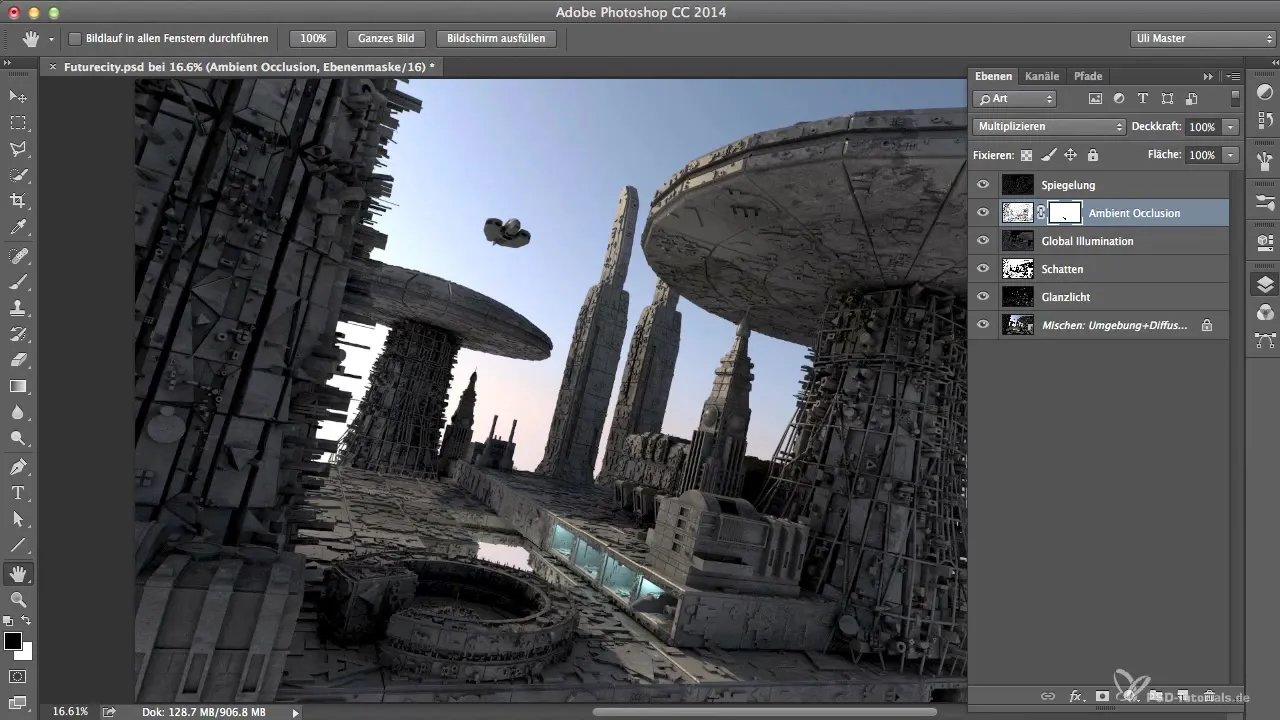
Finally, you can make last adjustments to your image to ensure that it meets the desired quality. Use tools like the zoom tool to closely examine and fix any existing issues. After the final review, you can save the edited image and be ready to present your creative work.
Summary – Cinema 4D Meets Photoshop: Saving and Checking the File
This guide has shown you how to effectively save your rendering from Cinema 4D and check it in Photoshop. By choosing the right file format, adjusting the color depth, and reviewing the blending modes, you ensure that your graphic works achieve the best possible quality.
Frequently Asked Questions
How do I save the rendering from Cinema 4D?You should go to “Image” and select “History” before choosing the “Save As” option under “File.”
What file format is best for saving?The PSD format is ideal because it supports all layers and compresses losslessly.
Why is color depth important?A higher color depth like 16 bits prevents tonal issues and allows for better editing in Photoshop.
How can I adjust the blending modes of the layers?Select the layer in Photoshop and change the blending mode in the layers panel to “Linear Dodge,” if necessary.
What should I do if certain channels are not displayed correctly in Photoshop?Check the blending modes and adjust them as needed to improve visibility.


