The completion of a Photoshop-composing is always a critical moment. It is important to bring the image to life through targeted color adjustments, vignetting, and atmospheric effects. In this tutorial, I will show you the final steps I took to get the best out of your image. Get inspired!
Key Insights By using color adjustments, you can significantly influence the desired look of your image. Vignettes help direct the viewer's focus, while atmospheric effects make the image appear more vibrant. These techniques are essential for a successful composing.
Step-by-Step Guide
Create Color Layer and Adjust Color Style
First, start by creating a new folder. Name this folder "Final Steps". In this folder, place a color layer as an adjustment layer and choose a nice shade of blue, for example, RGB: 12, 86, 144. Initially, hide this color layer.
To make the color adjustment, reveal the color layer again and set it to "Color" mode. Hold down the control key and click on the RGB channel to fill the mask. You will see how the style of the image immediately changes with the adjustment. Reduce the opacity of this layer to 30% to ensure that the individual elements of the image appear more harmonious.

Make Tone Correction
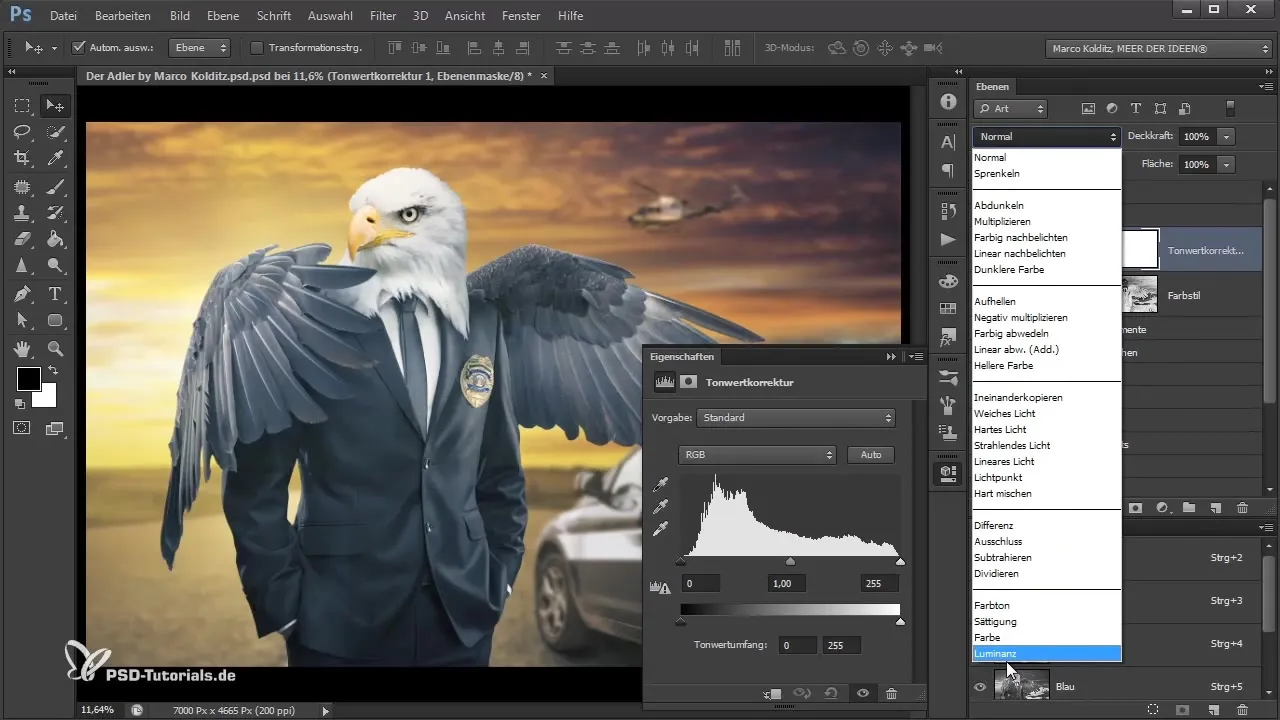
Now create another adjustment layer, this time a tone correction in "Luminance" mode. With this setting, you can adjust the brightness of the image elements without changing the colors. Slightly darken the brightness in the dark areas to add more depth to your image. This ensures that the colors stand out even more.

Add Vignette
Now it's time for the vignette. Select the foreground color to white and paint along the edges of the image with a soft brush to darken the edges slightly. Play with the opacity until you achieve the desired effect. A well-placed vignette focuses attention on the main subject of the image.

Adjust Color Balance
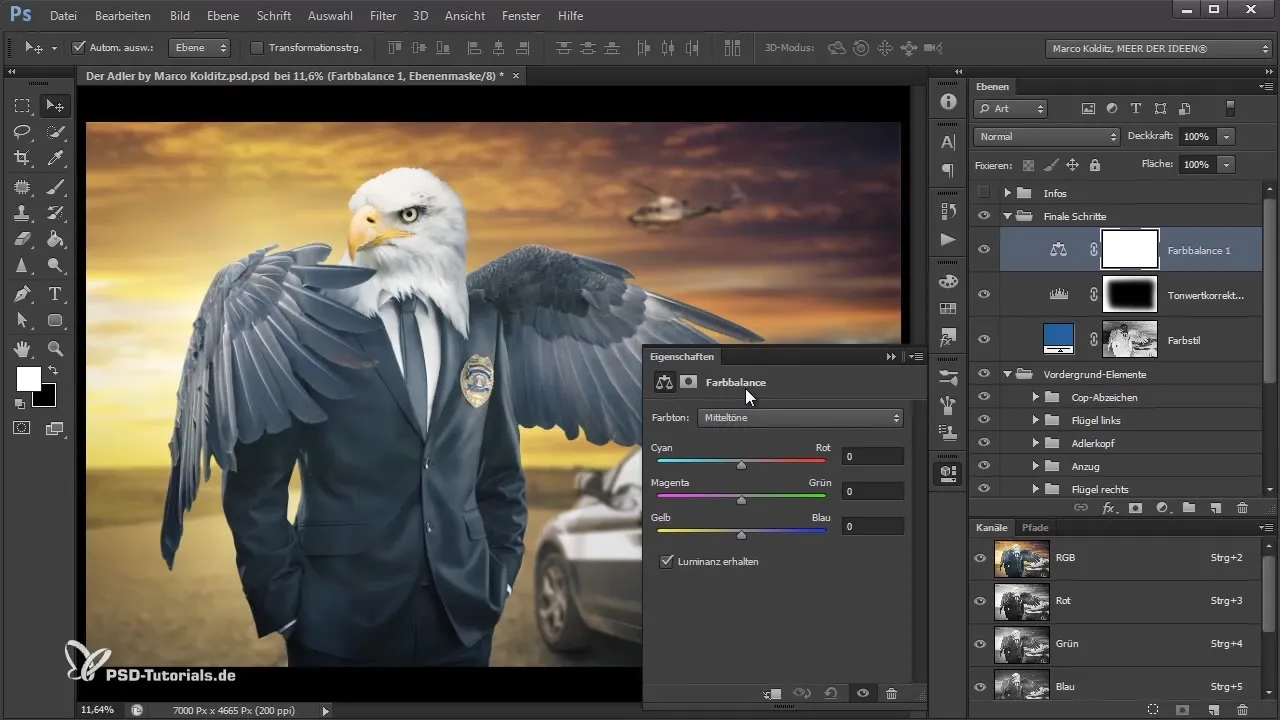
Next, create an adjustment layer for the color balance. Here, you can work excellently on the shadows, midtones, and highlights. For example, set the shadows to +50 in red and slightly lighten the midtones to achieve a harmonious color palette. Reduce the opacity of the color balance layer to decrease the contrast and achieve a smooth interplay of colors.

Adjust Dynamics
To further control the color saturation, create a dynamics adjustment layer. Set the value here to -10 to make the image appear less "vibrant". This adjustment improves the overall mood of the image and leads to a balanced appearance.

Add Light and Atmosphere
The next step is to create two new empty layers, one in "Normal" mode and the other in "Overlay" mode. Set both layers to about 55% opacity. Use a soft brush to paint light spots into the image. This increases the brightness of the sunlight on the wings, making the entire scene appear more atmospheric.

Adjust Background Effect
To make the image more interesting, import an image with a blurry background (Bokeh). Set it to "Multiply" mode. Adjust the colors and opacity of this layer to achieve a harmonious transition. With a tone correction, you can further control the brightness of this layer to subtly integrate the reflections into the composition.

Add Noise
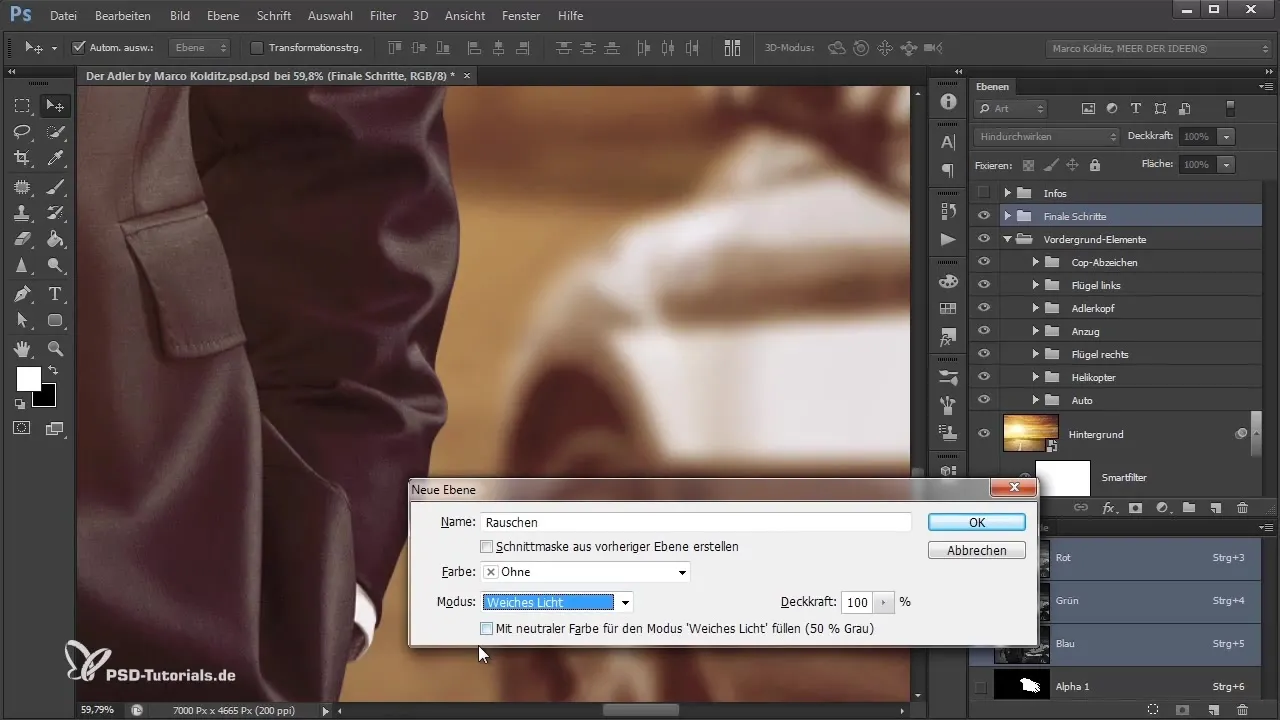
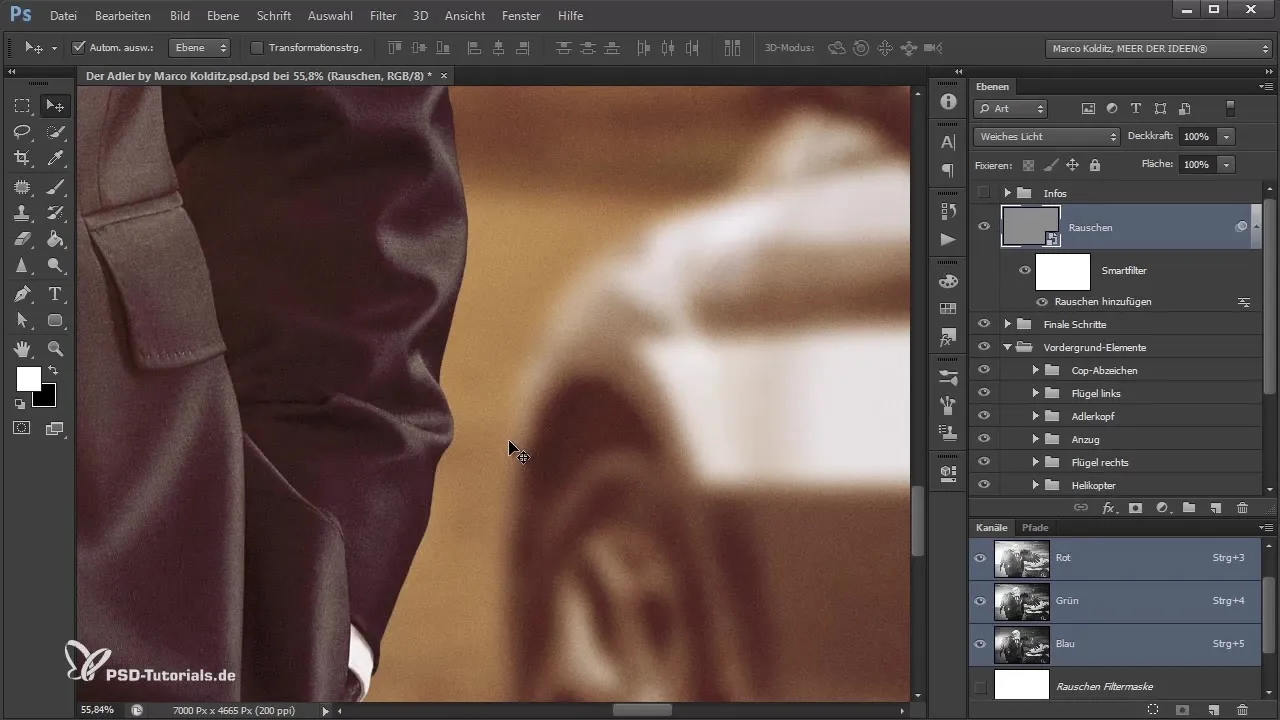
To prevent the image from looking too digital, add a new layer named "Noise" and set it to "Soft Light" mode. Apply the noise filter to overlay a slight texture over the image. Ensure that you choose a moderate strength of around 7%. This makes the image more harmonious and helps the sharp and blurry areas blend better together.

Completion of the Composing
After following all the steps, you can review the image and ensure that all adjustments match your desired look. Toggle the noise layer on and off to assess the difference. This way, you've transformed the image with a final touch into a harmonious composing.

Summary - Photoshop Composing: Color, Vignette, and Effects for the Perfect Image
This guide shows you how to perfect your Photoshop composing with targeted color adjustments, vignettes, and atmospheric effects. Each step contributes to enhancing the expressiveness and mood of the image.
Frequently Asked Questions
How do I change the color style in Photoshop?You can change the color style by adding a color layer as an adjustment layer and setting it to "Color" mode.
What is the purpose of a vignette in an image?A vignette directs the viewer's focus on the main subject and adds more depth to the image.
How can I improve the atmosphere of the image?By adding light points, a bokeh background, and a slight noise texture, you can enhance the atmosphere of the image.
How do I adjust the brightness in Photoshop?You can change the brightness with a tone correction or brightness adjustment layers.
How can I add noise to my image?Create a new layer in "Soft Light" mode and apply the noise filter to create a harmonious texture.


